Traditional methods for converting documents to video, such as recording a video based on the document, are time-consuming and often require professional video editing skills. Large Language Model (LLM) technology offers a more efficient and intelligent solution. This guide demonstrates how to automatically convert documents into videos using LLMs and multimodal application techniques. It includes a complete code package to help you get started quickly.
Demo
By following this guide and using the provided complete code, you can convert documents to videos with large language models. The resulting video includes visuals, narration, and subtitles. An example is shown below. The input document for this example is 'Understanding Large Language Models', the first lesson in Chapter 1 of the Alibaba Cloud Large Language Model Engineer ACA Certification course: Understanding Large Language Models. The resulting video is shown below:
Chapter 1, Lesson 1 of the Alibaba Cloud Large Language Model Engineer ACA Certification course: Understanding Large Language Models.
Solution overview
Document segmentation: Use a large language model to summarize the document title and split the document into sections. Then, generate a concise title for each section.
Generate presentation slides: Combine the titles, body text, and images to generate presentation slide images.
Generate narration and subtitles: Use multimodal large language models to convert text into audio files. Then, generate matching subtitle text based on the audio duration.
Generate final video: Compile all the slide images into a video and embed the audio and subtitle files.
Preparations
Obtain your API key and API host to call large language models from Alibaba Cloud Model Studio.
Alibaba Cloud Model Studio provides new users with a free quota. After you use up this quota, you are billed based on the number of tokens. For more information, see Billing Details.
This guide uses FFmpeg for audio and video processing and Marp for presentation generation. You can install both tools using the sample code below:
macOS
# Run this in Terminal
# Configure a domestic mirror source for faster downloads
# Install FFmpeg
brew install ffmpeg
# Install Marp
# If you encounter network issues during installation, configure a domestic mirror or use cnpm instead of npm
brew install node
npm install -g cnpm --registry=https://registry.npmmirror.com
cnpm install -g @marp-team/marp-cli
Windows
Install Miniconda. You can skip this step if it is already installed.
Create a Python virtual environment using conda.
Run the following command in the Command Prompt:
# "py12" is the virtual environment name (you can change it); "3.12" is the Python version (you can change it)
conda create --name py12 python=3.12
conda activate py12
Install Marp.
Run the following command in the Command Prompt:
# Install Node.js first (required for Marp)
conda config --add channels conda-forge
conda install nodejs

# Configure the Taobao mirror
npm config set registry https://registry.npmmirror.com

# Install Marp
npm install -g @marp-team/marp-cli
Install FFmpeg.
Run the following command in the Command Prompt:
conda install -c conda-forge ffmpeg
This guide generates images using a browser rendering engine. Make sure that a browser, such as Chromium, Google Chrome, or Microsoft Edge, is installed in your operating environment.
This guide uses Python code. Confirm that Python is installed in your environment. You can also install the required Python libraries using the sample code below:
macOS
# Run this in Terminal
# To speed up downloads, configure a domestic mirror source
pip install --upgrade pip
pip install urllib3==1.25.8
pip install pyppeteer
pip install dashscope
pip install --upgrade dashscope
pip install pydub
pip install natsort
pip install moviepy
pip install ffmpeg-python
pip install --upgrade requests
Windows
You created a Python virtual environment with Miniconda in a previous step. Activate that environment.
# Replace "your_py_env" with your actual virtual environment name
conda activate your_py_env
Then, run the following commands:
# Run this in PowerShell
# To speed up downloads, configure a domestic mirror source
pip install --upgrade pip
pip install pyppeteer
pip install dashscope
pip install --upgrade dashscope
pip install pydub
pip install natsort
pip install moviepy
pip install ffmpeg-python
pip install --upgrade urllib3 requests
If you encounter an error such as 'pyppeteer 2.0.0 requires urllib3<2.0.0,>=1.25.8, but you have urllib3 2.4.0', run the following three commands:
pip uninstall urllib3
# <2.0.0,>=1.25.8 means versions less than 2.0.0 and greater than or equal to 1.25.8. Fill in the exact version range from the error message.
pip install "urllib3<2.0.0,>=1.25.8"
# Replace 2.0.0 with the pyppeteer version mentioned in the error message
pip install pyppeteer==2.0.0
Quick start
To quickly try this solution, download the complete code provided in this guide to your local environment. Then, run the following command:
macOS
# Decompress
unzip doc2video.zip
# Go to the directory
cd doc2video
# Change permissions
chmod +x run.sh
# Run the script
./run.sh
Windows
Note
You can run the following Linux commands in Windows using Windows Subsystem for Linux (WSL):
# Decompress and go to the directory
cd doc2video
# Run the script. View logs in result.log
bash run.sh
The following sections explain how to build a document-to-video pipeline from scratch to help you understand the workflow and customize it for your needs.
Step 1: Prepare source material
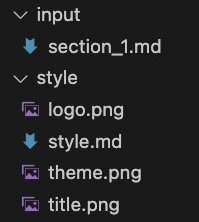
Write your document's text and Markdown-formatted image links into a Markdown file. Name the file in the section_1.md format and save it in the input folder. The following sample section_1.md file is used as the input.
section_1.md
Have you ever searched for something online and failed to find useful information?
Before large language models
We used search engines to find answers. But because web content quality varies widely, you might read five pages and still not find the answer you need.

After large language models
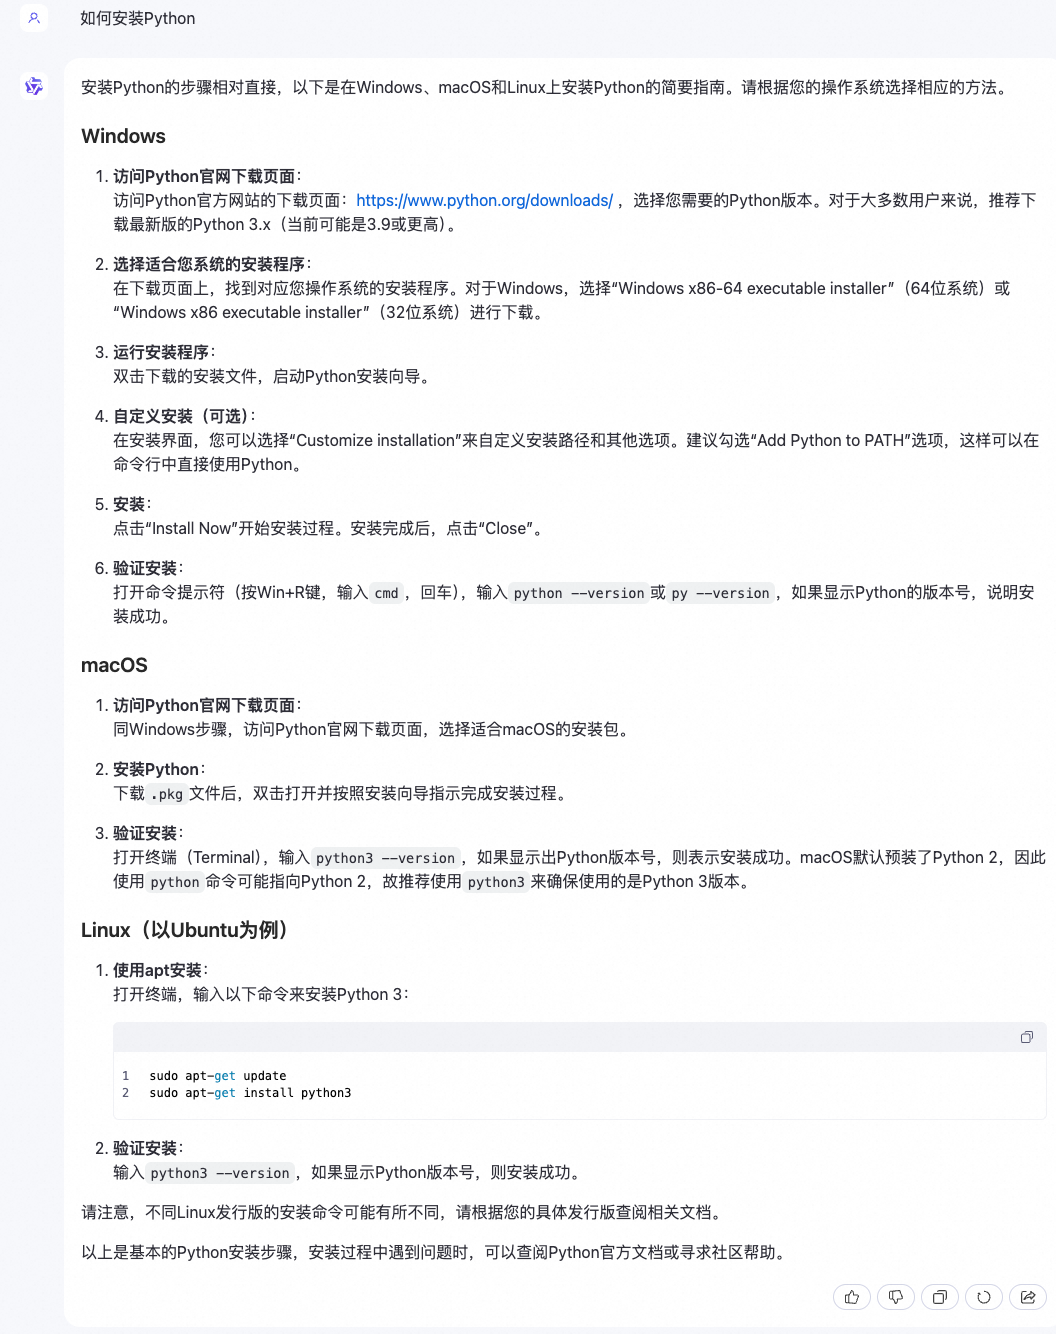
Enter your question directly into a large language model—for example, “How do I install Python?” Because large language models hold vast, high-quality knowledge, they return accurate answers, including installation steps for different operating systems. This is much easier than searching manually.
Large language models are now influencing every part of our lives. From ChatGPT’s breakout success at the end of 2022 to the ongoing “hundred-model competition,” large language models have become hot topics in both technology and public discourse.
Large language models mark a major milestone in artificial intelligence. They advance AI capabilities and open new possibilities for humanity.
Some compare the invention of large language models to a pivotal moment in human history. A poetic answer might be: the moment humans learned to use fire.

After completing this course, you will be able to:
Understand the features, key concepts, and working principles of large language models;
Learn about Alibaba Cloud’s large language model offerings and product matrix;
Explore common scenarios and examples of large language model applications.
You can use the images and style files included in the complete code and save them in the style folder.
Create a Python file named main.py in your working directory to set parameters and call functions. The following is the sample code:
main.py
import argparse
import datetime
import os
import shutil

# Import functions here


def main(args):
    # Record start time
    start_time = datetime.datetime.now()
    # Create output path and copy render assets
    input_base_name = os.path.splitext(os.path.basename(args.input_txt_path))[0]

    if not os.path.exists(args.markdown_path):
        os.makedirs(args.markdown_path)
    for filename in os.listdir(args.input_style_path):
        full_path = os.path.join(args.input_style_path, filename)
        if os.path.isfile(full_path):
            shutil.copy2(full_path, args.markdown_path)


    # Call functions here

    # Record end time
    end_time = datetime.datetime.now()

    # Calculate total time
    elapsed_time = end_time - start_time
    elapsed_hours, remainder = divmod(elapsed_time.total_seconds(), 3600)
    elapsed_minutes, elapsed_seconds = divmod(remainder, 60)

    start_time_str = start_time.strftime("%Y-%m-%d %H:%M:%S")
    end_time_str = end_time.strftime("%Y-%m-%d %H:%M:%S")
    elapsed_time_str = f"{int(elapsed_hours)}h {int(elapsed_minutes)}m {int(elapsed_seconds)}s"

    print(f"Start time: {start_time_str}")
    print(f"End time: {end_time_str}")
    print(f"Total time: {elapsed_time_str}")


if __name__ == "__main__":

    parser = argparse.ArgumentParser(description="Convert documents to videos")

    # Add command-line argument --input_txt_path, default value './input/section_1.md', path to input text
    parser.add_argument('--input_txt_path', type=str, default='./input/section_1.md', help='Path to input text')

    # Add command-line argument --input_style_path, default value './style', path to style folder
    parser.add_argument('--input_style_path', type=str, default='./style', help='Path to input style folder')

    # Add command-line argument --markdown_style_path, default value './style/style.md', path to Markdown style file
    parser.add_argument('--markdown_style_path', type=str, default='./style/style.md', help='Path to Markdown style file')

    # Add command-line argument --logo_path, default value './style/logo.png', path to logo image
    parser.add_argument('--logo_path', type=str, default='./style/logo.png', help='Path to logo image')

    # Add command-line argument --theme_path, default value './style/theme.png', path to theme image
    parser.add_argument('--theme_path', type=str, default='./style/theme.png', help='Path to theme image')

    # Add command-line argument --title_path, default value './style/title.png', path to title image
    parser.add_argument('--title_path', type=str, default='./style/title.png', help='Path to title image')

    # Add command-line argument --json_path, default value './material/json', path to JSON files
    parser.add_argument('--json_path', type=str, default='./material/json', help='Path to JSON files')

    # Add command-line argument --image_path, default value './material/image', path to image folder
    parser.add_argument('--image_path', type=str, default='./material/image', help='Path to image folder')

    # Add command-line argument --audio_path, default value './material/audio', path to audio folder
    parser.add_argument('--audio_path', type=str, default='./material/audio', help='Path to audio folder')

    # Add command-line argument --markdown_path, default value './material/markdown', path to Markdown folder
    parser.add_argument('--markdown_path', type=str, default='./material/markdown', help='Path to Markdown folder')

    # Add command-line argument --srt_and_video_path, default value './material/video', path to subtitle and video folder
    parser.add_argument('--srt_and_video_path', type=str, default='./material/video', help='Path to subtitle and video folder')

    # Add command-line argument --fps, default value 30, frames per second
    parser.add_argument('--fps', type=int, default=30, help='Frames per second')

    # Add command-line argument --title, default value "Understanding Large Language Models", video title
    parser.add_argument('--title', type=str, default="Understanding Large Language Models", help='Document subject')

    args = parser.parse_args()

    main(args)
Save main.py in the same directory as the input and style folders. In the following steps, you will import and call module functions in main.py. The locations for adding these imports and calls are marked in the preceding main.py code. After you call the functions, you can test the output by running the following command in your terminal:
python main.py
Step 2: Document segmentation
In this step, you can use a large language model to generate a document title and split the input document into sections. Then, you can use the model to summarize each section and generate a title for it.
Split text into sections
Call the Qwen-Plus large language model from Alibaba Cloud Model Studio using an API to generate a document title and split the input document into sections.
Qwen-Plus is an enhanced version of the Qwen ultra-large language model. It supports Chinese, English, and other languages. Its balanced capabilities make it ideal for tasks of medium complexity. Its inference quality and speed are between those of Qwen-Max and Qwen-Flash. You can select the model that best suits your use case. For more information, see the model list.
Qwen-Plus costs CNY 0.004 per 1,000 input tokens and CNY 0.012 per 1,000 output tokens. New users receive a free quota of 1 million tokens for 30 days after they enable Model Studio.
Create a Python file named theme_generate.py. The following is the sample code:
theme_generate.py
from http import HTTPStatus
import dashscope
import re

def theme_generate_with_qwen_plus(input_filepath, title):
    """
    Generate a summary title using Qwen-Plus.

    This function reads the content of a specified file and generates a precise, concise summary title based on that content and a given subject.

    Parameters:
    - input_filepath: Path to the input file. Its content is used to generate the summary title.
    - title: Subject around which the summary title must be built. Ensure the title closely relates to this subject.

    Returns:
    - response_content: Generated summary title.

    Notes:
    - Requests are streamed. Content is accumulated only when the response status code is HTTPStatus.OK.
    - On error, the function prints relevant request error details.
    """
    # Read input file content
    with open(input_filepath, 'r', encoding='utf-8') as file:
        content = file.read()

    # Build prompt to guide the model to generate a title tightly focused on the subject
    prompt = f"""
                Create a precise, concise summary title for the following document. The title must reflect the core content and ignore all links—focus only on text.
                Keep the title tightly focused on the subject "{title}".
                Return only the title—no extra text. Use no more than 10 Chinese characters. Answer in Chinese.
                Document content:
              """

    # Build message format
    messages = [{
        'role': 'user',
        'content': f"""
                    "{prompt}"
                    "{content}"
                   """
    }]

    # Initialize response content
    response_content = ''

    # Stream responses
    responses = dashscope.Generation.call("qwen-plus",
                                          messages=messages,
                                          result_format='message',
                                          stream=True,
                                          incremental_output=True)

    # Accumulate title content from responses
    for response in responses:
        if response.status_code == HTTPStatus.OK:
            response_content += response.output.choices[0]['message']['content']
        else:
            # Print error info
            print('Request id: %s, Status code: %s, error code: %s, error message: %s' % (
                response.request_id, response.status_code,
                response.code, response.message
            ))

    # Remove surrounding double quotes if present
    response_content = re.sub(r'^"|"$', '', response_content)

    # Return generated title
    return response_content
In theme_generate.py, define a function named theme_generate_with_qwen_plus that calls Qwen-Plus using an API to generate a document title. You can import and call this function in main.py as shown below:
Import and call theme_generate_with_qwen_plus
# Import
from theme_generate import theme_generate_with_qwen_plus

# Call
# Call Qwen-Plus via API to generate a document title
theme = theme_generate_with_qwen_plus(args.input_txt_path, args.title)
# Print document title
print(theme)
Call this function to obtain the title for the sample document section_1.md:
Sample document title: Large Language Models: Impact and Applications.
Next, create a Python file named doc_split.py. The following is the sample code:
doc_split.py
from http import HTTPStatus
import dashscope
import json
import os
def doc_split_with_qwen_plus(input_filepath, output_filepath):

    if not os.path.exists(output_filepath):
        os.makedirs(output_filepath)

    with open(input_filepath, 'r', encoding='utf-8') as file:
        content = file.read()

    prompt = """
                    Process the document by splitting it into sections and generating section titles. Follow these rules:

                    1. **Section logic**: Analyze the document content and split it into sections based on semantic meaning.

                    2. **Title creation**: For each section, write a concise title—no more than 10 characters—that accurately summarizes its core idea.

                    3. **Output format**: Output must be valid JSON. Each section and its title form one entry. Example format:


                    [
                        {"title": " ", "content": " "},
                        {"title": " ", "content": " "},
                        ...
                    ]

                    Start with "[" and end with "]". Output nothing else.

                    4. **Text fidelity**: The "content" field in each JSON entry must match the original document exactly—no additions, deletions, or changes. Process the entire document without omissions. Preserve the relative position of text and links.

                    5. **Link handling**: Save Markdown image links separately in JSON entries. Set "title" to "link{index}" and "content" to the URL, where index is the link order.

                    6. **Formatting restrictions**: Output must contain no extra spaces, line feeds, tab characters, or HTML/XML/Markdown symbols. Use Chinese only.

                    Follow all rules strictly.

                    Document content:
              """

    messages = [{
        'role': 'user',
        'content': f"""
                    "{prompt}"
                    "{content}"
                   """
    }]

    response_content = ''
    responses = dashscope.Generation.call("qwen-plus",
                                          messages=messages,
                                          result_format='message',
                                          stream=True,
                                          incremental_output=True)

    for response in responses:
        if response.status_code == HTTPStatus.OK:
            response_content += response.output.choices[0]['message']['content']
        else:
            print('Request id: %s, Status code: %s, error code: %s, error message: %s' % (
                response.request_id, response.status_code,
                response.code, response.message
            ))
    if response_content.startswith("```") and response_content.endswith("```"):
        response_content = response_content[8:-3].strip()

    input_base_name = os.path.splitext(os.path.basename(input_filepath))[0]
    output_file_path = os.path.join(output_filepath, f'{input_base_name}.json')
    with open(output_file_path, 'w', encoding='utf-8') as json_file:
        json.dump(json.loads(response_content), json_file, ensure_ascii=False, indent=4)

    return response_content
In doc_split.py, define a function named doc_split_with_qwen_plus that calls Qwen-Plus using an API to split the input document into sections and generate a title for each section. You can import and call this function in main.py as shown below:
Import and call doc_split.py
# Import
from doc_split import doc_split_with_qwen_plus

# Call
# Call Qwen-Plus via API to split the input document into sections and generate a title for each
doc_split_with_qwen_plus(args.input_txt_path, os.path.join(args.json_path))
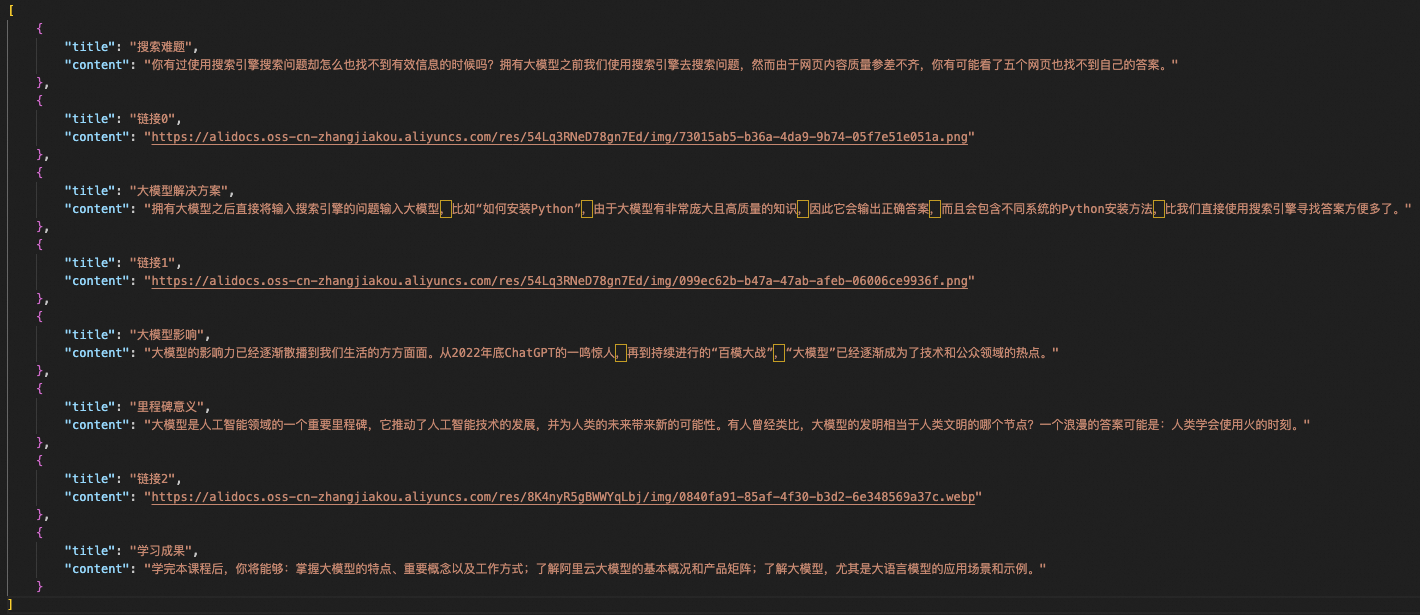
Call this function to split section_1.md into sections and generate section titles. The output JSON file section_1.json is saved to the ./material/json directory:
The output section_1.json file. The "title" field contains the section title, and the "content" field contains the section text. Image links are stored separately.
Summarize content
Next, call the Qwen-Plus model from Model Studio using an API to summarize each section.
Create a Python file named qwen_plus_marp.py. The following is the sample code:
qwen_plus_marp.py
import asyncio

import os
from http import HTTPStatus
import dashscope

def call_with_stream(content):
    prompt2 = """
                    Extract the main points from the text below and output them in Markdown format. Use Chinese.
                    If the text is a link, output it directly in Markdown format.
                    Output only valid Markdown. Avoid symbols like '''.
                    Keep Markdown content concise.
                    In each Markdown section, limit content lines to three.
                    Do not add extra paragraphs after "- content".

                    Example input: Have you ever searched for something online and failed to find useful information?
                    Example output: - Search engine issue: Hard to find useful information

                    Example input: https://alidocs.oss-cn-zhangjiakou.aliyuncs.com/res/54Lq3RNeD78gn7Ed/img/6f9f3049-78a2-46b3-a052-88792052890d.png
                    Example output: https://alidocs.oss-cn-zhangjiakou.aliyuncs.com/res/54Lq3RNeD78gn7Ed/img/6f9f3049-78a2-46b3-a052-88792052890d.png

                    Text to process:


              """


    messages = [{
        'role': 'user',
        'content': f"""
                    "{prompt2}"
                    "{content}"
                   """
    }]

    response_content = ''
    responses = dashscope.Generation.call("qwen-plus",
                                          messages=messages,
                                          result_format='message',
                                          stream=True,
                                          incremental_output=True)

    for response in responses:
        if response.status_code == HTTPStatus.OK:
            response_content += response.output.choices[0]['message']['content']
        else:
            print('Request id: %s, Status code: %s, error code: %s, error message: %s' % (
                response.request_id, response.status_code,
                response.code, response.message
            ))

    return response_content
In qwen_plus_marp.py, define a function named call_with_stream that calls Qwen-Plus using an API to process the section content as follows:
For text, extract key points and output them in Markdown format.
For image links, output the link directly.
You will import and call call_with_stream when you combine text and images.
Step 3: Generate presentation slides
In this step, you can combine text and images into Markdown files and generate presentation slide images.
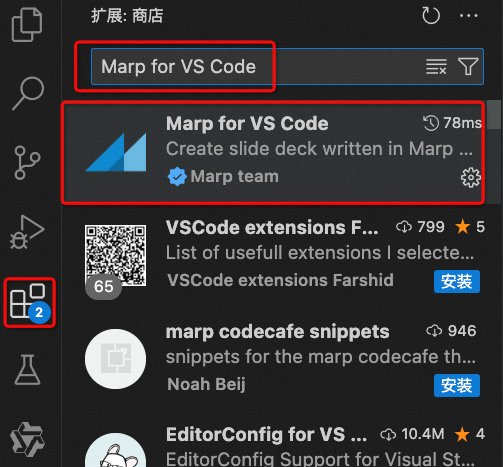
Before you review the detailed workflow and code, this section provides a brief introduction to Marp, the tool that is used in this guide. Marp is an open-source presentation tool that is based on Markdown syntax. You can edit Markdown text to generate polished slides. If you use VS Code, you can install the Marp for VS Code extension for real-time previews. For more information, see the official Marp documentation to build presentations with your own style.
Search for and install Marp for VS Code in the VS Code Extensions marketplace.
Marp uses specific formatting rules and extended syntax to convert Markdown to slides. Therefore, a Python script named markdown_gather.py is provided to collect and apply Markdown formatting optimizations. The following is the sample code:
markdown_gather.py
import os
import re
from pathlib import Path
import os
def merge_style_with_md_files(md_file_path, style_file_path):
# Check if style file exists
if not os.path.isfile(style_file_path):
raise FileNotFoundError(f"Style file {style_file_path} does not exist.")
# Read style file content
with open(style_file_path, 'r', encoding='utf-8') as f:
style_content = f.read()
# Loop through all files in the specified directory
for filename in os.listdir(md_file_path):
if filename.startswith('section') and filename.endswith('.md'):
file_path = os.path.join(md_file_path, filename)
# Merge style content with .md file content
if os.path.exists(file_path):
with open(file_path, 'r+', encoding='utf-8') as f:
original_content = f.read()
# Move pointer to start to overwrite
f.seek(0)
f.write(style_content + '\n\n' + original_content)
# Clear buffer to ensure all data is written
f.truncate()
def remove_trailing_dashes(directory):
"""
Remove trailing consecutive dashes (---) from Markdown files if they appear at the end with no content after (except optional line breaks).
"""
for filename in os.listdir(directory):
# Check if file starts with 'section' and ends with '.md'
if filename.startswith('section') and filename.endswith('.md'):
filepath = os.path.join(directory, filename)
# Read file content
with open(filepath, 'r', encoding='utf-8') as file:
content = file.read()
# Check if file ends with '---' followed only by optional line breaks
if content.rstrip().endswith('---') and content.rstrip('---').endswith('\n'):
# Remove trailing '---' and line breaks
content = content.rstrip('---\n')
# Replace all "------" with empty string
content = content.replace("------", "")
content = re.sub(r'\n{3,}', '\n\n', content)
# Write updated content
with open(filepath, 'w', encoding='utf-8') as file:
file.write(content)
def remove_empty_lines(filename):
# Read file content
with open(filename, 'r', encoding='utf-8') as file:
content = file.read()
# Replace all "------" with empty string
content = content.replace("------", "")
with open(filename, 'w', encoding='utf-8') as file:
file.write(content)
def append_string_to_file(file_path):
# Read file content
with open(file_path, 'r', encoding='utf-8') as file:
content = file.read()
# Append string '---' to end of file
new_content = content + '---'
# Write new content
with open(file_path, 'w', encoding='utf-8') as file:
file.write(new_content)
def insert_logo(file_path, logo_path):
# Read file content
with open(file_path, 'r', encoding='utf-8') as file:
content = file.read()
# Get logo filename
logo_filename = Path(logo_path).name
# Define string to insert
insert_str = f"""<!--\nbackgroundImage: url("./{logo_filename}");\nbackgroundSize: 10% ;\nbackgroundPosition: 98% 3% ;\n-->
"""
# Use regex to replace
# Replace only standalone "---", not those surrounded by other dashes
new_content = re.sub(r'(?<!-)---(?!-)', f'\n{insert_str}\n---', content, flags=re.DOTALL)
# Write new content
with open(file_path, 'w', encoding='utf-8') as file:
file.write(new_content)
def insert_bg_if_no_link(filename, theme_url):
# Store final result
result = []
# Read file content
with open(filename, 'r', encoding='utf-8') as file:
content = file.read()
# Get theme filename
theme_filename = Path(theme_url).name
# Split text using regex
sections = re.split(r'---+', content)
# Loop through each section
for i, section in enumerate(sections):
# Look for "# {string}" pattern
header_match = re.search(r'# \{(.+?)\}', section)
if header_match:
# Extract content after "# {string}"
header_content = section[header_match.end():].strip()
# Check if content contains  links
if not re.search(r'!\[[^\]]*\]\([^\)]*\)', header_content):
# If no links and no background image, add specified text after "# {string}"
section = f'{section[:header_match.end()]}\n{section[header_match.end():]}\n---'
# Add processed section to result
result.append(section)
# Keep original separator if not last section
if i < len(sections) - 1:
result.append('---')
# Write result back to file
with open(filename, 'w', encoding='utf-8') as file:
file.write(''.join(result))
def title_to_md(file_path, content, title_url):
# Read original file content
title_filename = Path(title_url).name
with open(file_path, 'r', encoding='utf-8') as file:
original_content = file.read()
content = f"\n# {content}\n---"
# Prepend new content
new_content = content + '\n' + original_content
# Write new content
with open(file_path, 'w', encoding='utf-8') as file:
file.write(new_content)
Save this file in the same directory as main.py and other function files. You can call its functions later.
Combine text and images
Call the call_with_stream function from Step 2 to obtain the key points, titles, and image links for each section. Combine them into Markdown format and save them as a Markdown file. Create a Python file named json2md.py. The following is the sample code:
json2md.py
import json
import os
import re
from qwen_plus_marp import call_with_stream
from pathlib import Path
def is_link(text):
"""Check if given text is a link."""
return text.startswith("http://") or text.startswith("https://")
def parse_json_list_to_markdown(json_list, theme_url):
"""
Convert list of JSON objects to Markdown format, processing 'content' with call_with_stream.
Parameters:
- json_list (list): List of dicts, each with 'title' and 'content' keys.
Returns:
- str: Markdown-formatted string.
"""
theme = "\n\n"
theme_filename = Path(theme_url).name
markdown_content = ""
for item in json_list:
title = item.get('title', 'Unnamed')
processed_content = call_with_stream(item.get('content', ''))
if is_link(processed_content):
markdown_content += f"---\n\n\n\n---"
else:
markdown_content += f"\n\n# {title}\n\n{processed_content}\n\n---"
return markdown_content
def parse_json_list_to_markdown_new(json_list, theme_url):
"""
Convert list of JSON objects to Markdown format, processing 'content' with call_with_stream.
Parameters:
- json_list (list): List of dicts, each with 'title' and 'content' keys.
Returns:
- str: Markdown-formatted string.
"""
theme_filename = Path(theme_url).name
theme = f"\n\n"
markdown_content = ""
for i, item in enumerate(json_list):
title = item.get('title', 'Unnamed')
processed_content = call_with_stream(item.get('content', ''))
if processed_content.startswith("```") and processed_content.endswith("```"):
processed_content = processed_content[11:-3].strip()
if not is_link(json_list[i].get('content')):
# If this is the last item
if i == len(json_list) - 1:
markdown_content += f"\n\n## {title}\n\n{processed_content}\n\n{theme}\n\n---"
else:
if not is_link(json_list[i + 1].get('content')):
# Current and next are not links
markdown_content += f"\n\n## {title}\n\n{processed_content}\n\n{theme}\n\n---"
else:
# Current is not a link but next is
markdown_content += f"\n\n## {title}\n\n{processed_content}\n\n---"
else:
# Current is a link
markdown_content += f"---\n\n})\n\n---"
return markdown_content
def convert_json_file_to_md(json_file_path, output_dir, theme_url):
"""
Read JSON file, process content with call_with_stream, and save as Markdown file.
Parameters:
- json_file_path (str): Path to JSON file.
- output_dir (str): Directory to save Markdown file.
"""
if not os.path.exists(output_dir):
os.makedirs(output_dir)
with open(json_file_path, 'r', encoding='utf-8') as file:
json_data = json.load(file)
markdown_content = parse_json_list_to_markdown_new(json_data, theme_url)
base_name = os.path.splitext(os.path.basename(json_file_path))[0]
md_file_name = f"{base_name}.md"
output_path = os.path.join(output_dir, md_file_name)
with open(output_path, 'w', encoding='utf-8') as file:
file.write(markdown_content)
def save_markdown_to_file(content, filename):
""" Save Markdown content to file """
with open(filename, 'w', encoding='utf-8') as file:
file.write(content)
def process_markdown(input_file):
""" Process Markdown text, split as needed, and save """
with open(input_file, 'r', encoding='utf-8') as file:
input_text = file.read()
# Use regex to ensure each part ends with "---"
parts = re.split(r'(?<=---\n)', input_text)
# Remove empty strings
parts = [part.strip() for part in parts if part.strip()]
filenames = []
base_path = os.path.dirname(input_file) # Get base path
for i, part in enumerate(parts):
# Generate filename
filename = f'{os.path.splitext(os.path.basename(input_file))[0]}_{i}.md'
# Build full path
full_filename = os.path.join(base_path, filename)
save_markdown_to_file(f'{part}', full_filename)
filenames.append(full_filename)
In json2md.py, define several functions for the following main purposes:
Combine section titles, text, and image links into a single unit.
Use '---' to separate sections and generate multiple slide images.
Set the slide backgrounds.
You can import and call functions from json2md.py in main.py as shown below:
Import and call functions from json2md.py
# Import
from json2md import convert_json_file_to_md
# Call
# Summarize section content, save as Markdown, and set background image. Replace theme.png in the style folder with your custom background.
for filename in os.listdir(args.json_path):
    if filename.endswith('.json'):
        json_file_path = os.path.join(args.json_path, filename)
        convert_json_file_to_md(json_file_path, args.markdown_path, args.theme_path)
To improve the appearance of the slides, add the Alibaba Cloud logo and a title page, and adjust the Markdown formatting for Marp. You can import and call functions from markdown_gather.py as shown below:
Import and call functions from markdown_gather.py
# Import
from markdown_gather import insert_logo, remove_empty_lines, title_to_md

# Call
# Add document title as title page at start of Markdown file and set title page background. Replace title.png in the style folder with your custom title background.
title_to_md(os.path.join(args.markdown_path,f'{input_base_name}.md'), theme, args.title_path)

# Remove blank lines to meet Marp formatting requirements
remove_empty_lines(os.path.join(args.markdown_path,f'{input_base_name}.md'))

# Add Alibaba Cloud logo. Replace with your own logo: name it logo.png and place it in the style folder.
insert_logo(os.path.join(args.markdown_path,f'{input_base_name}.md'), os.path.join(args.logo_path))
Using section_1.json from Step 2 as the input, the output Markdown file section_1.md is saved to the ./material/markdown directory. A demo is shown below:
Example of the output section_1.md file after assets are combined.
Generate presentation slides
Next, generate slides using Marp. Before you generate the slides, define the global style and theme for Marp. You can set this at the top of your Markdown file. For example:
---
marp: true
theme: gaia

---
marp: true indicates to Marp that this Markdown file must be treated as a presentation.
theme: gaia sets the Marp theme to gaia, which is one of Marp's official themes.
You can obtain the Markdown style file style.md from the style folder in the complete code for this guide. Place it at the top of your Markdown file. To do this, you can import and call functions from markdown_gather.py in main.py as shown below:
Load style file style.md
# Import
from markdown_gather import merge_style_with_md_files, remove_trailing_dashes
# Call
process_markdown(os.path.join(args.markdown_path,f'{input_base_name}.md'))

# Add Marp style file. Customize styles using Marp docs: name your style file style.md and place it in the style folder.
merge_style_with_md_files(args.markdown_path, args.markdown_style_path)

# Remove trailing "---" from Markdown files to avoid blank slides
remove_trailing_dashes(args.markdown_path)
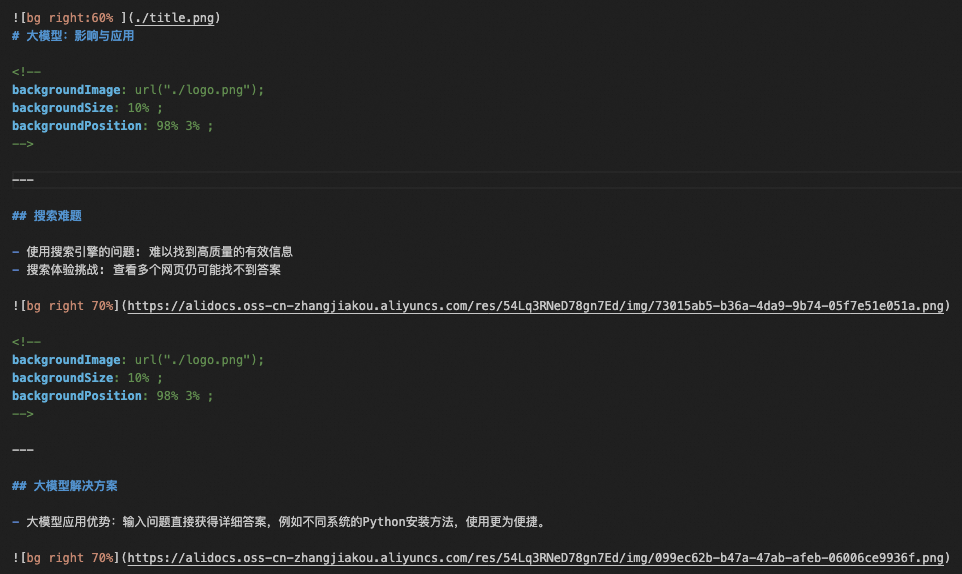
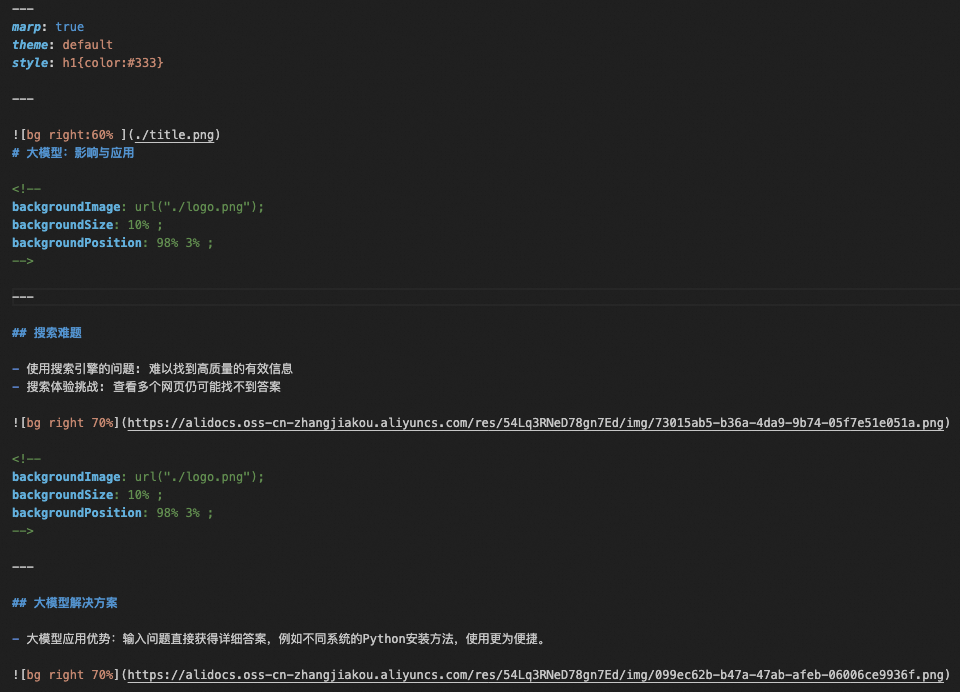
The output is shown below:
Example of the Markdown output after style.md is loaded.
After you obtain this output, if you use VS Code and have the Marp for VS Code extension installed, you can preview the slides in real time. Click the preview icon in the upper-right corner of the interface:
Click the Preview icon in the top-left corner of the VS Code interface.
The real-time preview is shown below:
A demo of the Marp real-time preview.
After you confirm that the Marp slide output is correct in the preview, you can export it as images. Create a Python file named marp2image.py. The following is the sample code:
marp2image.py
import os
import re
from pathlib import Path
import os
def merge_style_with_md_files(md_file_path, style_file_path):
# Check if style file exists
if not os.path.isfile(style_file_path):
raise FileNotFoundError(f"Style file {style_file_path} does not exist.")
# Read style file content
with open(style_file_path, 'r', encoding='utf-8') as f:
style_content = f.read()
# Loop through all files in the specified directory
for filename in os.listdir(md_file_path):
if filename.startswith('section') and filename.endswith('.md'):
file_path = os.path.join(md_file_path, filename)
# Merge style content with .md file content
if os.path.exists(file_path):
with open(file_path, 'r+', encoding='utf-8') as f:
original_content = f.read()
# Move pointer to start to overwrite
f.seek(0)
f.write(style_content + '\n\n' + original_content)
# Clear buffer to ensure all data is written
f.truncate()
def remove_trailing_dashes(directory):
"""
Remove trailing consecutive dashes (---) from Markdown files if they appear at the end with no content after (except optional line breaks).
"""
for filename in os.listdir(directory):
# Check if file starts with 'section' and ends with '.md'
if filename.startswith('section') and filename.endswith('.md'):
filepath = os.path.join(directory, filename)
# Read file content
with open(filepath, 'r', encoding='utf-8') as file:
content = file.read()
# Check if file ends with '---' followed only by optional line breaks
if content.rstrip().endswith('---') and content.rstrip('---').endswith('\n'):
# Remove trailing '---' and line breaks
content = content.rstrip('---\n')
# Replace all "------" with empty string
content = content.replace("------", "")
content = re.sub(r'\n{3,}', '\n\n', content)
# Write updated content
with open(filepath, 'w', encoding='utf-8') as file:
file.write(content)
def remove_empty_lines(filename):
# Read file content
with open(filename, 'r', encoding='utf-8') as file:
content = file.read()
# Replace all "------" with empty string
content = content.replace("------", "")
with open(filename, 'w', encoding='utf-8') as file:
file.write(content)
def append_string_to_file(file_path):
# Read file content
with open(file_path, 'r', encoding='utf-8') as file:
content = file.read()
# Append string '---' to end of file
new_content = content + '---'
# Write new content
with open(file_path, 'w', encoding='utf-8') as file:
file.write(new_content)
def insert_logo(file_path, logo_path):
# Read file content
with open(file_path, 'r', encoding='utf-8') as file:
content = file.read()
# Get logo filename
logo_filename = Path(logo_path).name
# Define string to insert
insert_str = f"""<!--\nbackgroundImage: url("./{logo_filename}");\nbackgroundSize: 10% ;\nbackgroundPosition: 98% 3% ;\n-->
"""
# Use regex to replace
# Replace only standalone "---", not those surrounded by other dashes
new_content = re.sub(r'(?<!-)---(?!-)', f'\n{insert_str}\n---', content, flags=re.DOTALL)
# Write new content
with open(file_path, 'w', encoding='utf-8') as file:
file.write(new_content)
def insert_bg_if_no_link(filename, theme_url):
# Store final result
result = []
# Read file content
with open(filename, 'r', encoding='utf-8') as file:
content = file.read()
# Get theme filename
theme_filename = Path(theme_url).name
# Split text using regex
sections = re.split(r'---+', content)
# Loop through each section
for i, section in enumerate(sections):
# Look for "# {string}" pattern
header_match = re.search(r'# \{(.+?)\}', section)
if header_match:
# Extract content after "# {string}"
header_content = section[header_match.end():].strip()
# Check if content contains  links
if not re.search(r'!\[[^\]]*\]\([^\)]*\)', header_content):
# If no links and no background image, add specified text after "# {string}"
section = f'{section[:header_match.end()]}\n{section[header_match.end():]}\n---'
# Add processed section to result
result.append(section)
# Keep original separator if not last section
if i < len(sections) - 1:
result.append('---')
# Write result back to file
with open(filename, 'w', encoding='utf-8') as file:
file.write(''.join(result))
def title_to_md(file_path, content, title_url):
# Read original file content
title_filename = Path(title_url).name
with open(file_path, 'r', encoding='utf-8') as file:
original_content = file.read()
content = f"\n# {content}\n---"
# Prepend new content
new_content = content + '\n' + original_content
# Write new content
with open(file_path, 'w', encoding='utf-8') as file:
file.write(new_content)
In marp2image.py, define a function named convert_md_files_to_png to export Markdown files as PNG slides. You can import and call convert_md_files_to_png in main.py as shown below:
Import and call convert_md_files_to_png
# Import
from marp2image import convert_md_files_to_png
# Call
# Generate presentation slide images using Marp
convert_md_files_to_png(os.path.join(args.markdown_path,f'{input_base_name}.md'), args.image_path)
All output images are saved to ./material/image. An example is shown below:
Example.
Step 4: Generate narration and subtitles
In this step, use multimodal speech models to convert text into audio and compute precise audio durations. Then automatically generate timestamped subtitles.
Convert text to audio
Split the document content into sentences. Then call the CosyVoice speech synthesis model from Alibaba Cloud Model Studio via API to synthesize each sentence into an MP3 audio file. Create a Python file named audio_generate_each_sentence.py. Sample code follows:
audio_generate_each_sentence.py
import json
import os
import re
import time
import dashscope
from dashscope.audio.tts_v2 import SpeechSynthesizer

import traceback

def read_json_file(file_path):
    with open(file_path, 'r', encoding='utf-8') as file:
        data = json.load(file)
    return data


def split_into_sentences(text):
    # List of Chinese punctuation marks
    punctuation = [',', '。', ';', '?', '!']
    brackets = {'(': ')', '[': ']', '{': '}', '(': ')', '【': '】', '《': '》'}

    # Initialize result list and temporary sentence storage
    sentences = []
    temp_sentence = ''
    bracket_stack = []

    # Iterate over each character in text
    for char in text:
        # If left bracket, push to stack
        if char in brackets:
            bracket_stack.append(char)
        # If right bracket and matches top of stack, pop stack
        elif char in brackets.values() and bracket_stack and brackets[bracket_stack[-1]] == char:
            bracket_stack.pop()

        # If character is Chinese punctuation and bracket stack is empty, sentence ends
        if char in punctuation and not bracket_stack:
            # Add temp sentence to result and clear it
            sentences.append(temp_sentence.strip())
            temp_sentence = ''
        else:
            # Otherwise, add character to temp sentence
            temp_sentence += char

    # Handle last sentence without ending punctuation
    if temp_sentence:
        sentences.append(temp_sentence.strip())

    return sentences


def save_sentences_to_markdown(sentences, base_dir, index1):
    for index2, sentence in enumerate(sentences, start=1):
        # Create directory
        dir_name = f'audio_for_paragraph_{index1}'
        dir_path = os.path.join(base_dir, dir_name)
        os.makedirs(dir_path, exist_ok=True)

        # Build filename
        file_name = f'paragraph_{index1}_sentence_{index2}.md'
        file_path = os.path.join(dir_path, file_name)

        # Write Markdown file
        with open(file_path, 'w', encoding='utf-8') as file:
            file.write(sentence + '\n')


def process_json_file(json_file_path, base_dir):

    if not os.path.exists(base_dir):
        os.makedirs(base_dir)

    file_prefix = os.path.splitext(os.path.basename(json_file_path))[0]

    base_dir = os.path.join(base_dir, file_prefix)

    # Read JSON file
    json_data = read_json_file(json_file_path)

    # Process each entry in JSON data
    for index1, item in enumerate(json_data):
        if 'content' in item:
            content = item['content']
            # Check if content is a link
            if not is_url(content):
                sentences = split_into_sentences(content)
                save_sentences_to_markdown(sentences, base_dir, index1+1)

def is_url(s):
    url_pattern = re.compile(r'http[s]?://(?:[a-zA-Z]|[0-9]|[$-_@.&+]|[!*\\(\\),]|(?:%[0-9a-fA-F][0-9a-fA-F]))+')
    return bool(url_pattern.match(s))


def synthesize_md_to_speech(base_directory):
    """
    Find all .md files in the specified directory, read their content, and use DashScope API to convert to speech.
    Save as same-name .mp3 files in the same directory.

    Parameters:
    base_directory (str): Top-level directory containing .md files.
    """
    # Ensure DashScope API key is set in environment variables
    if 'DASHSCOPE_API_KEY' not in os.environ:
        raise ValueError("DashScope API key must be set in the environment variables.")

    # Walk through directory and subdirectories
    for root, dirs, files in os.walk(base_directory):
        for file in files:
            if file.endswith('.md'):
                # Build full file path
                md_file_path = os.path.join(root, file)

                # Read .md file content
                with open(md_file_path, 'r', encoding='utf-8') as f:
                    text = f.read()

                # Initialize speech synthesizer
                speech_synthesizer = SpeechSynthesizer(model='cosyvoice-v2', voice='longxiaochun_v2')


                # Synthesize speech
                audio_data = speech_synthesizer.call(text)

                # Build output .mp3 file path
                mp3_file_path = os.path.splitext(md_file_path)[0] + '.mp3'

                # Save audio to file
                with open(mp3_file_path, 'wb') as f:
                    f.write(audio_data)

                print(f'Synthesized text from file "{md_file_path}" to file: {mp3_file_path}')
In audio_generate_each_sentence.py, define two functions:
process_json_file: Split the document content into sentences.
synthesize_md_to_speech: Call the CosyVoice speech synthesis model from Alibaba Cloud Model Studio via API to synthesize all sentences into MP3 audio files.
Import and call these functions in main.py, as shown below:
Import and call process_json_file and synthesize_md_to_speech
# Import
from audio_generate_each_sentence import process_json_file, synthesize_md_to_speech
# Call
# Split paragraph content into sentences and synthesize speech using CosyVoice
process_json_file(os.path.join(args.json_path,f'{input_base_name}.json'), args.audio_path)
synthesize_md_to_speech(os.path.join(args.audio_path, input_base_name))
After calling these functions, all audio files are saved to corresponding subfolders under ./material/audio. Example shown below:
Text: Have you ever searched for something online and failed to find useful information?
Generate subtitles
Next, generate SRT-format subtitle files by reading audio durations and matching them to the corresponding text content. Create a Python file named srt_generate_for_each_sentence.py. Sample code follows:
srt_generate_for_each_sentence.py
import os
import re
from moviepy import AudioFileClip
from typing import List

def format_time(seconds):
    hours, remainder = divmod(seconds, 3600)
    minutes, seconds = divmod(remainder, 60)
    milliseconds = int((seconds - int(seconds)) * 1000)
    seconds = int(seconds)
    return f"{int(hours):02d}:{int(minutes):02d}:{int(seconds):02d},{milliseconds:03d}"

# Function to get audio file duration
def get_audio_duration(file_path):
    audio = AudioFileClip(file_path)
    duration = audio.duration
    audio.close()
    return duration

# Function to generate SRT subtitle line
def create_srt_line(index, start_time, end_time, text):
    return f"{index}\n{start_time} --> {end_time}\n{text}\n\n"

def generate_srt_from_audio(base_dir: str, output_dir: str, output_srt_file: str) -> None:
    """
    Generate SRT subtitle file from audio folders in the specified directory.

    :param base_dir: Root directory containing audio folders.
    :param output_dir: Directory to save SRT file.
    :param output_srt_file: Full path to output SRT file.
    """

    # Create output directory if it doesn't exist
    if not os.path.exists(output_dir):
        os.makedirs(output_dir)

    # Ensure output file name ends with .srt
    if not output_srt_file.endswith('.srt'):
        output_srt_file += '.srt'


    # Initialize current time
    current_time = 2.000  # Initial time

    # Open SRT file for writing
    with open(output_srt_file, 'w', encoding='utf-8') as srt_file:
        srt_index = 1

        # Get all matching subdirectories and sort by index
        sub_dirs = [d for d in os.listdir(base_dir) if d.startswith('audio_for_paragraph_')]
        sub_dirs.sort(key=lambda x: int(re.search(r'\d+', x).group()))

        # Loop through subdirectories
        for sub_dir in sub_dirs:
            sub_dir_path = os.path.join(base_dir, sub_dir)

            # Find all .md and .mp3 files
            files = [f for f in os.listdir(sub_dir_path) if f.endswith('.md') or f.endswith('.mp3')]
            md_files = [f for f in files if f.endswith('.md')]

            # Sort .md files by index1 and index2
            md_files.sort(key=lambda x: (int(x.split('_')[1]), int(x.split('_')[3].split('.')[0])))

            # Process each .md file
            for md_file in md_files:
                md_file_path = os.path.join(sub_dir_path, md_file)
                mp3_file_path = os.path.splitext(md_file_path)[0] + '.mp3'

                # Ensure matching .mp3 file exists
                if os.path.exists(mp3_file_path):
                    # Read .md file content
                    with open(md_file_path, 'r', encoding='utf-8') as f:
                        text = f.read().strip()

                    # Get .mp3 file duration
                    duration = get_audio_duration(mp3_file_path)

                    # Generate SRT subtitle line
                    start_time_str = format_time(current_time)
                    end_time_str = format_time(current_time + duration)
                    srt_line = create_srt_line(srt_index, start_time_str, end_time_str, text)

                    # Write to SRT file
                    srt_file.write(srt_line)

                    # Update current time
                    current_time += duration + 0.3  # Add 0.3 seconds to avoid overlap

                    srt_index += 1
                else:
                    print(f"No corresponding MP3 file found for {md_file}")

    print("SRT file generated successfully.")
In srt_generate_for_each_sentence.py, define a function generate_srt_from_audio that reads audio durations and matching text to generate SRT subtitle files.
Import and call generate_srt_from_audio in main.py, as shown below:
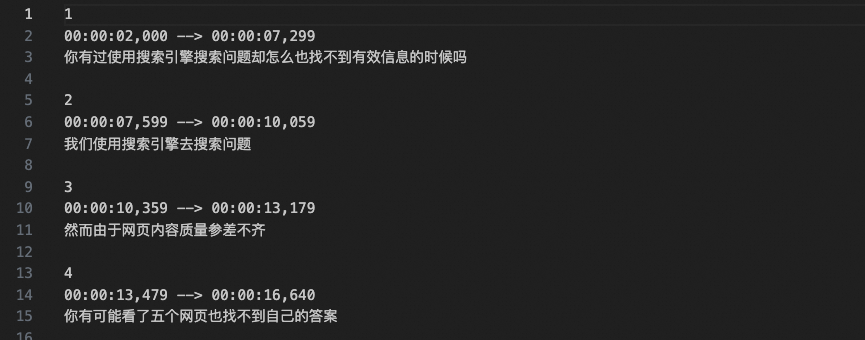
Calling this function automatically generates the SRT file and saves it to ./material/video. Example output shown below:
Step 5: Generate final video
In this step, compile the presentation slides into a video and embed the audio and subtitle files.
Video editing
First, calculate how long each slide appears in the video. Create a Python file named calculate_durations_for_each_image.py. Sample code follows:
calculate_durations_for_each_image.py
import os
from pydub import AudioSegment

def calculate_audio_durations(directory):
    """
    Calculate total duration (in seconds) of all MP3 files in folders named audio_for_paragraph_{index}.

    Parameters:
        directory (str): Root directory to scan.

    Returns:
        list: List of total durations (in seconds) for each audio_for_paragraph_{index} folder.
    """
    # Initialize result list
    durations = []

    # Scan subdirectories
    for entry in os.scandir(directory):
        if entry.is_dir() and entry.name.startswith("audio_for_paragraph_"):
            # Extract index
            index = int(entry.name.split("_")[-1])

            # Initialize total duration for this folder
            total_duration_ms = 0

            # Scan files in folder
            for file_entry in os.scandir(entry.path):
                if file_entry.name.endswith(".mp3"):
                    # Load MP3 and calculate duration
                    audio = AudioSegment.from_mp3(file_entry.path)
                    delay = 300
                    total_duration_ms += len(audio) + delay

            # Convert to seconds and add to results
            total_duration_seconds = total_duration_ms / 1000.0
            durations.append((index, total_duration_seconds))

    # Sort by index
    durations.sort(key=lambda x: x[0])


    # Keep only durations (seconds)
    durations = [duration for _, duration in durations]

    durations.insert(0, 2)

    return durations
In calculate_durations_for_each_image.py, define a function calculate_audio_durations to calculate how long each slide appears in the video.
Import and call calculate_audio_durations in main.py as shown below:
Import and call calculate_audio_durations
# Import
from calculate_durations_for_each_image import calculate_audio_durations
# Call
# Calculate total audio duration for each paragraph
durations = calculate_audio_durations(os.path.join(args.audio_path, input_base_name))
Next, compile all slides into a video. Create a Python file named movie_editor.py. Sample code follows:
movie_editor.py
from moviepy import *
import os
import re
from PIL import Image
import natsort
import math
import numpy as np

def images_to_video_with_durations(input_image_path, output_video_path, durations, fps, base_name):
    # Get all matching image files and sort by number in filename
    pattern = r'^' + re.escape(base_name) + r'_(\d+)\.png$'
    image_files = [
        f"{input_image_path}/{file}"
        for file in os.listdir(input_image_path)
        if re.match(pattern, file)
    ]
    image_files = natsort.natsorted(image_files, key=lambda x: int(re.match(pattern, os.path.basename(x)).group(1)))

    # Set background size
    target_width, target_height = 1280, 720
    background_size = (target_width, target_height)

    # Create clip for each image
    clips = []
    for i, file in enumerate(image_files):
        img = Image.open(file)
        width, height = img.size
        ratio = width / height
        if width > target_width or height > target_height:
            if ratio > target_width / target_height:
                new_width = target_width
                new_height = math.floor(new_width / ratio)
            else:
                new_height = target_height
                new_width = math.floor(new_height * ratio)
        else:
            new_width, new_height = width, height

        img = img.resize((new_width, new_height), resample=Image.Resampling.LANCZOS)
        img_clip = ImageClip(np.array(img)).with_duration(durations[i]).with_position(("center", "center"))

        bg_clip = ColorClip(size=background_size, color=(255,255,255), duration=durations[i])
        composite_clip = CompositeVideoClip([bg_clip, img_clip])
        # Add transition effect (except for last clip)
        # if i < len(image_files) - 1:  # Ensure not last clip
        #     composite_clip = composite_clip.fx(vfx.fadein, duration=0.3).fx(vfx.fadeout, duration=0.3)


        clips.append(composite_clip)

    # Concatenate all clips
    final_clip = concatenate_videoclips(clips, method="compose")


    # Write video file
    output_filename = f"{base_name}.mp4"

    final_clip.write_videofile(os.path.join(output_video_path, output_filename), fps=fps)
In movie_editor.py, define a function images_to_video_with_durations to compile all input slides into a video. Import and call images_to_video_with_durations in main.py as shown below:
After calling this code, the video section_1.mp4 saves to ./material/video. Demo shown below:
This video has no audio or subtitles.
Embed audio and subtitles
Next, embed audio files into the video. Create a Python file named audio2video.py. Sample code follows:
audio2video.py
import os
from moviepy import *
from glob import glob
import re
def merge_audio_and_add_to_video(video_path, audio_base_dir, output_path):
    """
    Merge multiple audio files and add to video.

    :param video_path: Path to video file.
    :param audio_base_dir: Base directory containing audio folders.
    :param output_path: Path to output video.
    """
    # Load video file
    video_clip = VideoFileClip(video_path)

    # Initialize audio list
    audio_clips = []

    silent_audio_start = AudioClip(lambda t: [0,0], duration=2)
    audio_clips.append(silent_audio_start)

    # Get all audio folders and sort by number
    audio_dirs = glob(os.path.join(audio_base_dir, "audio_for_paragraph_*"))
    audio_dirs.sort(key=lambda x: int(re.search(r'\d+', os.path.basename(x)).group()))

    # Loop through audio folders
    for audio_dir in audio_dirs:
        # Get index for current directory
        index = int(os.path.basename(audio_dir).split("_")[-1])

        # Get all MP3 files in directory
        mp3_files = glob(os.path.join(audio_dir, f"paragraph_{index}_sentence_*.mp3"))
        mp3_files.sort(key=lambda x: int(re.search(r'_sentence_(\d+)', os.path.basename(x)).group(1)))

        # Loop through sorted MP3 files
        for mp3_file in mp3_files:
            # Load audio file
            audio_clip = AudioFileClip(mp3_file)

            # Add to audio list
            if audio_clips:
                # Add 0.3-second silence before each audio after the first
                silent_audio = AudioClip(lambda t: [0,0], duration=0.3)
                audio_clips.append(silent_audio)
            audio_clips.append(audio_clip)

    # Concatenate all audio clips
    final_audio = concatenate_audioclips(audio_clips)

    # Add audio to video
    video_with_audio = video_clip.with_audio(final_audio)

    # Write video with new audio
    video_with_audio.write_videofile(output_path, codec='libx264', audio_codec='aac')

    # Close clips to release resources
    video_clip.close()
In audio2video.py, define a function merge_audio_and_add_to_video to embed audio files into the video.
Import and call merge_audio_and_add_to_video in main.py as shown below:
In srt2video.py, define a function merge_video_and_subtitle to embed the SRT subtitle file into the video. Import and call merge_video_and_subtitle in main.py as shown below:
Import and call merge_video_and_subtitle
# Import
from srt2video import merge_video_and_subtitle
# Call
merge_video_and_subtitle(args.srt_and_video_path, input_base_name)
After calling this code, the final video section_1_with_audio_with_subs.mp4 saves to ./material/video. Video demo shown below:
This is the final output video, with audio and subtitles.
Step 6 (optional): Generate video from long documents
You have now built a complete document-to-video project and converted the sample document section_1.md into a video. In practice, you may need to convert longer documents, such as the first lesson of Chapter 1 of the Alibaba Cloud Large Language Model Engineer ACA Certification course: Understanding Large Language Models. We recommend splitting long documents into shorter ones, generating a video for each part, and then merging them into a single video.
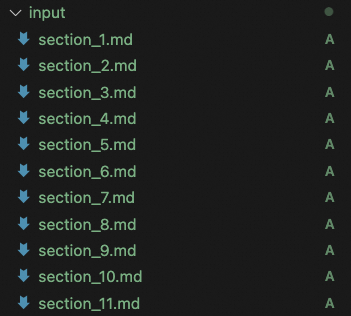
Split the document
You can split the long document into a sequence of shorter documents and save them in the input folder. The file names must follow the format section_index.md, where index is the sequential number of the document. The following image shows an example:
Generate video from long document
You can create a Python file named merge_all_videos.py. The sample code is as follows:
merge_all_videos.py
import os
import re
from moviepy import VideoFileClip, concatenate_videoclips

def merge_videos(input_directory):
    # Define video file pattern
    video_pattern = r"section_(\d+)_with_audio_with_subs\.mp4"

    # Find and sort matching files
    files = sorted(
        (fn for fn in os.listdir(input_directory) if re.match(video_pattern, fn)),
        key=lambda x: int(re.match(video_pattern, x).group(1))
    )

    # Load all video clips
    clips = [VideoFileClip(os.path.join(input_directory, file)) for file in files]

    # Concatenate all clips
    final_clip = concatenate_videoclips(clips)

    # Output merged video
    output_path = os.path.join(input_directory, 'output_merge_all_video.mp4')
    final_clip.write_videofile(output_path, audio_codec='aac')

merge_videos("./material/video")
In the merge_all_videos.py file, you can define a merge_videos function to merge all the videos.
To simplify the entire workflow of generating and merging videos, you can create a shell script named run.sh. The sample code is as follows:
run.sh
#!/bin/bash

# Log file path
log_file="./result.log"

# Clear log file
> "$log_file"

# Record script start time
start_time=$(date +%s)

# Define Python script paths
python_main_script_path="main.py"
python_merge_script_path="merge_all_videos.py"

# Define video output path
video_path=“./material/video/”
# Get all matching filenames and sort numerically
files=$(find ./input -maxdepth 1 -type f -name "section_*.md" | sort -V)

# Loop through files
index=0
for file in $files; do
    index_part=$(basename "$file" .md | cut -d '_' -f 2)
    echo "Processing part ${index_part}" >> "$log_file"
    python "$python_main_script_path" --input_txt_path "$file" >> "$log_file" 2>&1
    if [ $? -ne 0 ]; then
        echo "Error processing $file" >> "$log_file"
        exit 1
    fi
    ((index++))
done

# Merge videos
python "$python_merge_script_path" --input_directory $video_path >> "$log_file" 2>&1

# Record script end time
end_time=$(date +%s)

# Calculate runtime
runtime=$((end_time - start_time))

# Format runtime as hh:mm:ss
hours=$((runtime / 3600))
minutes=$(((runtime % 3600) / 60))
seconds=$((runtime % 60))

# Output completion message
echo "Video generation completed" >> "$log_file"
echo "Total time: $hours hours $minutes minutes $seconds seconds" >> "$log_file"

# Output log
cat "$log_file"
The run.sh script reads all documents in order, converts each document to a video, and then merges all the videos. You can run the run.sh script to execute this workflow. The following is the sample code to run the script:
macOS
# Change permissions
chmod +x run.sh
# Run script
./run.sh
Windows
# Run script. View logs in result.log
bash run.sh
After the script runs, you can view the logs in the ./result.log file. The final merged video, output_merge_all_video.mp4, is saved to the ./material/video directory. For more information, see the demo.
Summary
With this hands-on guide, you will be able to:
Use large language models, multimodal applications, and Marp to convert rich-text documents into engaging presentation videos.
Walk through the end-to-end document-to-video workflow using our complete code package.
Customize input documents, Marp style files, and render assets to create videos in your unique style.