Custom KV templates
This topic describes the features, benefits, use cases, and procedure for using custom KV templates.
Introduction
A custom KV template is a feature for documents with fixed layouts, such as cards, certificates, and receipts. It lets you create a template by visually configuring a single sample document using a drag-and-drop interface. This process eliminates the need for data labeling and model training, allowing you to perform custom structured recognition and extraction for documents with the same layout. A well-configured template can achieve over 85% recognition accuracy. Additionally, the toolbox provides classifier management and field type management tools. These tools allow you to use a single API to automatically classify, route, and accurately process documents with different layouts.
Benefits
Low cost: Create a template from a single sample image without data labeling.
Low barrier to entry: Define templates in a visual, drag-and-drop interface, with no secondary development required.
High efficiency: Configure a template in just 3 to 5 minutes.
Use cases
Small-sample cold start: Ideal for quickly launching and validating a service with a small number of sample documents (fewer than 20).
Fixed document layouts: Suitable for processing document types that have clearly identifiable fields and fixed key-value positions. This feature is widely used for structured recognition in scenarios like qualification reviews, financial reimbursements, and business data processing, which involve documents such as student IDs, marriage certificates, and bank transfer slips.
Procedure
The following video demonstrates how to create a custom KV template.
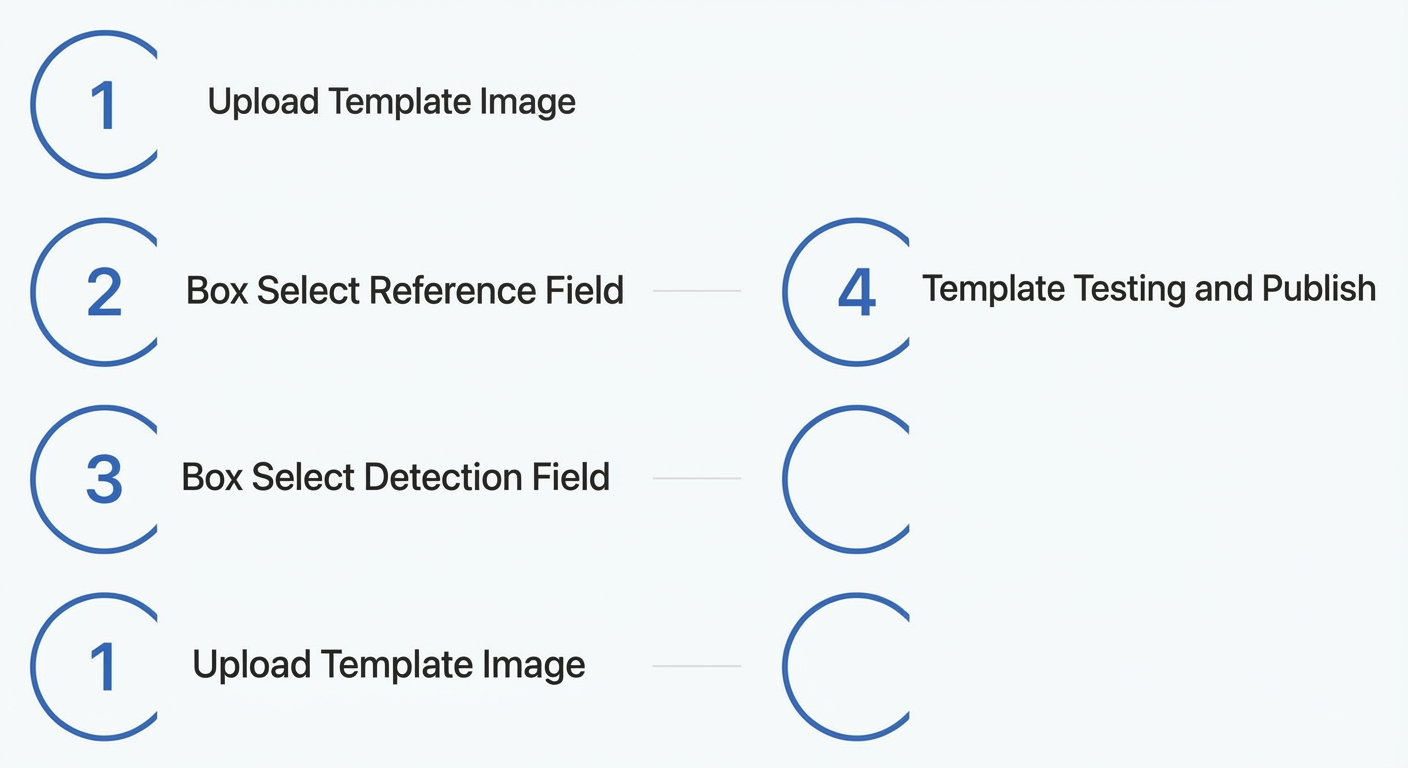
Create a custom KV template in four steps:
Step 1: Upload a template image
Go to the OCR Document Self-learning Platform, find custom KV template, and click Enable Now.
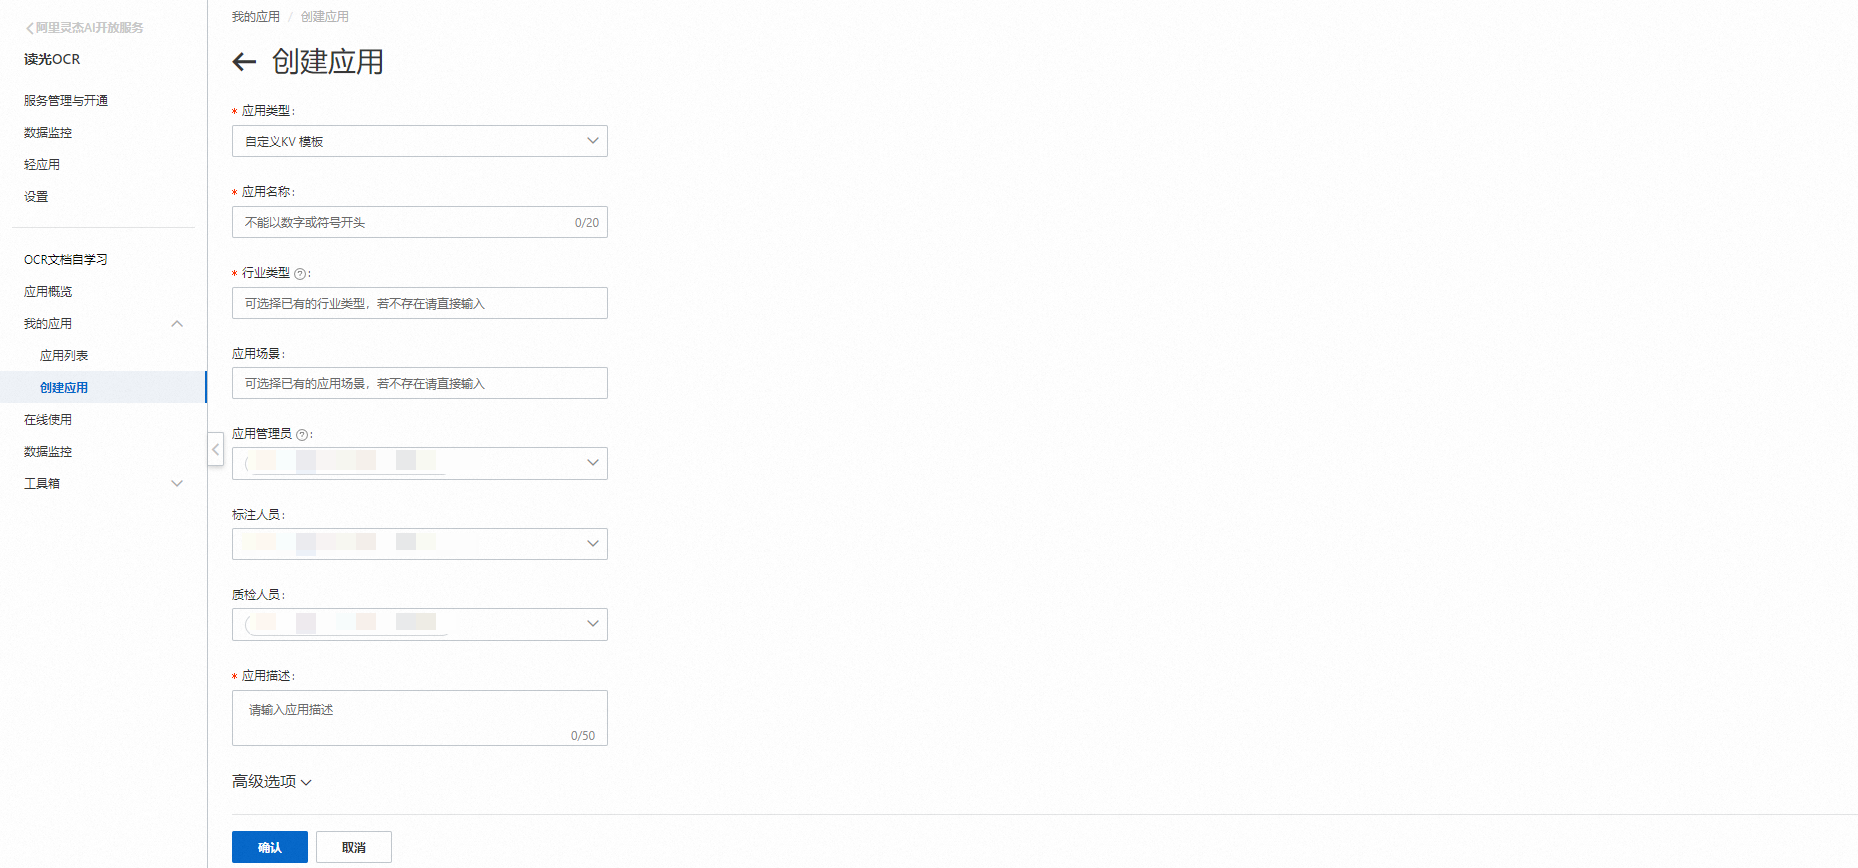
After the service is enabled, you are redirected to the OCR Document Self-learning Platform. Find custom KV template and click Create Task. On the Create Application page, configure the parameters, and then click OK.
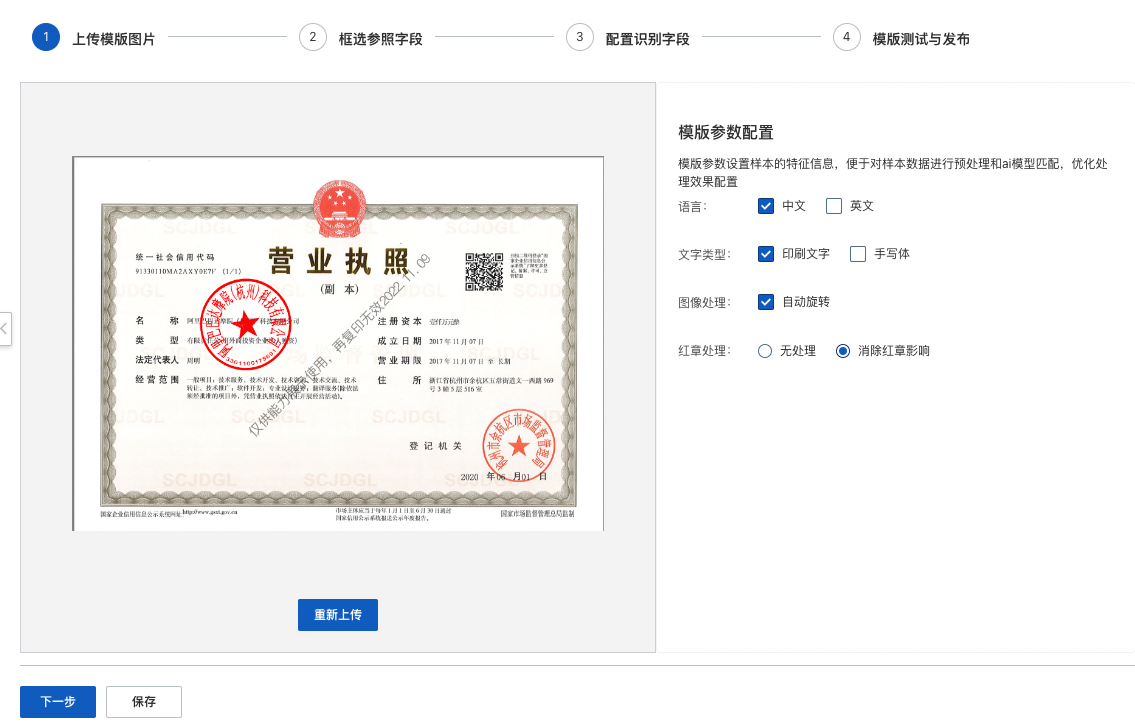
On the My Applications page, find the application you created and click Enter Application. Click Start Creating Template. On the Upload Template Image page, click View Local Files to upload a clear and properly oriented template image. Configure the parameters based on your data, and then click Next.
Step 2: Select anchor fields
From the toolbar on the left, select the Select tool. Use it to draw boxes around text areas with fixed content and position on the template image. These areas serve as anchor fields.
In the anchor field panel on the right, configure the parameters, and then click Next. The parameter is described as follows:
Anchor field: An anchor field is a text area with fixed content and position. It is used to automatically correct and align incoming images with the template. It also affects the performance of the combined classifier if one is used.
Step 3: Configure recognition fields
On the Configure recognition fields page, select the Select tool from the toolbar. Use it to draw boxes around the areas of the template image that you want to recognize.
In the panel on the right, enter a field name, verify the value, and choose the appropriate field type and advanced settings to improve recognition accuracy. Then, click Next. The parameters are described as follows:
Recognition field: A recognition field is an area in the image to be recognized. It represents the information that you want to extract for your business and is used to generate structured results. Each recognition field requires a name, value, and type. Advanced settings are optional.
Field name: The external name of the recognition field, which corresponds to the key in the API response. The field name must be globally unique.
Value: The content of the recognition field, which is automatically recognized and populated after you select the area. To perform post-processing on a specific field (such as normalizing dates, extracting only digits from amounts, or replacing symbols with a regular expression), you can use the field type and advanced settings. These settings are applied during the API call.
Step 4: Test and publish the template
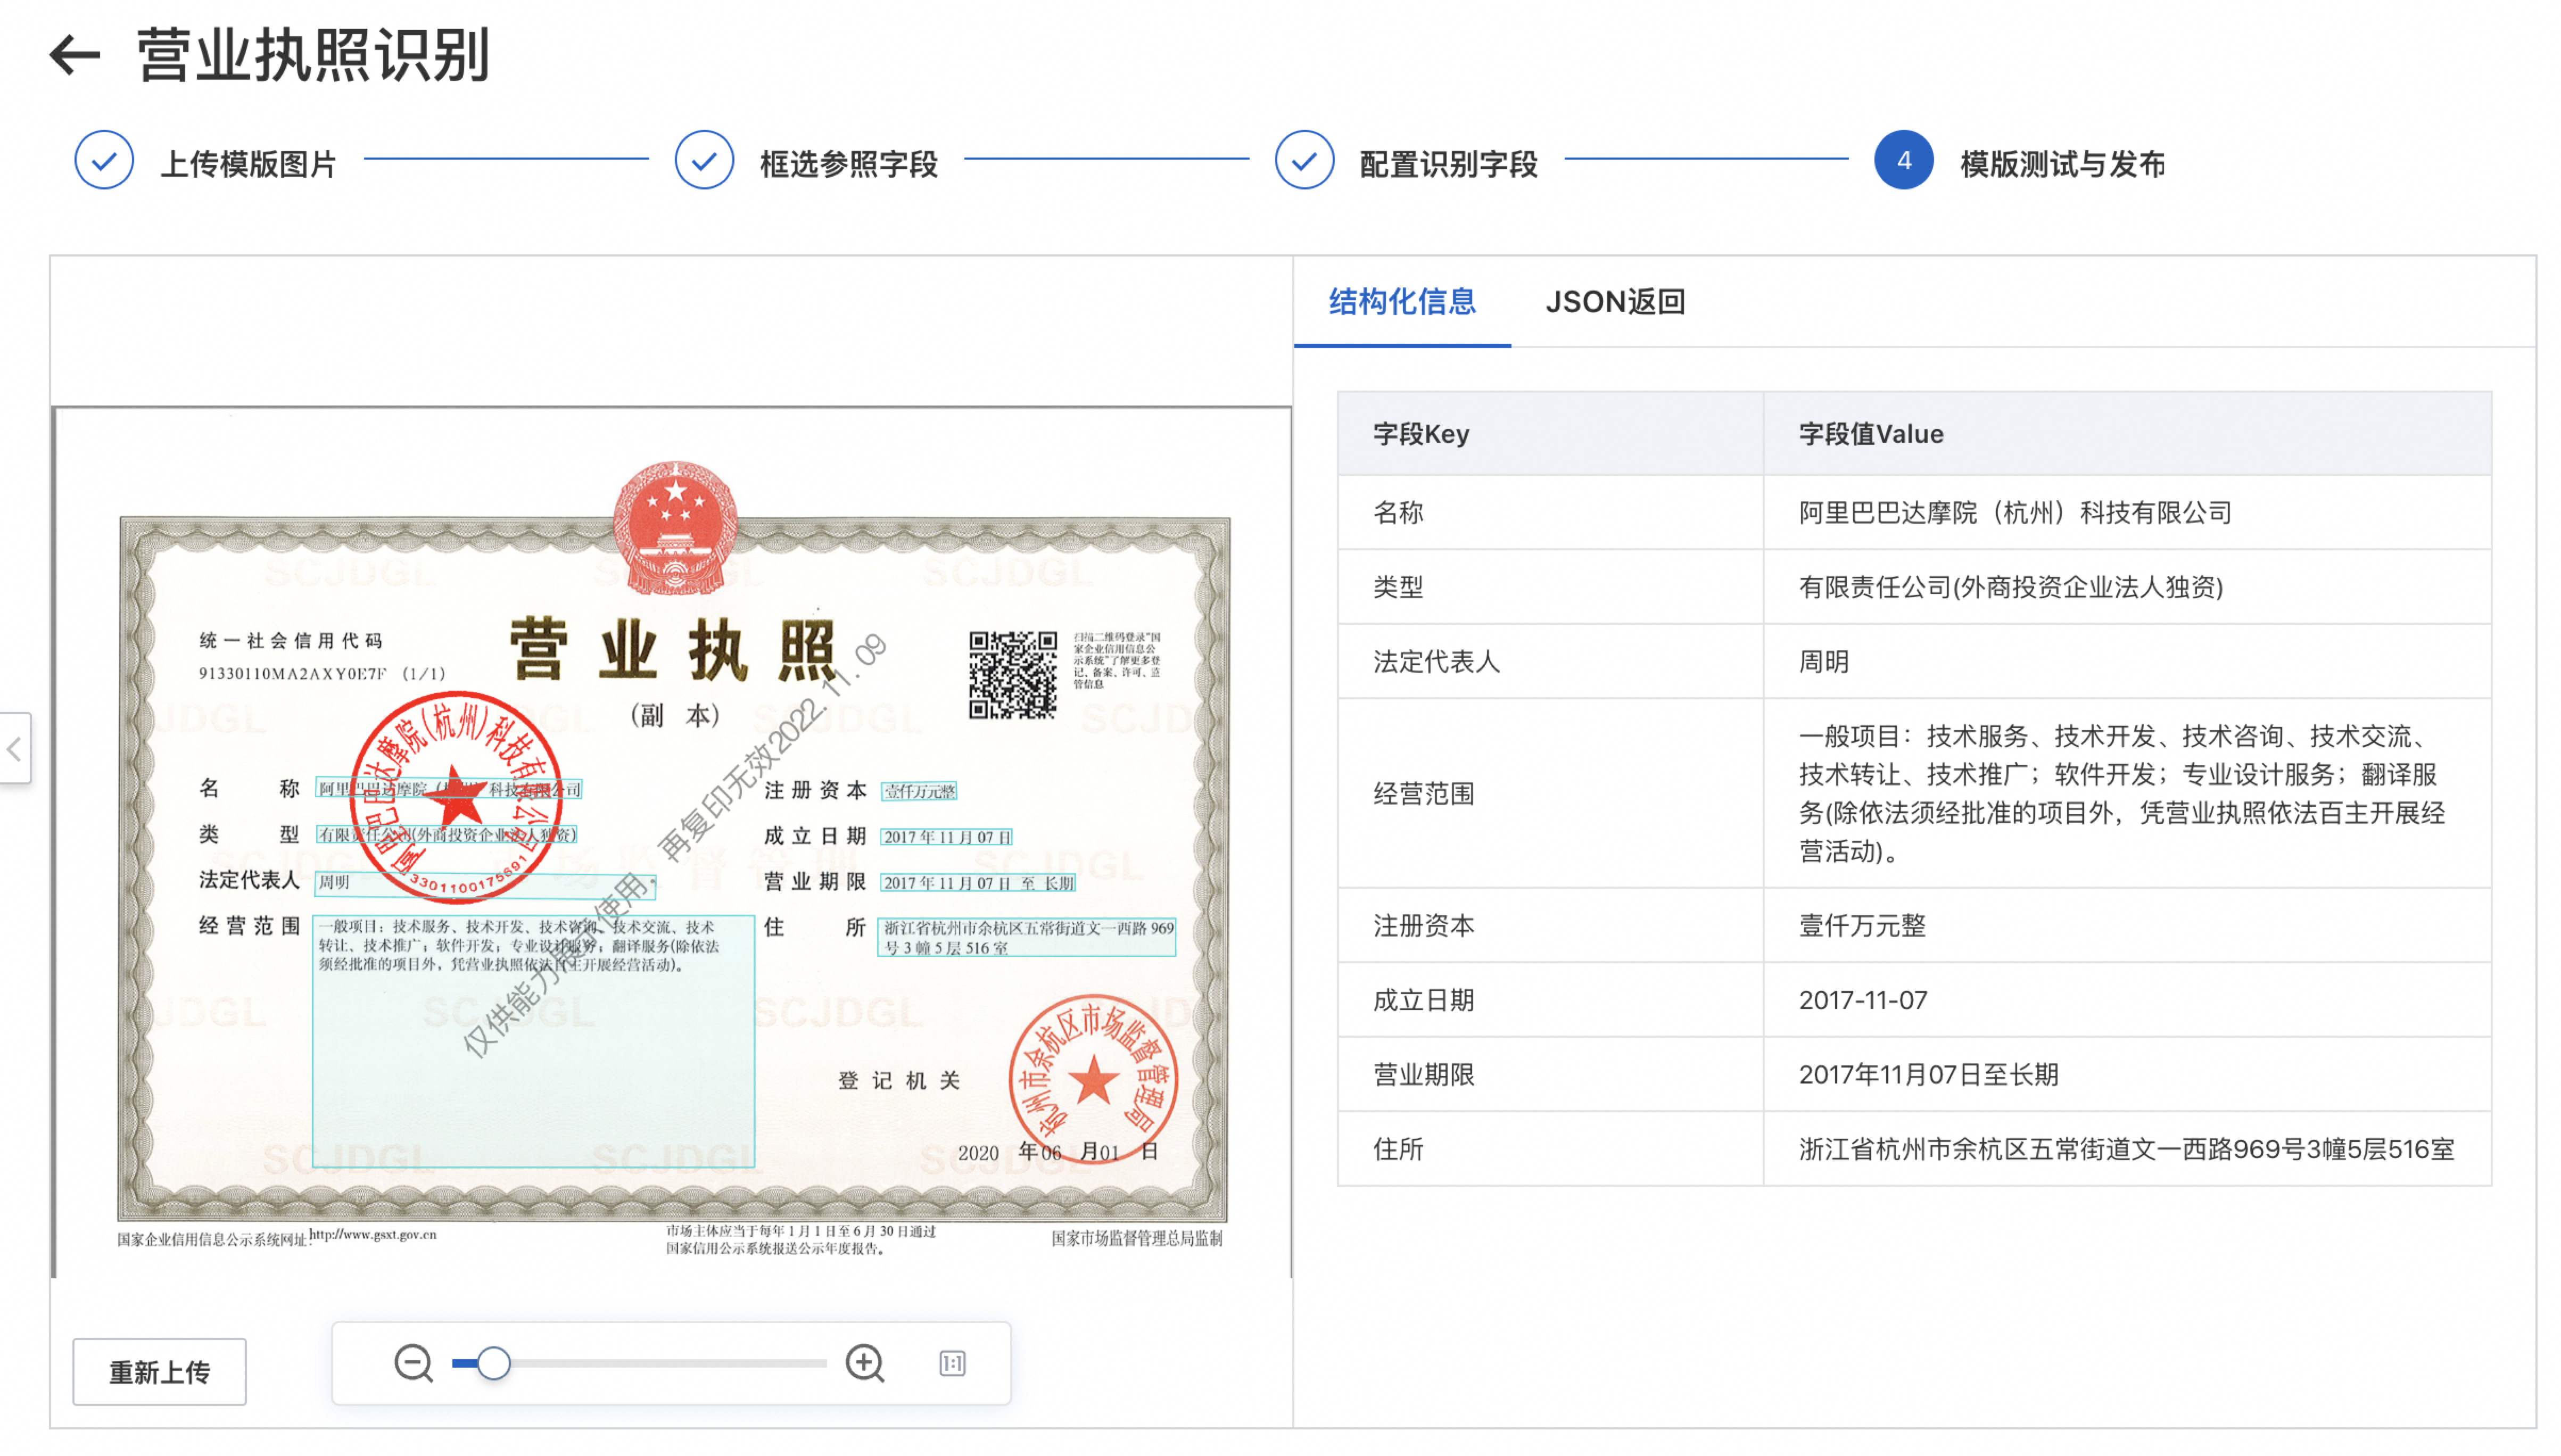
After selecting all anchor and recognition fields, you can test and publish the template. Click View Local Files to upload an image with the same layout to test the template's performance. If you are satisfied with the results, click Publish template and start API calling. You can use the Re-upload button to test more documents and go back to previous steps to fine-tune the configuration.
Optimize and manage templates
Optimization tips
-
What should I do if the test image does not match the template?
Confirm the uploaded test image has the same layout as the template image.
Adjust the selection of anchor fields or choose different anchor fields to improve template matching accuracy.
-
What should I do if the recognition results are incomplete?
Adjust the selection box for the recognition field. Ensure the box covers the maximum possible area where the field's text might appear to prevent incomplete results.
Check the selected field type. For example, if numbers are recognized as letters, adjust the field type for that recognition field.
Check the advanced settings for the field.
-
What should I do if a recognition field is incorrect?
Check the selected field type. For example, changing the type from "regular" to "numeric" can help recognize the field more accurately.
Check the advanced settings for the field.
-
What should I do if the selection boxes are misaligned during testing?
Check if the anchor fields and recognition fields were selected according to the requirements.
Check if the template image meets the requirements.
Template management
After you publish a template, you can go to the project details page to view the project overview, which includes basic information, template configuration, and usage data. You can call published templates through APIs or use them online.
You must enable the custom KV template feature before you can configure templates.
Only published templates can be used for API calls and online use. Usage data is available on the details dashboard. Both API calls and online use are billed. For more information, see OCR Document Self-learning billing.
Related links
OCR Document Self-learning: console
Custom KV template developer guide: Online debugging, API reference, SDK documentation