Create and update custom images
If you use custom images, you must keep them updated to ensure security. Regular updates include installing the latest operating system (OS) patches, upgrading middleware, and adding the latest versions of third-party software. The public template from OOS helps you automate image updates and reduce operational costs.
How it works
OOS provides a public template that fully automates the image update process. To get started, you select a OOS, provide the required parameters such as Shell commands for a Linux instance, and then create an execution to generate a new image. With ECS, you do not need to install additional tools, manage the lifecycle of OOS instances (creation, login, modification, and release), or configure environment variables and AccessKey pairs. You can also customize OOS templates to schedule automated updates or update images in batches.
Comparison of other image update methods
|
Method |
Tools and dependencies |
Pros |
Cons |
|
Use OOS to create and update custom images |
Activate OOS. No other dependencies. |
|
None |
|
No other dependencies |
Easy to use in the ECS console |
|
|
Use Packer to create a custom image |
Packer installation required. |
Open-source with multi-cloud support |
|
Procedure
-
Log in to the CloudOps Orchestration Service console.
-
In the left-side navigation pane, choose .
-
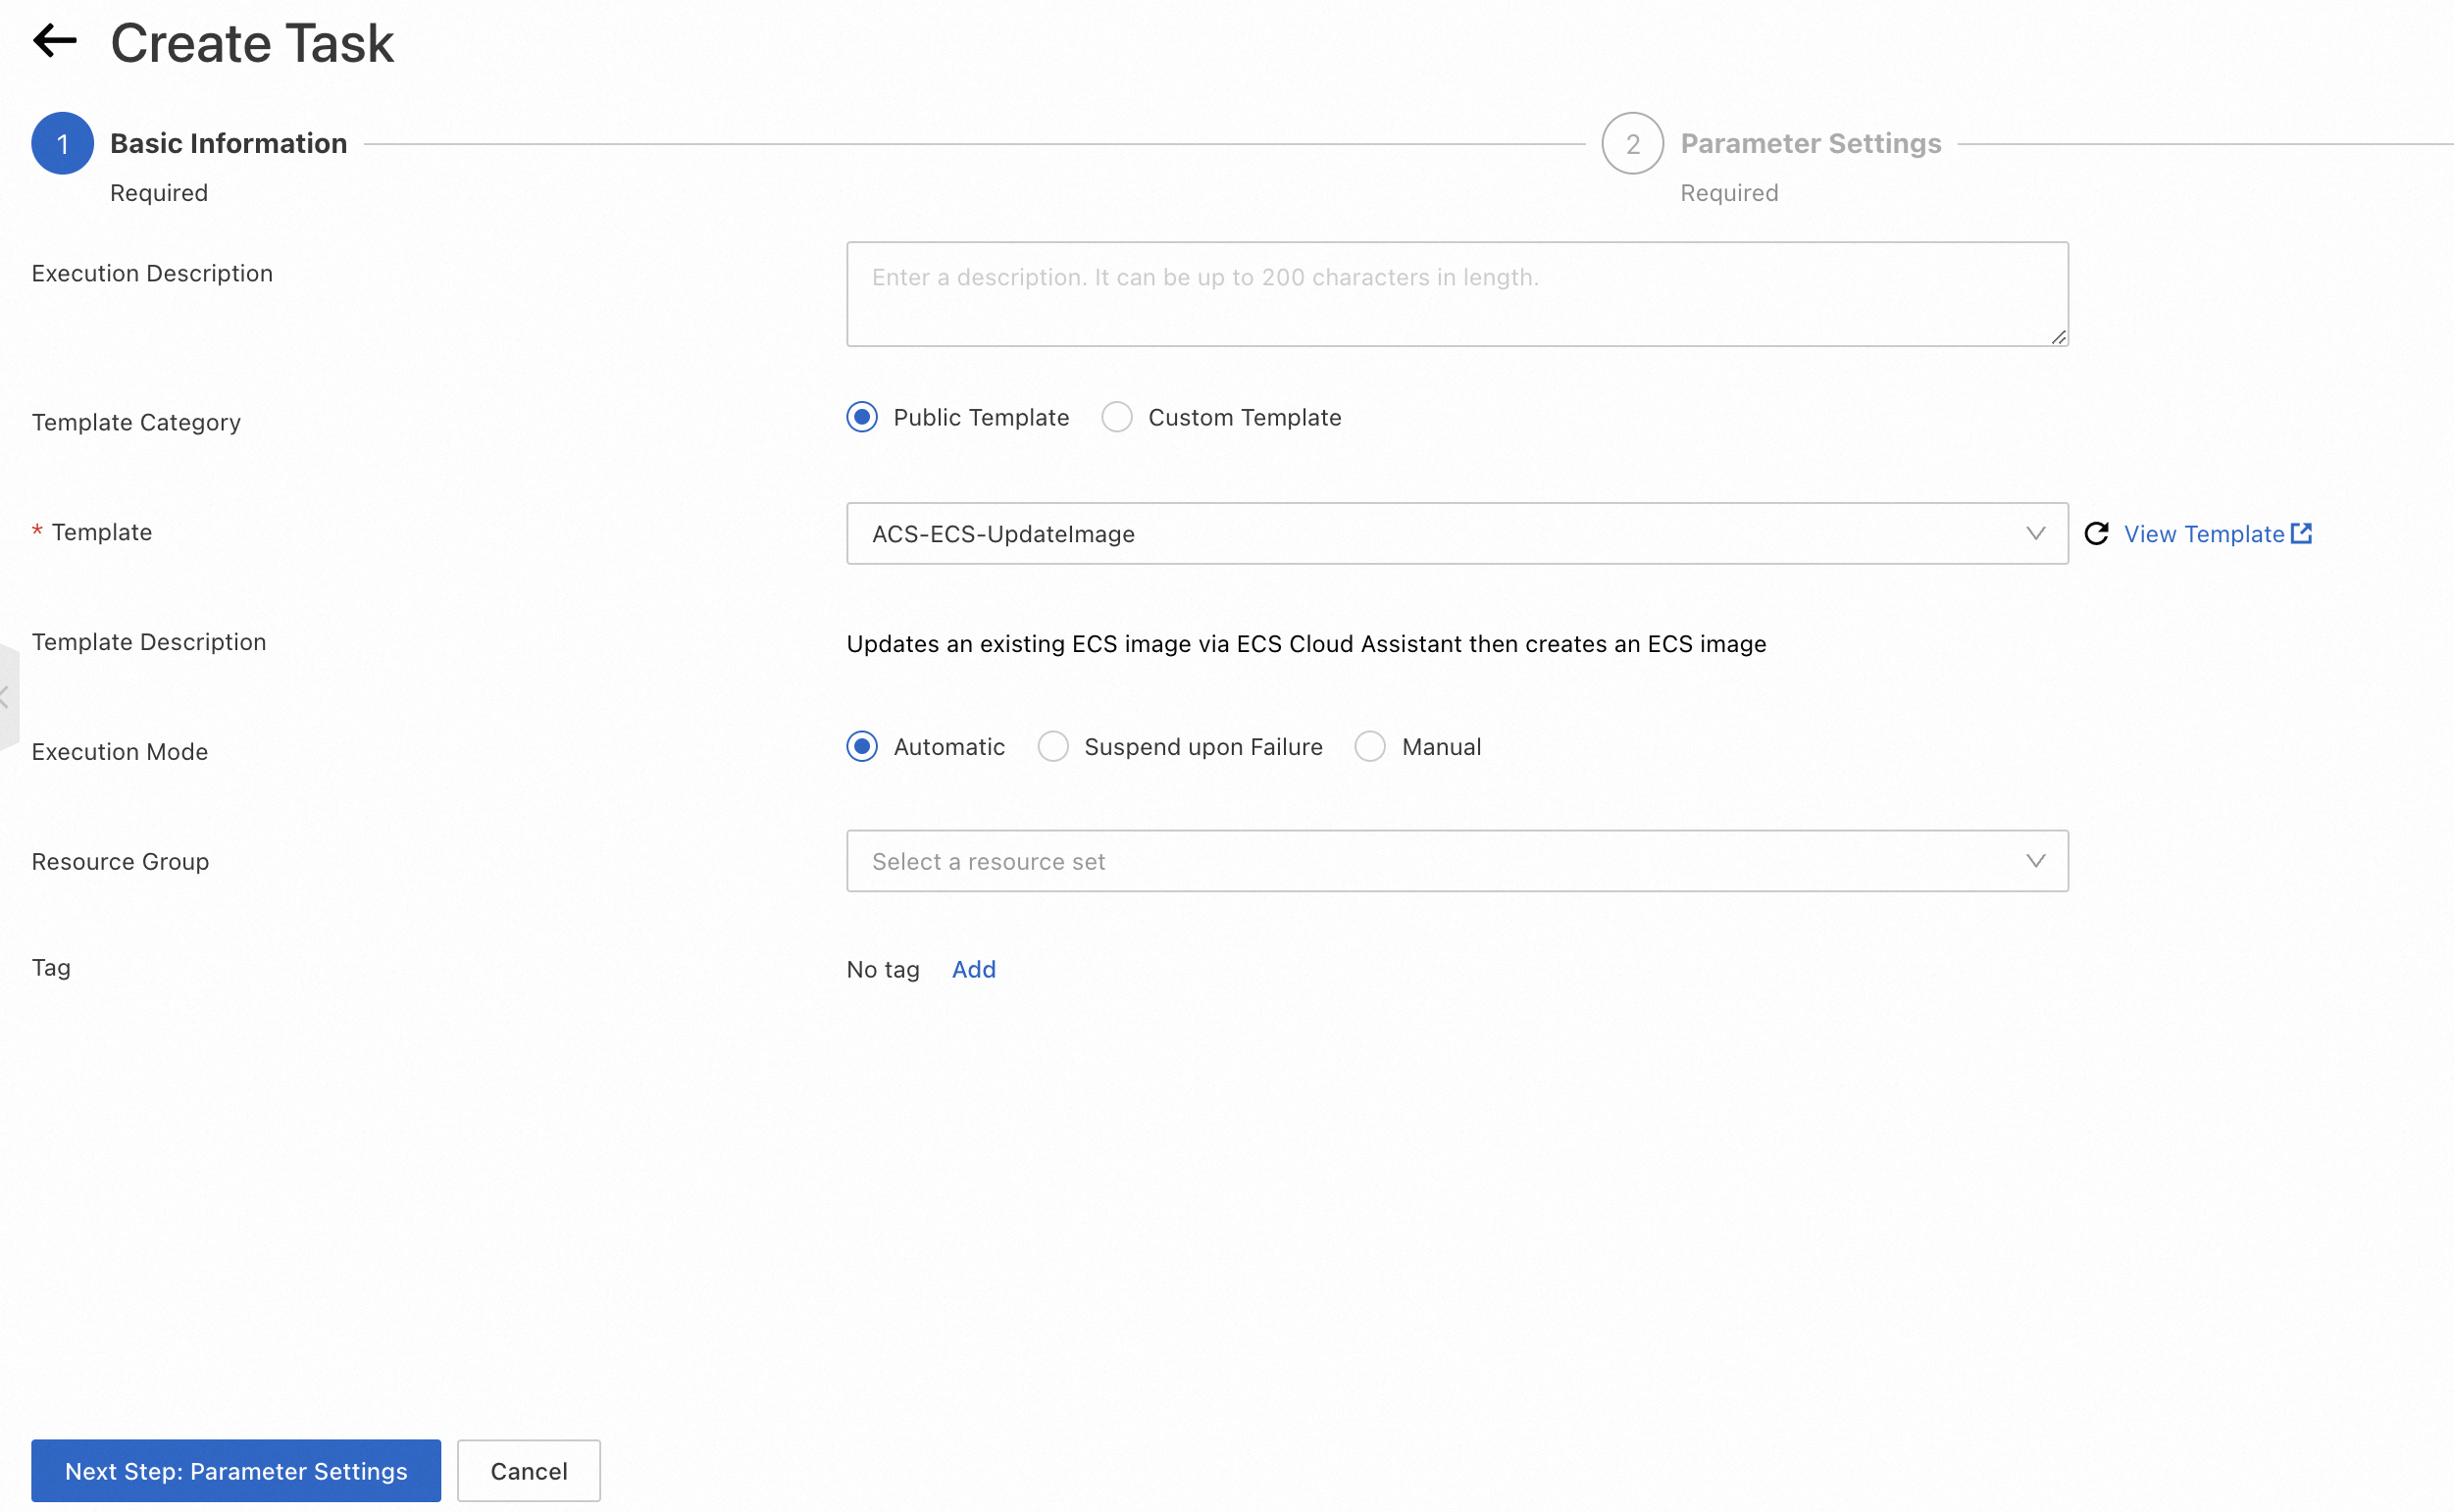
Find the Update Image template and click Create an execution.

-
Click Next Step: Parameter Settings.
-
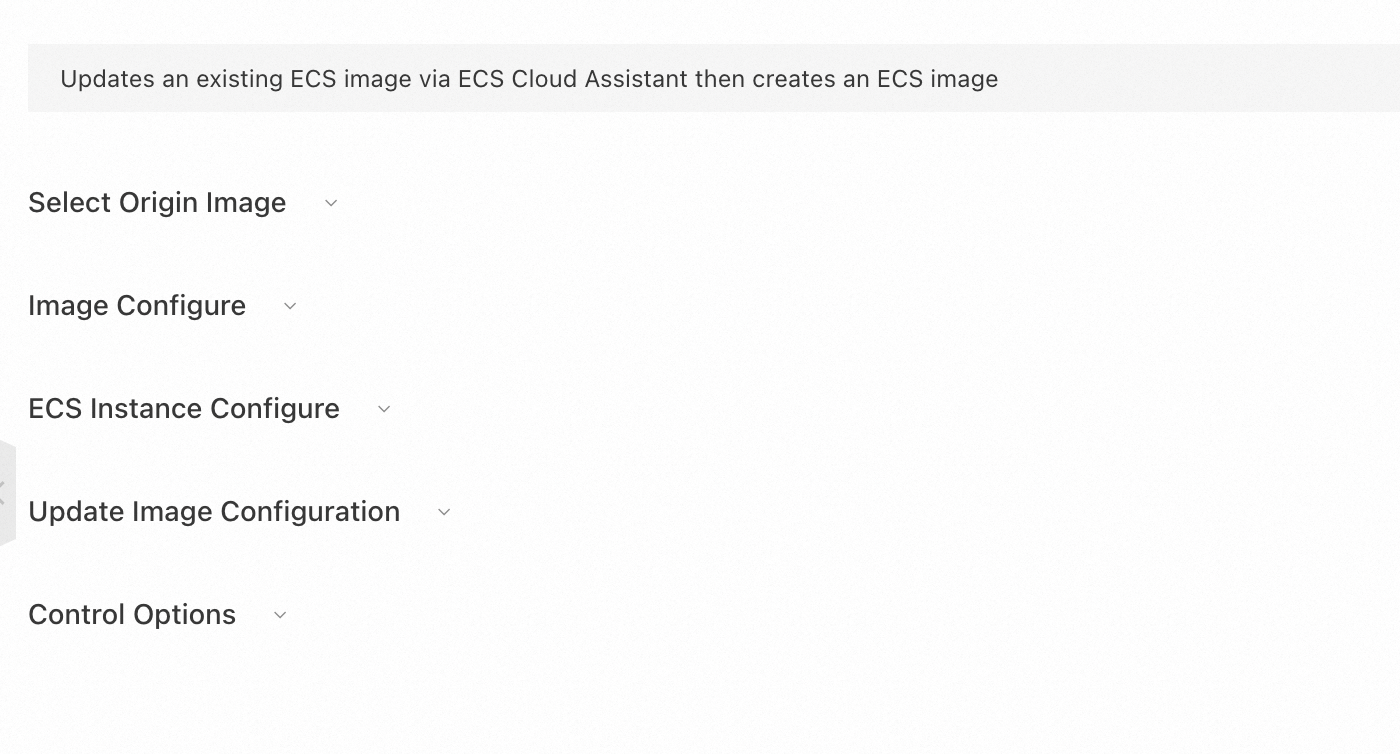
Configure the following parameters.
-
Select Source Image: Select the source image to update.
-
Image Settings: Define the name and tags for the new image.
-
Transit Instance Settings: Configure the instance type and other settings for the ECS.
-
Update Image Configuration: Specify the update method, command type, and script content.
-
Advanced Options: By default, OOS performs actions by using the permissions of the current user. If you specify a OOS, OOS assumes this role to perform the actions.
-
-
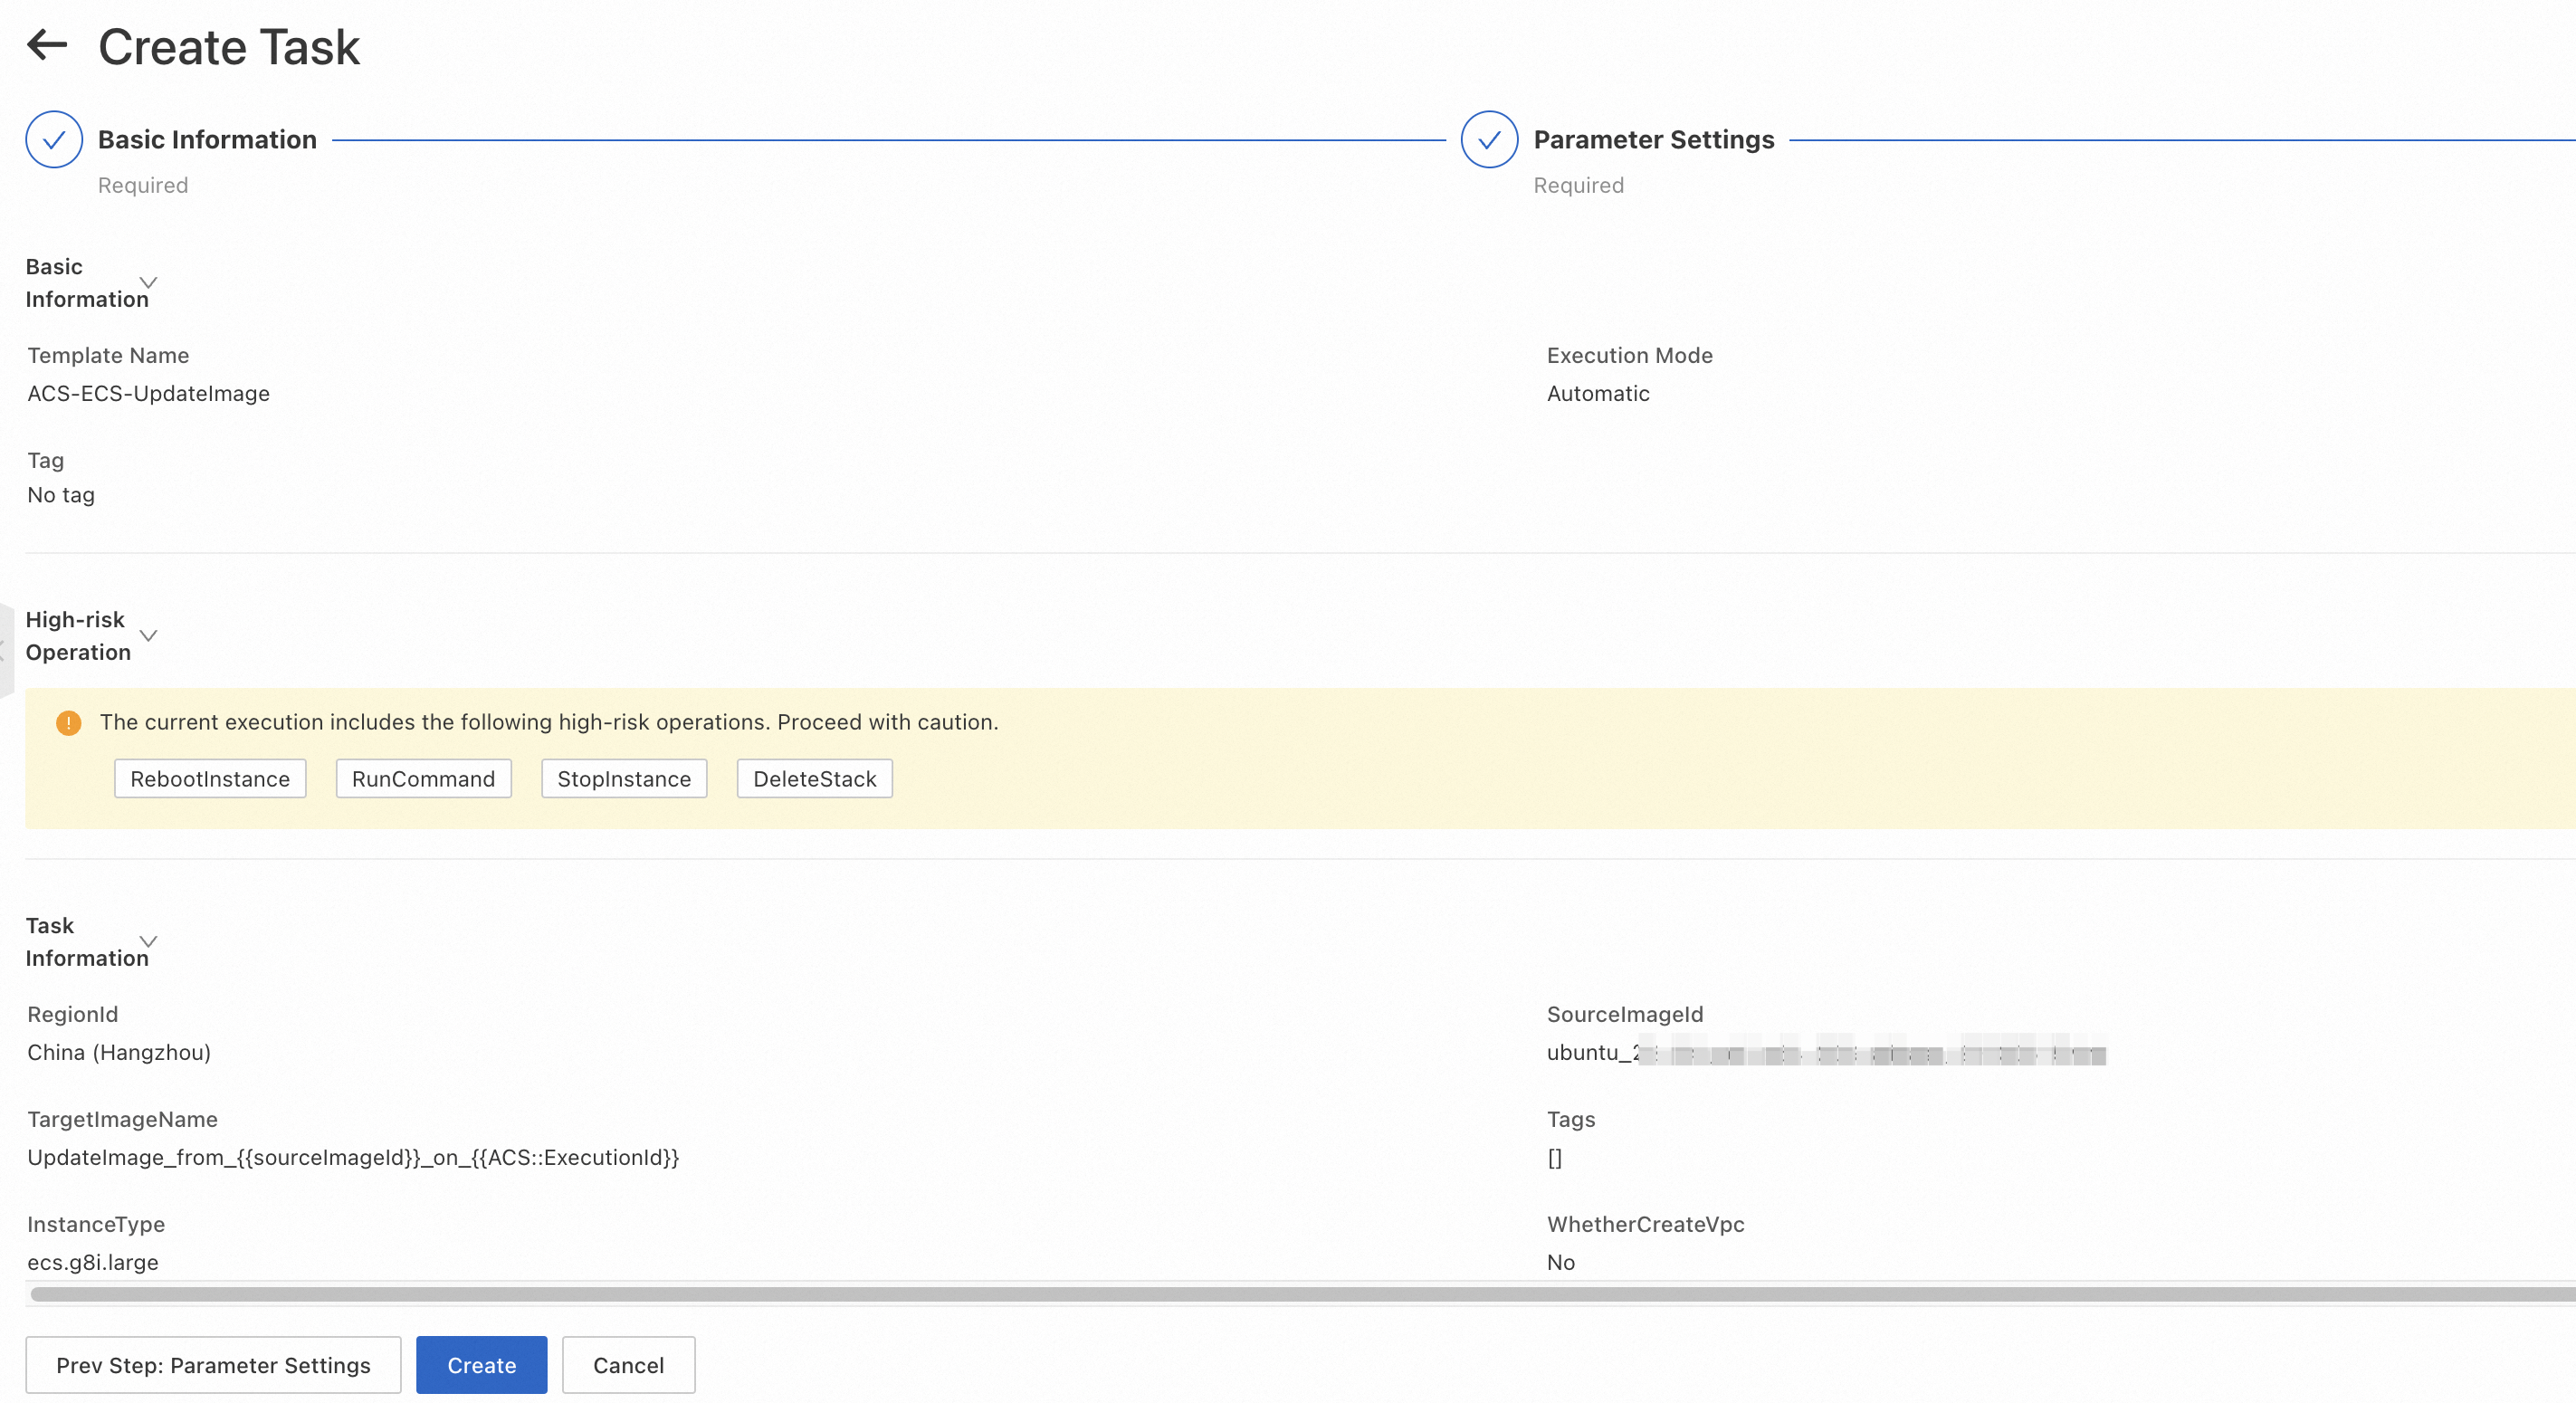
Click Next Step: Confirm, and then click Confirm and Create.
-
Navigate to to view the execution that you just created. If the execution status is Running, the image update is in progress.

-
When the execution status changes to Success, the image update is complete. You can find the new image ID on the execution details page.

-
To learn more about the update process, you can click Details for the execution and view the Execution Logs tab to monitor the progress and status in real time.

Appendix 1: Public template and logic
The following shows the content of the ACS-ECS-UpdateImage public template:
FormatVersion: OOS-2019-06-01
Description: Updates an existing ECS image via ECS Cloud Assistant then creates a
  ECS image.
Parameters:
  sourceImageId:
    Description: The image ID for the ECS instances, centos_6_10_64_20G_alibase_20190326.vhd,
      for example.
    Type: String
    AllowedPattern: '[A-Za-z0-9_\-\.]*'
    MinLength: 1
    MaxLength: 40
  instanceType:
    Description: The instance type for the ECS instances, ecs.g5.large, for example.
    Type: String
    AllowedPattern: ecs\.[A-Za-z0-9\.\-]*
    MinLength: 1
    MaxLength: 30
  securityGroupId:
    Description: The security group ID for the ECS instances, sg-xxxxxxxxxxxxxxxxxxxx,
      for example.
    Type: String
    AllowedPattern: sg-[A-Za-z0-9]*
    MinLength: 1
    MaxLength: 30
  vSwitchId:
    Description: The virtual switch ID for the ECS instances, vsw-xxxxxxxxxxxxxxxxxxxx,
      for example.
    Type: String
    AllowedPattern: vsw-[A-Za-z0-9]*
    MinLength: 1
    MaxLength: 30
  commandContent:
    Description: The content of command.
    Type: String
  commandType:
    Description: The type of command to run in ECS instance.
    Type: String
    AllowedValues:
    - RunBatScript
    - RunPowerShellScript
    - RunShellScript
    MinLength: 1
    MaxLength: 30
  targetImageName:
    Description: The name of image.
    Type: String
    AllowedPattern: '[A-Za-z0-9\-_]*'
    MinLength: 1
    MaxLength: 30
  OOSAssumeRole:
    Description: The RAM role to be assumed by OOS.
    Type: String
    Default: OOSServiceRole
RamRole: '{{ OOSAssumeRole }}'
Tasks:
- Name: checkNewImageName
  Action: ACS::CheckFor
  Description: Check image name is available.
  Properties:
    Service: ECS
    API: DescribeImages
    Parameters:
      ImageName: '{{ targetImageName }}'
    DesiredValues:
    - 0
    PropertySelector: TotalCount
- Name: runInstances
  Action: ACS::ECS::RunInstances
  Description: Create a ECS instance for the cloud assistant.
  Properties:
    imageId: '{{ sourceImageId }}'
    instanceType: '{{ instanceType }}'
    securityGroupId: '{{ securityGroupId }}'
    vSwitchId: '{{ vSwitchId }}'
  Outputs:
    instanceId:
      ValueSelector: instanceIds[0]
      Type: String
- Name: installCloudAssistant
  Action: ACS::ECS::InstallCloudAssistant
  Description: Install cloud assostant for ECS instance.
  OnError: deleteInstance
  Properties:
    instanceId: '{{ runInstances.instanceId }}'
- Name: runCommand
  Action: ACS::ECS::RunCommand
  Description: Run command on ECS instance.
  OnError: deleteInstance
  Properties:
    commandContent: '{{ commandContent }}'
    commandType: '{{ commandType }}'
    instanceId: '{{ runInstances.instanceId }}'
- Name: stopInstance
  Action: ACS::ECS::StopInstance
  Description: Stops the ECS instance by the instance ID.
  Properties:
    instanceId: '{{ runInstances.instanceId }}'
- Name: createImage
  Action: ACS::ECS::CreateImage
  Description: Create image with the specified image name and instance ID.
  OnError: deleteInstance
  Properties:
    imageName: '{{ targetImageName }}'
    instanceId: '{{ runInstances.instanceId }}'
  Outputs:
    imageId:
      ValueSelector: imageId
      Type: String
- Name: deleteInstance
  Action: ACS::ExecuteAPI
  Description: Deletes the ECS instance by the instance ID.
  Properties:
    Service: ECS
    API: DeleteInstance
    Risk: Normal
    Parameters:
      InstanceId: '{{ runInstances.instanceId }}'
      Force: true
Outputs:
  imageId:
    Type: String
    Value: '{{ createImage.imageId }}'
The template performs the following tasks:
-
Checks whether the name you specified for the new image is available.
-
Creates and runs a temporary instance launched from the source image and configured with the parameters you provide.
-
Installs the Cloud Assistant client on the temporary instance if not already present.
-
Runs the update commands on the temporary instance by using Cloud Assistant and waits for the commands to complete successfully.
-
Stops the temporary instance after the update commands finish executing.
-
Creates a custom image from the stopped instance and waits for the creation to complete.
-
Deletes the temporary instance.