Deploying AI art with SDWebUI
Stable Diffusion (SD) is a powerful image generation model that can create high-quality, high-resolution images. Stable Diffusion WebUI provides a visual user interface based on Gradio with a rich set of image generation tools. Elastic Algorithm Service (EAS) supports scenario-based deployment. You can deploy an SD WebUI service with one click by configuring only a few parameters.
Features and advantages
Compared to self-managed services, PAI-EAS provides the following advantages:
One-click deployment: Pre-configured runtime images contain all dependencies.
GPU auto scaling: Dynamically adjusts GPU resources based on demand.
Enterprise-grade features: Multi-user isolation, GPU sharing, and cost allocation.
Integrated file management: The FileBrowser extension makes it easy to upload models.
Choose a suitable version
Version | Scenarios | Invocation method | Billing |
Standard Edition | Personal testing and prototype development | WebUI, API calls (sync) | You are charged based on the deployment configuration. For more information, see Billing of EAS. |
API edition | Production environment APIs, high-concurrency scenarios | API calls (sync & async) | |
Cluster WebUI edition | Team collaboration, design teams | WebUI | |
Serverless edition Note This edition is available only in the China (Shanghai) and China (Hangzhou) regions. | Elastic workloads, cost optimization | WebUI | Service deployment is free. You are charged only for the duration of image generation. |
Quick Start: Deploy AI art generation services using a scenario-based template
Log on to the PAI console. Select a region on the top of the page. Then, select the desired workspace and click Enter Elastic Algorithm Service (EAS).
On the Elastic Algorithm Service (EAS) page, click Deploy Service. Then, in the Scenario-based Model Deployment area, click AI Painting - SD Web UI Deployment.
Configure the following key parameters:
Version: Select Standard Edition.
Model Settings: Select OSS and a bucket path to store model files and images generated by inference.
Instance Type: Select a GPU type. The recommended specification is
ml.gu7i.c16m60.1-gu30because it is the most cost-effective.
After you configure the parameters, click Deploy. Wait for 5 to 10 minutes until the service status changes to Running.
Invoke the service
Invoke using the WebUI
You can use the WebUI to invoke services of the Standard, Cluster WebUI, and Serverless editions. Follow these steps:
Click the target service name to go to the Overview page, and then click Web applications in the upper-right corner.
Perform model inference validation.
On the Stable Diffusion WebUI page, on the Text-to-Image tab, enter a positive prompt, such as
cute dog. Then, click Generate to create the AI art.
Invoke using synchronous API calls
After you deploy a Standard Edition or API edition service, you can send synchronous API requests.
Query endpoint information
After the service is deployed, click the service name to open the Overview page.
In the Basic Information area, click View Endpoint Information.
On the Invocation Information page, obtain the public service endpoint and token.
Call examples
Save images to a local device
import requests
import base64
from PIL import Image
import io

# IMPORTANT: Remove the trailing slash (/) from the endpoint URL.
SERVICE_URL = "<your_endpoint_url>"
TOKEN = "<your_token>"

def generate_image(prompt: str) -> Image.Image:
    """Generates an image based on a text prompt."""
    payload = {
        "prompt": prompt,
        "negative_prompt": "blurry, low quality, deformed",
        "steps": 25,
        "width": 512,
        "height": 512,
        "cfg_scale": 7.5,
    }

    response = requests.post(
        f"{SERVICE_URL}/sdapi/v1/txt2img",
        json=payload,
        headers={"Authorization": TOKEN}
    )
    response.raise_for_status()

    # Decode the first image
    img_data = response.json()["images"][0]
    return Image.open(io.BytesIO(base64.b64decode(img_data)))

# Generate and save the image
image = generate_image("a serene mountain landscape at sunset")
image.save("output.png")
Save images to OSS
import requests

# IMPORTANT: Remove the trailing slash (/) from the endpoint URL.
SERVICE_URL = "<your_endpoint_url>"
TOKEN = "<your_token>"

payload = {
    "prompt": "professional portrait photography",
    "steps": 30,
    "alwayson_scripts": {
        "sd_model_checkpoint": "v1-5-pruned-emaonly.safetensors",
        "save_dir": "/code/stable-diffusion-webui/data/outputs"
    }
}

response = requests.post(
    f"{SERVICE_URL}/sdapi/v1/txt2img",
    json=payload,
    headers={"Authorization": TOKEN}
)

# Get the path of the saved image
data = response.json()

# This is the mount_path corresponding to the default mounted OSS folder when you deploy the EAS service.
mount_path = "/code/stable-diffusion-webui/data"

# This is the OSS bucket address you selected when you deployed the EAS service.
oss_url = "oss://examplebucket/data-oss"

for idx, img_path in enumerate(data['parameters']['image_url'].split(',')):
    # Get the actual address of the generated image in OSS.
    img_oss_path = img_path.replace(mount_path, oss_url)
    print(img_oss_path)
You can also use LoRA and ControlNet data formats in the request data.
Use a LoRA model configuration in the request data
When you send a service request, you can add <lora:yaeMikoRealistic_Genshin:1000> to the request body to include a LoRA model. For more information, see Lora.
The following example shows a request body configuration.
{
  "prompt":"girls <lora:yaeMikoRealistic_Genshin:1>",
  "steps":20,
  "save_images":true
}
Use the ControlNet data format in the request data
Using the ControlNet data format in API request data lets you perform common image transformations. For more information about how to configure this, see ControlNet data format for text-to-image.
Invoke using asynchronous API calls
After you deploy an API edition service, you can send asynchronous API requests. In asynchronous mode, the client does not need to wait for the result. Instead, it receives results pushed from the server-side through a subscription. Follow these steps:
Query Invocation Information
After the service is successfully deployed, click the service name to go to the Overview page.
In the Basic Information area, click View Endpoint Information.
On the Invocation Information page, click the Asynchronous Invocation tab to obtain the public invocation address and token.
Send a request
The client sends a request to the server-side through an asynchronous API operation.
import requests


SERVICE_URL = "<your_public_input_endpoint>"
TOKEN = "<your_token>"

response = requests.post(
    f"{SERVICE_URL}/sdapi/v1/txt2img?task_id=job_001",
    json={
        "prompt": "futuristic city skyline",
        "steps": 30,
        "alwayson_scripts": {
            "save_dir": "/code/stable-diffusion-webui/data/outputs"
        }
    },
    headers={"Authorization": TOKEN}
)
print(f"Task enqueued: {response.json()}")
The asynchronous queue has limits on the size of input requests and output results, which typically should not exceed 8 KB. Therefore, when you send requests, you must meet the following two conditions:
If the request data contains images, we recommend that you use URLs to pass the image information. Stable Diffusion WebUI automatically downloads and parses this image data.
To ensure that the returned result does not contain the original image data, we recommend that you use save_dir to specify the save path for the generated images. For more information, see Additional parameters configurable for API operations.
Subscription results
The client receives results through a subscription. After the server-side processes the request, it automatically pushes the result to the client.
from eas_prediction import QueueClient

# You must adjust the endpoint URL format to match the example: 112231234124214.cn-hangzhou.pai-eas.aliyuncs.com
SERVICE_URL = "<your_endpoint_url>"
TOKEN = "<your_token>"
# The service name configured when the service was created
SERVICE_NAME = "<your_service_name>"

sink = QueueClient(SERVICE_URL, SERVICE_NAME + '/sink')
sink.set_token(TOKEN)
sink.init()

for result in sink.watch(0, 5, auto_commit=True).run():
    print(f"Task {result.tags.get('task_id')} completed")
    print(f"Image URL: {result.data}")
EAS supports new features based on the native Stable Diffusion WebUI API operations. You can add optional parameters to the request data to implement more features. For more information, see Additional parameters configurable for API operations.
Advanced deployment options
Custom deployment
JSON-based deployment
Install plug-ins for enhanced features
You can install plug-ins for Stable Diffusion WebUI to extend its functionality. PAI provides several pre-installed plug-ins, such as the BeautifulPrompt plug-in, which expands and refines prompts. The following section uses BeautifulPrompt as an example to show how to install and use a plug-in.
Install a plug-in
You can view and install plug-ins on the Extensions tab of the WebUI page. Follow these steps:
Click the target service name to go to the Overview page, and then click Web applications in the upper-right corner.
On the WebUI page, on the Extensions tab, check whether BeautifulPrompt is selected. If it is not selected, select the plug-in and click Apply and restart UI to reload the BeautifulPrompt plug-in.
When you install the plug-in, the WebUI page restarts automatically. After it reloads, you can perform inference validation.
Use the plug-in for inference validation
Switch to the BeautifulPrompt tab, enter a simple prompt in the text box, and then click Generate to generate a more detailed prompt.
You can configure the following generation parameters:
Top K: 50
Top P: 0.9
Temperature: 0.9
Repetition penalty: 1.05
Max new tokens: 384
Num prompts: 5
After you click Generate, the result panel on the right outputs multiple expanded Stable Diffusion prompts. To the right of each result, to txt2img and to img2img buttons let you send the prompt directly to the corresponding feature page.
PAI provides multiple prompt generation models, and each model generates slightly different prompts. The models are:
pai-bloom-1b1-text2prompt-sd-v2: Excels at generating prompts for complex scenes.
pai-bloom-1b1-text2prompt-sd: Generates prompts that describe a single object.
You can choose the appropriate model to generate prompts as needed. You can also select the Negative prompt check box to generate negative prompts at the same time.
Select the prompt that you want to use and click to txt2img to the right of the prompt.
The page automatically switches to the Text-to-Image tab and fills in the prompt area.
Click Generate to generate an image on the right side of the WebUI page.
The enhanced prompt includes rich image quality and composition descriptors, such as masterpiece, best quality, and ultra-detailed, which help generate high-quality anime-style images.
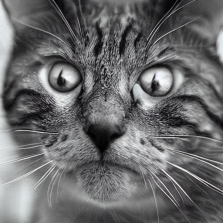
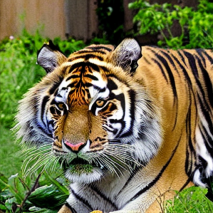
Compared to not using the BeautifulPrompt plug-in, using it can improve the aesthetic quality of the generated images and help you add more details. The following table shows a comparison of results with and without the BeautifulPrompt plug-in for other scenarios.
Input Prompt
Result without BeautifulPrompt
Result with BeautifulPrompt
a cat

a giant tiger

FAQ
Q: How do I mount my own models and output directories?
After the service is deployed, the system automatically creates the following directory structure in the mounted OSS or NAS storage space.
api_rec/configs/extensions/images/models/progress_images/requests_folder/cache.jsonparams.txtui-config.json
Where:
models: This directory is used to store model files.
outputs: After an inference request is initiated, the system automatically outputs the result files to this directory according to the preset configuration in the API code.
You can store models downloaded from open source communities or your own trained LoRA or Stable Diffusion models in the specified directories to load and use them. Follow these steps:
Upload the model file to the corresponding subdirectory within the
modelsdirectory of the mounted storage. For more information, see Step 2: Upload files.On the Elastic Algorithm Service (EAS) page, click
 > Restart Service in the Actions column of the target service. The changes take effect after the service is successfully restarted.
On the Stable Diffusion WebUI page, switch the model and perform model inference validation.
Click the Stable Diffusion checkpoint drop-down list and select the target model, for example,
chilloutmix_NiPrunedFp32Fix.safetensorsordeliberate_v2.safetensors.
Q: Are downloaded plug-ins and uploaded files saved in the instance if the configuration is unchanged?
Q: What do I do if the service is stuck for a long time?
You can first try to resolve the issue by reopening the Stable Diffusion WebUI interface or restarting the EAS service.
Click the target service to go to the Overview page and click Web applications in the upper-right corner to reopen the Stable Diffusion WebUI.
Click
 > Restart Service in the Actions column of the target service to restart the EAS service.
If restarting does not resolve the issue after a long time, it is likely because the service needs to download content, such as models or plug-ins, from the Internet. By default, EAS does not have public network access. Runtime images can be started offline, and mounting models does not require a network connection. However, some plug-ins depend on downloading content from the Internet. In this case, we recommend that you check the logs to find the download path of the model or plug-in, manually download it, and upload it to OSS for mounting. For more information, see Q: How do I mount my own models and output directories?. If you still need to connect to the Internet, see Access public or internal network resources from EAS to configure a public network connection.
 > Restart Service in the Actions column of the target service to restart the EAS service.
Q: How do I switch the default language of the WebUI page to English?
Q: How do I manage my file system?
Q: Error: No such file or directory: 'data-oss/data-********.png'
Q: I cannot access the WebUI page
Appendix
Parameters configurable at service startup
Common parameters
Common parameter
Feature description
Recommendation
--bladeEnables PAI-Blade acceleration to speed up image generation.
We recommend that you enable this.
--filebrowserA plug-in that lets you upload and download models or images.
Enabled by default.
--data-dir /code/stable-diffusion-webui/data-ossThe path used for persistent storage mounts.
Use when you mount persistent storage. The default starting path is
/code/stable-diffusion-webui/. You can also use a relative path.--apiThe API call mode for the WebUI.
Enabled by default.
--enable-nsfw-censorDisabled by default. If you have security and compliance requirements, you can enable the pornography detection feature.
Adjust as needed.
--always-hide-tabsSpecifies that some tabs are hidden.
Adjust as needed.
--min-ram-reserved 40 --sd-dynamic-cacheCache the Stable Diffusion large model in memory.
None.
Cluster edition parameters
NoteThe checkpoint (ckpt) LLMs and ControlNet LLMs automatically load files from the public directory and your custom files.
Cluster edition parameter
Feature description
Recommendation
--lora-dirSpecifies the public LoRA model directory. For example,
--lora-dir /code/stable-diffusion-webui/data-oss/models/Lora.Not configured by default. All user LoRA directories are isolated, and only LoRA models in the user's folder are loaded. When a specific directory is specified, all users will load both the LoRA models in that public directory and the LoRA models in their own folders.
--vae-dirSpecifies the public VAE model directory. For example,
--vae-dir /code/stable-diffusion-webui/data-oss/models/VAE.Not configured by default. All user VAE directories are isolated, and only VAE models in the user's folder are loaded. When a specific directory is specified, all users will only load the VAE models from that public directory.
--gfpgan-dirSpecifies the public GFPGAN model directory. For example,
--gfpgan-dir /code/stable-diffusion-webui/data-oss/models/GFPGAN.Not configured by default. All user GFPGAN directories are isolated, and only GFPGAN models in the user's folder are loaded. When a specific directory is specified, all users will only load the GFPGAN models from that public directory.
--embeddings-dirSpecifies the public embeddings model directory. For example,
--embeddings-dir /code/stable-diffusion-webui/data-oss/embeddings.Not configured by default. All user embeddings directories are isolated, and only embeddings models in the user's folder are loaded. When a specific directory is specified, all users will only load the embeddings models from that public directory.
--hypernetwork-dirSpecifies the public hypernetwork model directory. For example,
--hypernetwork-dir /code/stable-diffusion-webui/data-oss/models/hypernetworks.Not configured by default. All user hypernetwork directories are isolated, and only hypernetwork models in the user's folder are loaded. When a specific directory is specified, all users will only load the hypernetwork models from that public directory.
--root-extensionsThe plug-in directory uses a shared directory. With this parameter, all users see the exact same plug-ins.
Use this parameter when you need to install or manage plug-ins centrally.
Additional parameters configurable for API operations
EAS supports new features based on the native Stable Diffusion WebUI API. In addition to the required parameters, you can add optional parameters to the API operation to implement more features or custom requirements.
You can specify the Stable Diffusion model, VAE model, and save directory.
You can input parameters using a URL and receive corresponding status codes.
The generated images and their corresponding ControlNet images can be accessed using a URL.
The following are usage examples.
Text-to-image request and response examples
The following is an example of the request data format.
{
      "alwayson_scripts": {
          "sd_model_checkpoint": "deliberate_v2.safetensors",
          "save_dir": "/code/stable-diffusion-webui/data-oss/outputs",
          "sd_vae": "Automatic"
      },
      "steps": 20,
      "prompt": "girls",
      "batch_size": 1,
      "n_iter": 2,
      "width": 576,
      "height": 576,
      "negative_prompt": "ugly, out of frame"
  }
The following table describes the key parameters.
sd_model_checkpoint: Specifies the Stable Diffusion model checkpoint, which enables automatic switching to a large model.
sd_vae: Specifies the VAE model.
save_dir: Specifies the save path for the generated images.
The following is an example of a synchronous API request.
# Call the synchronous API operation to validate the model effect.

curl --location --request POST '<service_url>/sdapi/v1/txt2img' \
--header 'Authorization: <token>' \
--header 'Content-Type: application/json' \
--data-raw '{
      "alwayson_scripts": {
          "sd_model_checkpoint": "deliberate_v2.safetensors",
          "save_dir": "/code/stable-diffusion-webui/data-oss/outputs",
          "sd_vae": "Automatic"
      },
      "prompt": "girls",
      "batch_size": 1,
      "n_iter": 2,
      "width": 576,
      "height": 576,
      "negative_prompt": "ugly, out of frame"
  }'
The following is an example response data format:
{
  "images": [],
  "parameters": {
    "id_task": "14837",
    "status": 0,
    "image_url": "/code/stable-diffusion-webui/data-oss/outputs/txt2img-grids/2023-07-24/grid-29a67c1c-099a-4d00-8ff3-1ebe6e64931a.png,/code/stable-diffusion-webui/data-oss/outputs/txt2img-images/2023-07-24/74626268-6c81-45ff-90b7-faba579dc309-1146644551.png,/code/stable-diffusion-webui/data-oss/outputs/txt2img-images/2023-07-24/6a233060-e197-4169-86ab-1c18adf04e3f-1146644552.png",
    "seed": "1146644551,1146644552",
    "error_msg": "",
    "total_time": 32.22393465042114
  },
  "info": ""
}
The following is an example of an asynchronous API request:
# Send data directly to the asynchronous queue.
curl --location --request POST '<service_url>/sdapi/v1/txt2img' \
--header 'Authorization: <token>' \
--header 'Content-Type: application/json' \
--data-raw '{
    "alwayson_scripts": {
        "sd_model_checkpoint": "deliberate_v2.safetensors",
        "id_task": "14837",
        "uid": "123",
        "save_dir": "tmp/outputs"
    },
    "prompt": "girls",
    "batch_size": 1,
    "n_iter": 2,
    "width": 576,
    "height": 576,
    "negative_prompt": "ugly, out of frame"
}'
Image-to-image request data format example
The following is an example of the request data format.
{
    "alwayson_scripts": {
        "image_link":"https://eas-cache-cn-hangzhou.oss-cn-hangzhou-internal.aliyuncs.com/stable-diffusion-cache/tests/boy.png",
        "sd_model_checkpoint": "deliberate_v2.safetensors",
        "sd_vae": "Automatic",
        "save_dir": "/code/stable-diffusion-webui/data-oss/outputs"
    },
    "prompt": "girl",
    "batch_size": 1,
    "n_iter": 2,
    "width": 576,
    "height": 576,
    "negative_prompt": "ugly, out of frame",
    "steps": 20, # Sampling steps
    "seed": 111,
    "subseed": 111, # Variation seed
    "subseed_strength": 0, # Variation strength
    "seed_resize_from_h": 0, # Resize seed from height
    "seed_resize_from_w": 0, # Resize seed from width
    "seed_enable_extras": false, # Extra
    "sampler_name": "DDIM", # Sampling method
    "cfg_scale": 7.5, # CFG Scale
    "restore_faces": true, # Restore faces
    "tiling": false, # Tiling
    "init_images": [], # image base64 str, default None
    "mask_blur": 4, # Mask blur
    "resize_mode": 1, # 0 just resize, 1 crop and resize, 2 resize and fill, 3 just resize
    "denoising_strength": 0.75, # Denoising strength
    "inpainting_mask_invert": 0, #int, index of ['Inpaint masked', 'Inpaint not masked'], Mask mode
    "inpainting_fill": 0, #index of ['fill', 'original', 'latent noise', 'latent nothing'], Masked content
    "inpaint_full_res": 0, # index of ["Whole picture", "Only masked"], Inpaint area
    "inpaint_full_res_padding": 32, #minimum=0, maximum=256, step=4, value=32, Only masked padding, pixels
    #"image_cfg_scale": 1, # resized by scale
    #"script_name": "Outpainting mk2", # Name of the script to use. Do not add this field if not using a script.
    #"script_args": ["Outpainting", 128, 8, ["left", "right", "up", "down"], 1, 0.05]  # Parameters for the script, corresponding to: fixed field, pixels, mask_blur, direction, noise_q, color_variation
}
The following is an example of the response data format.
{
    "images":[],
    "parameters":{
        "id_task":"14837",
        "status":0,
        "image_url":"/data/api_test/img2img-grids/2023-06-05/grid-0000.png,/data/api_test/img2img-images/2023-06-05/00000-1003.png,/data/api_test/img2img-images/2023-06-05/00001-1004.png",
        "seed":"1003,1004",
        "error_msg":""
    },
    "info":""
}
ControlNet data format for text-to-image
The following is the request data format.
{
    "alwayson_scripts": {
        "sd_model_checkpoint": "deliberate_v2.safetensors", #Model name, required
        "save_dir": "/code/stable-diffusion-webui/data-oss/outputs",
        "controlnet":{
            "args":[
                {
                    "image_link": "https://pai-aigc-dataset.oss-cn-hangzhou.aliyuncs.com/pixabay_images/00008b87bf3ff6742b8cf81c358b9dbc.jpg",
                    "enabled": true,
                    "module": "canny",
                    "model": "control_v11p_sd15_canny",
                    "weight": 1,
                    "resize_mode": "Crop and Resize",
                    "low_vram": false,
                    "processor_res": 512,
                    "threshold_a": 100,
                    "threshold_b": 200,
                    "guidance_start": 0,
                    "guidance_end": 1,
                    "pixel_perfect": true,
                    "control_mode": "Balanced",
                    "input_mode": "simple",
                    "batch_images": "",
                    "output_dir": "",
                    "loopback": false
                }
            ]
        }
    },
    # Main parameters
    "prompt": "girls",
    "batch_size": 1,
    "n_iter": 2,
    "width": 576,
    "height": 576,
    "negative_prompt": "ugly, out of frame"
}
The following is an example of the response data format.
{
    "images":[],
    "parameters":{
        "id_task":"14837",
        "status":0,
        "image_url":"/data/api_test/txt2img-grids/2023-06-05/grid-0007.png,/data/api_test/txt2img-images/2023-06-05/00014-1003.png,/data/api_test/txt2img-images/2023-06-05/00015-1004.png",
        "seed":"1003,1004",
        "error_msg":"",
        "image_mask_url":"/data/api_test/controlnet_mask/2023-06-05/00000.png,/data/api_test/controlnet_mask/2023-06-05/00001.png"
    },
    "info":""
}
References
For more information about the billing of EAS, see Billing of Elastic Algorithm Service (EAS).