Manage a RAG knowledge base
A retrieval-augmented generation (RAG) chatbot lets you upload knowledge base files. These files can contain specialized knowledge and terminology from specific domains, such as healthcare, law, or finance. By expanding its knowledge, the knowledge base helps the model generate more professional and accurate responses. This topic describes how to upload and manage knowledge base files in the RAG chatbot's WebUI.
Limits
This knowledge base management method applies only to RAG services deployed with the v0.3.0 runtime image.
Go to the Elastic Algorithm Service (EAS) page, click the RAG service name, and then on the Overview page, find the Environment Context section to view the image version. If the image version does not meet the requirements, see Deploy a custom RAG service to deploy the service.
Access the WebUI
Log on to the PAI console. Select a region on the top of the page. Then, select the desired workspace and click Enter Elastic Algorithm Service (EAS).
Click the name of the destination RAG service. In the upper-right corner of the page, click View Web App. In the dialog box that appears, click Go to Web App.
Add a knowledge base
The default knowledge base is used by default. If different departments or individuals need to use separate knowledge bases, you can create multiple knowledge bases to effectively isolate the data:
On the System Settings tab of the WebUI, configure the following parameters and then click Add Knowledge Base.
Knowledge Base Name: Select NEW.
New Knowledge Base Name: Enter a custom name for the new knowledge base. For example, oss_index.
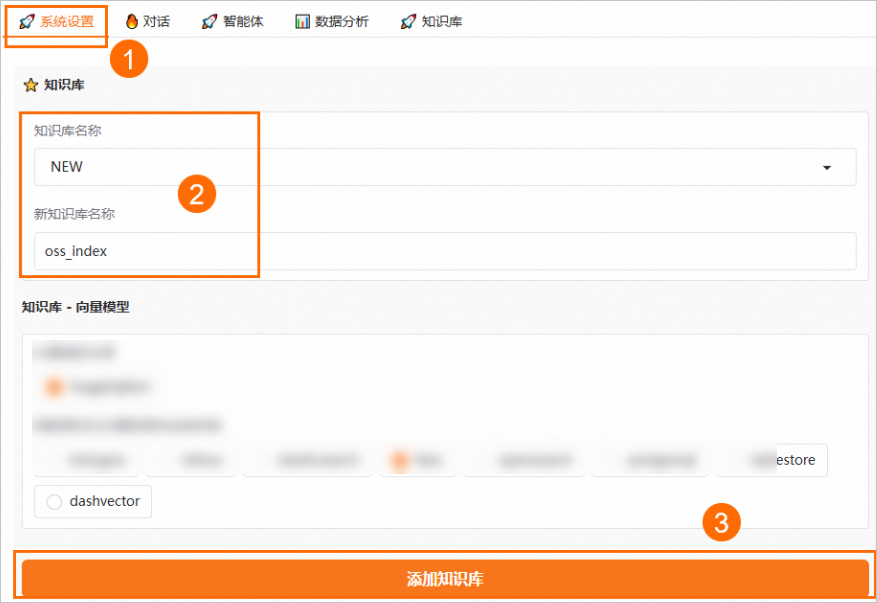
Upload and manage knowledge base files

As shown in the preceding figure, after you configure a knowledge base, each knowledge base name corresponds to a top-level folder on the File Management page of the Knowledge Base tab. This folder serves as the management path and typically contains the following two subdirectories:
docs: All knowledge base files must be uploaded to this folder.
.index: This folder stores intermediate files for debugging purposes only. These files include log files and the parsing and segmentation results of knowledge base files.
Upload knowledge base files
The following two upload methods are supported:
Using the RAG WebUI: This method is simple and suitable for uploading a small number of local files.
Using OSS: This method is suitable for batch uploading and deleting large numbers of files.
Using the RAG WebUI
The following example uses the default knowledge base name default:
On the File Management page of the Knowledge Base tab, click My files and go to the default/docs folder. Drag your local files to the page or click the  icon in the upper-right corner to upload your knowledge base files.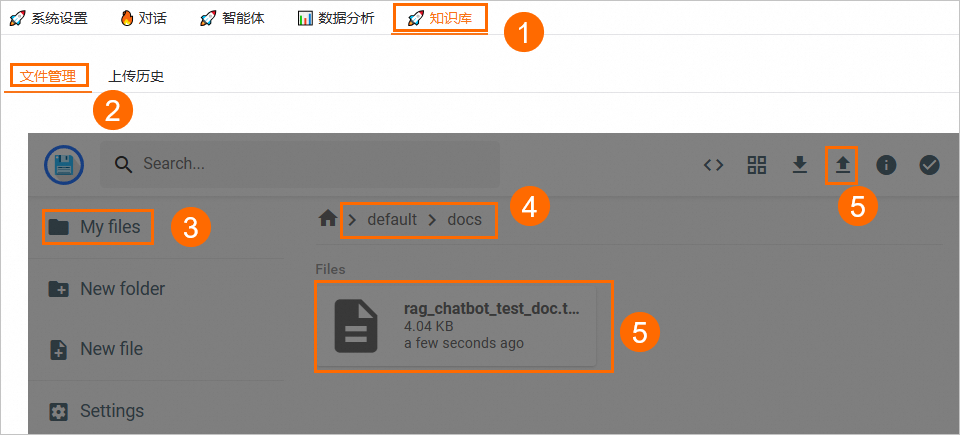
Using OSS
You can use the default knowledge base name default or create a new one. The following example uses a new knowledge base named oss_index. Log on to the OSS console. Go to the knowledgebase/oss_index/docs folder within the OSS path that you attached when you deployed the RAG service. Then, upload the knowledge base files to this folder.
Check the upload status
Switch to the Upload History tab. Select the Knowledge Base Name and click the Refresh button on the right. When the upload status of all files changes to done, the knowledge base is successfully uploaded.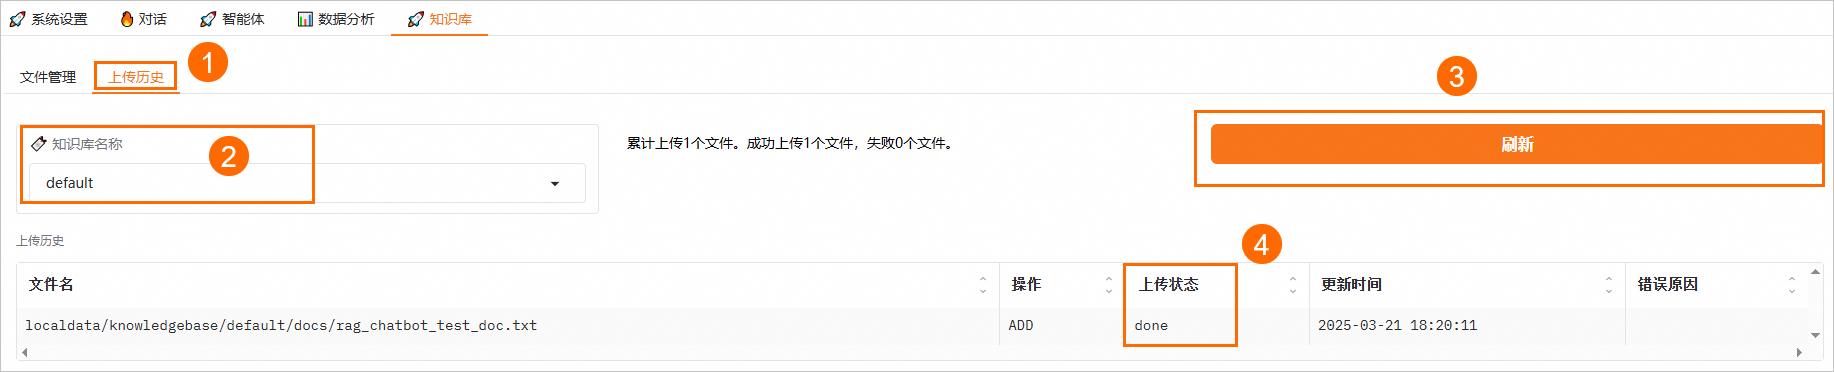
View file parsing and segmentation results
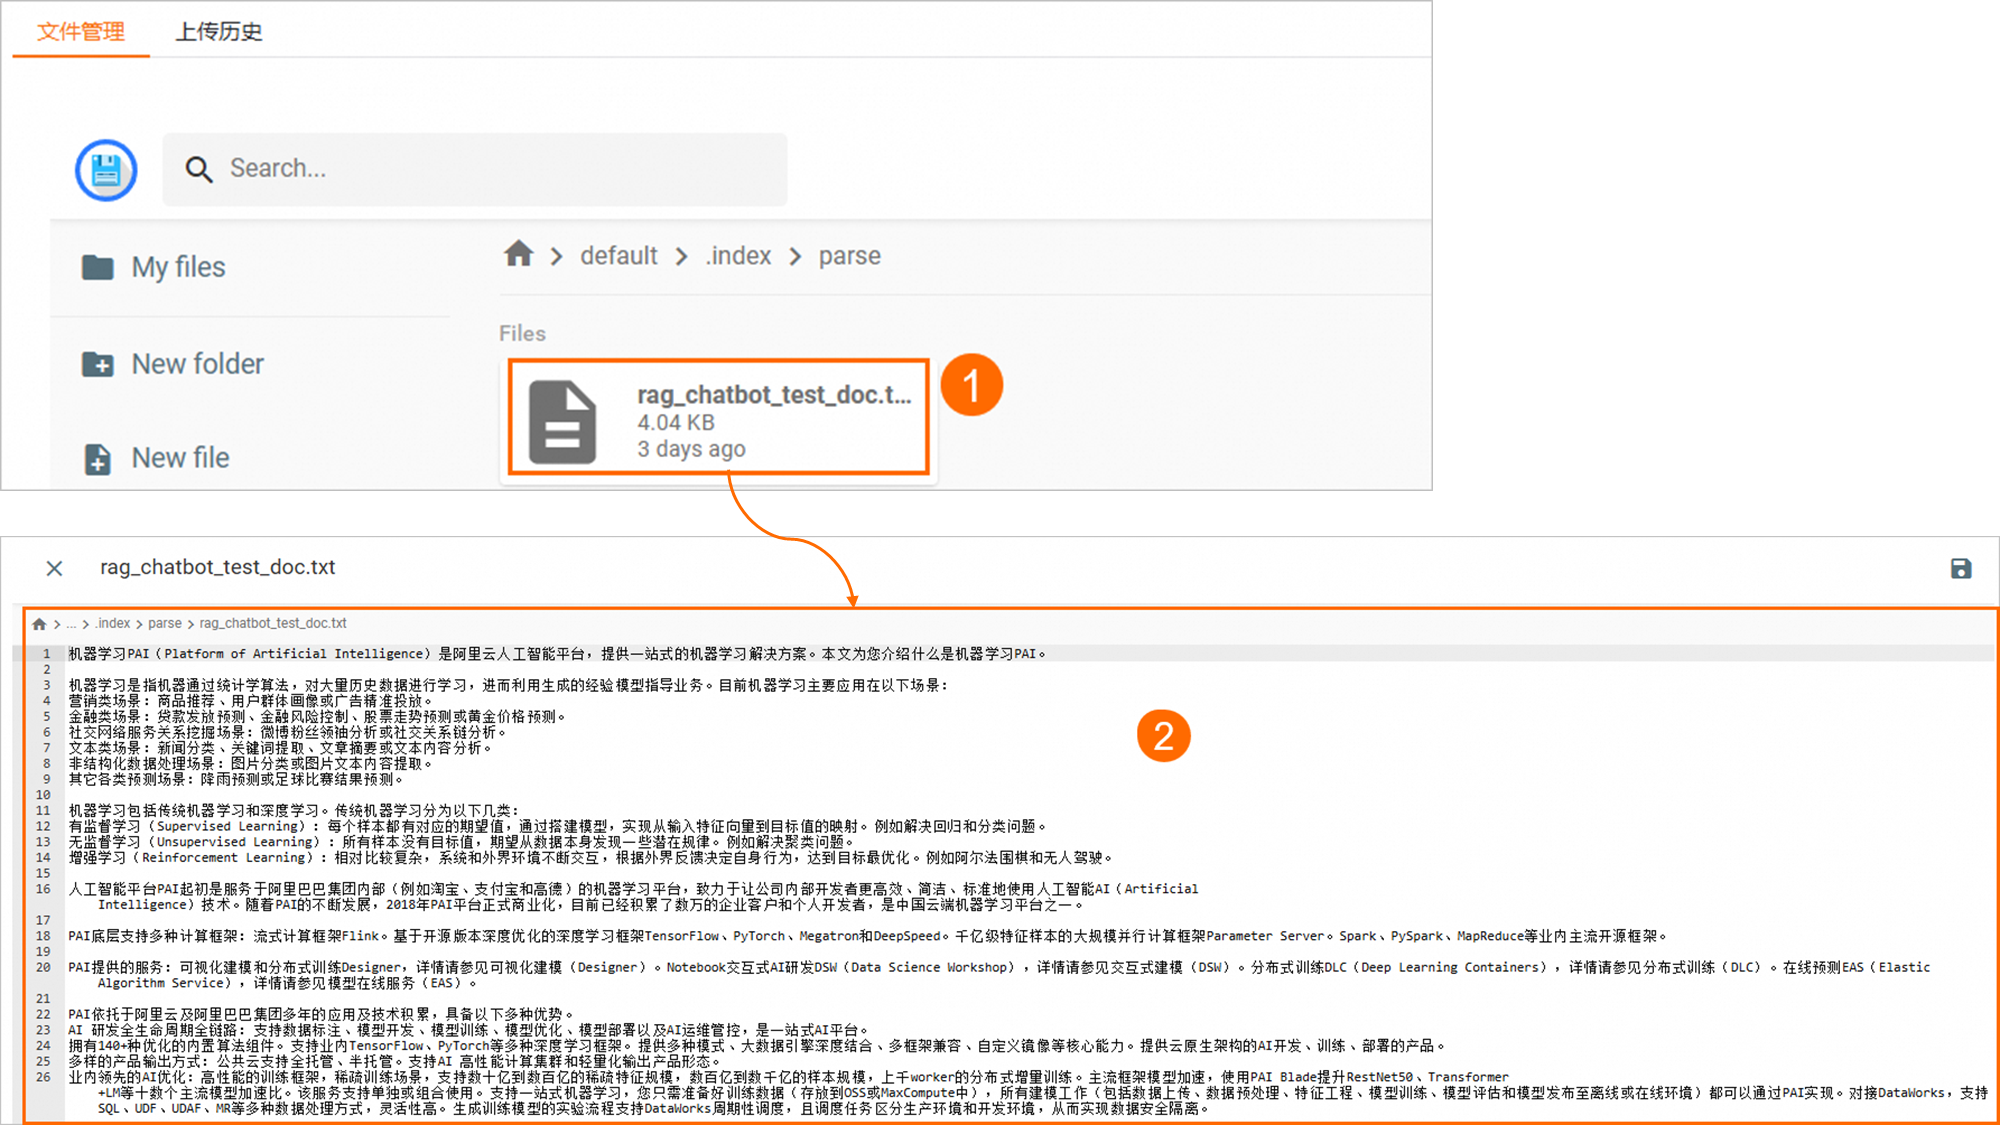
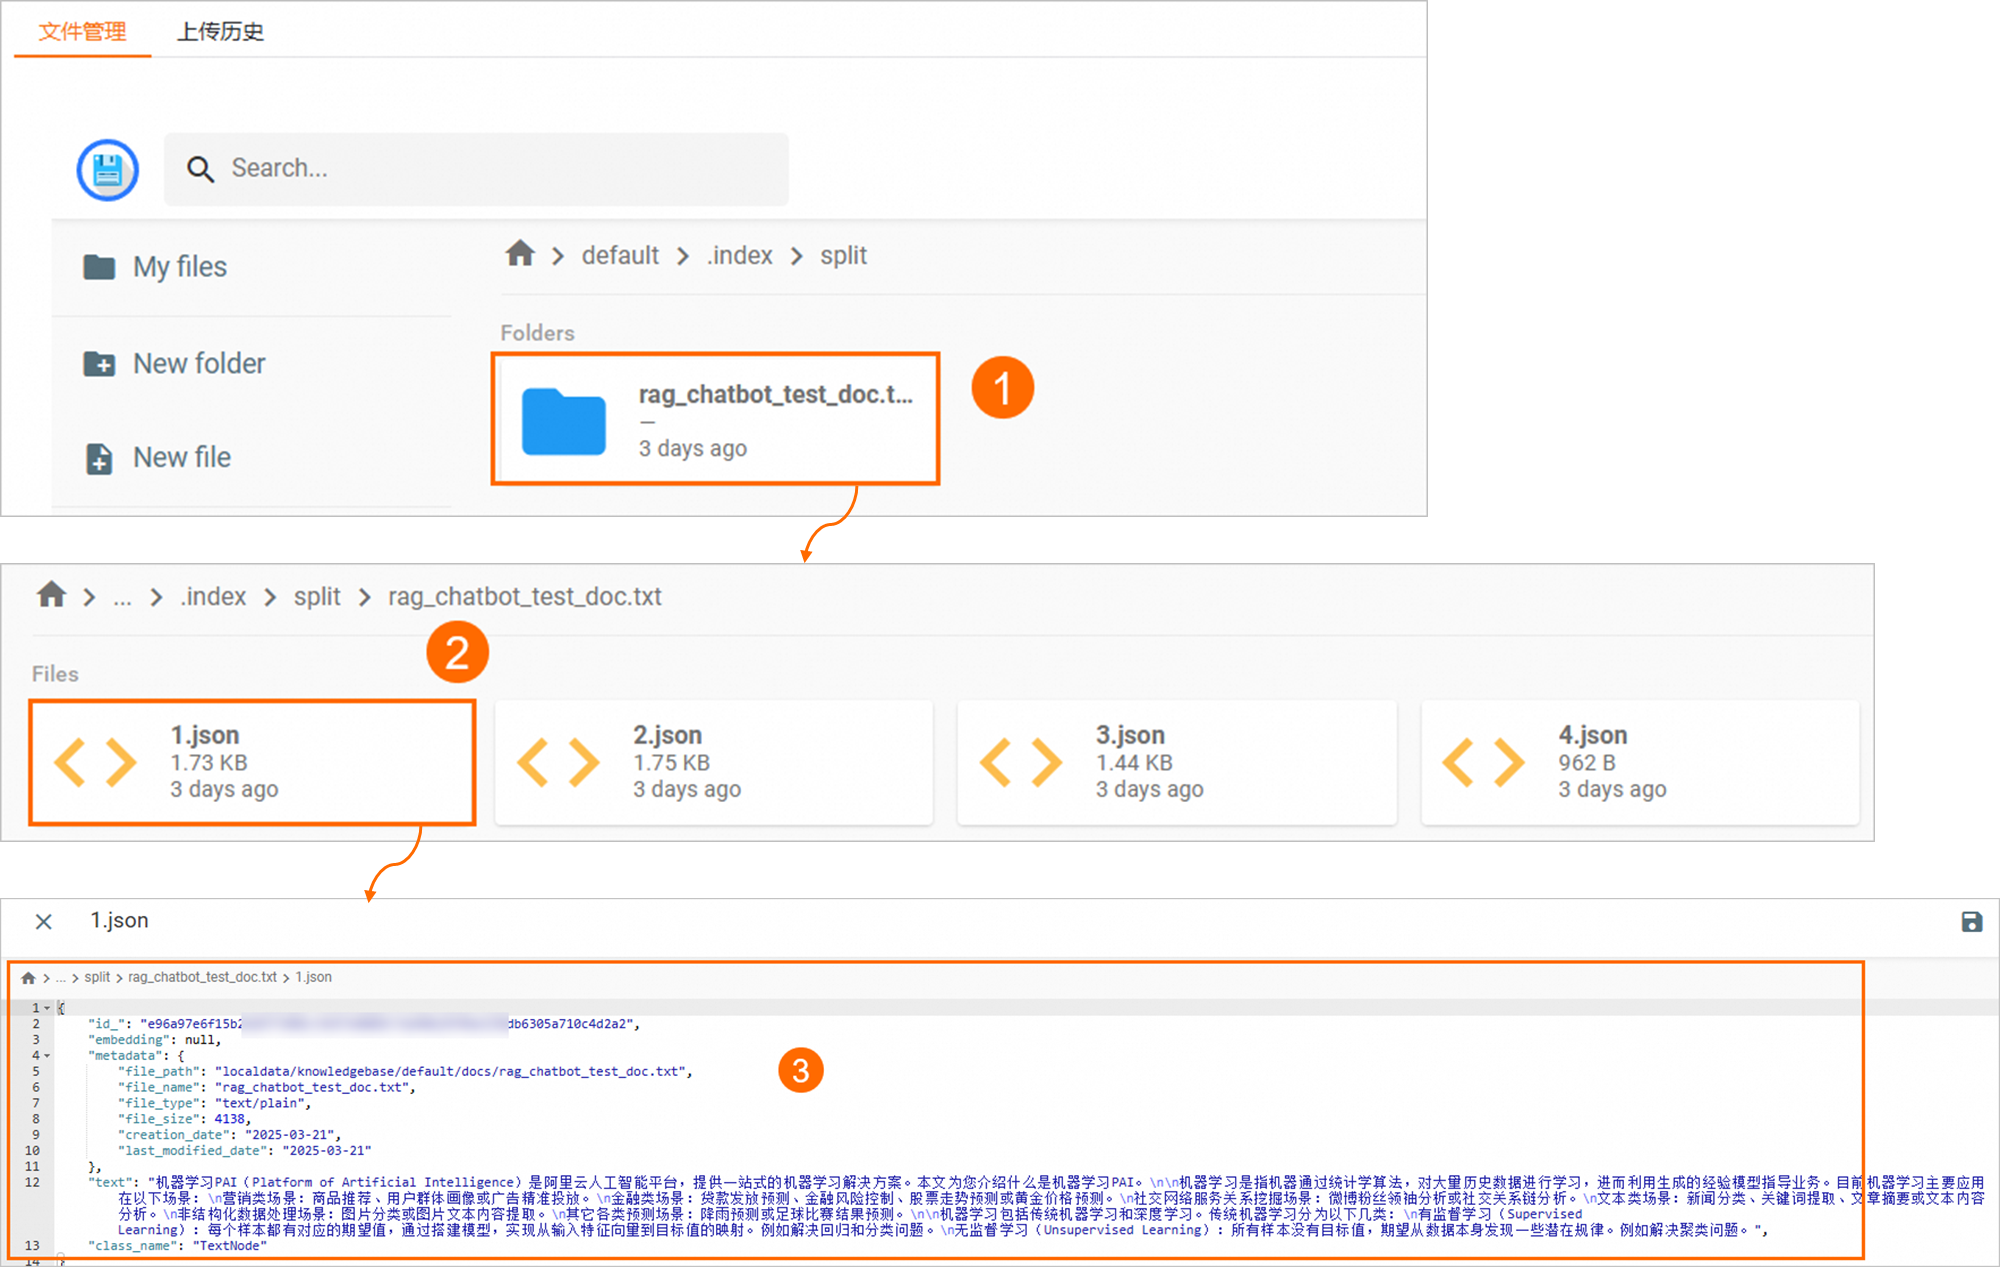
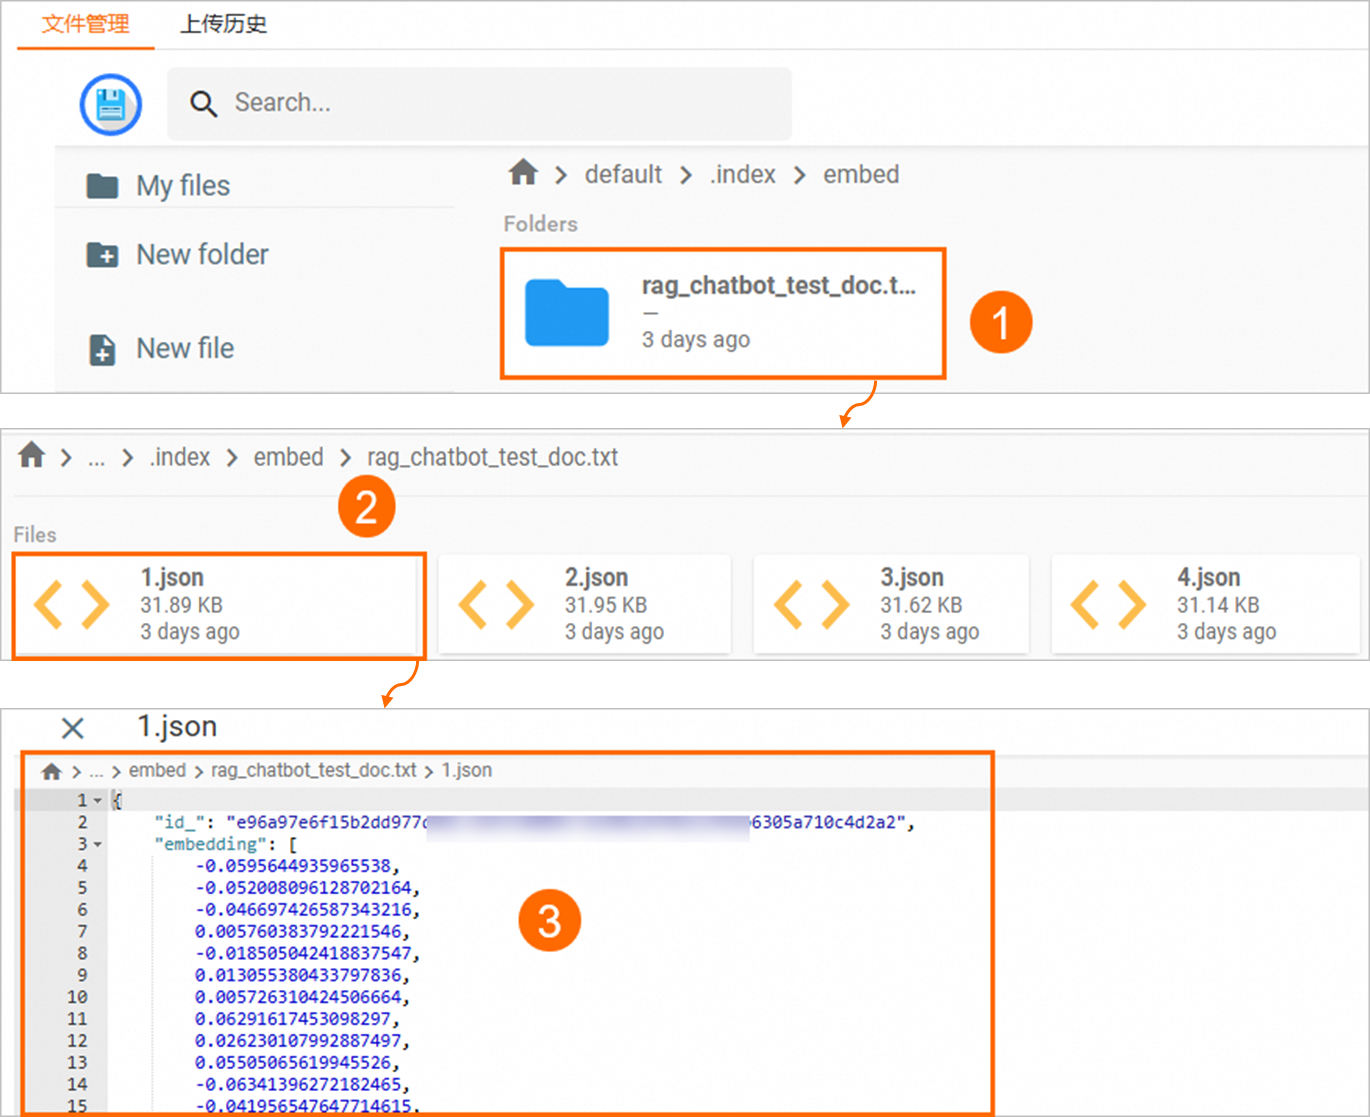
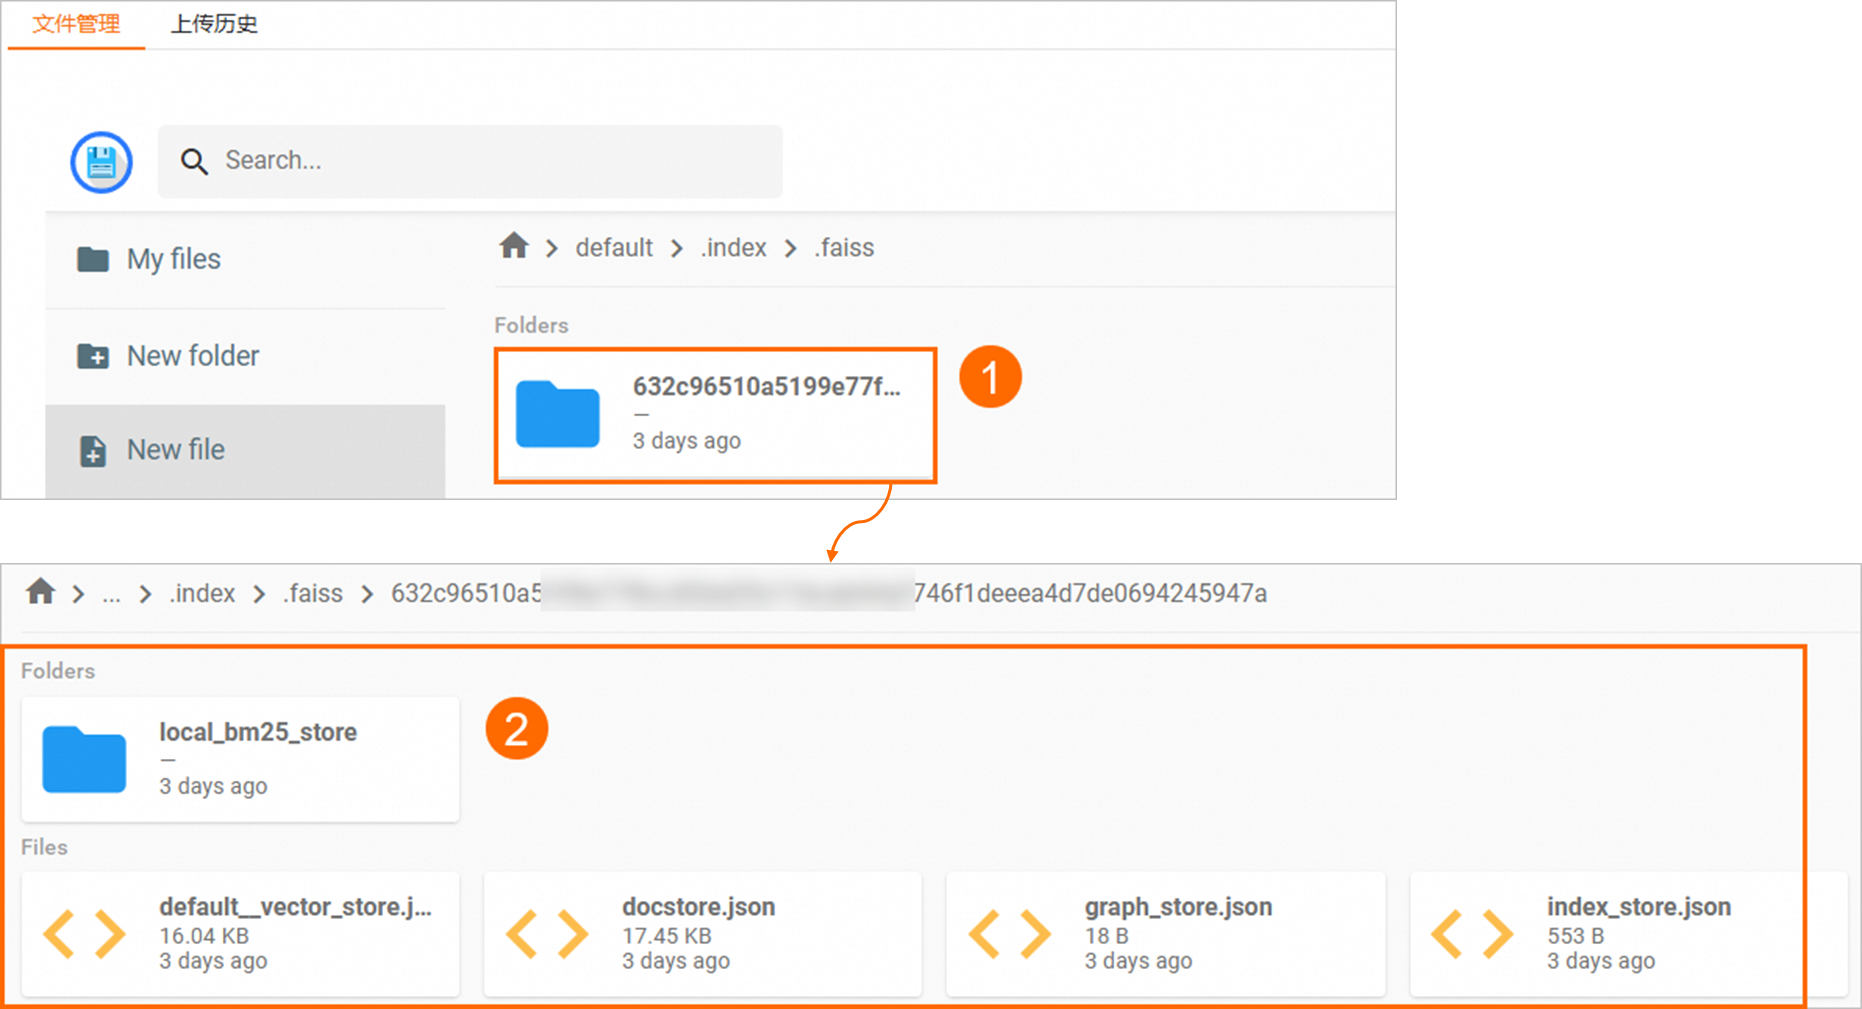
On the File Management page, click My files and go to the default/.index folder. The parsed content is stored in the following subdirectories.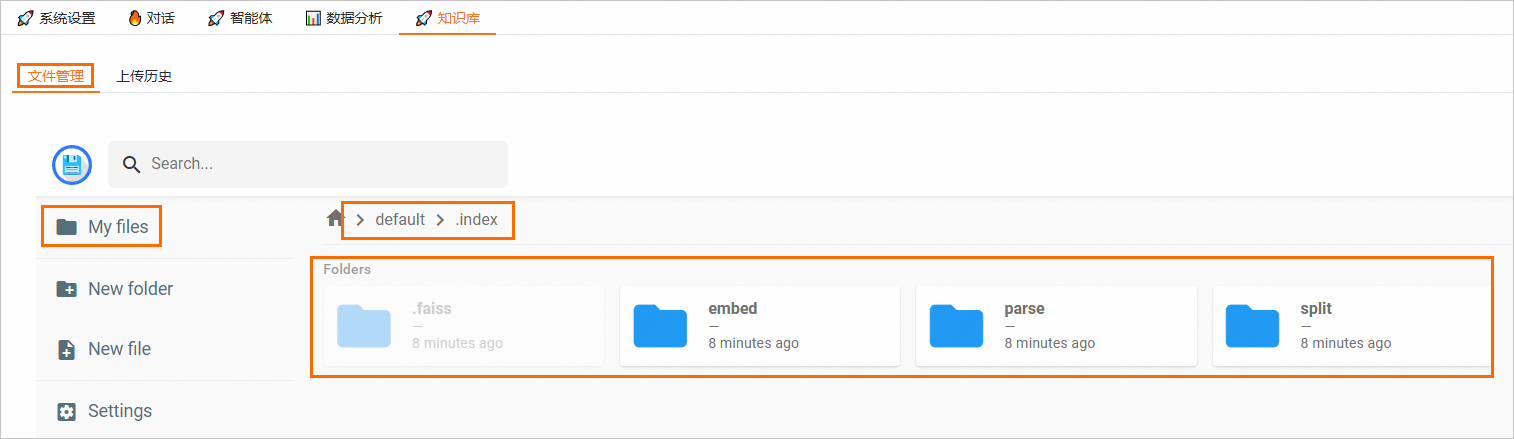
The following is an example of a knowledge base file:
Contents | Stored content |
parse | Stores the parsing results of the files. |
split | Stores the segmentation results of the files. |
embed | Stores the vectorized results of the file segments in JSON format. |
.faiss | Stores the manifest of the FAISS vector database. This folder exists only if you select FAISS for the knowledge base. |
Update knowledge base files
You must update files in the RAG WebUI. Do not update them directly in OSS. The OSS data source attached during RAG service deployment has a caching mechanism. This mechanism is not sensitive to file update operations and may fail to detect the file update status, which causes the update to fail.
Drag the updated knowledge base file to the docs folder of the knowledge base. In the dialog box that appears, click REPLACE. Then, switch to the Upload History page and click the Refresh button to check the update status. When the status changes to UPDATE:done, the update is successful.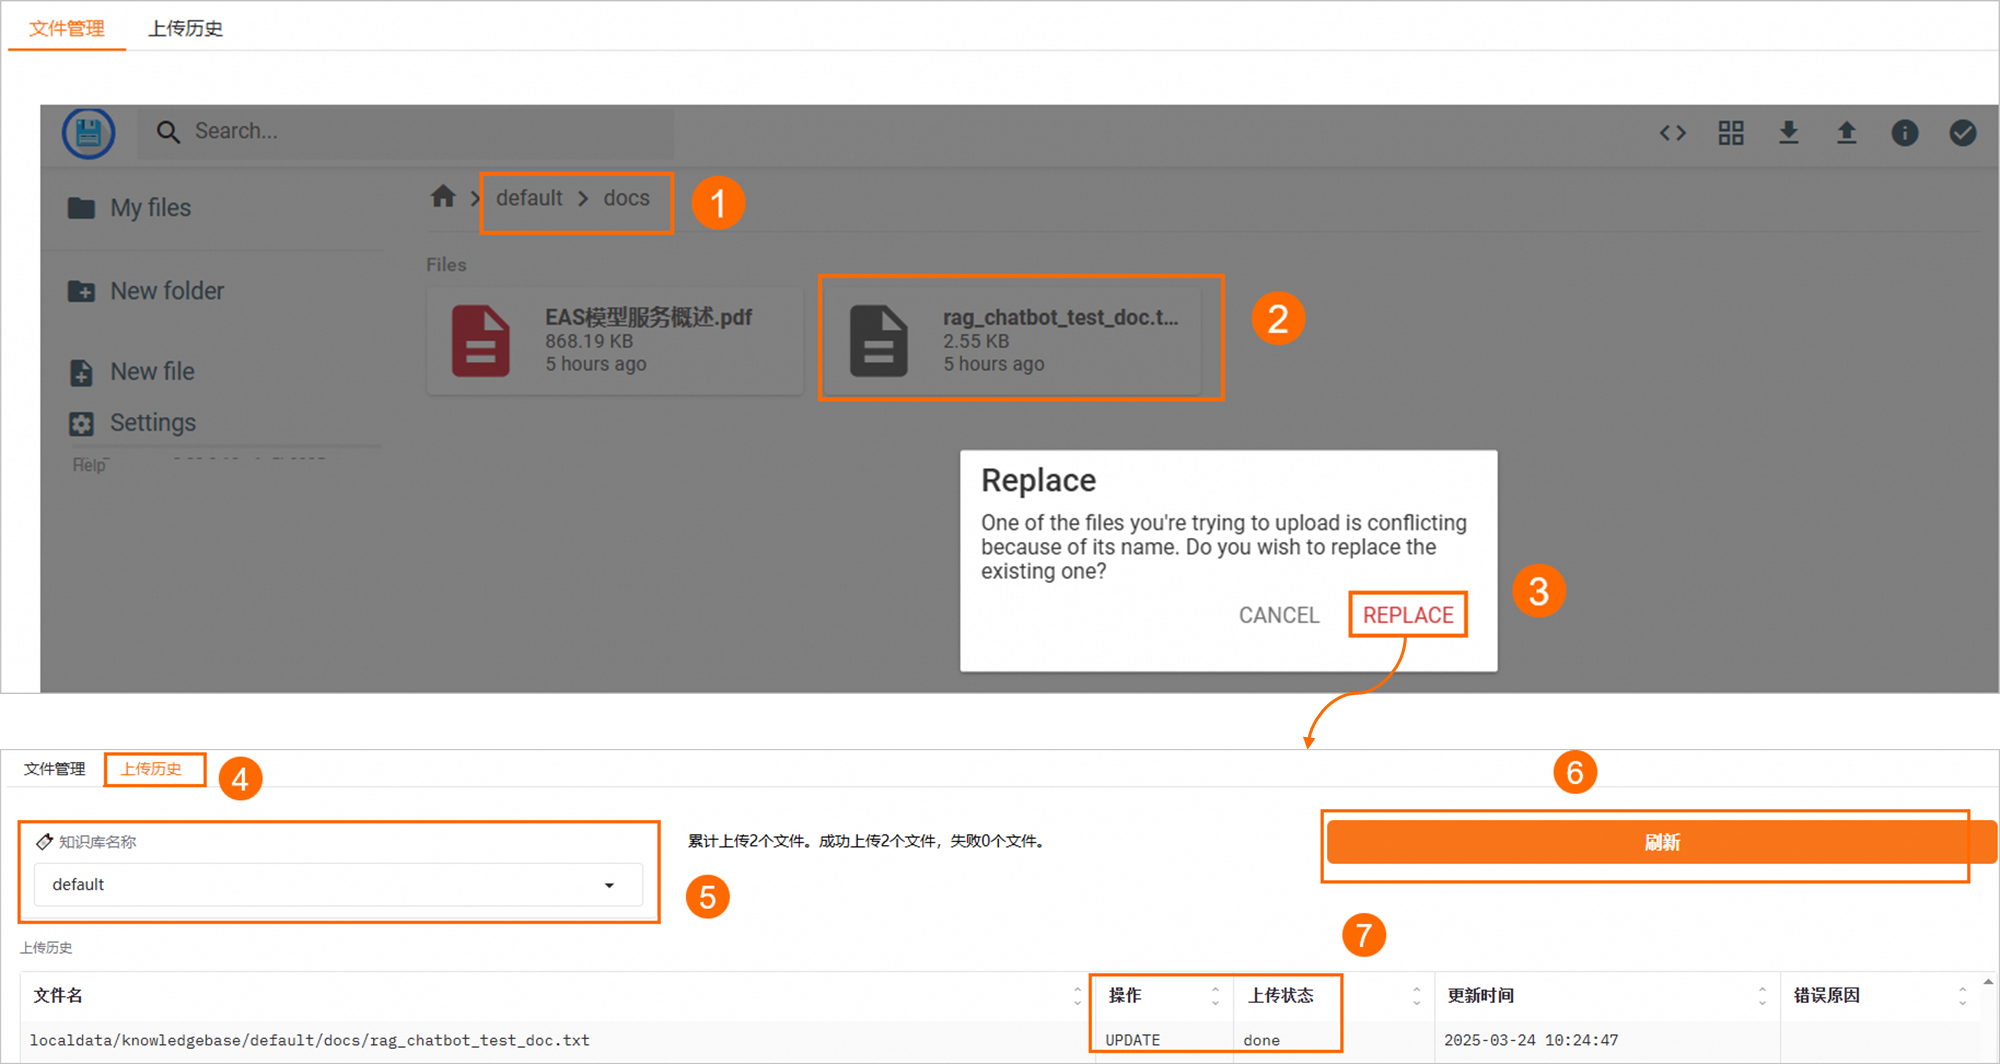
Delete files
The following methods are supported:
Using the RAG WebUI
In the docs folder, select the file to delete. Click the delete icon  in the upper-right corner. In the dialog box that appears, click DELETE. Then, switch to the Upload History page and click the Refresh button to check the deletion status. When the status changes to DELETE:done, the deletion is successful.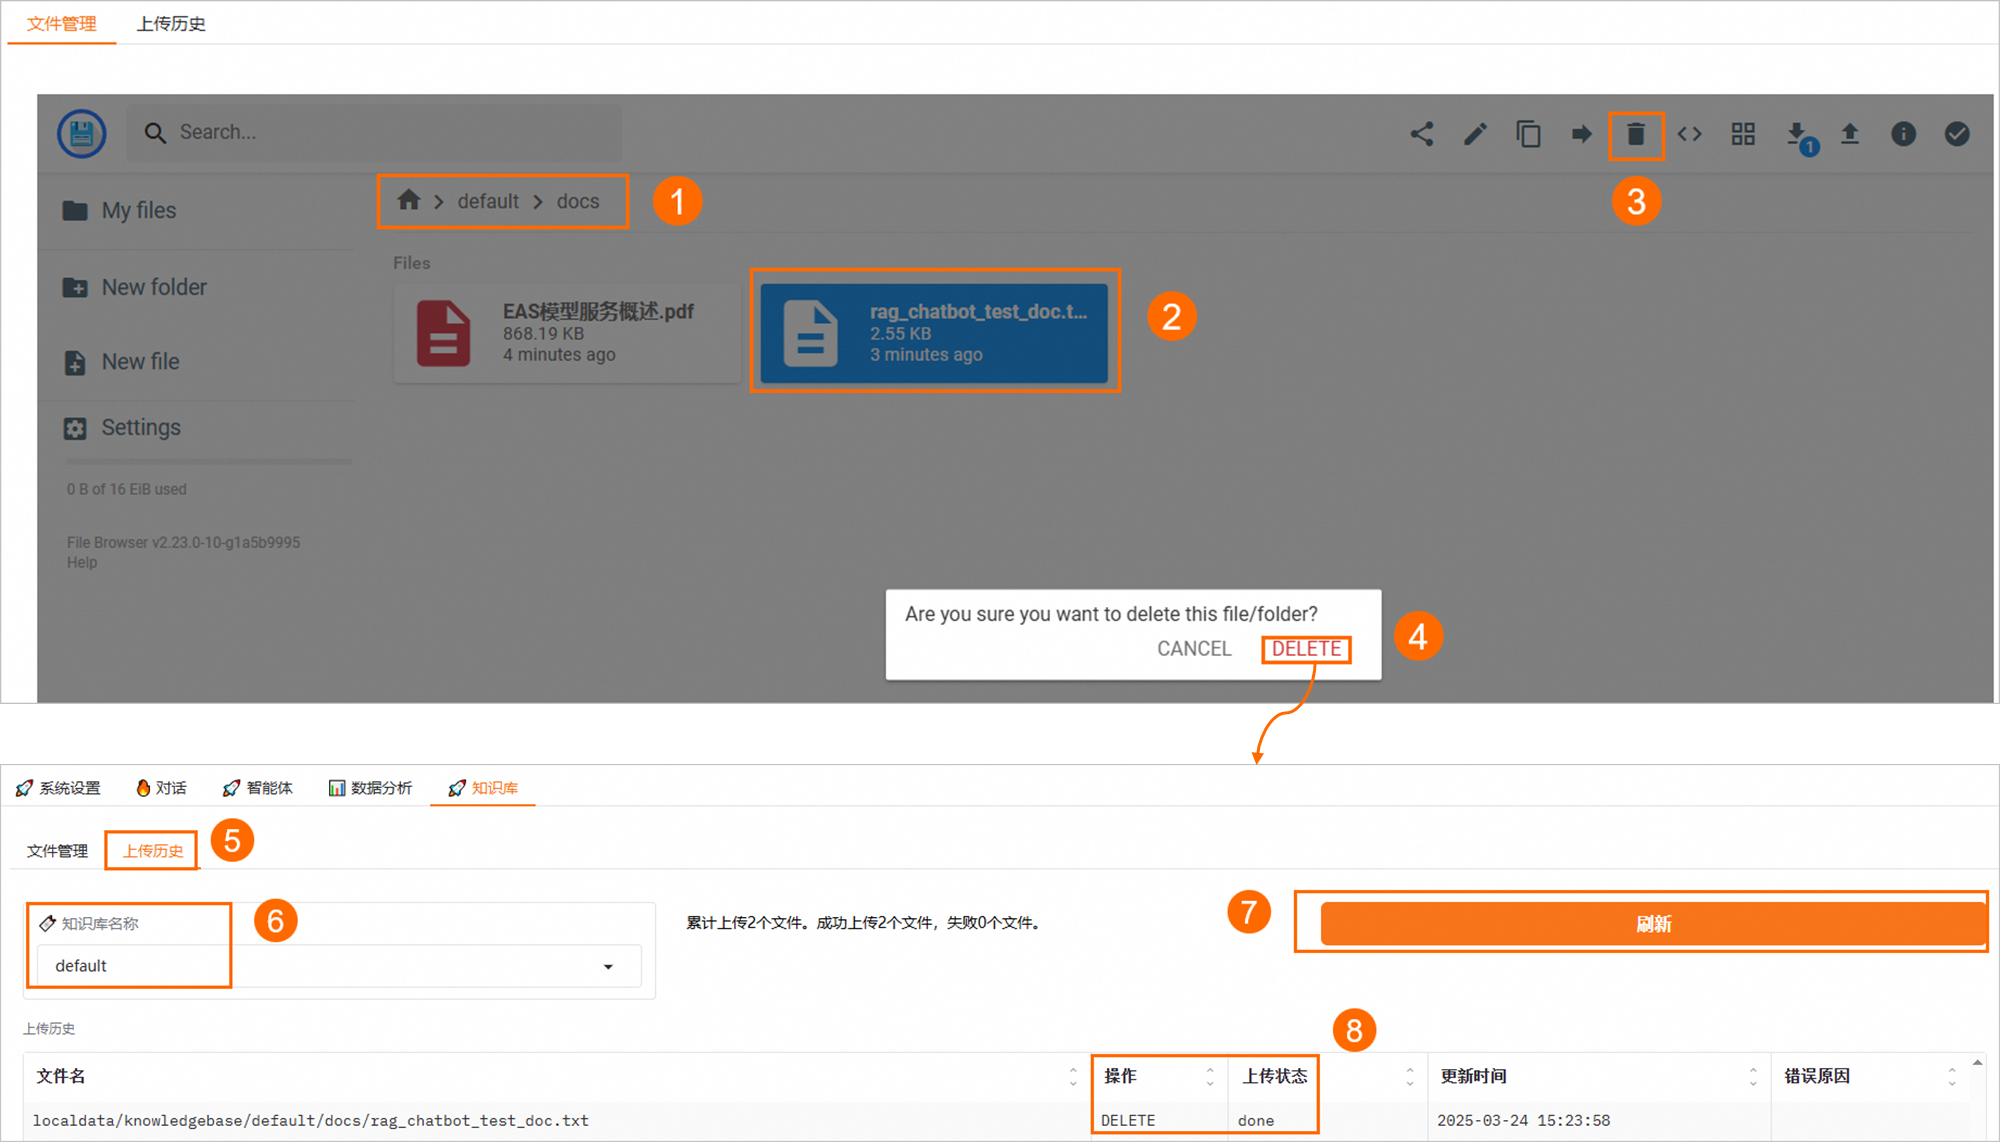
Using OSS
Log on to the OSS console. In the
knowledgebase/oss_index/docsfolder within the OSS path that you attached when you deployed the RAG service, delete the uploaded knowledge base files.On the Knowledge Base > Upload History page of the WebUI, select the Knowledge Base Name and click the Refresh button. When the status changes to DELETE:done, the deletion is successful.

