To let employees view reports on the mobile client, integrate Quick BI with WeCom by creating a custom mini-program. After an administrator creates the mini-program and configures the binding in Quick BI, employees can access reports directly from their WeCom mobile client. This topic describes how to create and configure the Quick BI mini-program and verify the integration.
Prerequisites
You have downloaded and registered a WeCom account.
Step 1: Create a custom app in WeCom
Only a WeCom administrator can create a custom mini-program in WeCom.
Create the WeCom mini-program.
Log in to the WeCom management console as a WeCom administrator. Find and record your CorpId. You will need it later.
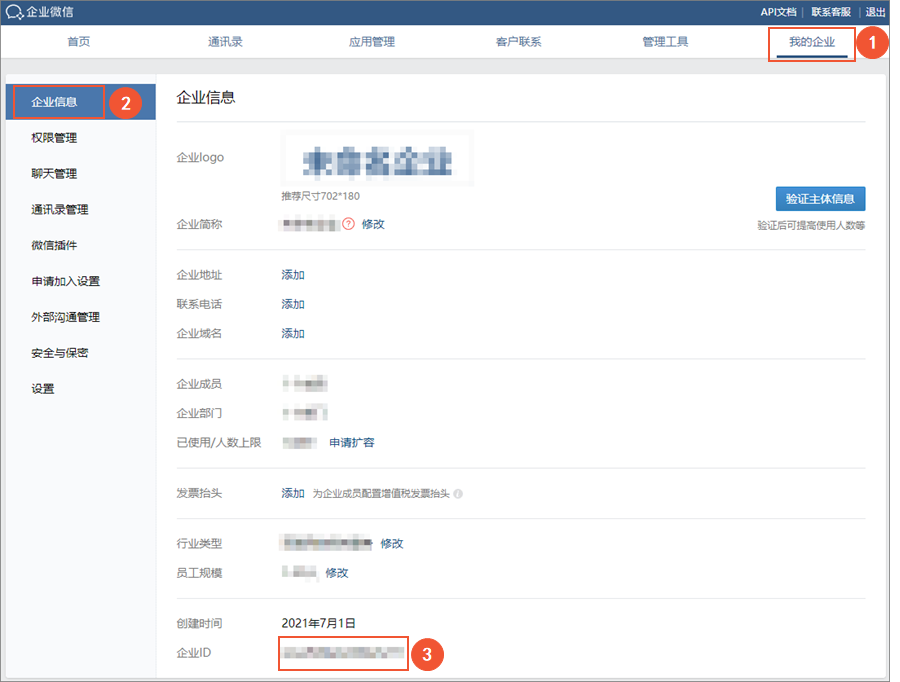
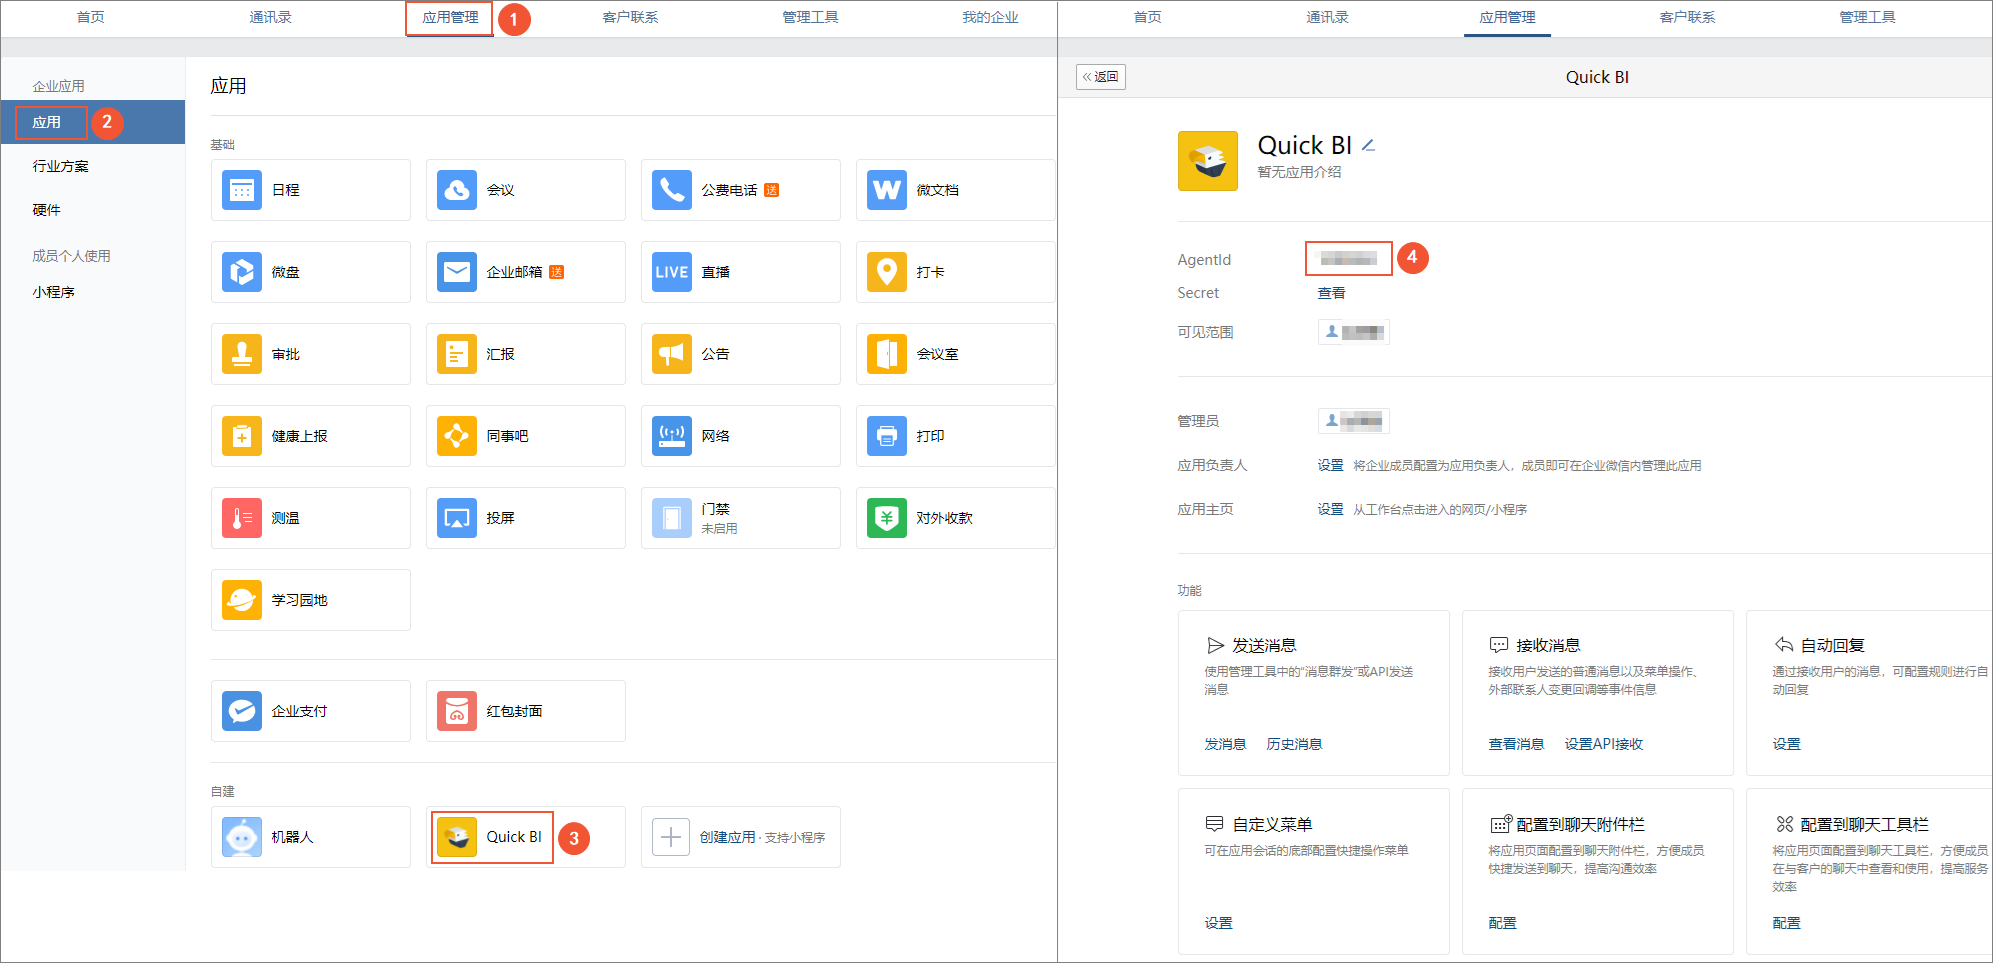
Follow the steps in the figure to create an application.

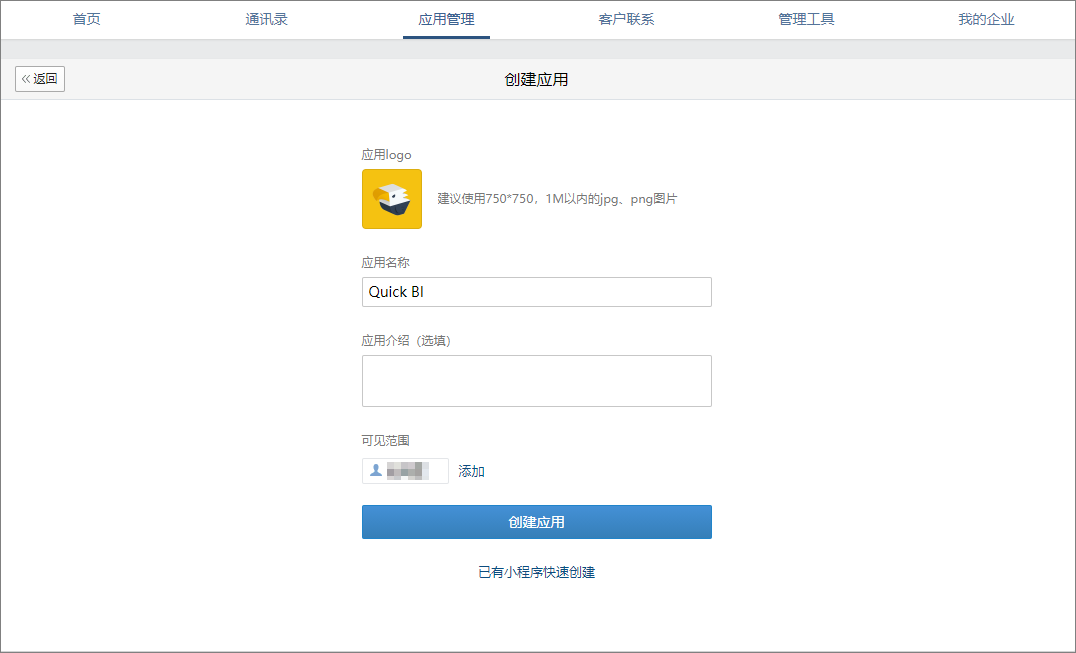
On the Create Application page, enter the application information and then click Create Application.
Parameter
Description
Example
Application logo
Required. Upload a logo for the application. You can use a custom image or the official Quick BI logo.
NoteThe uploaded image must meet the following requirements:
Format: JPG, PNG
Size: 1 MB
Resolution: 750 × 750 pixels

Application Name
Required. Enter a globally unique name for your application.
Quick BI
Application Introduction
Optional. Enter a brief description of the application.
-
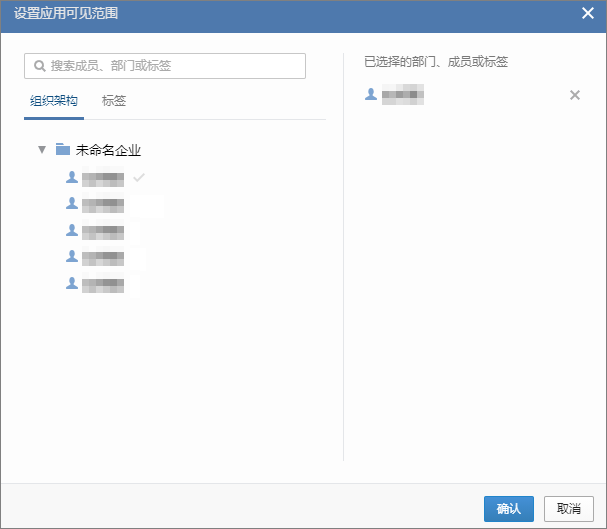
Visible Scope
Required. Specify which users or departments can access the application.
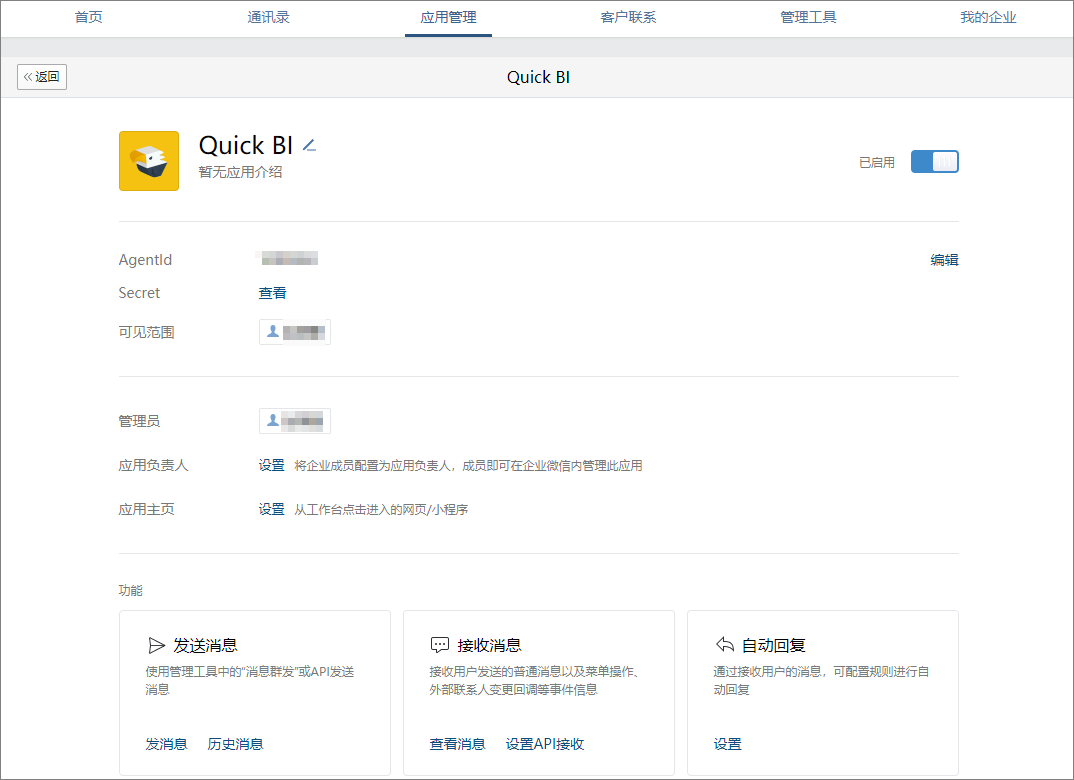
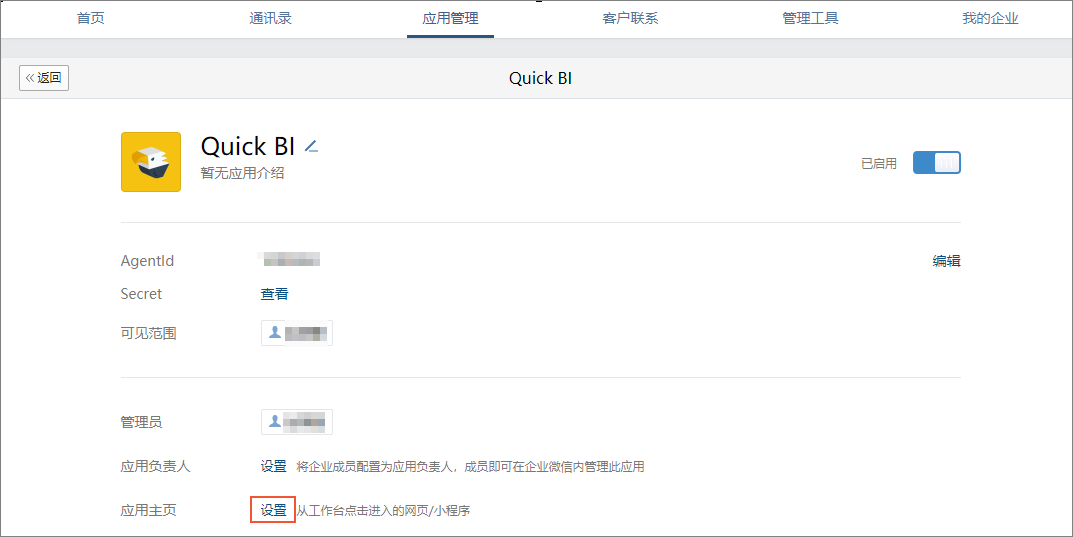
After you create the application, you are redirected to its management page.

Configure the domain for the Quick BI app homepage.
On the application details page, click Set to the right of Application Homepage.
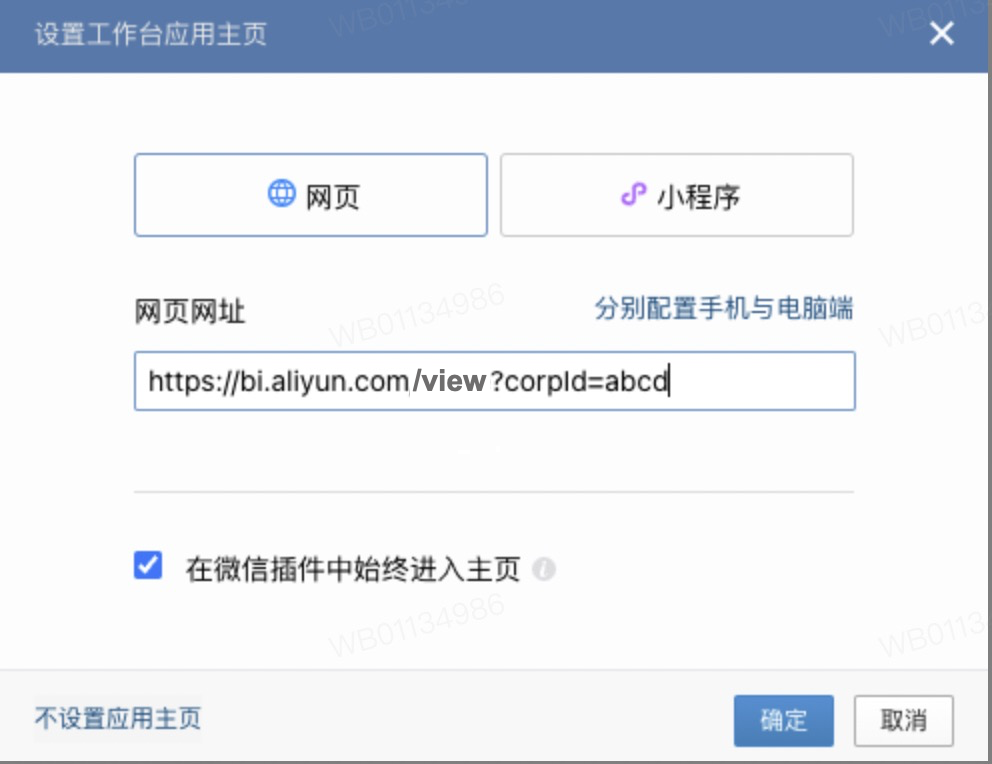
In the Set Workbench Application Homepage dialog box, enter the URL for your app homepage in the Web Page Address field. Construct the URL by using the following format and replacing the placeholders with your domain and the CorpId you recorded earlier.
http(s)://{your_domain}/view?corpId={your_CorpId}For example, if the domain for the Quick BI public cloud is bi.aliyun.com and your CorpId is abcd, the Web Page Address is
https://bi.aliyun.com/view?corpId=abcd.NoteYou must use your domain.
Click OK.
Step 2: Configure WeCom binding
A WeCom administrator must complete the binding in the Quick BI management console.
Obtain the verifyCode from the WeCom management console.
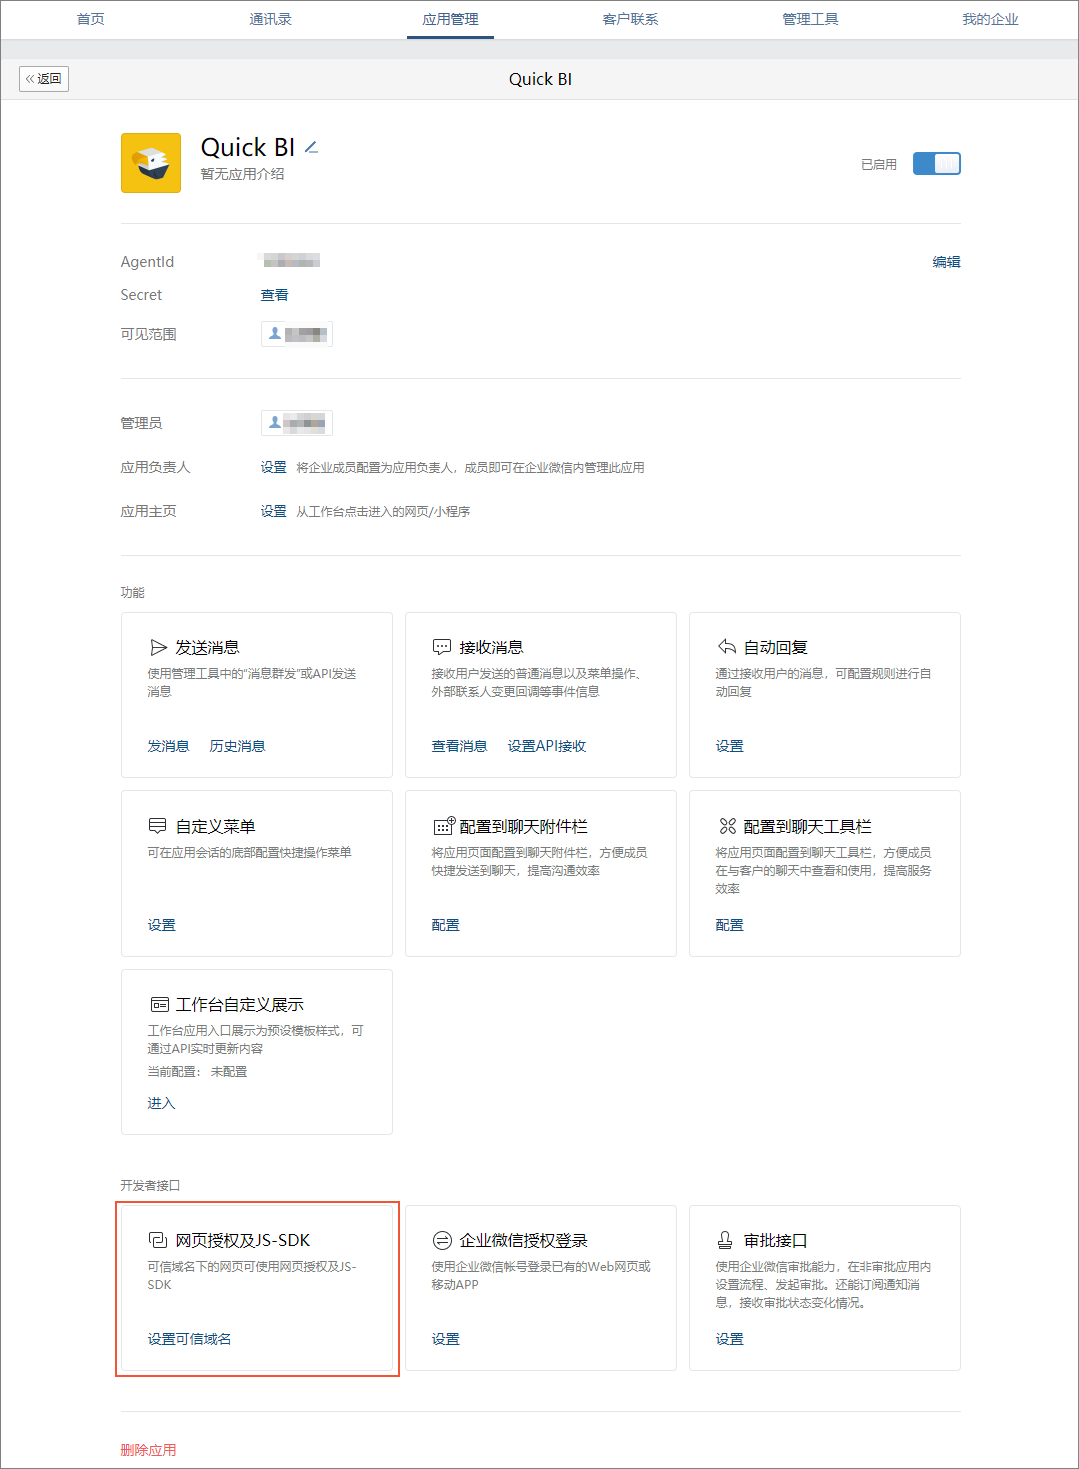
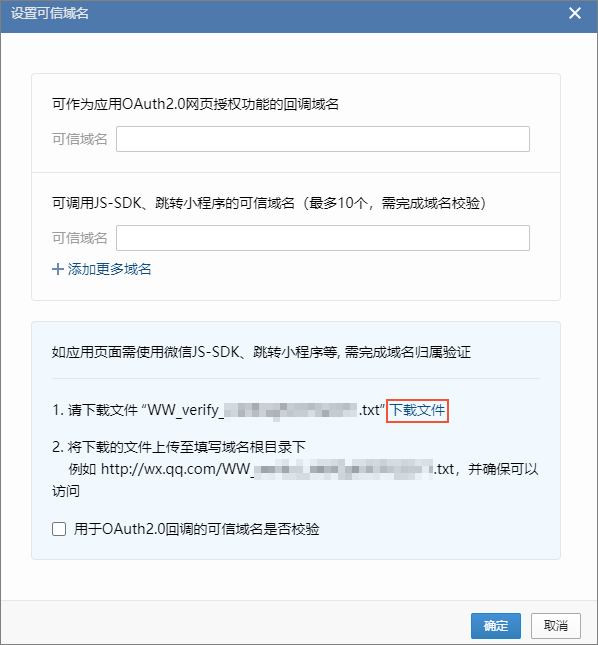
On the application details page, click Set Trusted Domain Name under Web Authorization and JS-SDK.
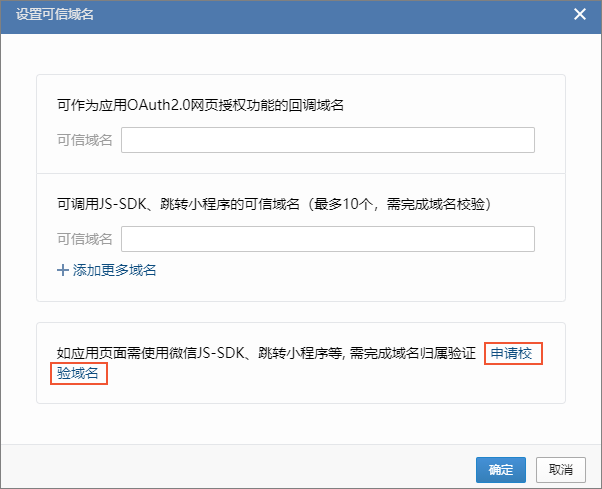
In the Set Trusted Domain Name dialog box, click Apply for Domain Name Verification.
Download the file and copy its content.
The file's content is the verifyCode.
In the Quick BI management console, configure the WeCom API settings.
Parameter
Description
CorpId
The unique identifier for your enterprise.
A WeCom administrator can find this value, labeled as Enterprise ID, in the WeCom management console.
AgentId
The unique identifier for your application.
You can find the AgentId on the application details page in the WeCom management console.
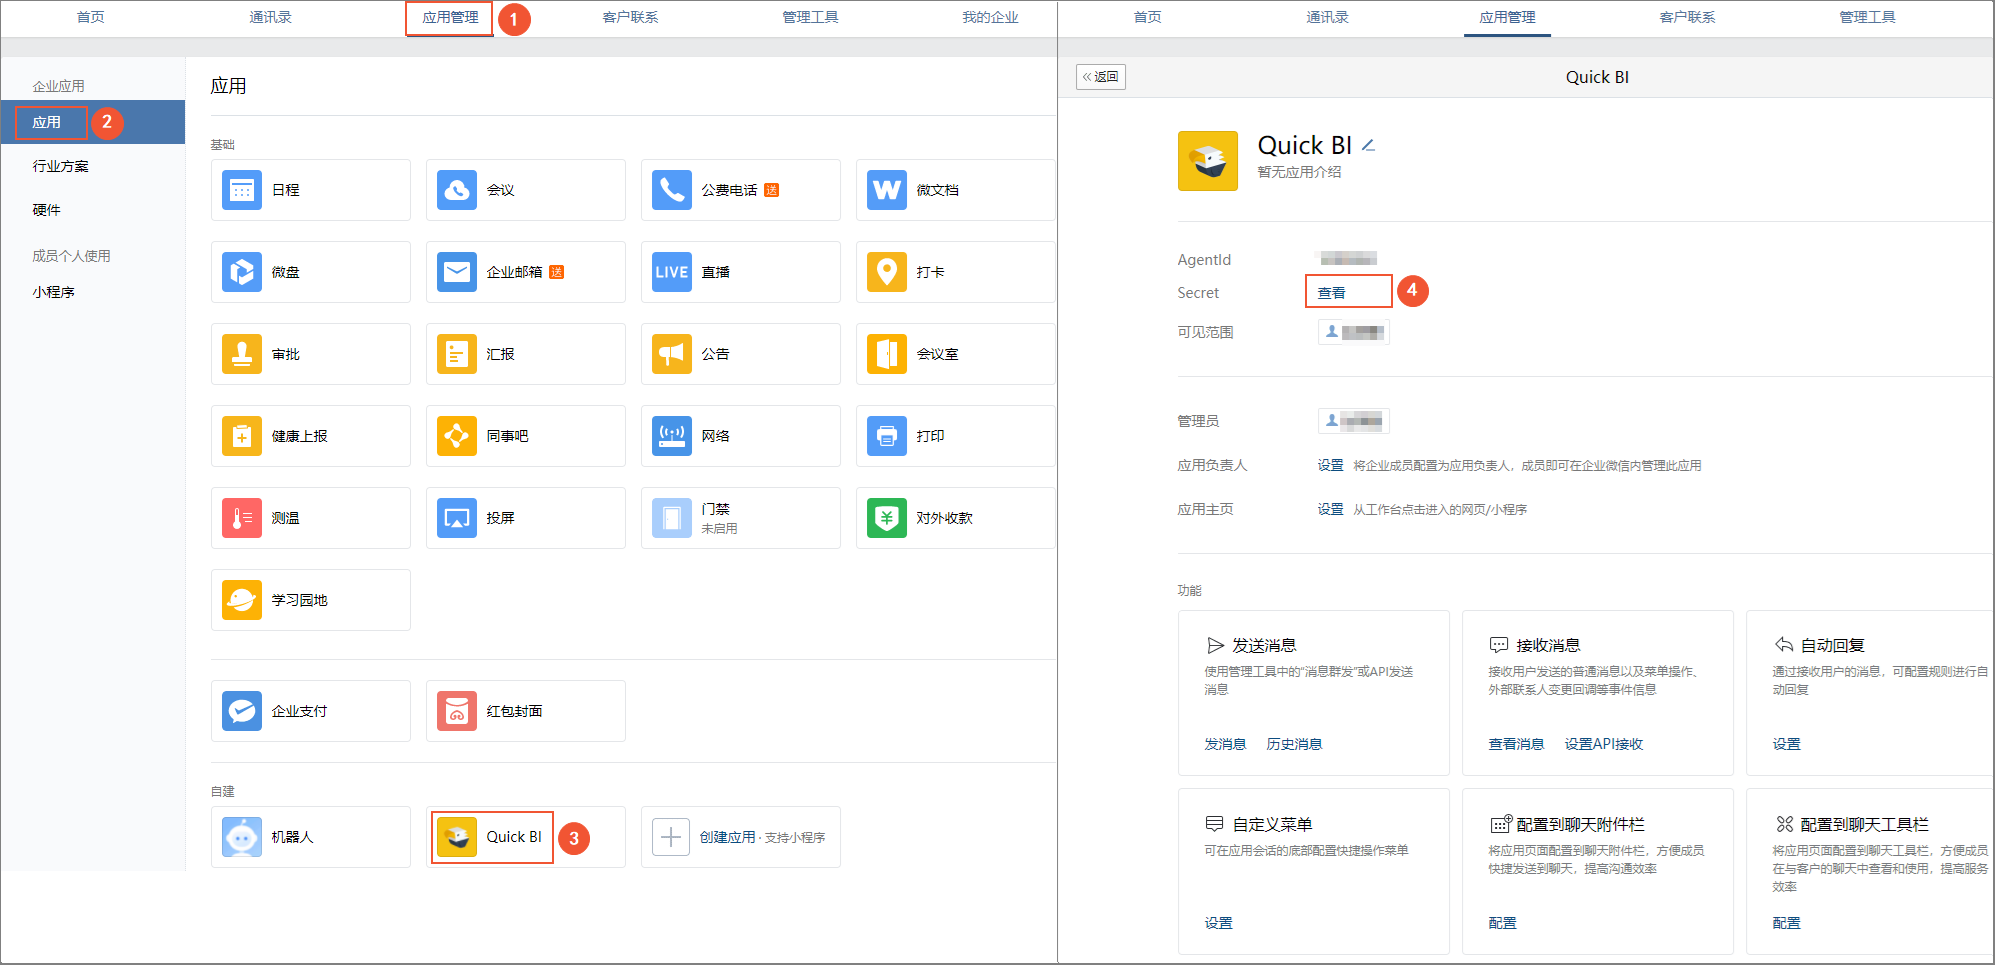
Secret
The secret key for your application.
You can find the Secret on the application details page in the WeCom management console.
verifyCode
The domain ownership verification code from WeCom. For instructions, see Obtain the verifyCode.

Step 3: Verify the trusted domain
Set the trusted domain.
On the application details page, click Set Trusted Domain Name under Web Authorization and JS-SDK.
In the Set Trusted Domain Name dialog box, enter your trusted domain. For example, enter
bi.aliyun.com. Then, click OK.
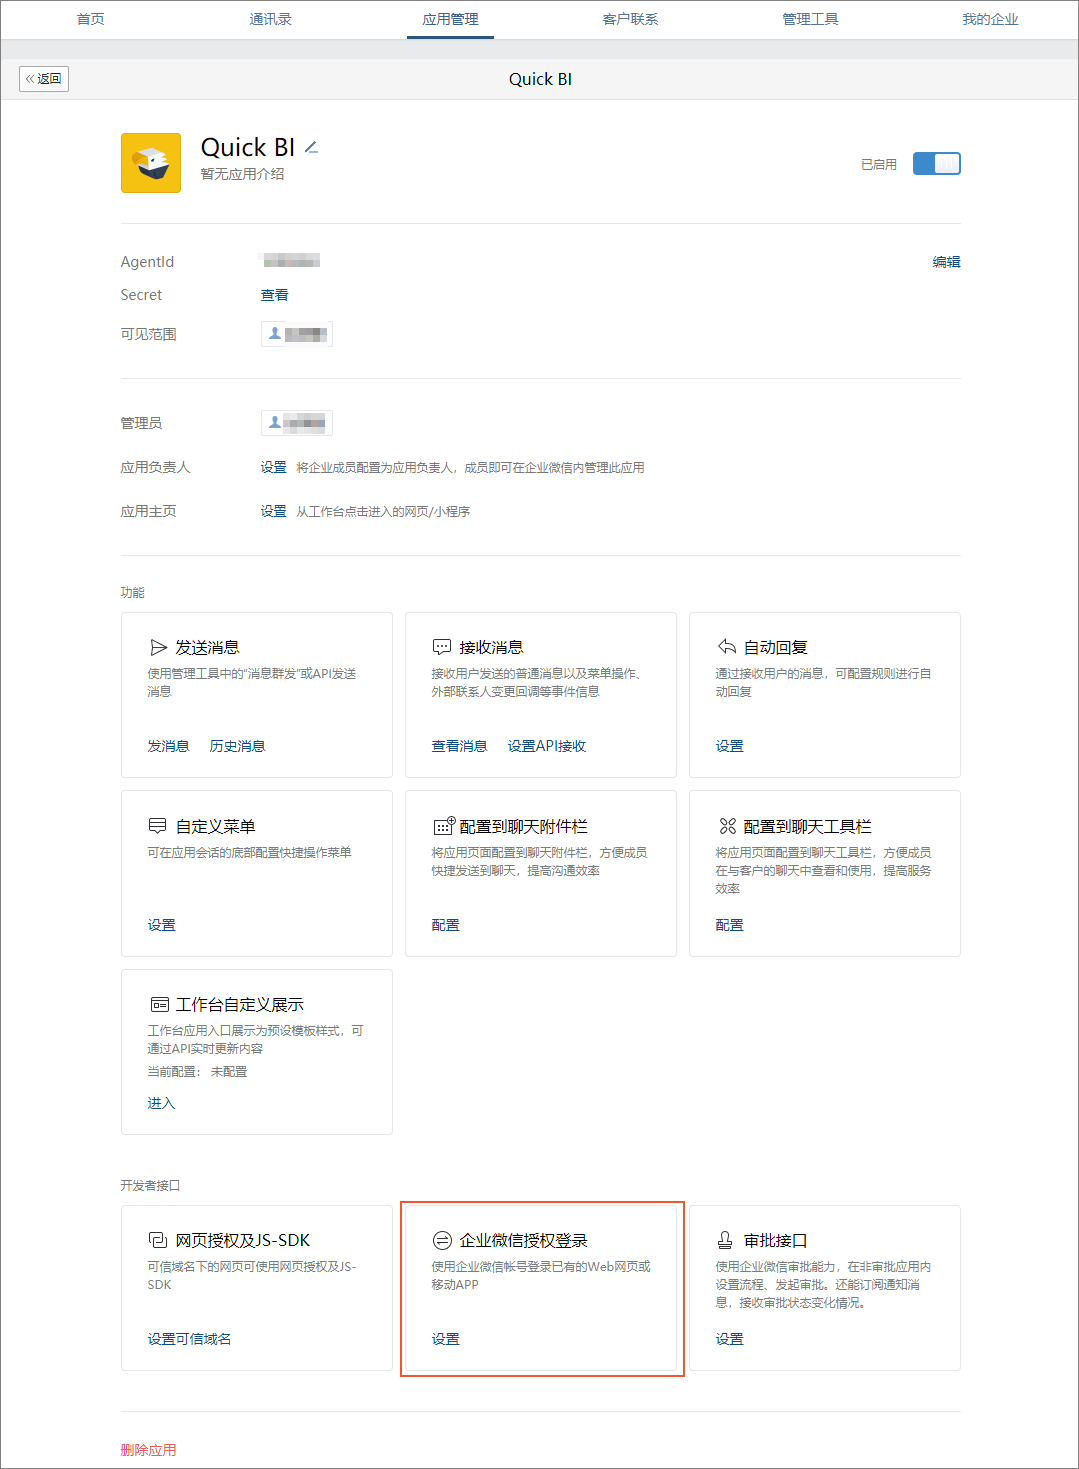
Authorize WeCom to log on to Quick BI.
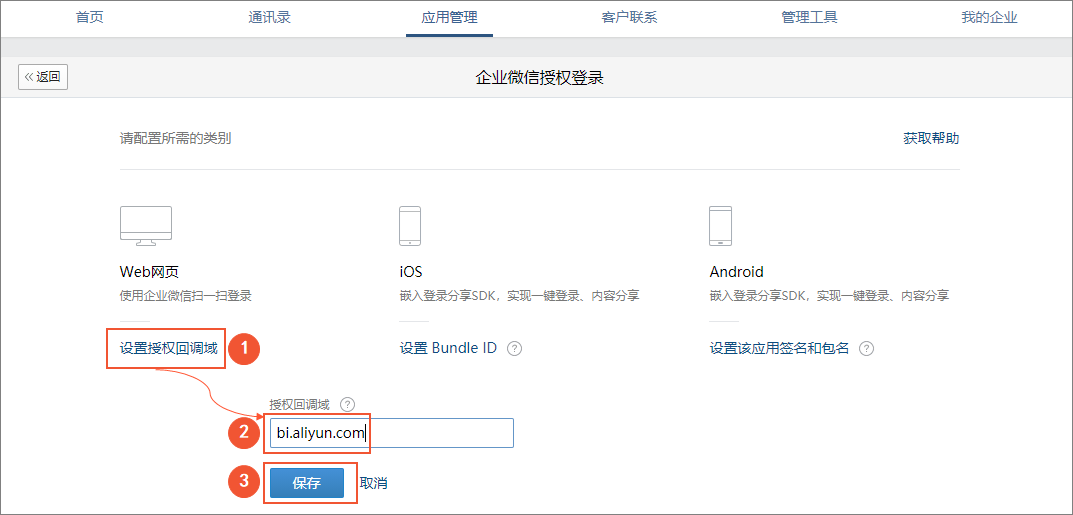
On the application details page, click Set under WeCom Authorization Login.
On the WeCom Authorization Login page, set the authorized callback domain.
In this example, the trusted domain is
bi.aliyun.com.NoteYou must use your domain as the trusted domain.
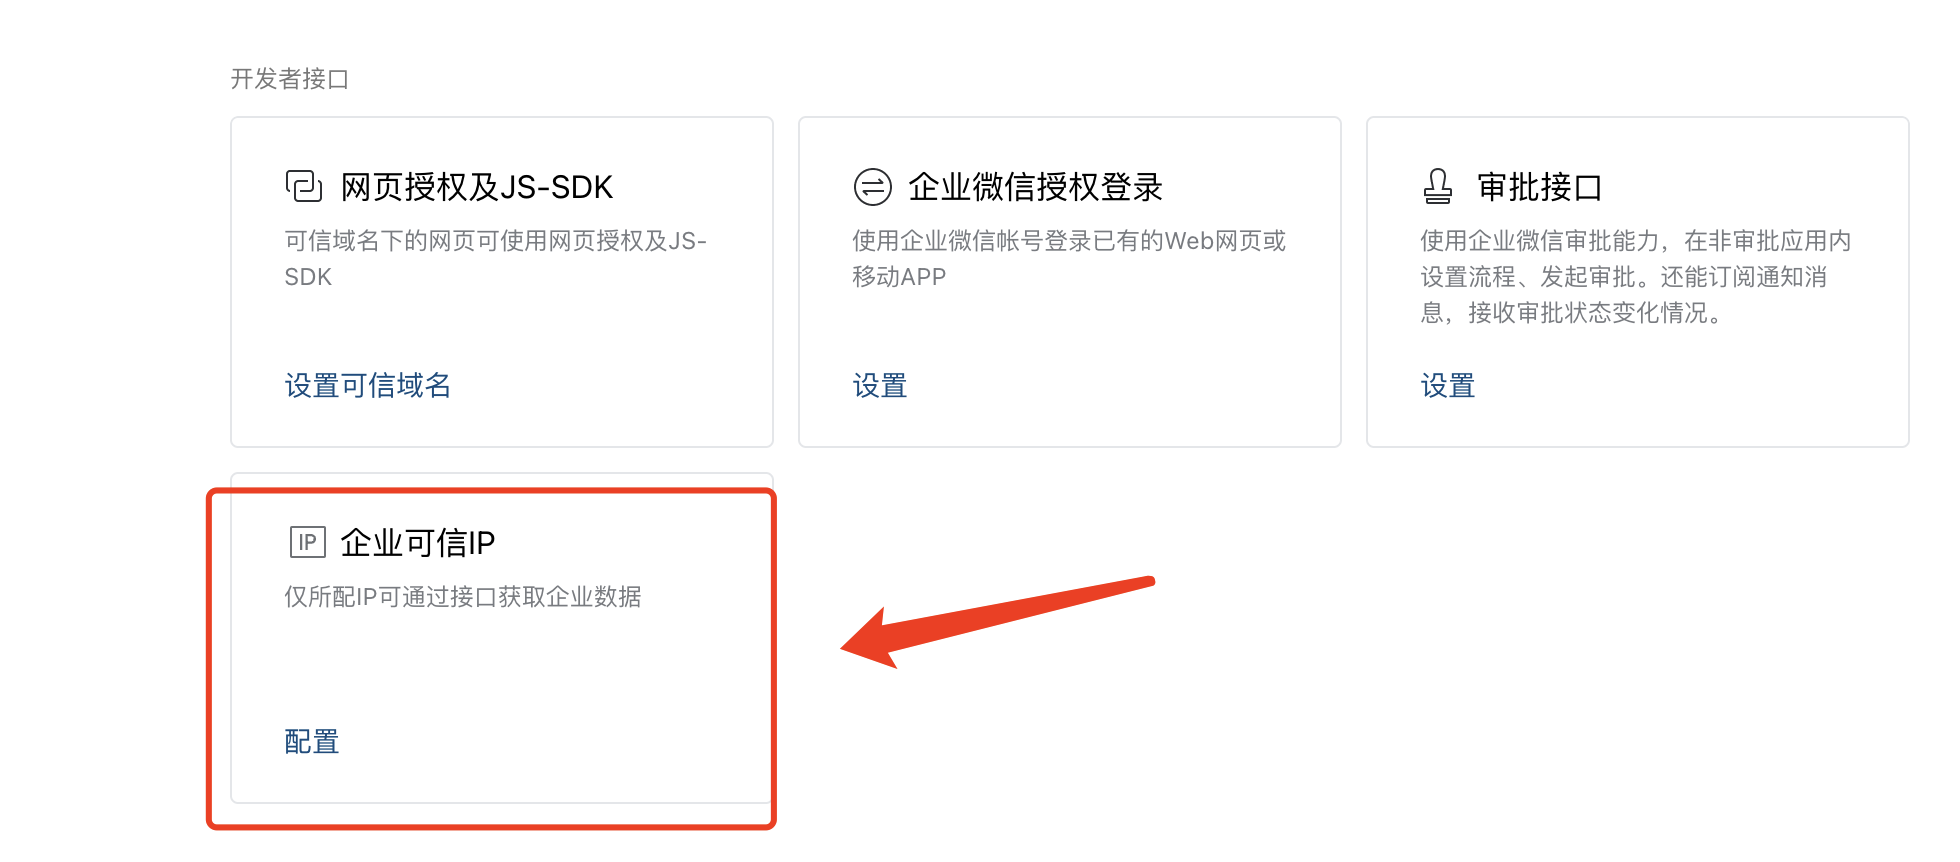
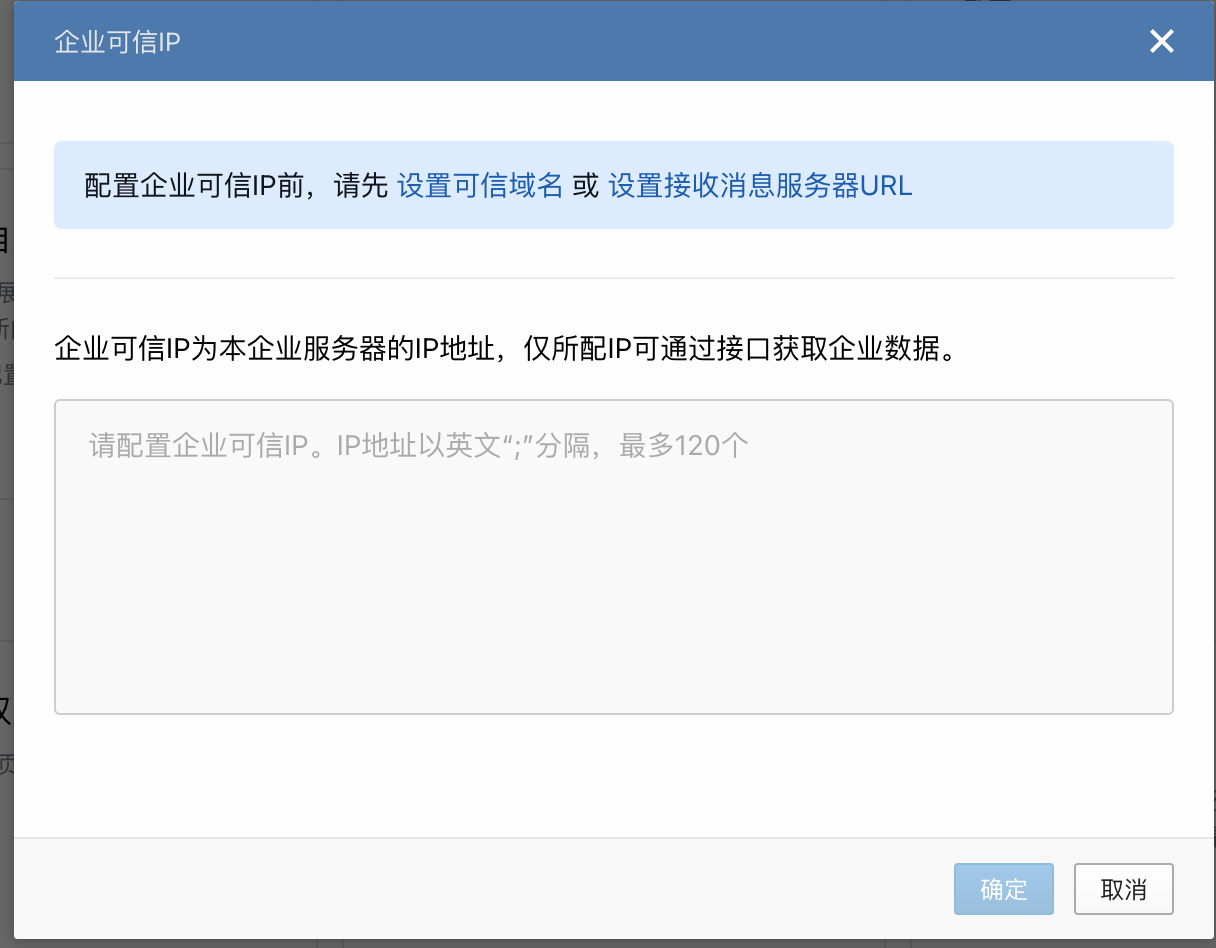
In the Enterprise Trusted IP field, add the IP address of your Quick BI service. If this is not configured, WeCom blocks API calls from Quick BI.
After you complete these steps, the Quick BI mini-program is integrated with WeCom. Employees can now log in to WeCom and view reports on their mobile client.
Limitations
Only the group space feature of the Quick BI Professional Edition supports WeCom integration.