(Public cloud) Enable the WeChat Work mini program
To help WeChat Work users view reports on the mobile client, Quick BI provides a WeChat Work mini program. A WeChat Work administrator can enable this mini program for their enterprise. After employees bind the WeChat Work mini program or become Quick BI organization members, they can view reports in the WeChat Work mobile client. This topic describes how an enterprise administrator can enable the WeChat Work mini program service and authorize its API on Quick BI.
Prerequisites
You are a WeChat Work administrator and have registered for WeChat Work.
Limitations
Quick BI Pro allows you to authorize up to five different companies. This is useful when your organization consists of multiple independent entities, such as subsidiaries or branch offices, that all need to access the same Quick BI instance.
If you have purchased multiple Quick BI instances, you can bind the same authorized application to multiple tenants. By default, a single authorized application can be bound to a maximum of five tenants.
Procedure
On the WeChat Work API Authorization page, click Add Authorization to open the Add New Authorization dialog box. Follow the steps below to authorize your enterprise.

Step 1: Enable the Quick BI mini program
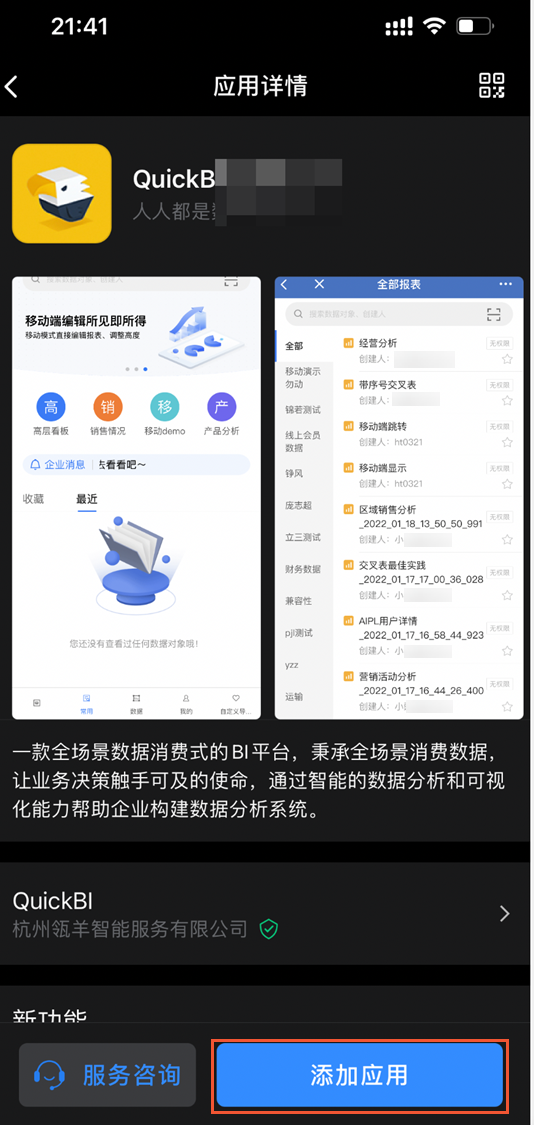
Install the Quick BI mini program on the WeChat Work mobile client.
Open the WeChat Work mobile client and scan the QR code displayed in the Add New Authorization dialog box.
On the App Details page, click Add App to complete the installation.
Step 2: Authorize the WeChat Work API
After installing the mini program, click Next in the Add New Authorization dialog box. This takes you from the Scan to Enable step to the Enter CorpId step. In this step, perform the following actions.
A single authorized application can be bound to a maximum of five tenants.
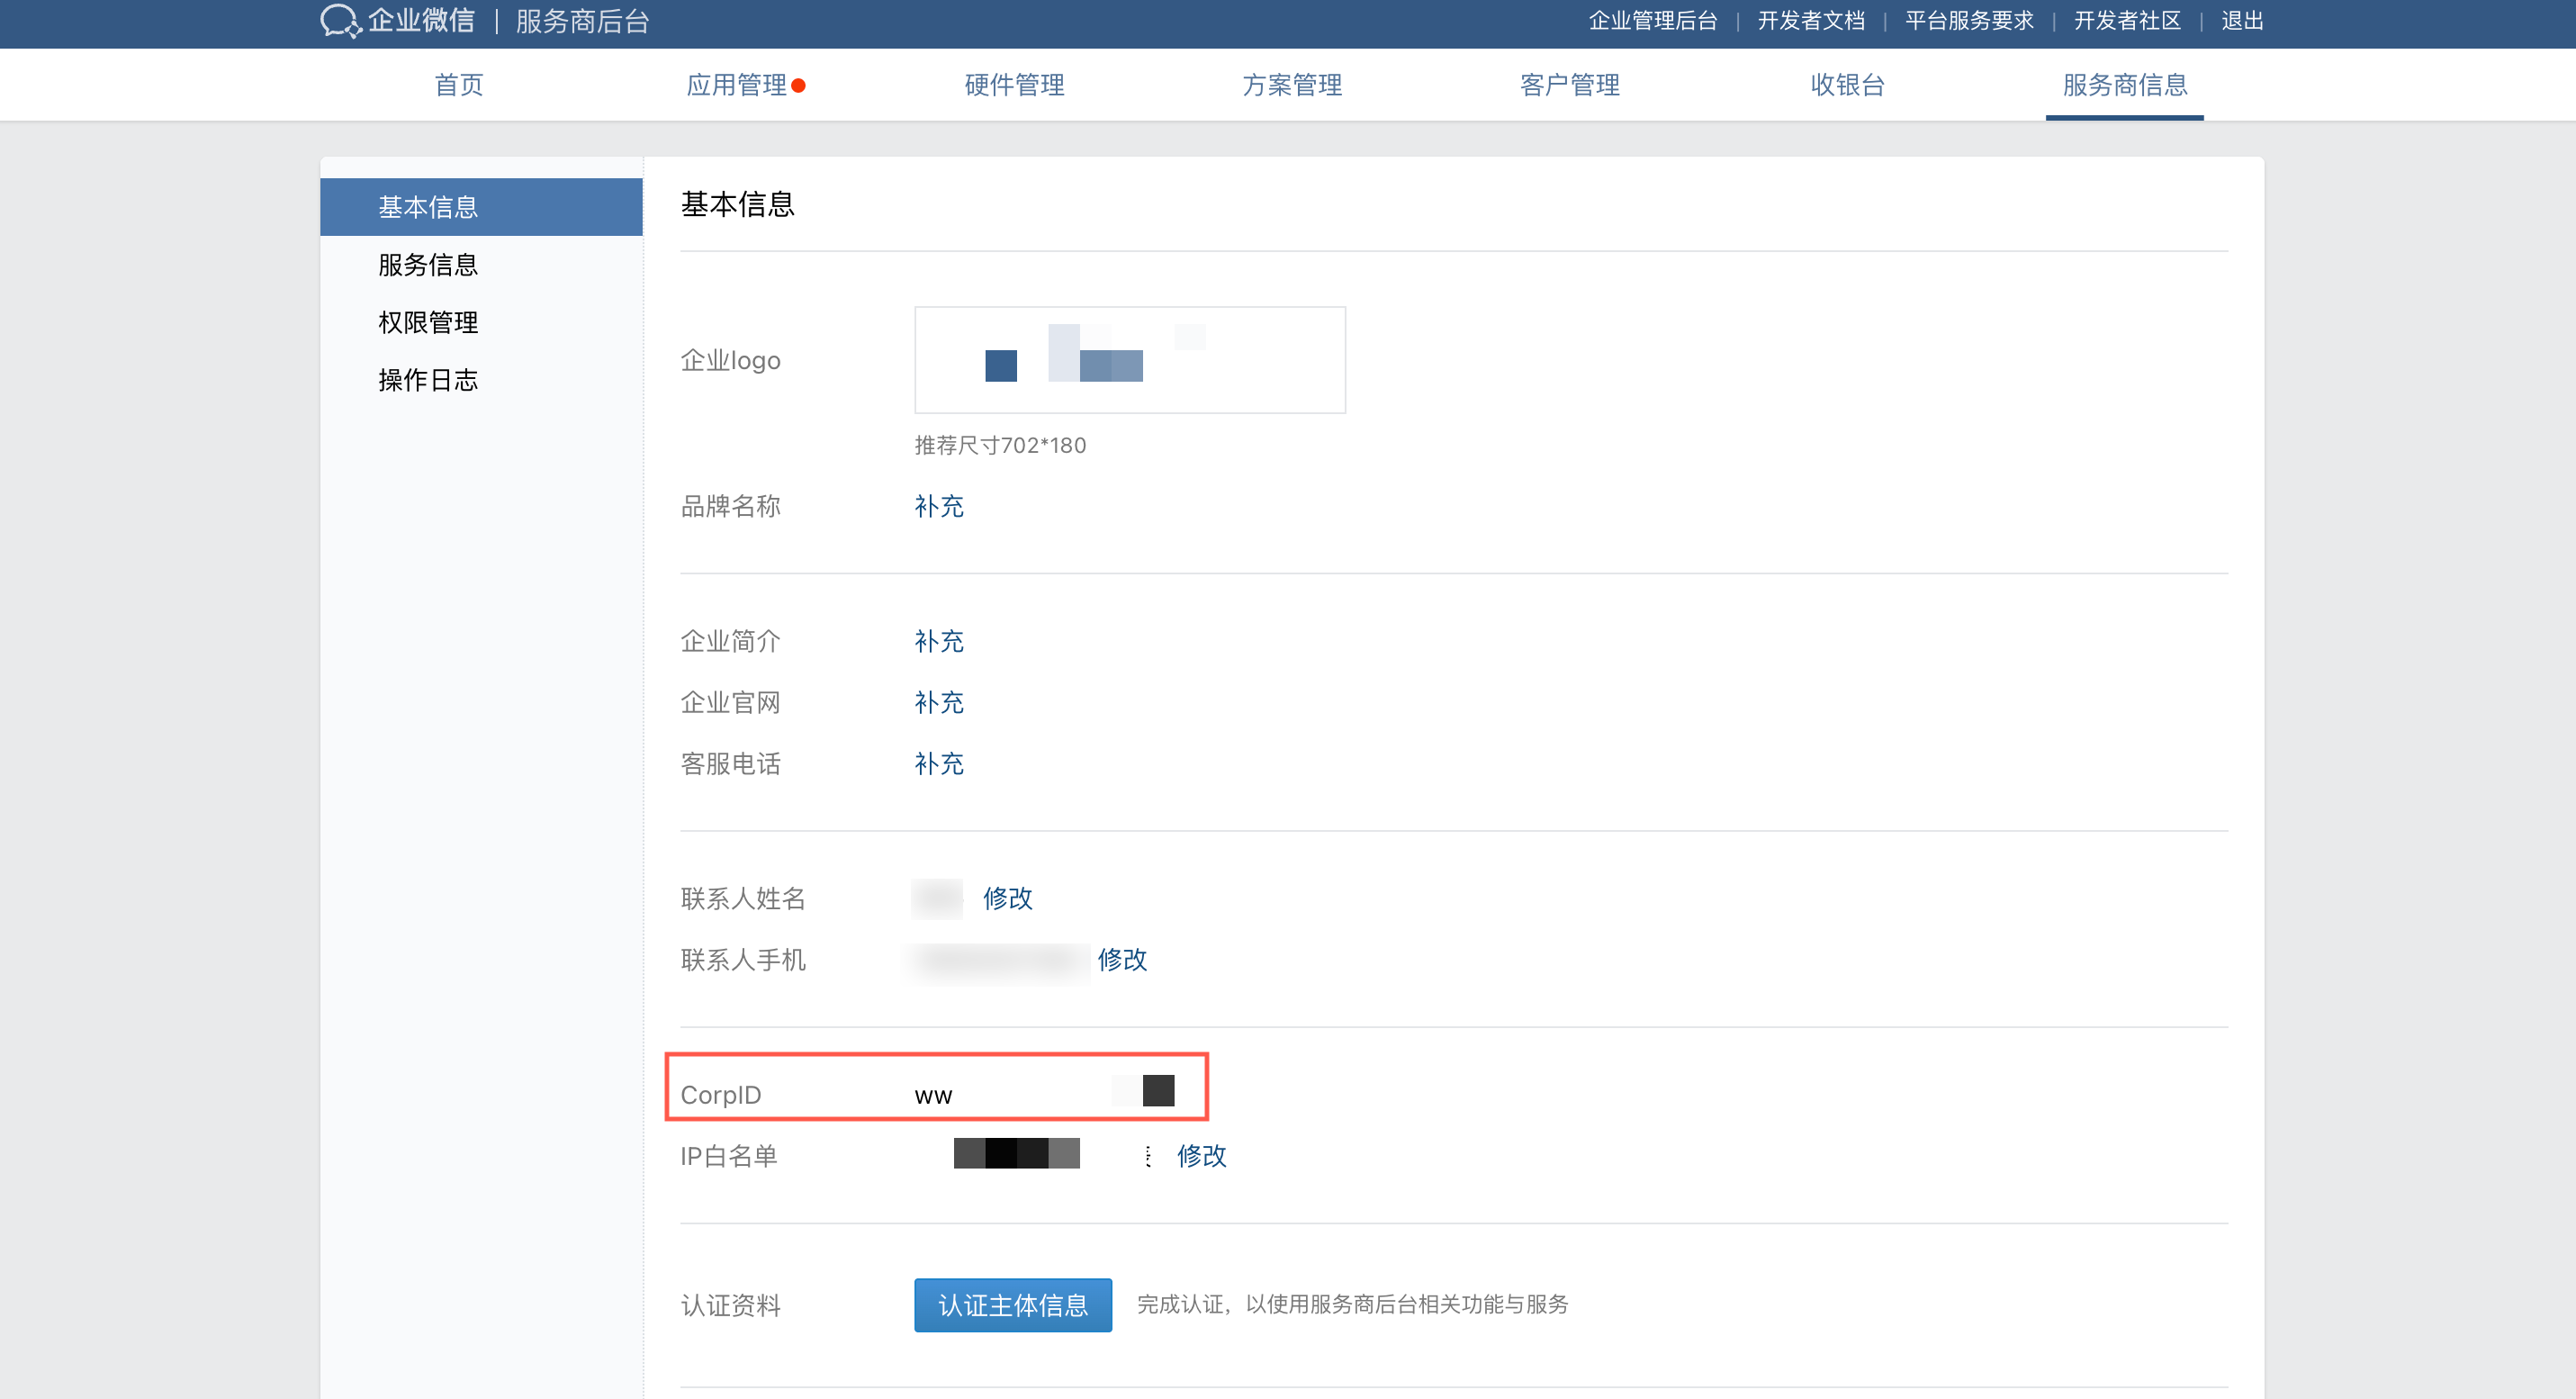
Get your enterprise's CorpId
Log in to the WeChat Work service provider console. On the Service Provider Information page, copy your enterprise's CorpId.
Enter the CorpId
In the Add New Authorization dialog box, paste the CorpId into the CorpId input field and click Verify. The system automatically recognizes and displays your enterprise's name.

After confirming that the organization name is correct, click Next to authorize the new enterprise.
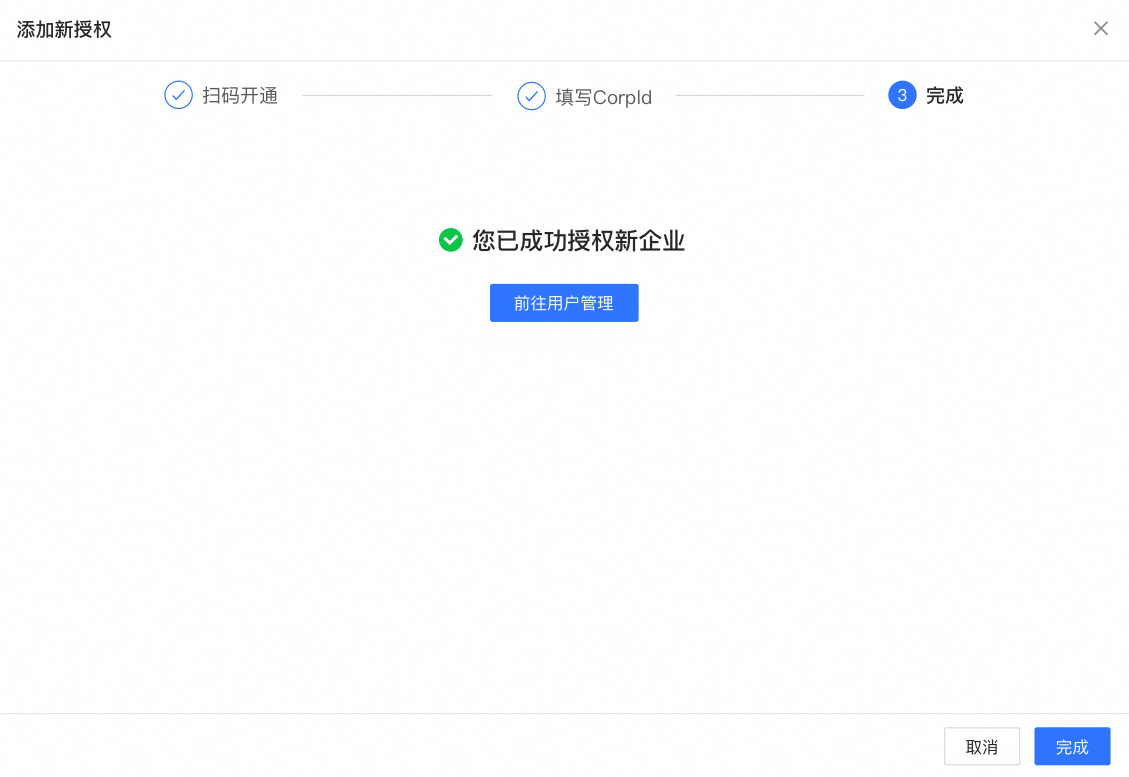
This action binds the WeChat Work enterprise associated with the specified CorpId to your Quick BI organization. You can click Go to User Management to navigate directly to the member management page and sync members from the current enterprise. For detailed instructions, see Add WeChat Work users.
Step 3: Configure the mini program
If they have editing permissions, accounts synced from office software, such as DingTalk, WeChat Work, or Lark, can use the PC client to create and edit reports in the mini program.
By default, the mini program opens in the workbench. You can change this setting to Open in browser based on your business needs.
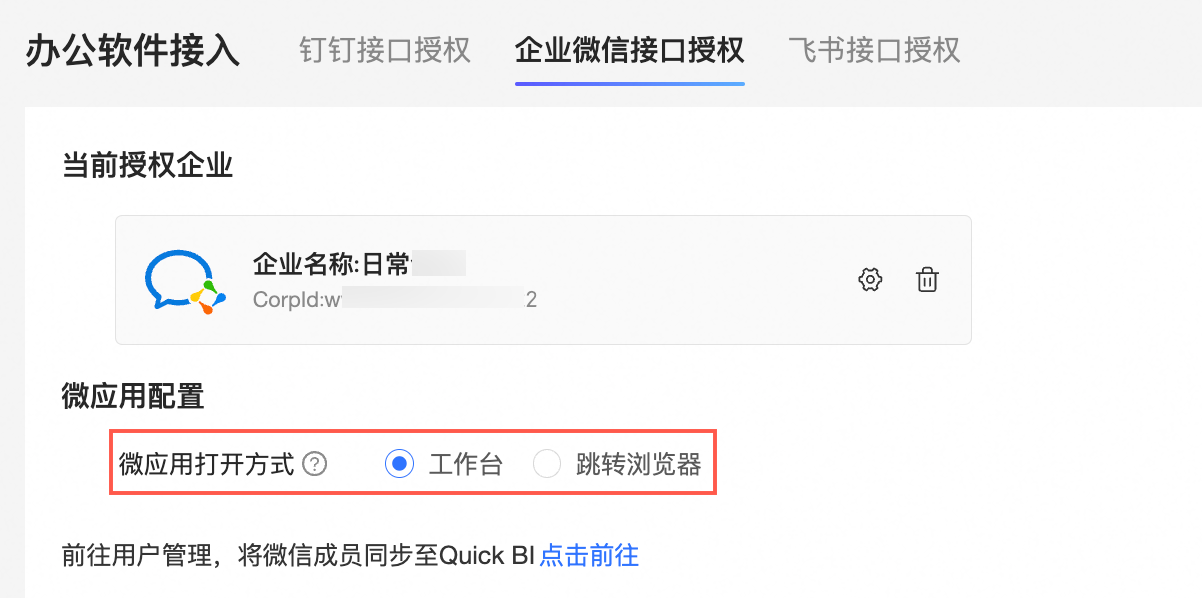
This setting applies only to the PC client.
When the mini program is set to open in the workbench, you can view and edit content directly within the workbench interface.
When the mini program is set to Open in browser, clicking it launches a new browser tab where you can view, edit, and perform other operations.
Next steps
After you add an enterprise authorization, you can perform other tasks such as editing an authorized enterprise's information, removing an authorization, or syncing WeChat Work members.
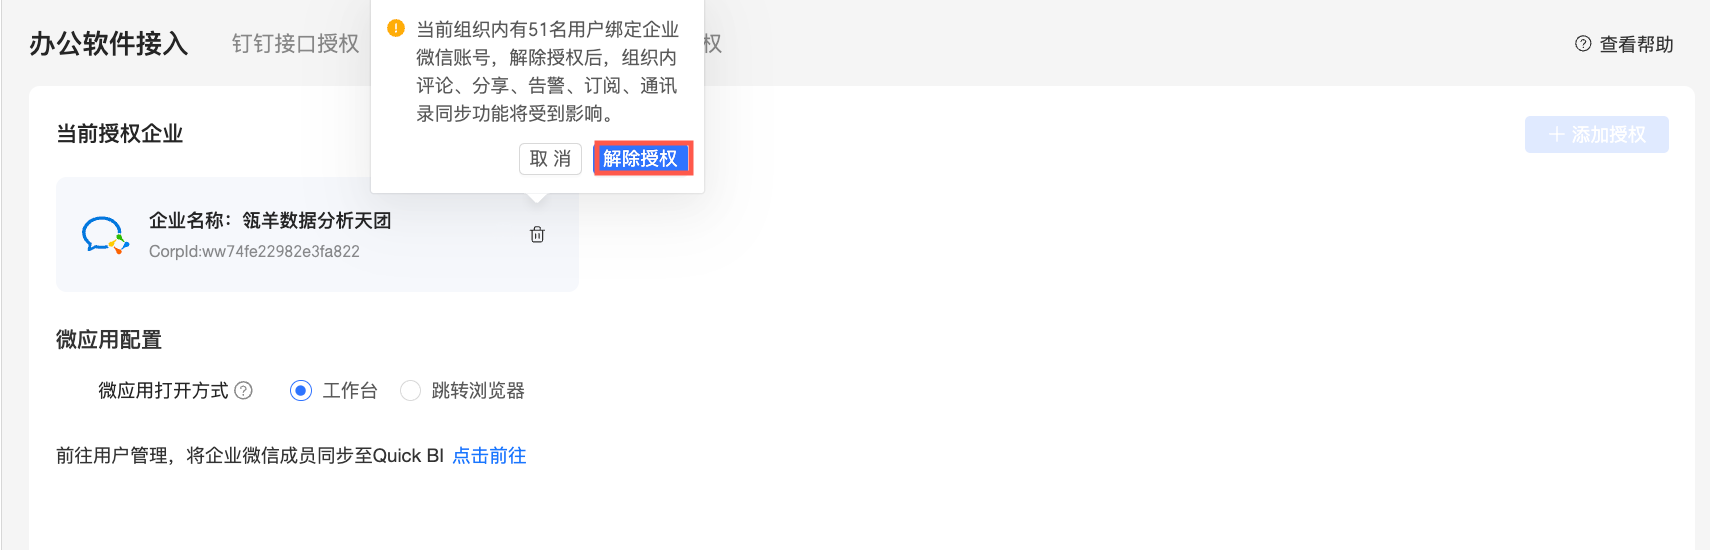
Remove enterprise authorization
Click the  icon on the target enterprise's card and select Remove Authorization in the confirmation dialog box to unbind it.
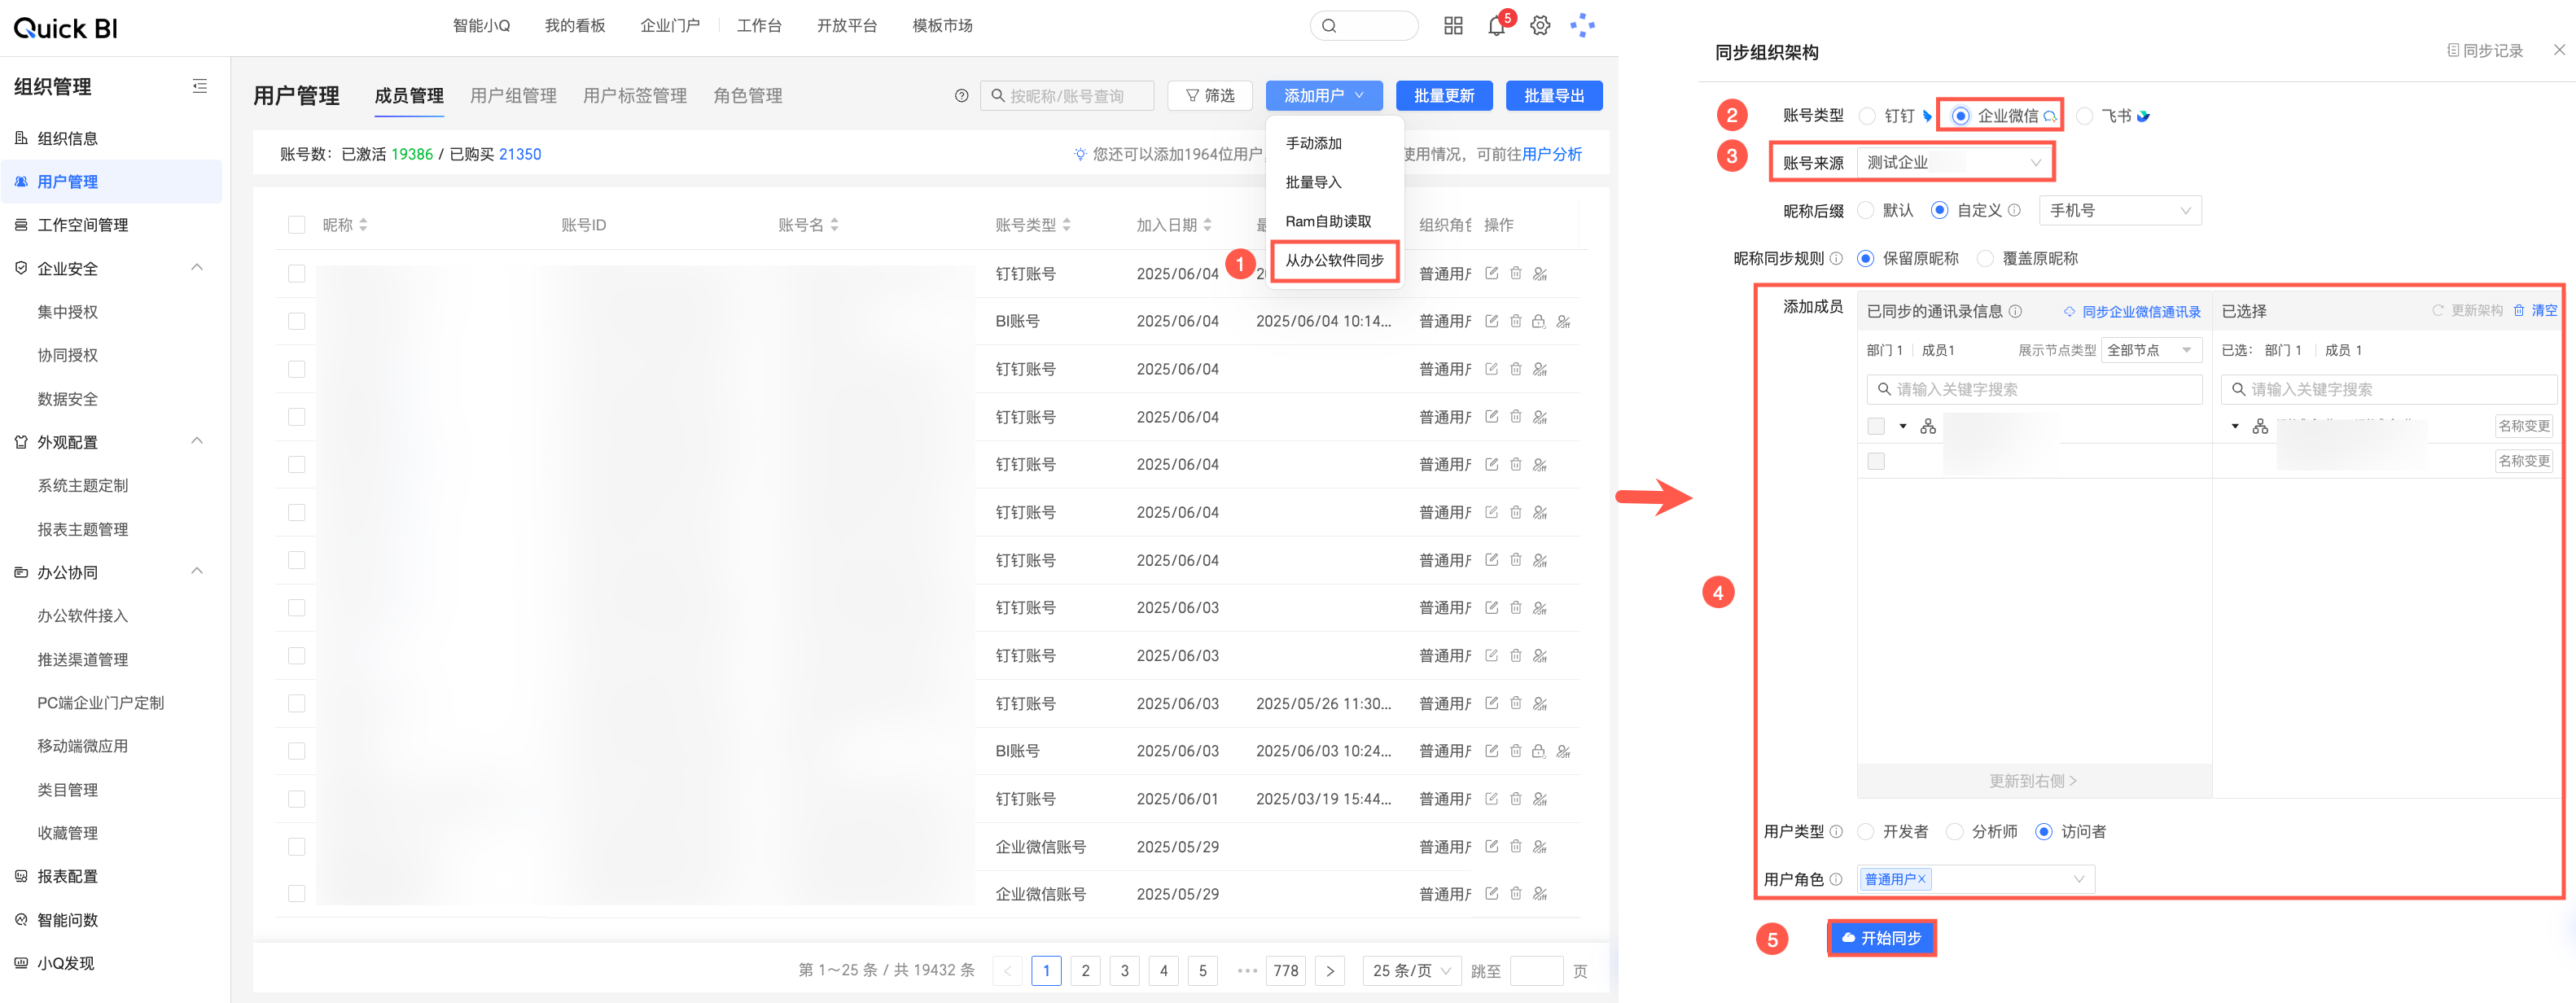
Sync WeChat Work members
In the Add User dialog, you can directly add WeChat Work users by selecting Sync from Office Software.
Bind WeChat Work account
After the WeChat Work API is successfully authorized, you can go to personal settings and bind your account by scanning the QR code under the Bind WeChat Work Account option.
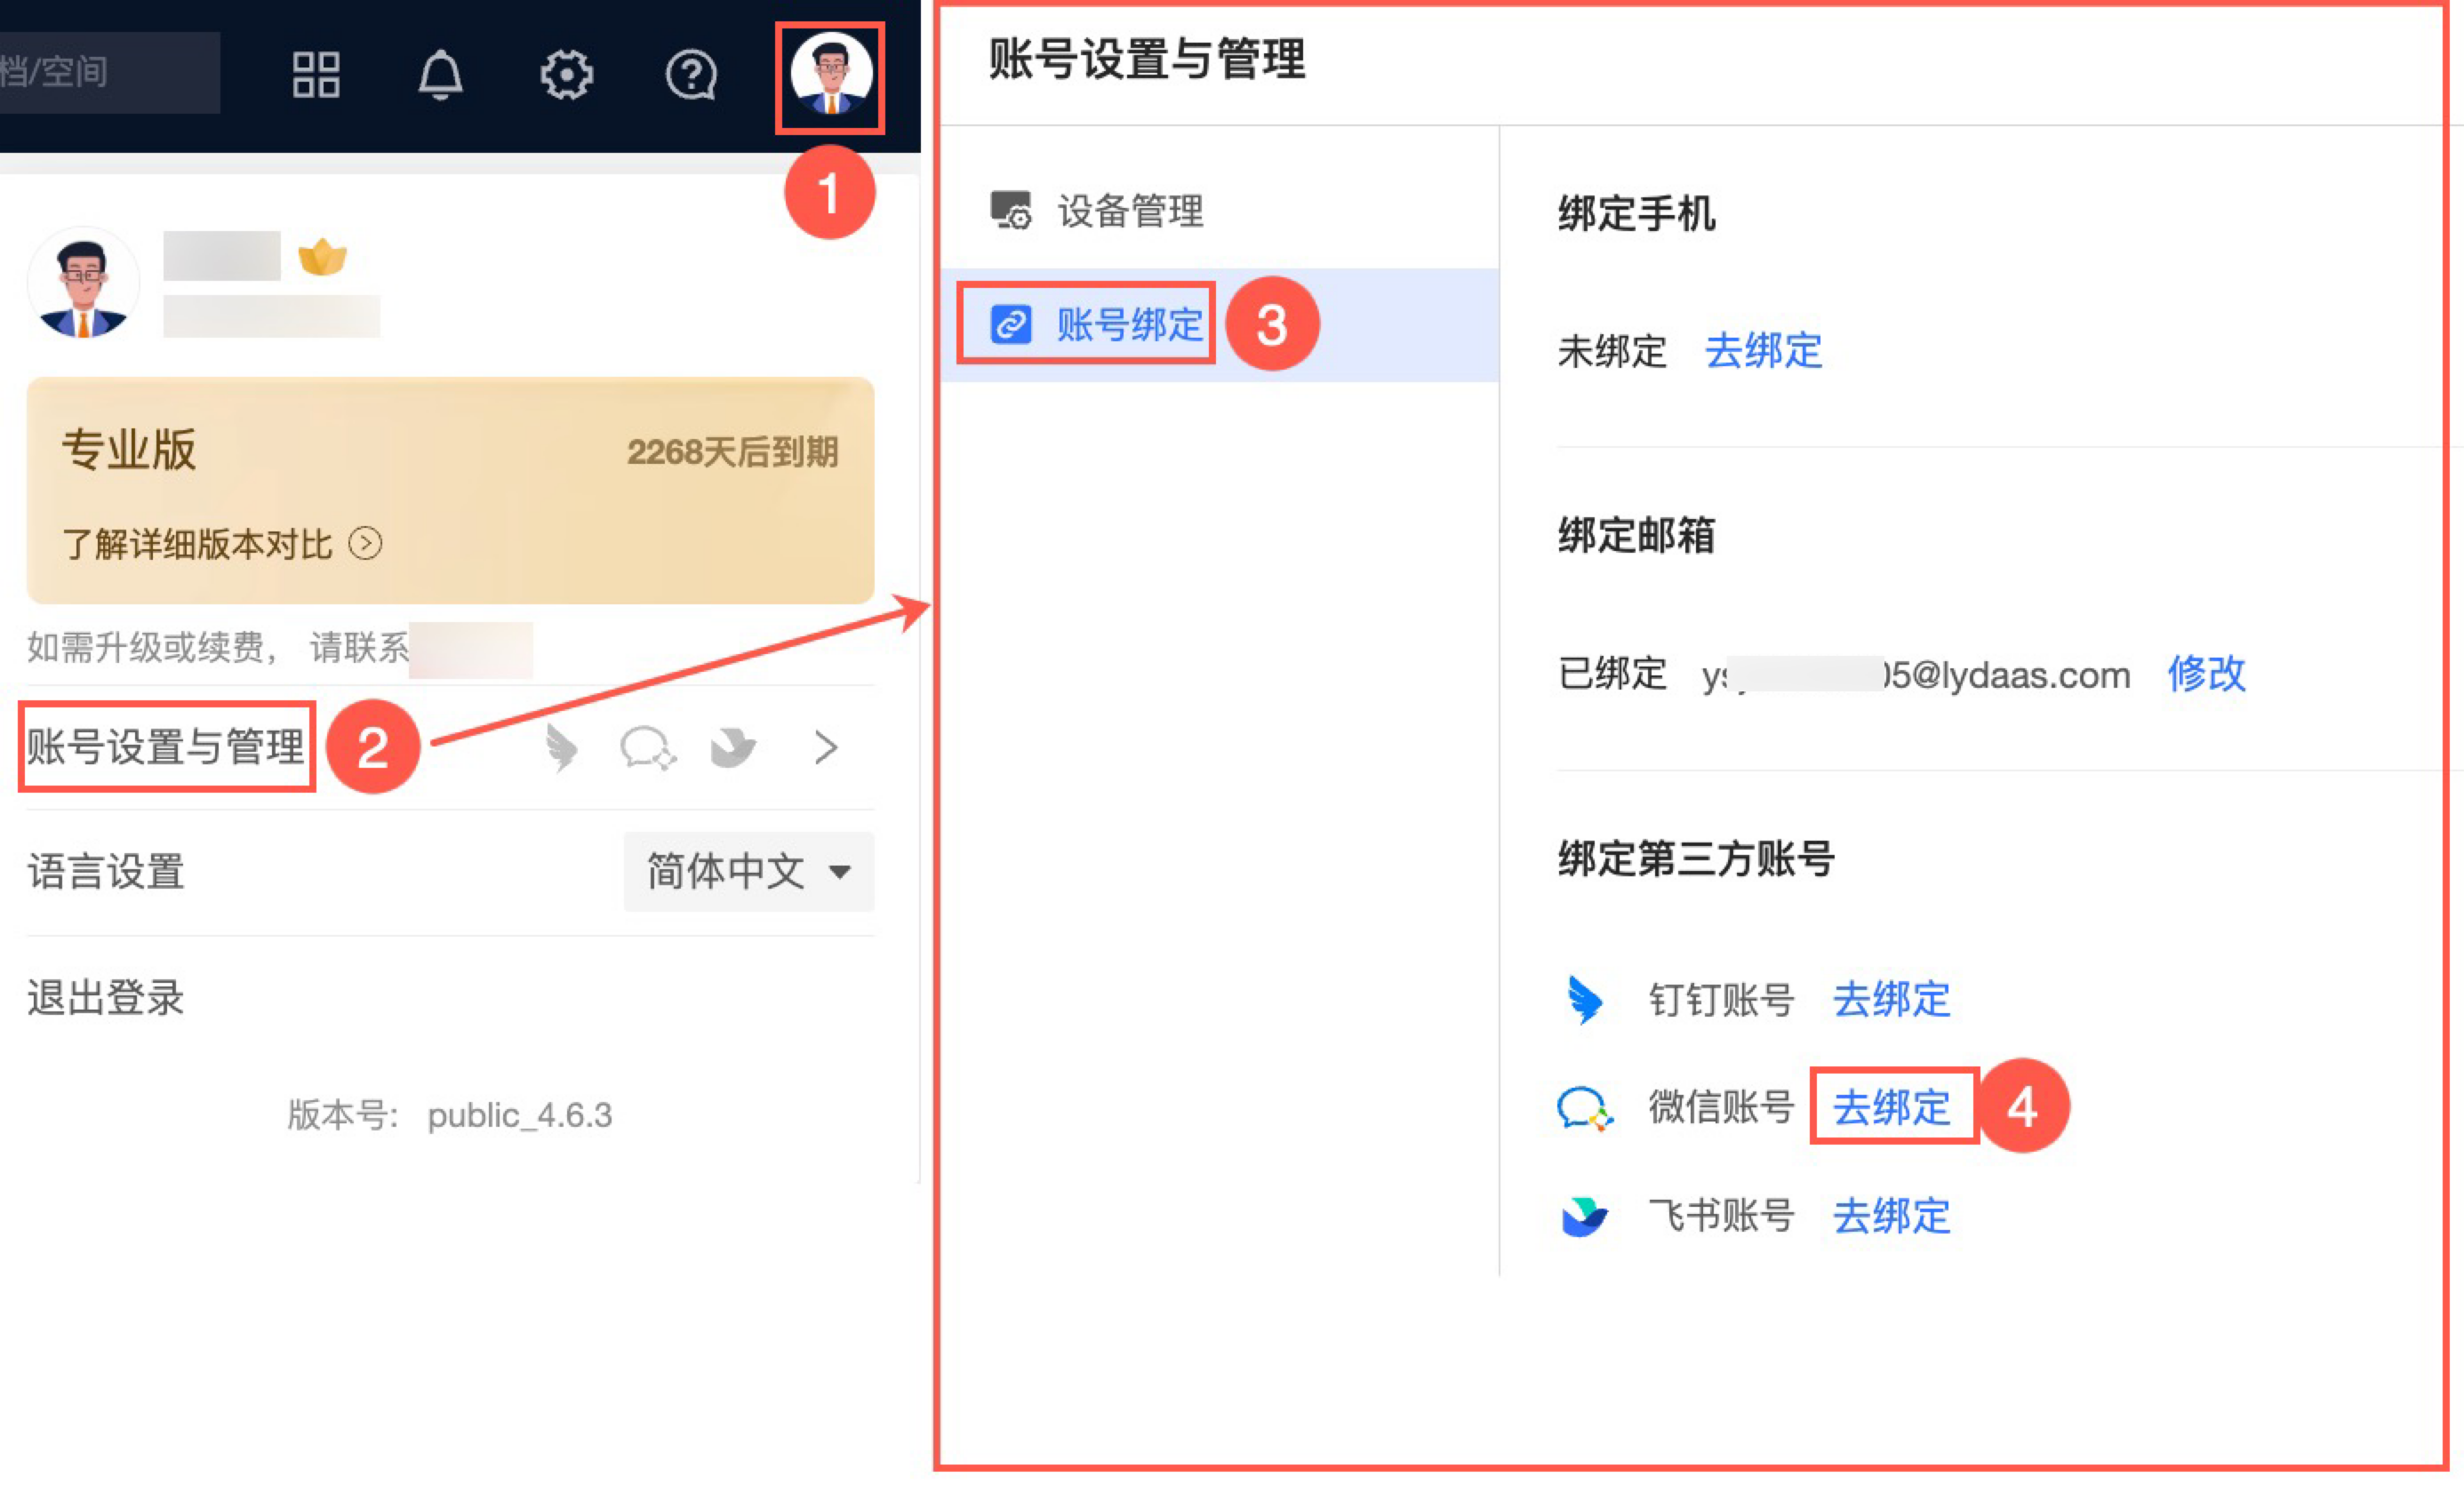 Organization administrators can bind WeChat Work accounts for other users from the member management page.

FAQ
Problem
A user on public cloud Quick BI clicks the Quick BI application in WeChat Work and receives the following error message: "Application unavailable: The application service provider has not enabled 'API call permission' for you in WeChat Work, so this application cannot be used. Please ask your administrator to contact the service provider to enable it."
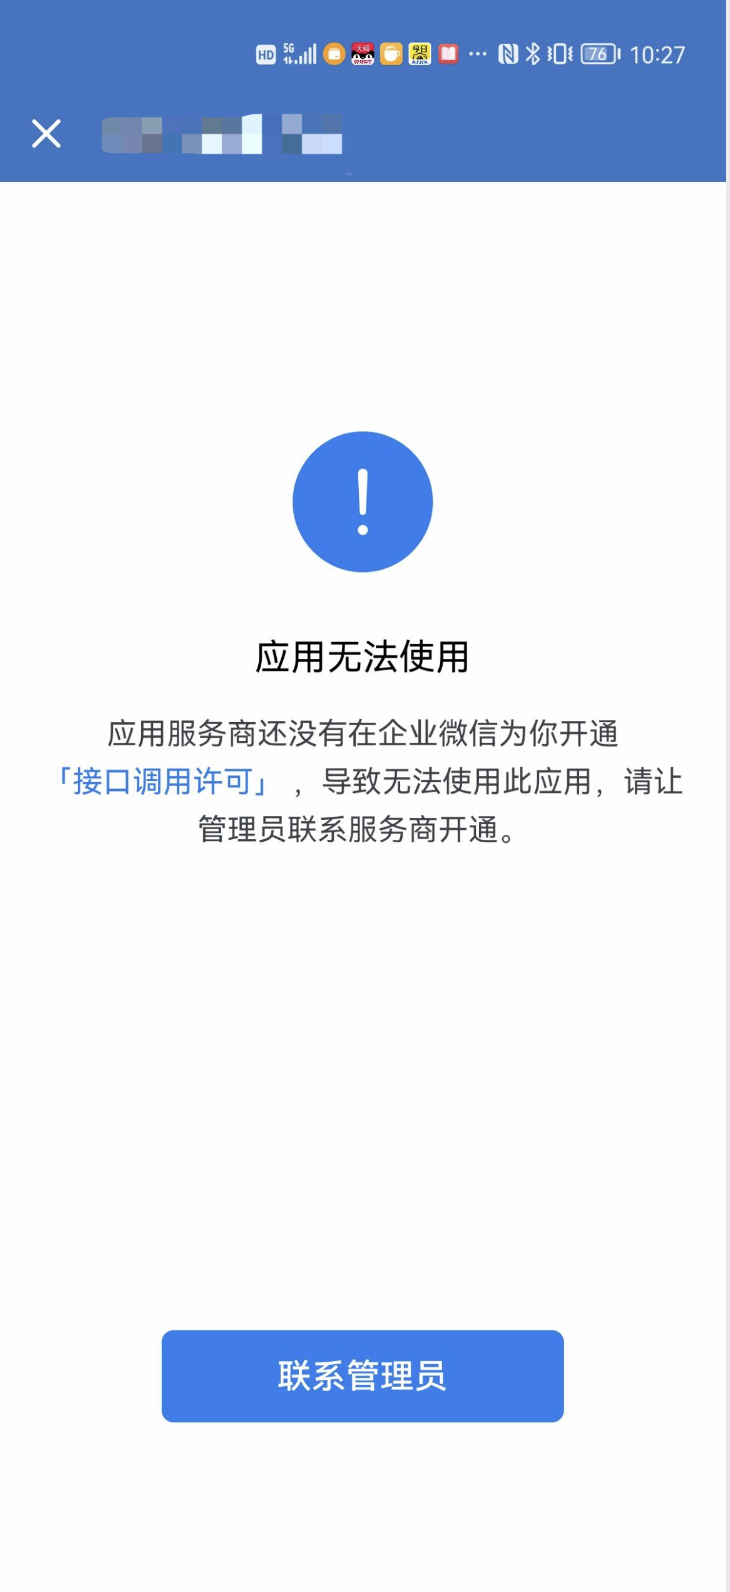
Cause
The number of used WeChat Work licenses has exceeded the threshold. As a third-party service provider, public cloud Quick BI provisions user licenses in WeChat Work that correspond to the number of licenses in your Quick BI organization. Each user who logs in consumes one license. When the number of used licenses reaches the threshold, any new users attempting to log in will encounter this error.
Solution
Solution 1: In the WeChat Work admin console, navigate to Application Management > Application > Third-party. Select and edit the Quick BI mini program. Modify the visible scope to remove unnecessary accounts, ensuring the number of users in the scope matches the number of WeChat Work accounts in your Quick BI organization.

Solution 2: In Quick BI, navigate to Organization Management > User Management > Member Management. Add the affected WeChat Work user as a new Quick BI organization member.

