Grouping field
When analyzing data, you often need to categorize raw dimension values into meaningful segments — for example, grouping individual ages into Minor, Youth, Middle-aged, and Senior. A grouping field lets you define these categories directly in the dataset, so you can slice data by group without writing a calculated field.
Prerequisites
Before you begin, ensure that you have:
A dataset. For instructions, see Create a Dataset
Create a grouping field
Quick BI provides two entry points for creating a grouping field.
From the toolbar
-
On the Data processing page, click New grouping field.
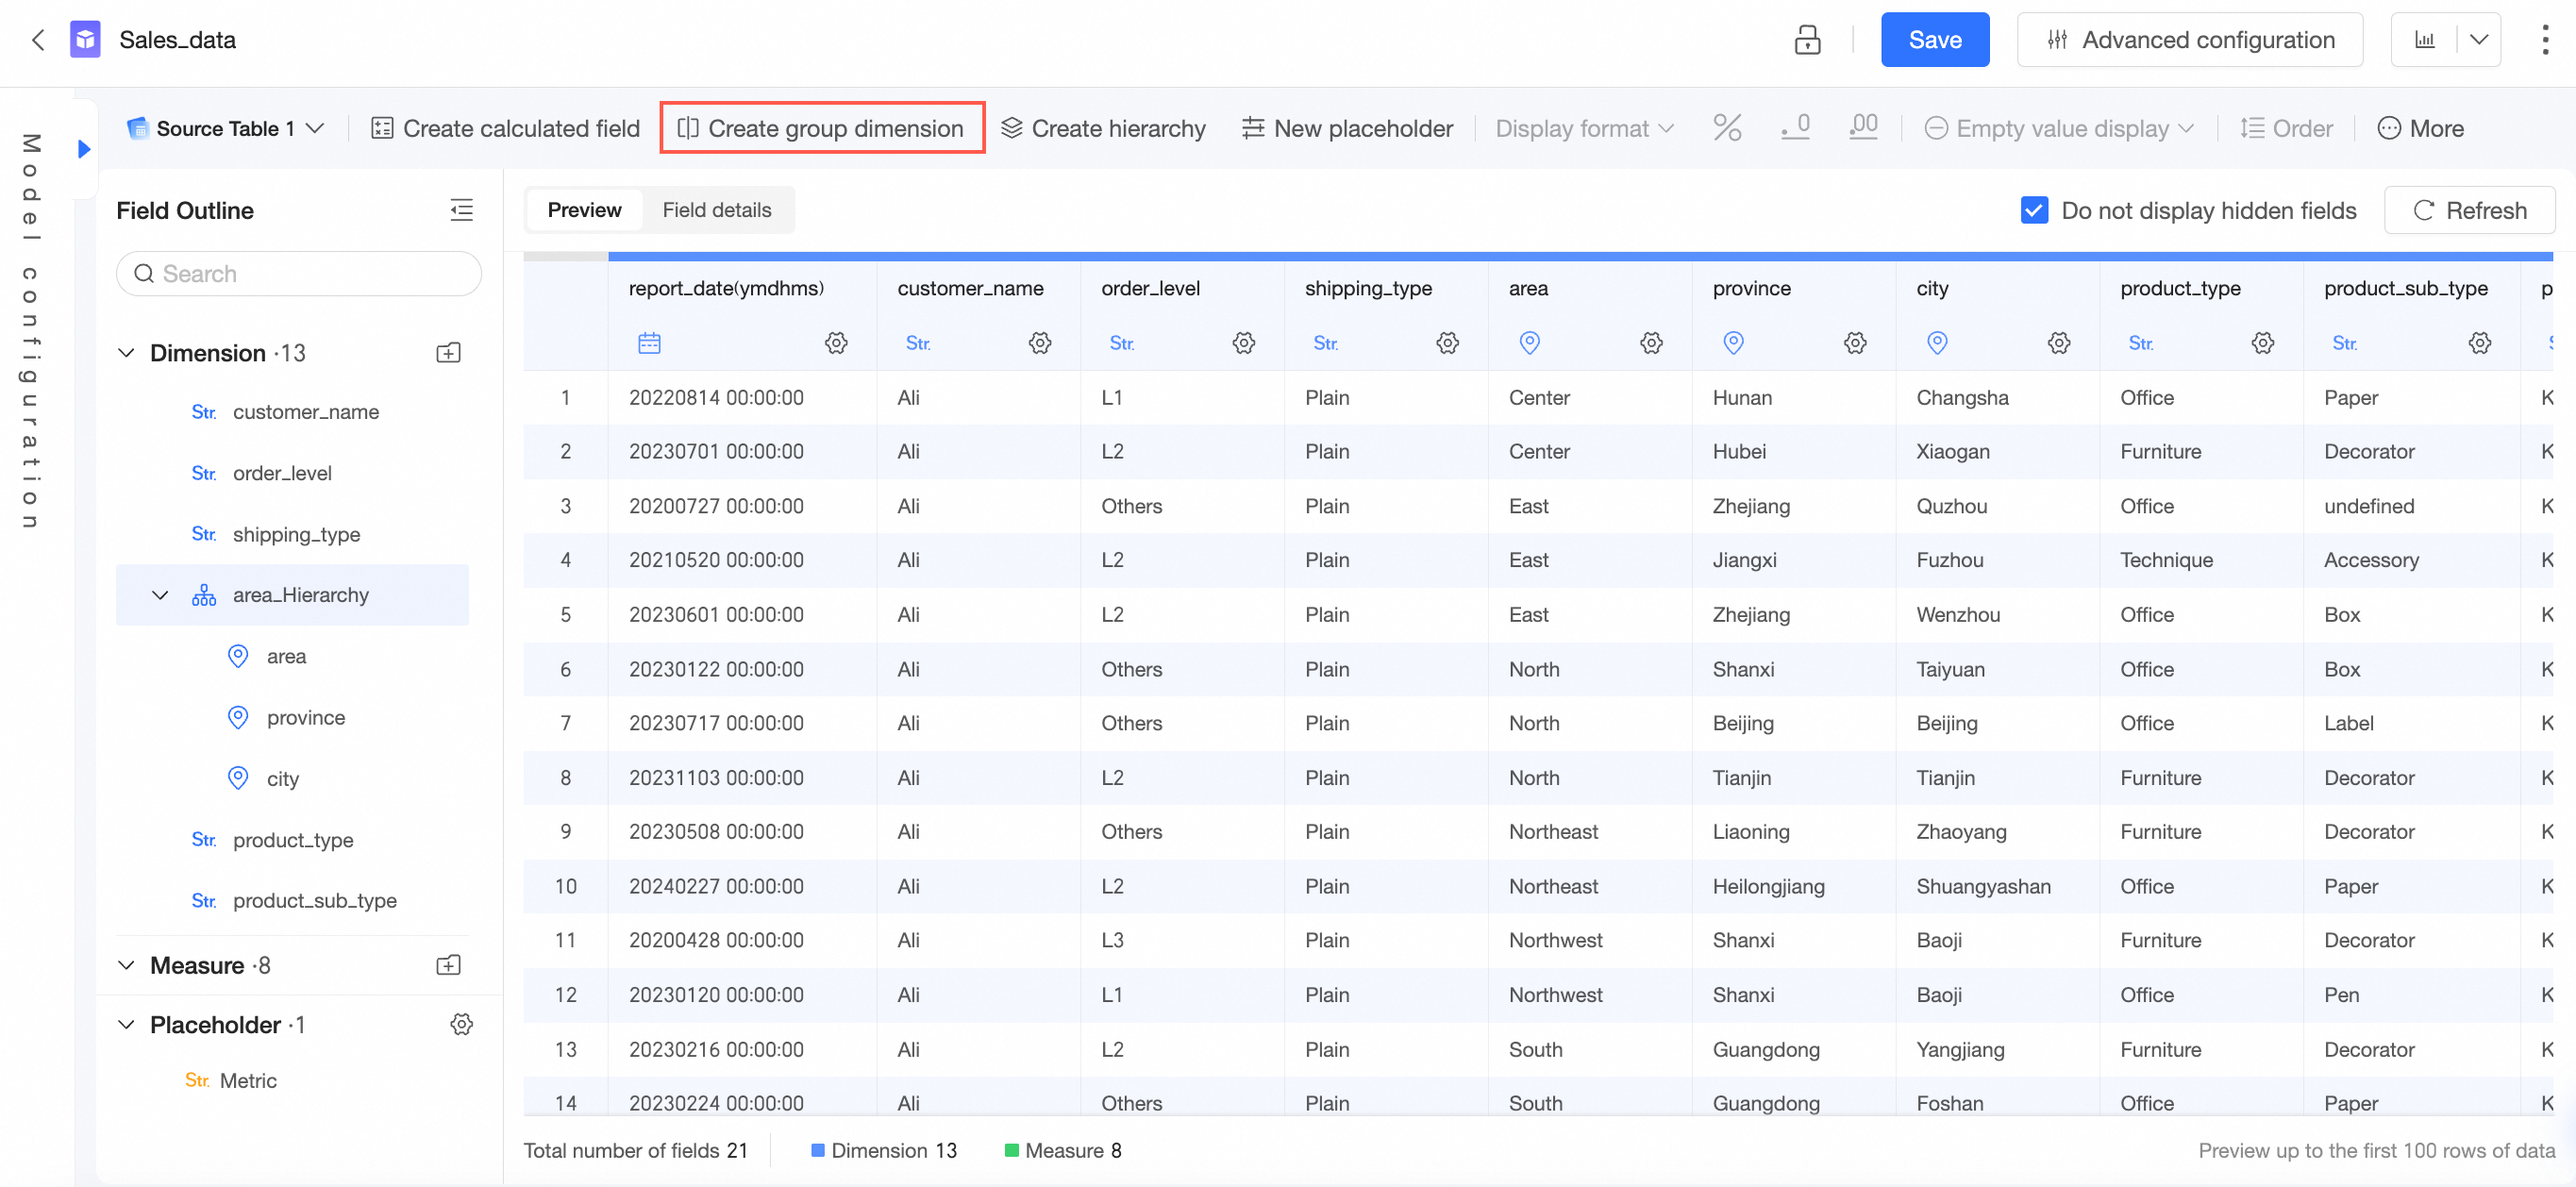
-
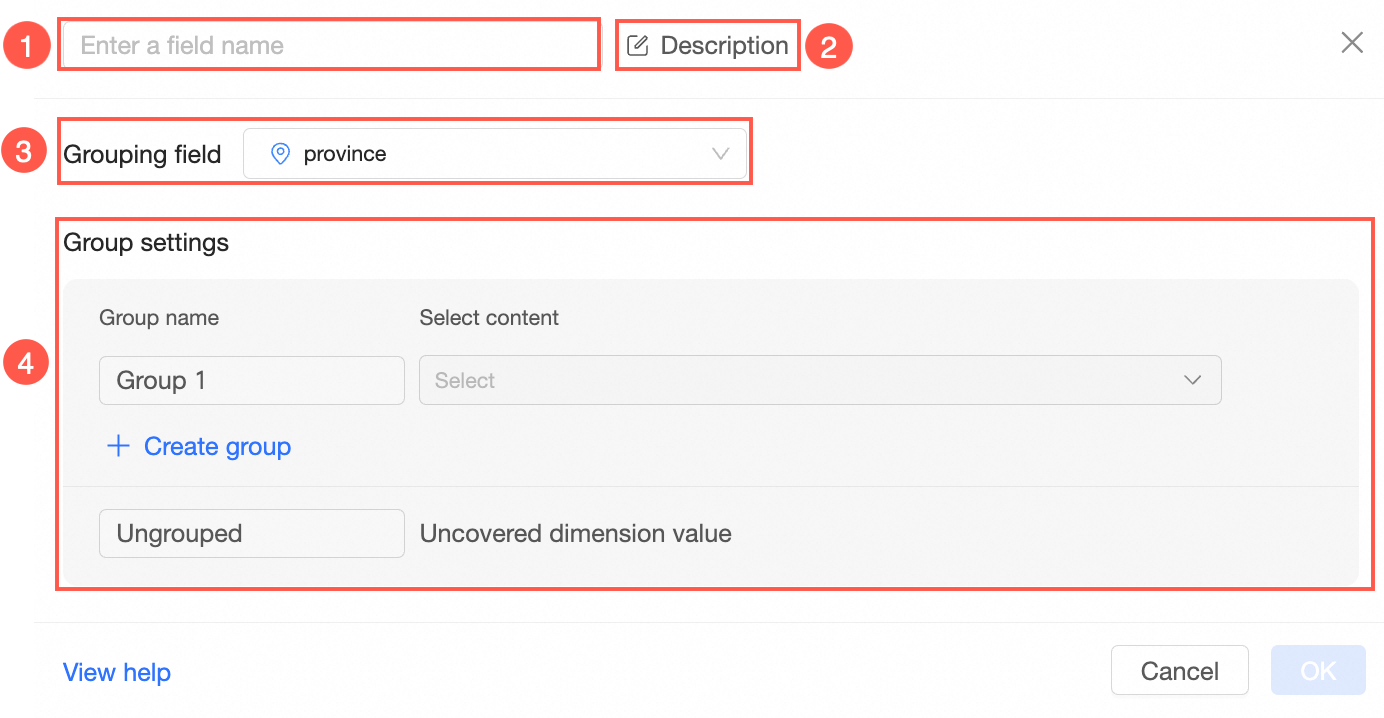
In the New grouping field dialog box, configure the parameters and click Save.
For configuration examples, see Examples.
 Note
NoteA grouping field cannot be referenced by a calculated field.
From the field list
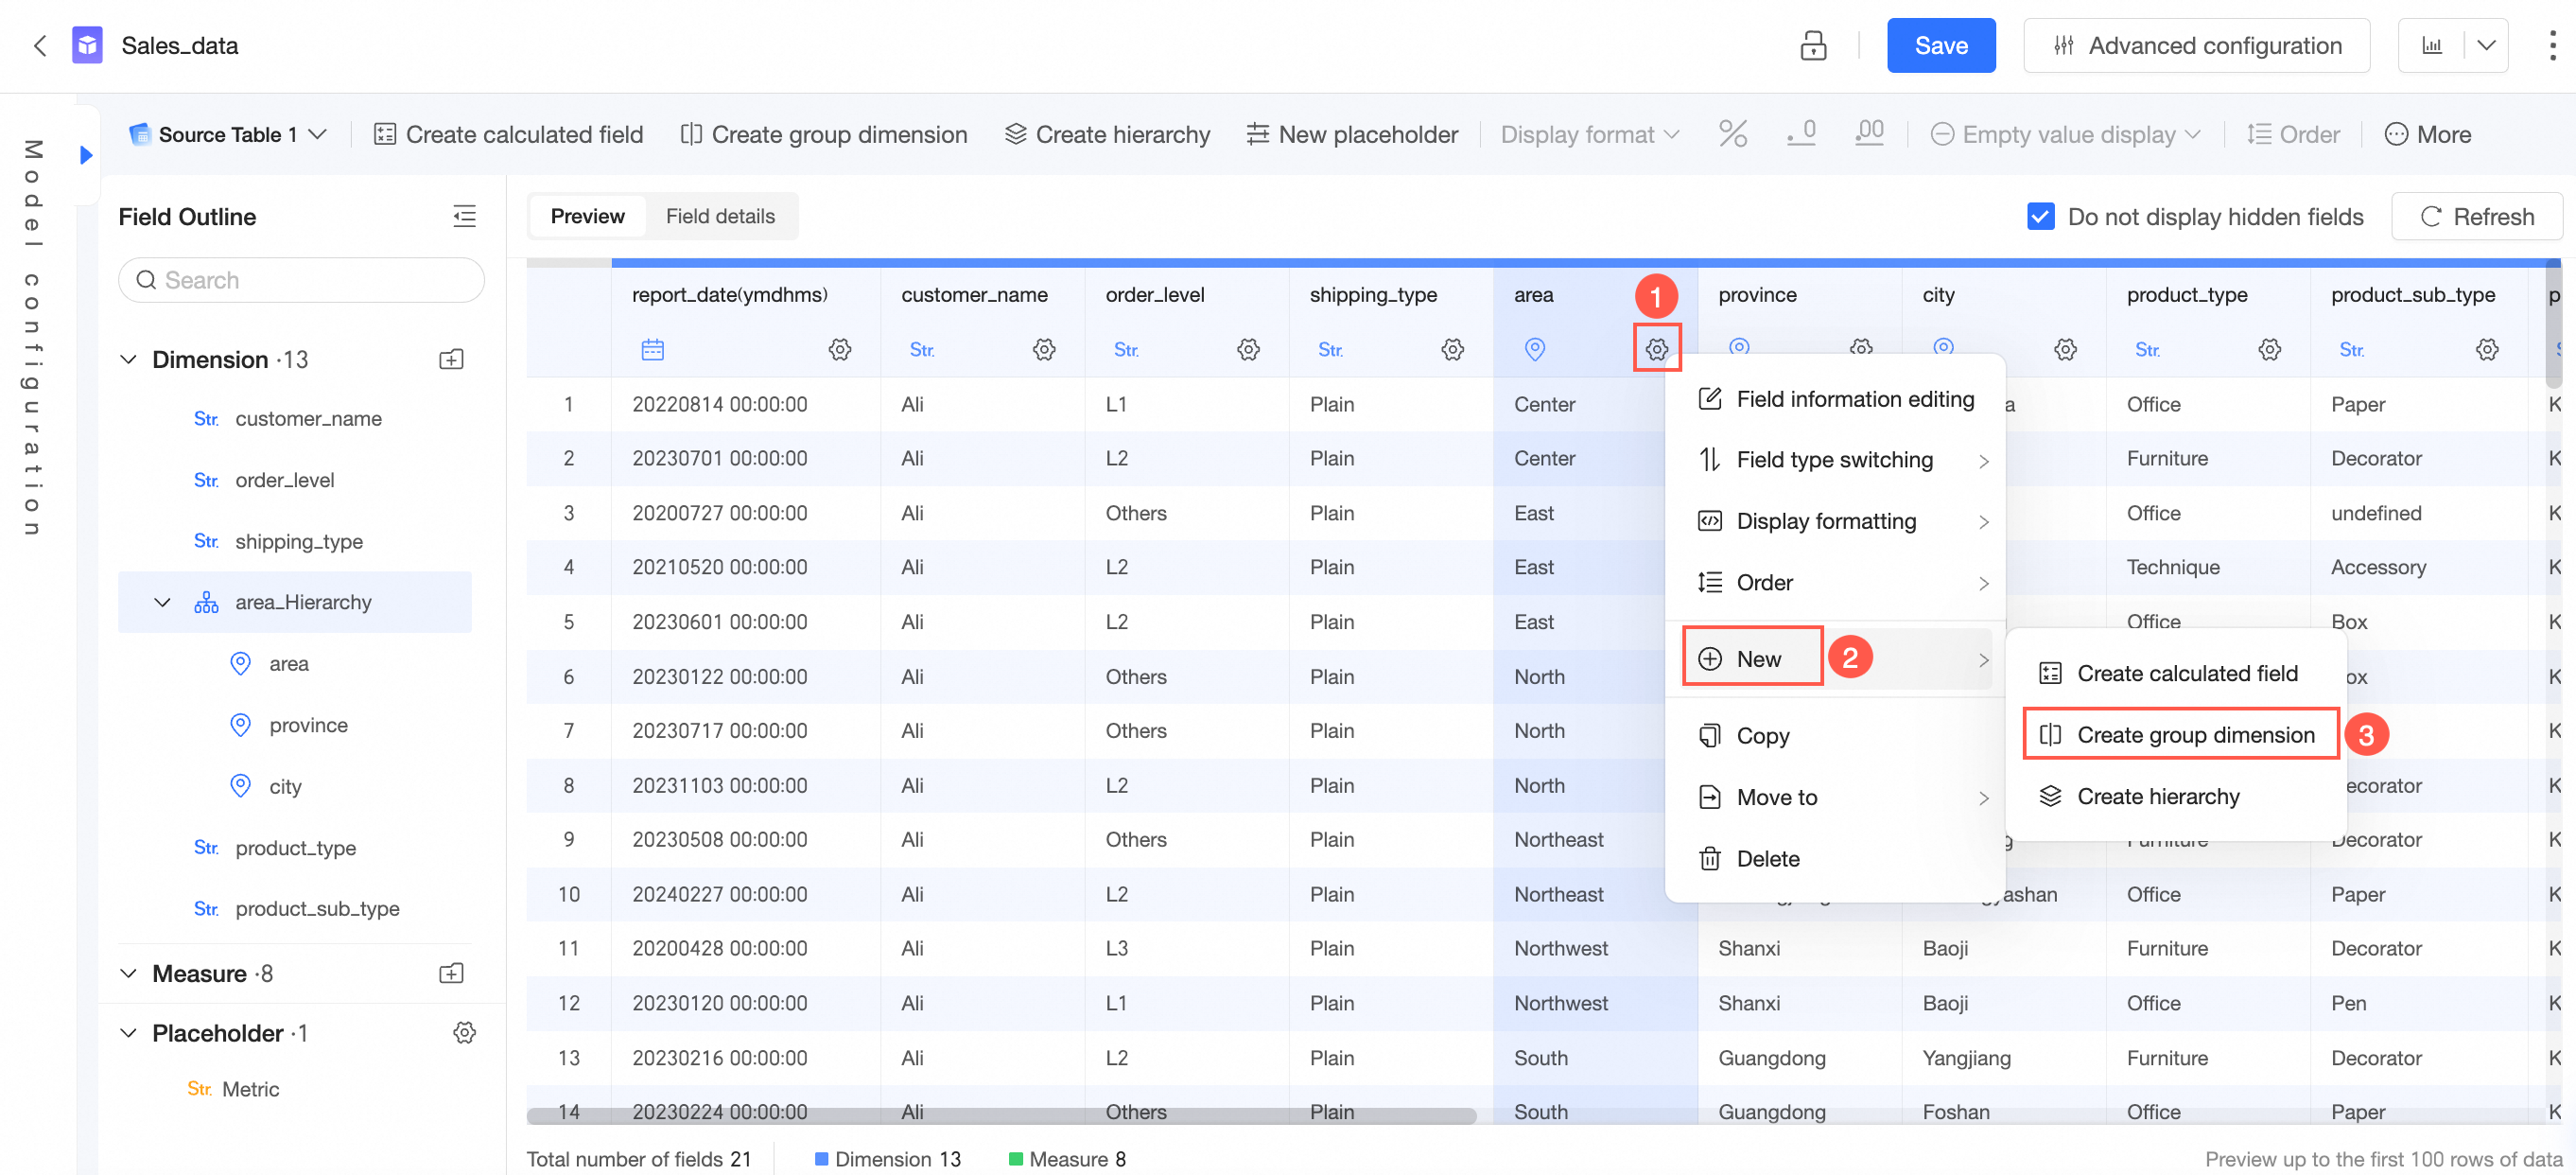
In the Field outline or Data preview, hover over the target field, click the  icon, and select New > New grouping field.
Configure the parameters in the New grouping field dialog box and click Save.
Examples
-
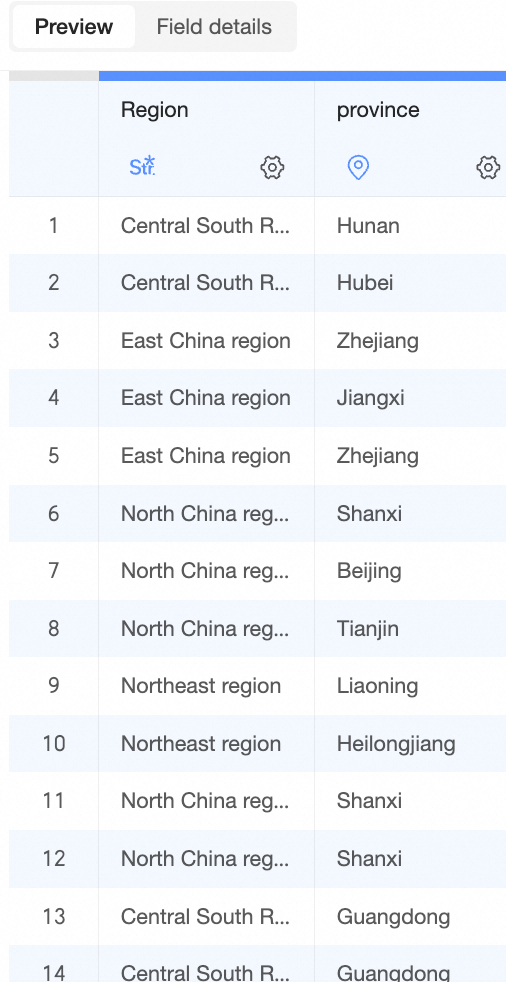
Geographic grouping — group the Province field into six regions.
Northeast China:
Heilongjiang,Liaoning,JilinNorth China:
Beijing,Tianjin,Hebei,Shanxi,Inner MongoliaEast China:
Shanghai,Jiangsu,Zhejiang,Anhui,Fujian,Jiangxi,ShandongCentral and South China:
Henan,Hubei,Hunan,Guangdong,Guangxi,HainanSouthwest China:
Chongqing,Sichuan,Guizhou,Yunnan,TibetNorthwest China:
Shaanxi,Gansu,Qinghai,Ningxia,Xinjiang
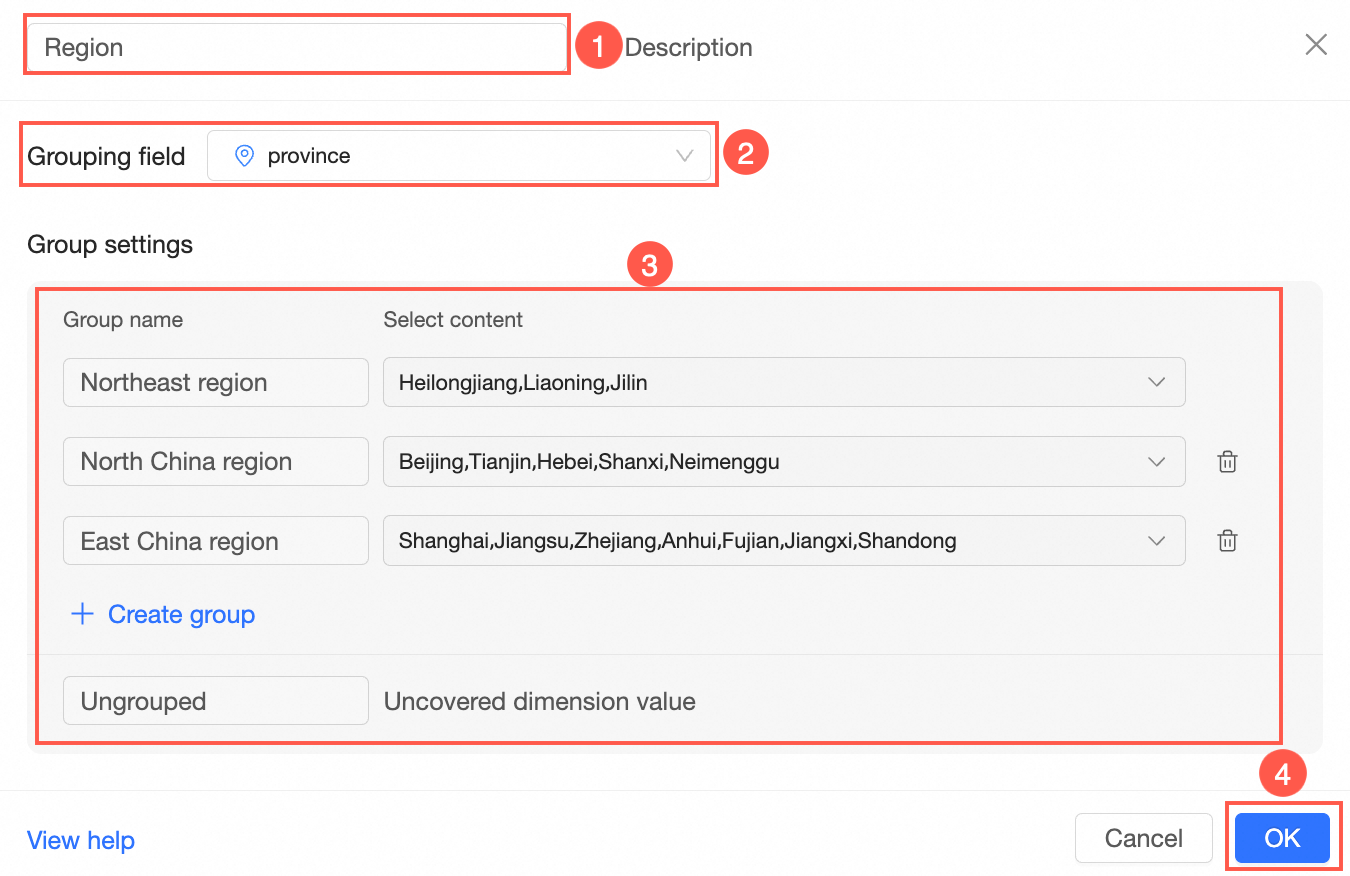
After you save, a new dimension field is added to the dataset and automatically populated with the corresponding group name.

-
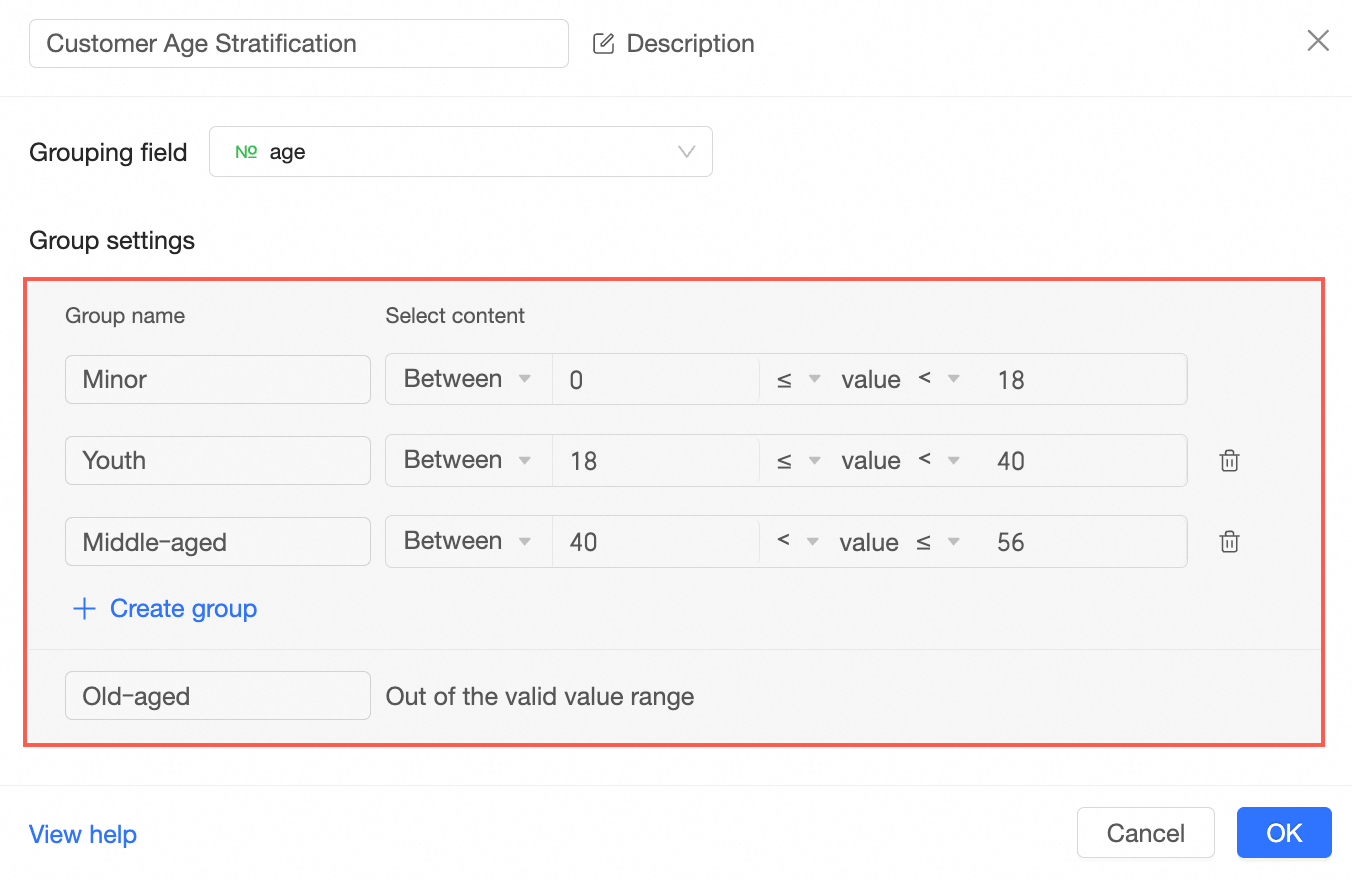
Age grouping — group the Customer Age field into four ranges.
Minor: 0 <= age < 18
Youth: 18 <= age < 40
Middle-aged: 40 <= age < 56
Senior: age >= 56
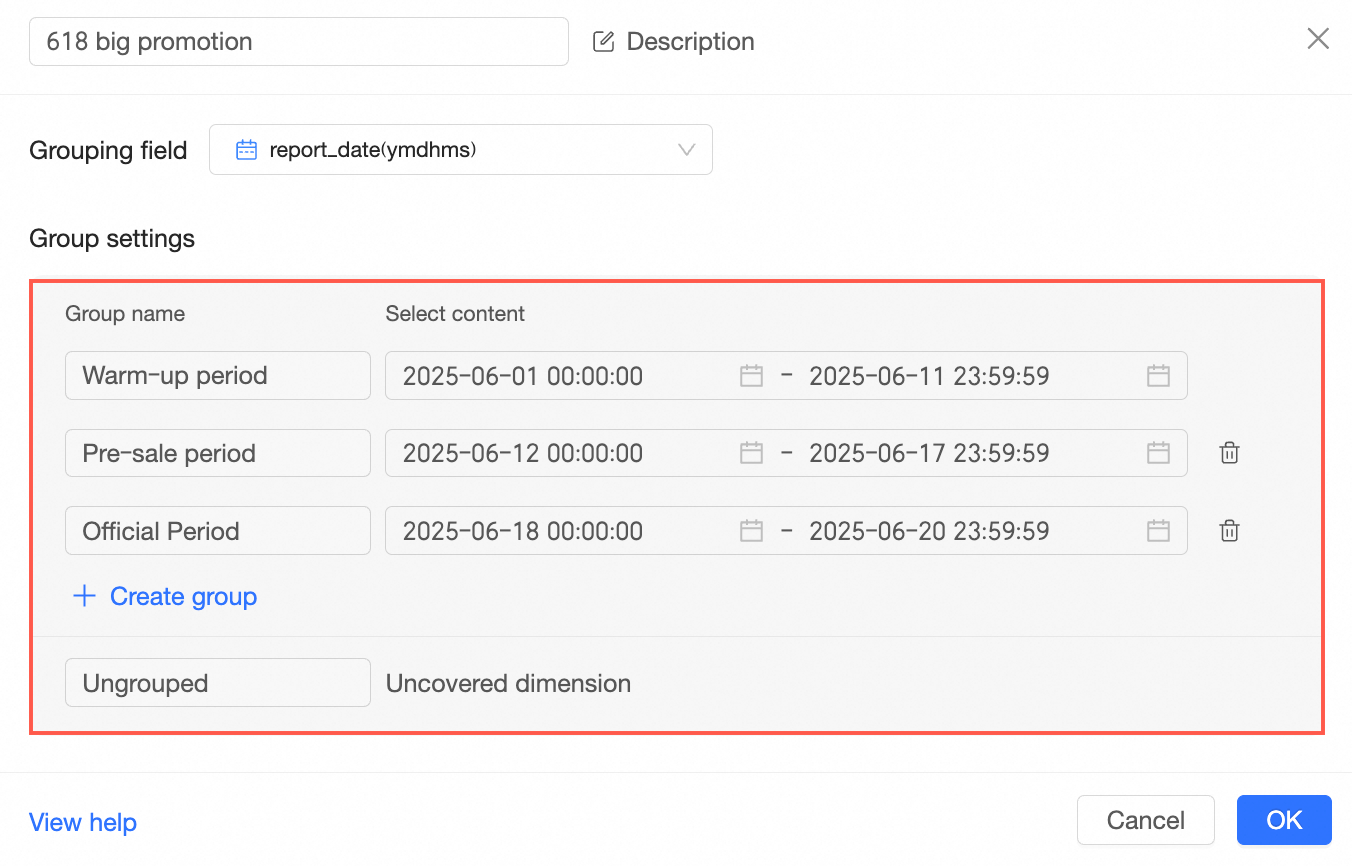
Date grouping — group a date field to define campaign phases.