Self-managed Kylin data source
This topic describes how to add a self-managed Kylin database as a data source in Quick BI. You must complete this step before you can use Quick BI to create reports or analyze your Kylin data.
Prerequisites
Ensure that your network connection is properly configured:
If you connect to your Kylin database over the public network, you must add the IP addresses of Quick BI to the database's allowlist. For more information, see Use security groups.
If you connect to your Kylin database over an internal network, establish a network connection between the data source and Quick BI by using one of the following methods:
If your Kylin database is deployed on an Alibaba Cloud ECS instance, you can connect through an Alibaba Cloud VPC.
You can also set up a bastion host and use an SSH tunnel to access the database.
You have the username and password for your self-managed Kylin database.
Background information
Apache Kylin is an open-source, distributed, analytical data warehouse that provides a SQL query interface and online analytical processing (OLAP) capabilities on top of Hadoop and Spark for large-scale data queries.
Procedure
Log on to the Quick BI console.
Add the data source:
Navigate to the data source creation page. For more information, see Create a data source.
On the Self-managed data sources tab, click Kylin.
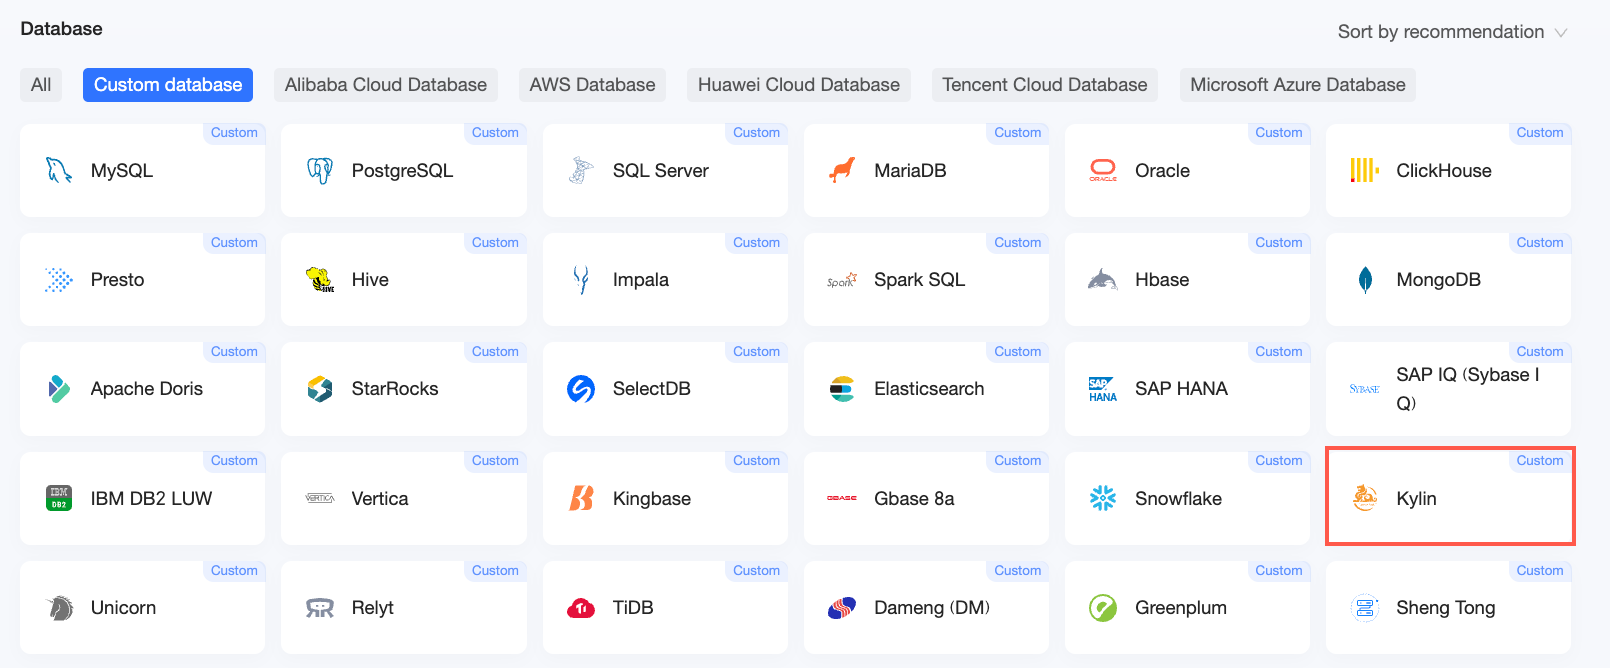
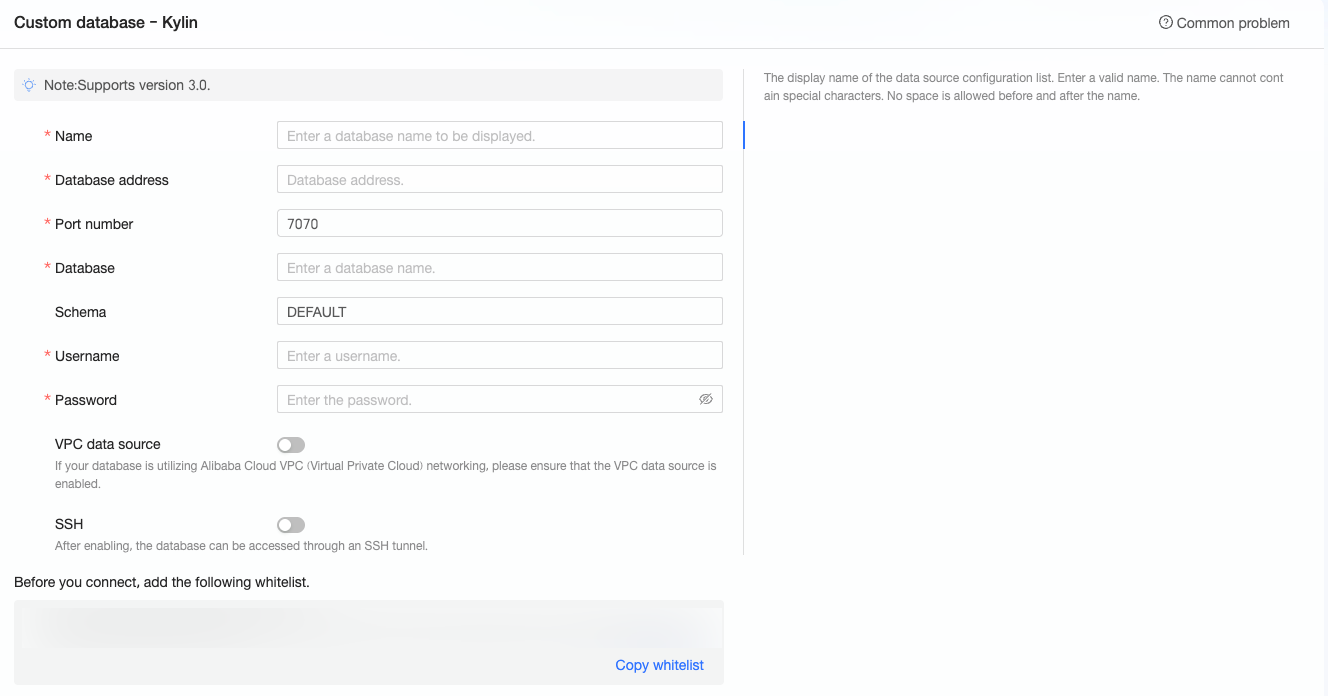
In the Configure Connection dialog box, set the following parameters.
Parameter
Description
Display name
A descriptive name for the data source. It cannot contain special characters or leading or trailing spaces.
Database address
The IP address or domain name of the Kylin database host.
Port
The port number of the Kylin database.
Database
The name of the database you specified during Kylin deployment.
Username
The username for connecting to the Kylin database. Ensure that this user has CREATE, INSERT, UPDATE, and DELETE permissions on the tables in the database.
Password
The password that corresponds to the username.
VPC data source
If the Kylin database is deployed on Alibaba Cloud ECS and its network type is Alibaba Cloud VPC, select VPC Data Source and configure the following parameters:
AccessKey ID: The AccessKey ID of the Alibaba Cloud account that owns the ECS instance.
For more information, see Create an AccessKey pair.
NoteThis AccessKey ID must have read permissions on the ECS instance. If it also has write permissions on the instance's security group, Quick BI automatically adds its IP addresses to the allowlist. Otherwise, you must add them manually. For more information, see Create a custom policy.
AccessKey Secret: The AccessKey Secret for the specified AccessKey ID.
For more information, see Create an AccessKey pair.
Instance ID: The ID of the ECS instance where the Kylin database is deployed. You can obtain the instance ID from the Instances page of the ECS console.
For more information, see View instance information.
Region: The region where the ECS instance is located.
For more information, see View instance information.
SSH
If you select SSH, you need to configure the following parameters:
You can set up a bastion host and use an SSH tunnel to access the database. Obtain the bastion host information from your operations team or system administrator.
SSH host: The IP address of the bastion host.
SSH username: The username for logging on to the bastion host.
SSH password: The password for the specified SSH username.
SSH port: The port number of the bastion host. The default value is 22.
For more information, see Connect to a Linux instance by using an SSH client.
Click Test Connection to verify the connection.

After the connection test succeeds, click OK to add the data source.
Next steps
After you create the data source, you can create datasets and analyze data.
Add tables from your Kylin database or write custom SQL queries in Quick BI to create a dataset. For more information, see Create and manage a dataset.
Add charts to a dashboard to analyze your data. For more information, see Create a dashboard and Chart overview.
Drill down into your data for in-depth analysis. For more information, see Step 3: Configure and view drill-down data.