Self-managed PostgreSQL data source
This topic describes how to create a self-managed PostgreSQL data source.
Prerequisites
Ensure network connectivity:
If you connect Quick BI to your PostgreSQL database over the public network, add Quick BI's IP addresses to your database whitelist. For more information, see Use security groups.
If you connect Quick BI to your PostgreSQL database over an internal network, use one of the following methods to establish network connectivity between your data source and Quick BI:
If your PostgreSQL database runs on an Alibaba Cloud ECS instance, connect using Alibaba Cloud VPC.
Set up a jump server and access the database through an SSH tunnel.
You have a self-managed PostgreSQL database.
You have the username and password for your self-managed PostgreSQL database.
You have obtained the AccessKey ID and AccessKey secret for authentication.
Limits
PostgreSQL version 8.2 or later is supported.
Procedure
Log on to the Quick BI console or the .
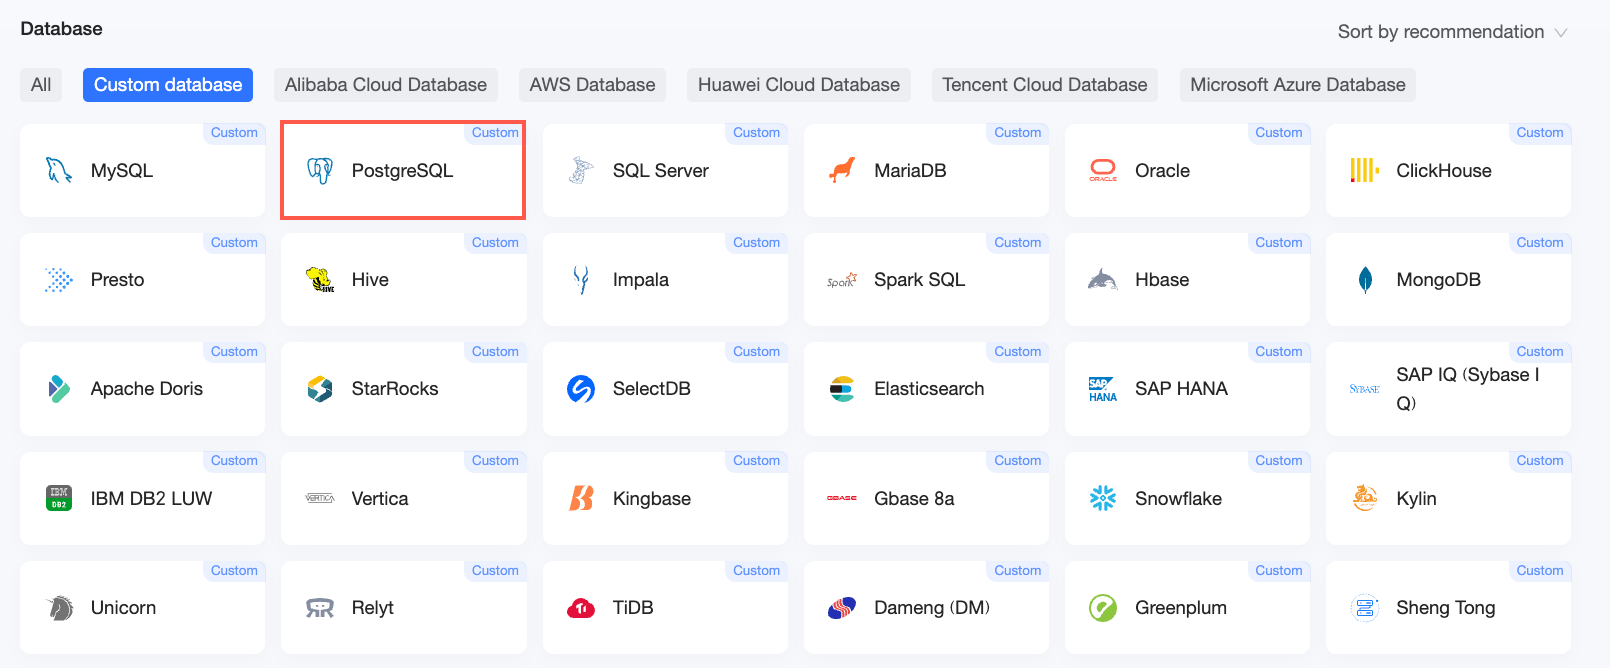
Add a data source as shown in the following figure:
Go to the data source creation page from the Create data source entry point.
On the Self-managed database tab, select PostgreSQL as the data source type.
In the Configure connection dialog box, complete the following settings.
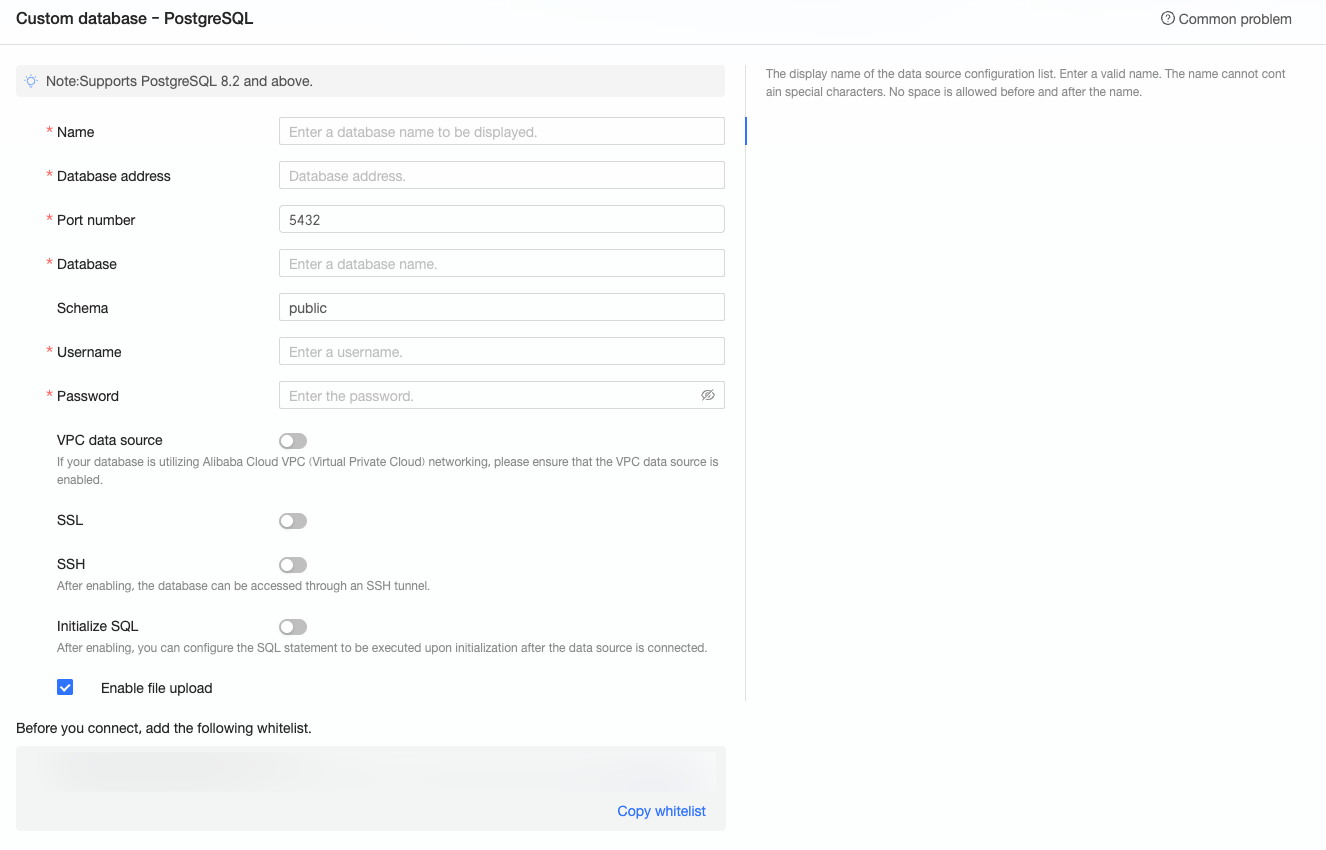
Name
Description
Display name
The display name for the data source in the data source list.
Enter a valid name without special characters. Do not include leading or trailing spaces.
Database address
The IP address or domain name where your PostgreSQL database is deployed.
Port
The port number of the database.
Database
The name of the database to connect to.
Schema
The name of the schema to connect to. The default value is public.
Username
The username for the database.
Password
The password for the database.
VPC data source
Select whether your data source resides in a VPC based on your business scenario. If you select VPC data source, configure the following parameters:
Purchaser AccessKey ID: The AccessKey ID of the account that purchased the instance.
For more information, see Create an AccessKey.
NoteMake sure this AccessKey ID has read permissions on the destination instance. If it also has write permissions, the system automatically adds the required IP addresses to the whitelist. Otherwise, you must add them manually. For more information, see Create a custom policy.
Purchaser AccessKey secret: The AccessKey secret of the account that purchased the instance.
For more information, see Create an AccessKey.
Instance ID: The instance ID of the ECS instance. Log on to the ECS console and find the instance ID on the Instances tab.
For more information, see View instance information.
Region: The region where the ECS instance resides. In this example, the region is China (Qingdao).
For more information, see View instance information.
SSL
Select whether to enable SSL based on your business scenario. If you select SSL, MaxCompute Lightning interactive search is supported. For more information, see Overview.
SSH
Select whether to use SSH to connect to your data source based on your business scenario. If you select SSH, configure the following parameters:
SSH Host: The hostname or IP address.
SSH username: The SSH username for the database.
SSH password: The password for the SSH username.
SSH port: The port for the database. The default value is 22.
NoteSSH tunnel access to self-managed data sources is supported only in Professional Edition workspaces.
Initialization SQL
The SQL statement executed after each connection to initialize the data source. Only SET statements are allowed. Separate multiple statements with semicolons.
Enable file upload
After enabling this option, file upload is supported.
Click Test connection to verify connectivity to the data source.

After the test succeeds, click OK to complete adding the data source.
What to do next
After creating a data source, you can create datasets and analyze data.
Add tables from your PostgreSQL database or custom SQL statements to Quick BI. For more information, see Create a dataset.
Add visual charts and analyze data. For more information, see Create a dashboard and Overview of visual charts.
Drill down for in-depth data analysis. For more information, see Step 3: Configure and display drilling.