The toolbars on the dataset edit page provide a wide range of functions for data management and preparation. You can save your dataset, configure advanced settings, switch data sources, and restore previous versions. You can also perform data preparation tasks, such as creating calculated fields, grouped dimensions, hierarchies, and placeholders. Other data processing tools allow you to calculate time differences, replace missing values, add aliases for dimension values, and split or merge fields. Additionally, the toolbars provide options for formatting fields, applying filters, sorting data, managing placeholders, and optimizing SQL code. This topic describes these toolbar functions.
Prerequisites
You have created a dataset. For more information, see Create a dataset.
Top toolbar
Log on to the Quick BI console.
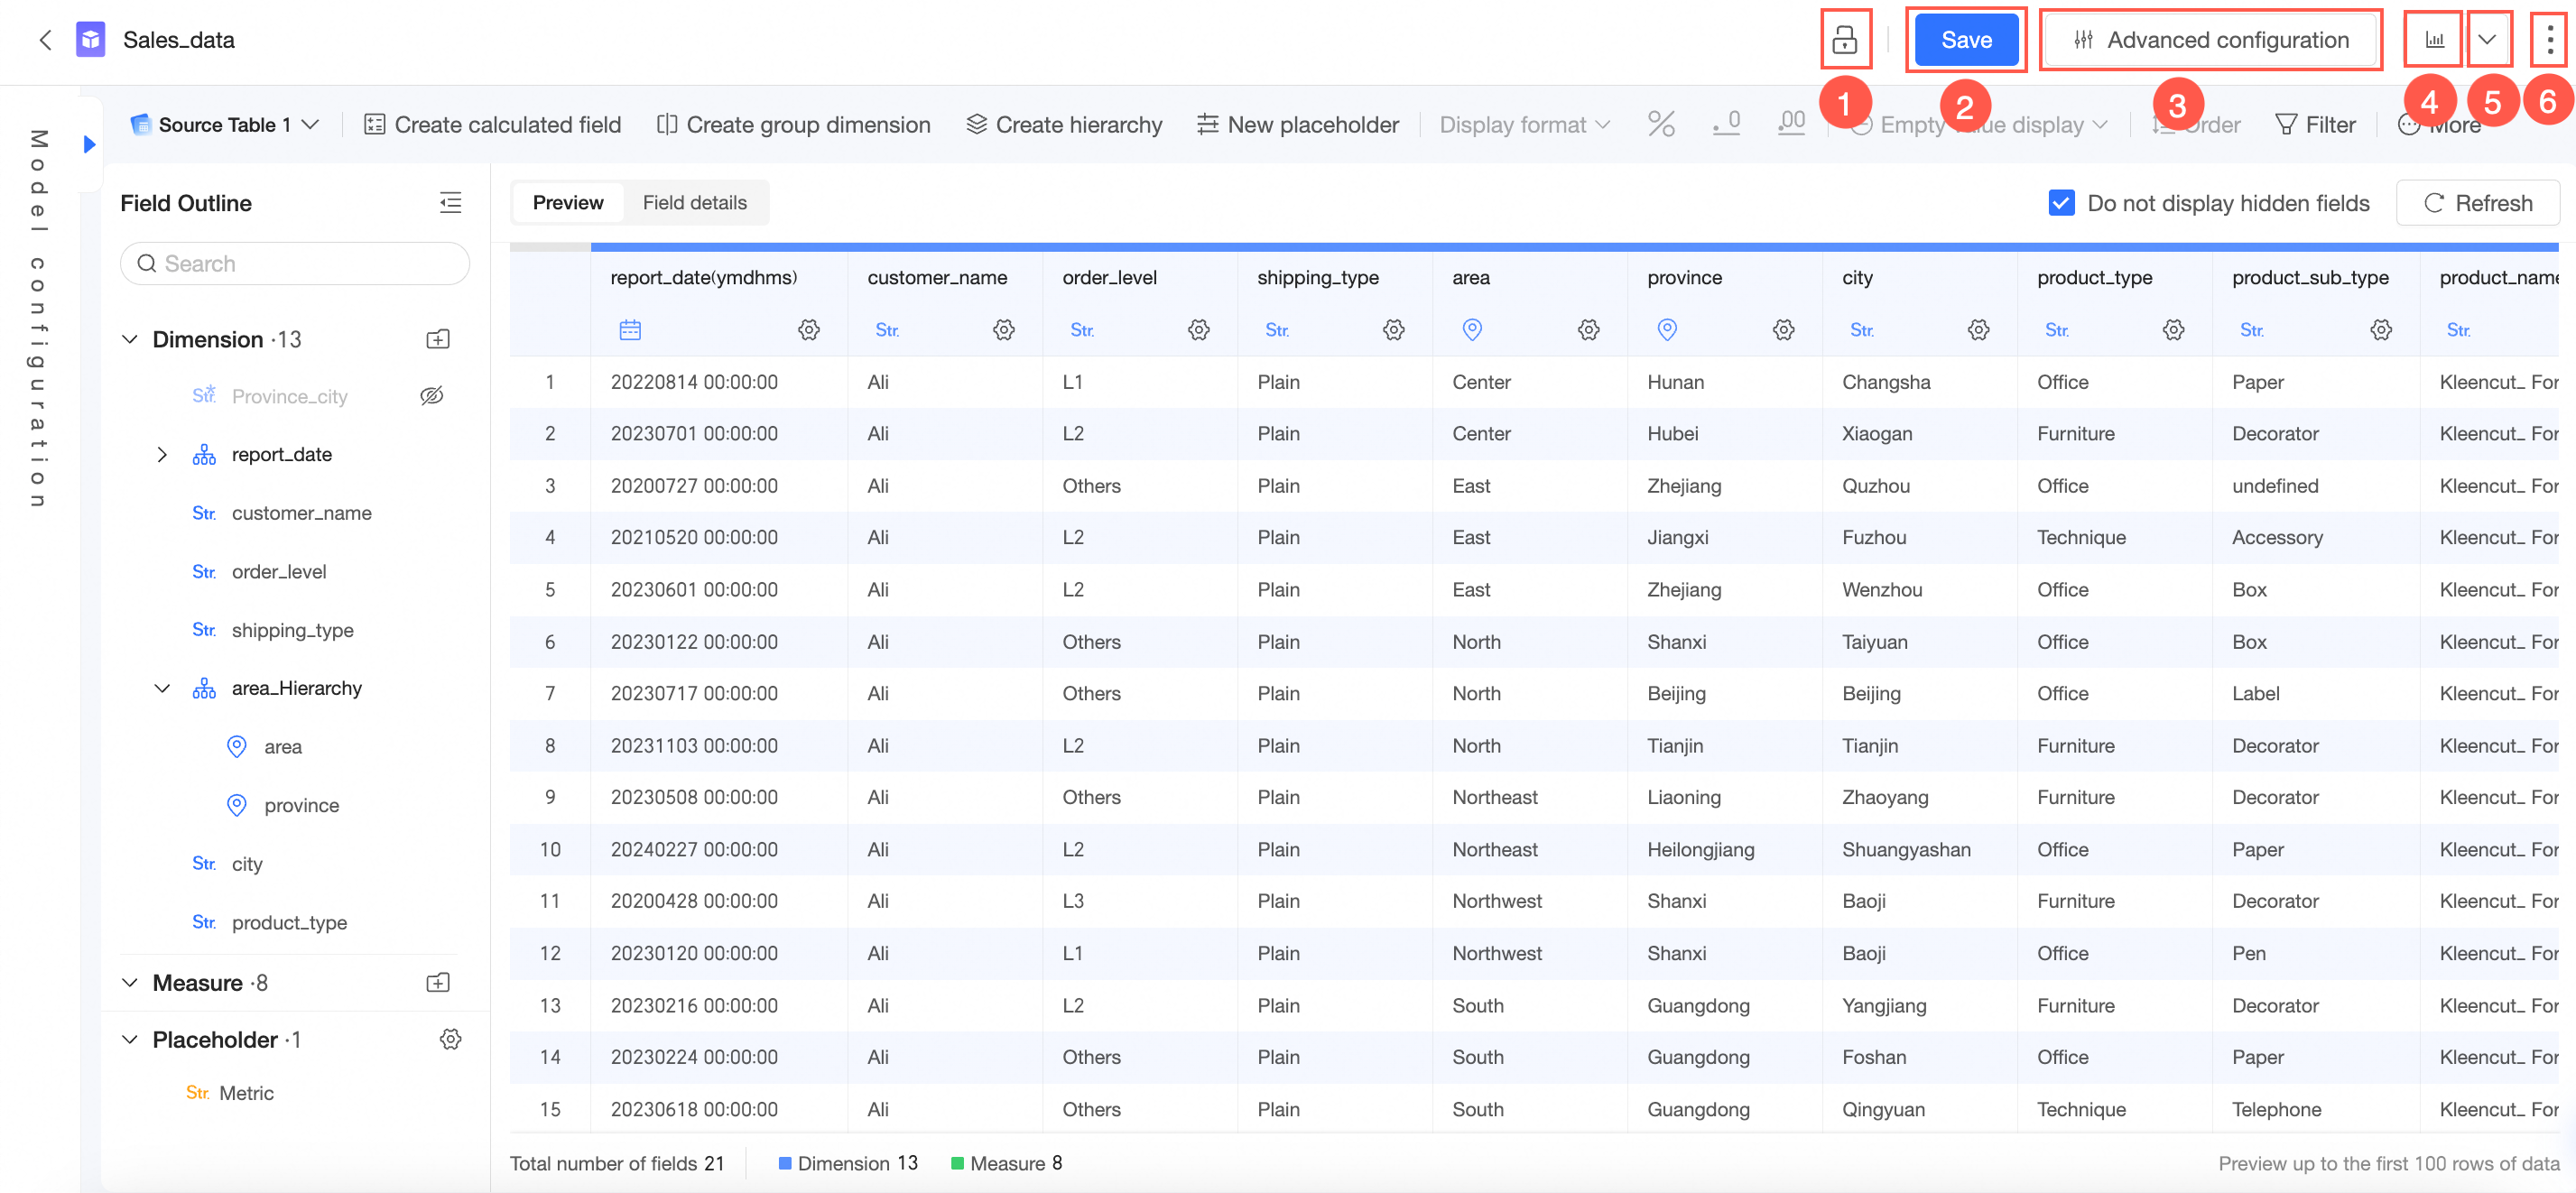
On the Quick BI homepage, follow the steps in the figure to navigate to the dataset edit page.
The top toolbar on the dataset edit page provides the following buttons.
You can edit the dataset only when the
 (unlocked) icon is displayed.
If the
 (locked) icon is displayed, you must click it to unlock the dataset before you can edit it.
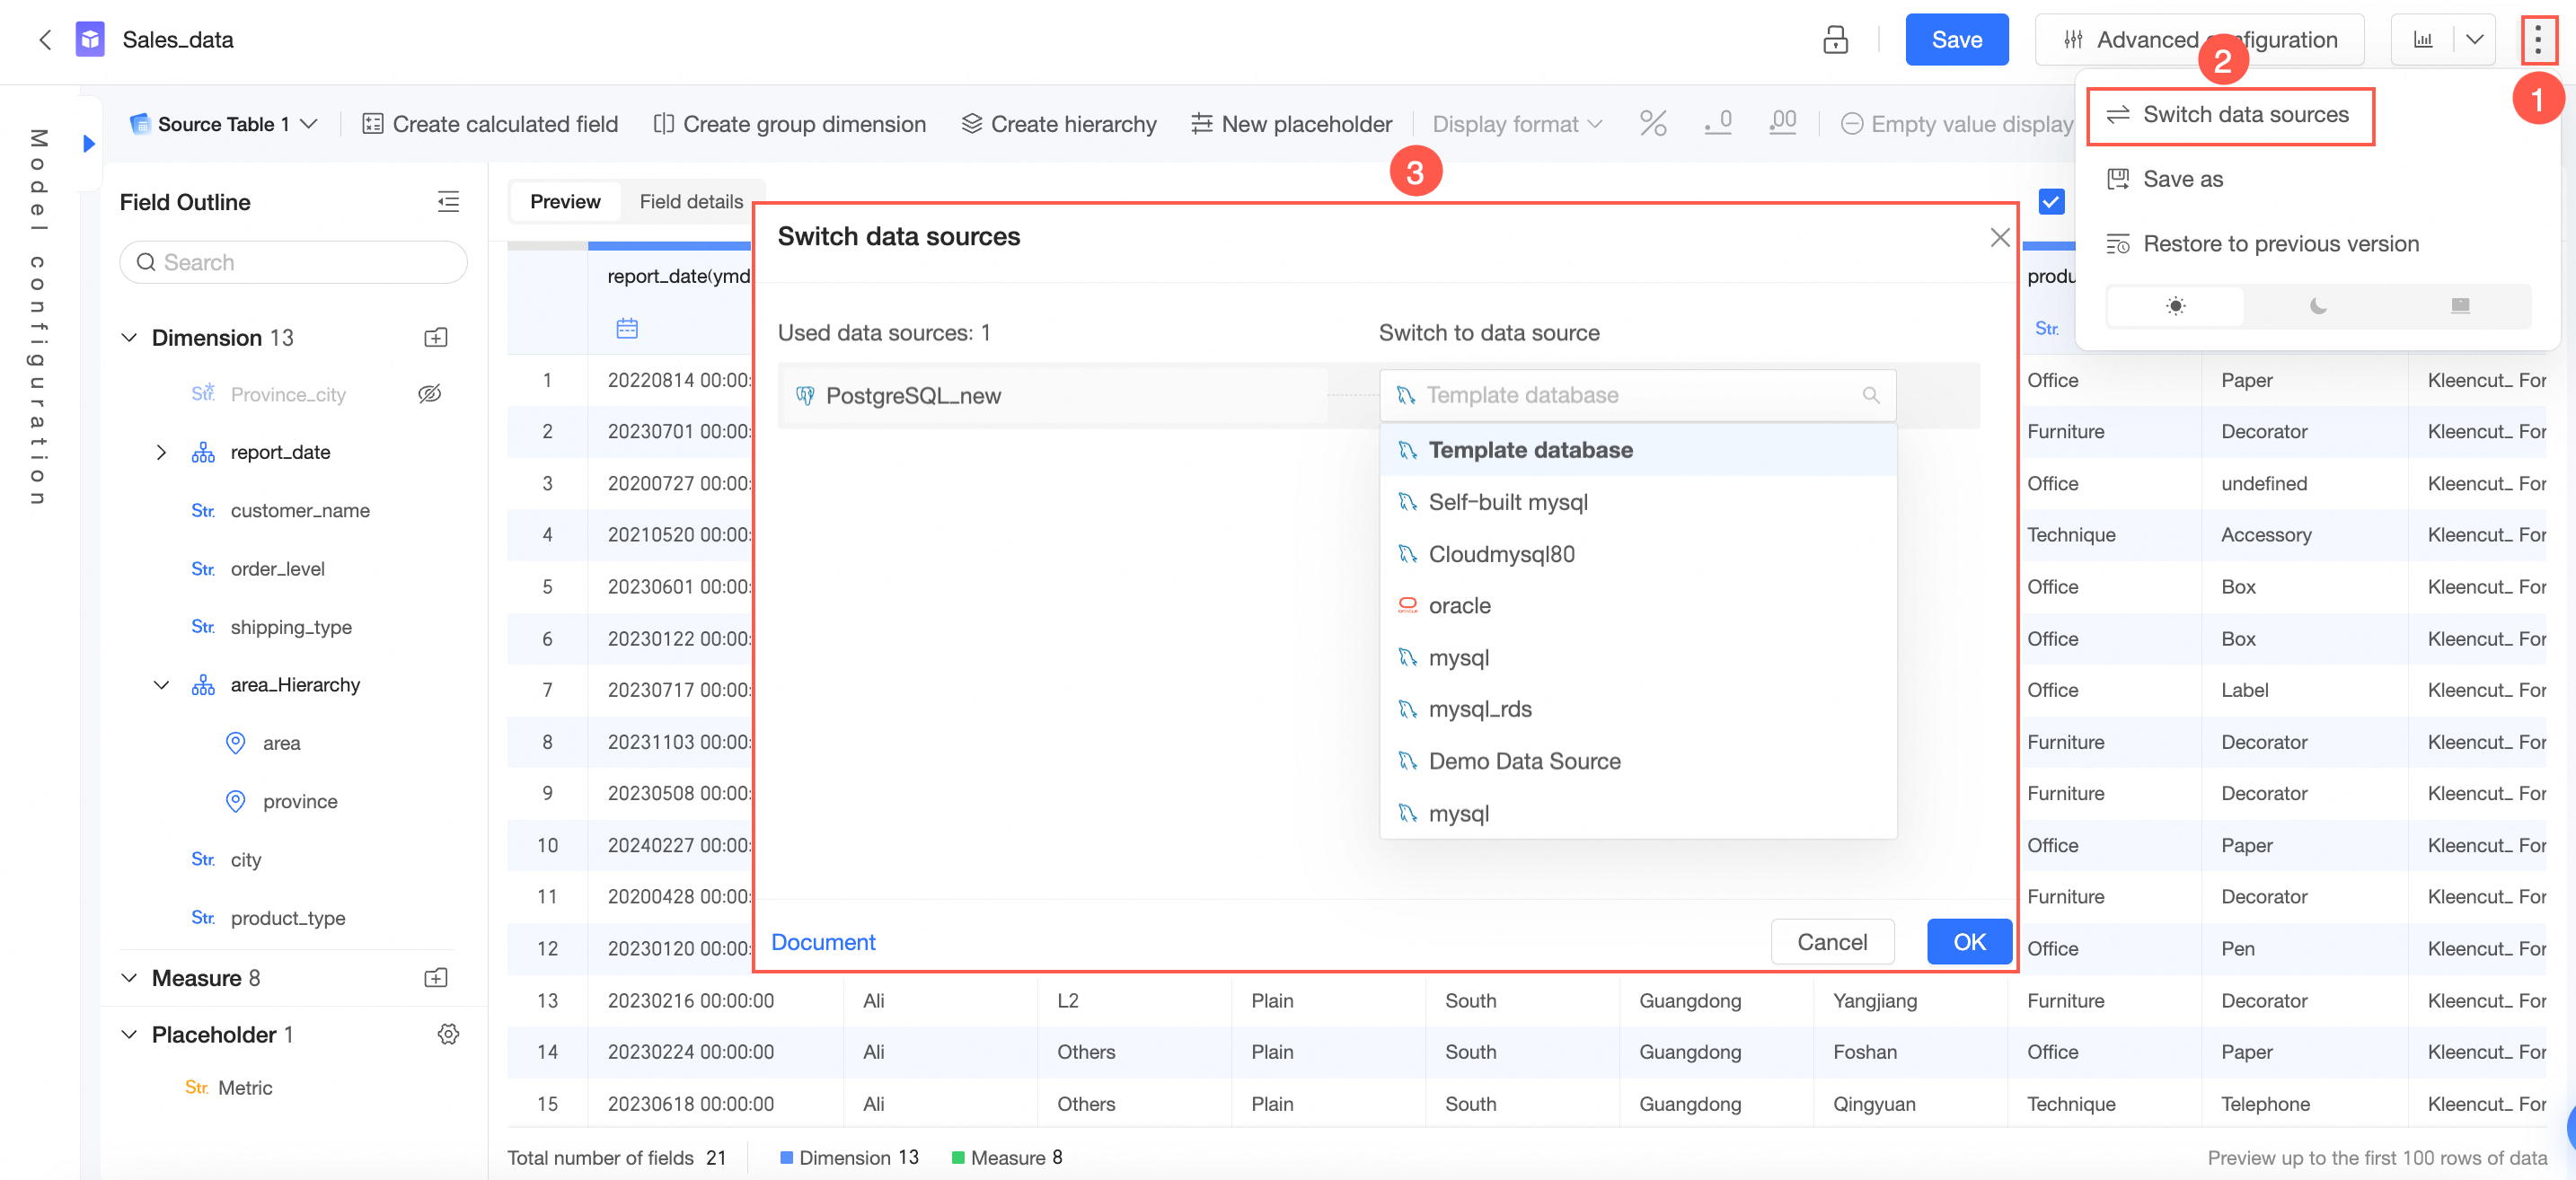
Switch data source
Changes the data source for the dataset.
ImportantSwitching the data source discards all unsaved changes, so save the dataset first. After switching, verify your calculated fields, as SQL syntax can differ between data sources.

Save as
Saves the dataset with a new name or to a new location.
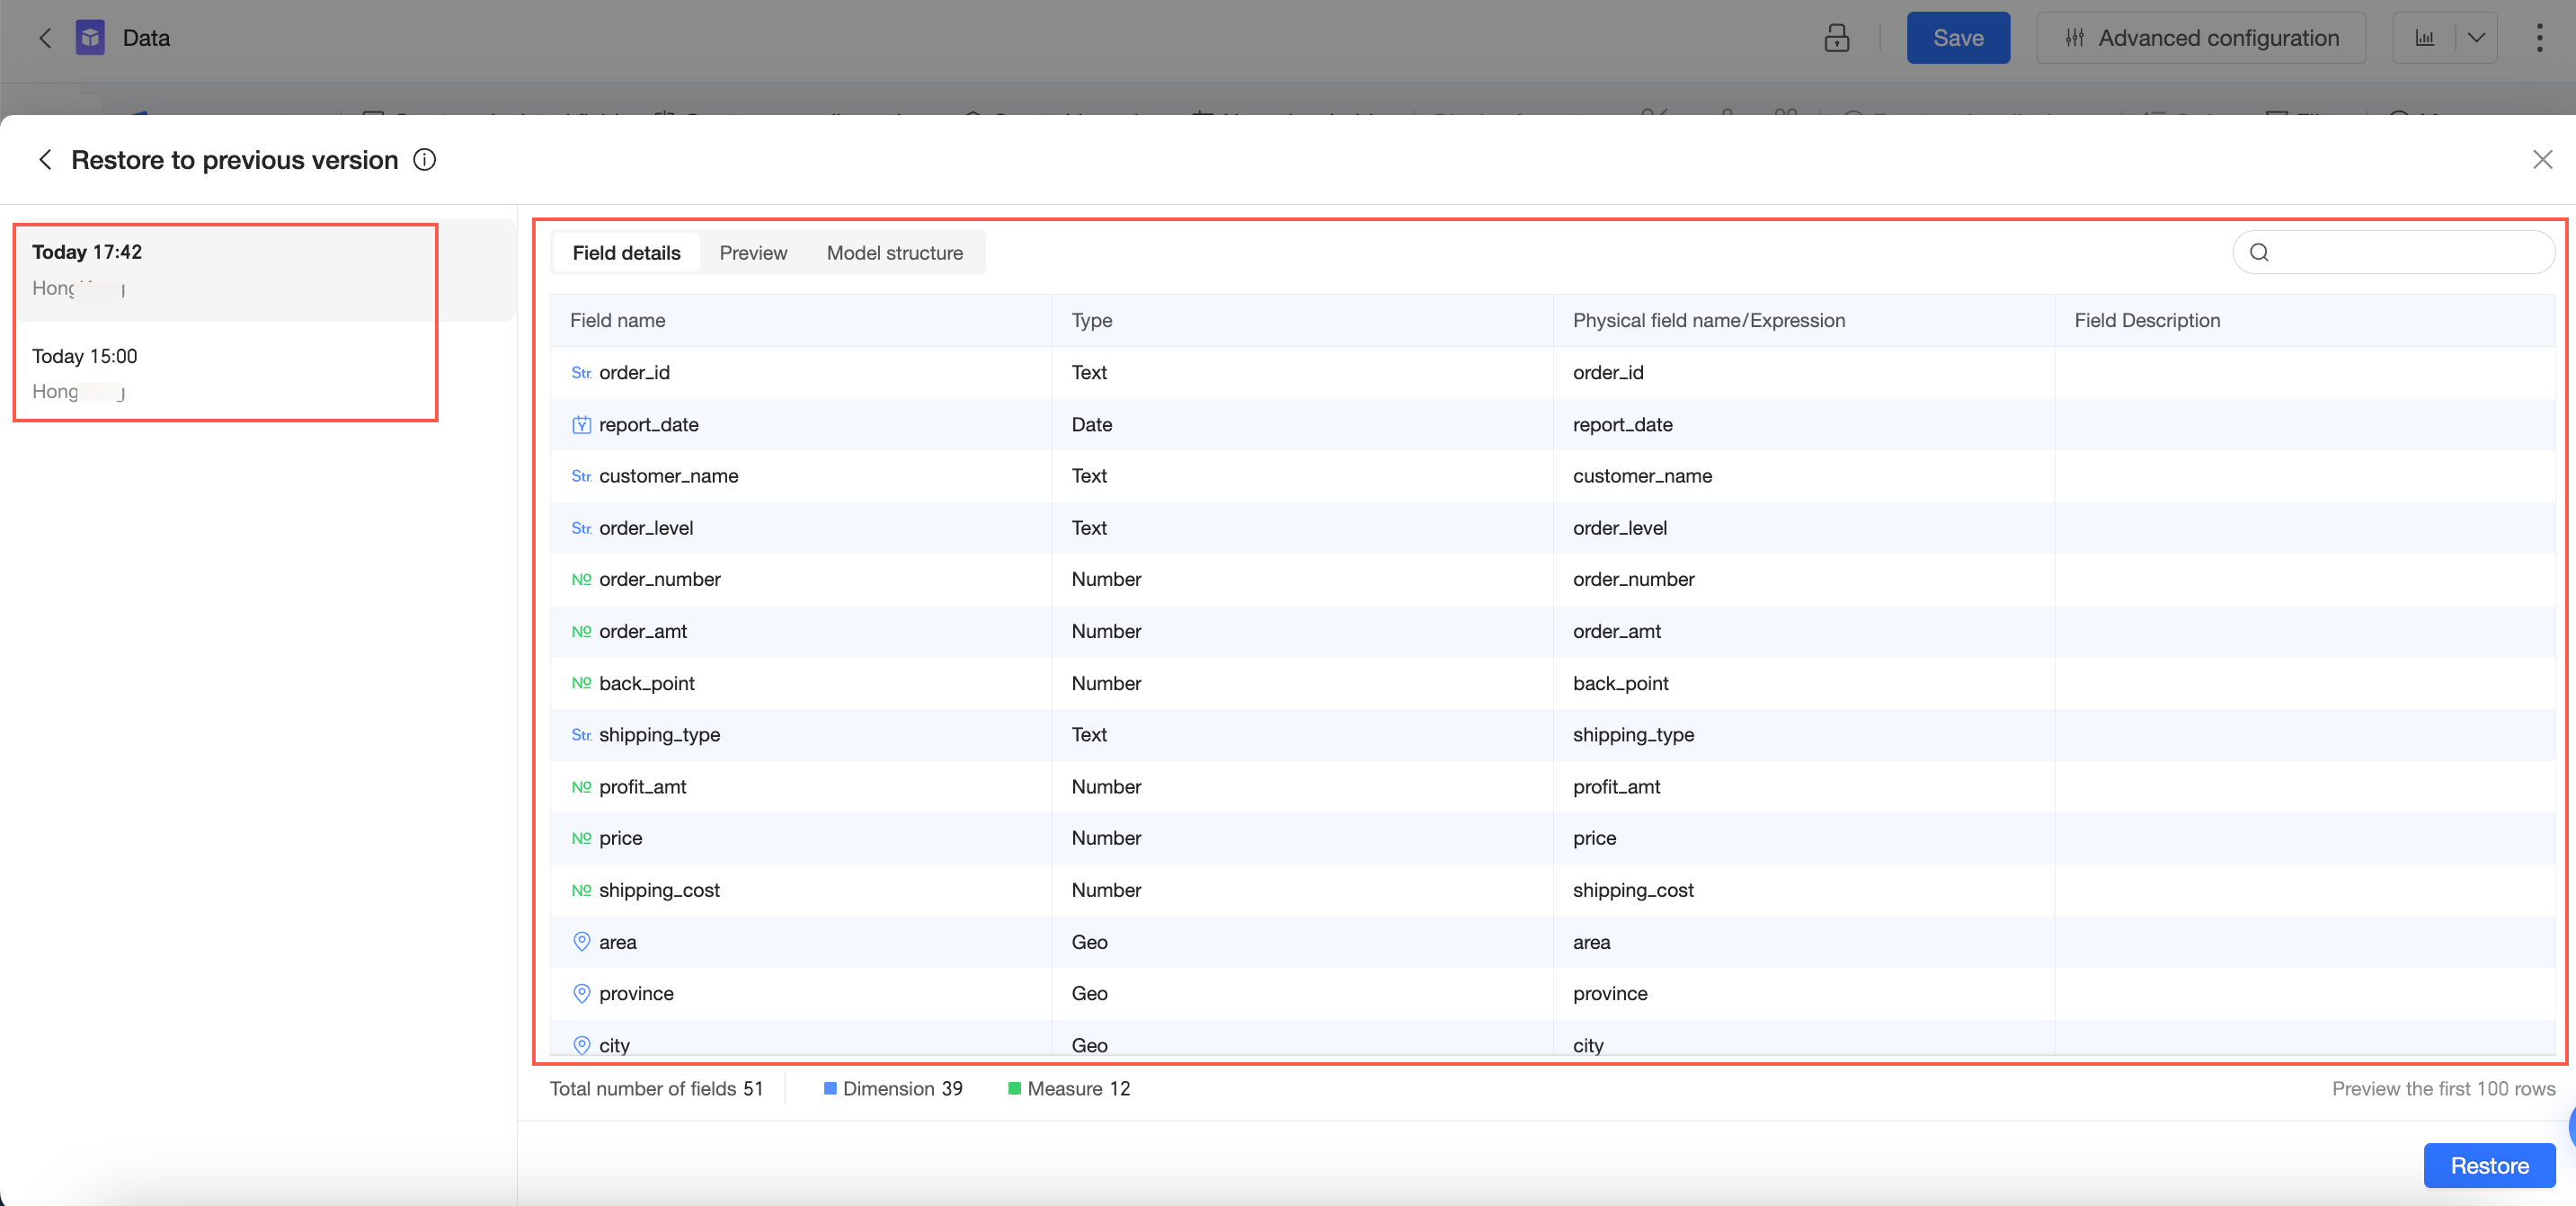
Restore historical version
The Restore historical version dialog box lists saved versions that meet the retention policy, sorted from newest to oldest. You can click a version to view its details, find the desired version, and restore it.
NoteA maximum of 15 versions from the last 3 months are retained.
Restoring an older version can cause errors in dependent charts if fields were deleted or modified. Proceed with caution.
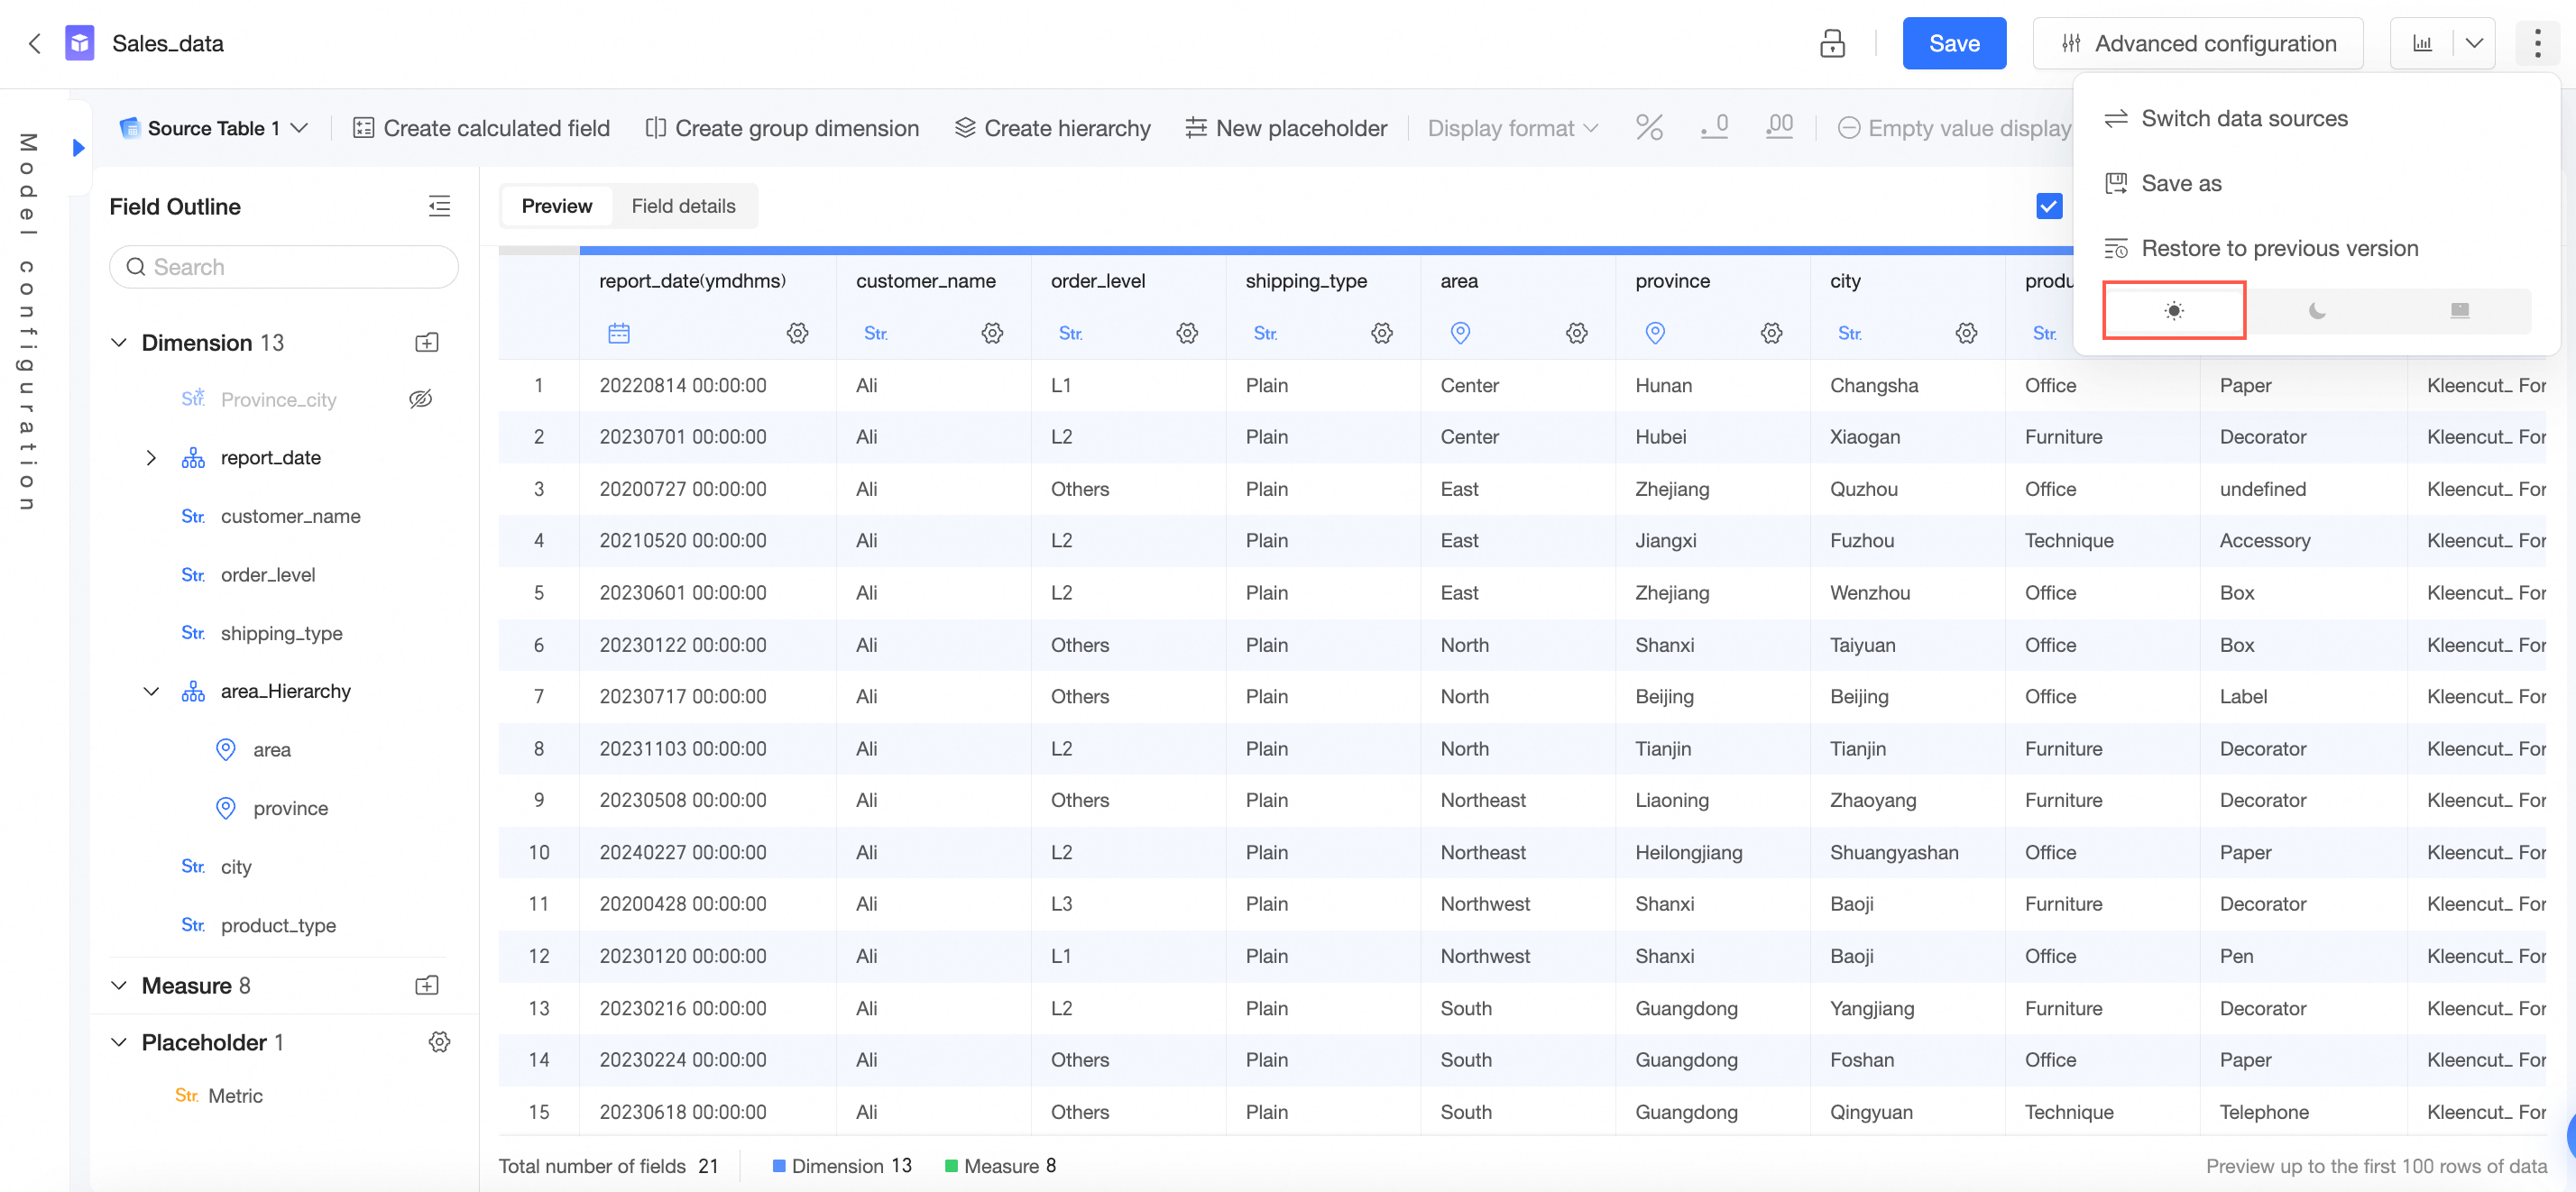
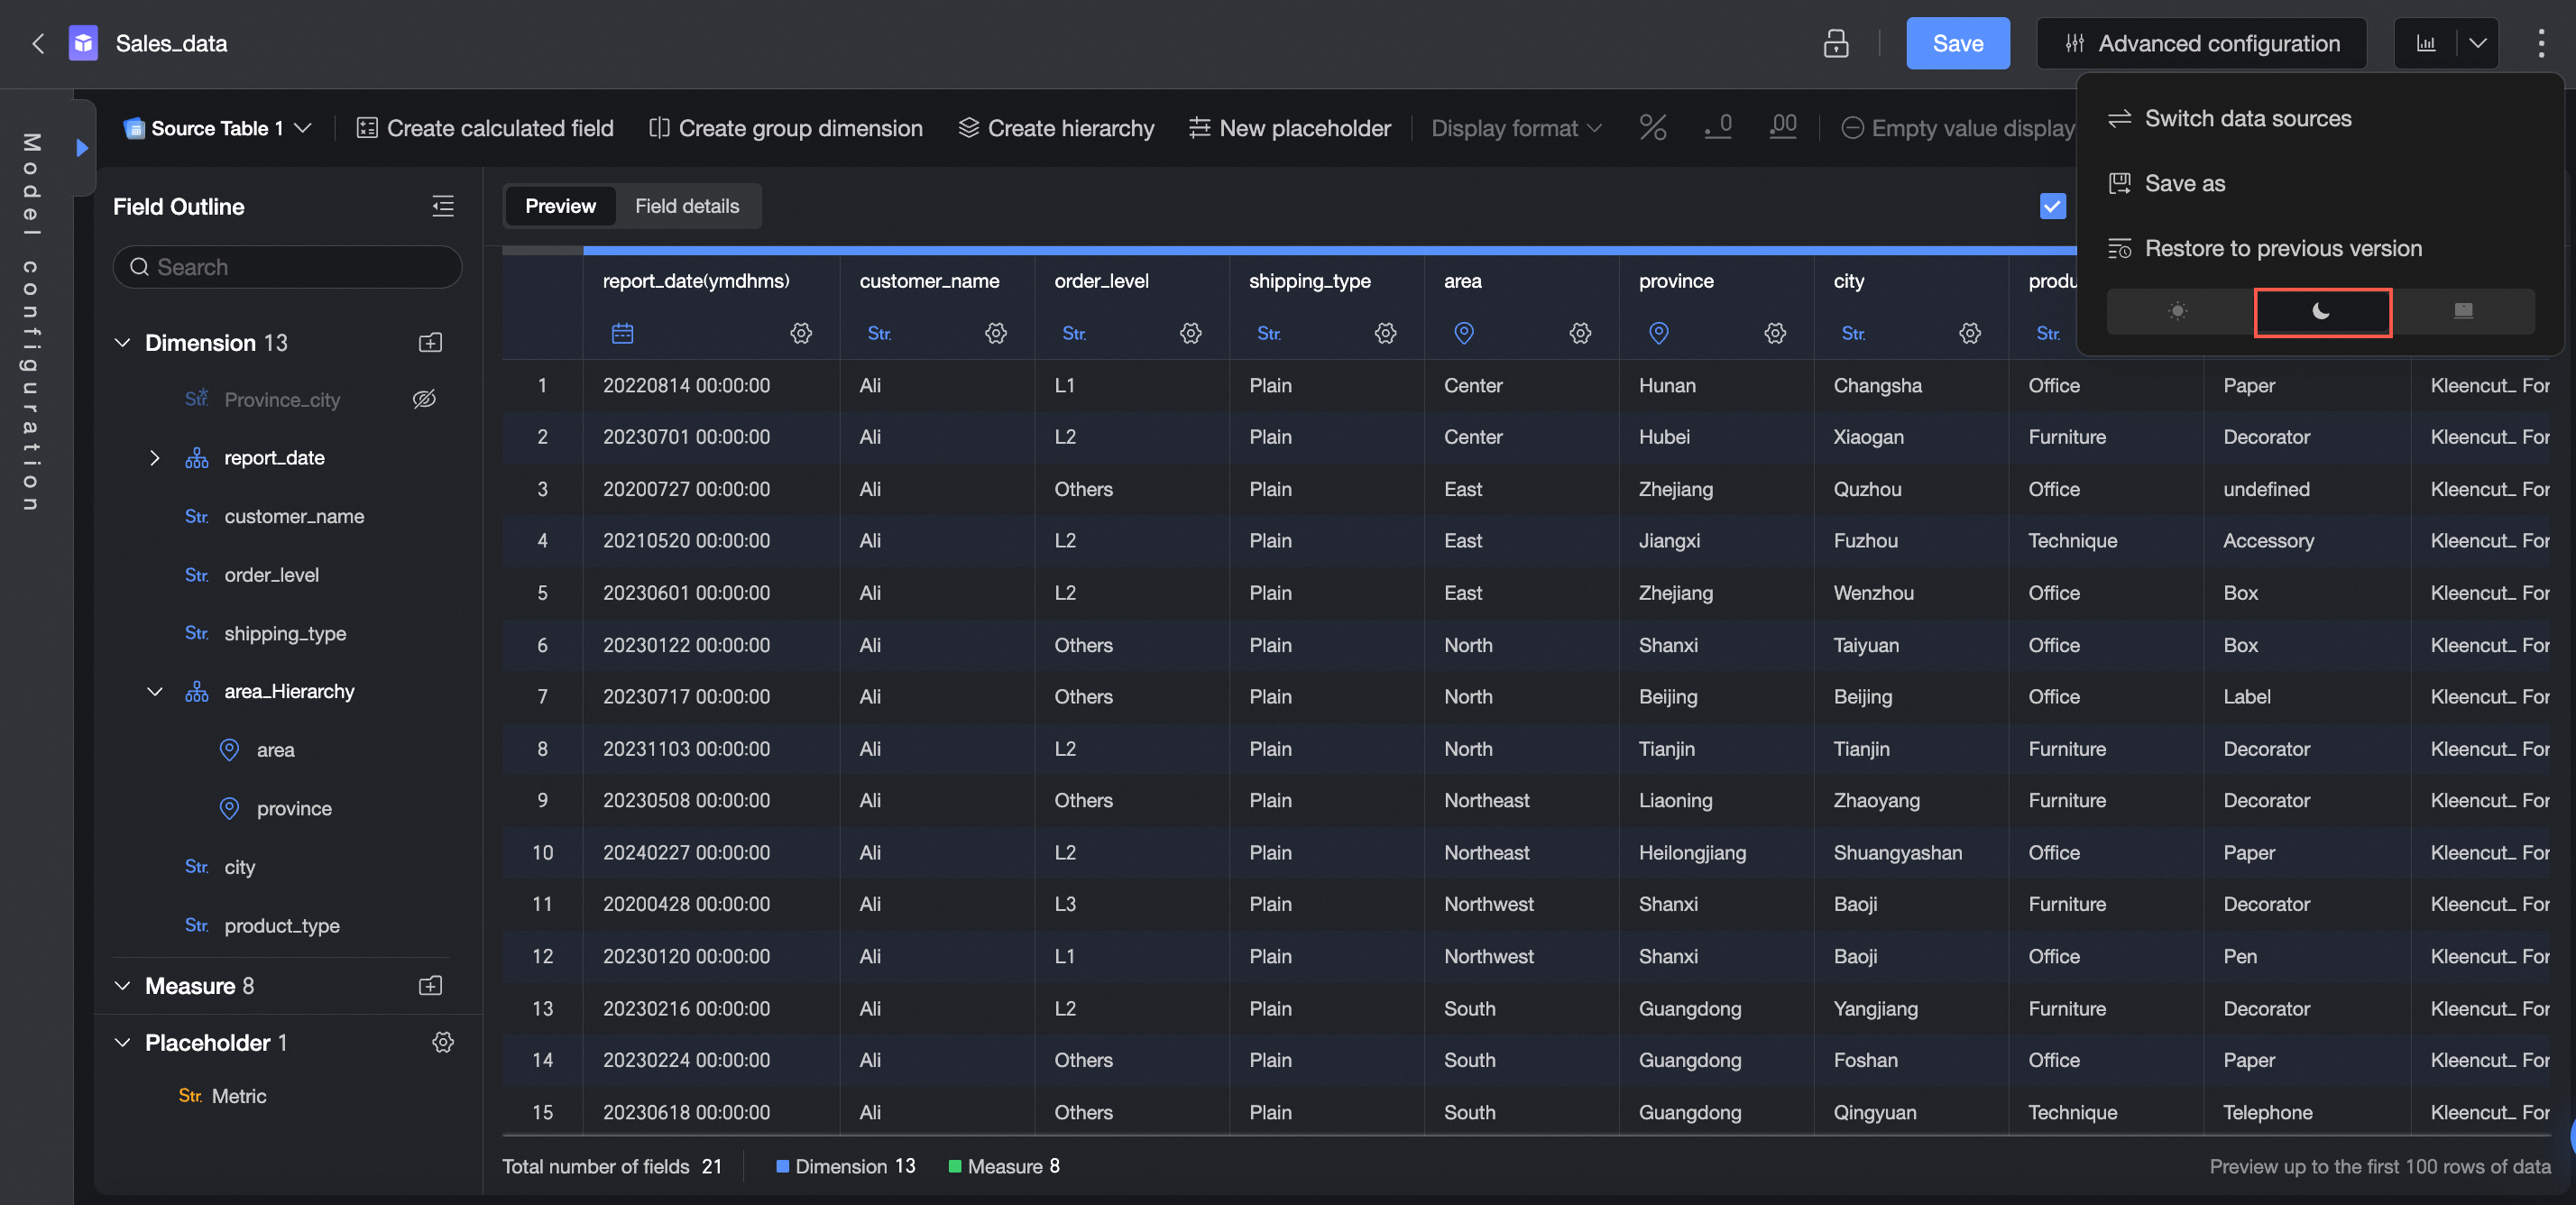
Switch between light and dark themes
Light mode
Dark mode
Follow organization settings
Applies the theme configured for your organization.
Button |
Description |
① Lock mechanism |
Provides a lock mechanism to protect data during multi-user collaboration.
Note
This button is displayed only when the workspace is a group workspace. |
② Save |
Saves the current dataset.
Note
Dataset names are limited to 100 characters. Longer names are truncated. |
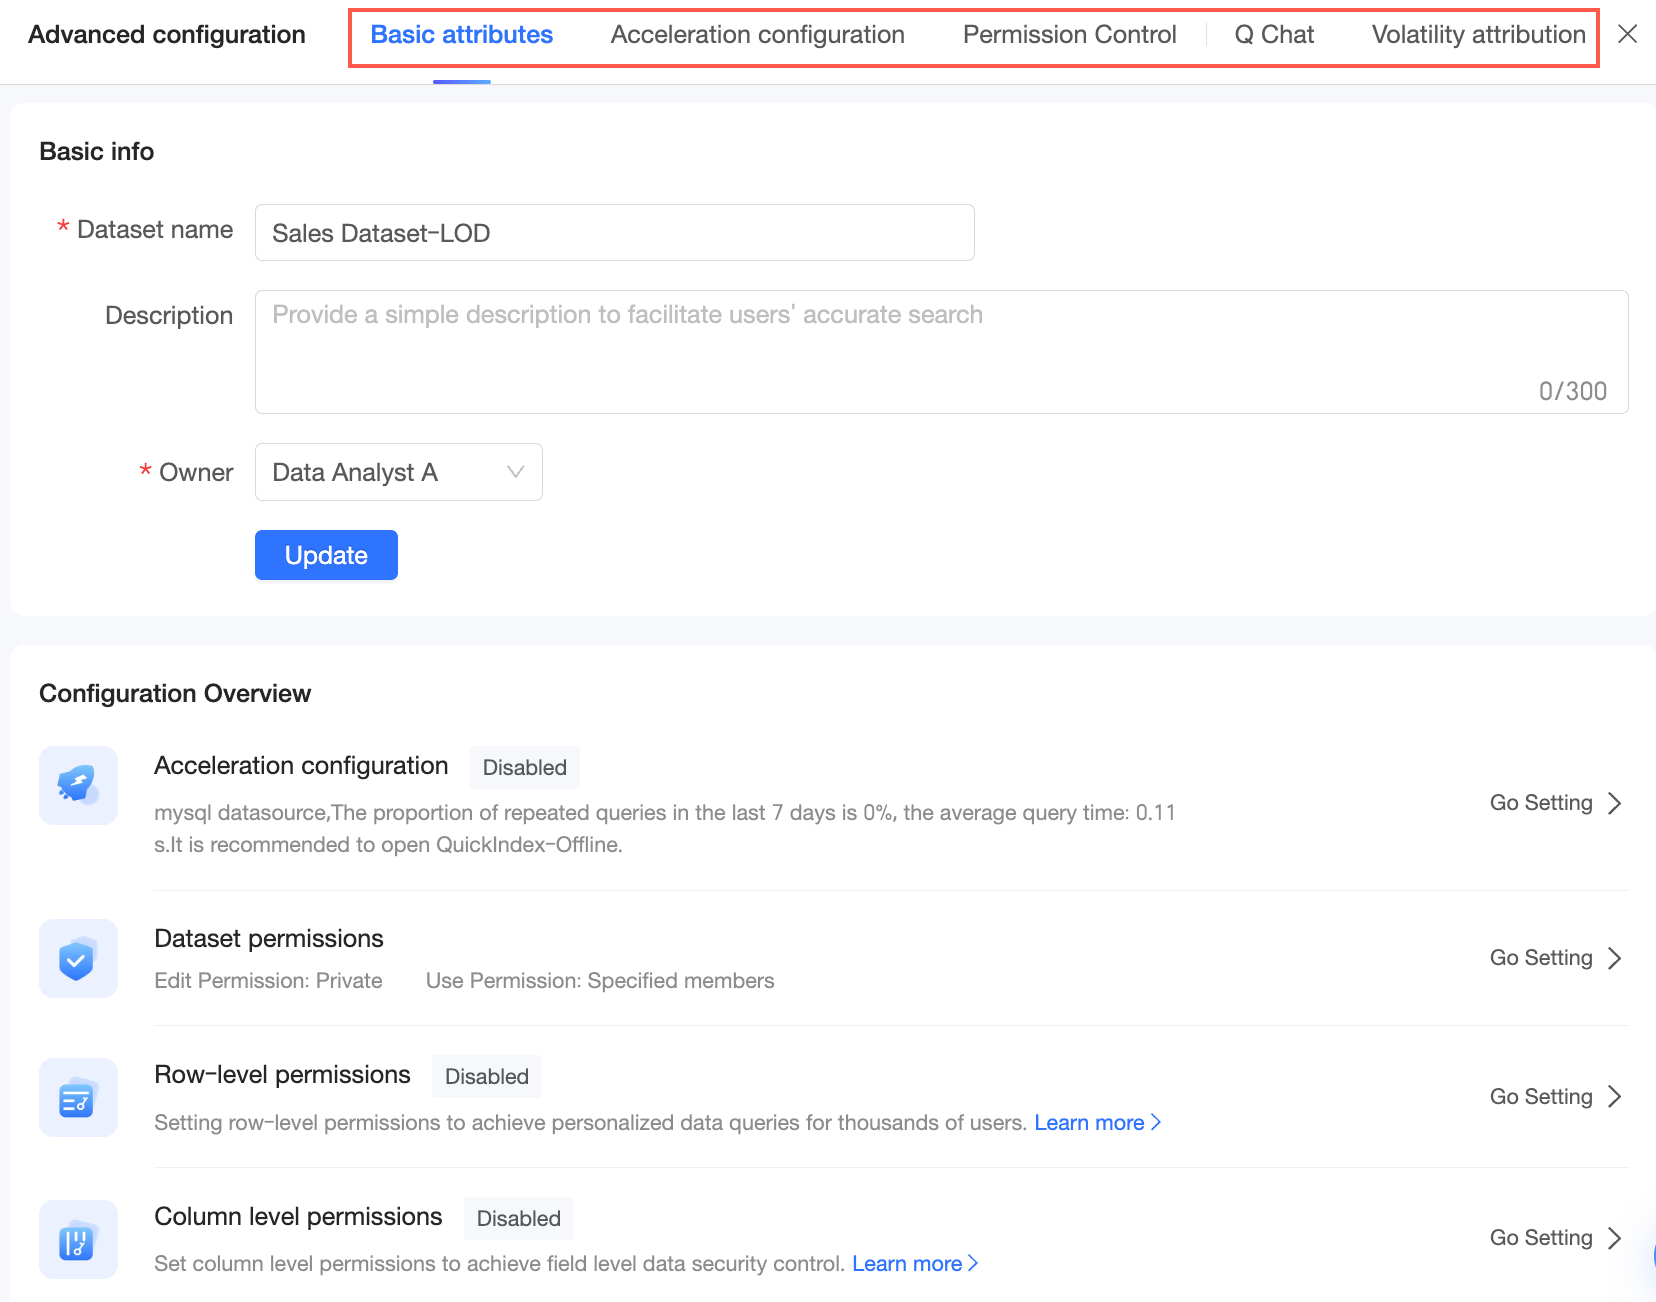
③ Advanced settings |
Configure the following advanced settings:
For more information, see Create a dataset. |
④ Create dashboard |
Creates a dashboard using the current data source. |
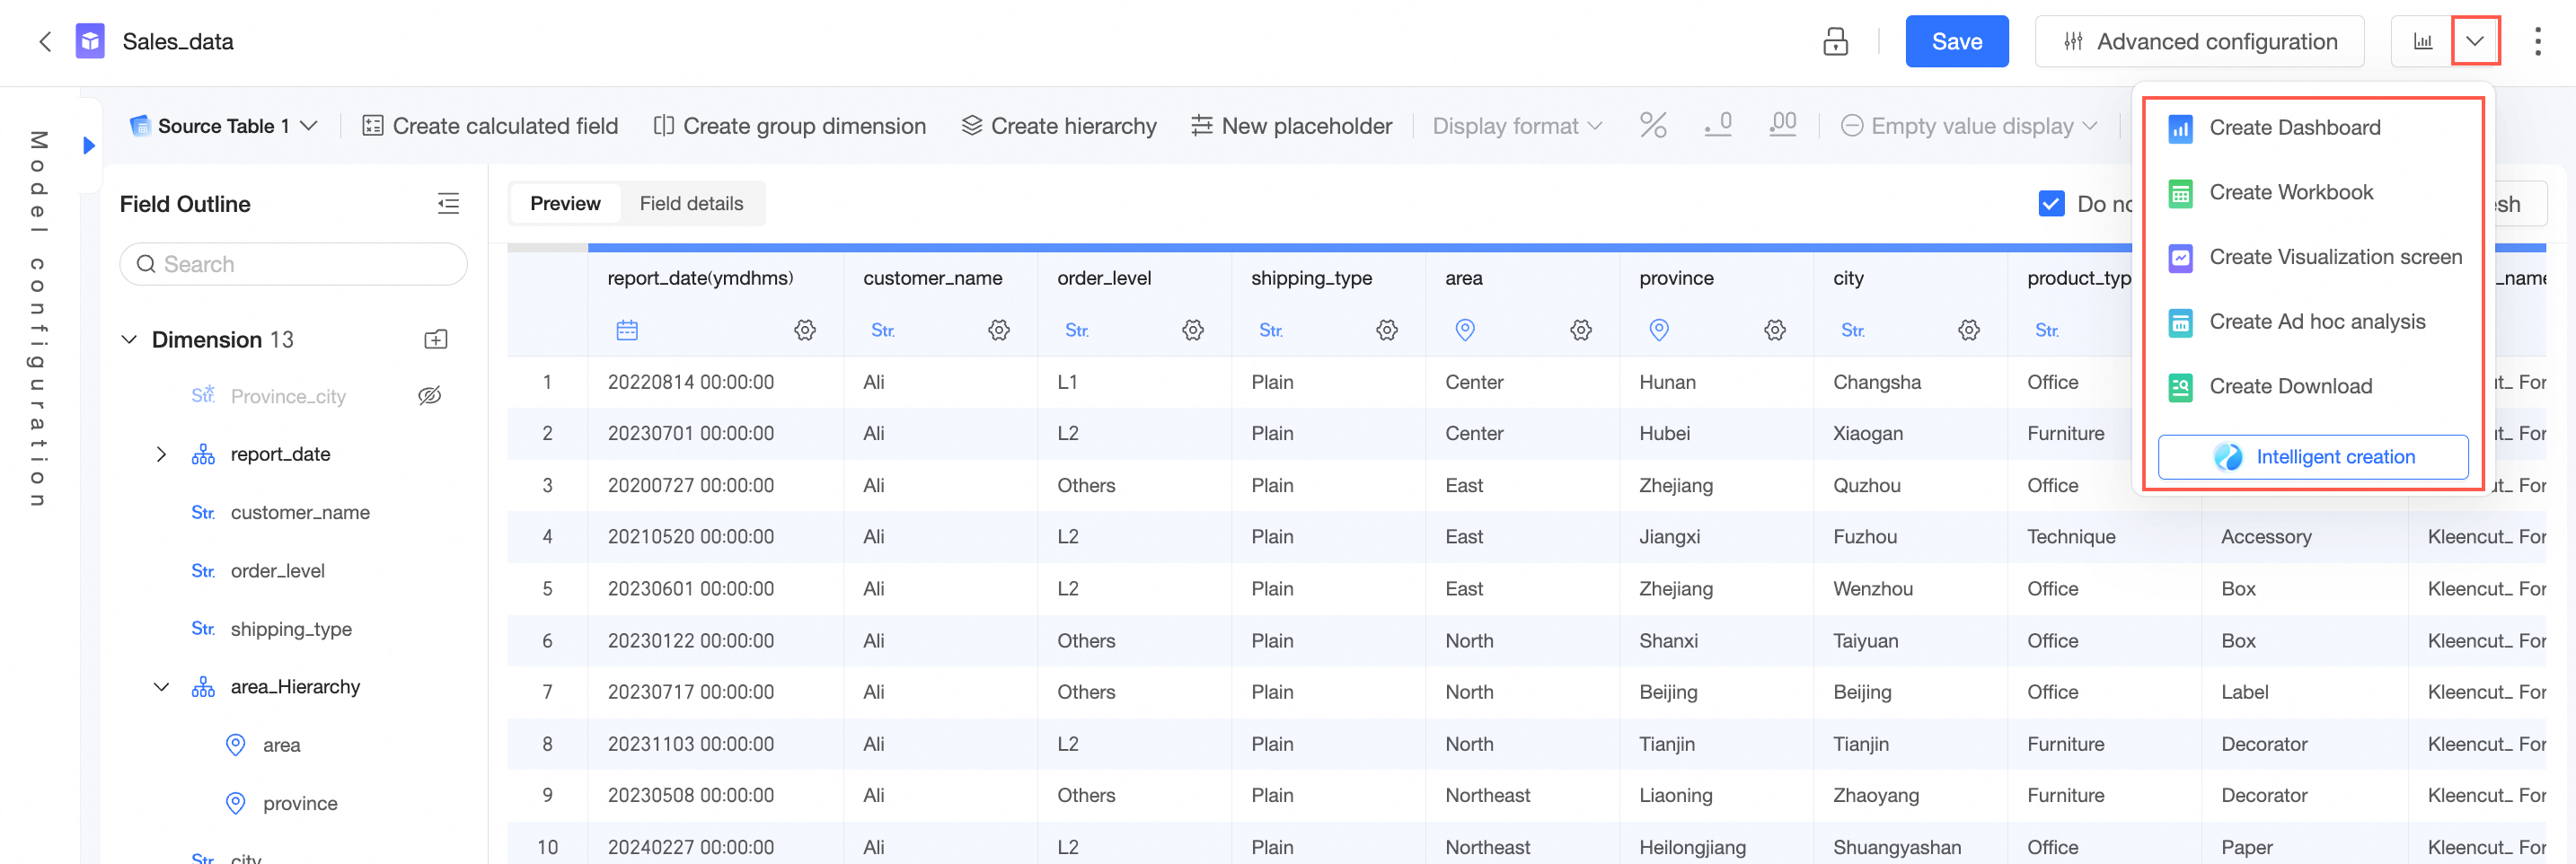
⑤ Start analysis |
Lets you use the current data source to create a dashboard, create a spreadsheet, create a data screen, perform an ad hoc analysis, create a self-service data retrieval task, or intelligently create a dashboard.
|
⑥ More |
Provides options to Switch data source, Save as, restore a historical version, and switch between light and dark themes. |


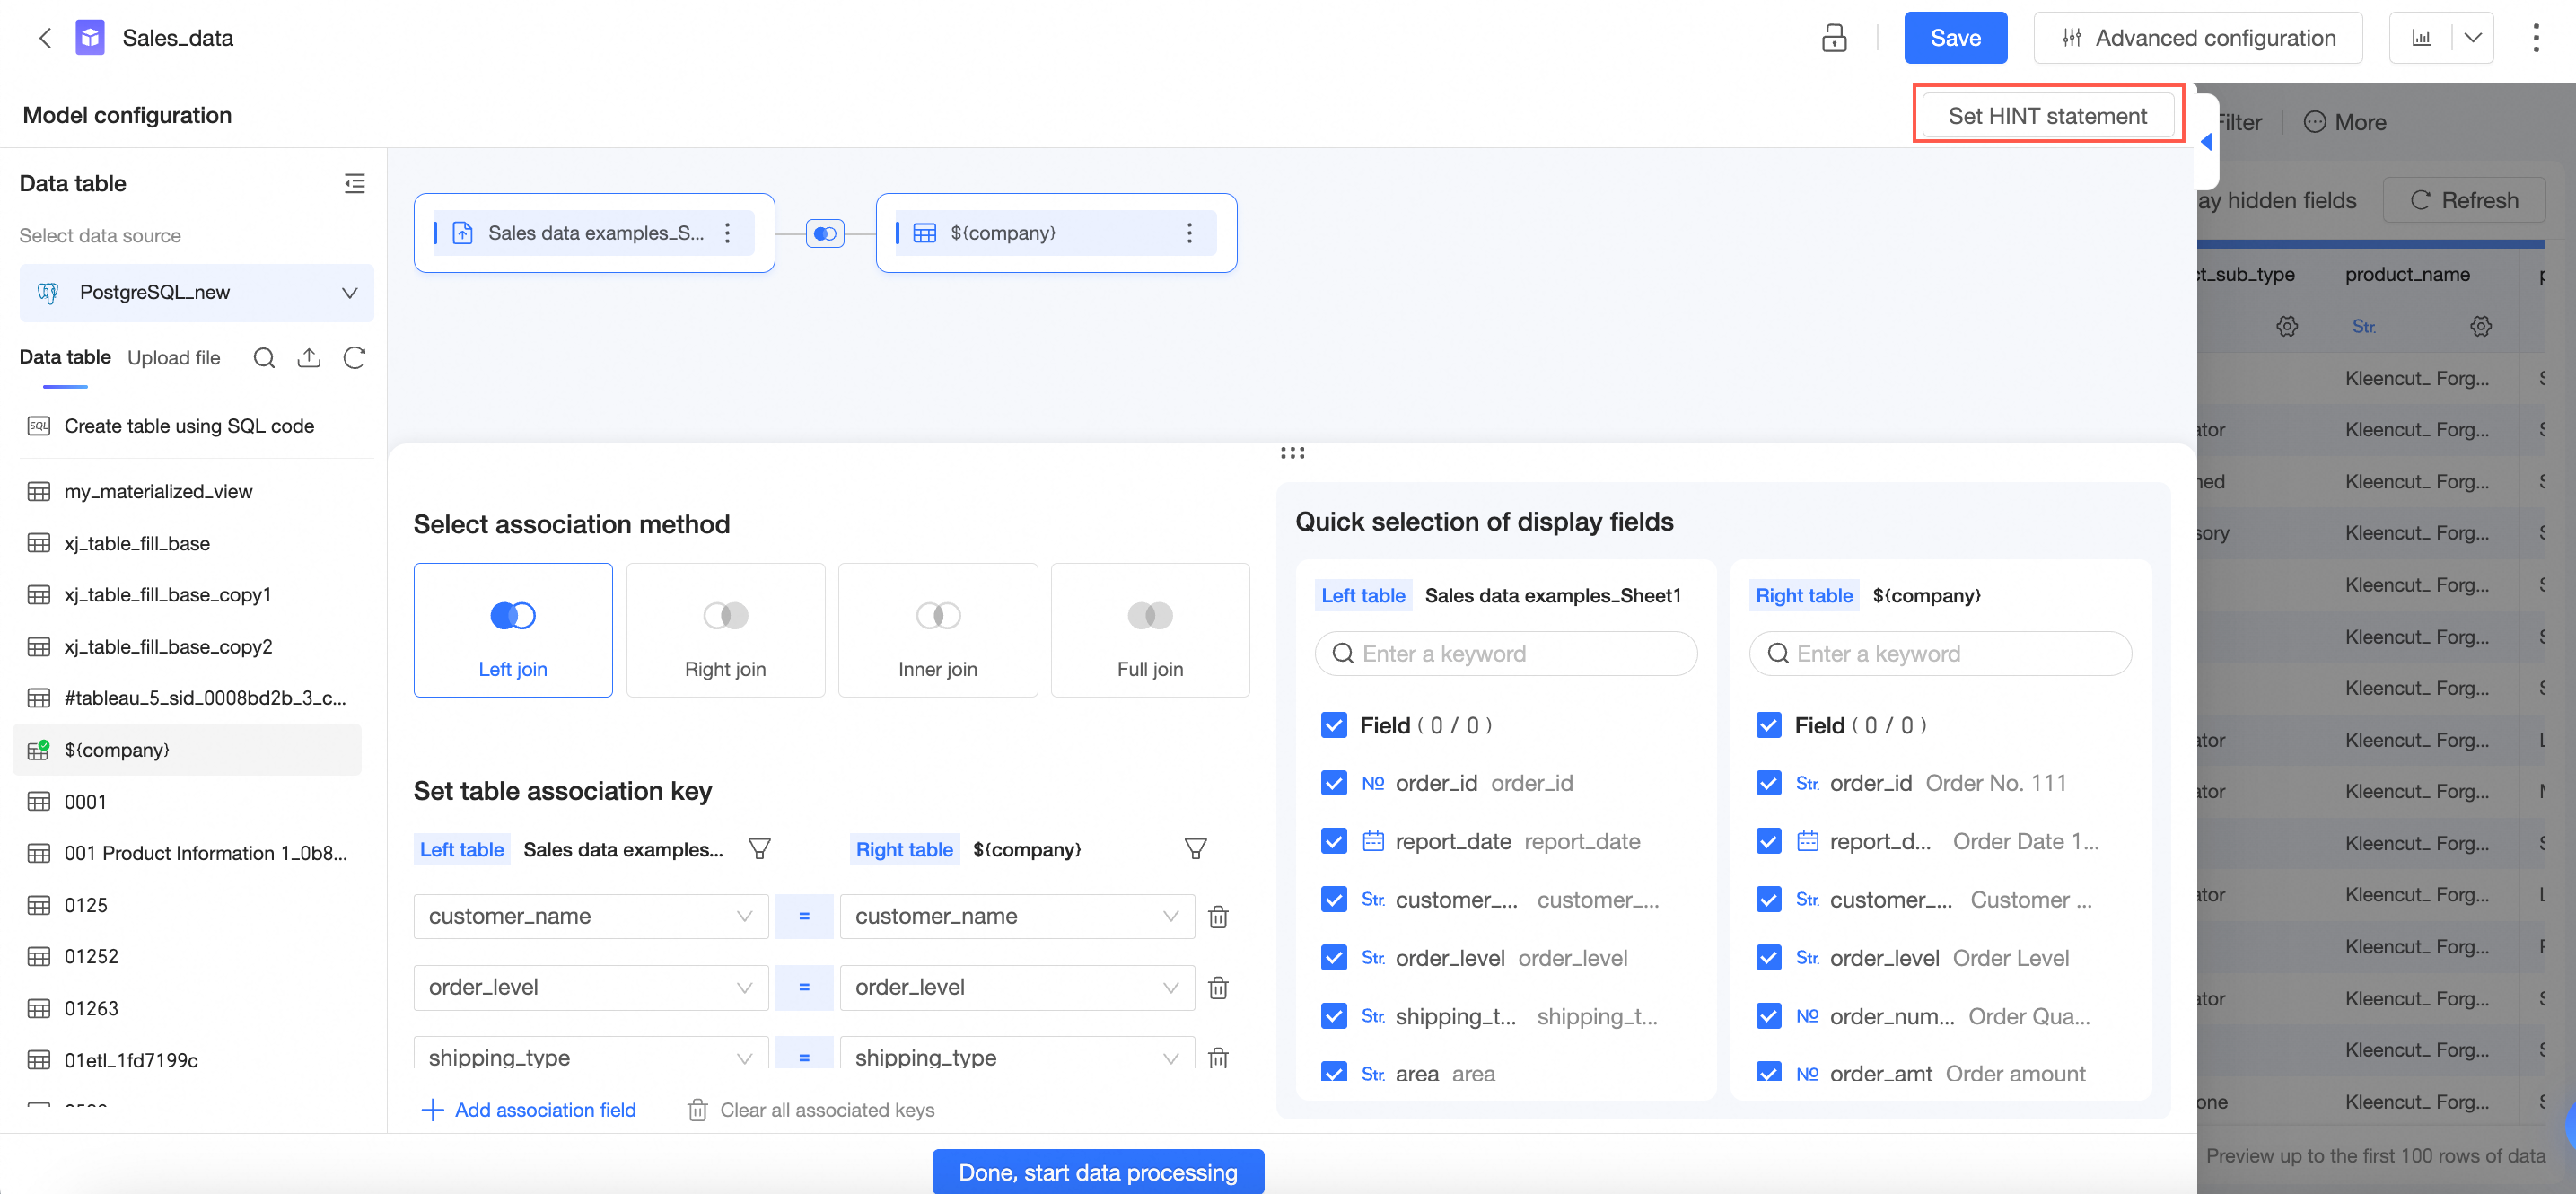
Model configuration toolbar
On the model configuration page, you can add a HINT statement. For more information, see HINT statements.
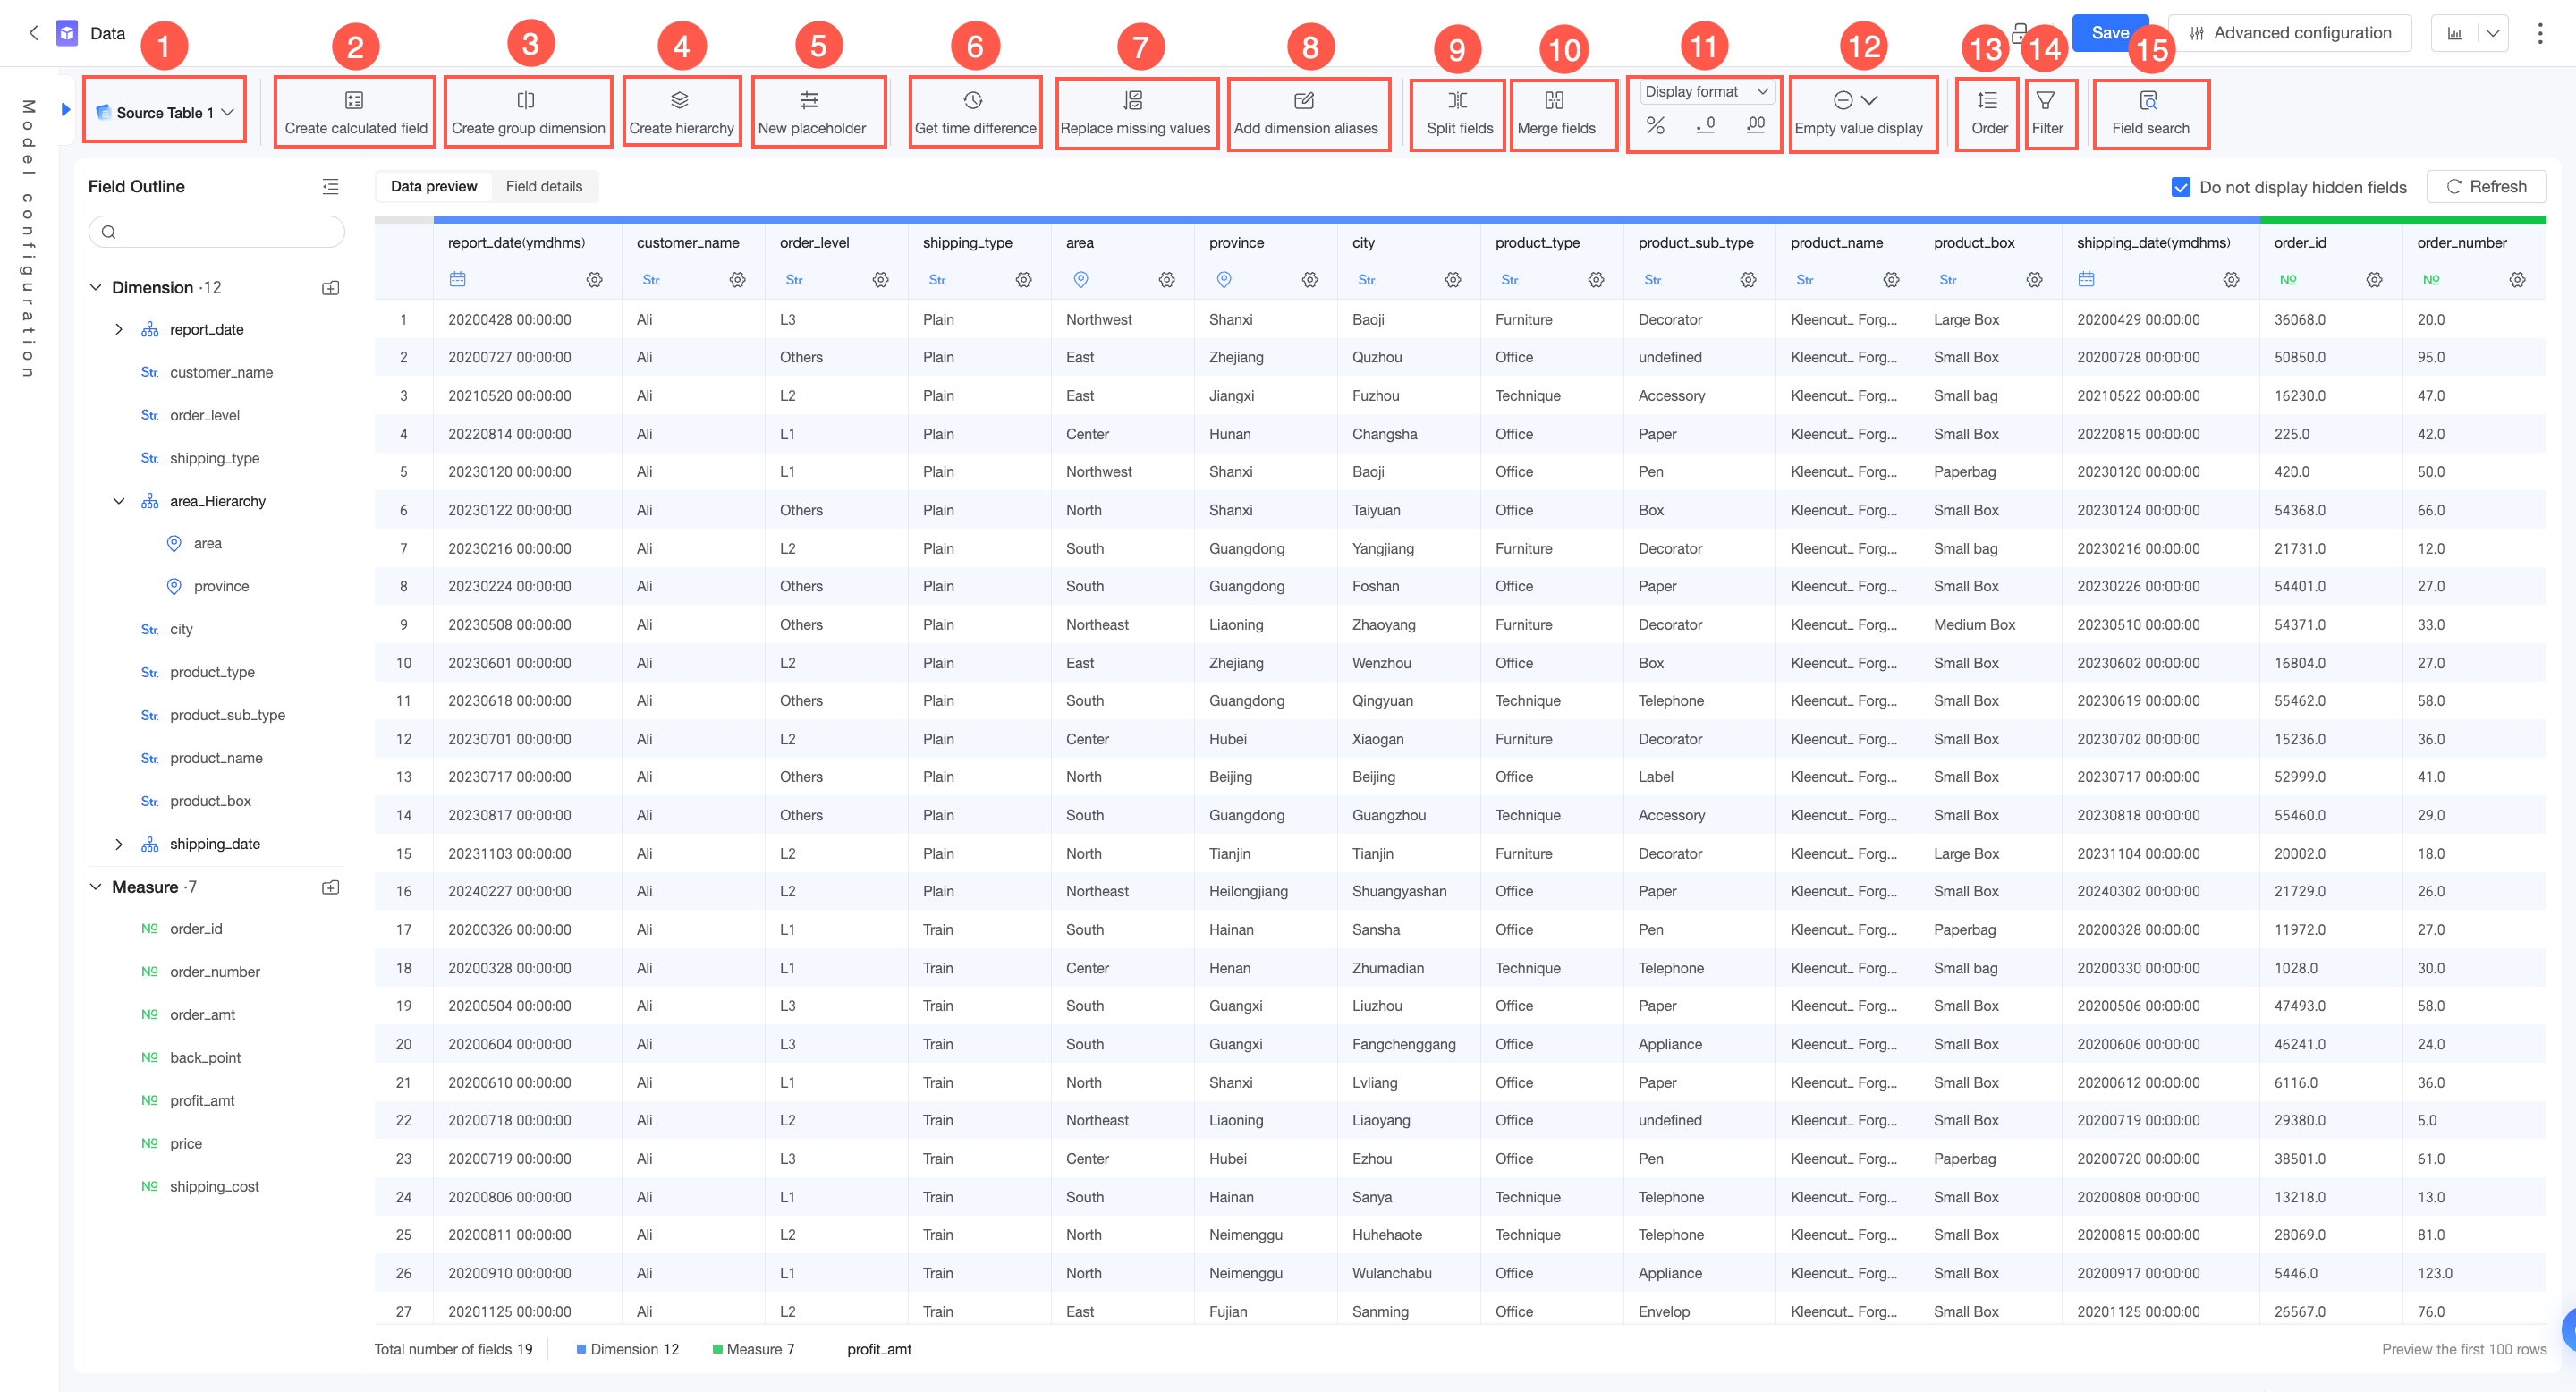
Data preparation toolbar
The data preparation toolbar provides the following buttons:
Button |
Description |
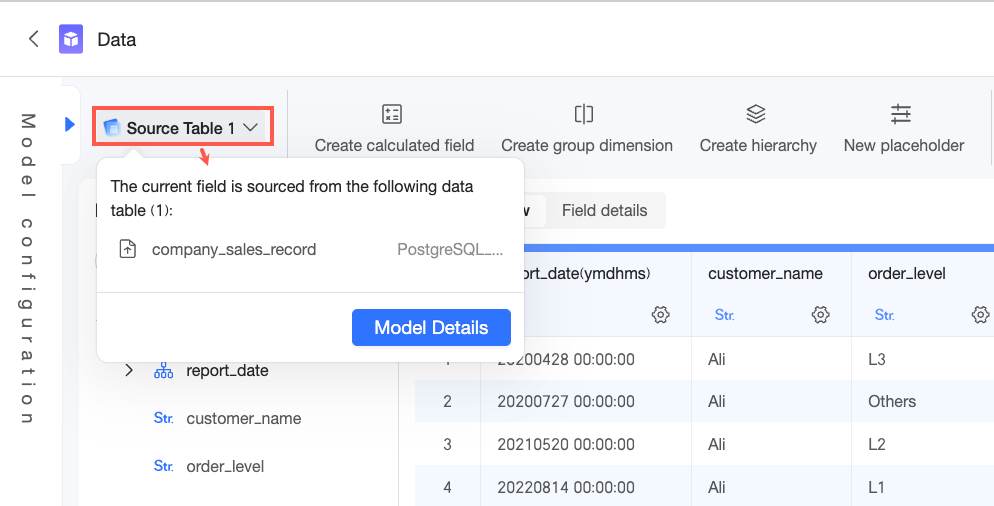
① Source table |
Displays the number of source tables. You can click to expand the list and view the source table names. Click Model Details to navigate to the model configuration page.
|
② New calculated field |
Create a calculated field to derive new data for analysis from existing fields. For more information, see Create a calculated field. |
③ New grouped dimension |
Groups dimension values into categories. For example, you can group an 'Age' field into 'Minor', 'Youth', 'Middle-aged', and 'Elderly' to analyze the vaccination status for each age group. For more information, see Grouped dimensions. |
④ New hierarchy |
Enables drill-down analysis in charts. Charts can automatically drill down based on the defined hierarchy. For more information, see Drill-down. |
⑤ New placeholder |
Use placeholders to dynamically adjust the results of calculated fields, switch between different measures or dimensions, or dynamically configure reference lines. For more information, see Placeholders. |
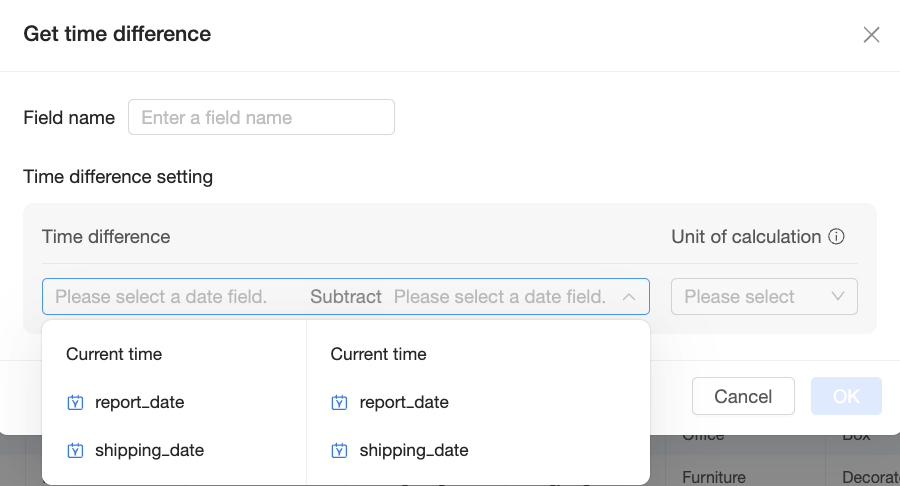
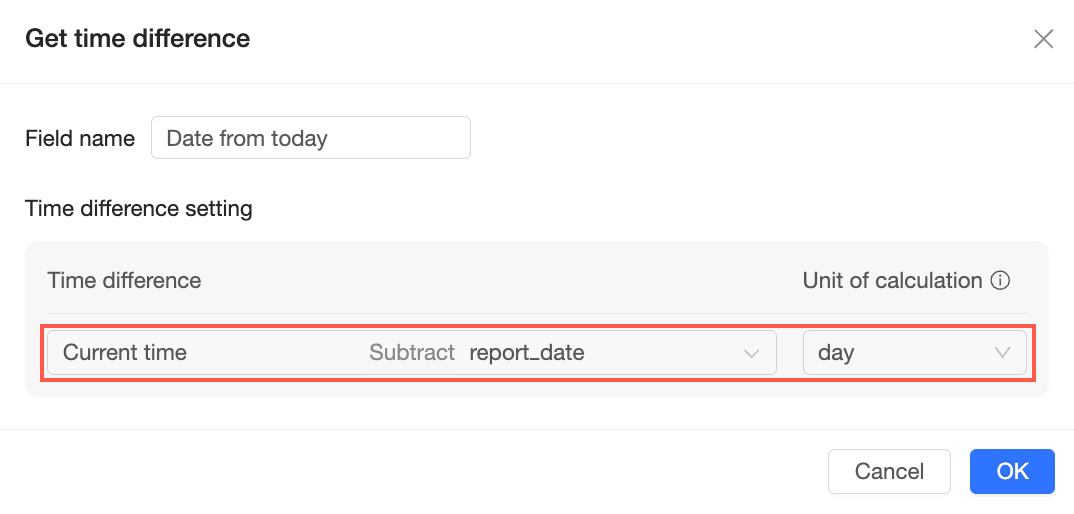
⑥ Get time difference |
Calculates the time difference between two date fields, returning the number of complete time units as a numeric value.
Note
Calculated fields are not supported.
You can specify a Field Name and configure the Time Difference Settings.
For example, you can calculate the number of days between a date and the current time by setting the calculation unit to 'Day'.
For more information, see Get Time Difference. |
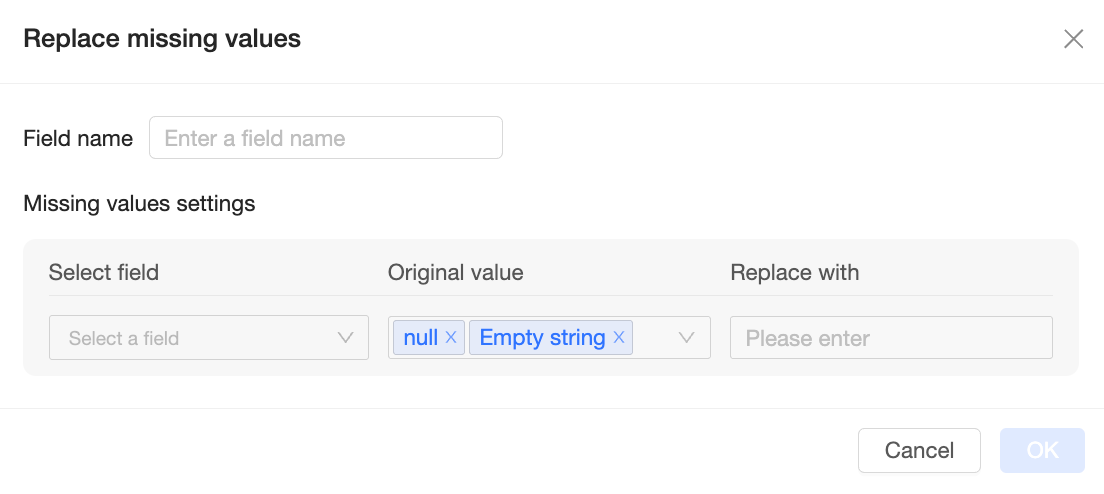
⑦ Replace missing values |
Replaces null values and empty strings with a specified value.
Note
Calculated fields are not supported. For more information, see Replace Missing Values. |
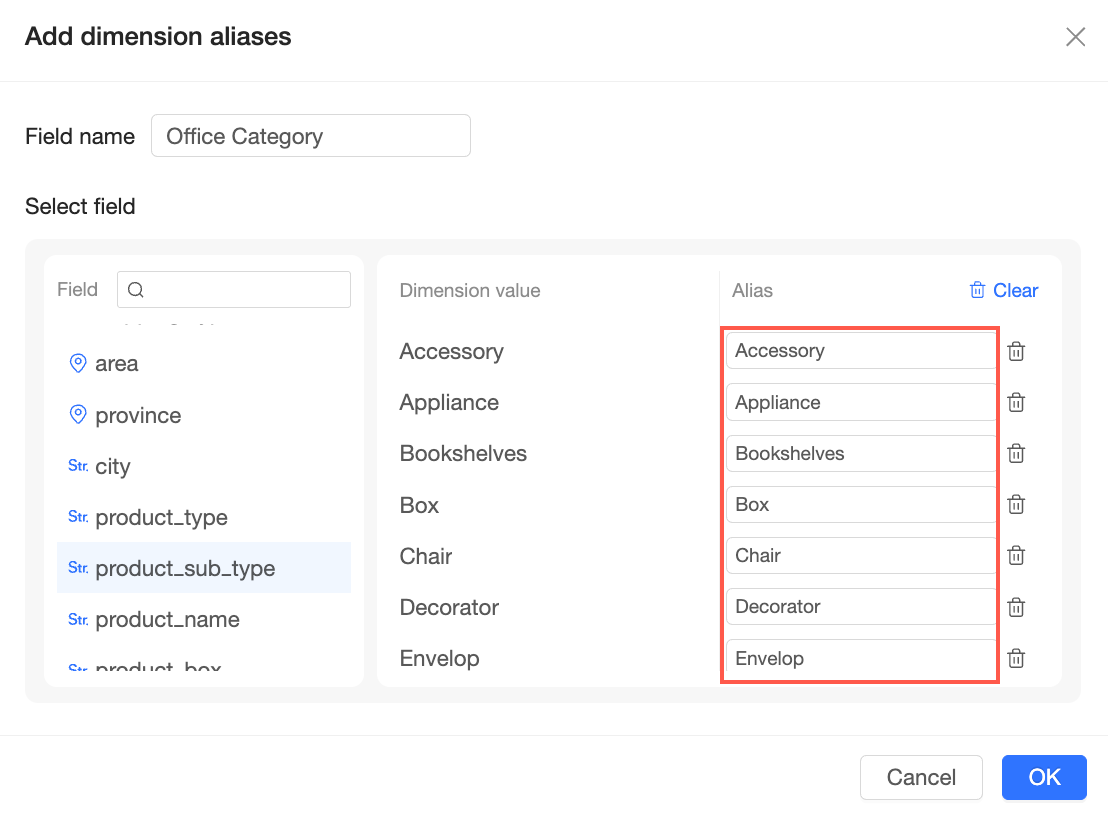
⑧ Add dimension value alias |
Creates aliases for the enumerated values of a text field.
Note
For more information, see Add Dimension Value Alias. |
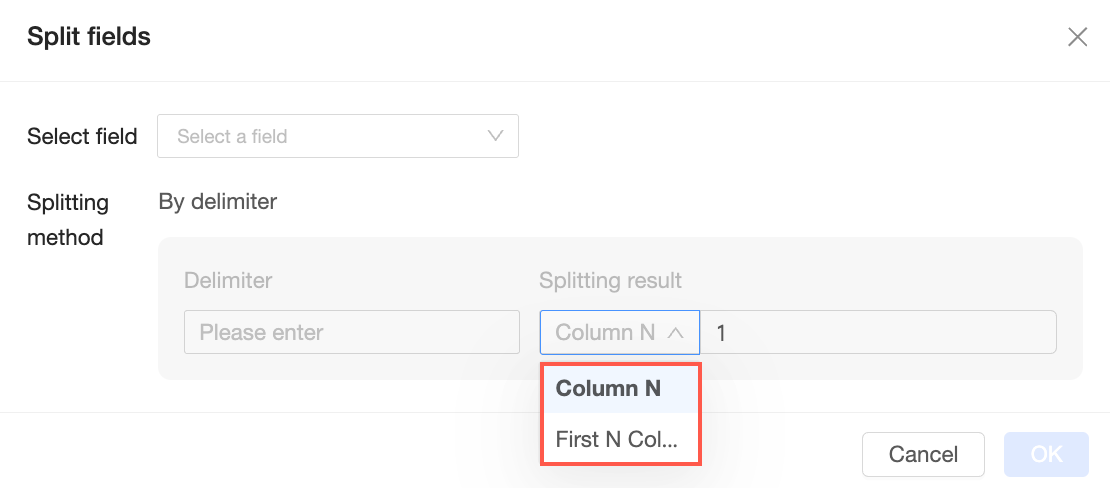
⑨ Split field |
Splits a single text field into multiple fields based on a specified delimiter. You can split a field by a specified delimiter and choose which resulting columns to generate, such as the Nth column or the first N columns.
Note
For more information, see Split Field. |
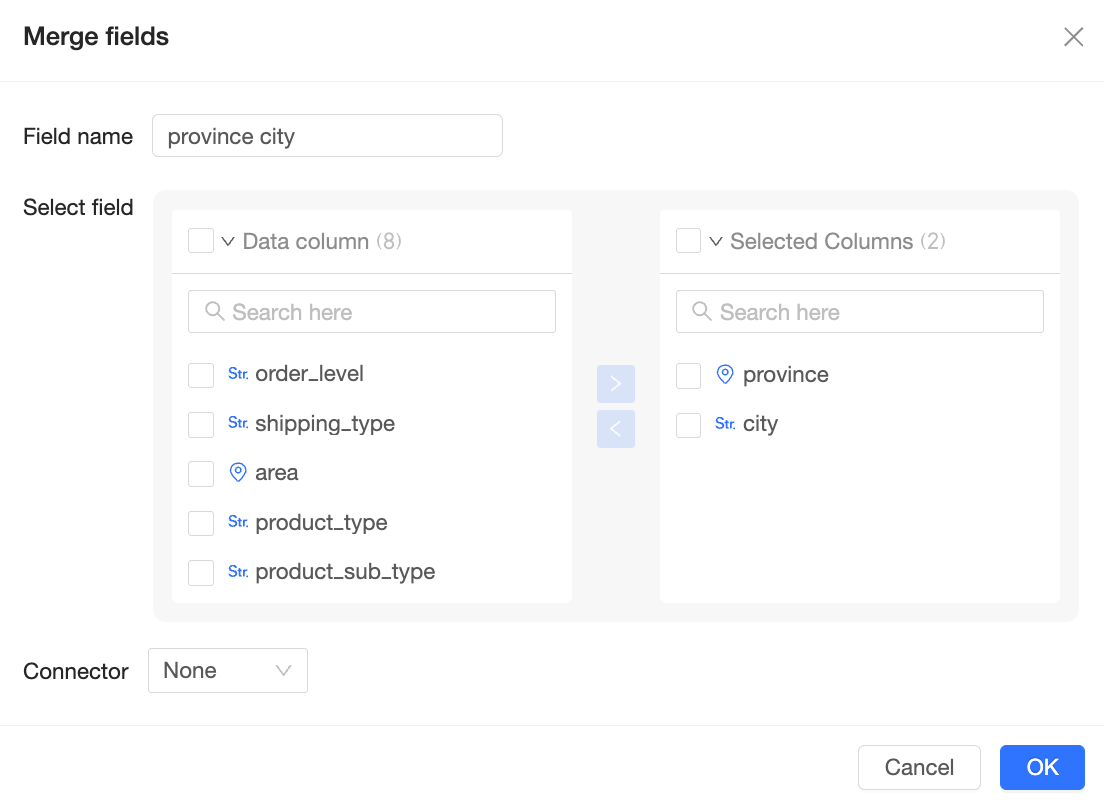
⑩ Merge fields |
Merges multiple text fields into a single new field with a specified separator.
Note
For more information, see Merge Fields. |
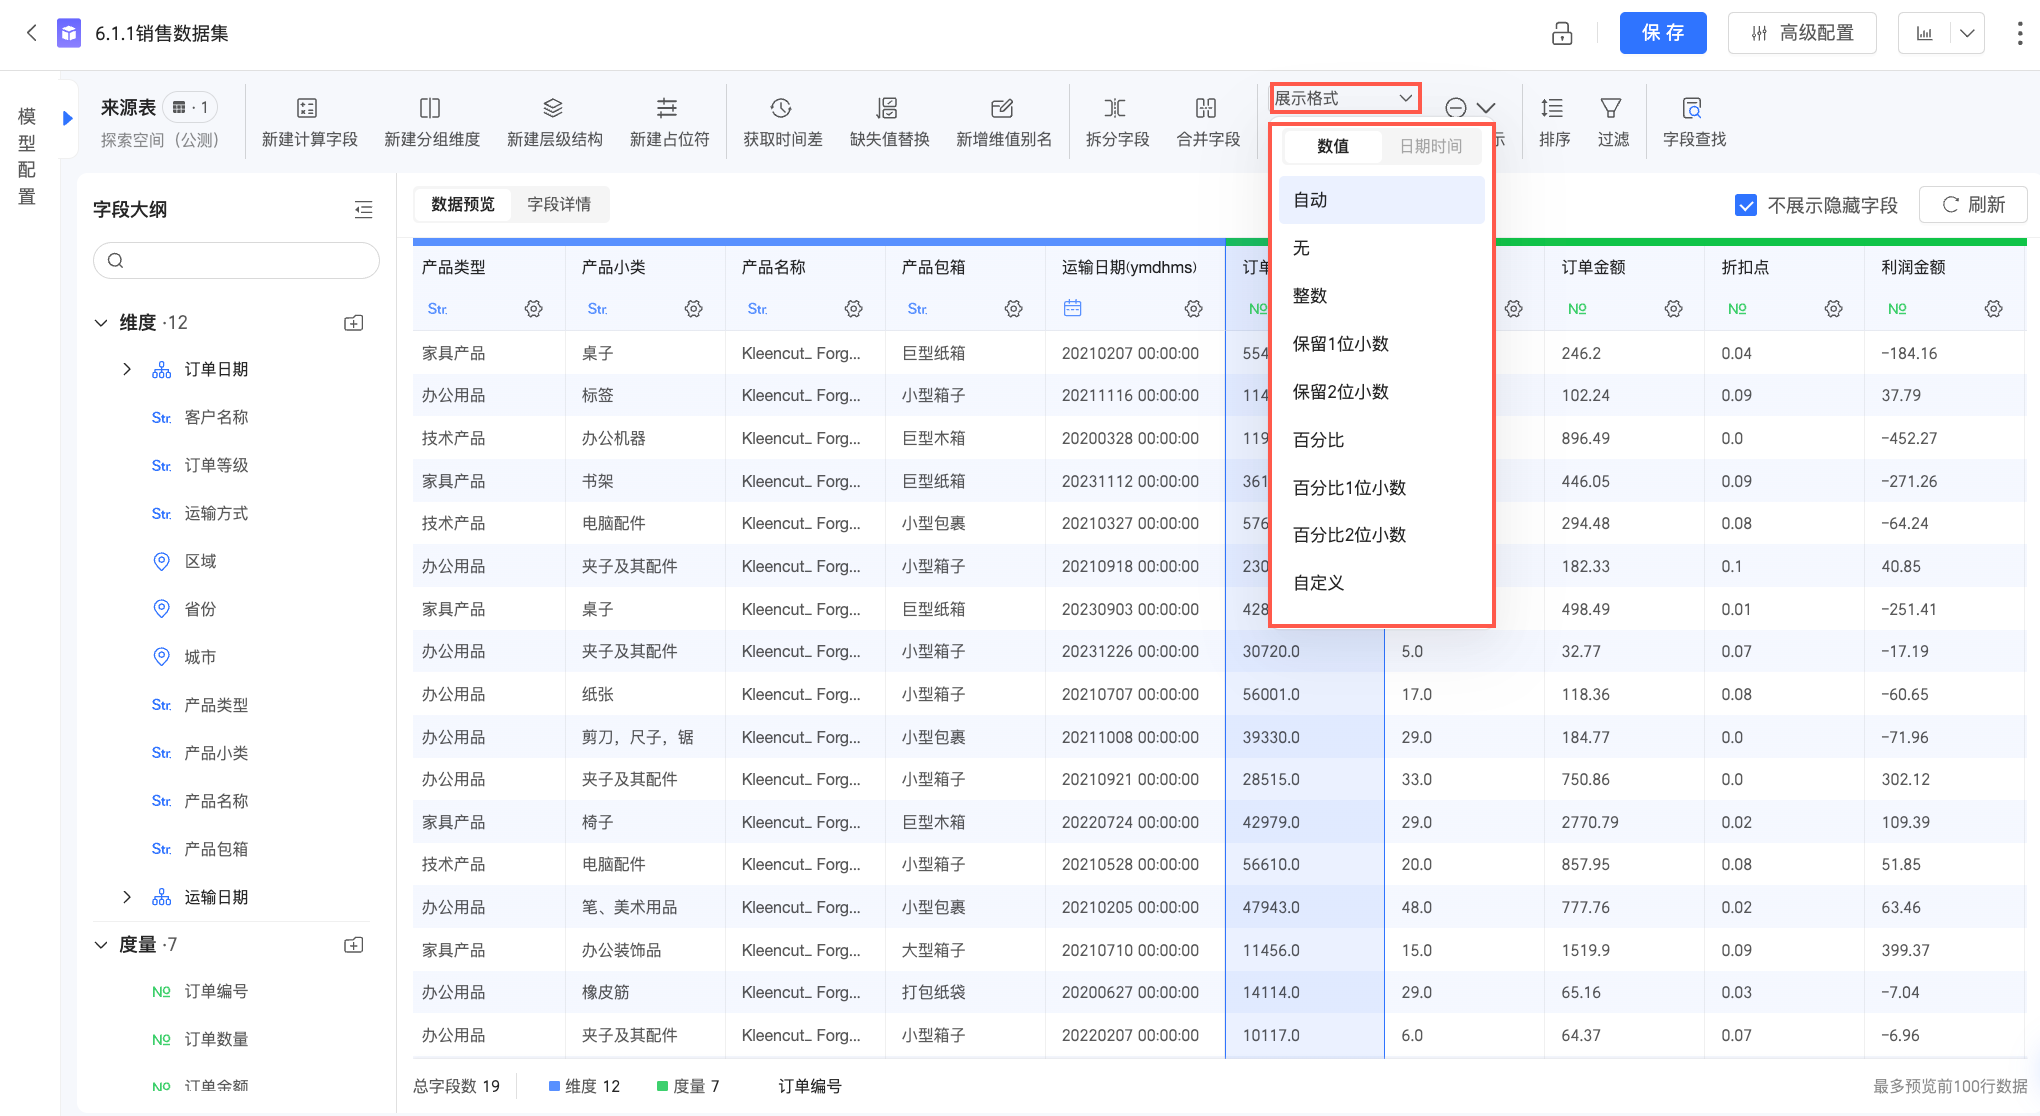
⑪ Display format |
|
⑫ Display of null values |
For a selected field, you can configure how null values are displayed. For dimension fields, you can set the display text for null values or empty strings. For measure fields, you can configure the numeric display format. For more information, see Field configurations. |
⑬ Sort |
Sets the sort order for a field. Options include Ascending, Descending, and Custom. By default, no sorting is applied. |
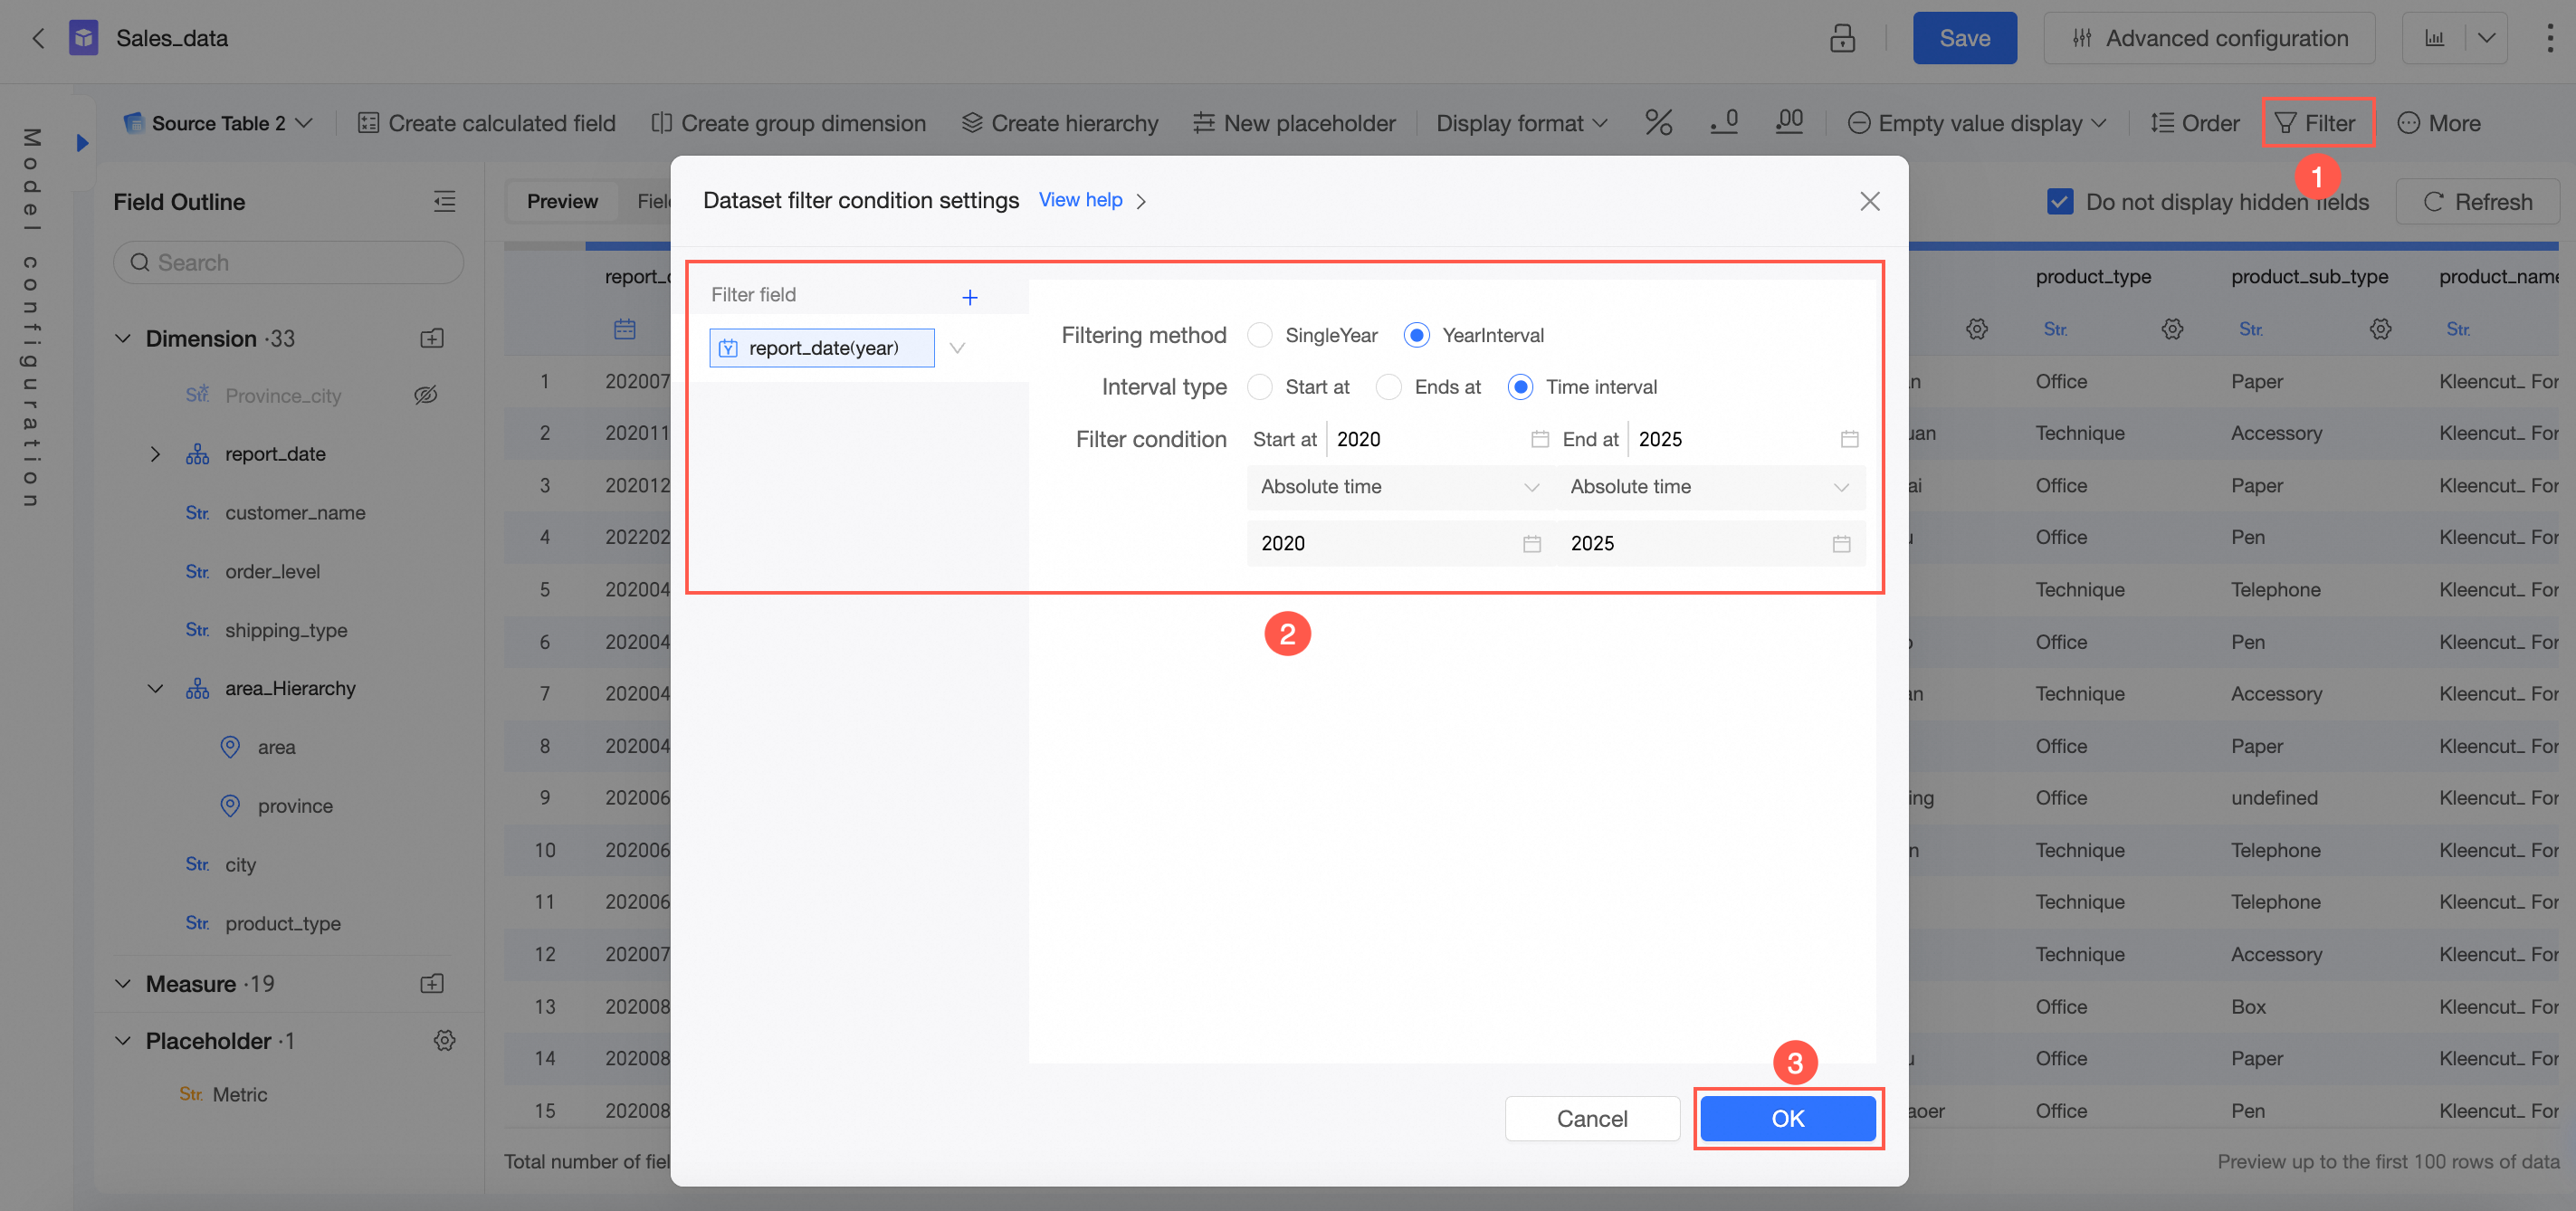
⑭ Filter |
Sets filter conditions on the dataset to include only the required data. |
⑮ Field search |
Lets you quickly find a field by keyword.
|

If your dataset contains placeholders, you can click the ![]() icon next to Placeholders in the Fields pane of the dataset editor to manage them. For more information, see Placeholders.
icon next to Placeholders in the Fields pane of the dataset editor to manage them. For more information, see Placeholders.

Custom SQL editor toolbar
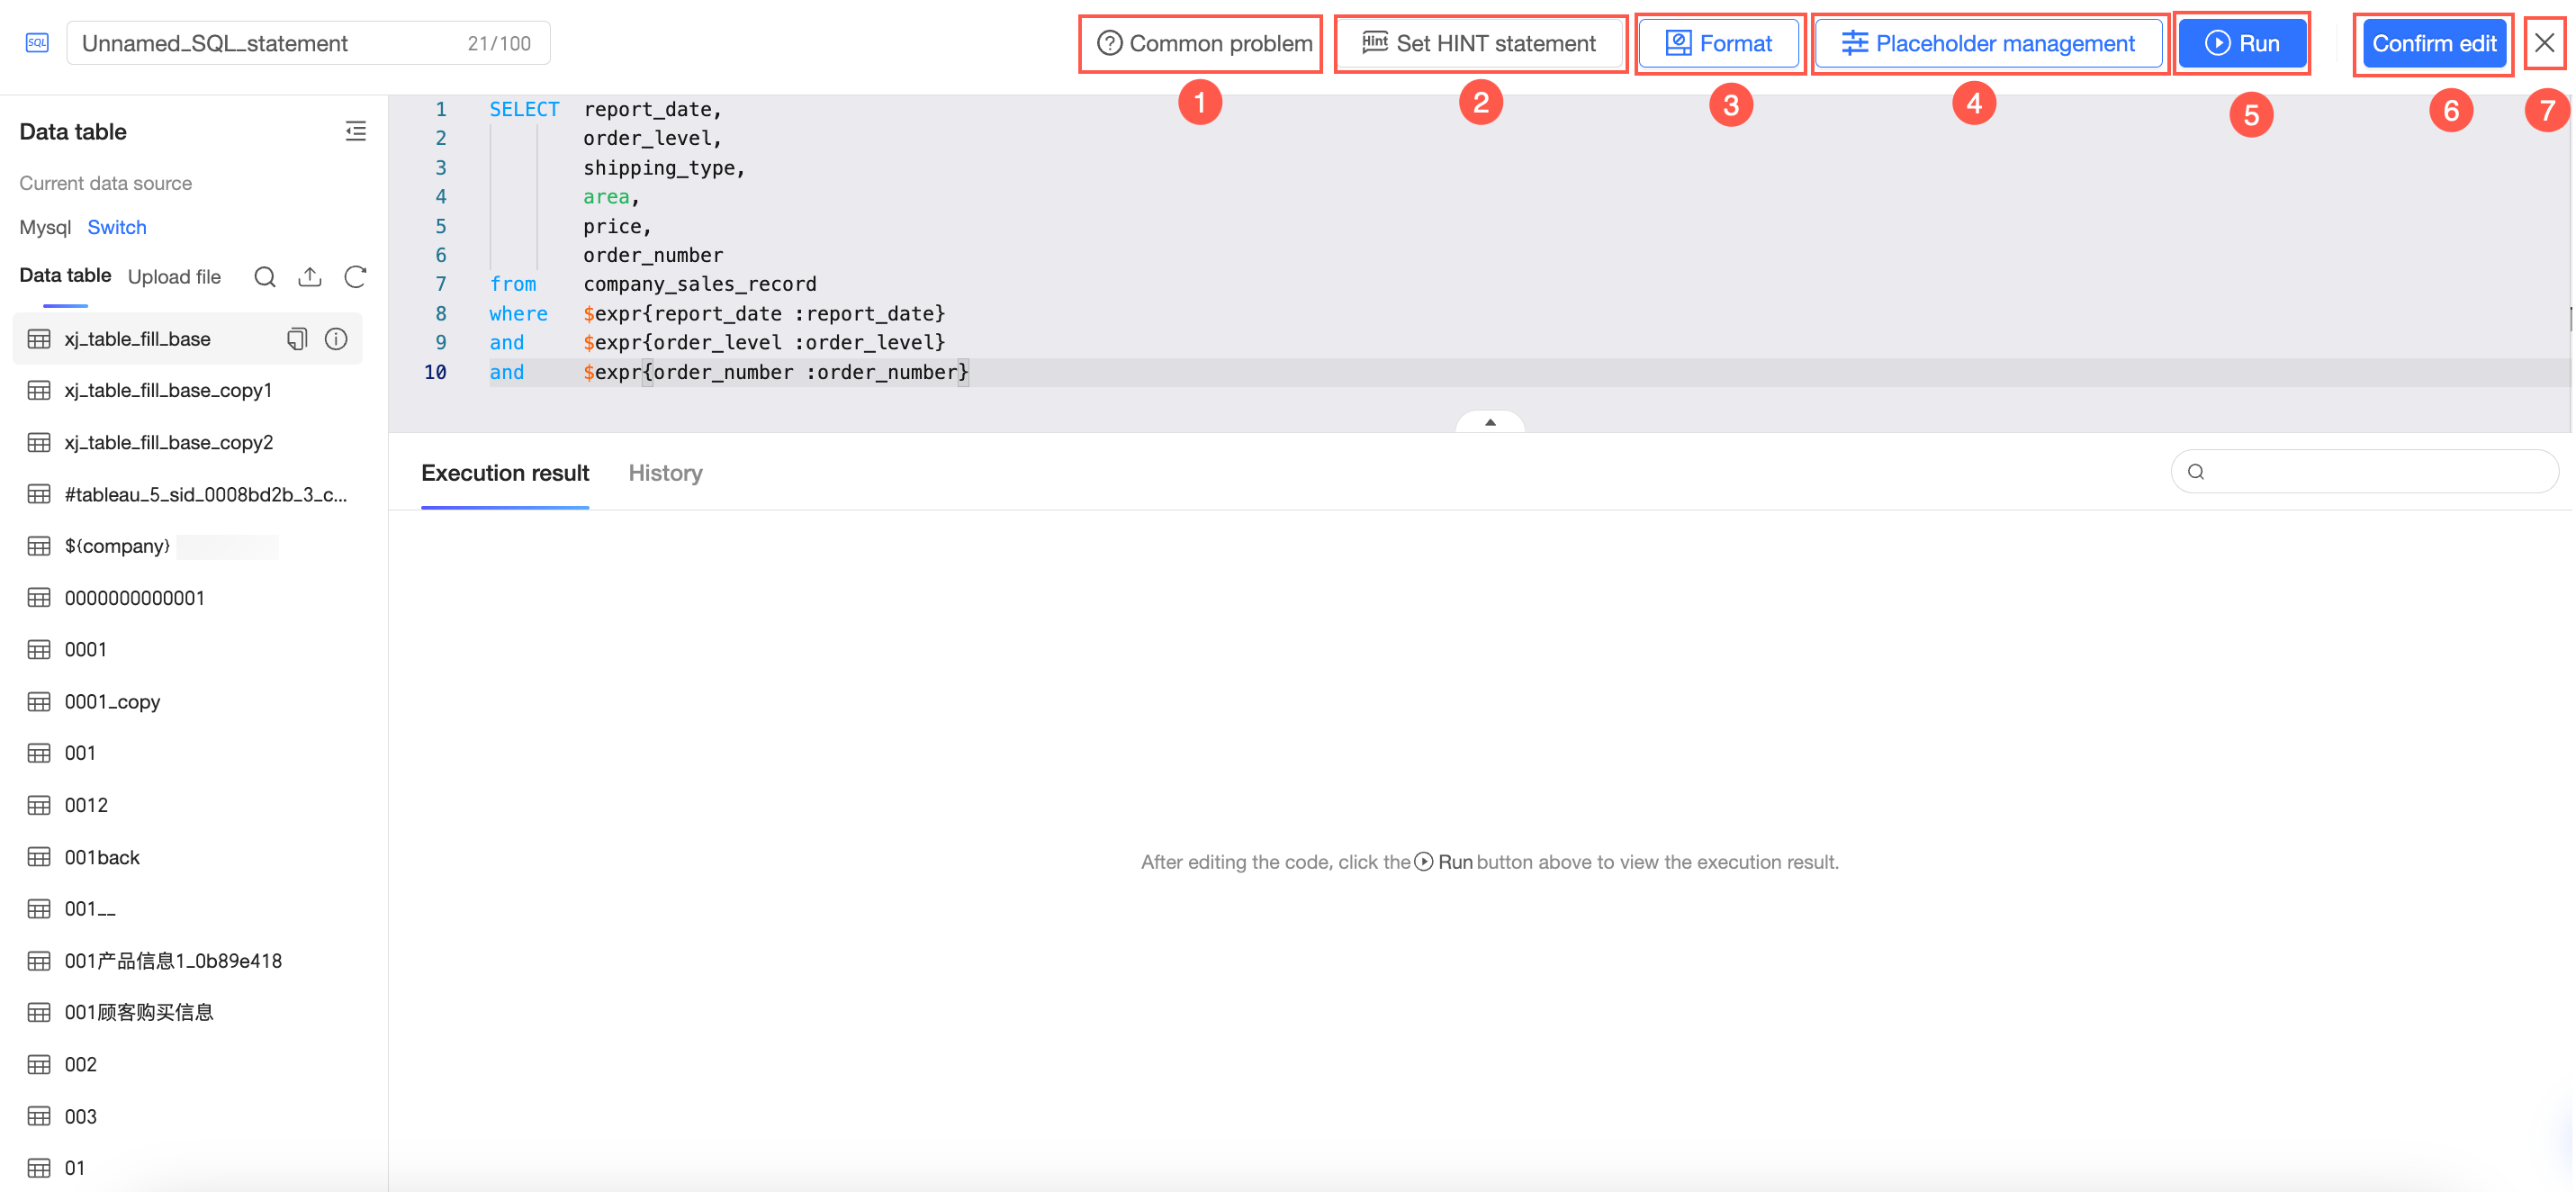
The custom SQL editor provides the following buttons:
Button |
Description |
① FAQ |
Links to frequently asked questions (FAQ) about datasets. For more information, see Dataset FAQ. |
② Set HINT statement |
Lets you add a custom HINT statement to your query. For more information, see Create a dataset.
Note
HINT statements are not supported for cross-source data models. |
③ Format |
Formats the custom SQL to improve its readability and conform to standard conventions. |
④ Placeholder management |
Opens the Placeholder management panel, where you can define and manage variables, set variable types, specify default values, and delete placeholders. For more information, see Placeholders. |
⑤ Run |
Executes the current custom SQL query. |
⑥ Confirm edit |
Saves the changes to the custom SQL query. |
⑦ Exit |
Exits the custom SQL editor and returns to the model configuration page. |