Business Insights empowers enterprise business teams by creating a unified, global business perspective that accurately reflects the operational status of the enterprise. This feature uses real-time data and interactive analysis to help users quickly identify anomalies, investigate root causes, and efficiently pinpoint business problems. It provides reliable data to support strategy formulation and operational optimization.
This is a value-added module that must be purchased separately.
Prerequisites
You have permission to use datasets.
You have create (edit) permission for Business Insights.
Configuration Entry Point
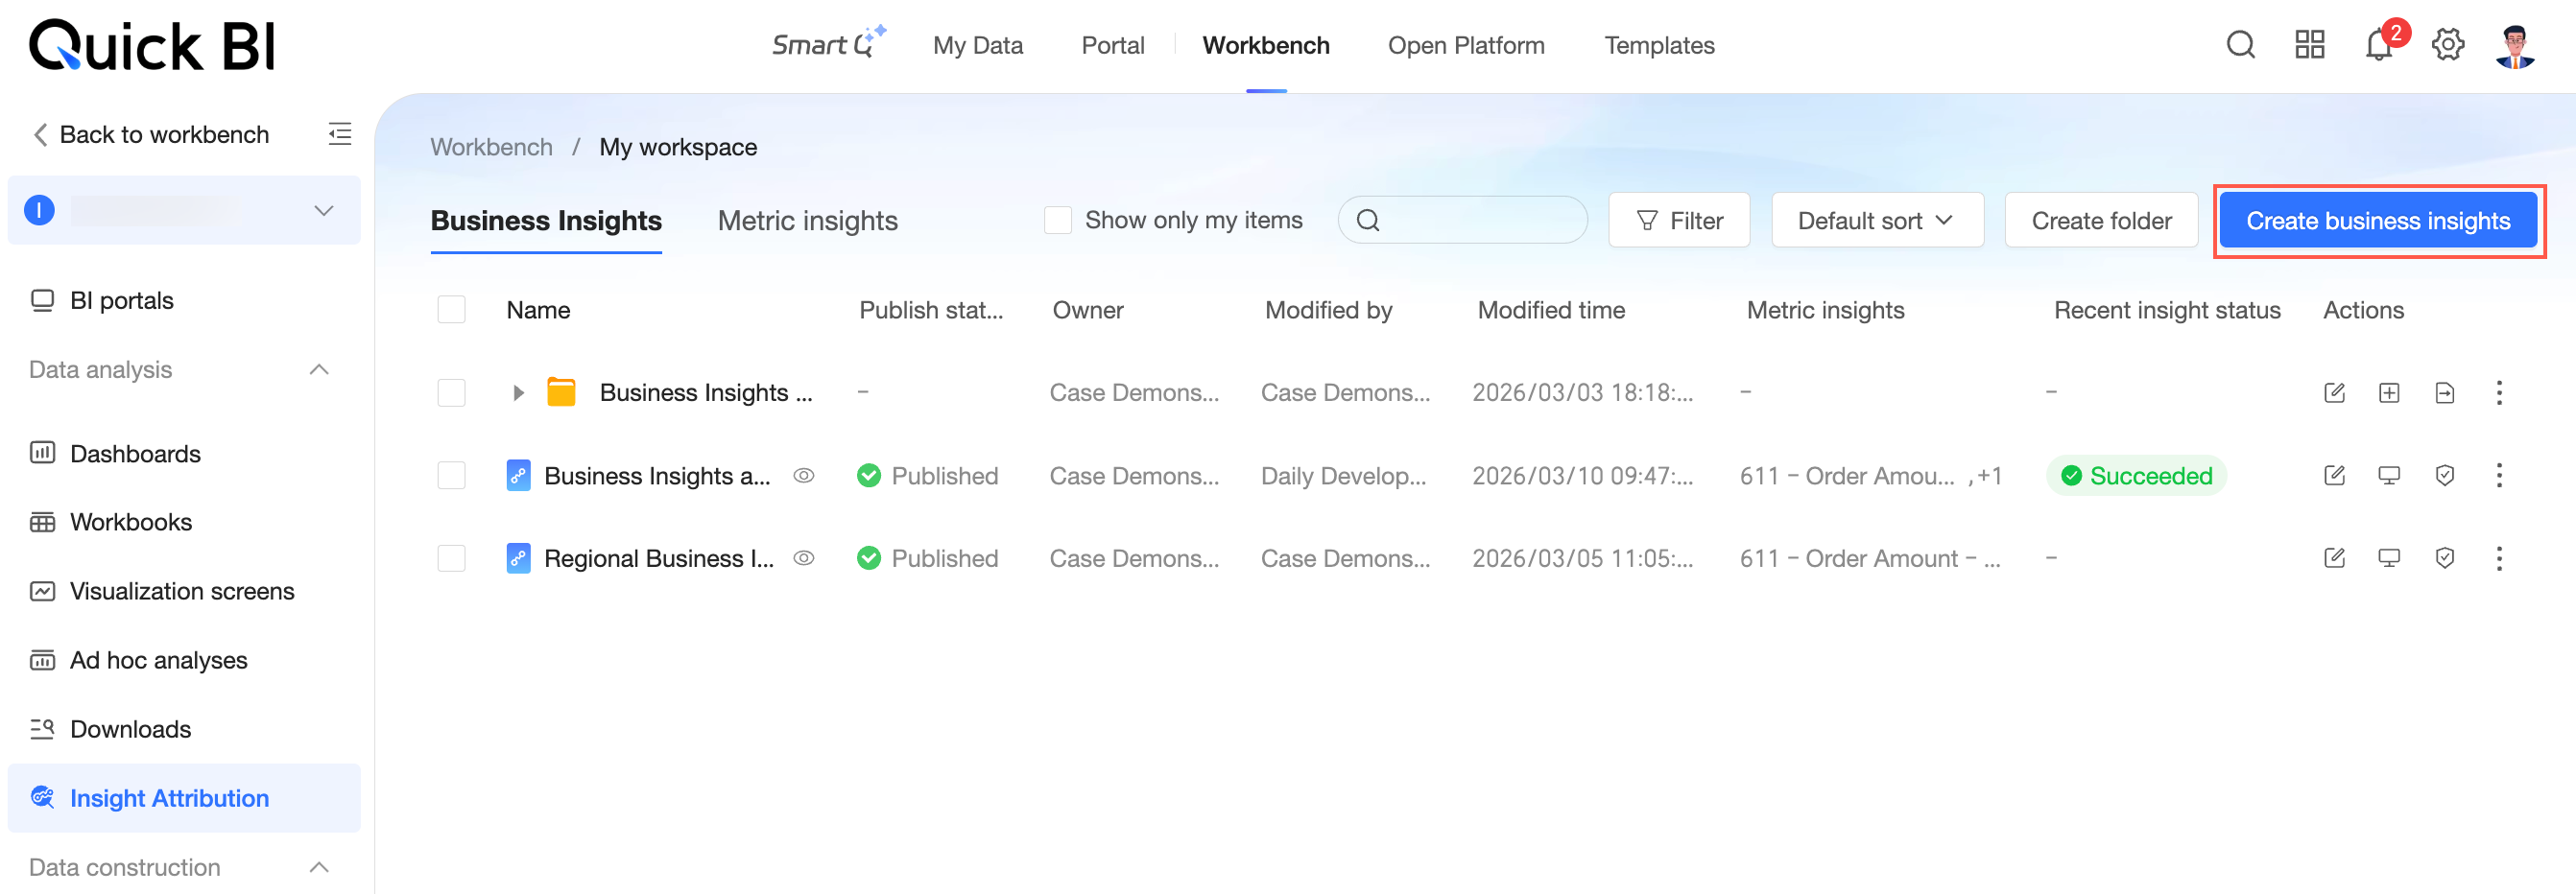
In the navigation pane on the left, choose Insight Attribution > Business Insights.

On the Business Insights page, you can create and manage business insights.
Create Business Insights
Click Create Business Insights.
The Create Business Insights page appears.
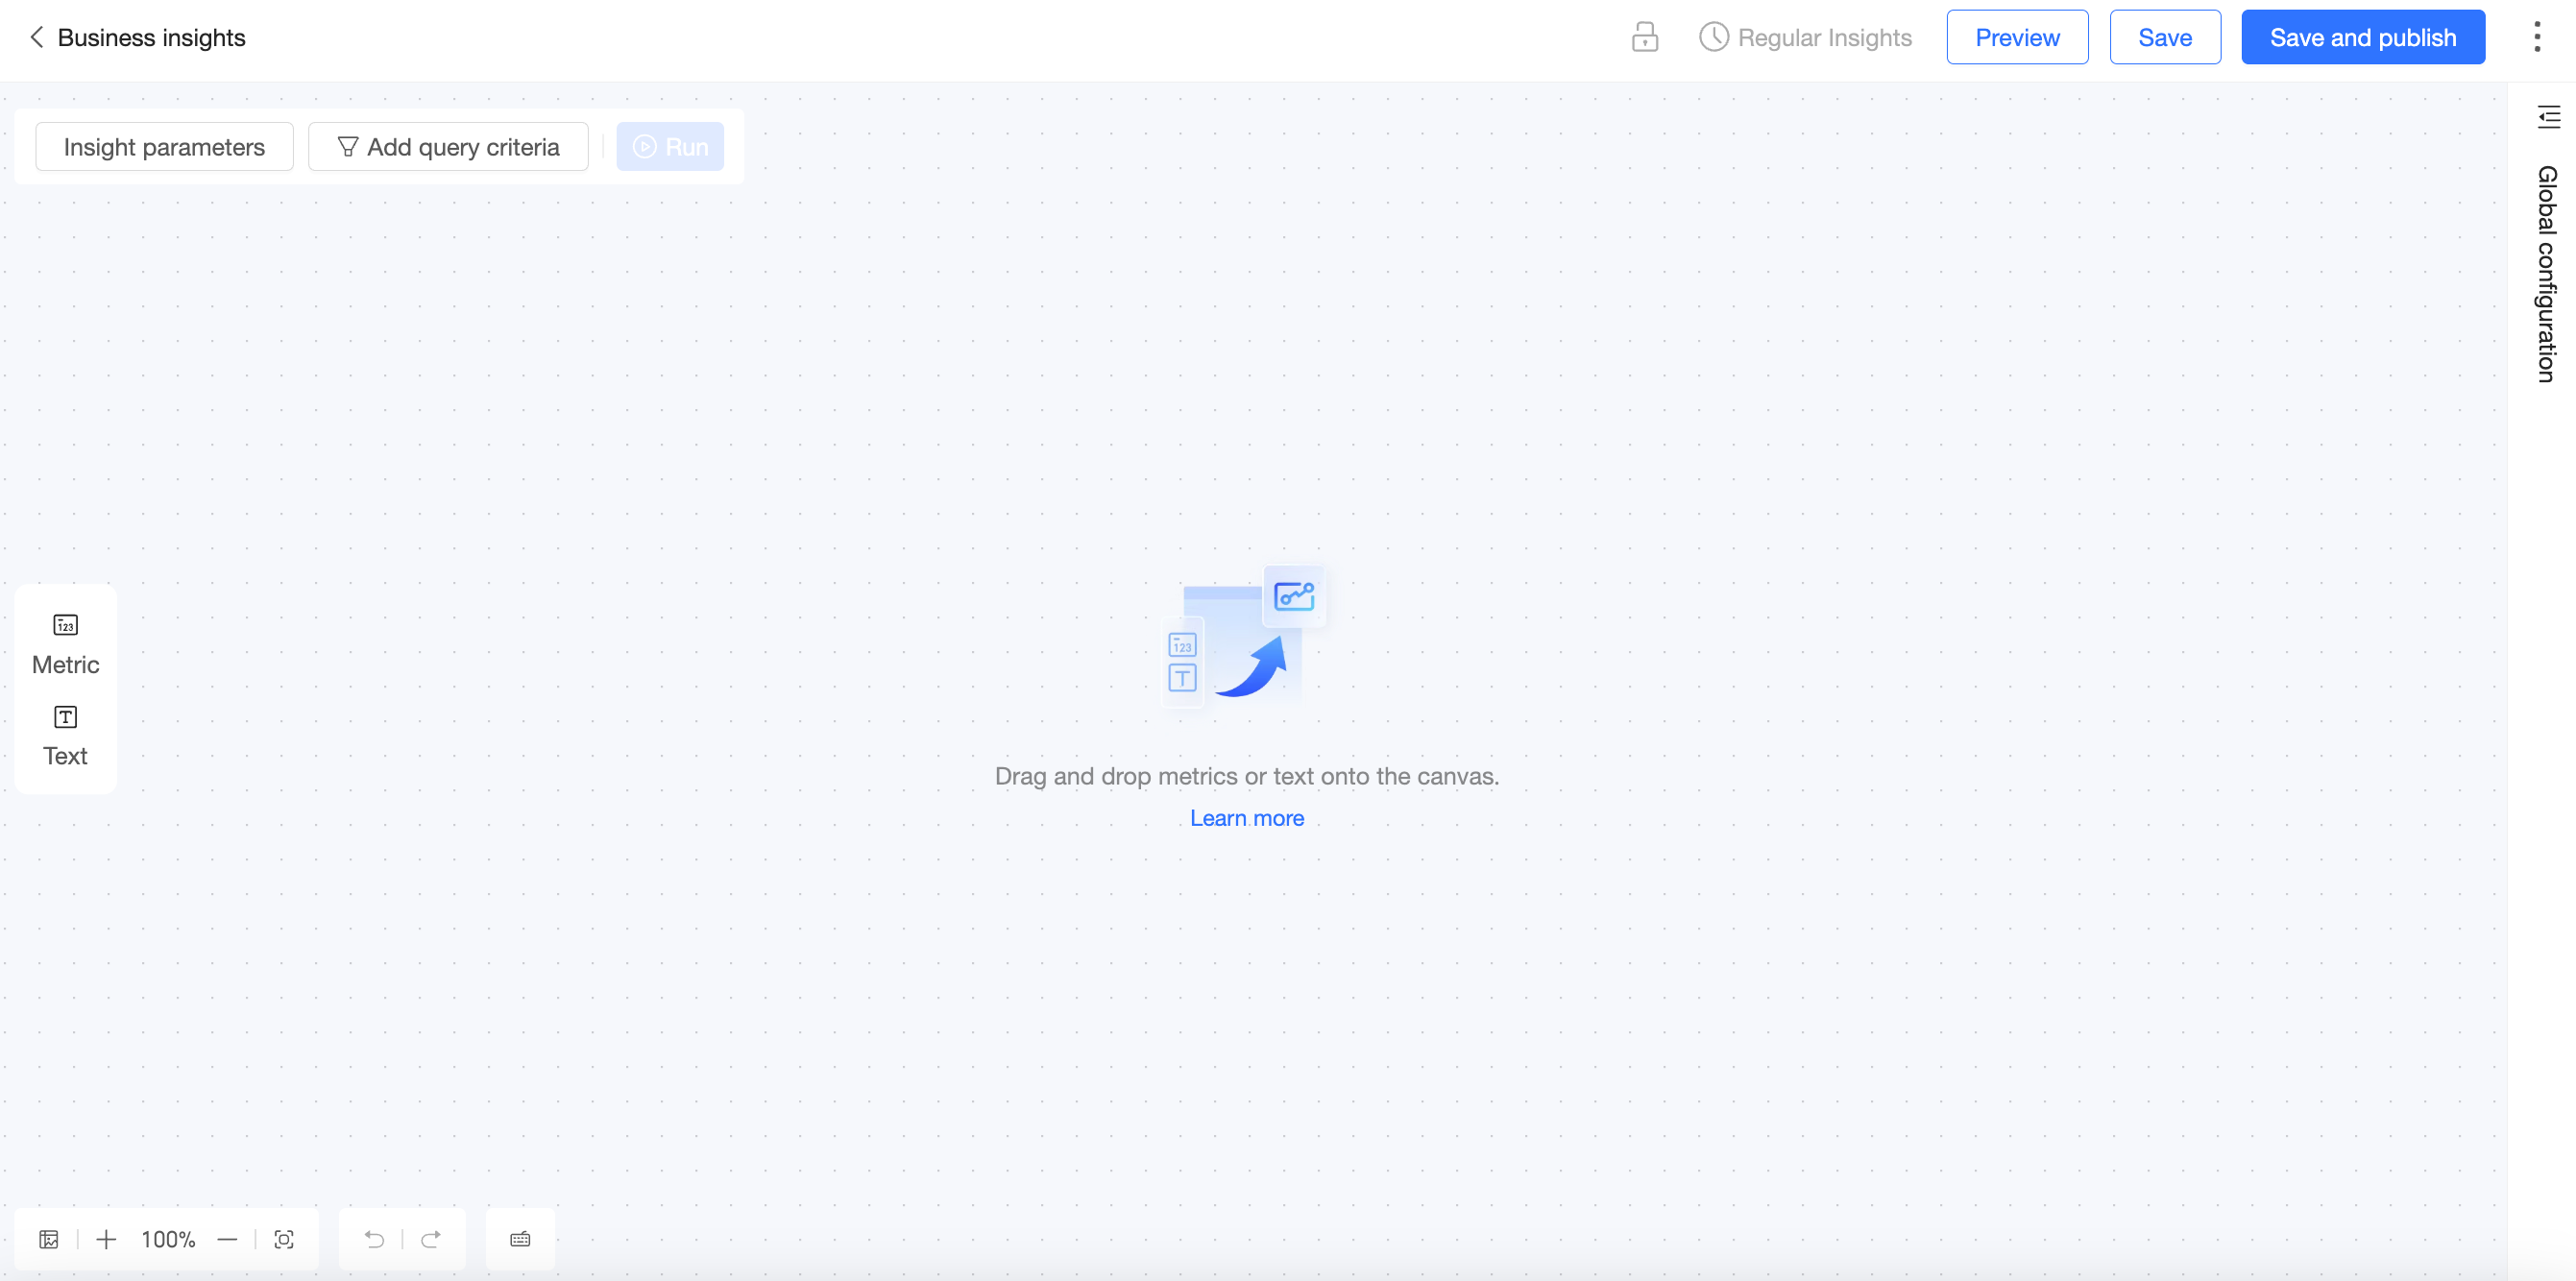
Create indicator nodes and text nodes, and then complete the relevant configuration. For more information, see the following sections.
If you create multiple nodes, arrange and connect them based on your business logic.

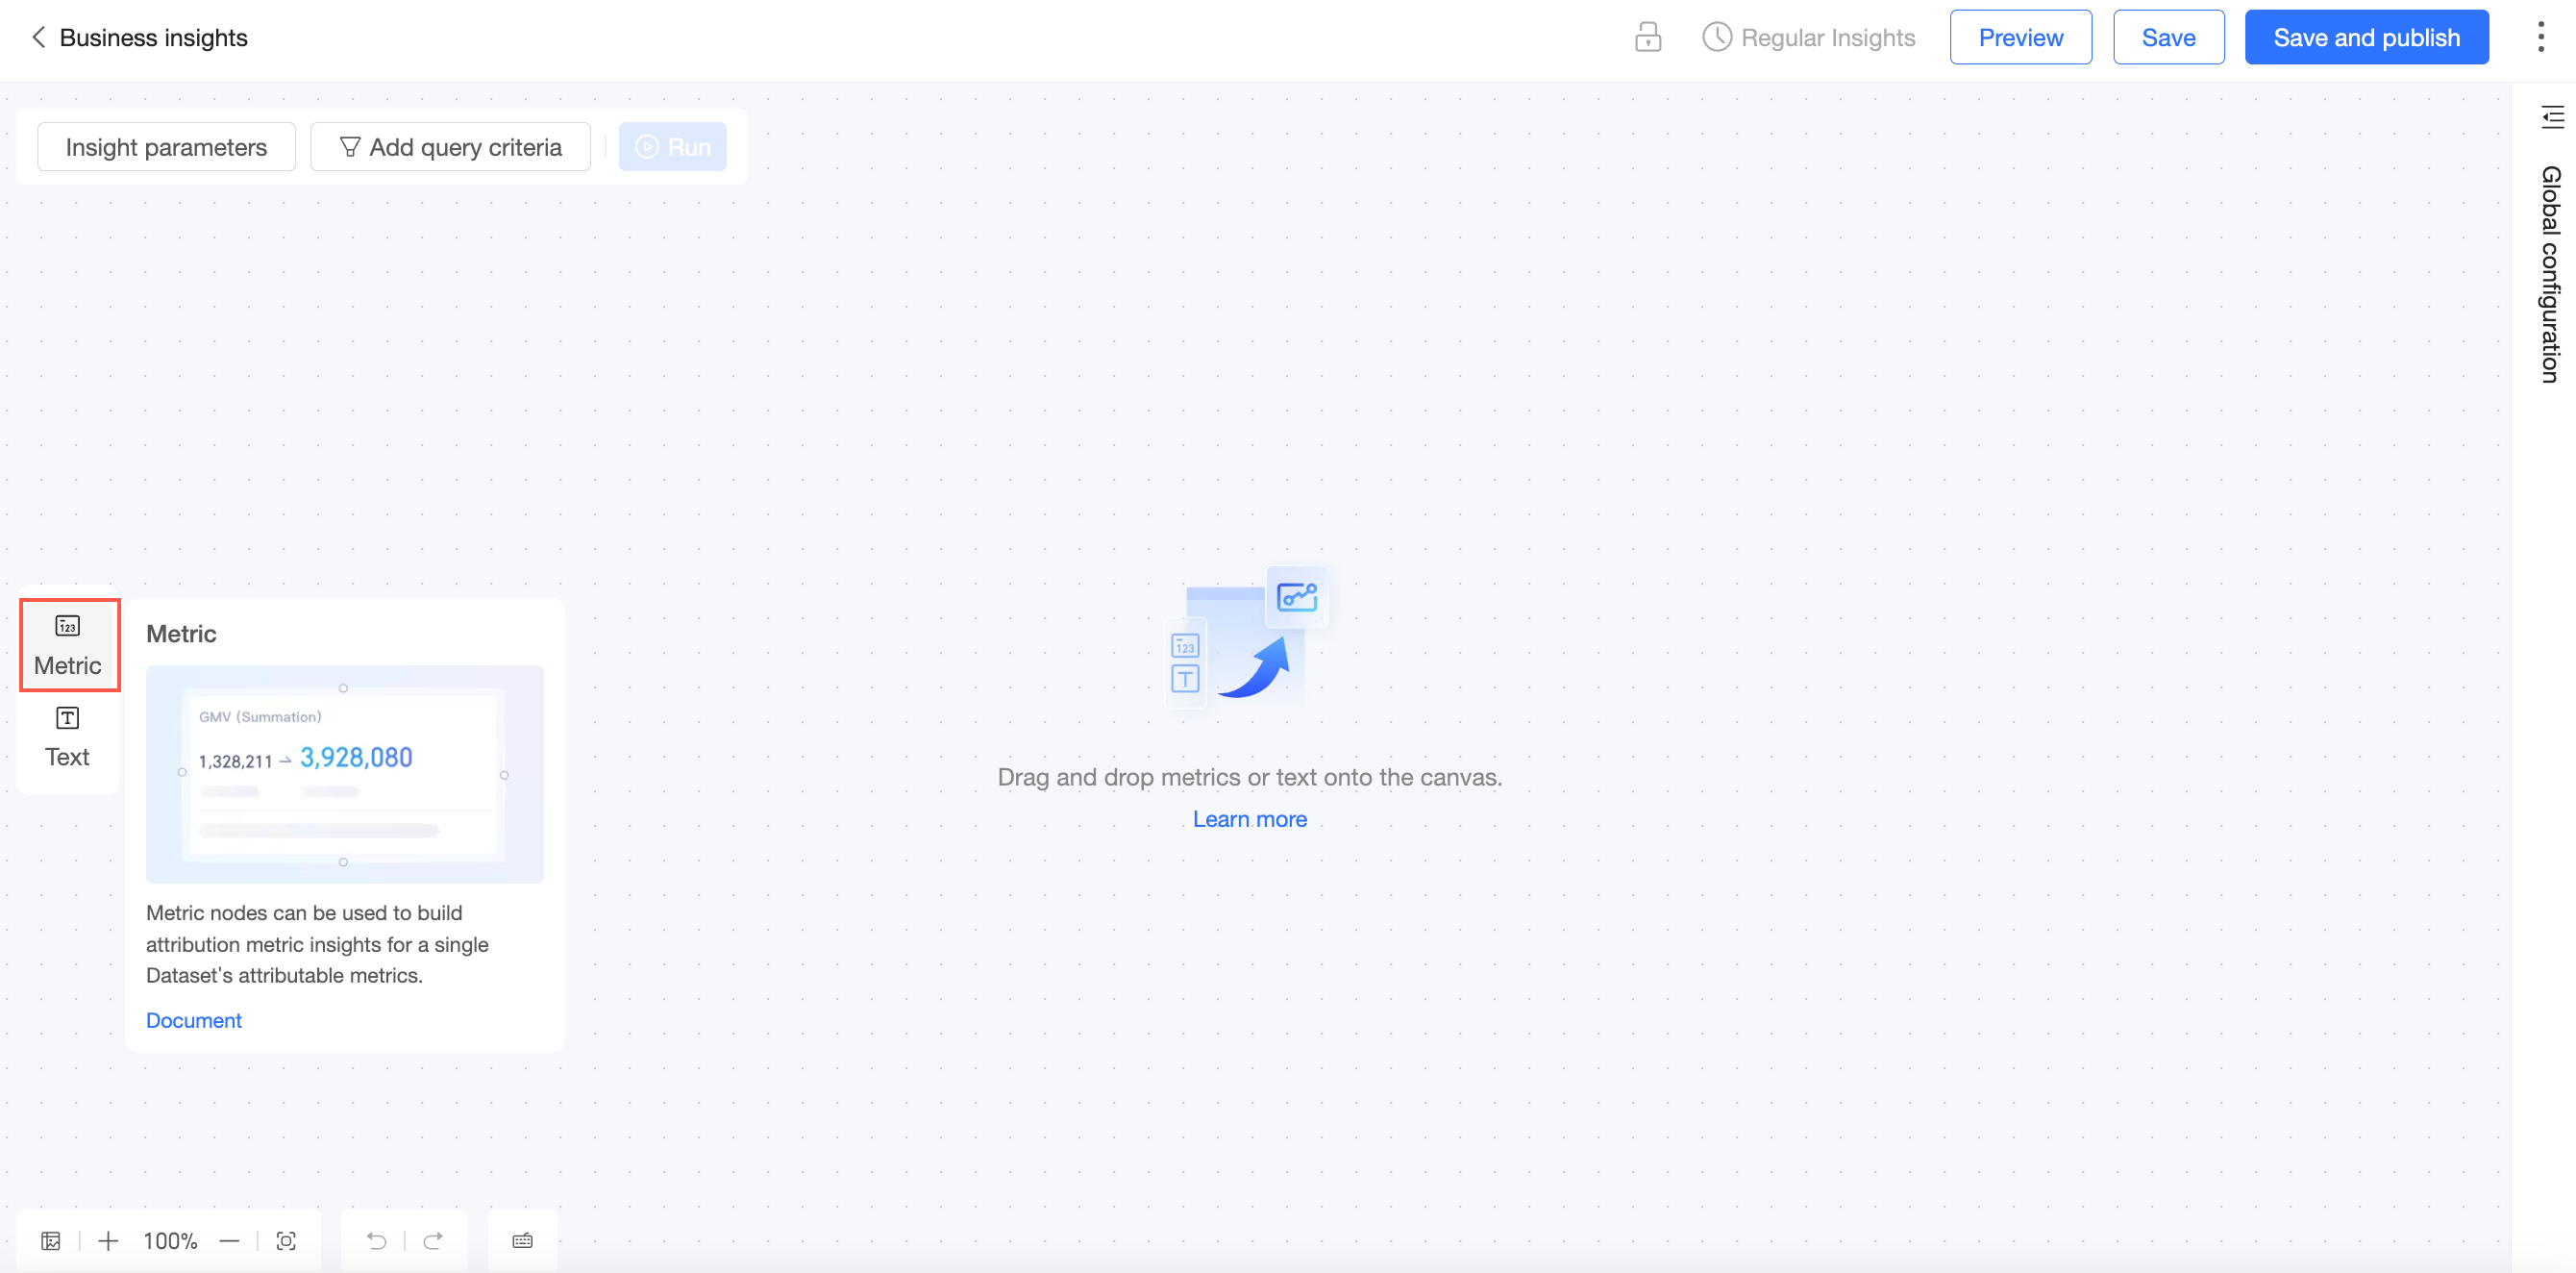
Indicator Node
You can use an indicator node to perform in-depth insight and attribution analysis of an indicator in a dataset.
Drag the indicator node to the canvas.
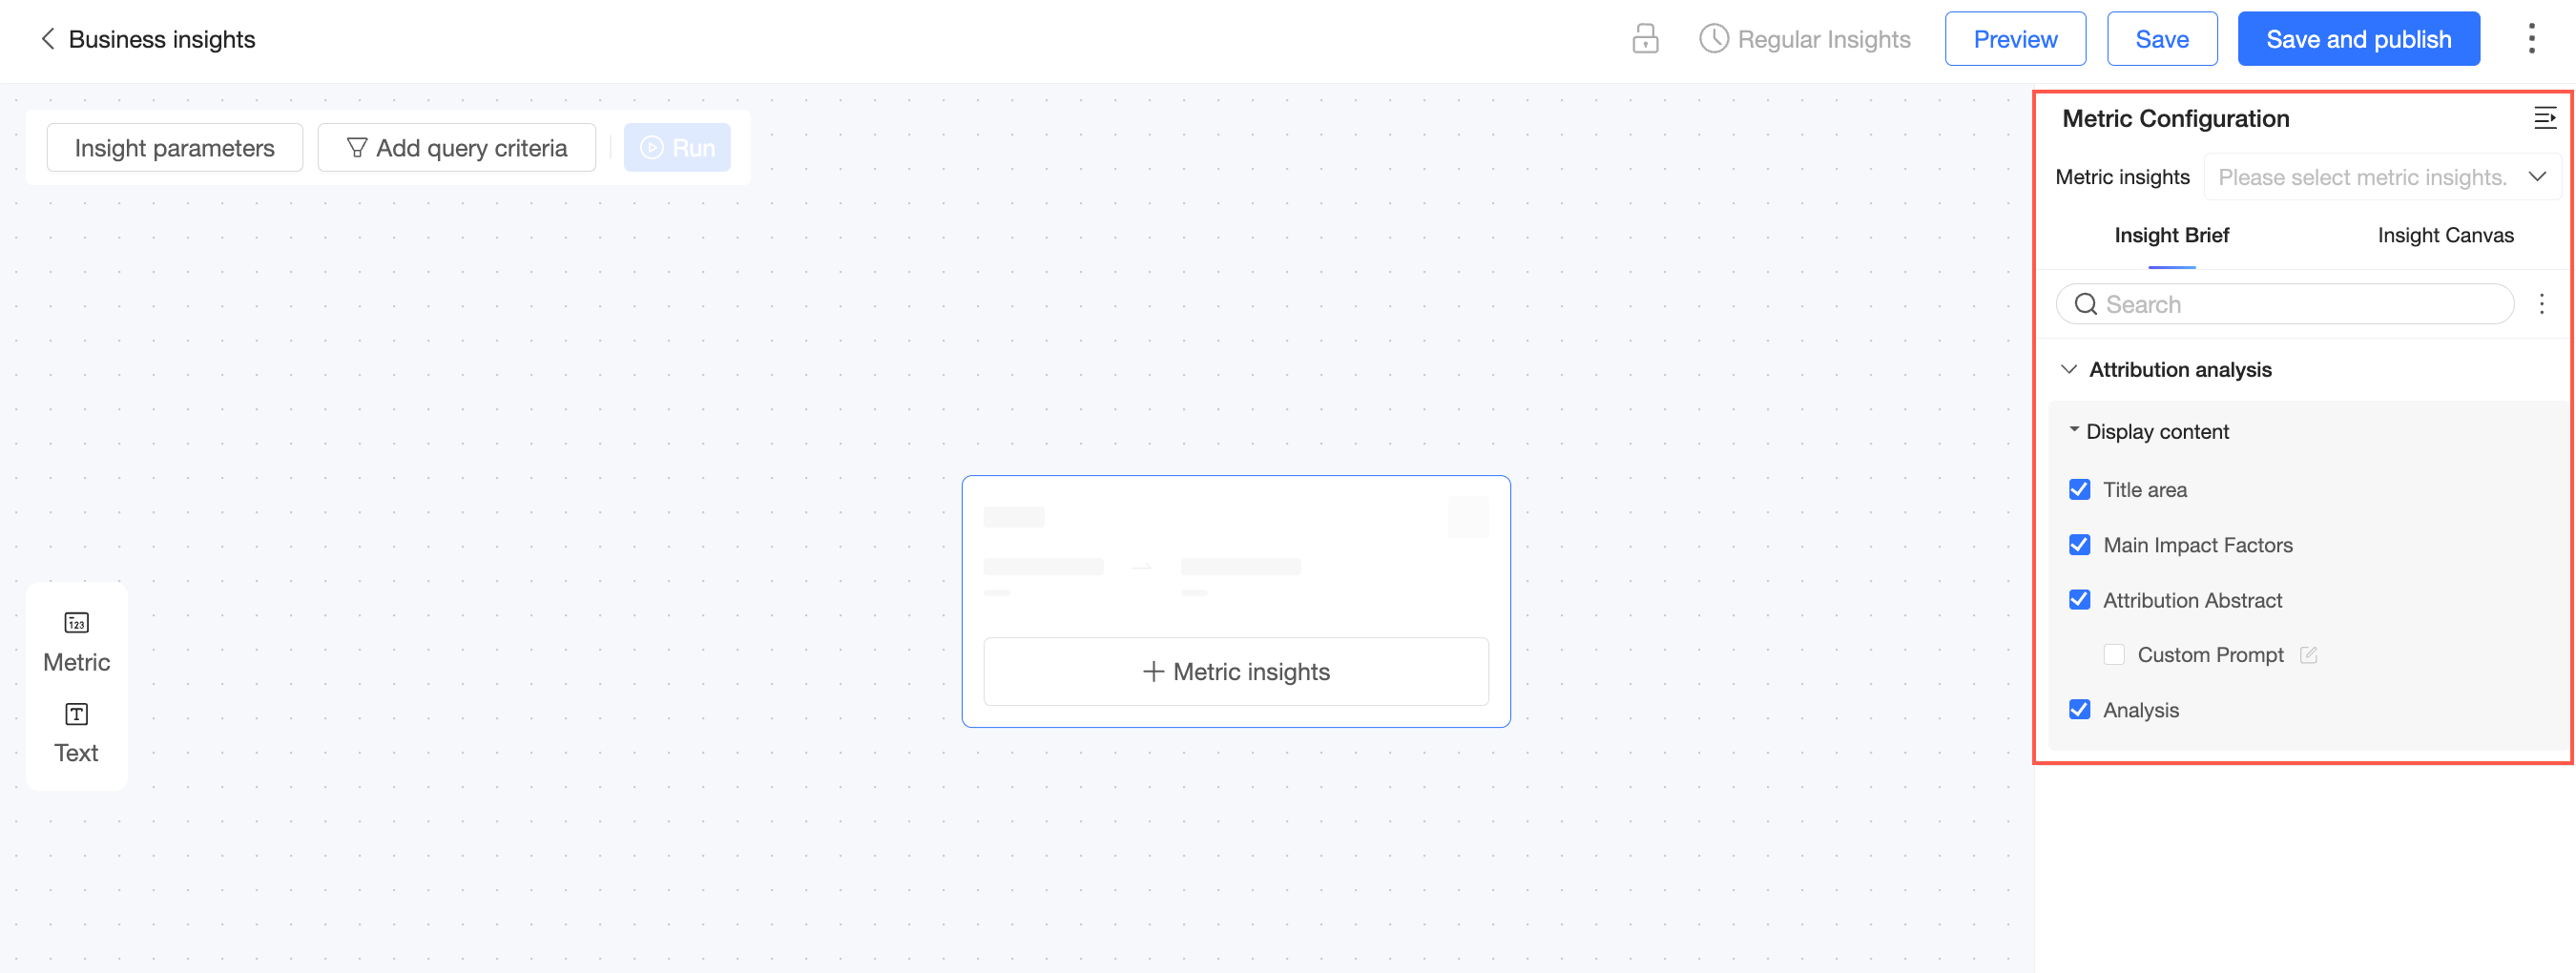
On the indicator configuration panel, configure the following parameters.

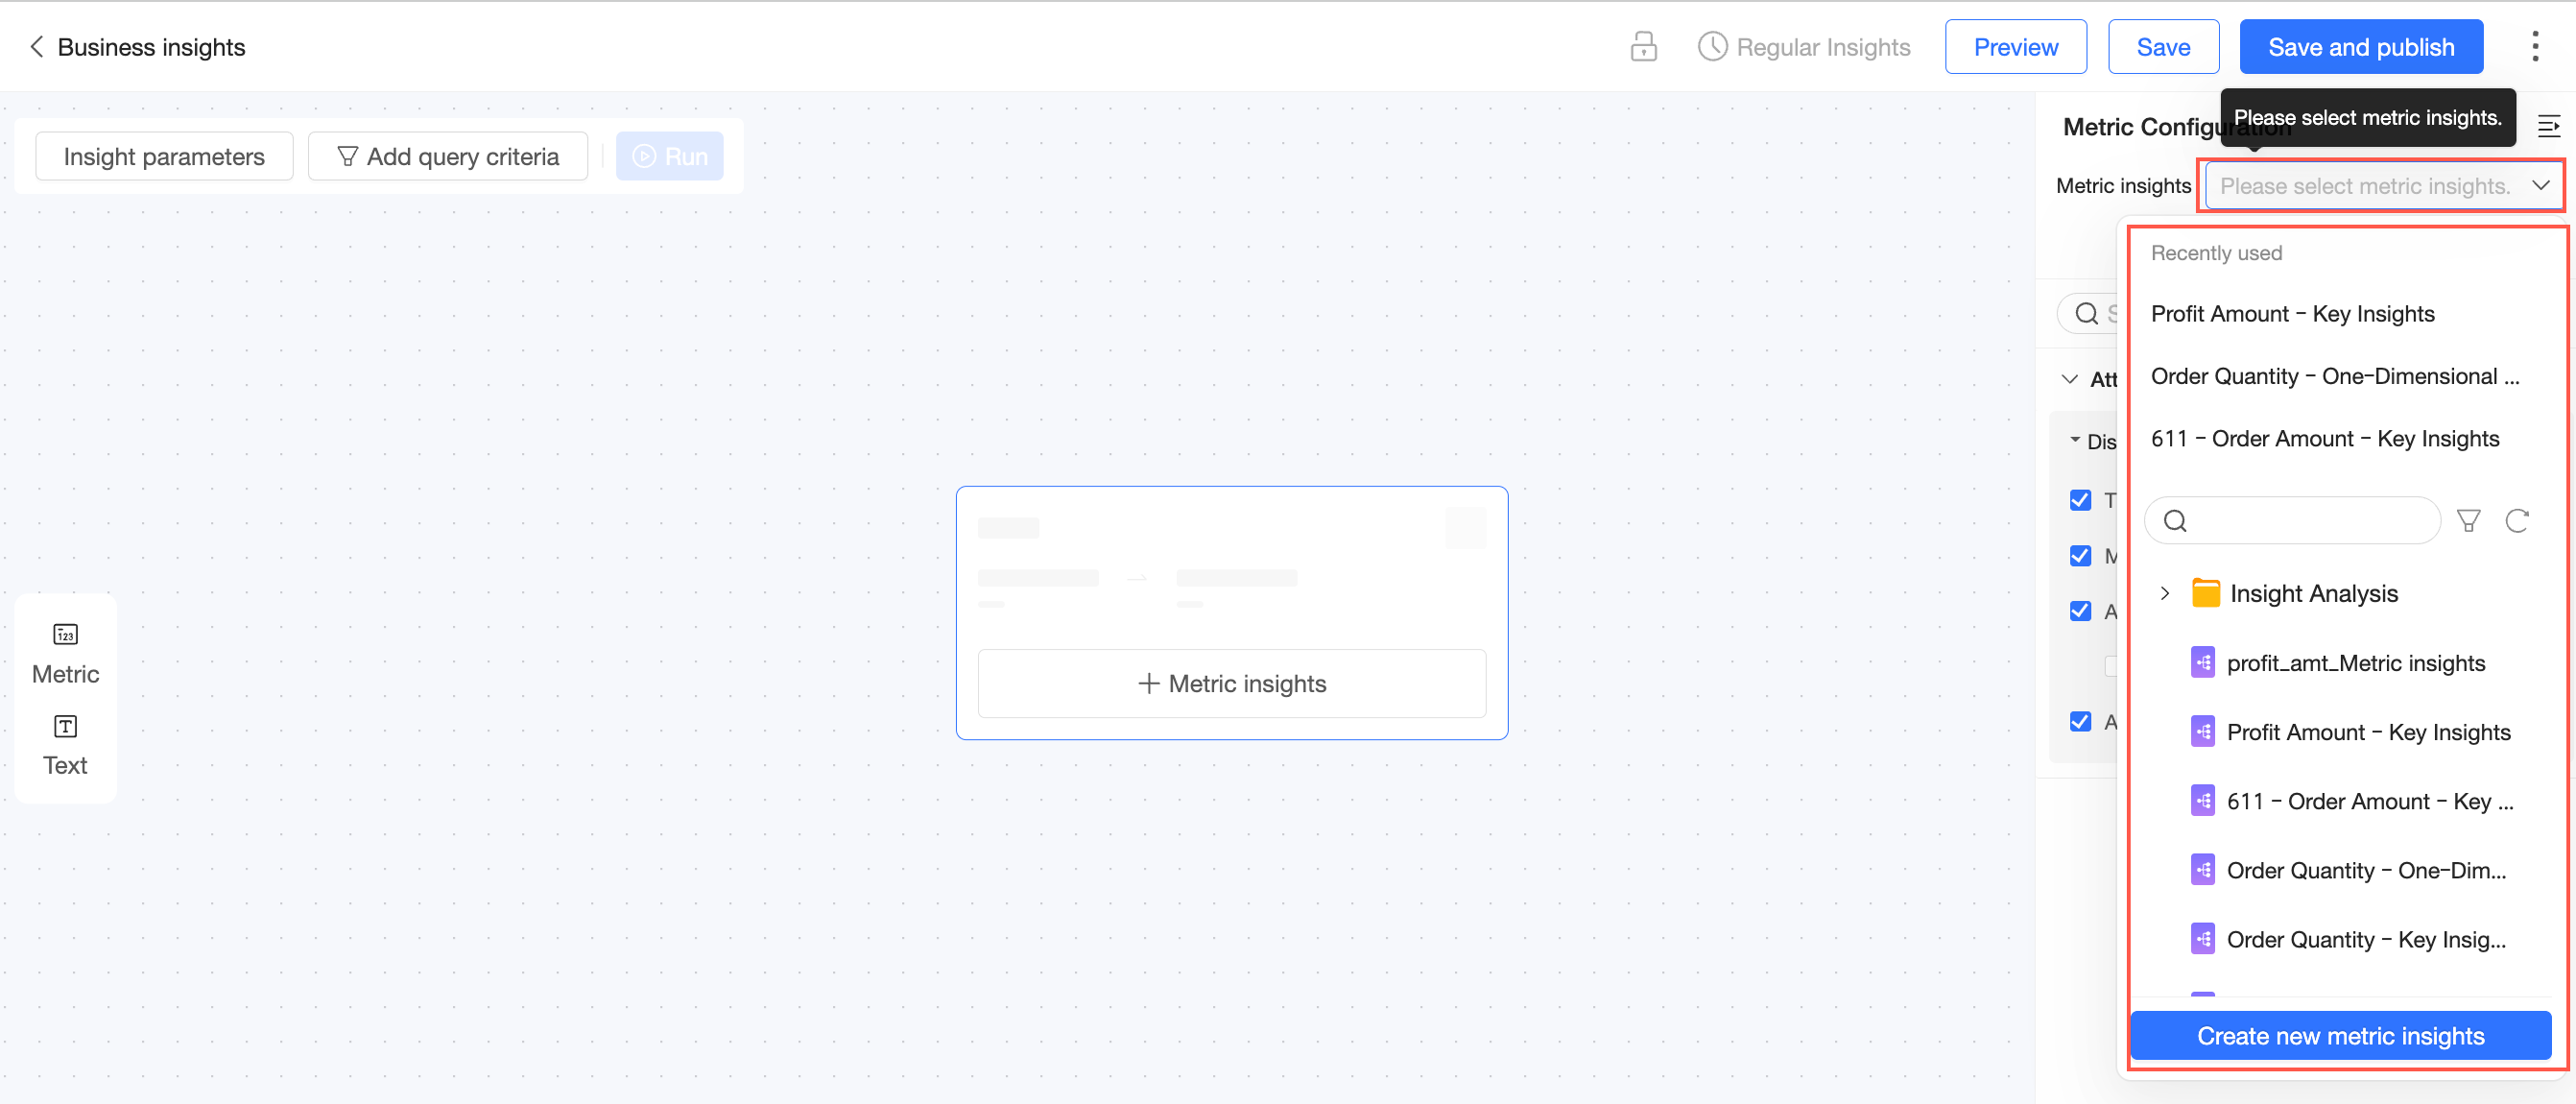
Select Indicator Insight.
Select a published indicator insight.
You can also click Create Indicator Insight to go to the indicator insight creation page.
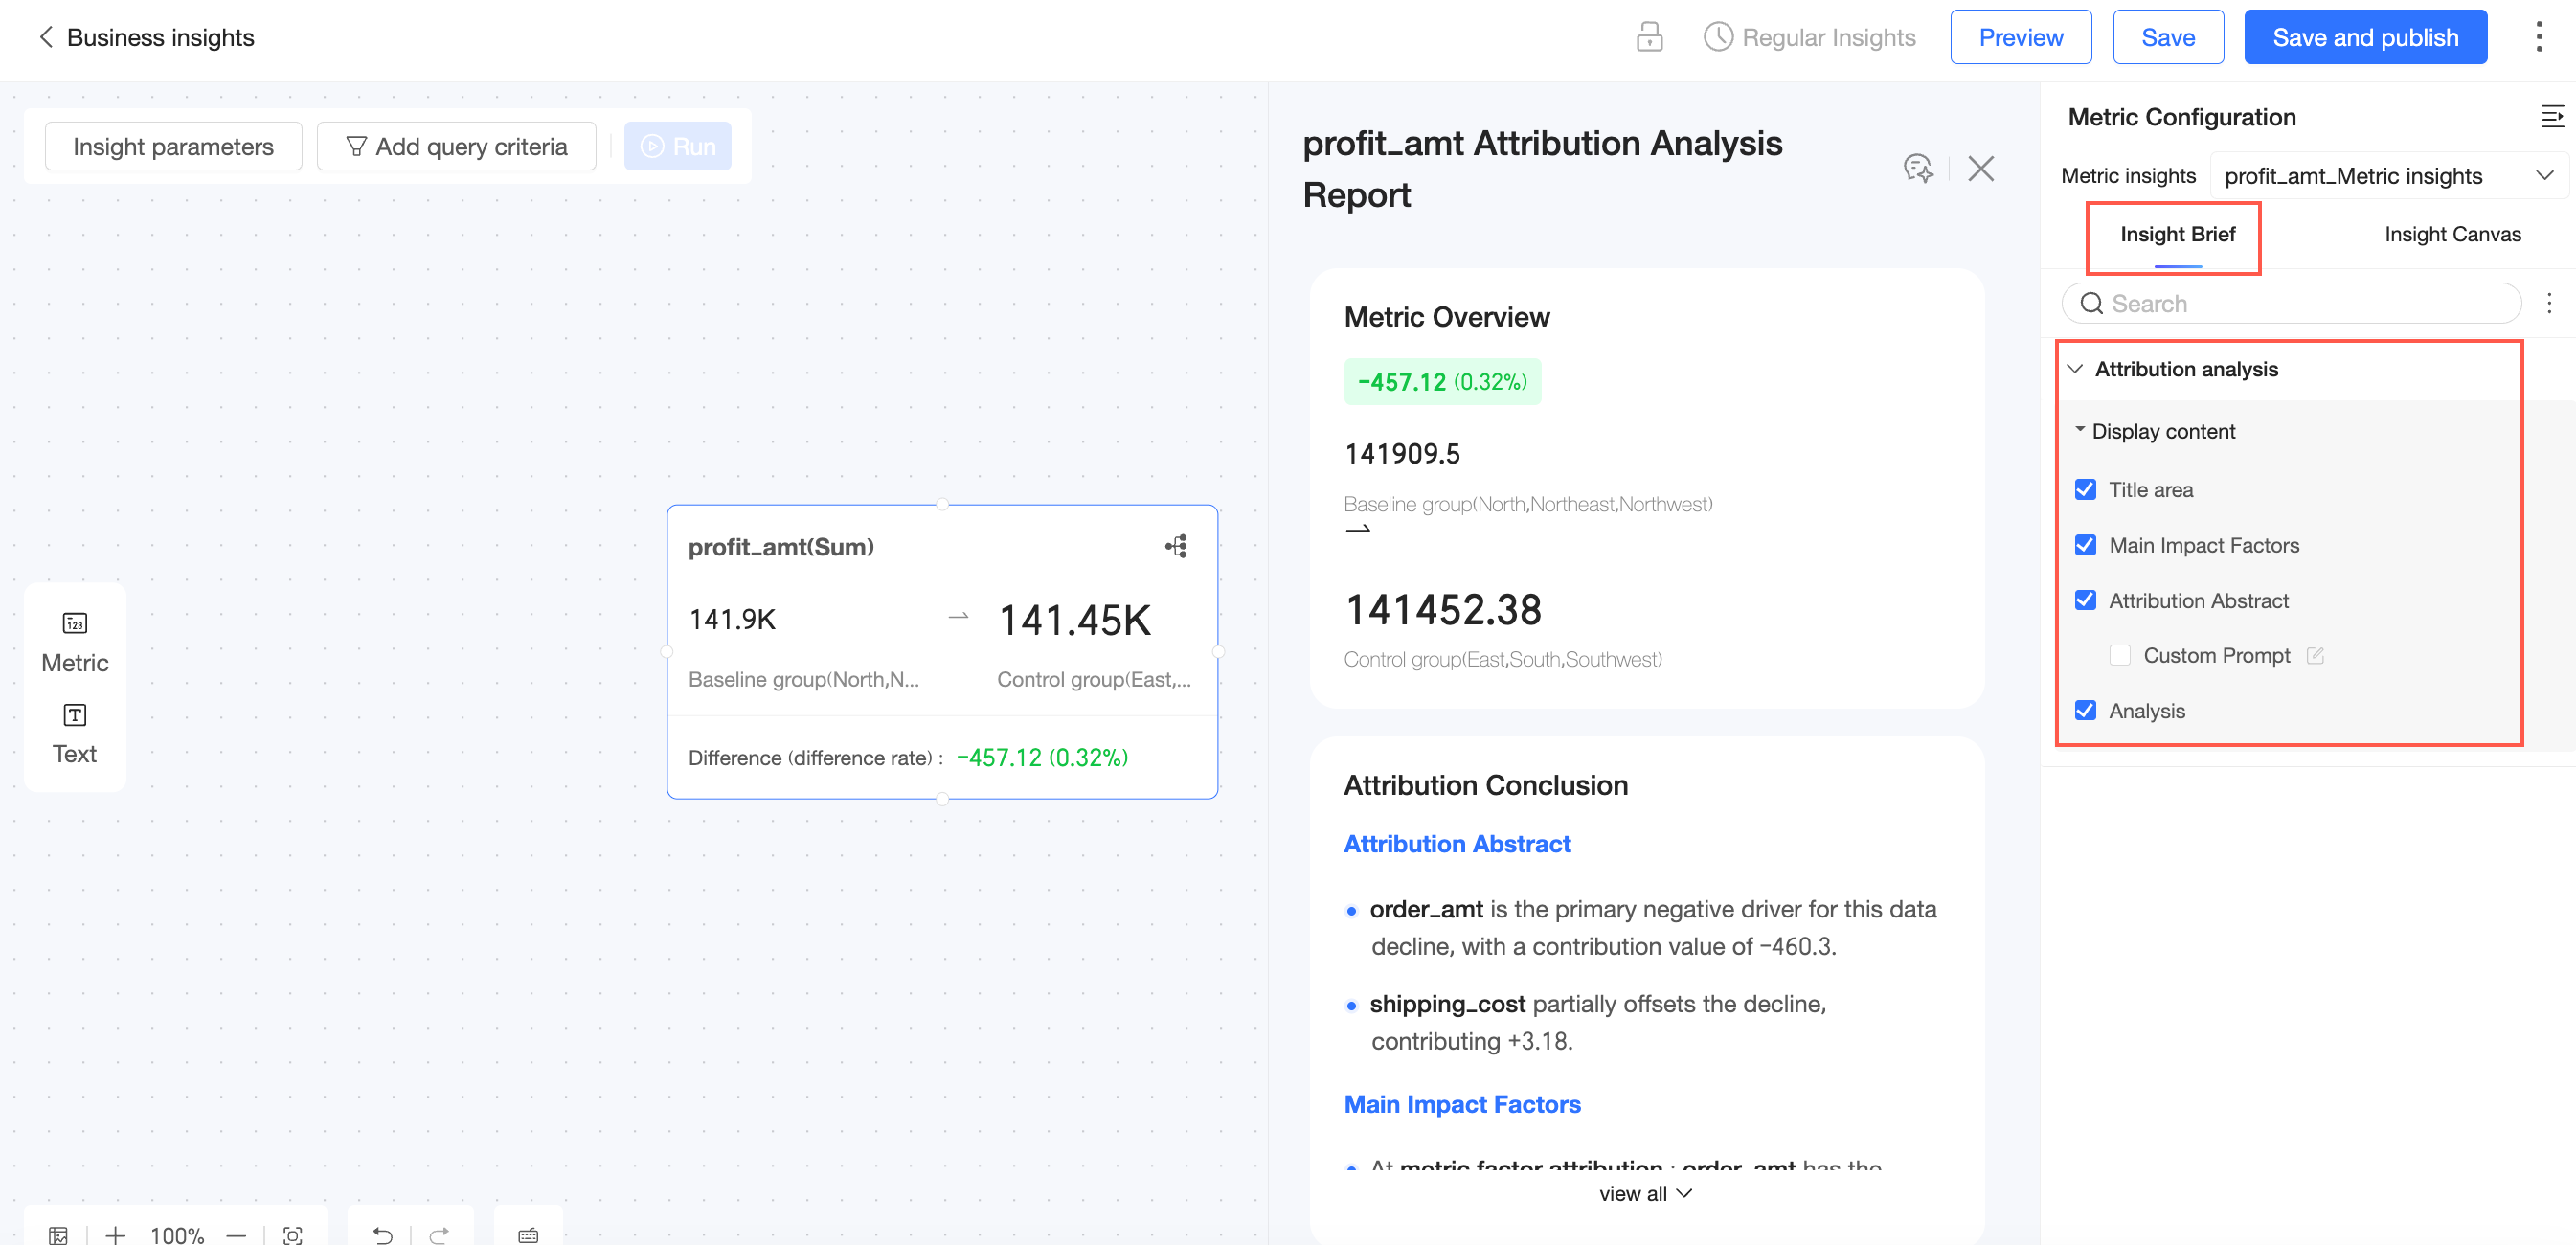
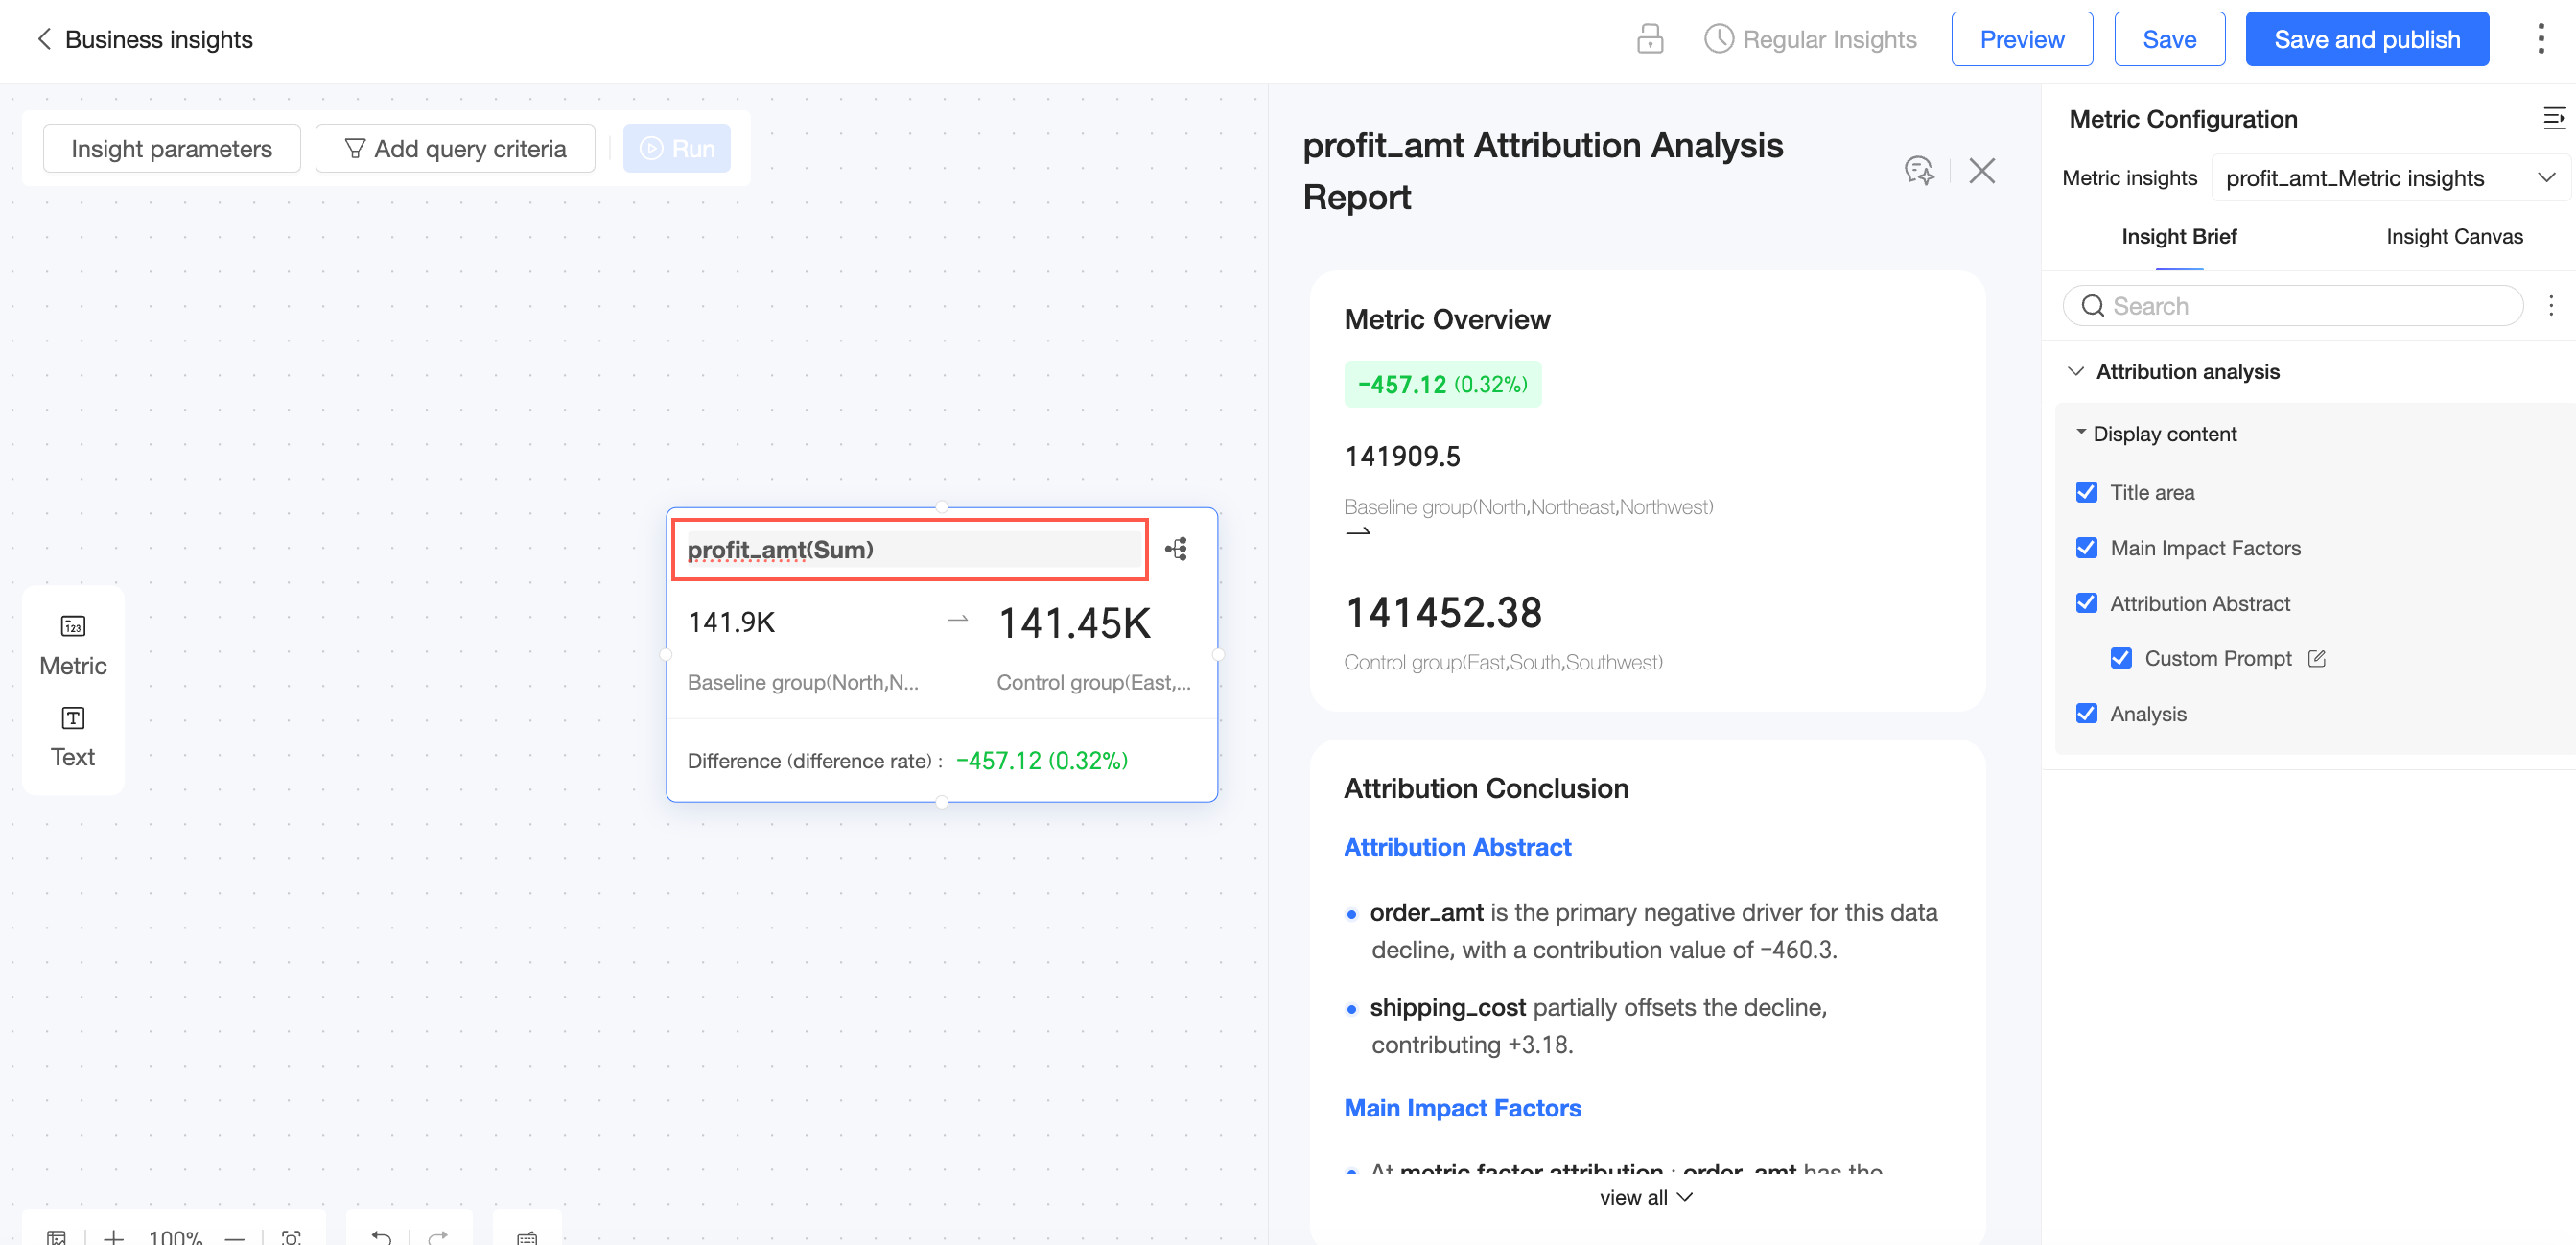
On the Insight Brief tab, you can show or hide the Title Area, Main Influencing Factors, Attribution Summary, and Detailed Analysis.
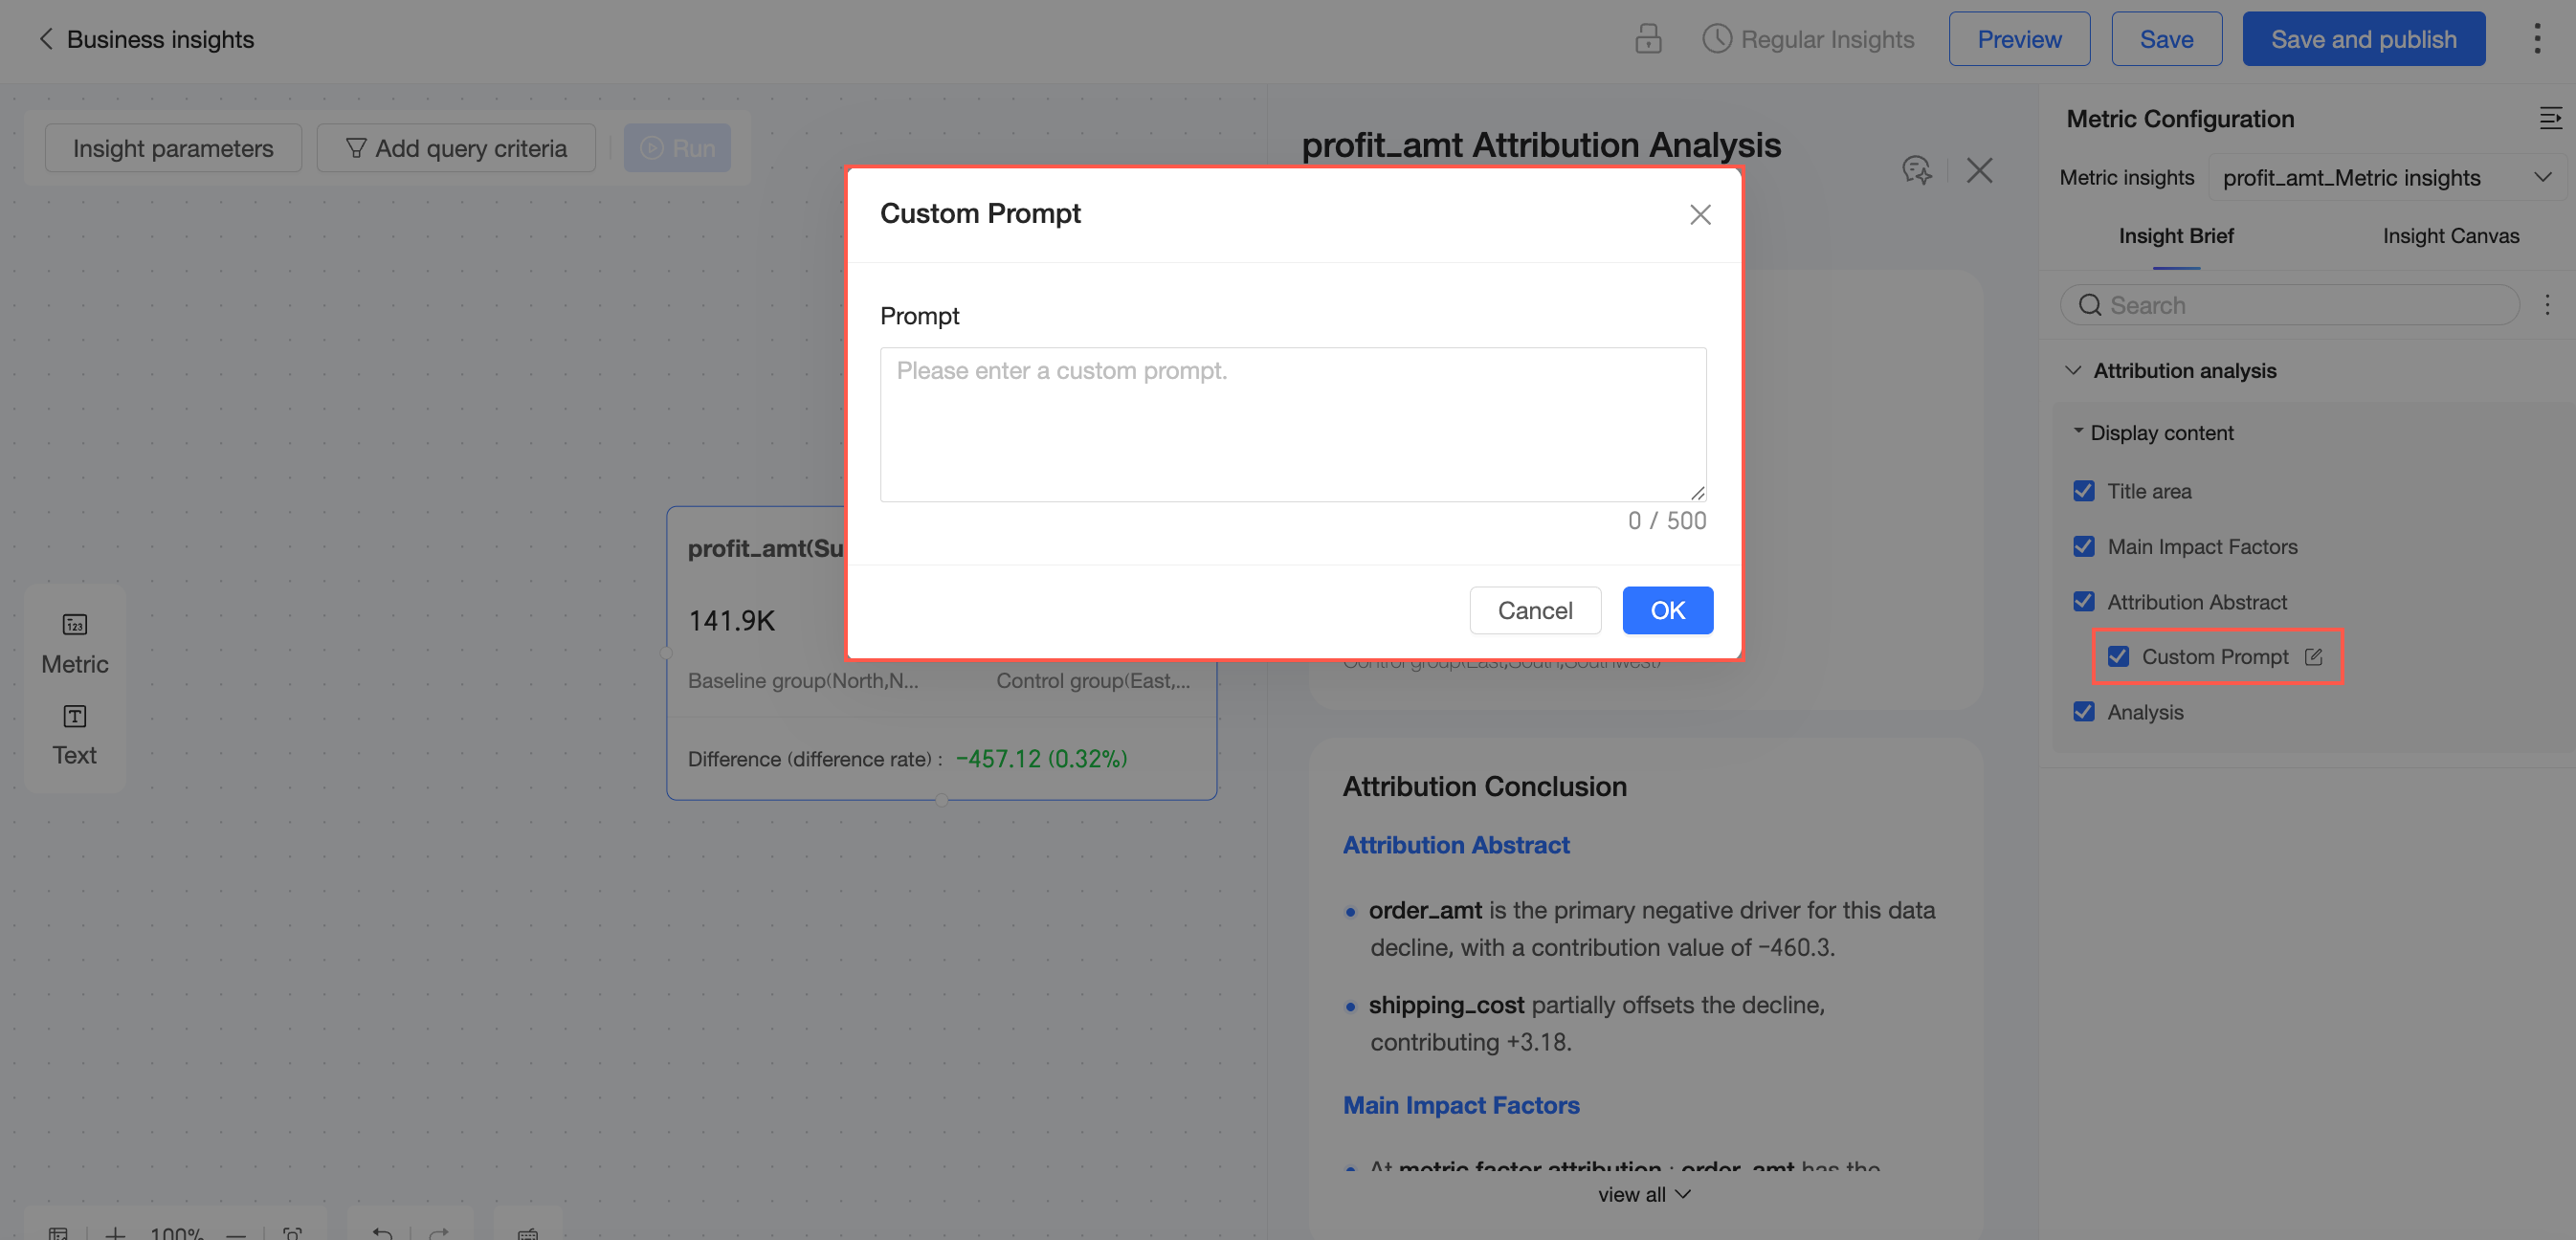
You can configure Custom Prompt settings for the Attribution Summary.
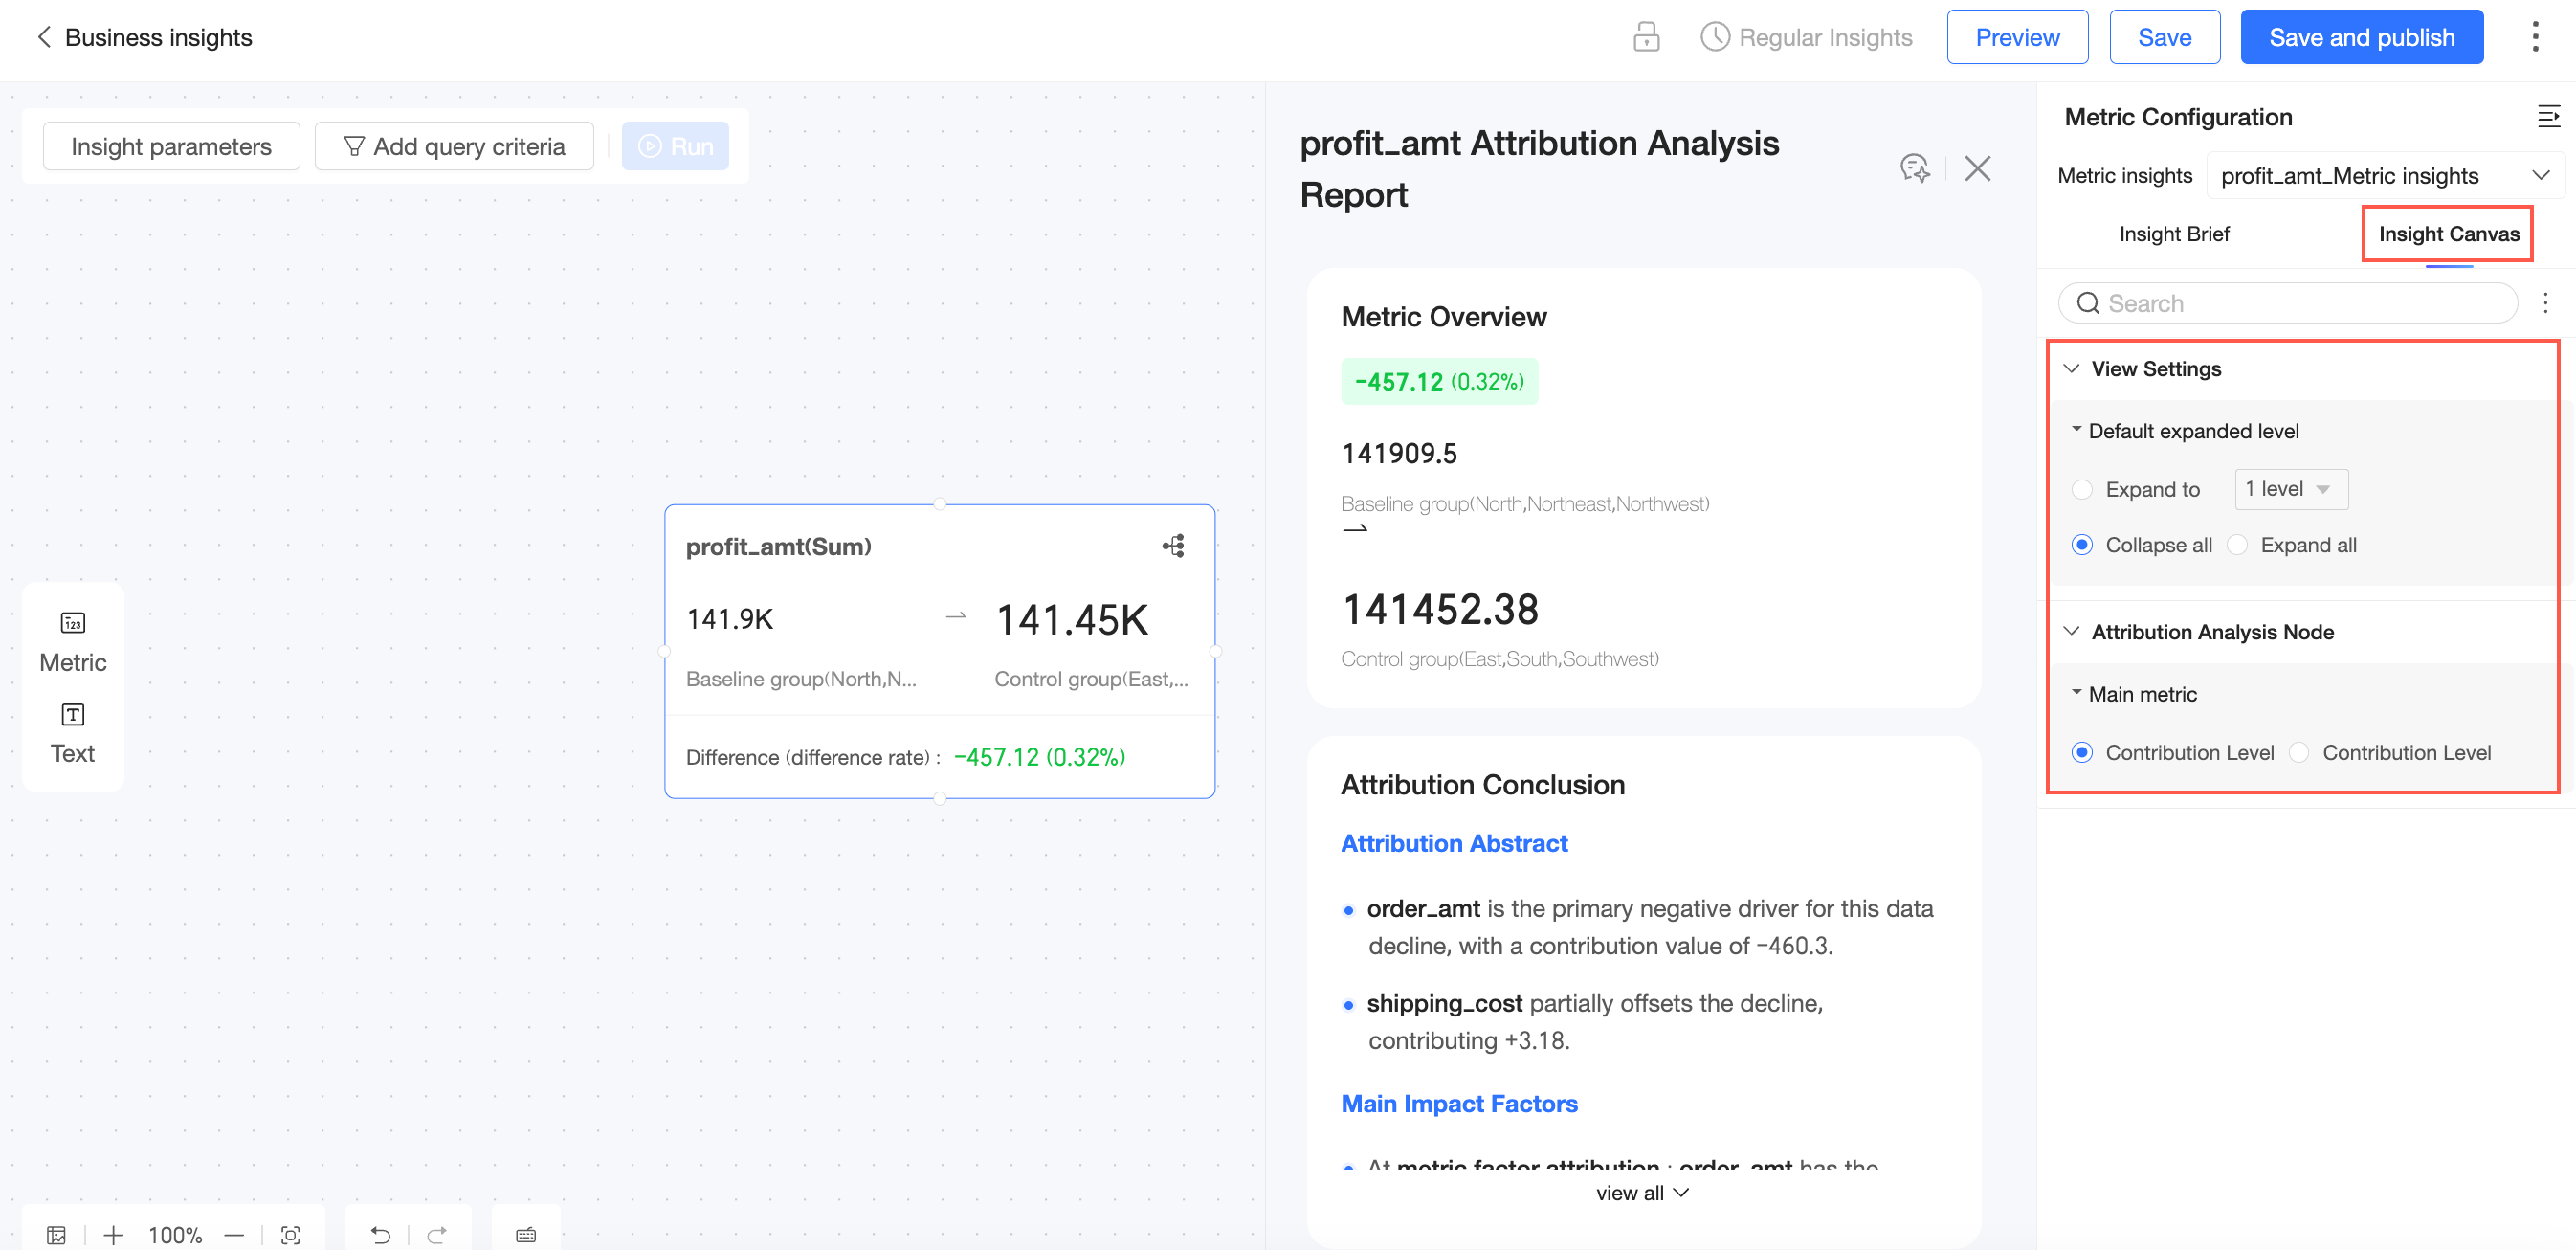
On the Insight Canvas tab, configure the View Settings and Attribution Node settings.
In the View Settings section, set the Default Expansion Level. This includes Expand to N Layers (maximum 6 layers) and the default expansion state, which can be Collapse All or Expand All.
In the Attribution Node section, set the Main Indicator to Contribution Rate or Contribution Amount.
Double-click the indicator node name to rename it.
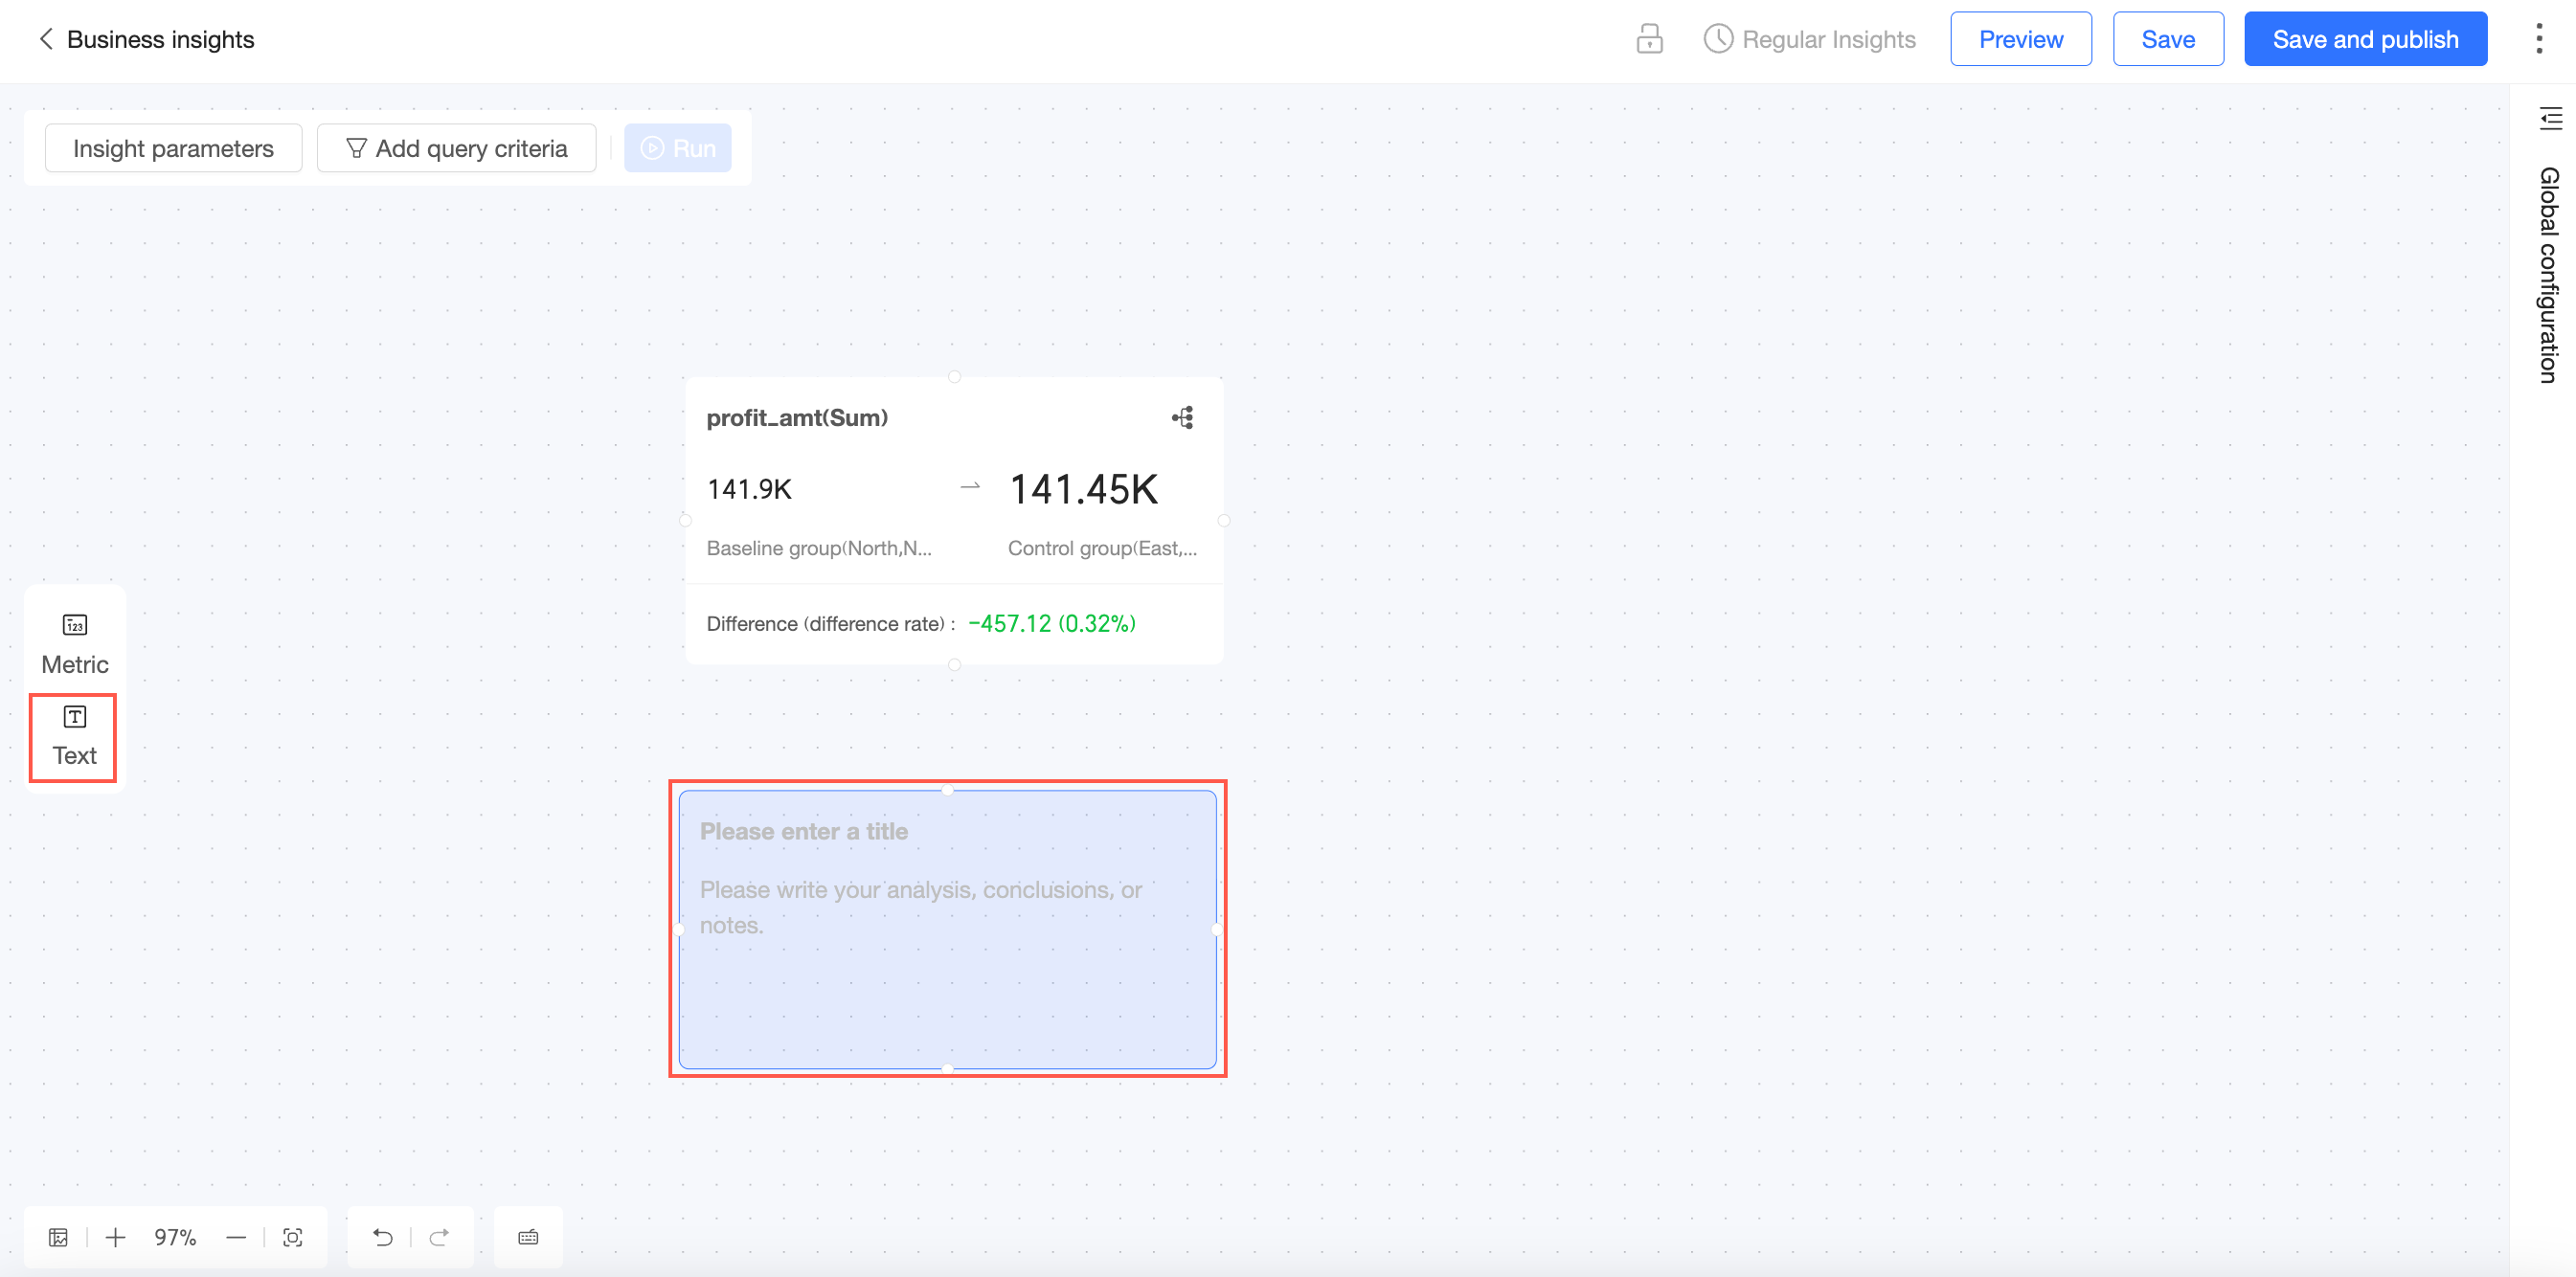
Text Node
You can use a text node to provide an overall explanation of business insights or a description of a specific link segment. You can add content such as an analysis description, a conclusion, or remarks.
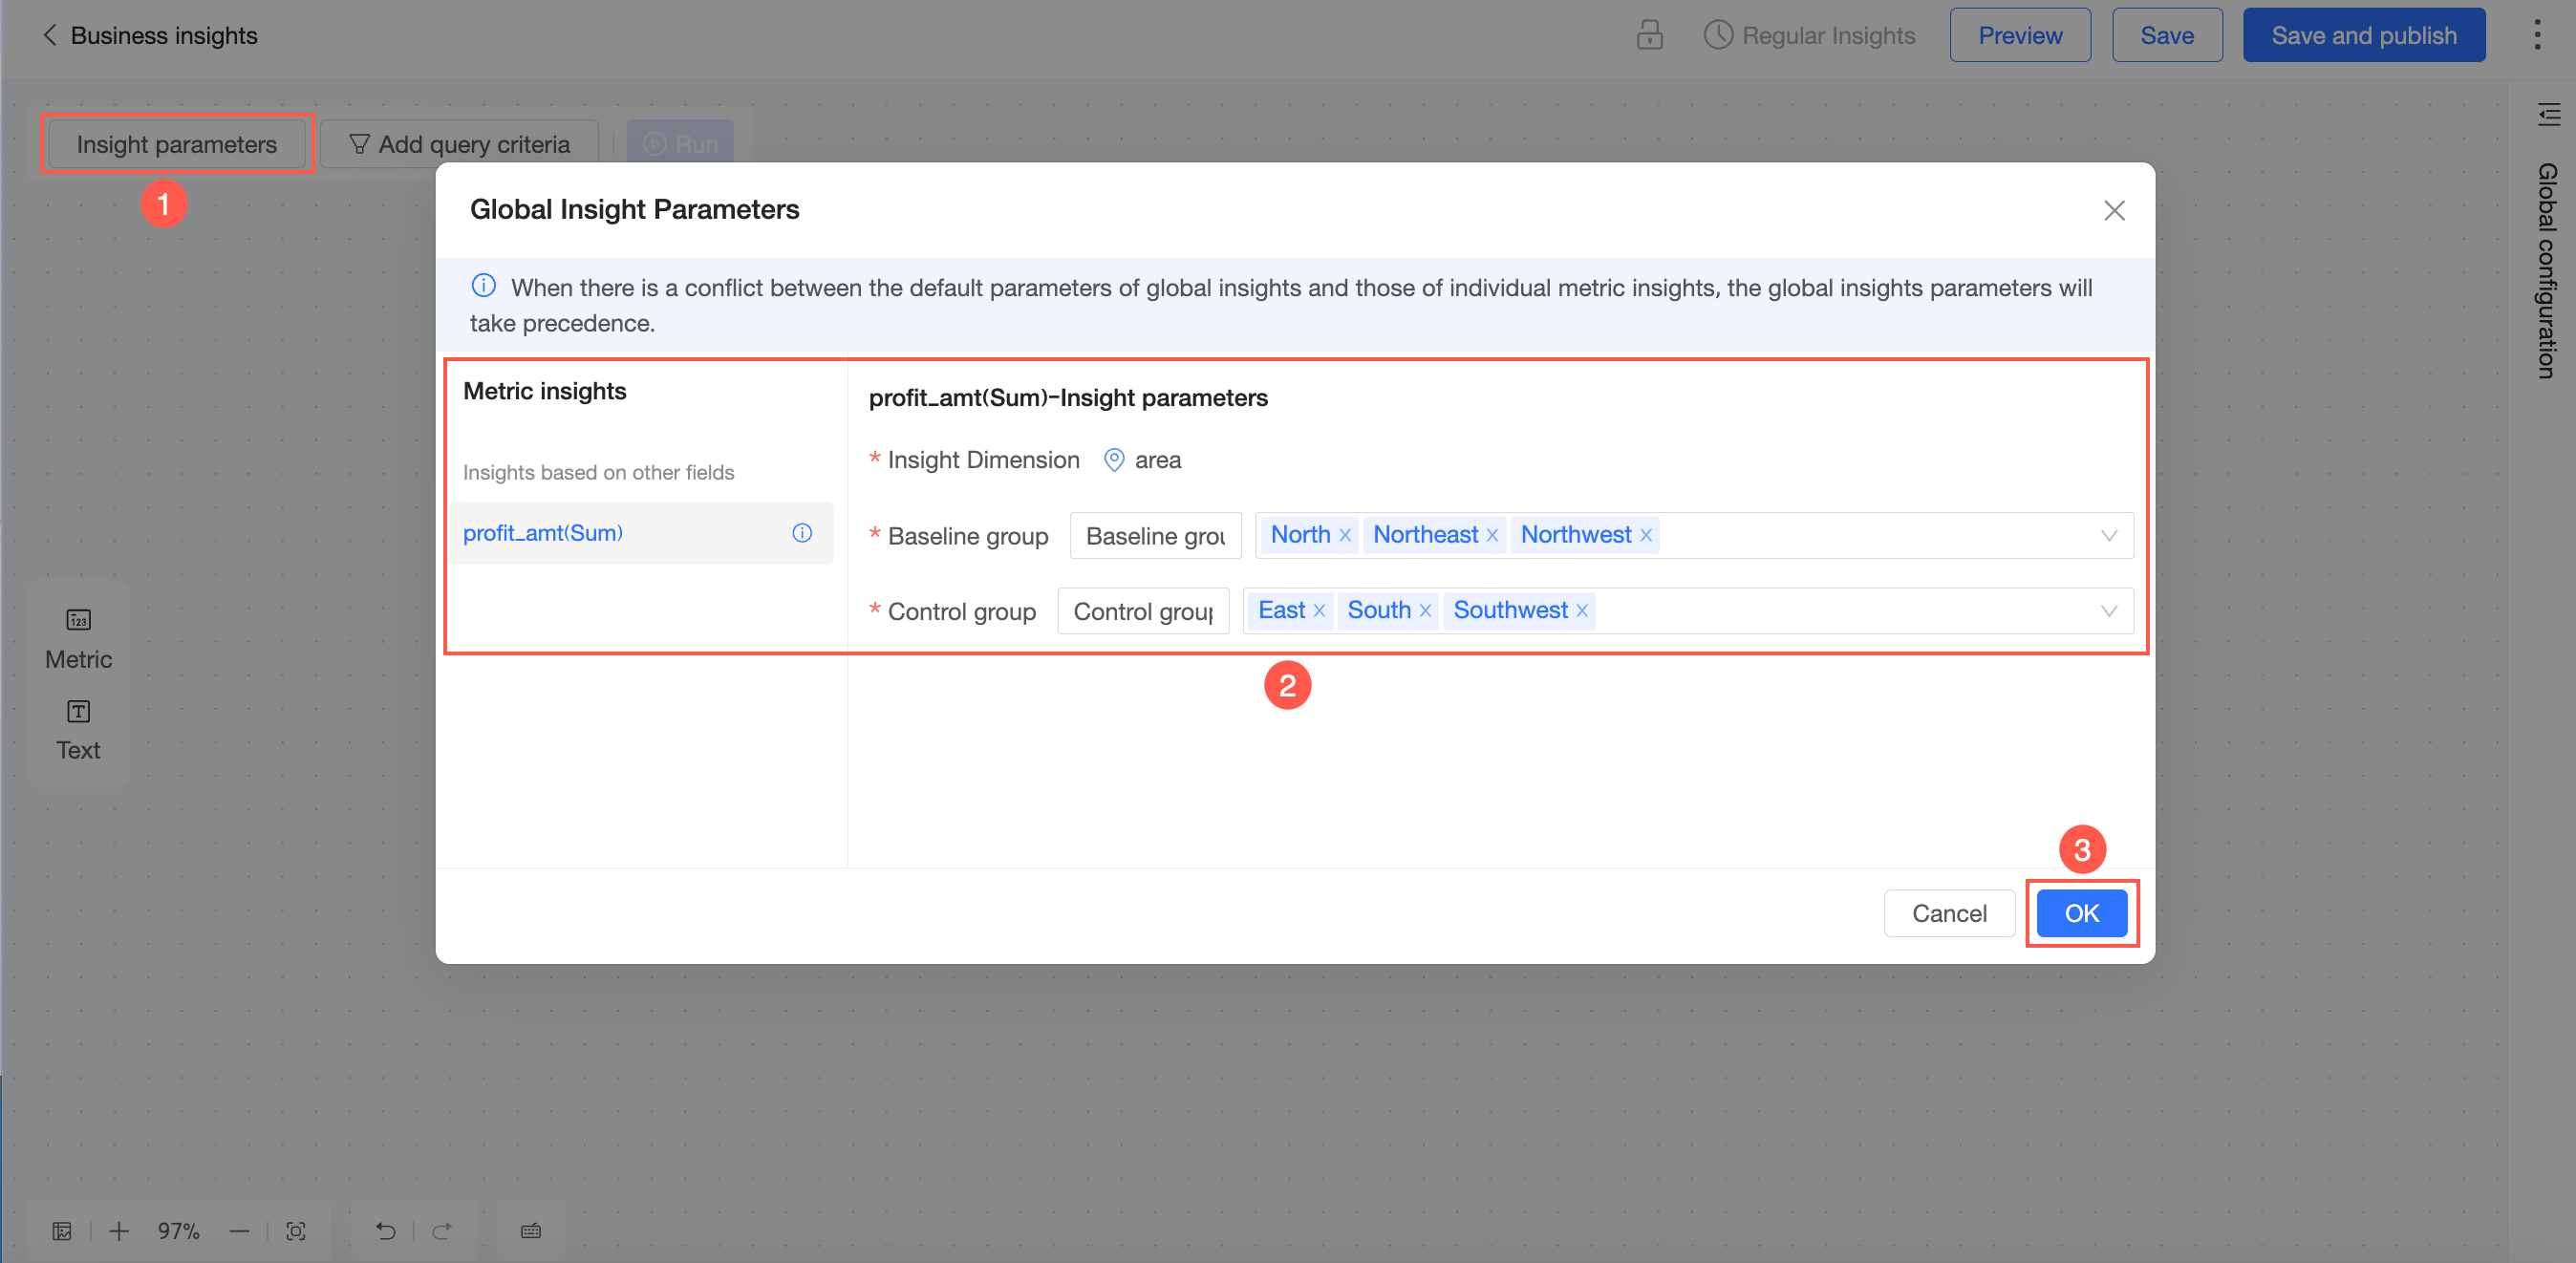
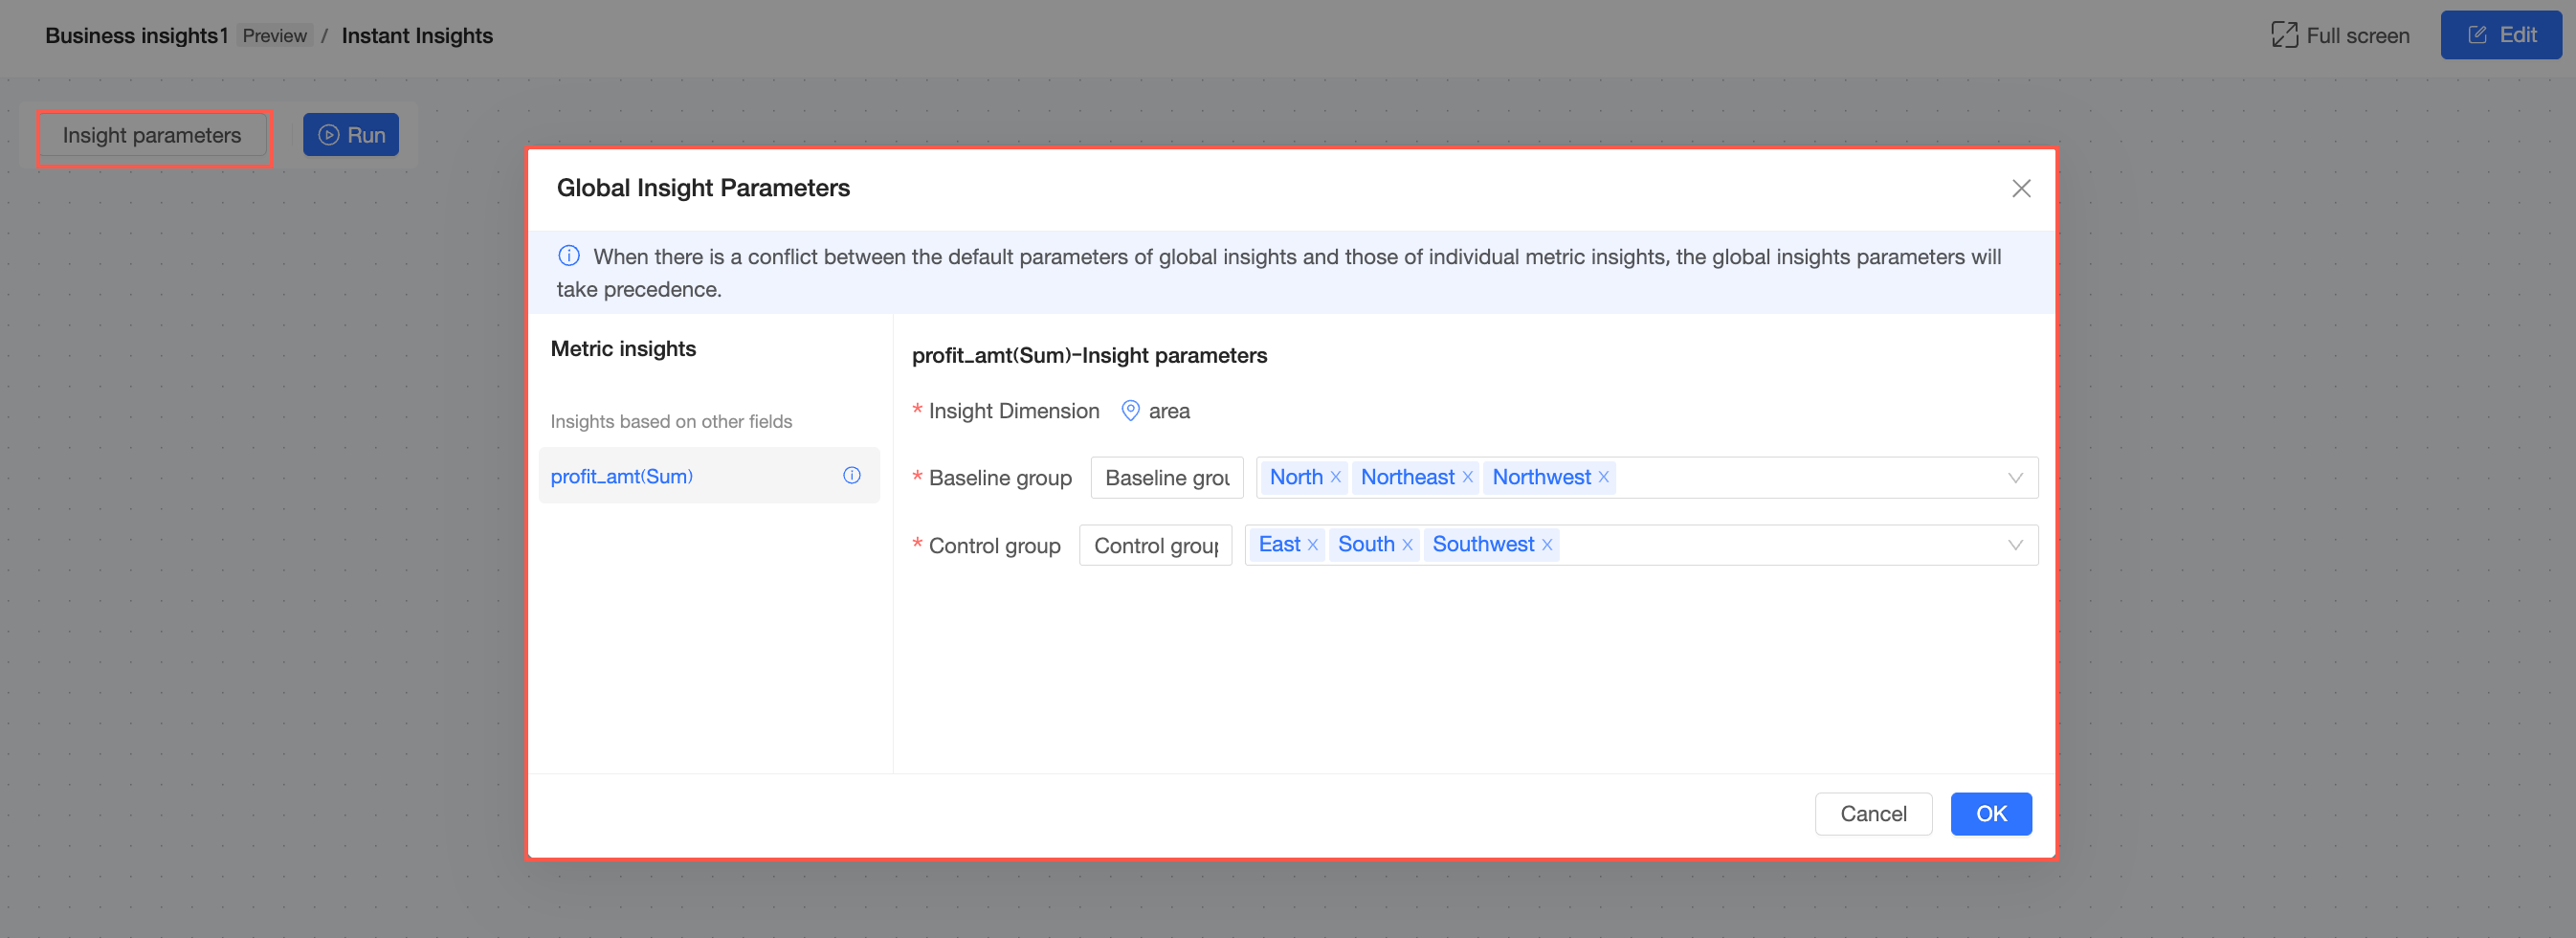
Insight Parameters
If global insight parameters conflict with the default parameters of an individual indicator insight, the global insight parameters take precedence. To configure global insight parameters, perform the following steps.
In the upper-left corner, click the Insight Parameters button.
Modify the names and dimension values of the insight dimension baseline group and comparison group.
Click Confirm.
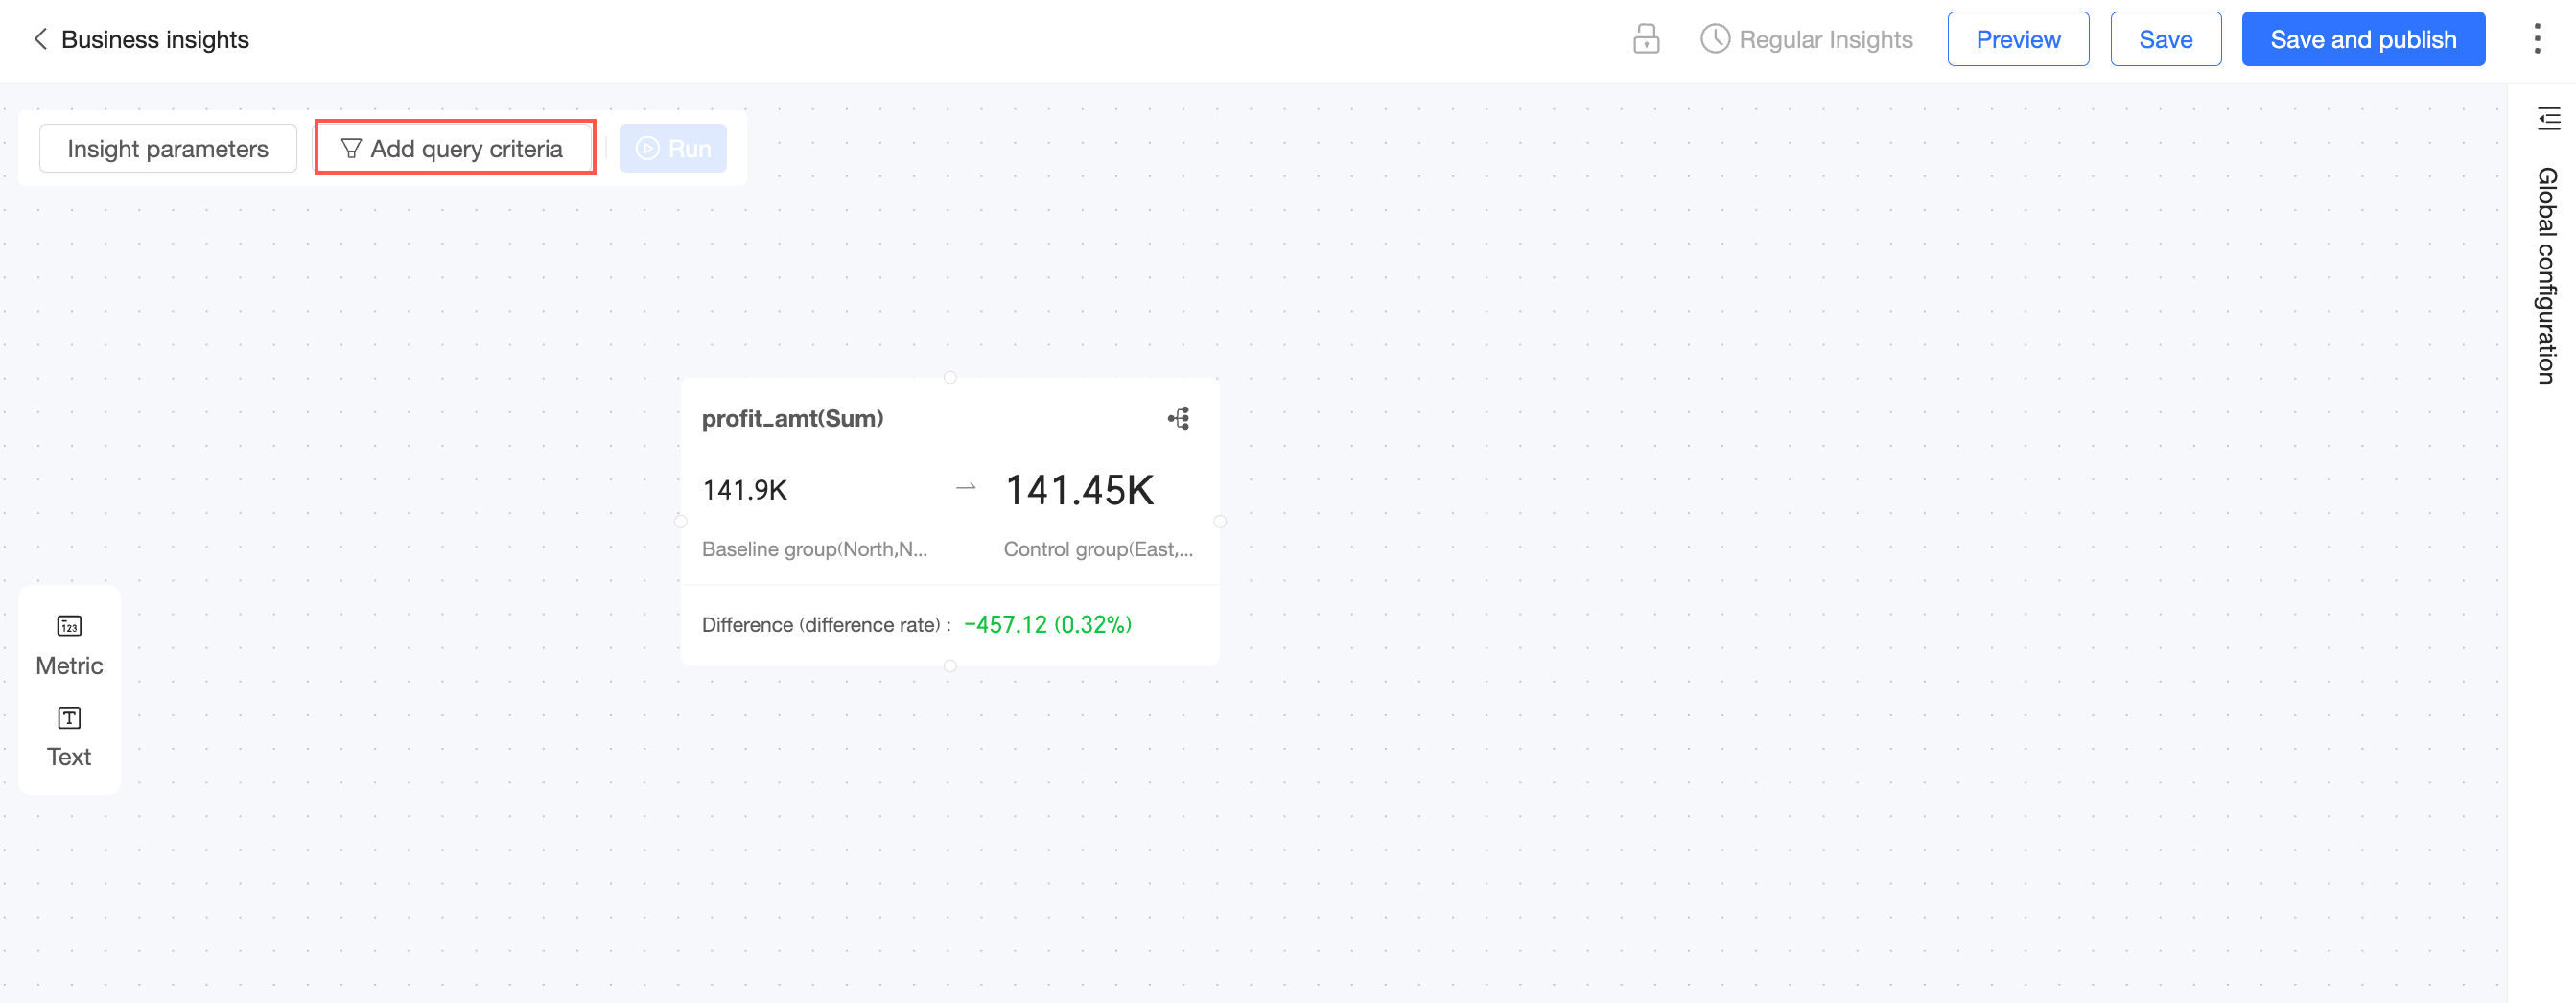
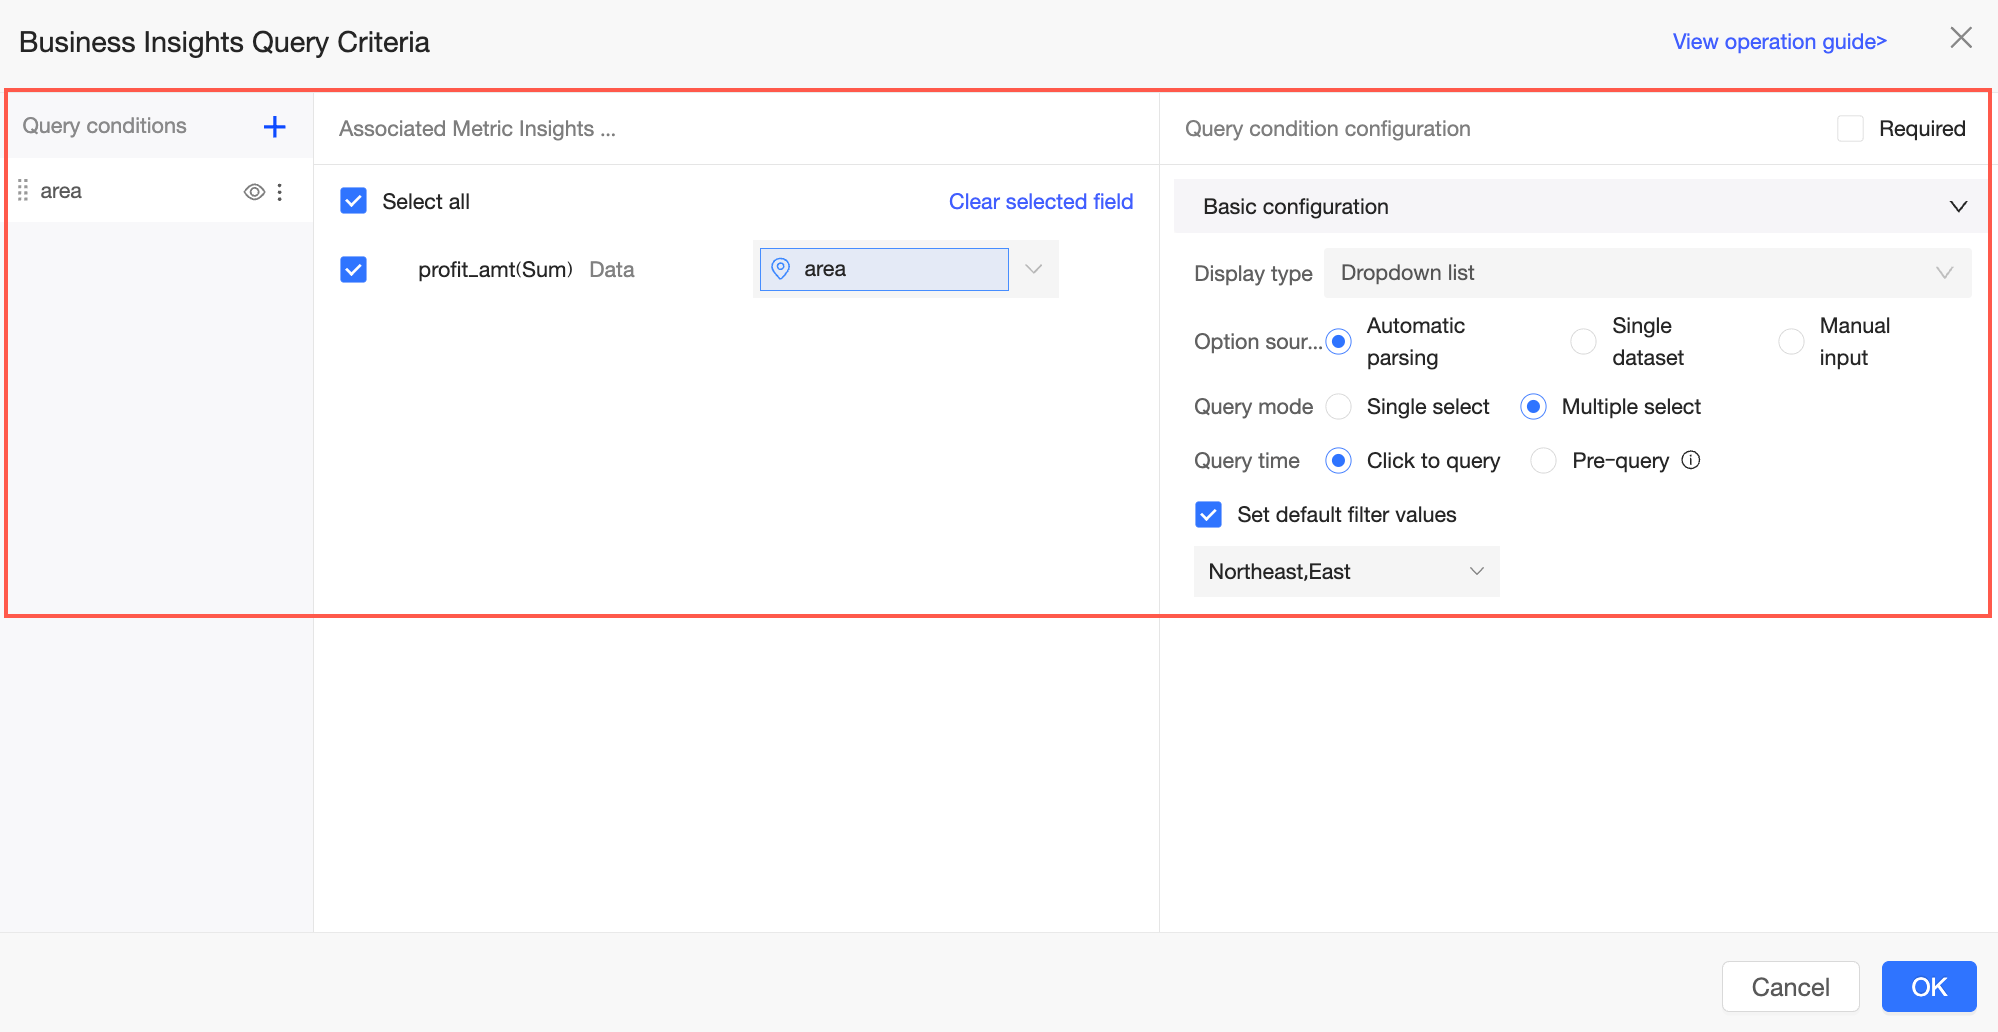
Add Query Condition
In the upper-left corner, click the Add Query Condition button.
In the dialog box that appears, configure the query condition.
Click Confirm.
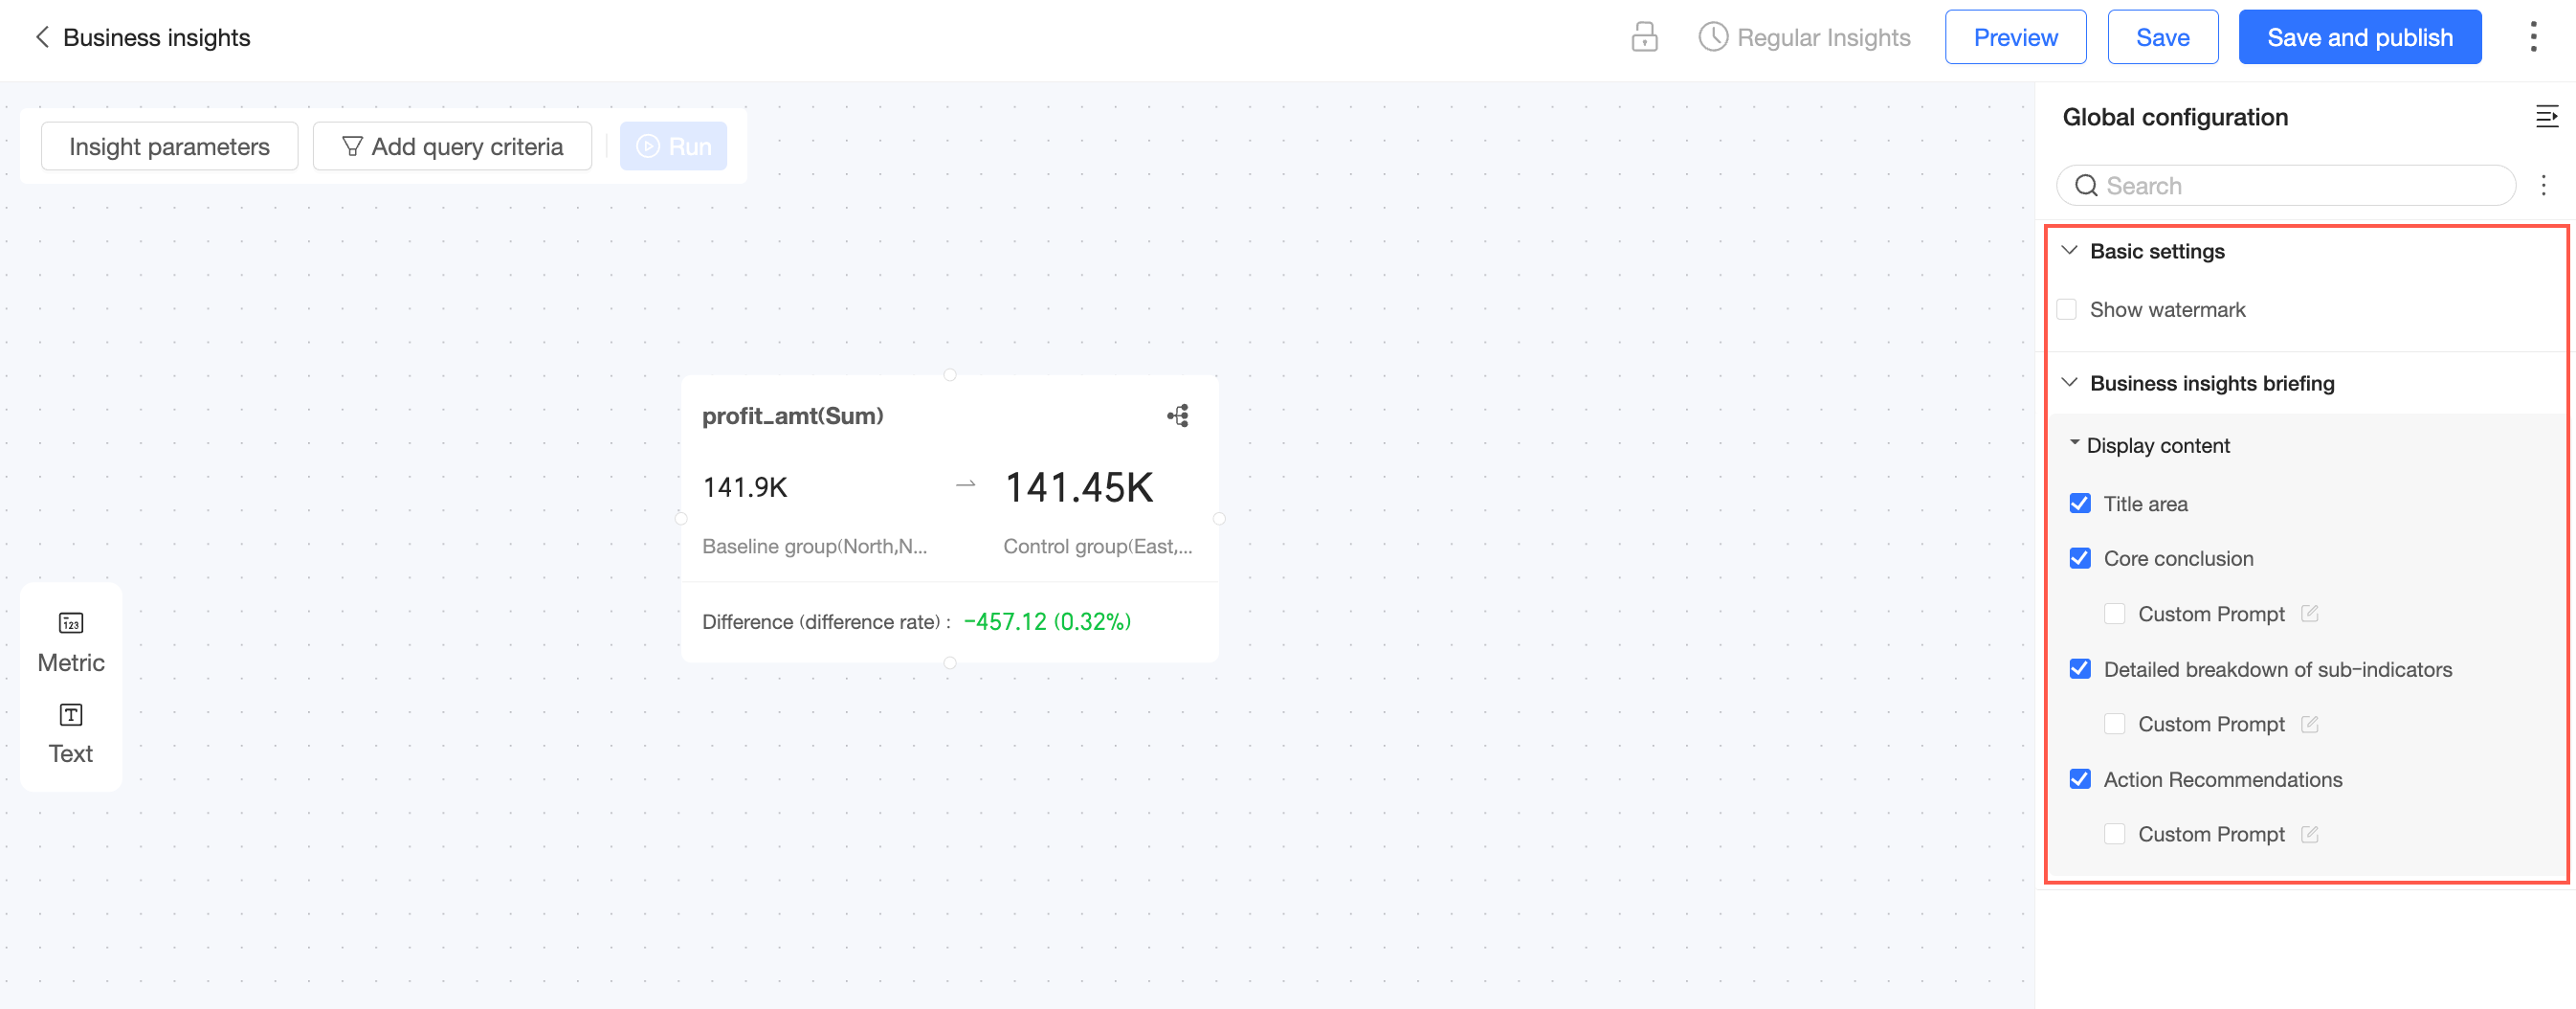
Global Configuration
In the upper-right corner, click the Global Configuration button to expand the global configuration panel.
On the global configuration panel, configure the following settings.
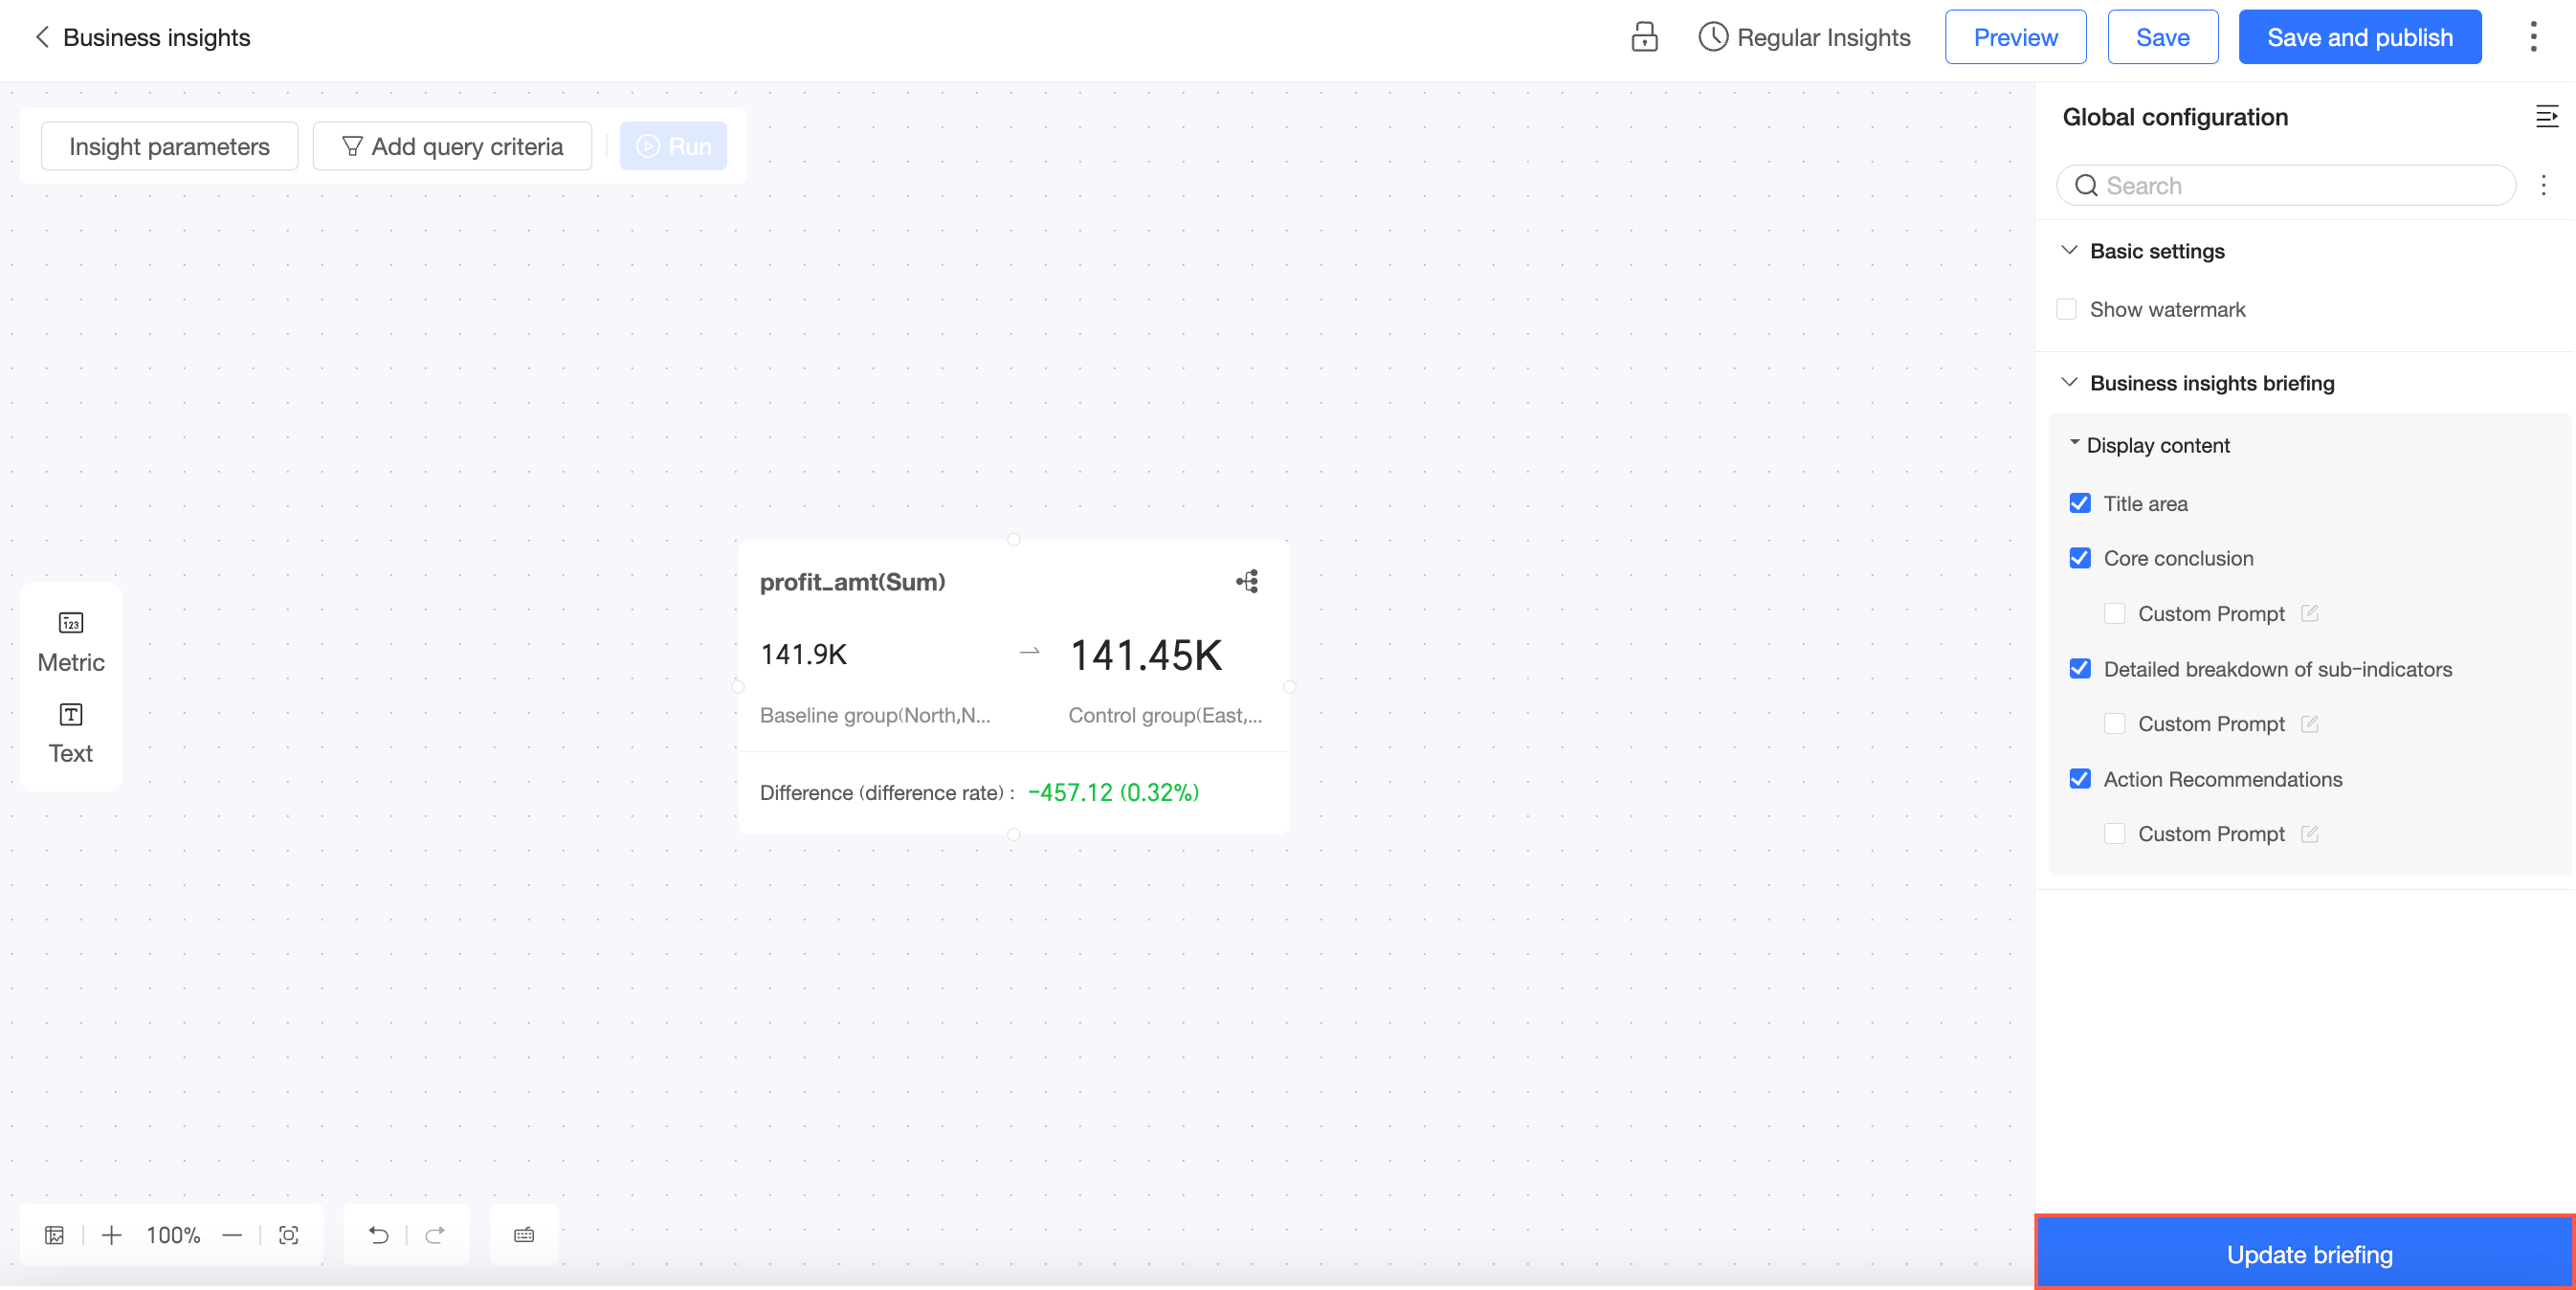
In the Basic Settings section, set whether to Display Watermark.
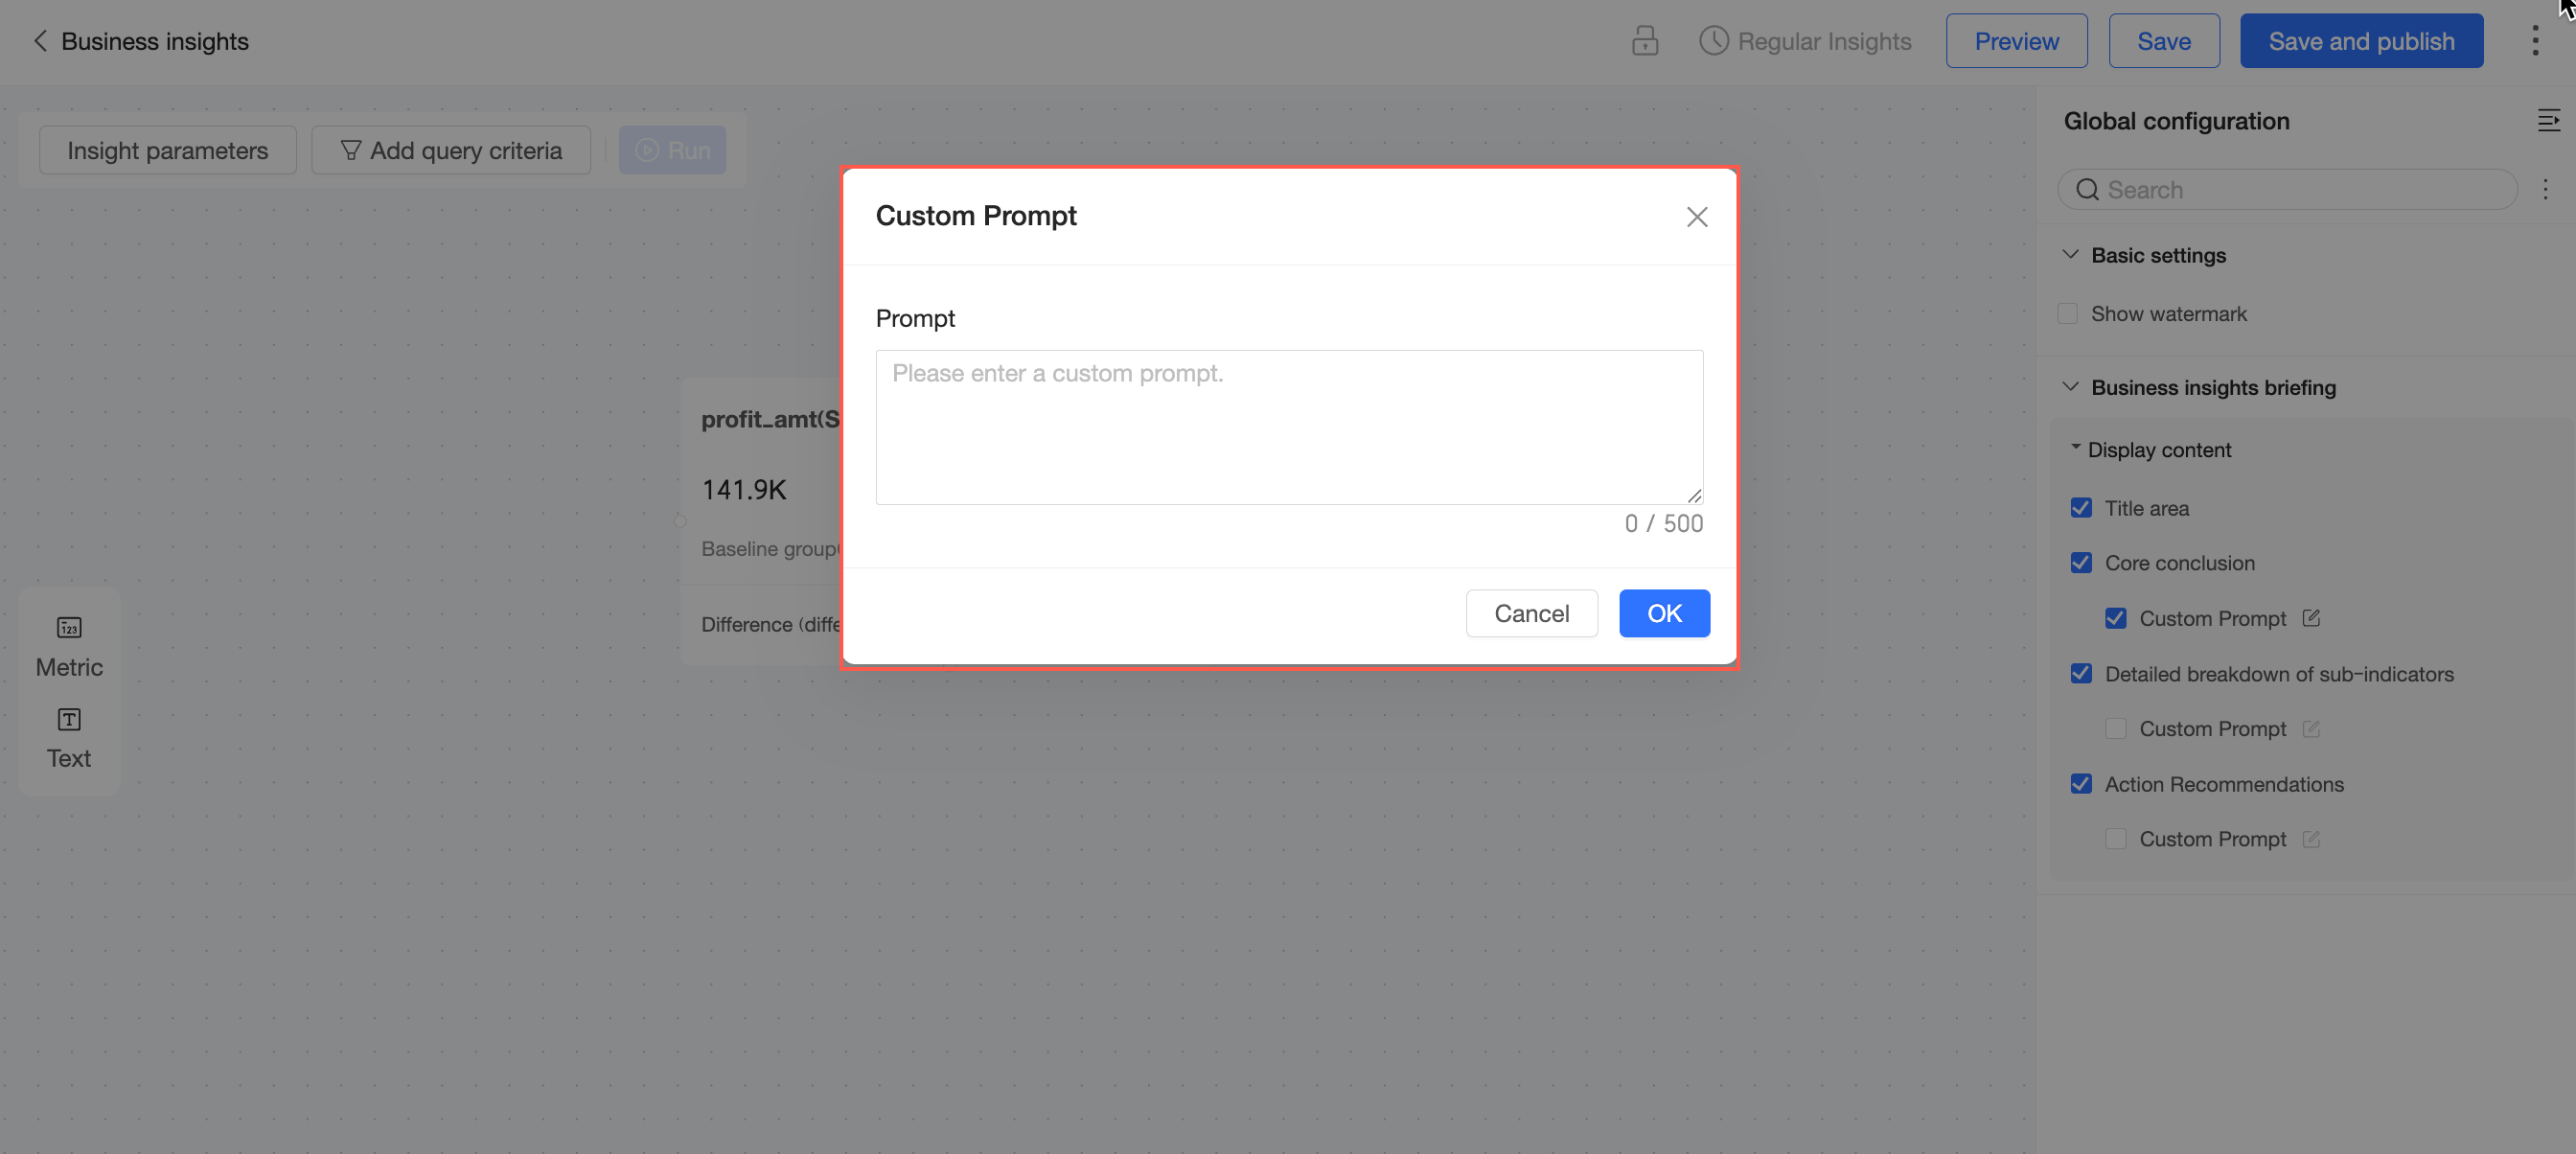
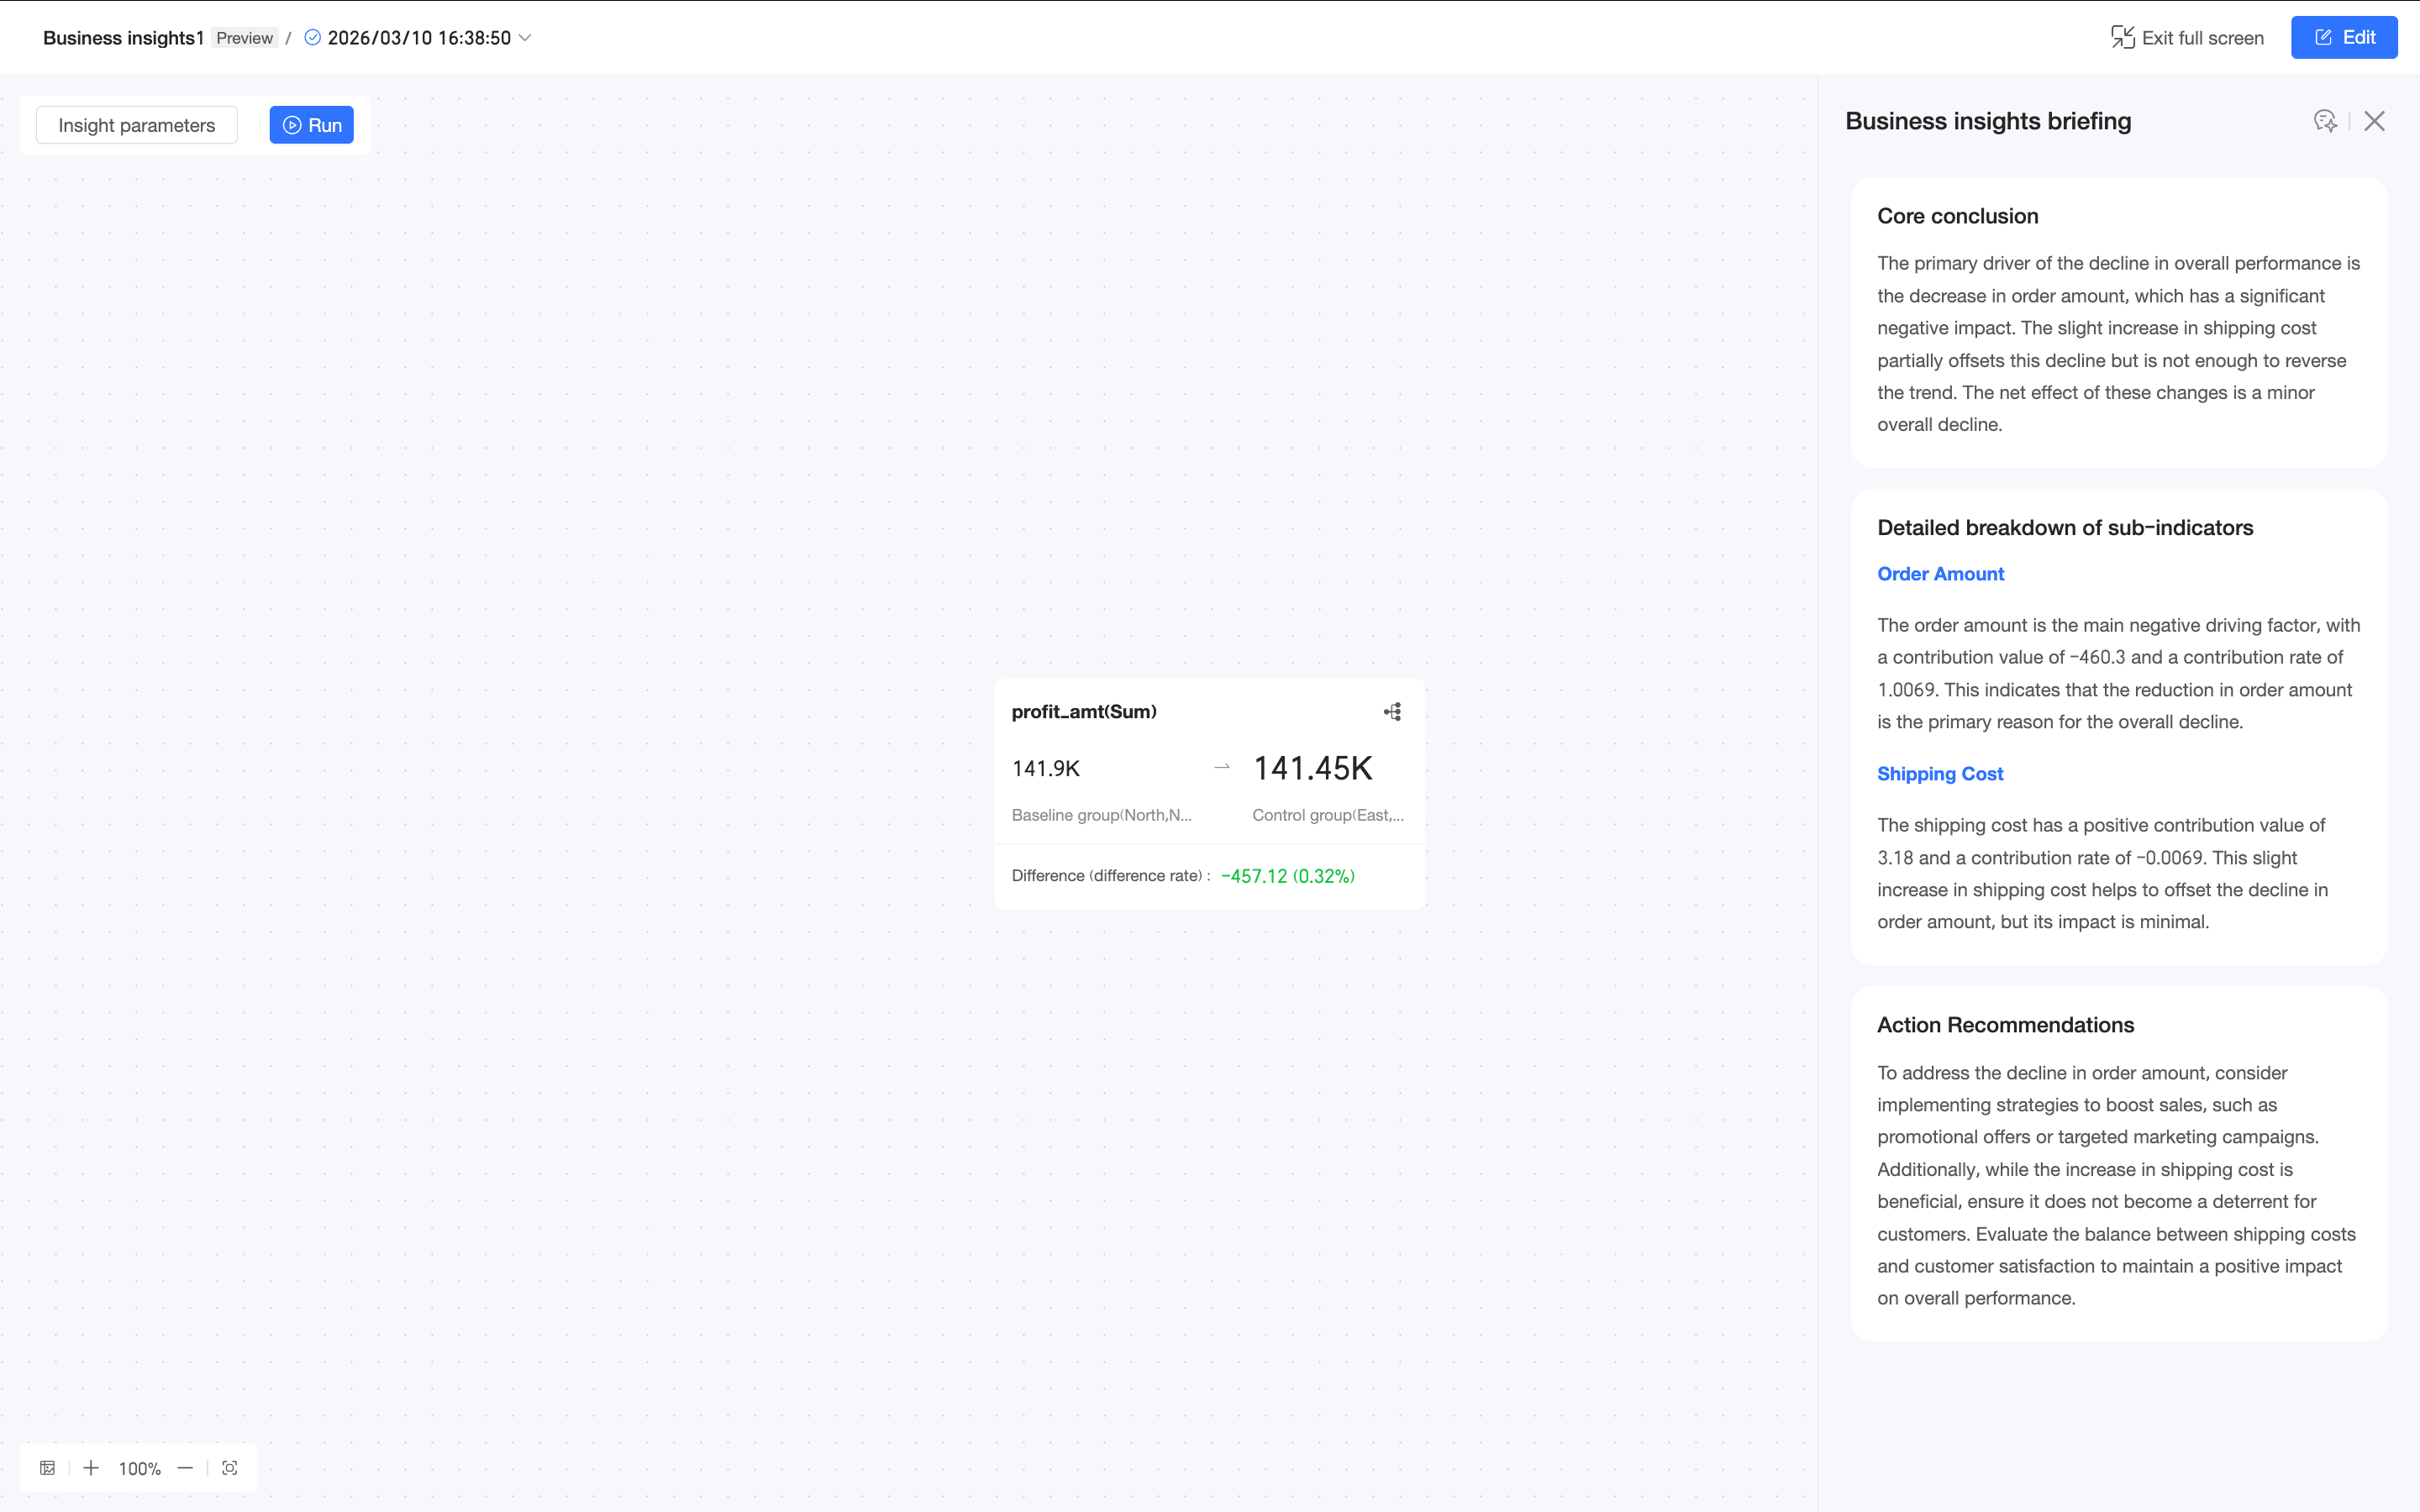
In the Business Insights Brief section, set whether to display the Title Area, Core Conclusions, Sub-indicator Details, and Action Recommendations. This section also supports Custom Prompt settings.
After you complete the settings, click Update Brief. The business brief is then updated.

Manage Business Insights
Scheduled Insights
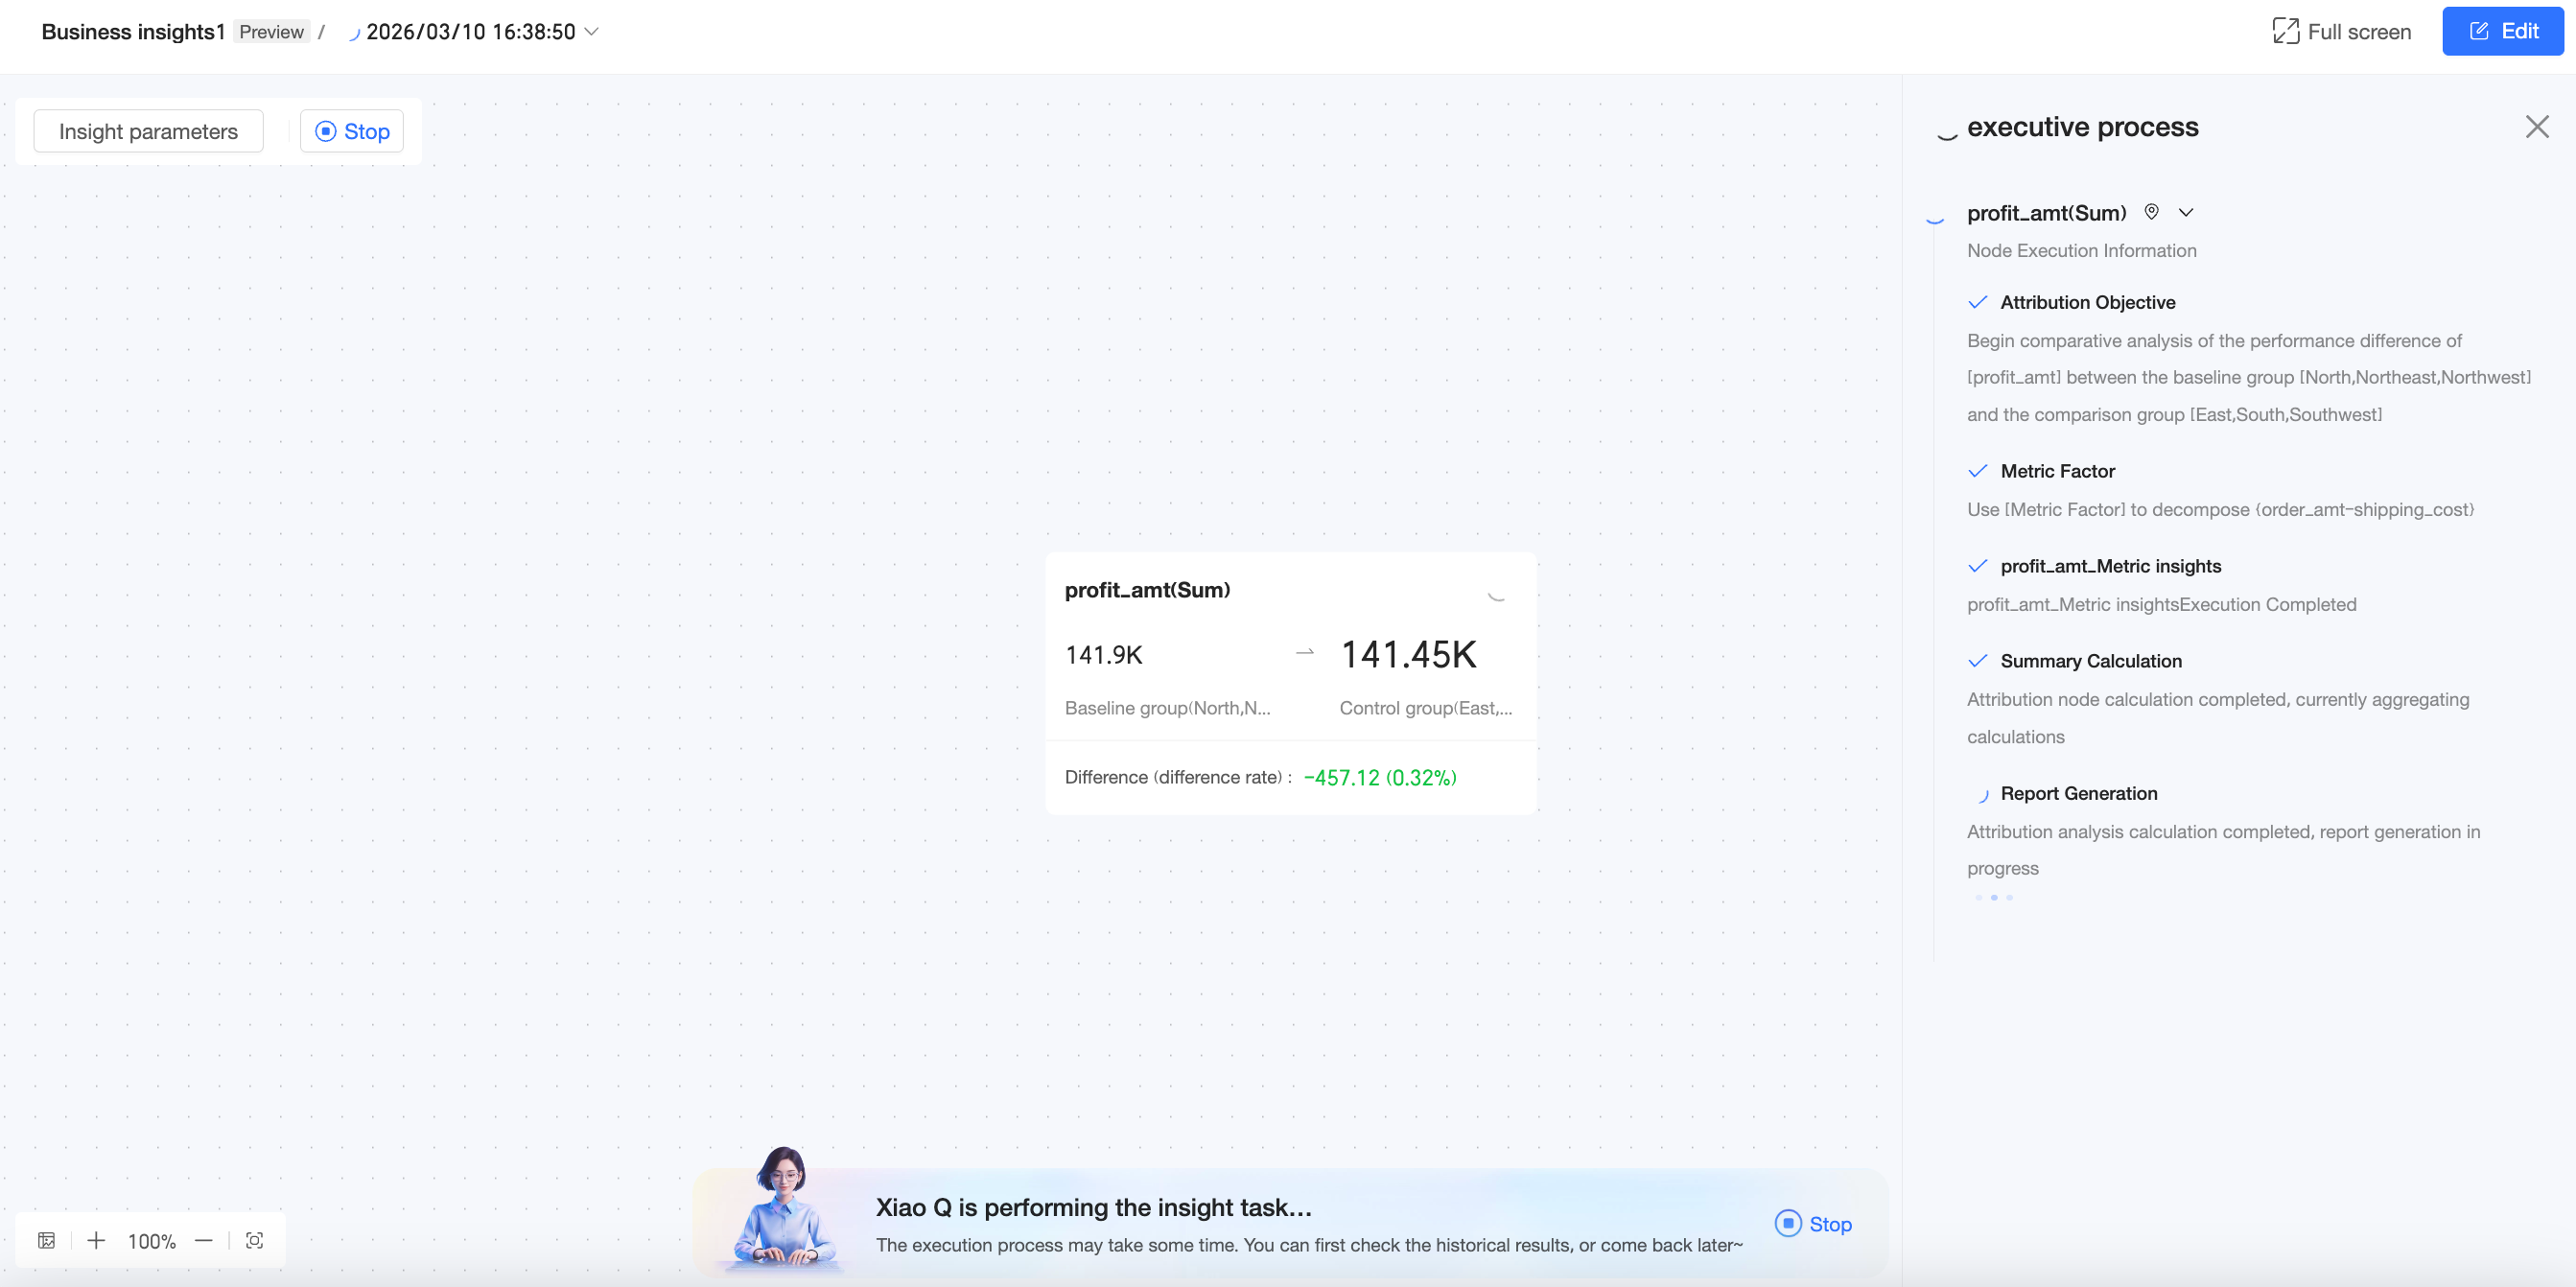
If you enable scheduled insights, the business insight automatically executes at a specified time and generates business insight briefs and indicator insight briefs. You can view these briefs on the preview page or through the XiaoQ Insight entry point.
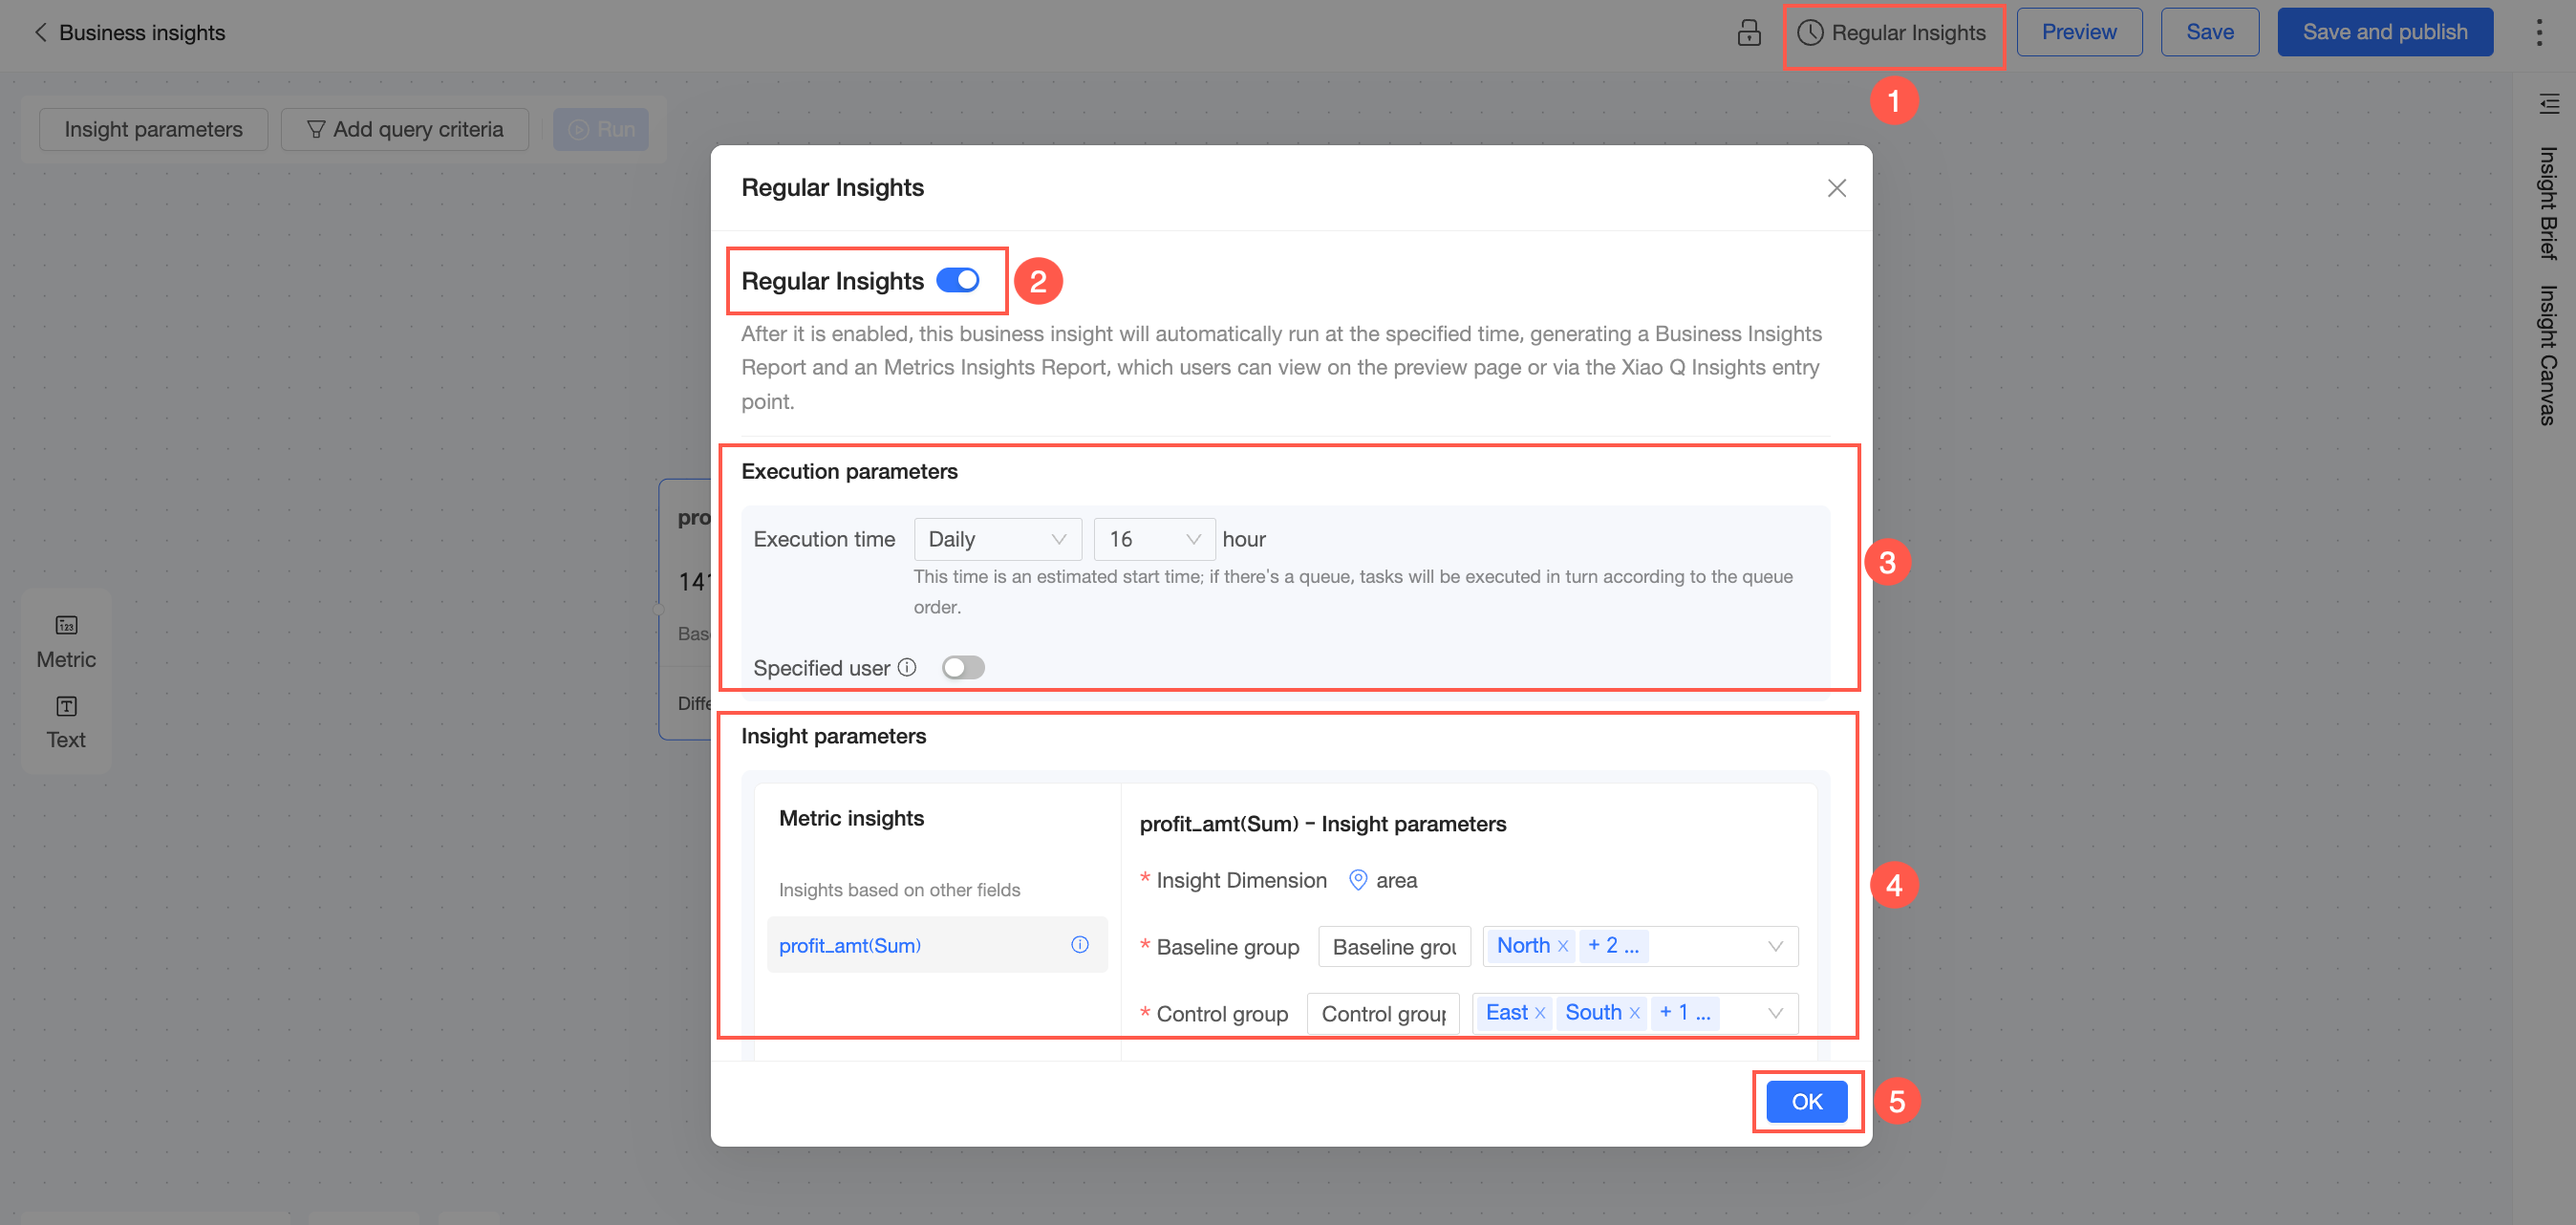
Click the Scheduled Insights button.
Enable Scheduled Insights.
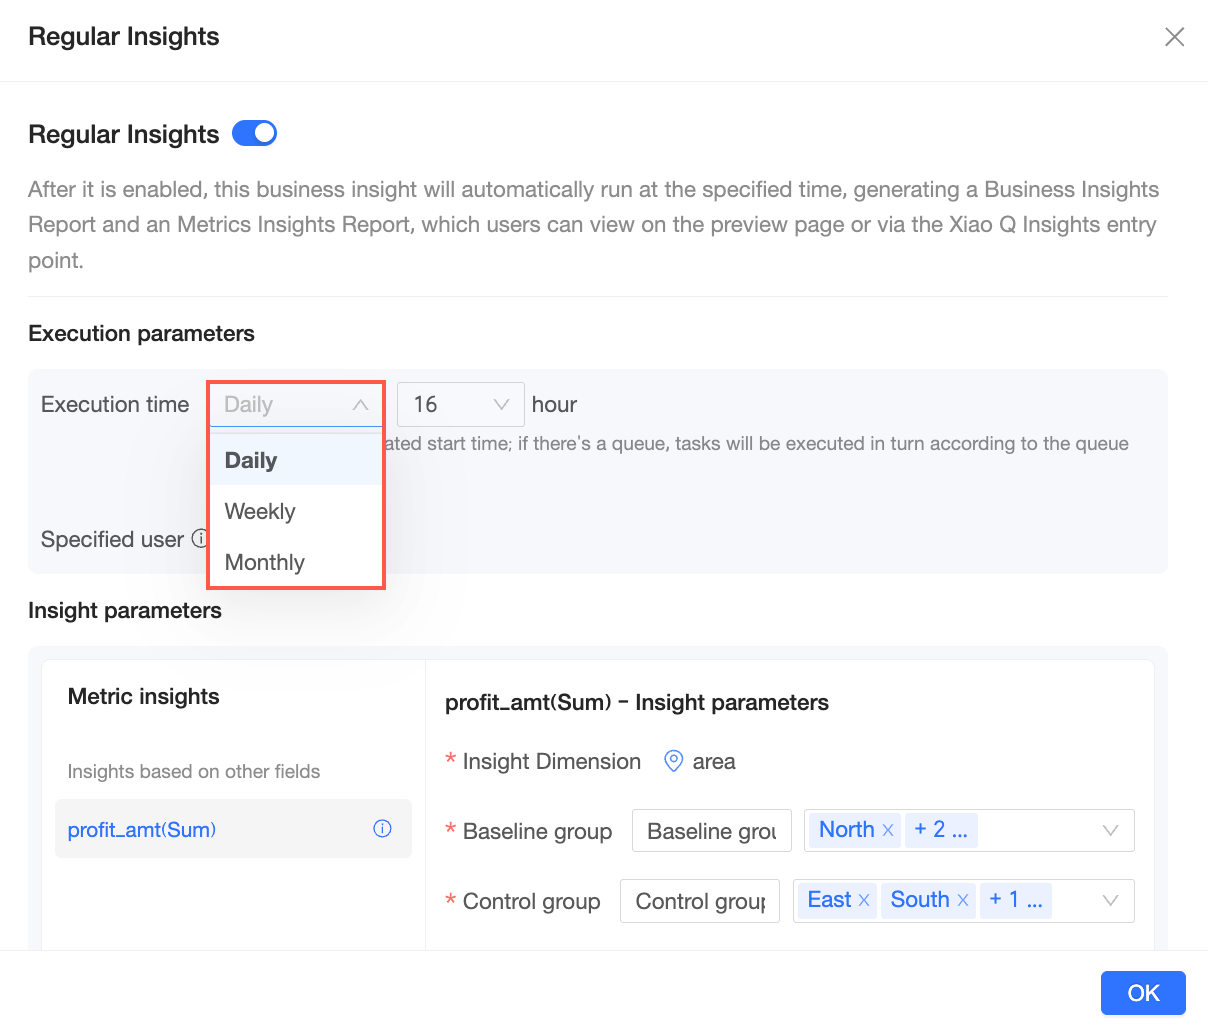
Set Runtime Parameters.
You can set the task to run daily, weekly, or monthly.
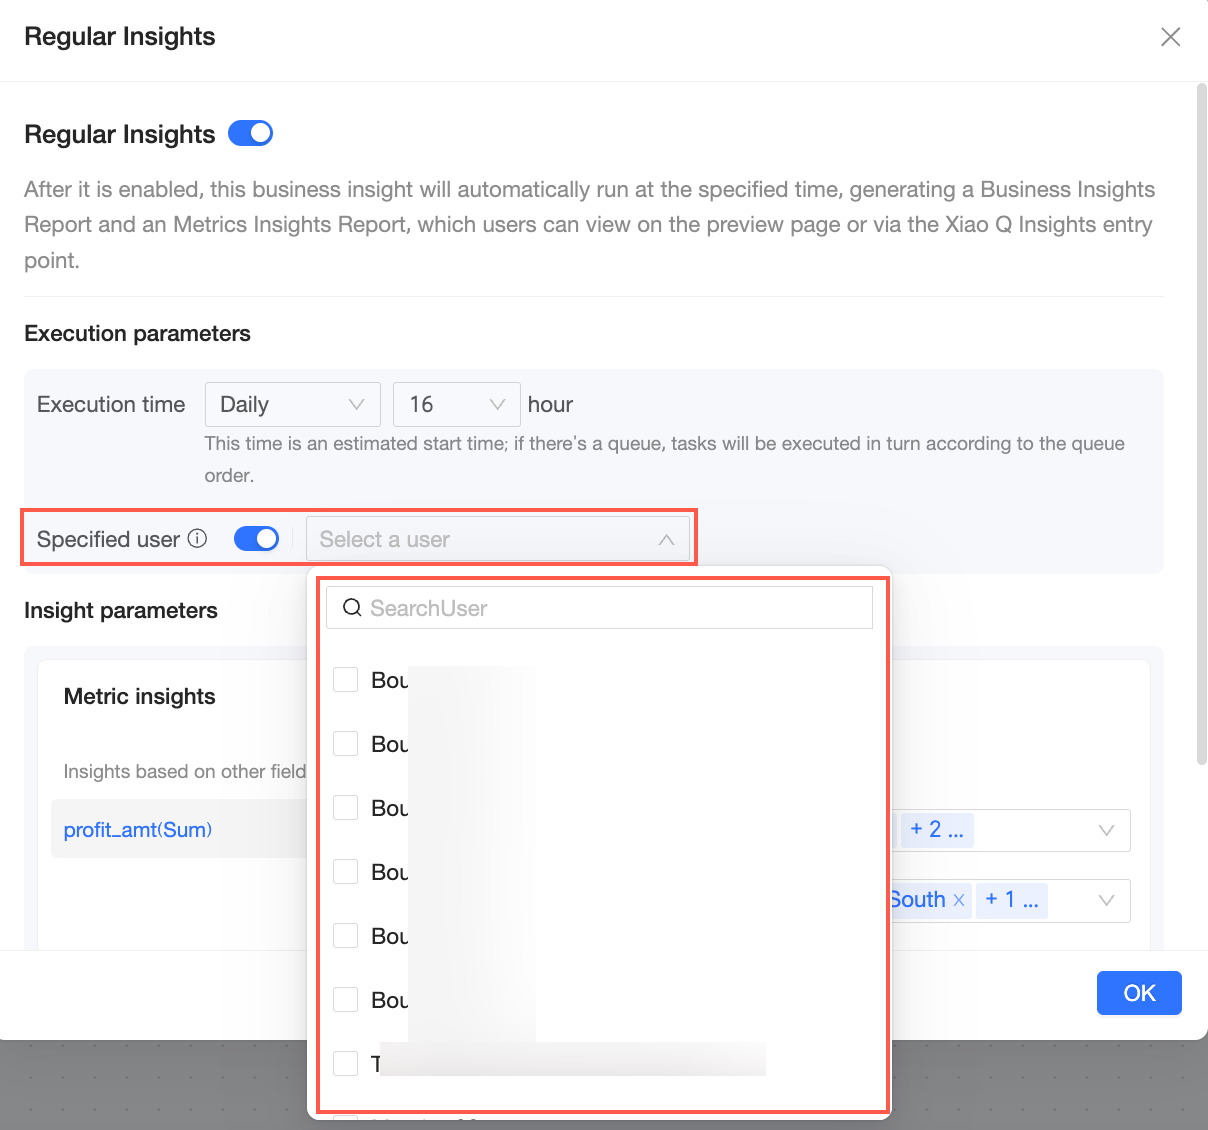
Select a Specified User to execute the insight task.
NoteThe insight task is executed as the specified user to obtain personalized insight results. Only the specified user can view these results.
Set Insight Parameters.
Modify the names and dimension values of the insight dimension baseline group and comparison group.
Click Confirm to complete the configuration.
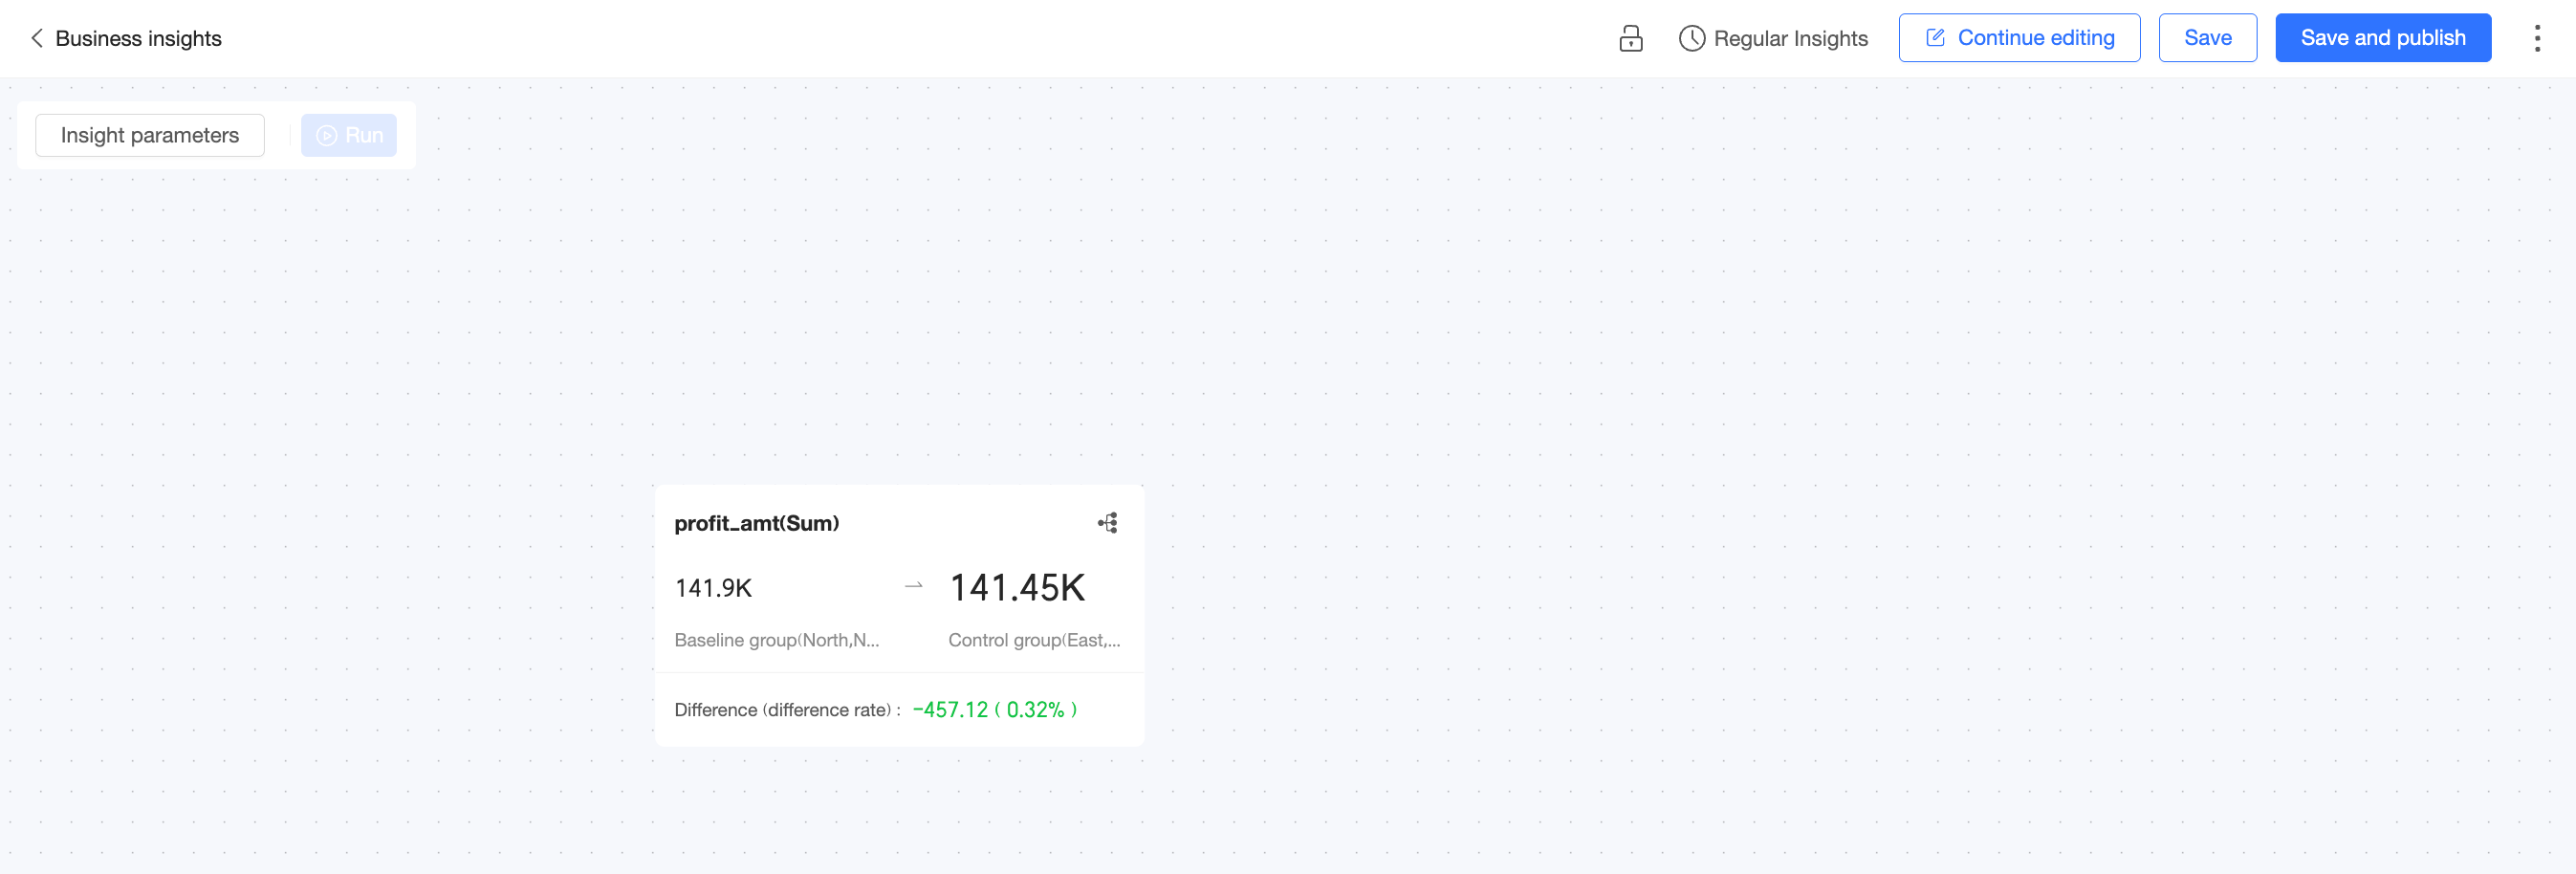
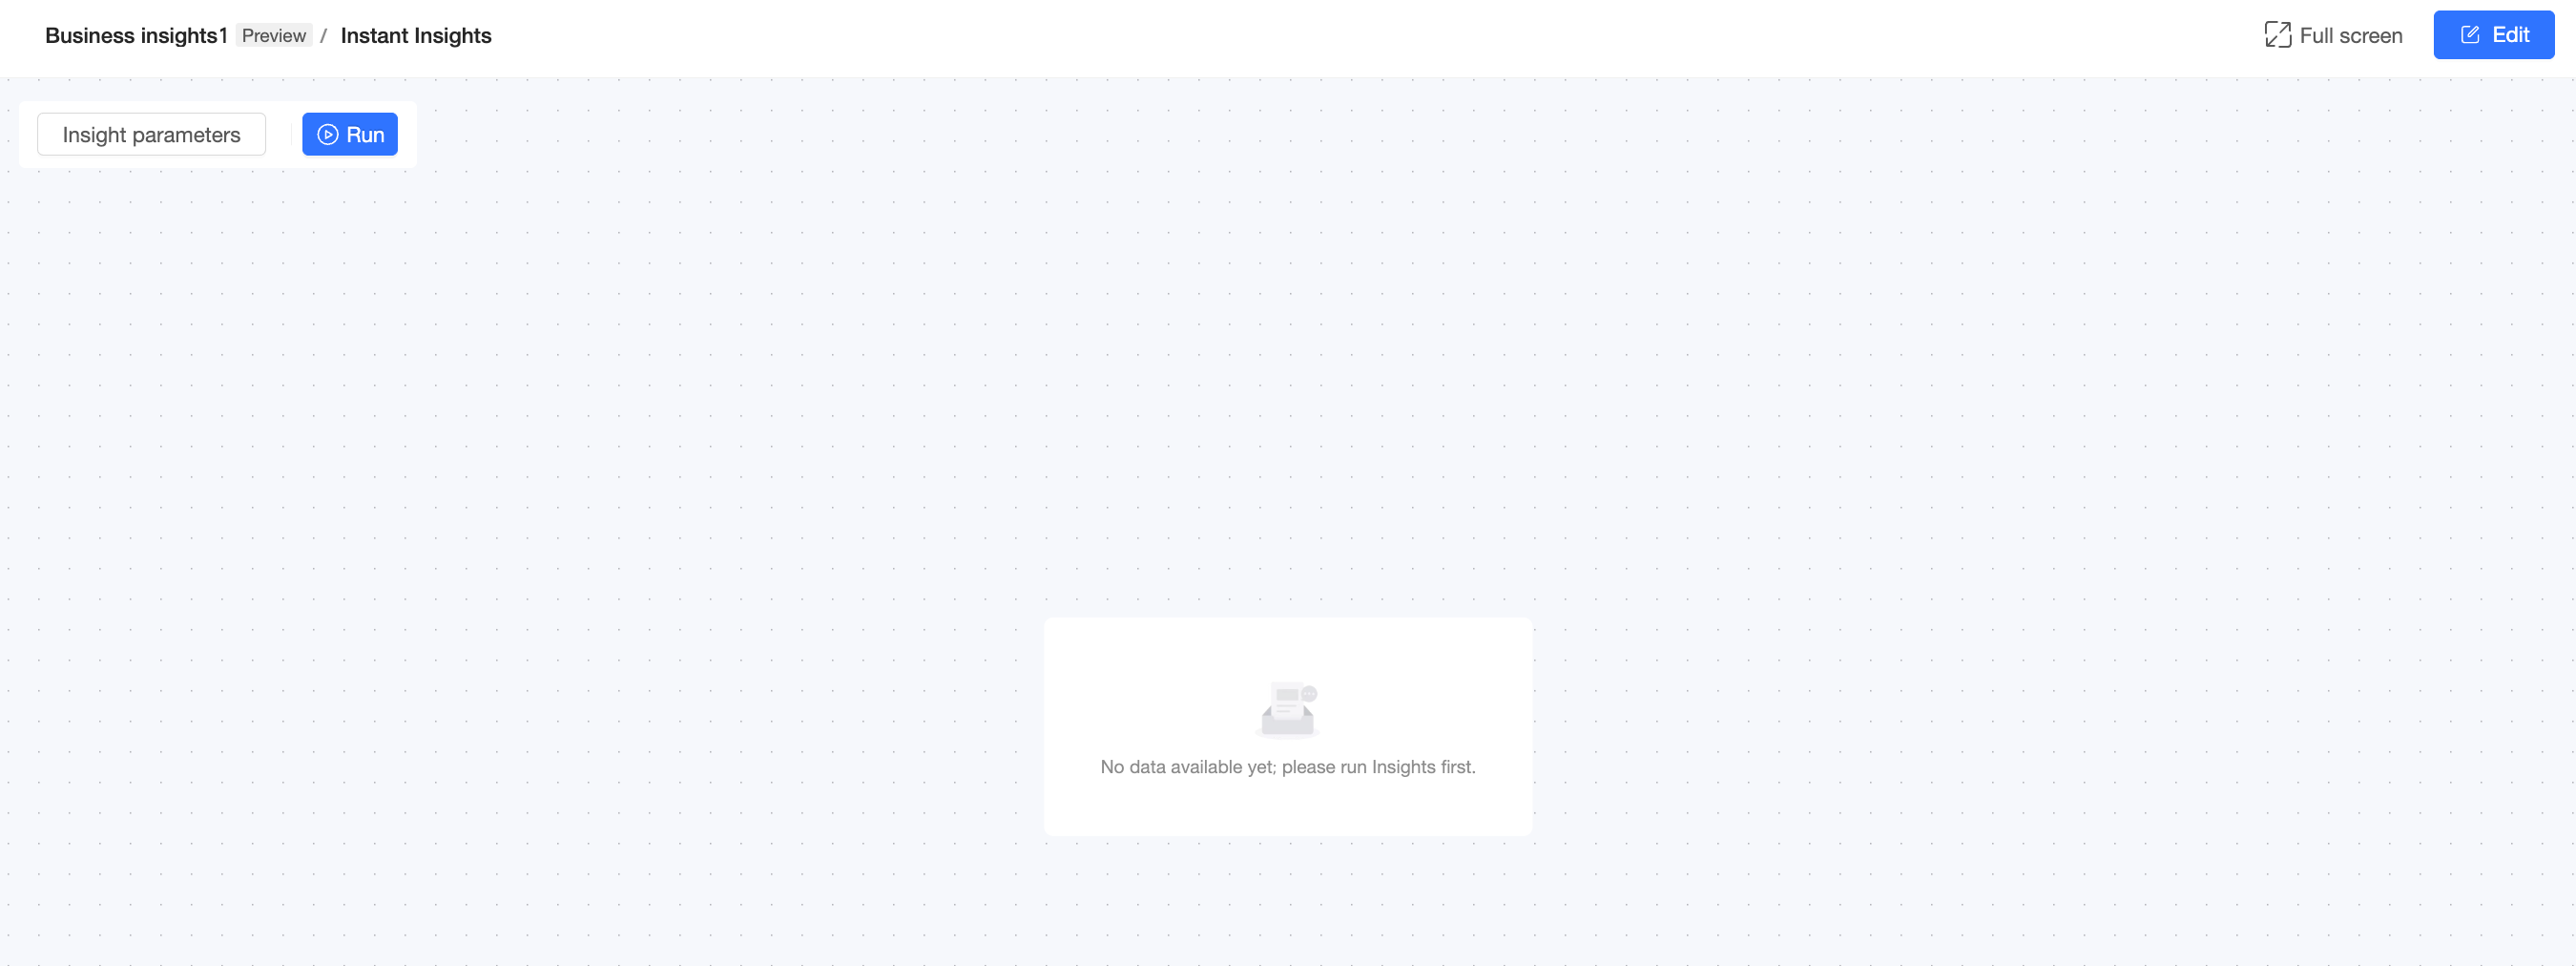
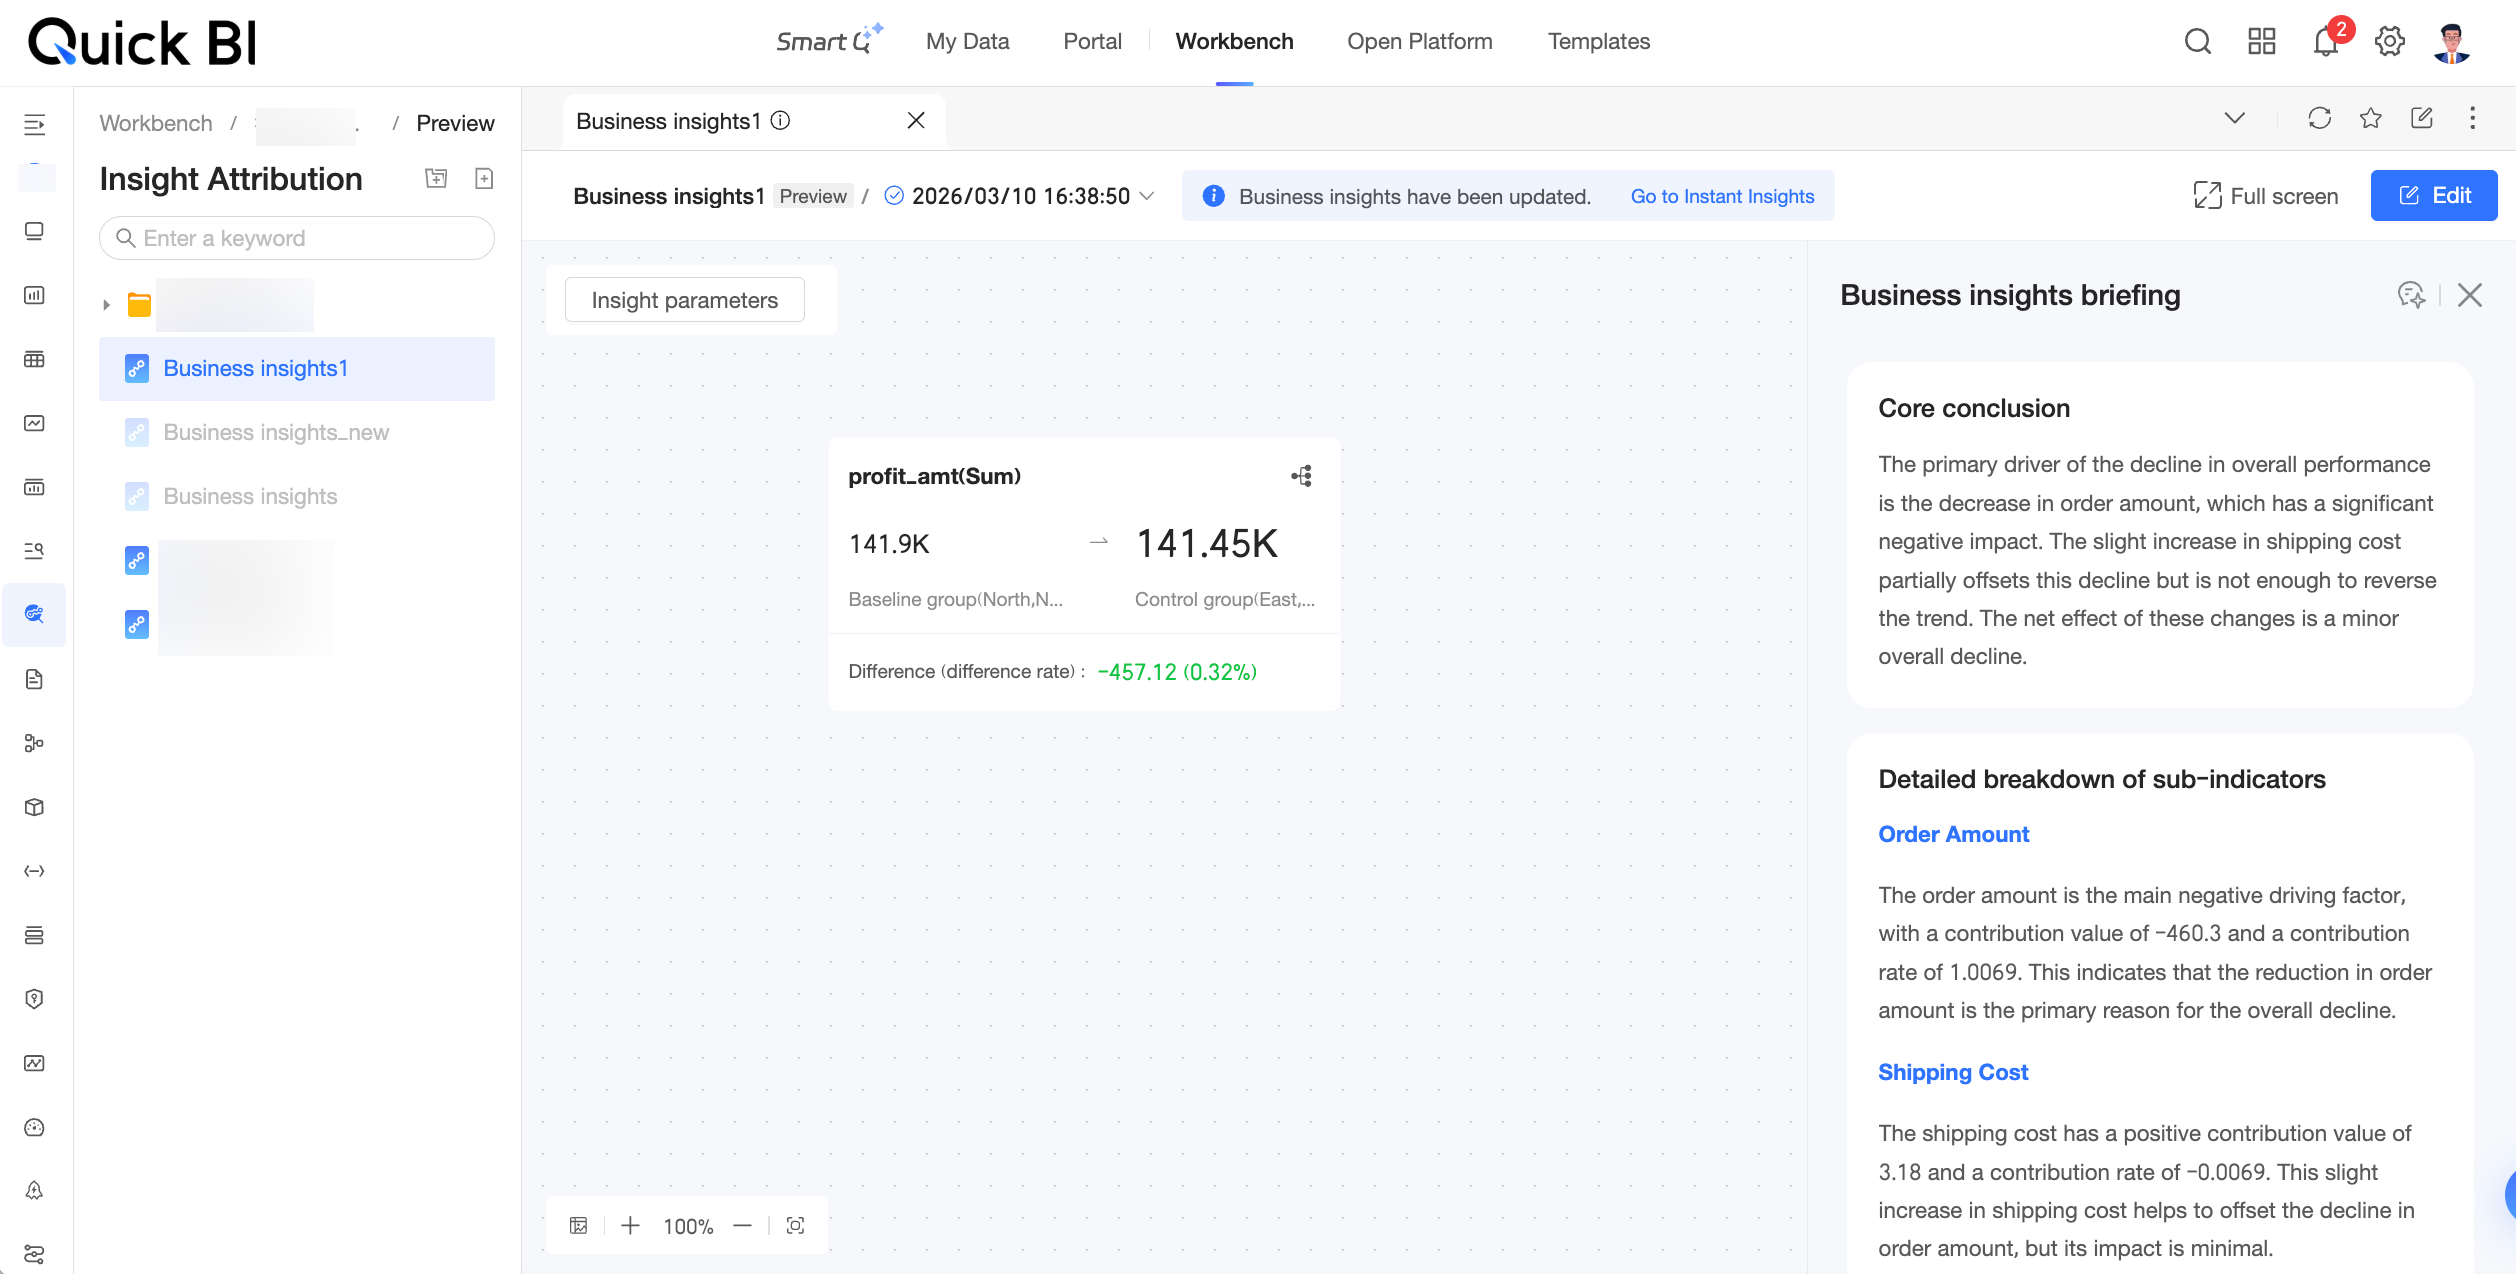
Preview
Click Preview to open the Business Insights preview page.
On the preview page, you can configure insight parameters, schedule insights, and save your changes. You can also click Continue Editing to return to the editing page.
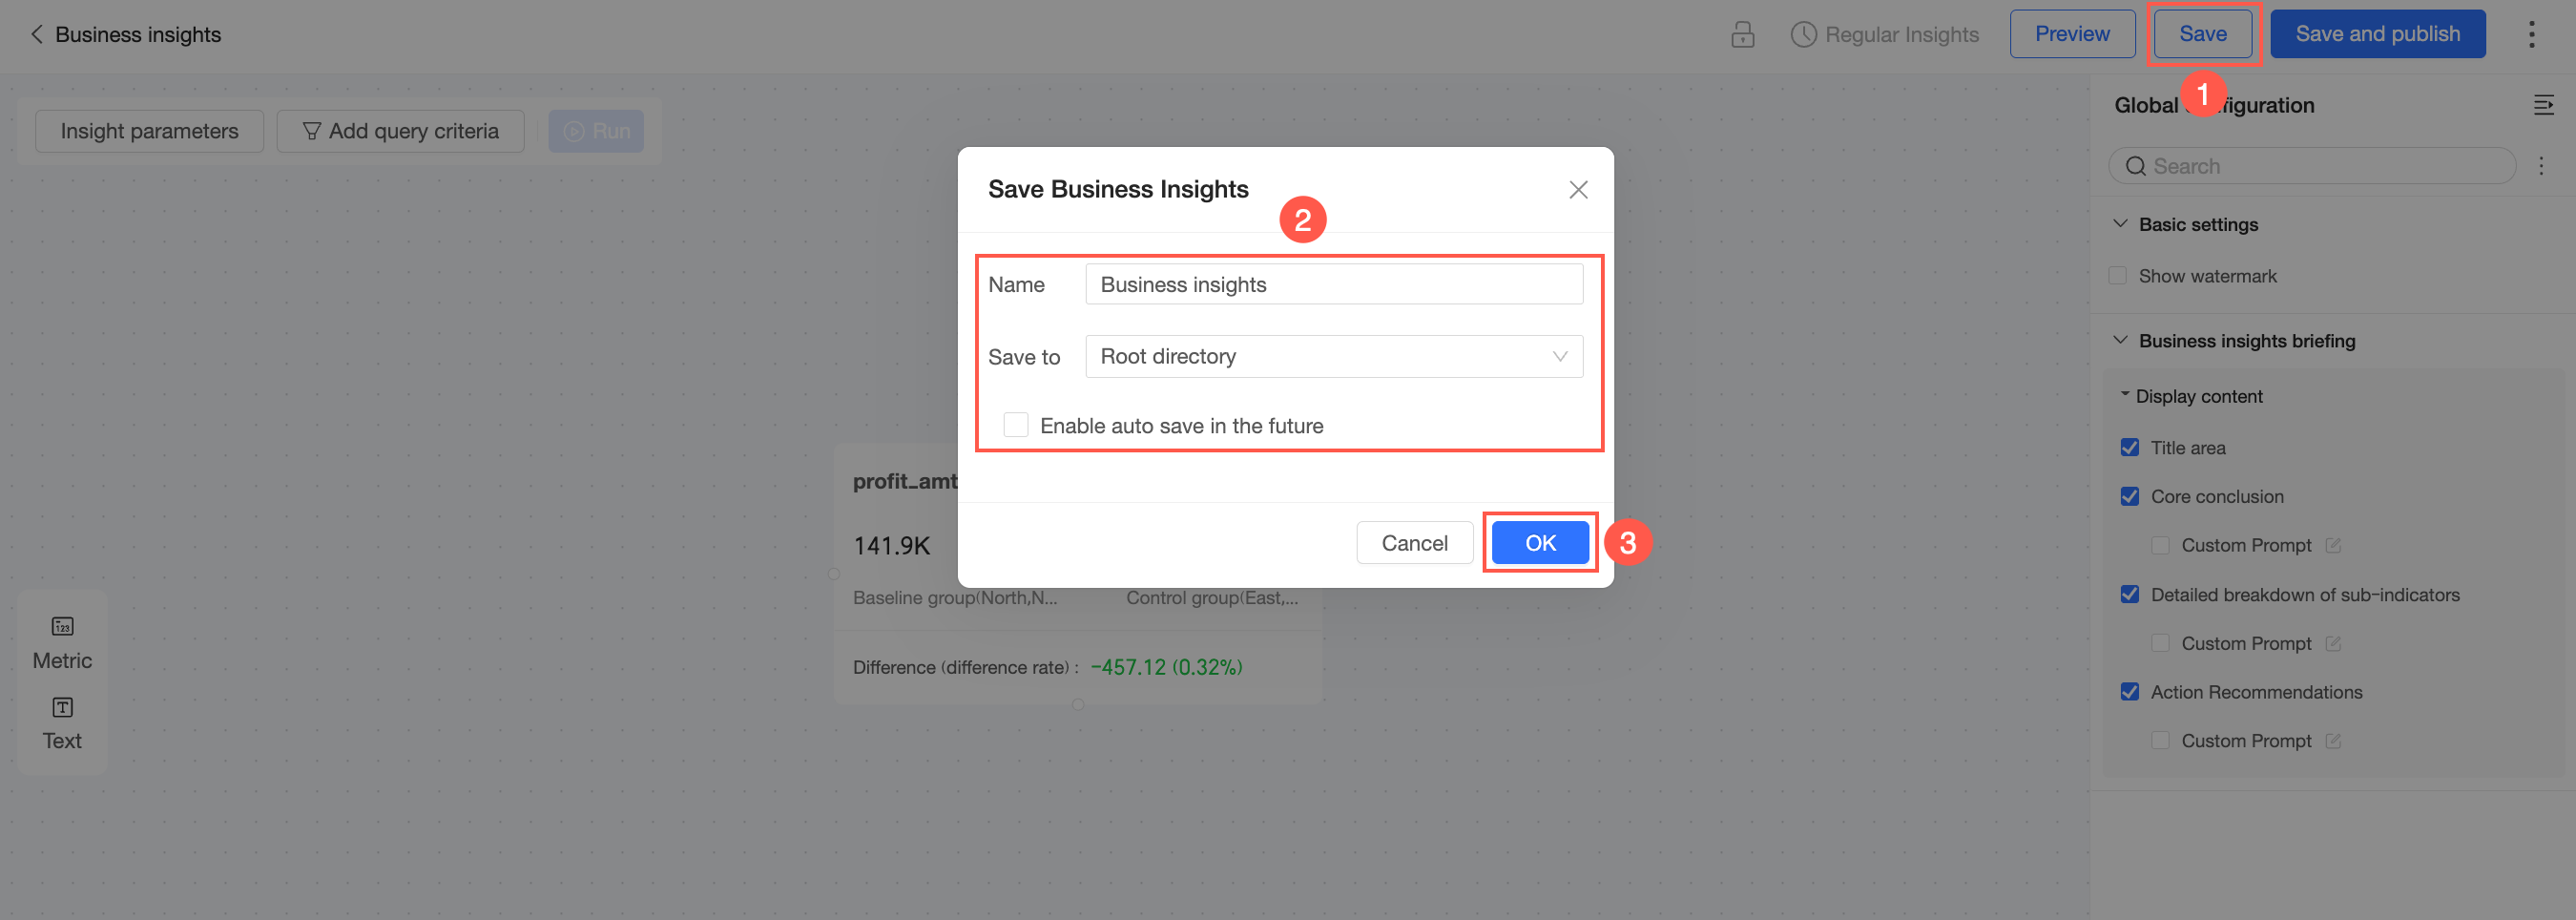
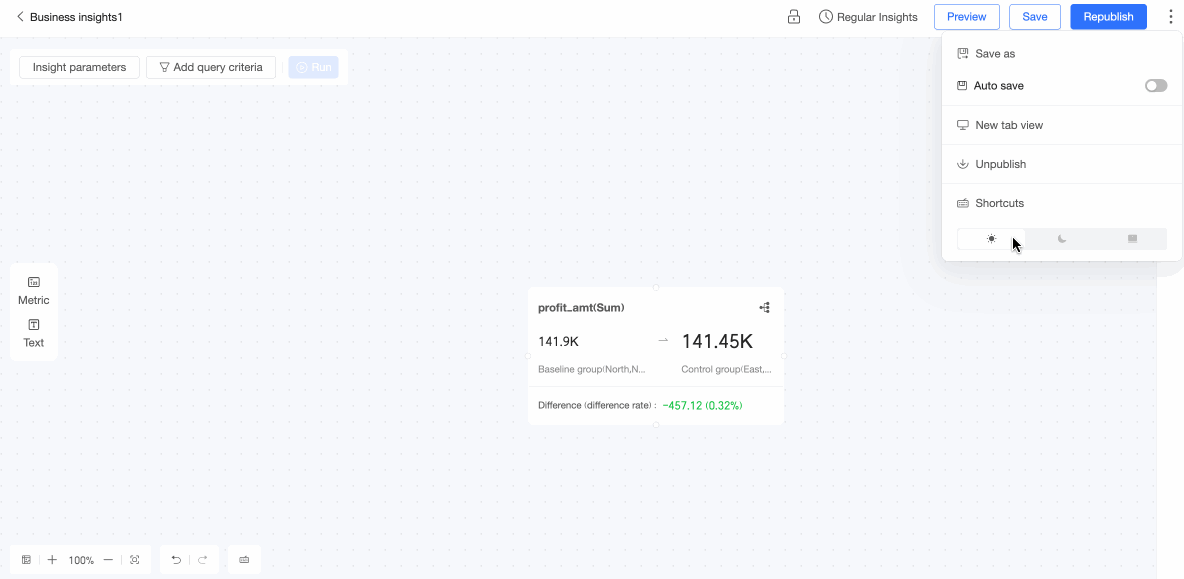
Save
Click Save. In the dialog box that appears, customize the Name of the business insight and select the save Location. Then, click Confirm. If required, you can select Enable auto-save during subsequent processes.
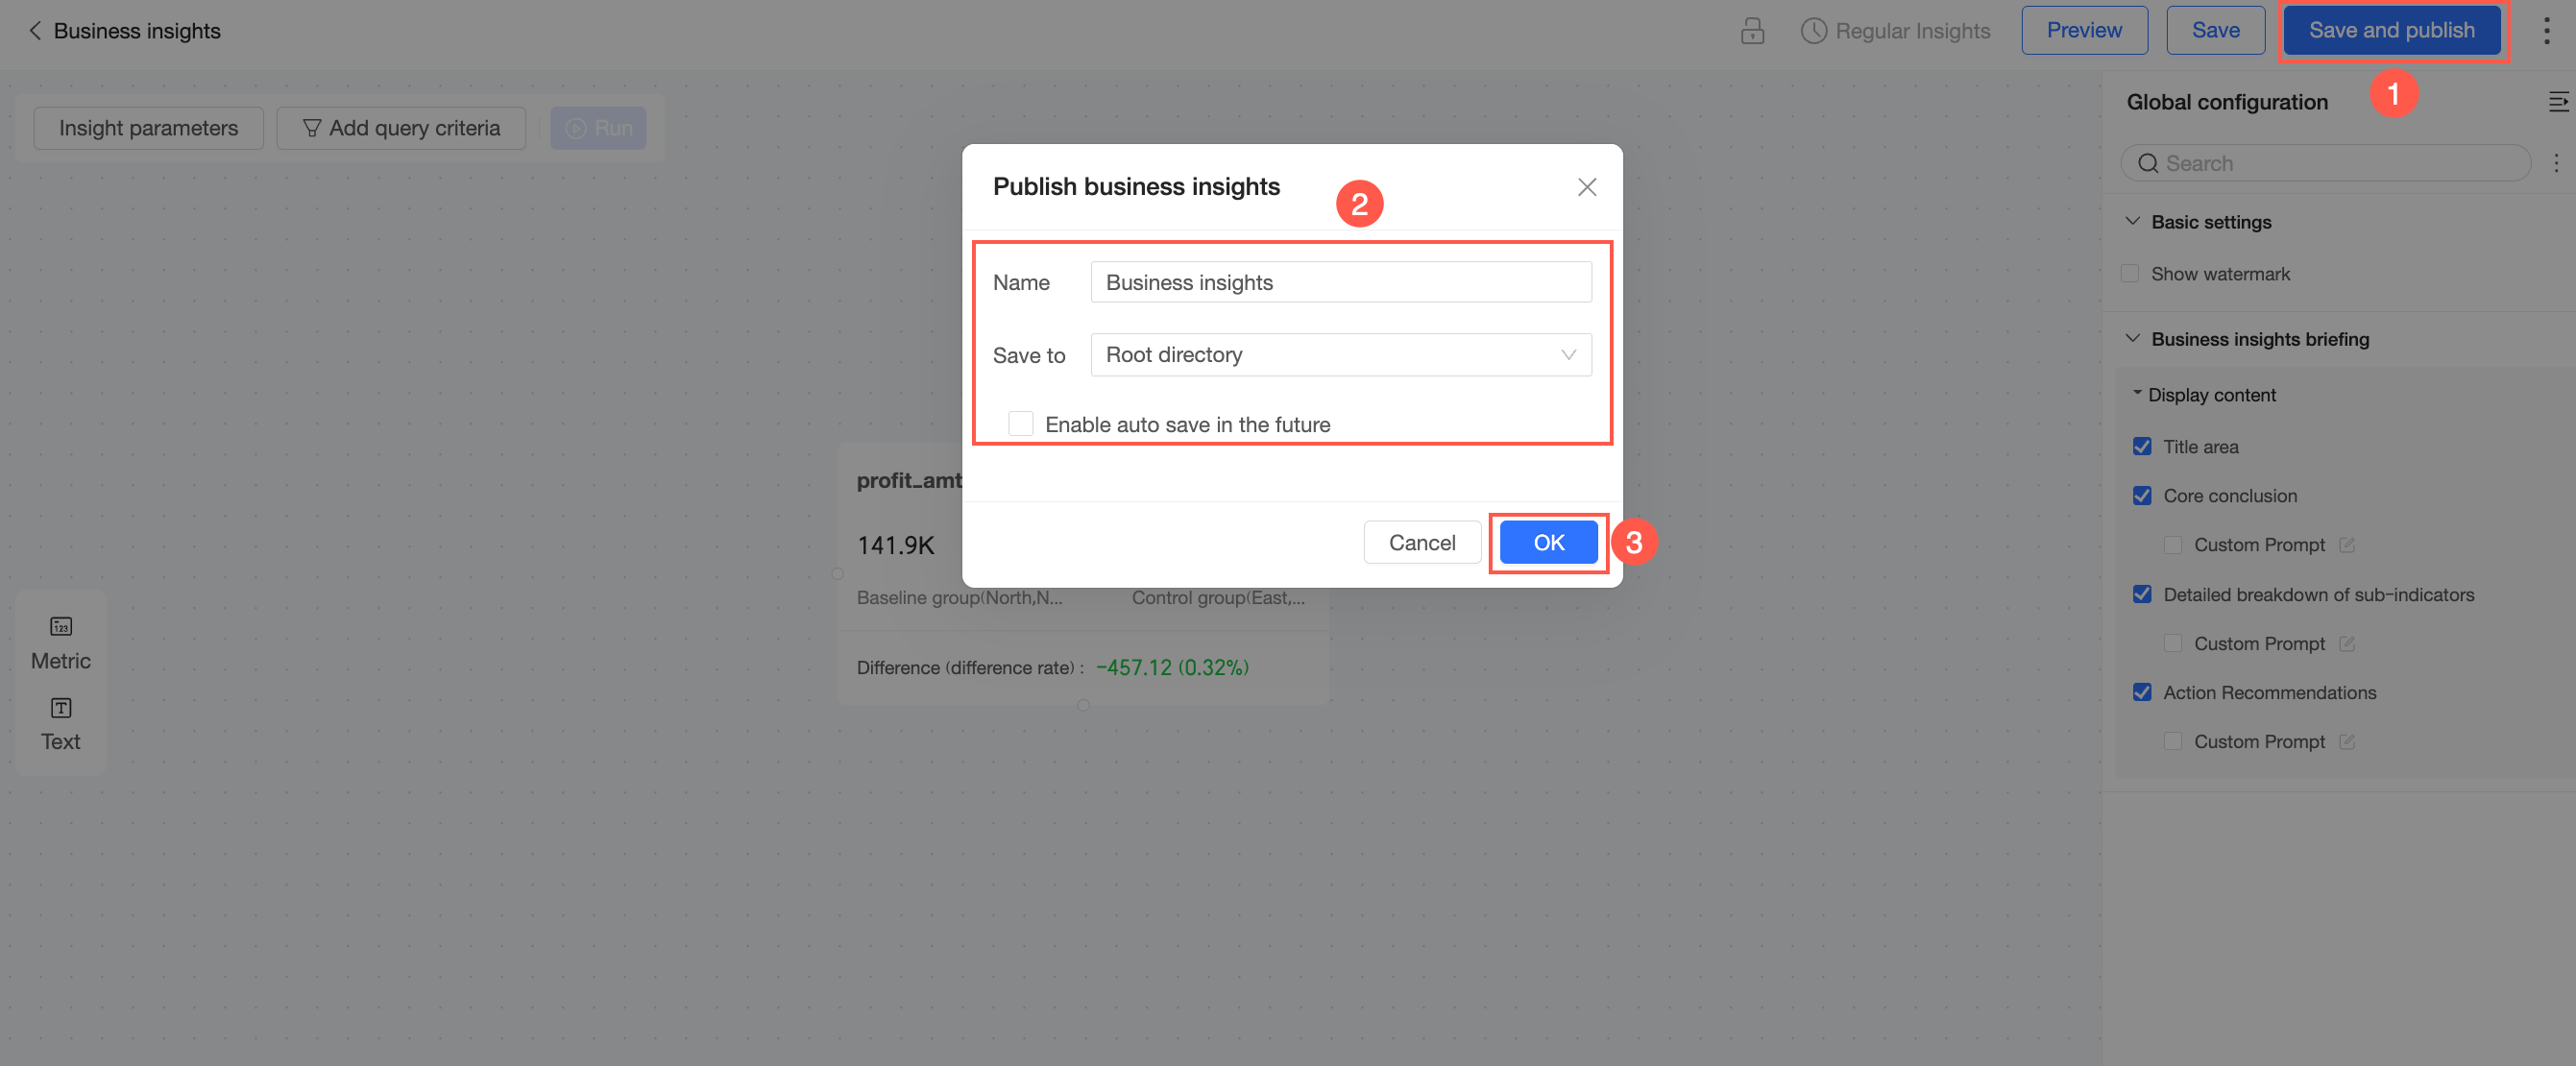
Save and Publish
Click Save and Publish. Then, in the confirmation dialog box that appears, click Confirm.

If the business insight has not been saved, customize its Name and select the save Location. Then, click Confirm.
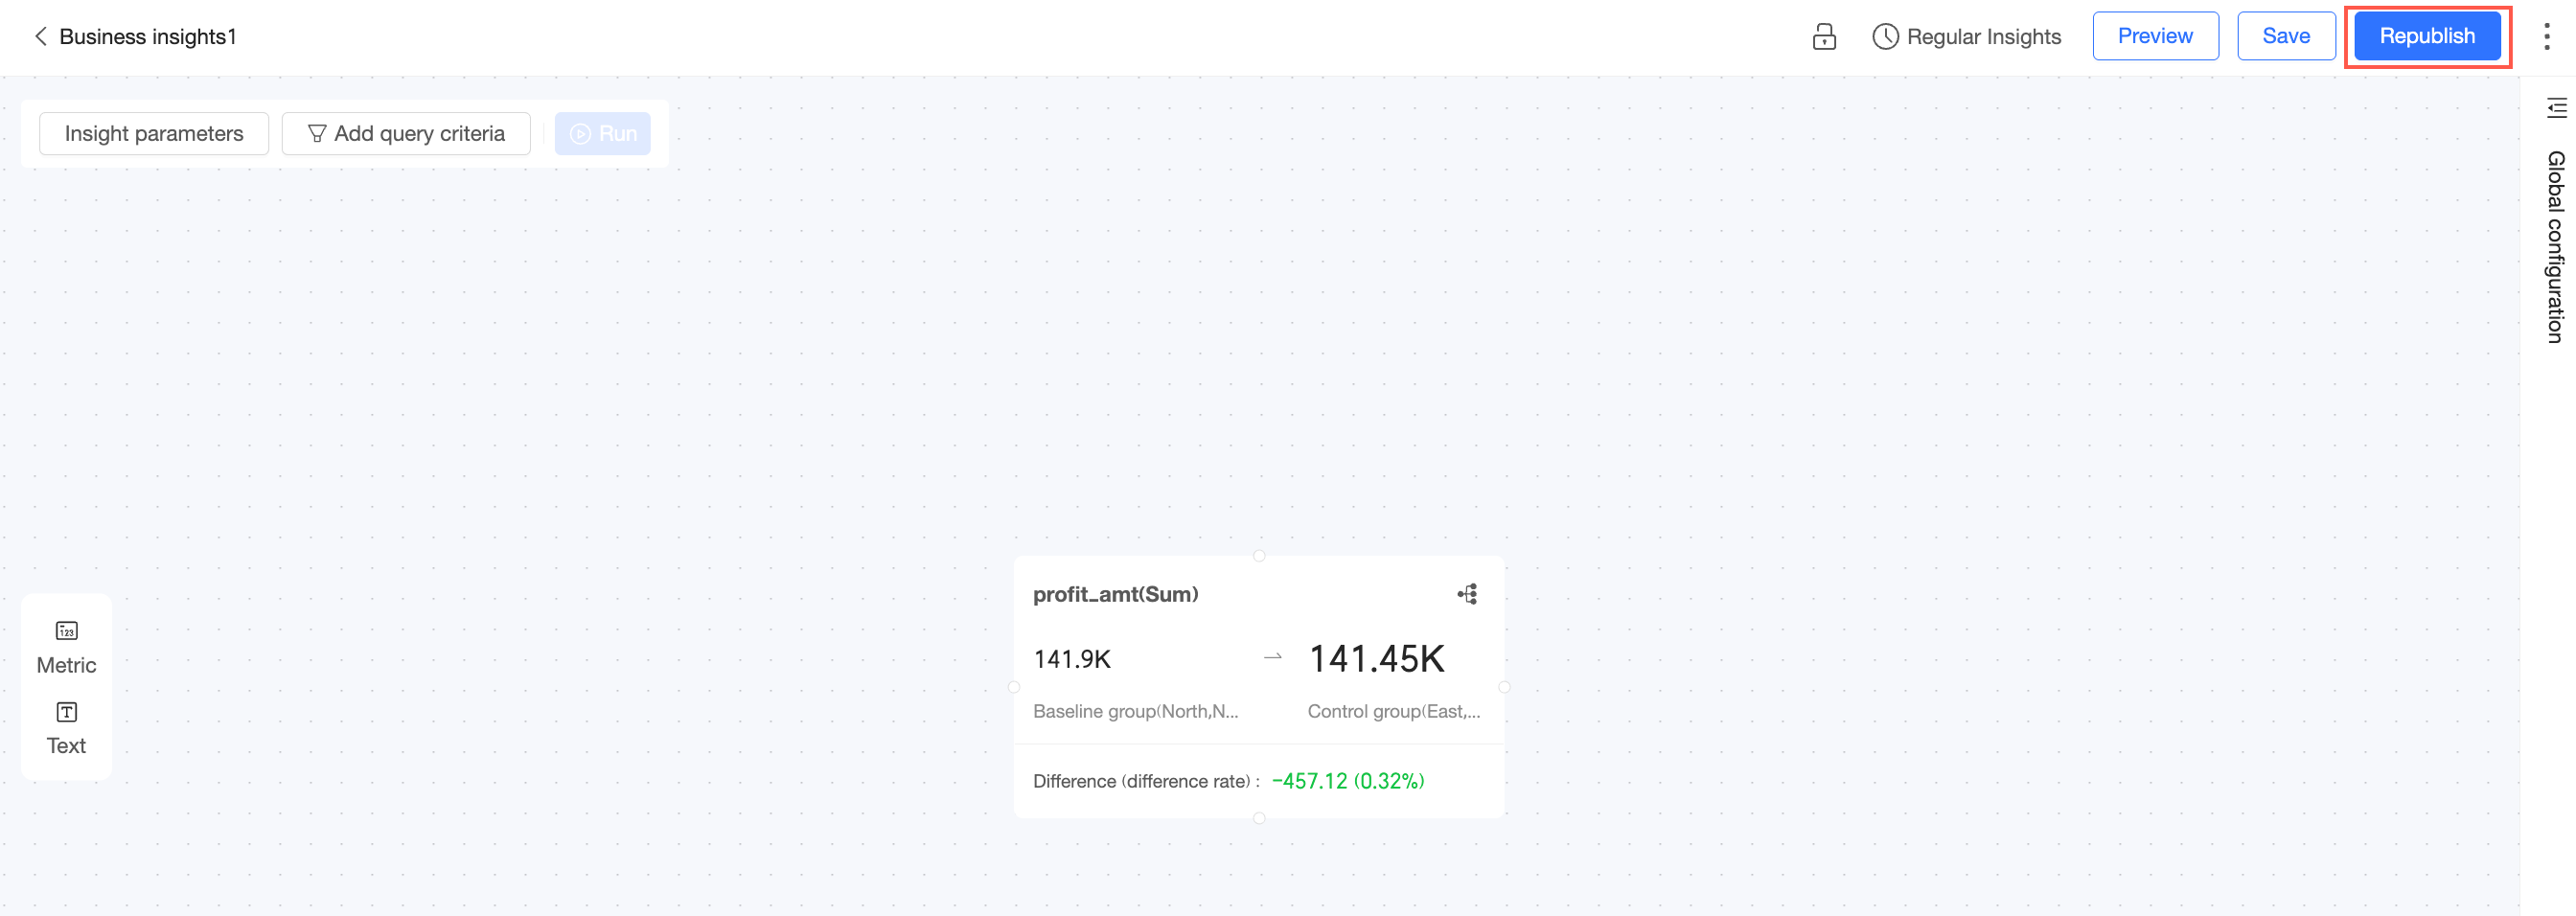
Republish
After you update a published business insight, click Republish to publish the changes.
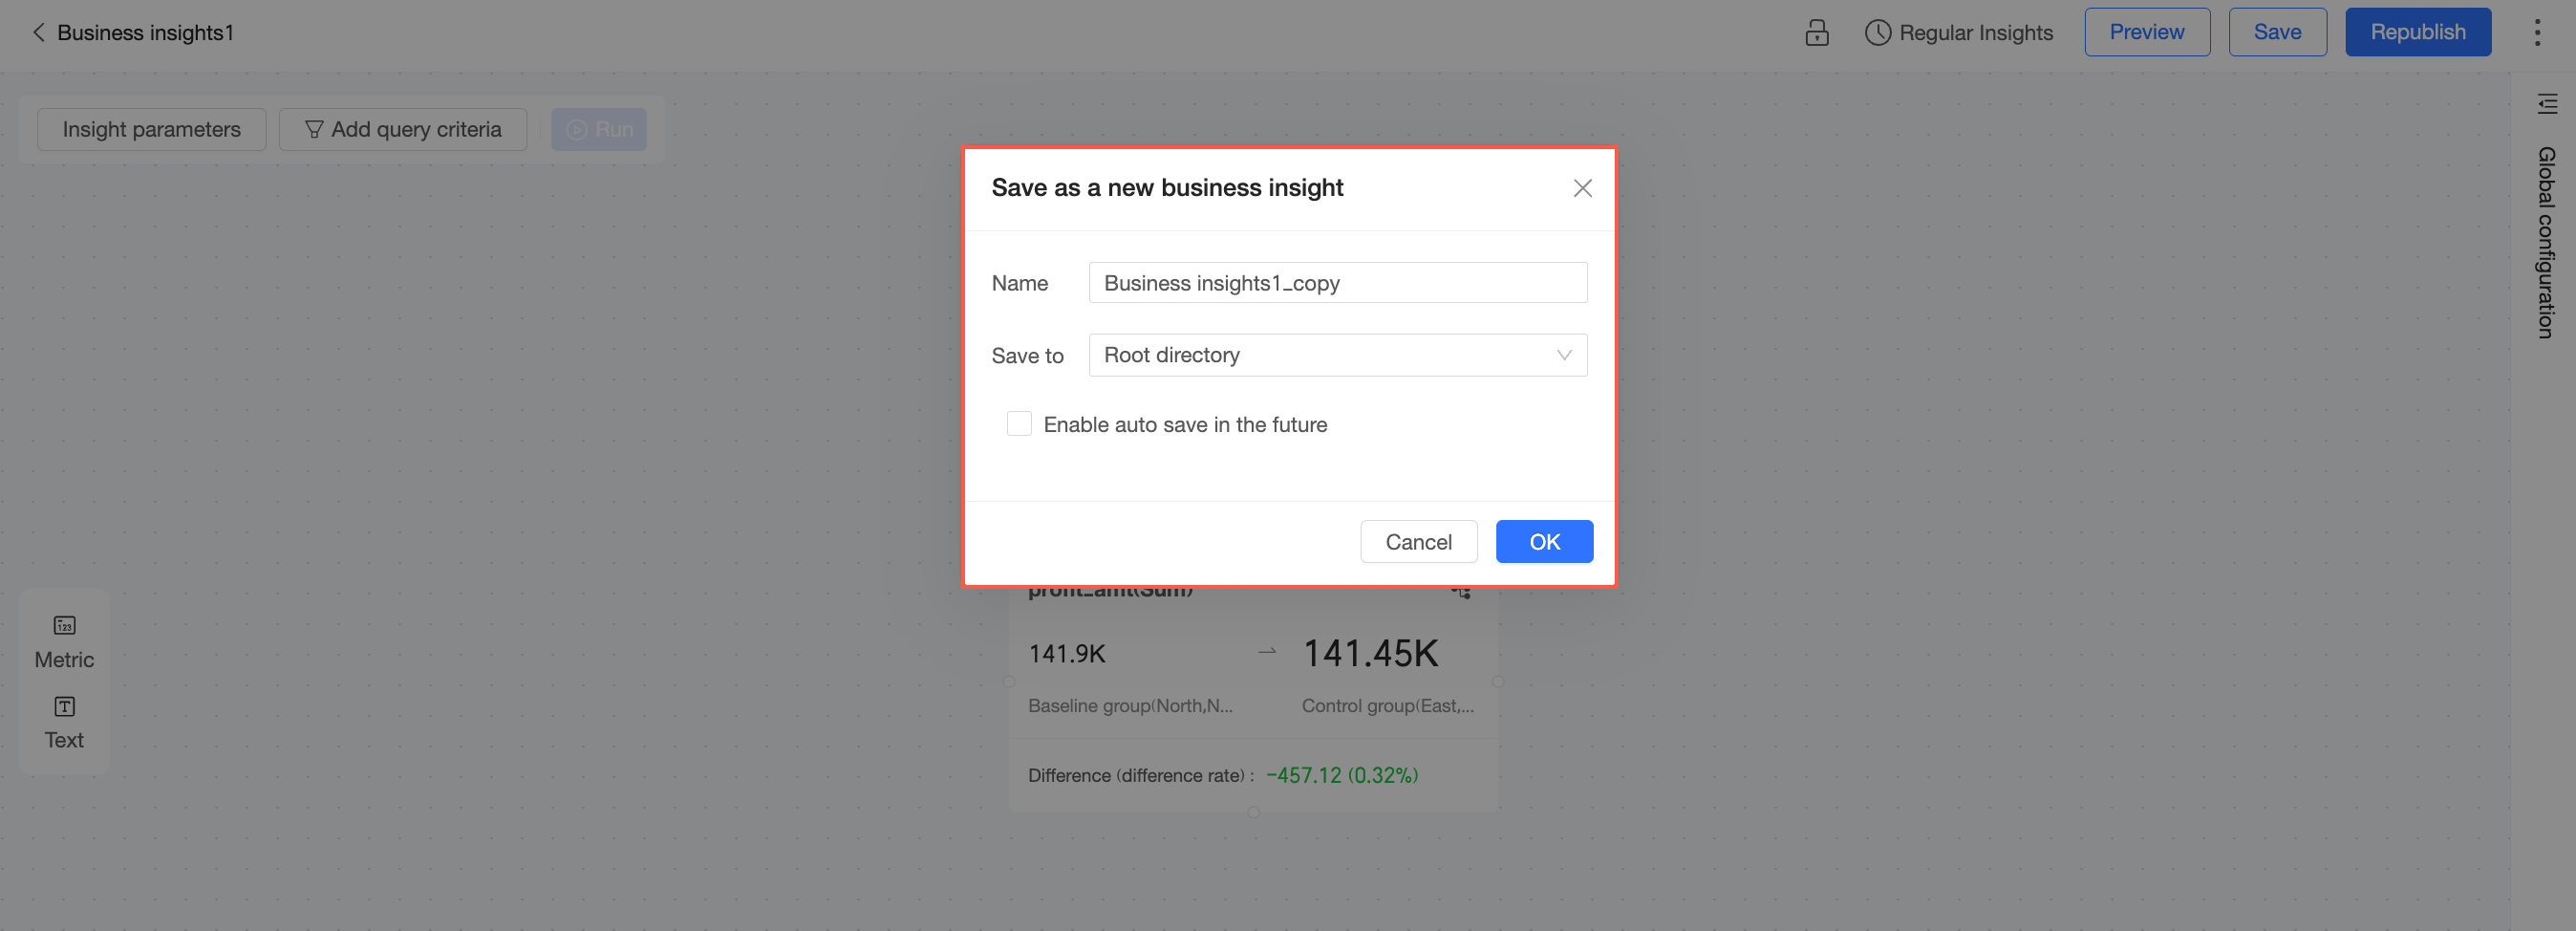
Save As
In the upper-right corner, click the
icon and select Save As.Customize the Name for the new business insight and select the save Location. Then, click Confirm. If required, you can select Enable auto-save during subsequent processes.
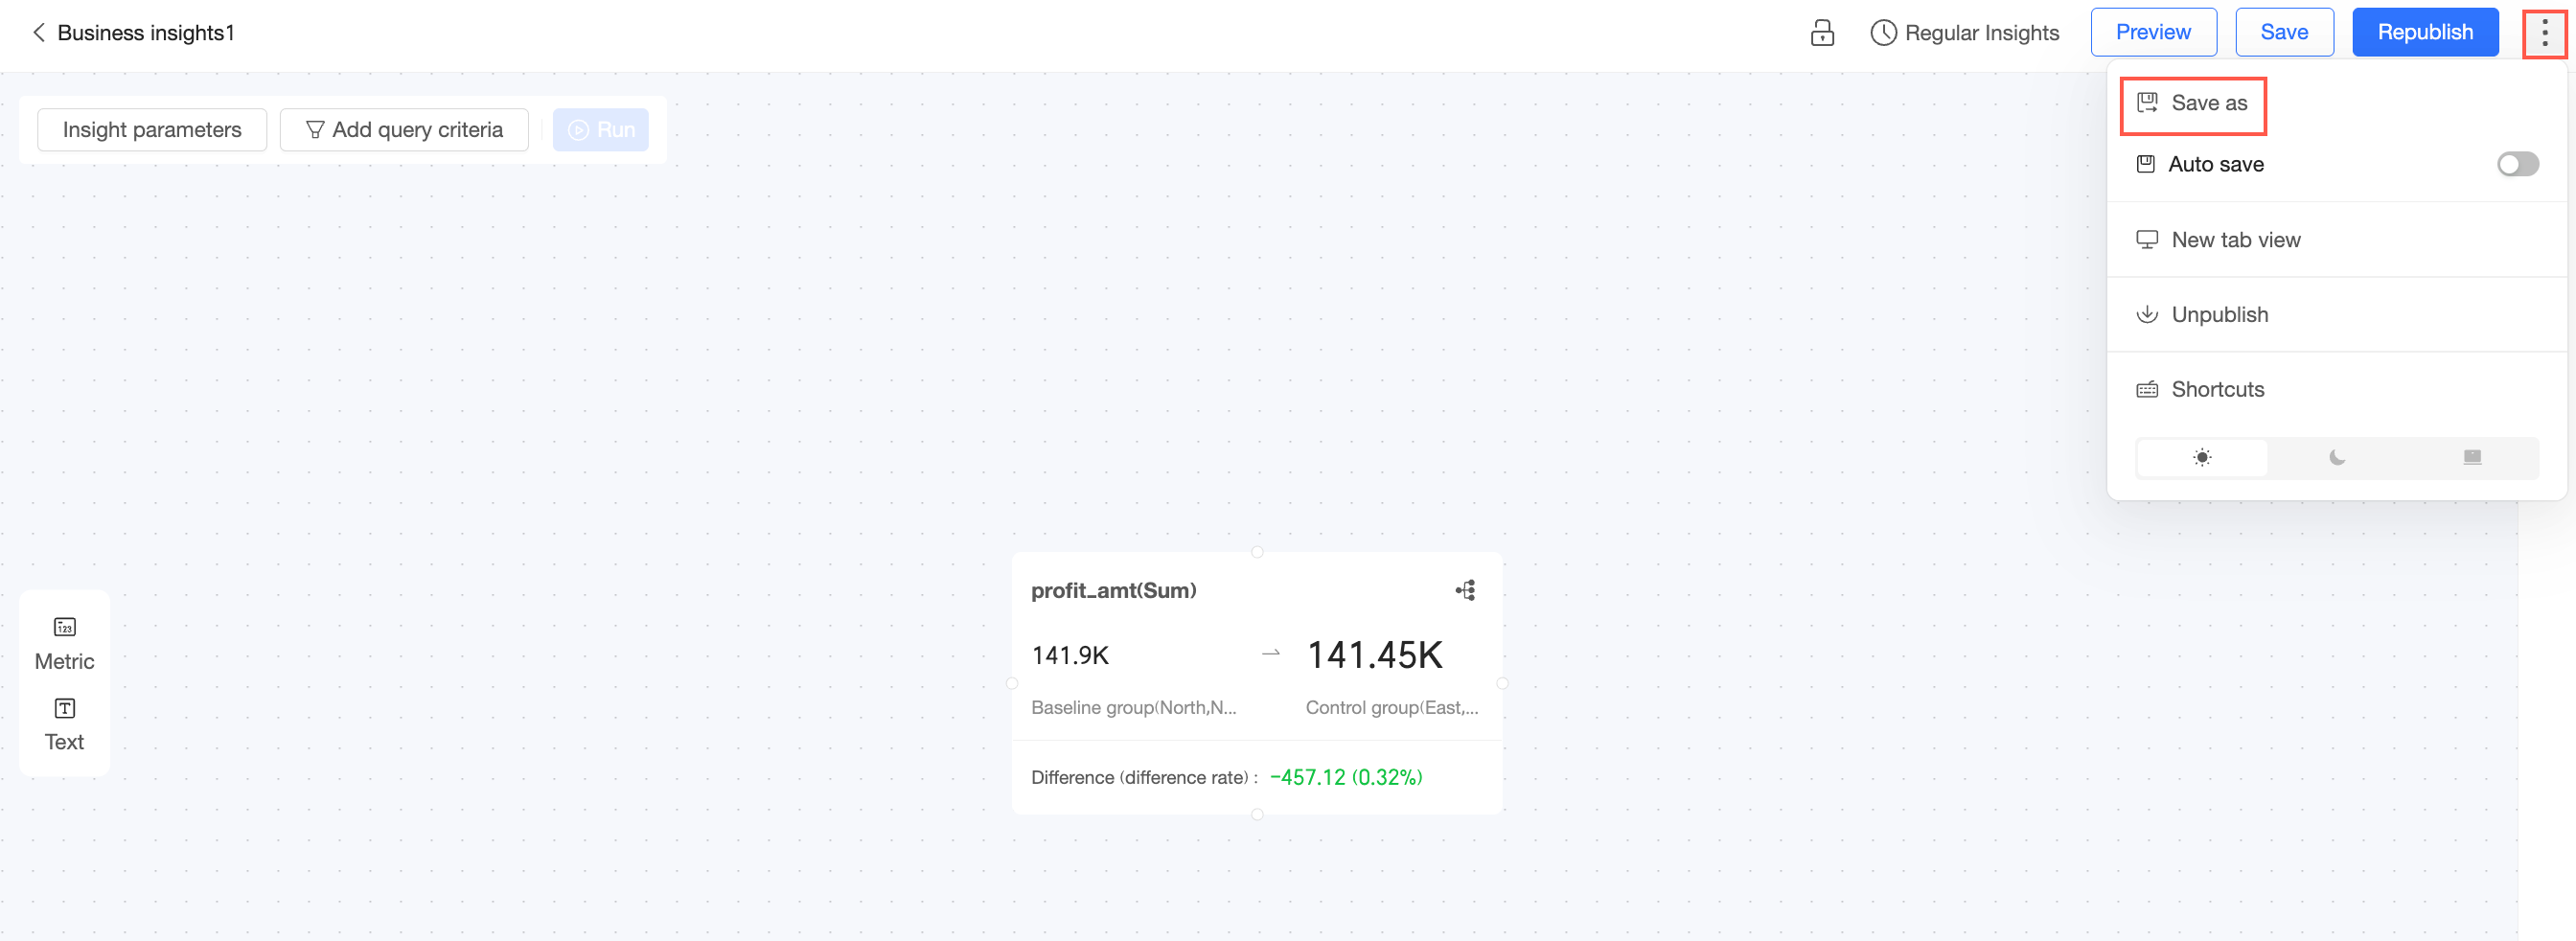
Auto-save
In the upper-right corner, click the ![]() icon and select Auto-save.
icon and select Auto-save.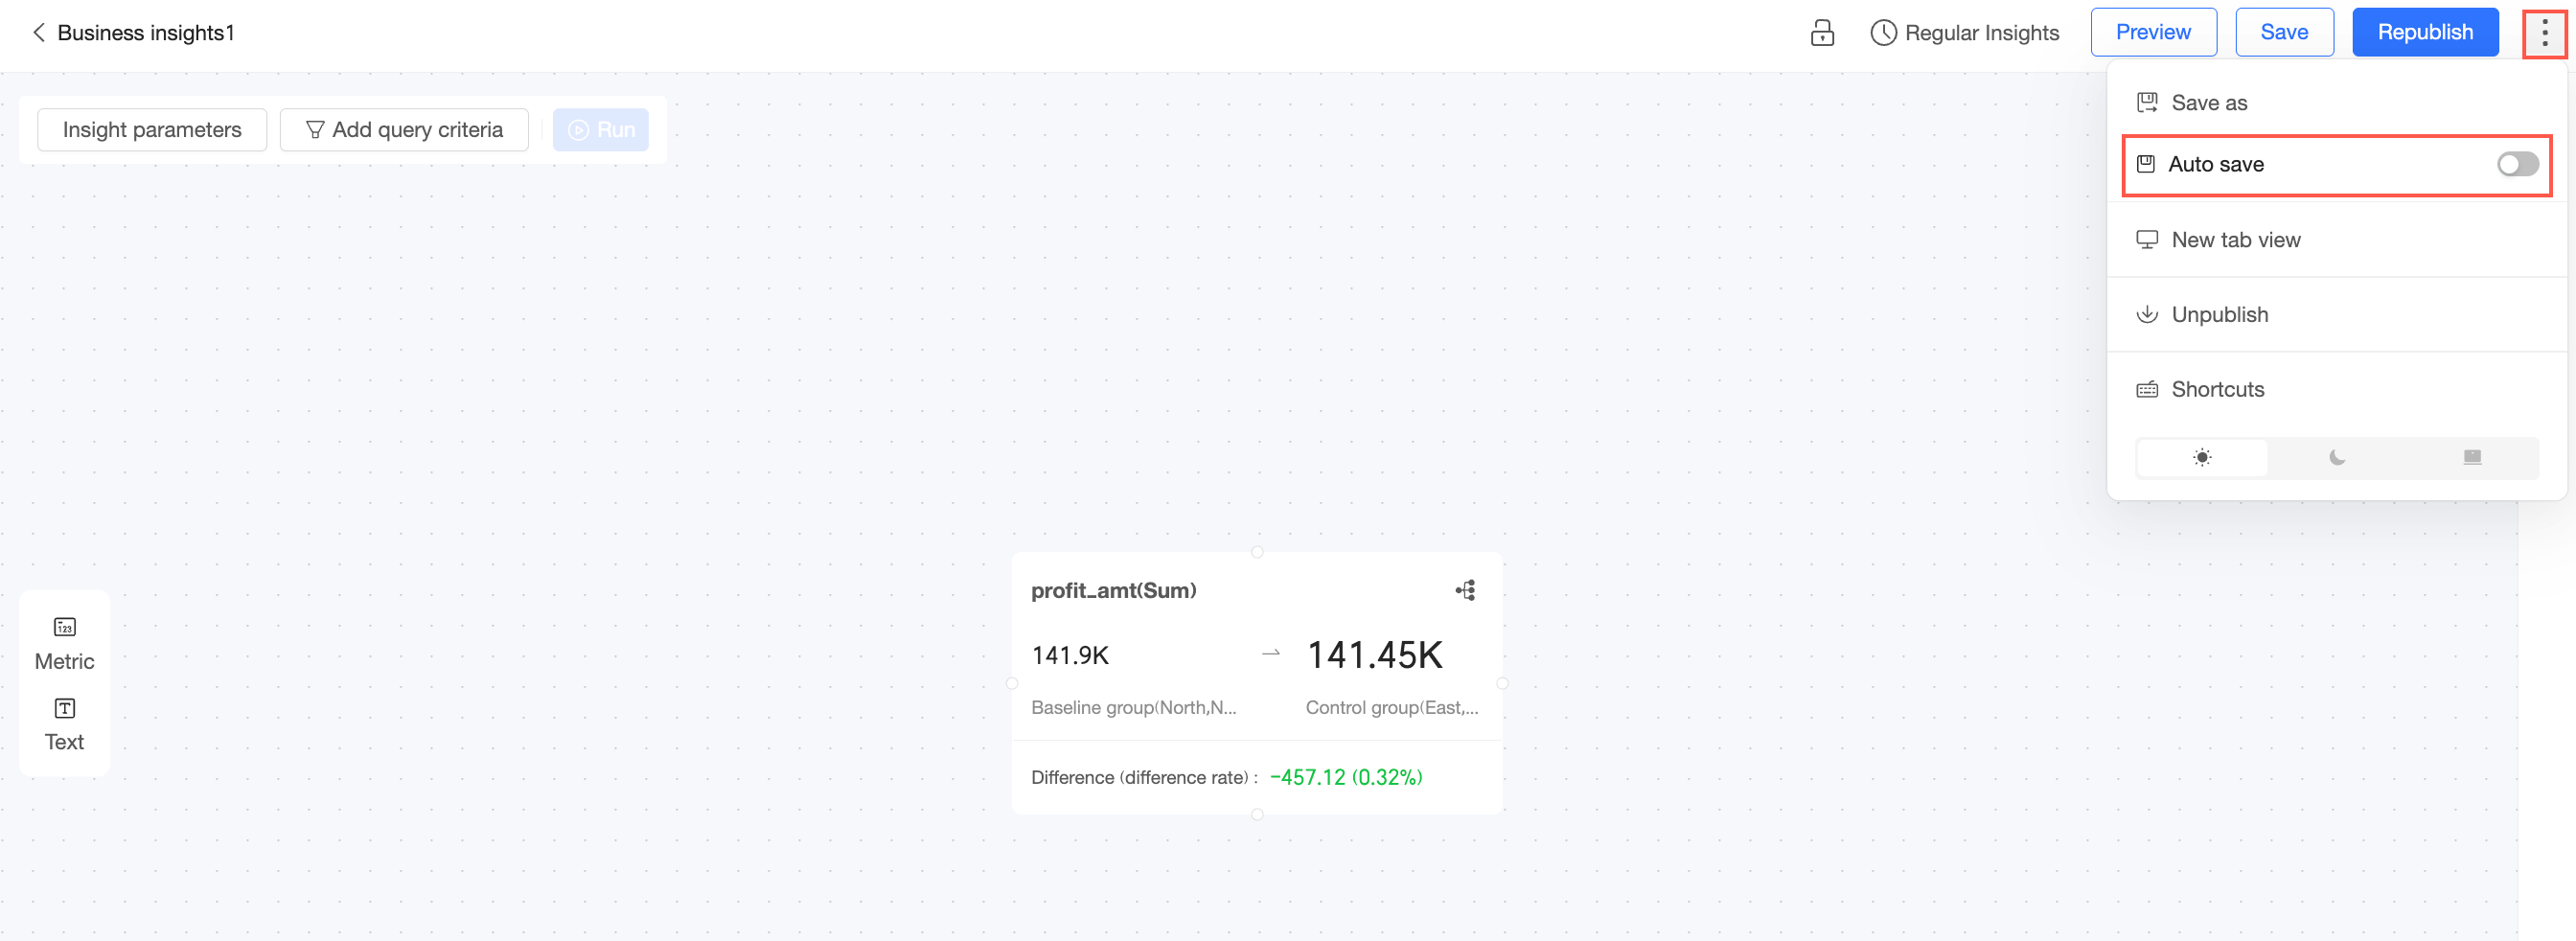
If this option is selected, the business insight is automatically saved during the editing process.
View in New Tab
Only published business insights can be viewed in a new tab.
In the upper-right corner, click the
icon and select View in New Tab.The preview page opens in a new tab.
On the preview page, you can perform the following operations:
Configure Insight Parameters.
Click Run to execute the insight task.
Click Full Screen to enable full-screen viewing.
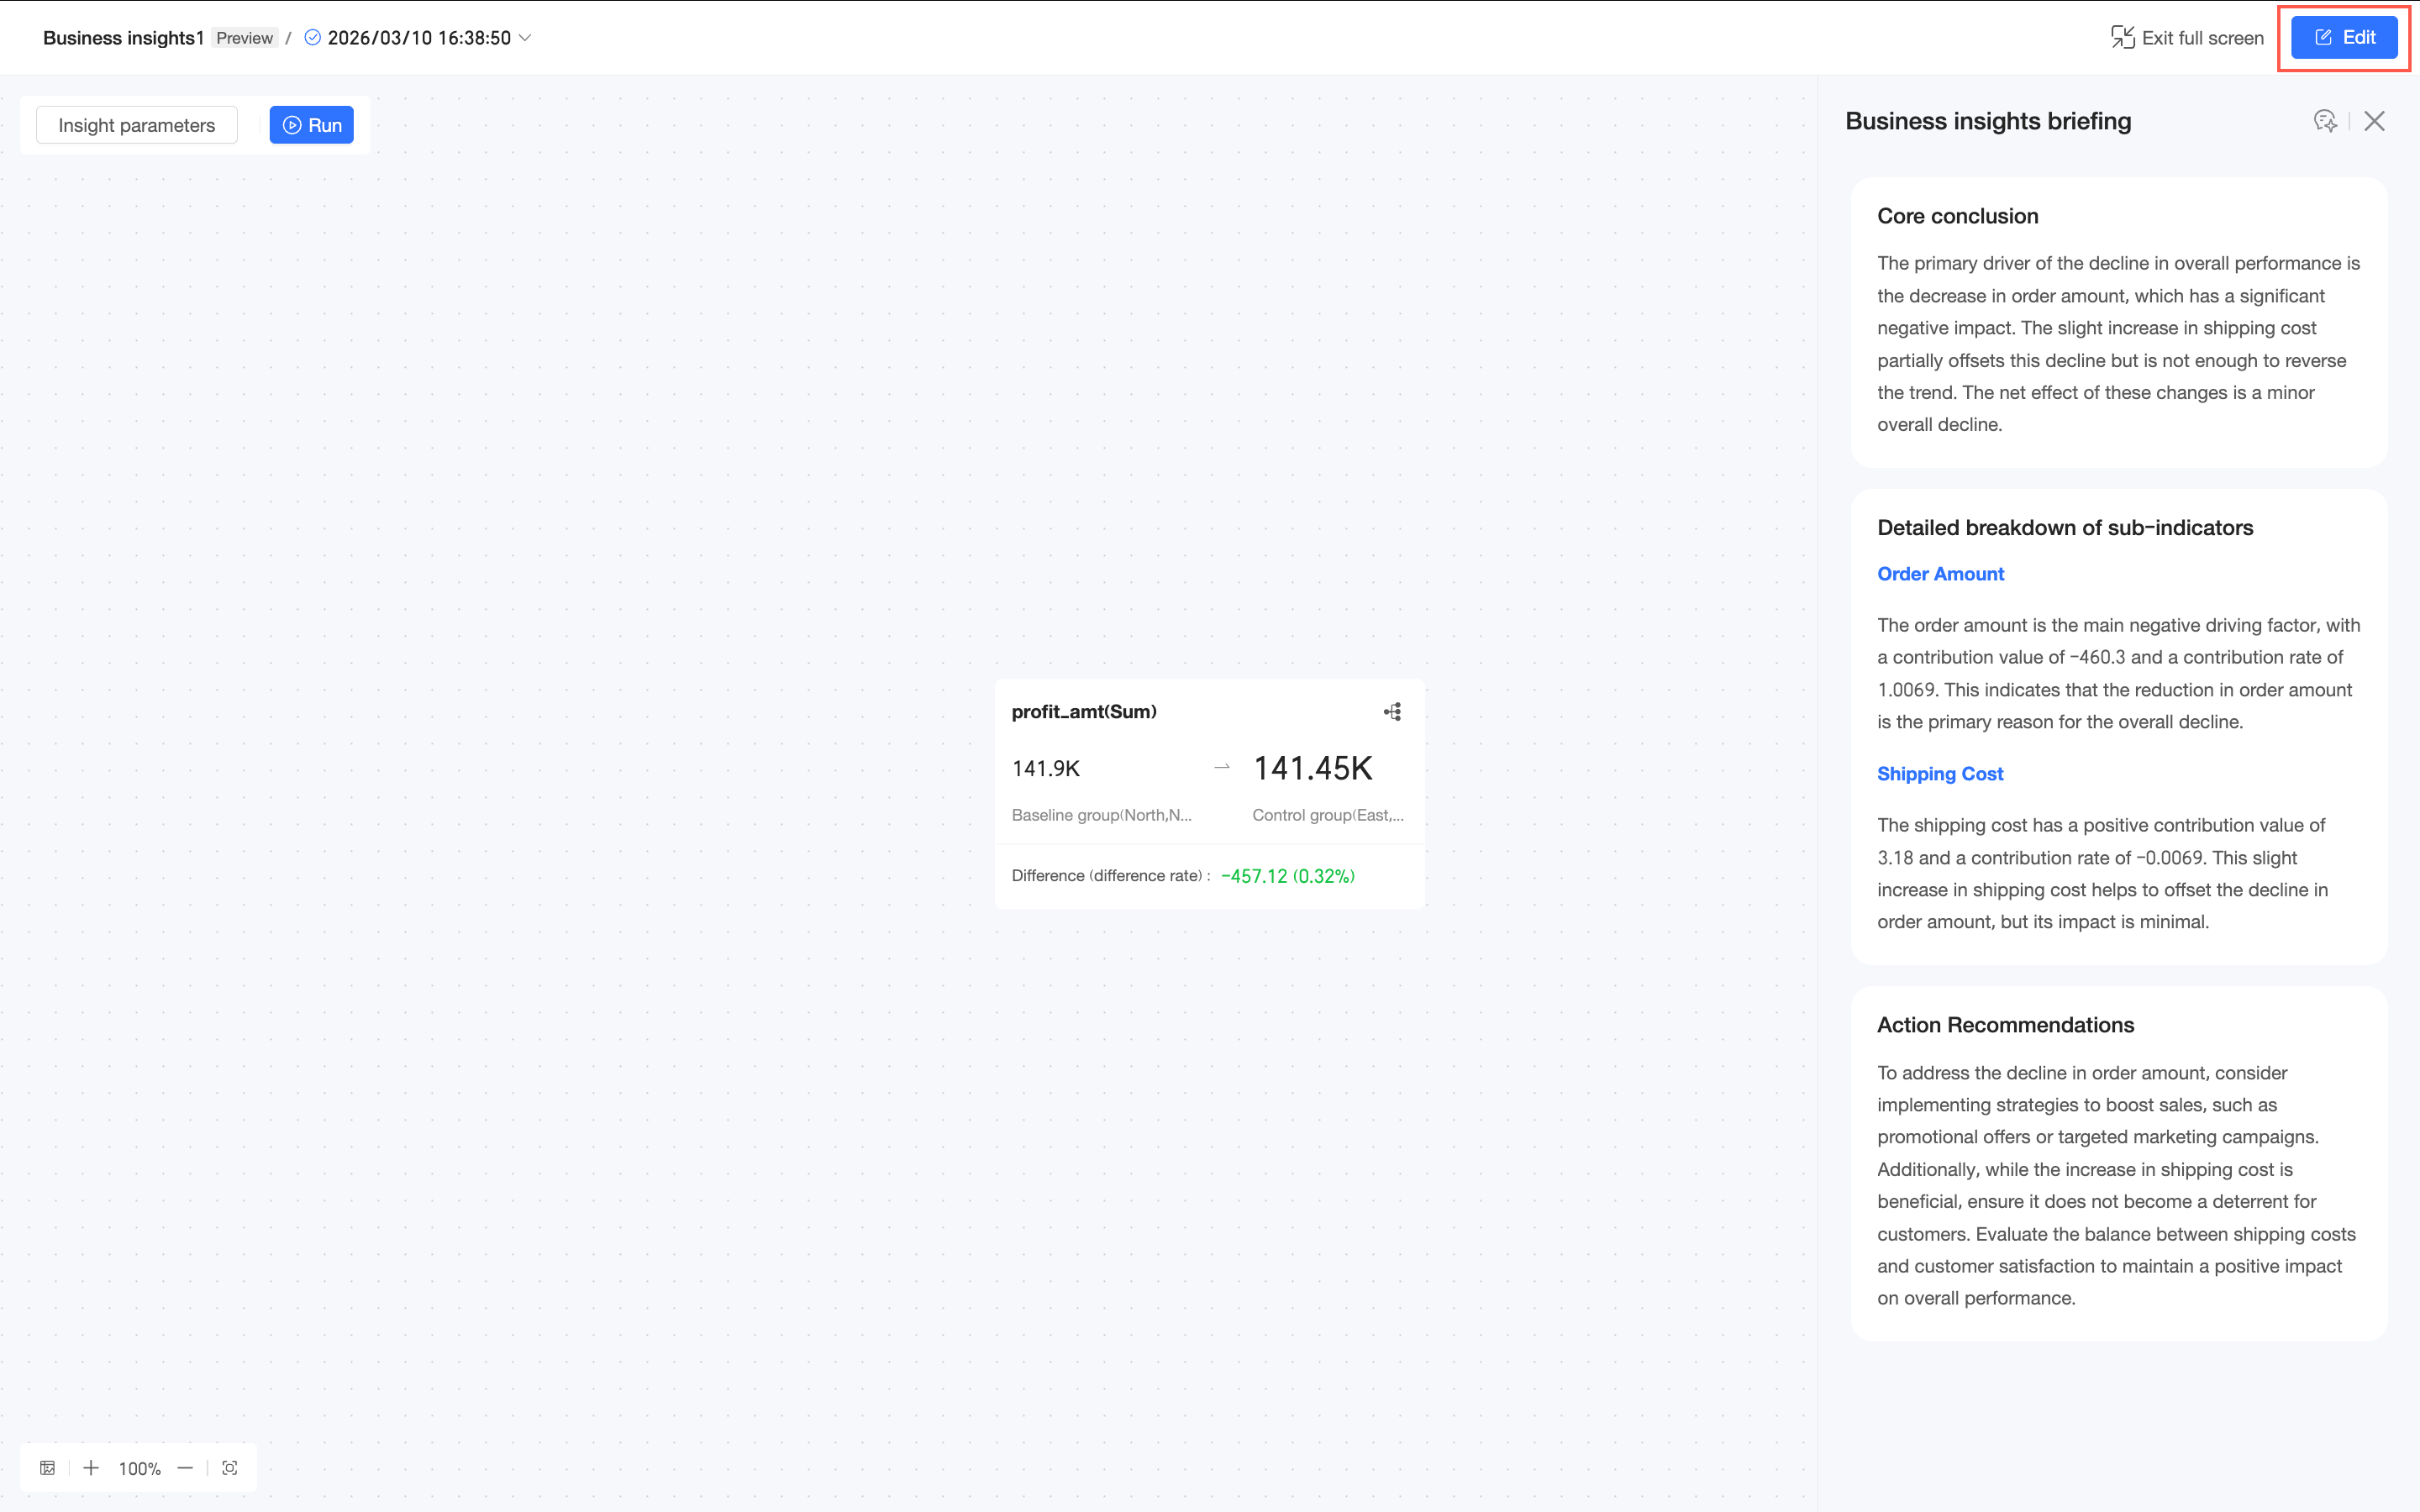
Click Edit to return to the indicator insight editing page.

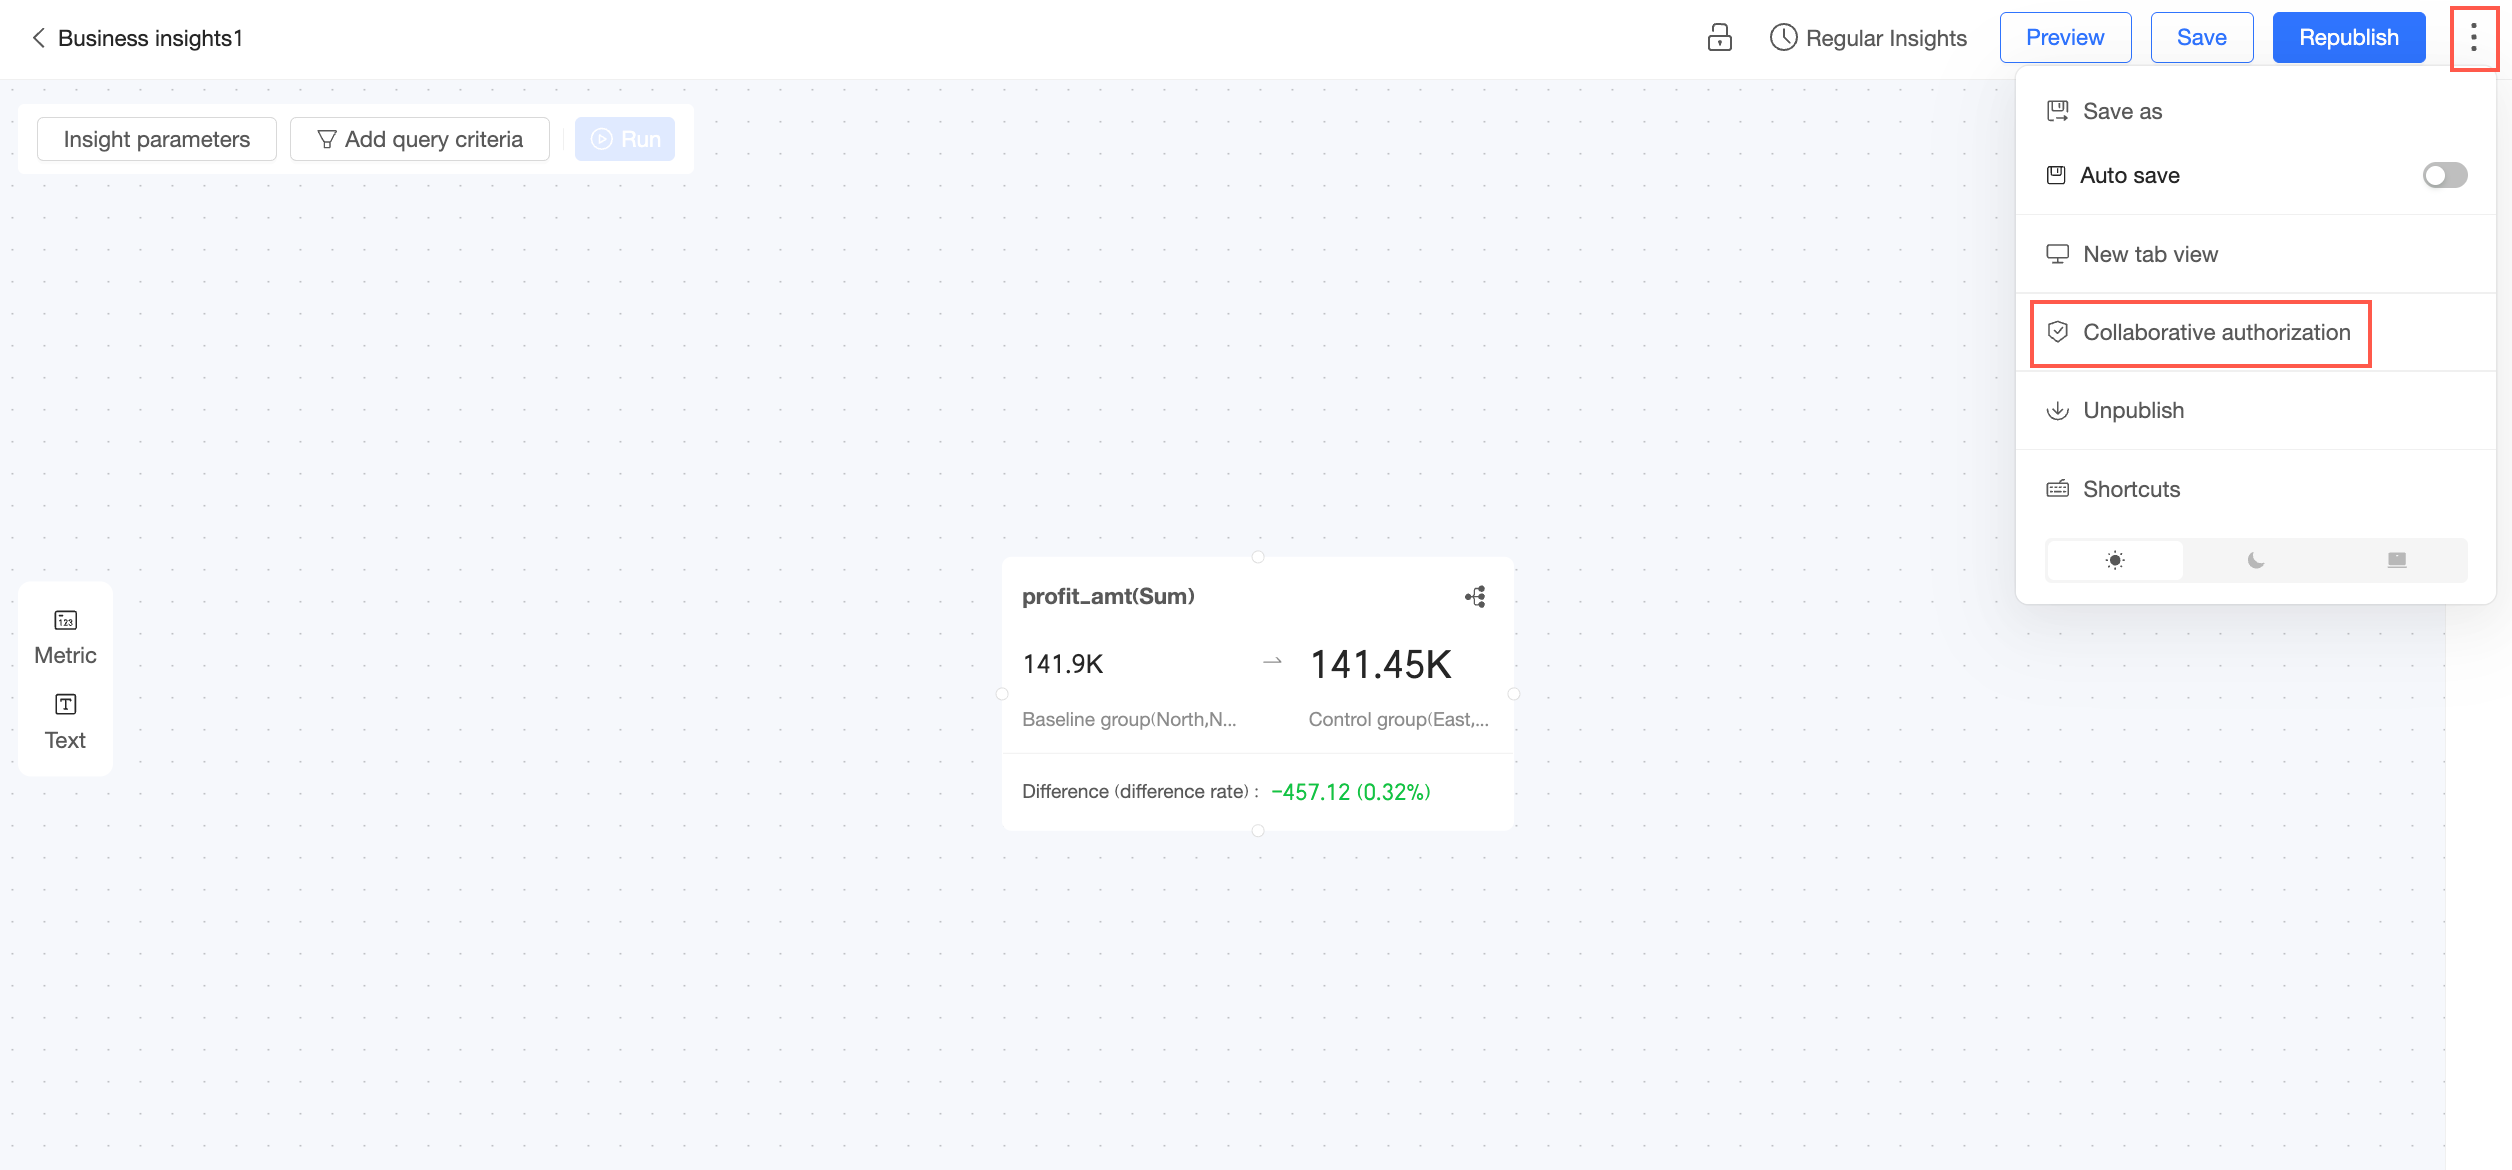
Collaborative Authorization
In the upper-right corner, click the
icon and select Collaborative Authorization.On the collaborative authorization page, you can grant view or edit permission to relevant users.
NoteIf the status is private, only the resource owner and the space administrator have edit permission. To grant edit permission to specified members, you must first switch the status to Specified members.
Edit permission can be granted only to users in this space who have Business Insights Create (Edit) permission.
Query and View permissions can be granted only to users in this space who have Business Insights Query permission.
Query: Allows users to initiate business insights in Smart XiaoQ > XiaoQ Insights.
View: Allows users to view generated business insight briefs.

Unpublish
In the upper-right corner, click the ![]() icon and select Unpublish. After a business insight is unpublished, users cannot view or use it.
icon and select Unpublish. After a business insight is unpublished, users cannot view or use it.

Keyboard Shortcuts
In the upper-right corner, click the
icon and select Keyboard Shortcuts.View the keyboard shortcuts for business insight operations.


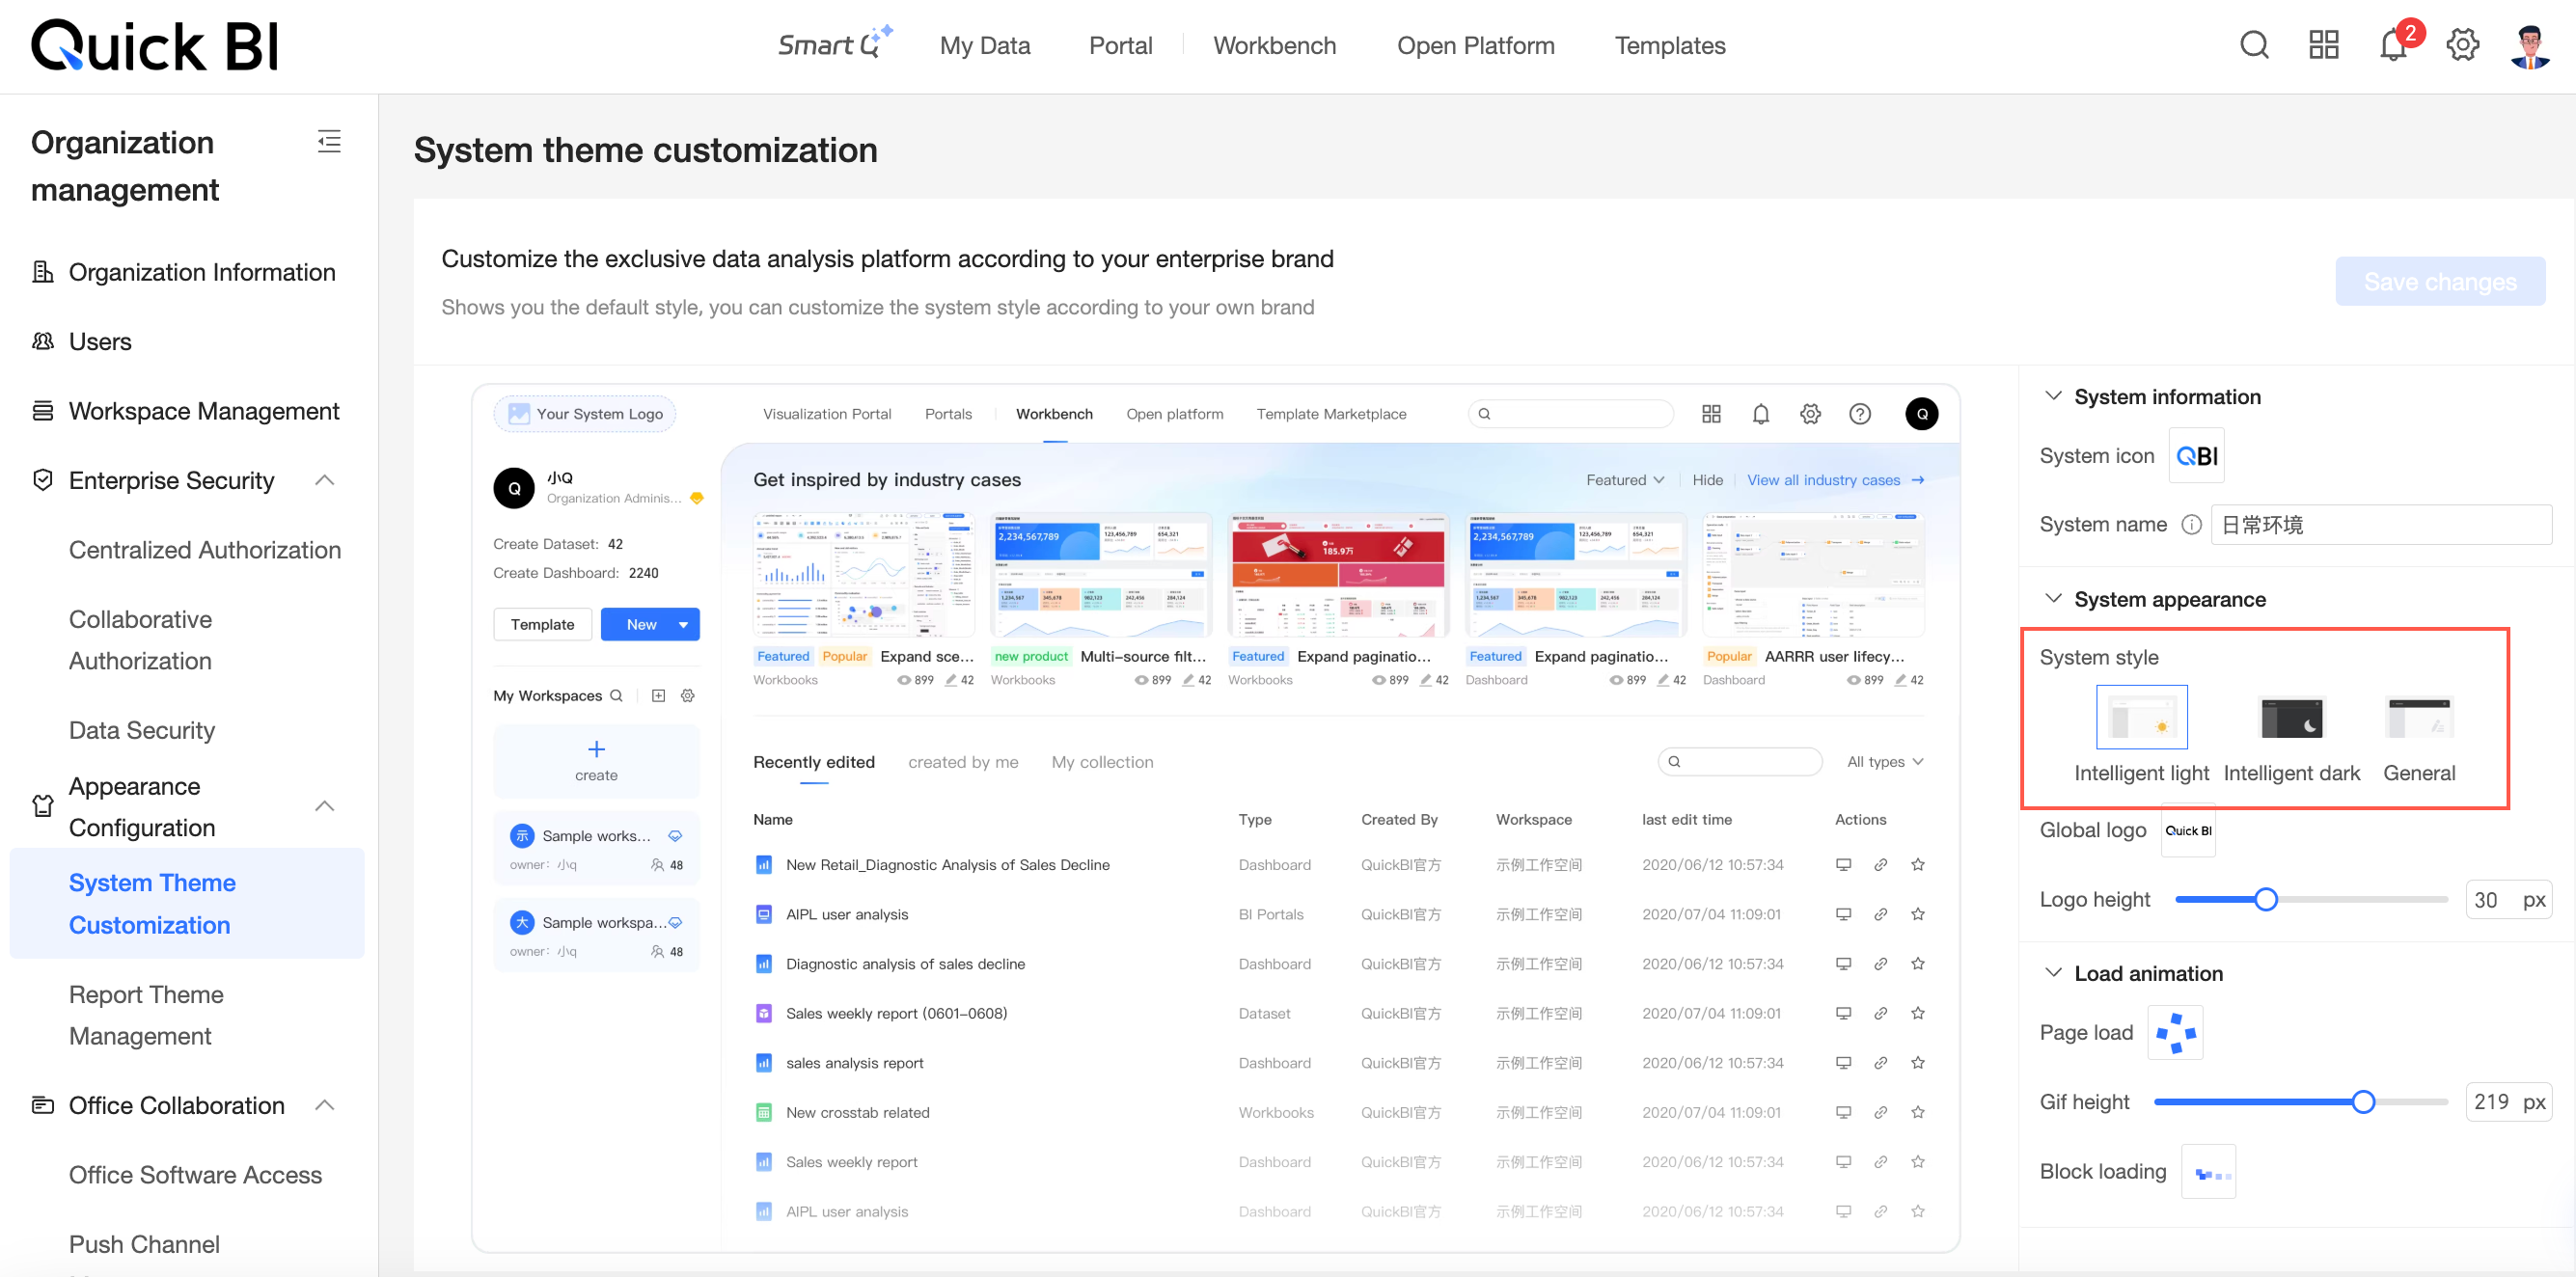
Dark/Light Theme Switch
You can set the theme to Light Mode, Dark Mode, or Follow Organization Settings.
For more information about the system style set by Follow Organization Settings, see System Theme Customization.
Operations on the Business Insights List Page
In the navigation pane on the left, choose Insight Attribution > Business Insights to go to the list page.
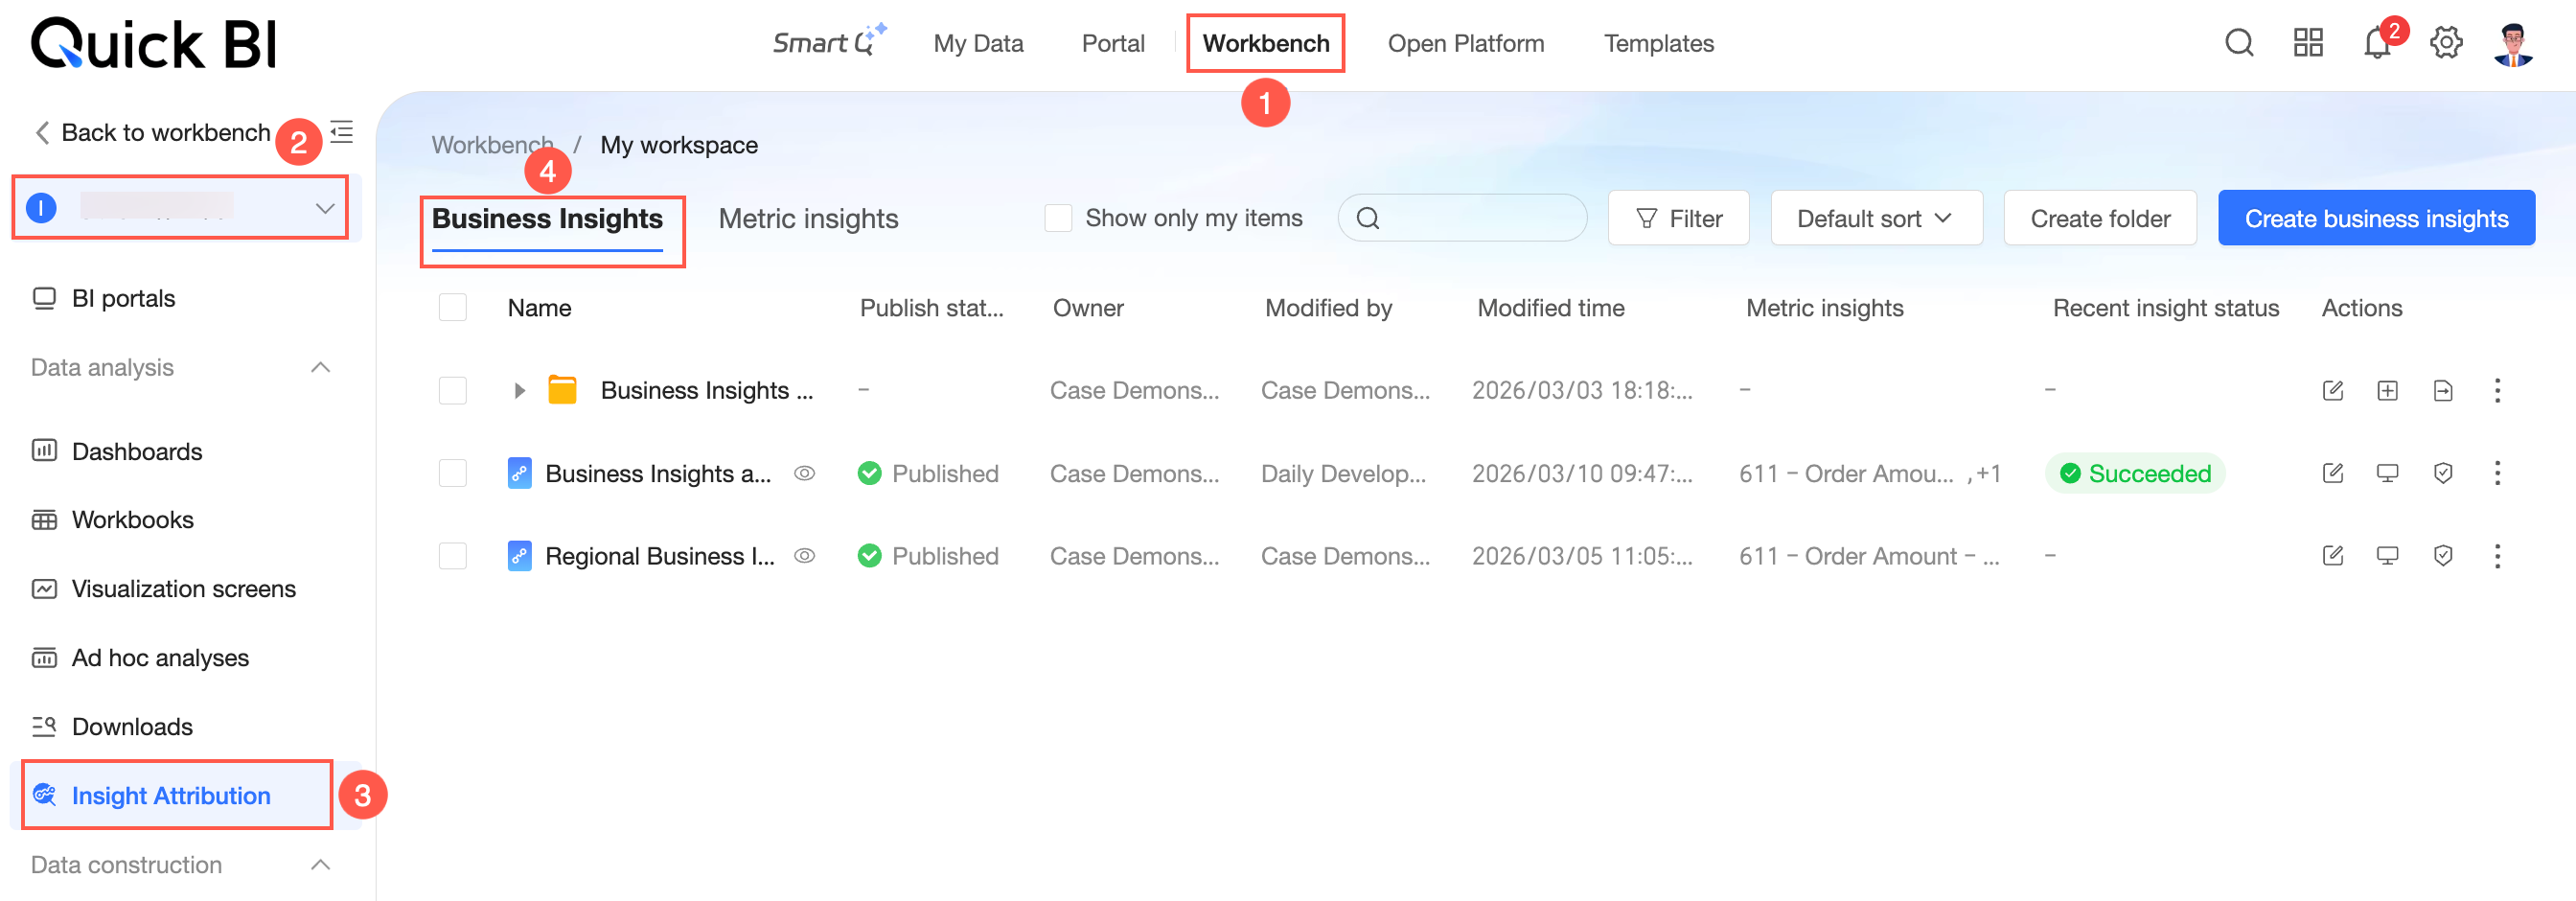
On the Business Insights list page, you can perform the following operations:
Preview
To the right of the target business insight, click the ![]() icon to open the preview page.
icon to open the preview page.
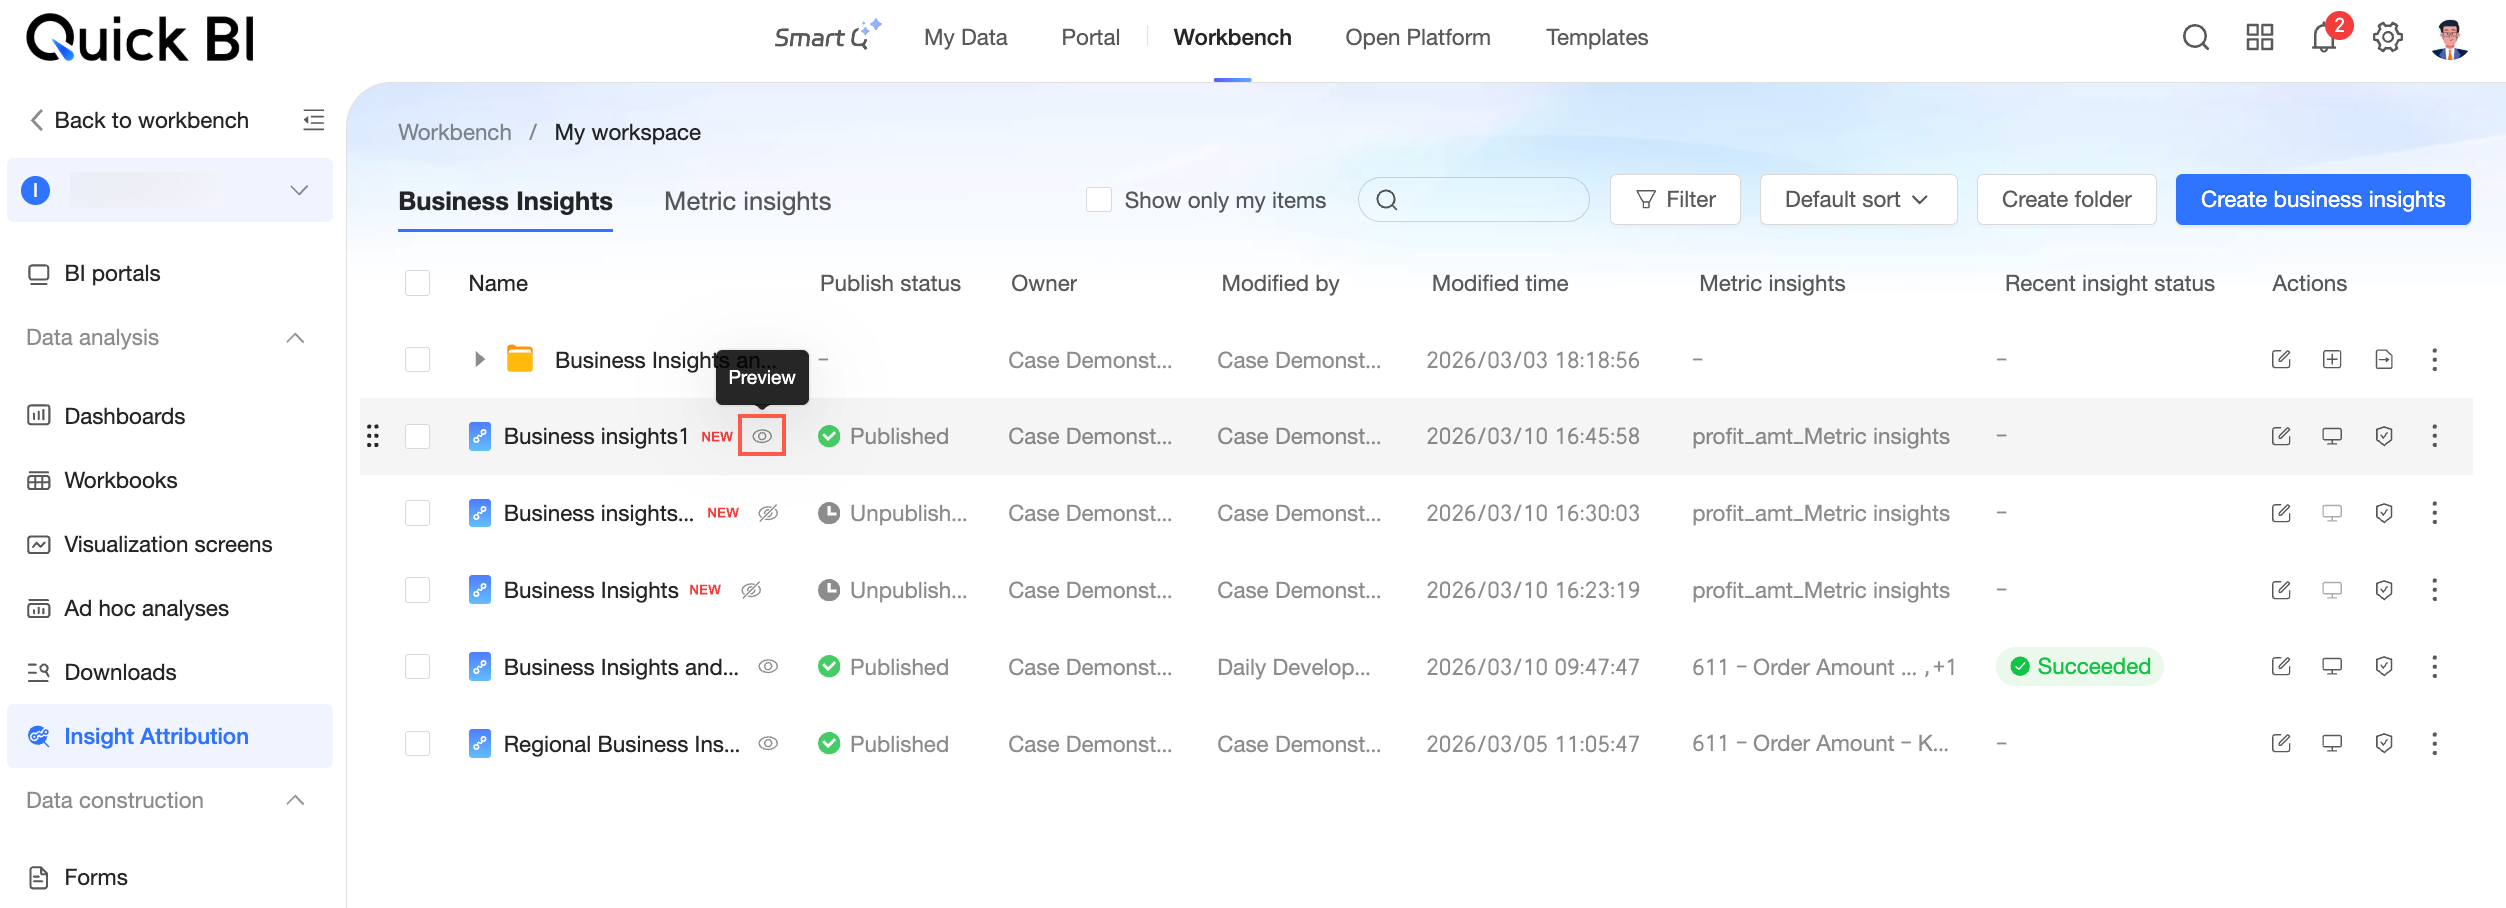
On the preview page, you can run insight attribution and perform other operations. The operations are the same as those described in the View in New Tab section.
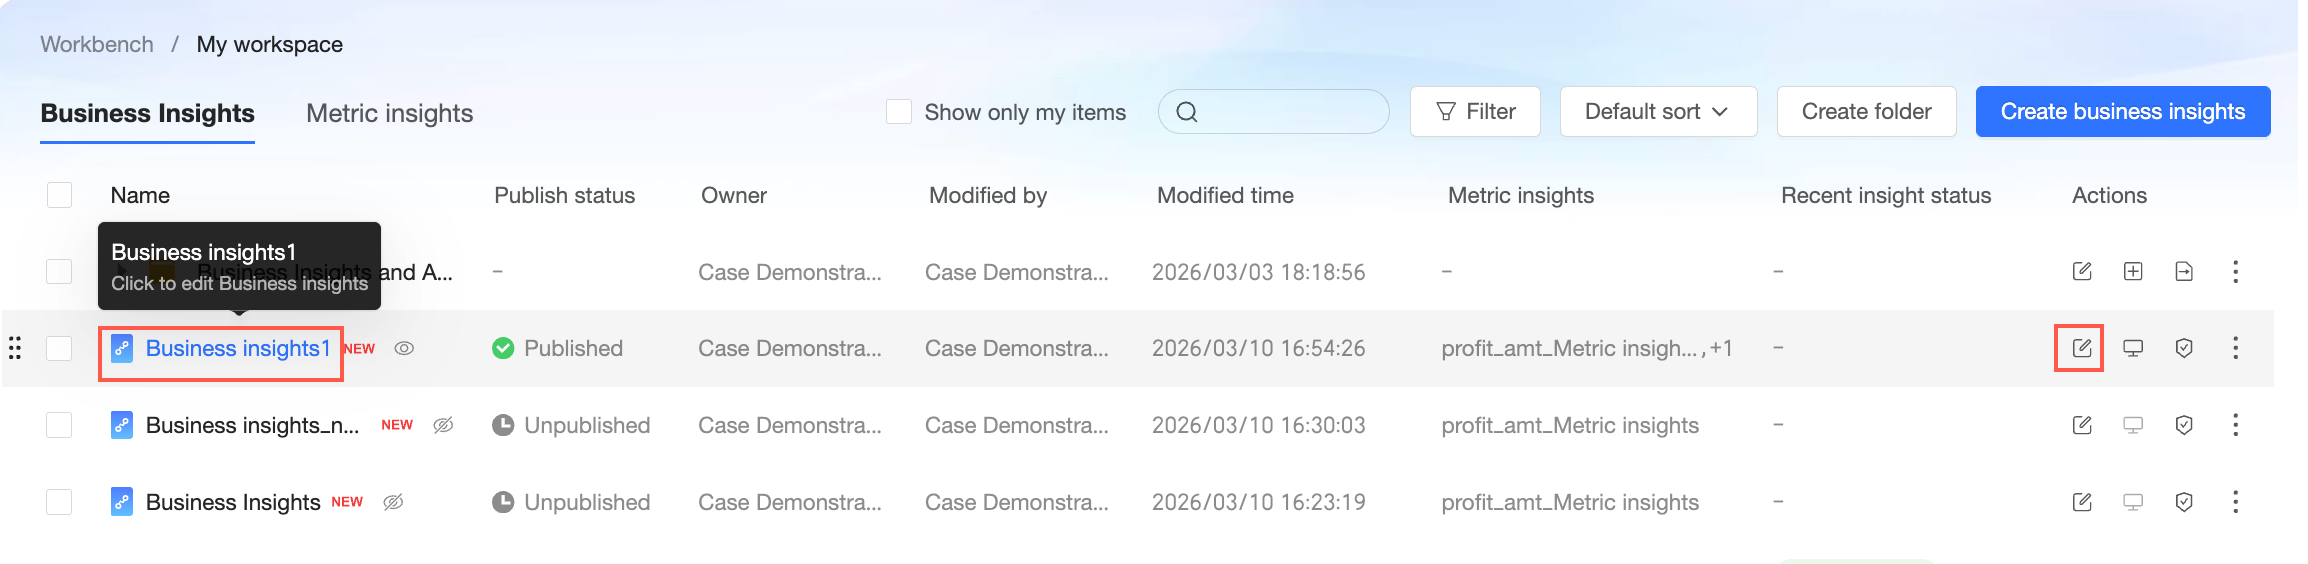
Edit
Click the name of the target business insight or the ![]() icon in the Operations column to go to the Business Insights editing page.
icon in the Operations column to go to the Business Insights editing page.
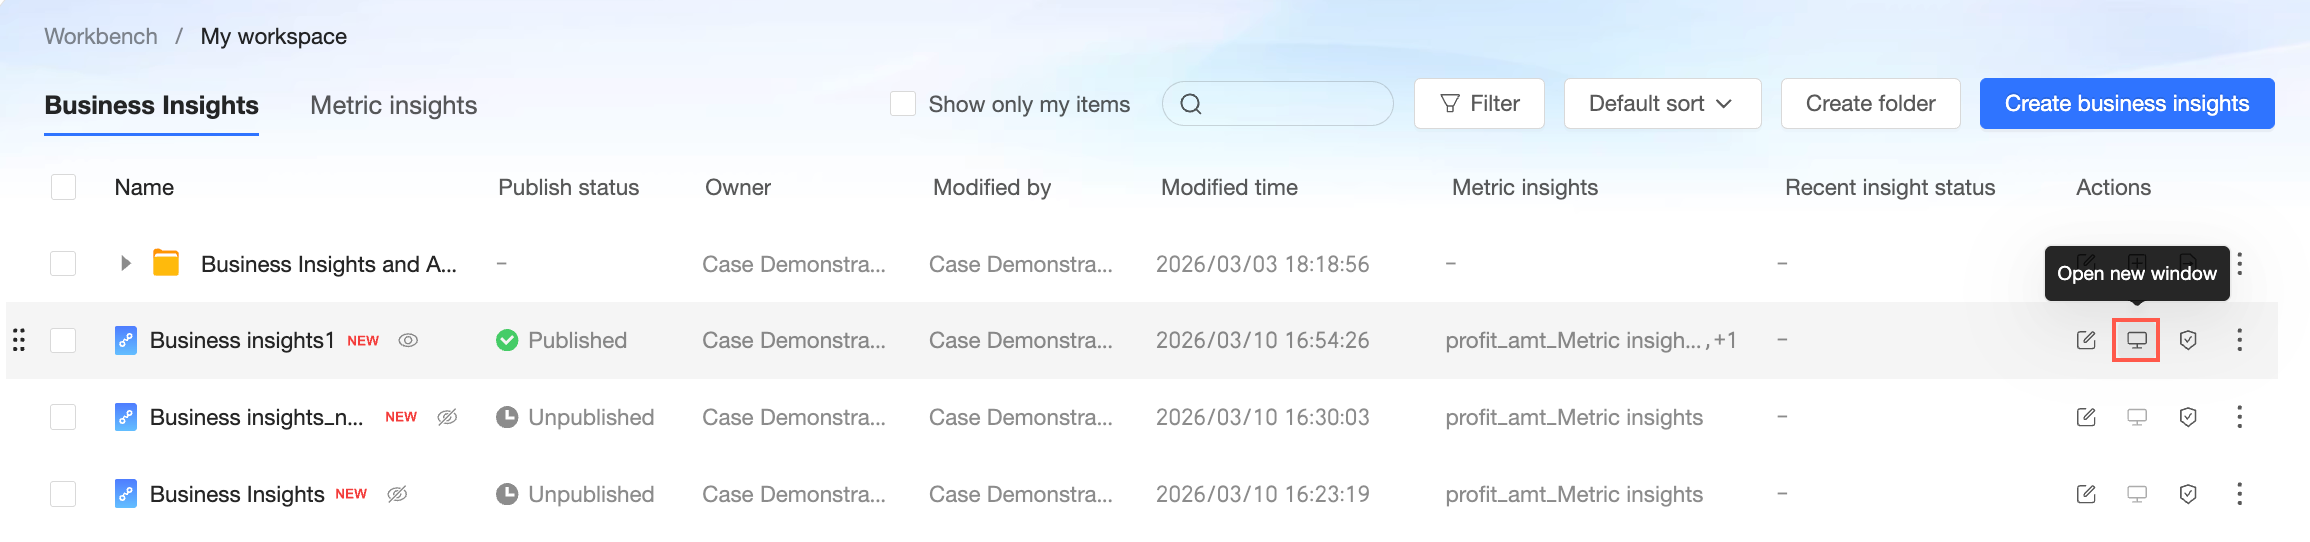
View in New Window
In the Operations column, click the ![]() icon to open the preview page in a new window.
icon to open the preview page in a new window.
Only published business insights can be viewed in a new window.
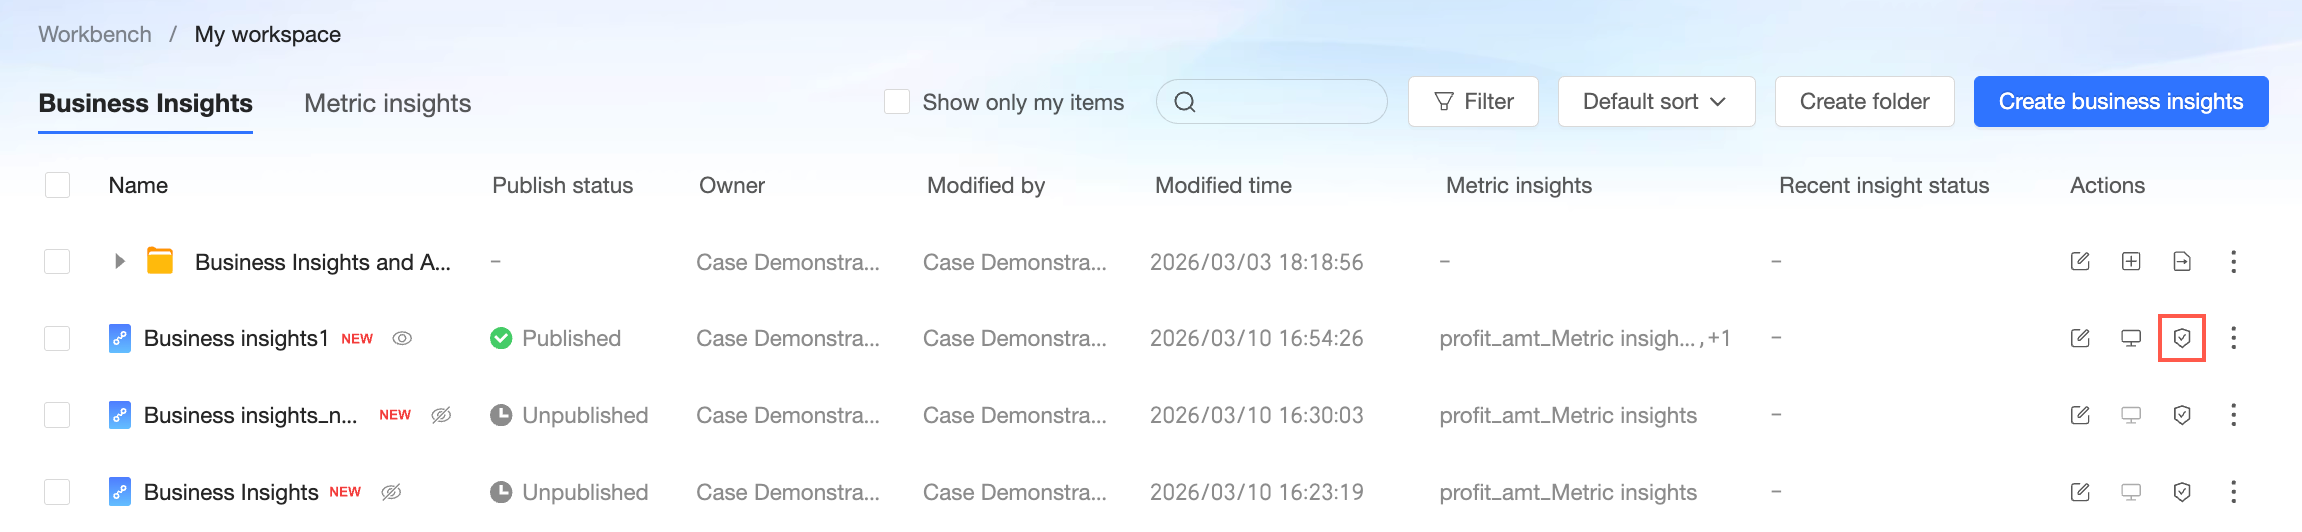
Collaborative Authorization
Click the
icon and select Collaborative Authorization.On the collaborative authorization page, you can grant view or edit permission to relevant users.
NoteIf the status is private, only the resource owner and the space administrator have edit permission. To grant edit permission to specified members, you must first switch the status to Specified members.
Edit permission can be granted only to users in this space who have Business Insights Create (Edit) permission.
Query and View permissions can be granted only to users in this space who have Business Insights Query permission.
Query: Allows users to initiate business insights in Smart XiaoQ > XiaoQ Insights.
View: Allows users to view generated business insight briefs.
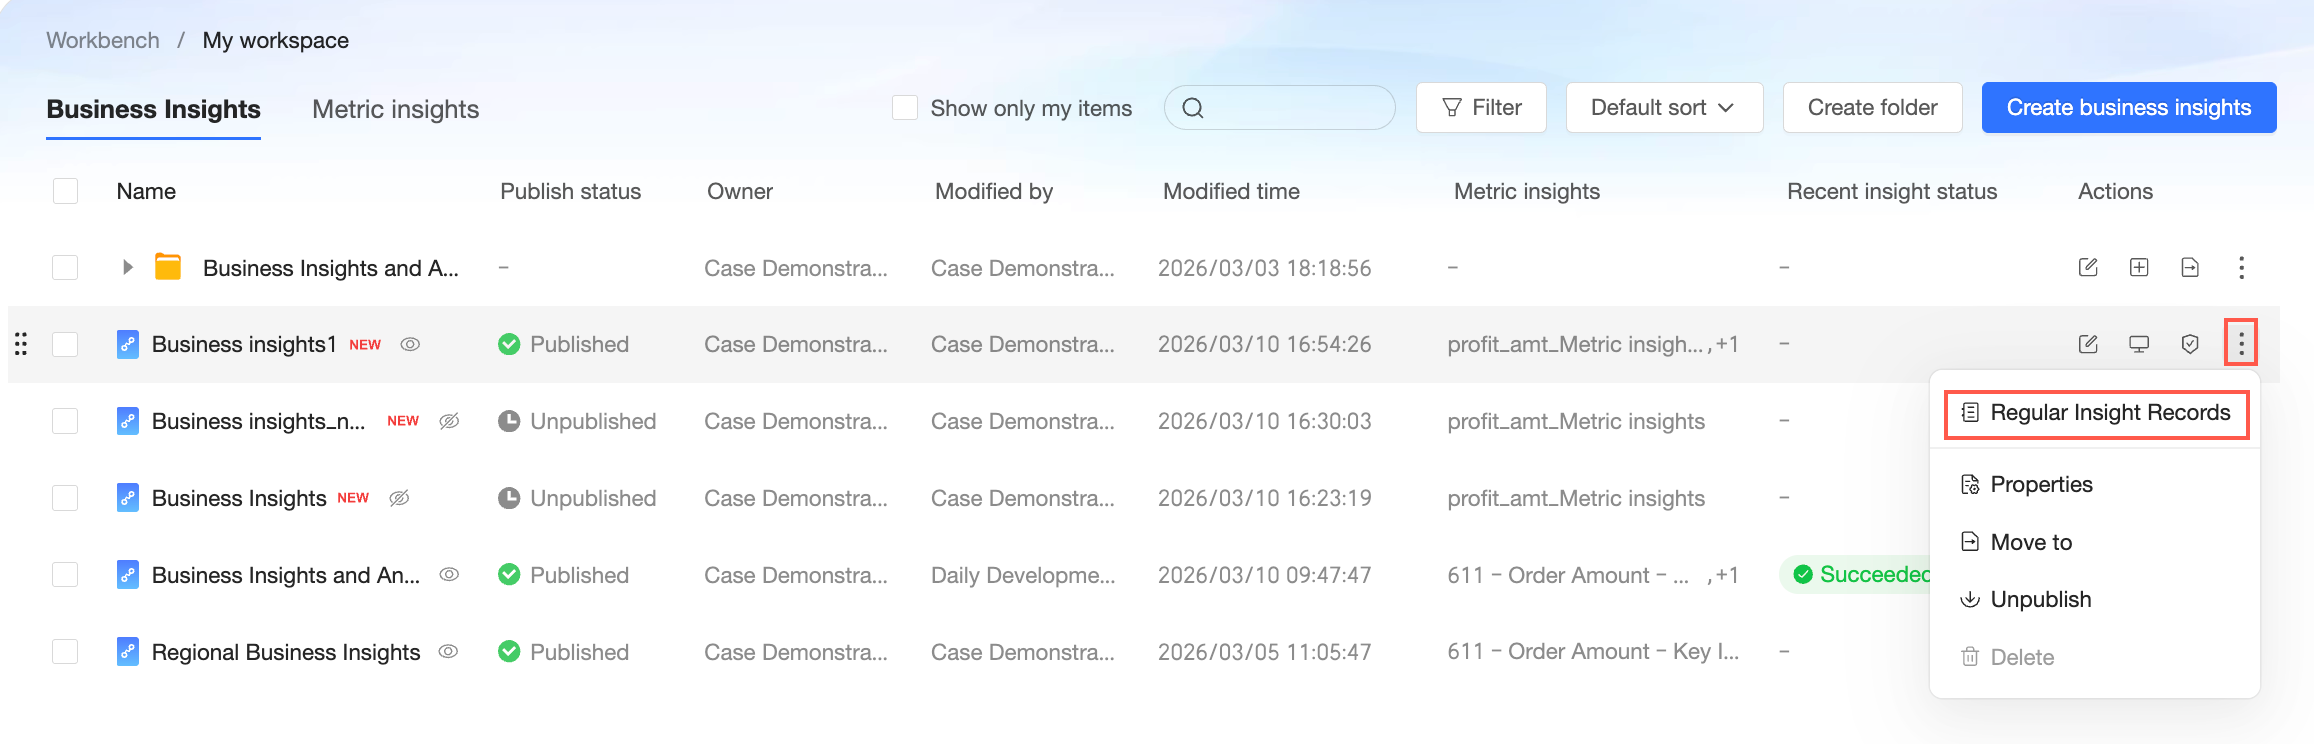
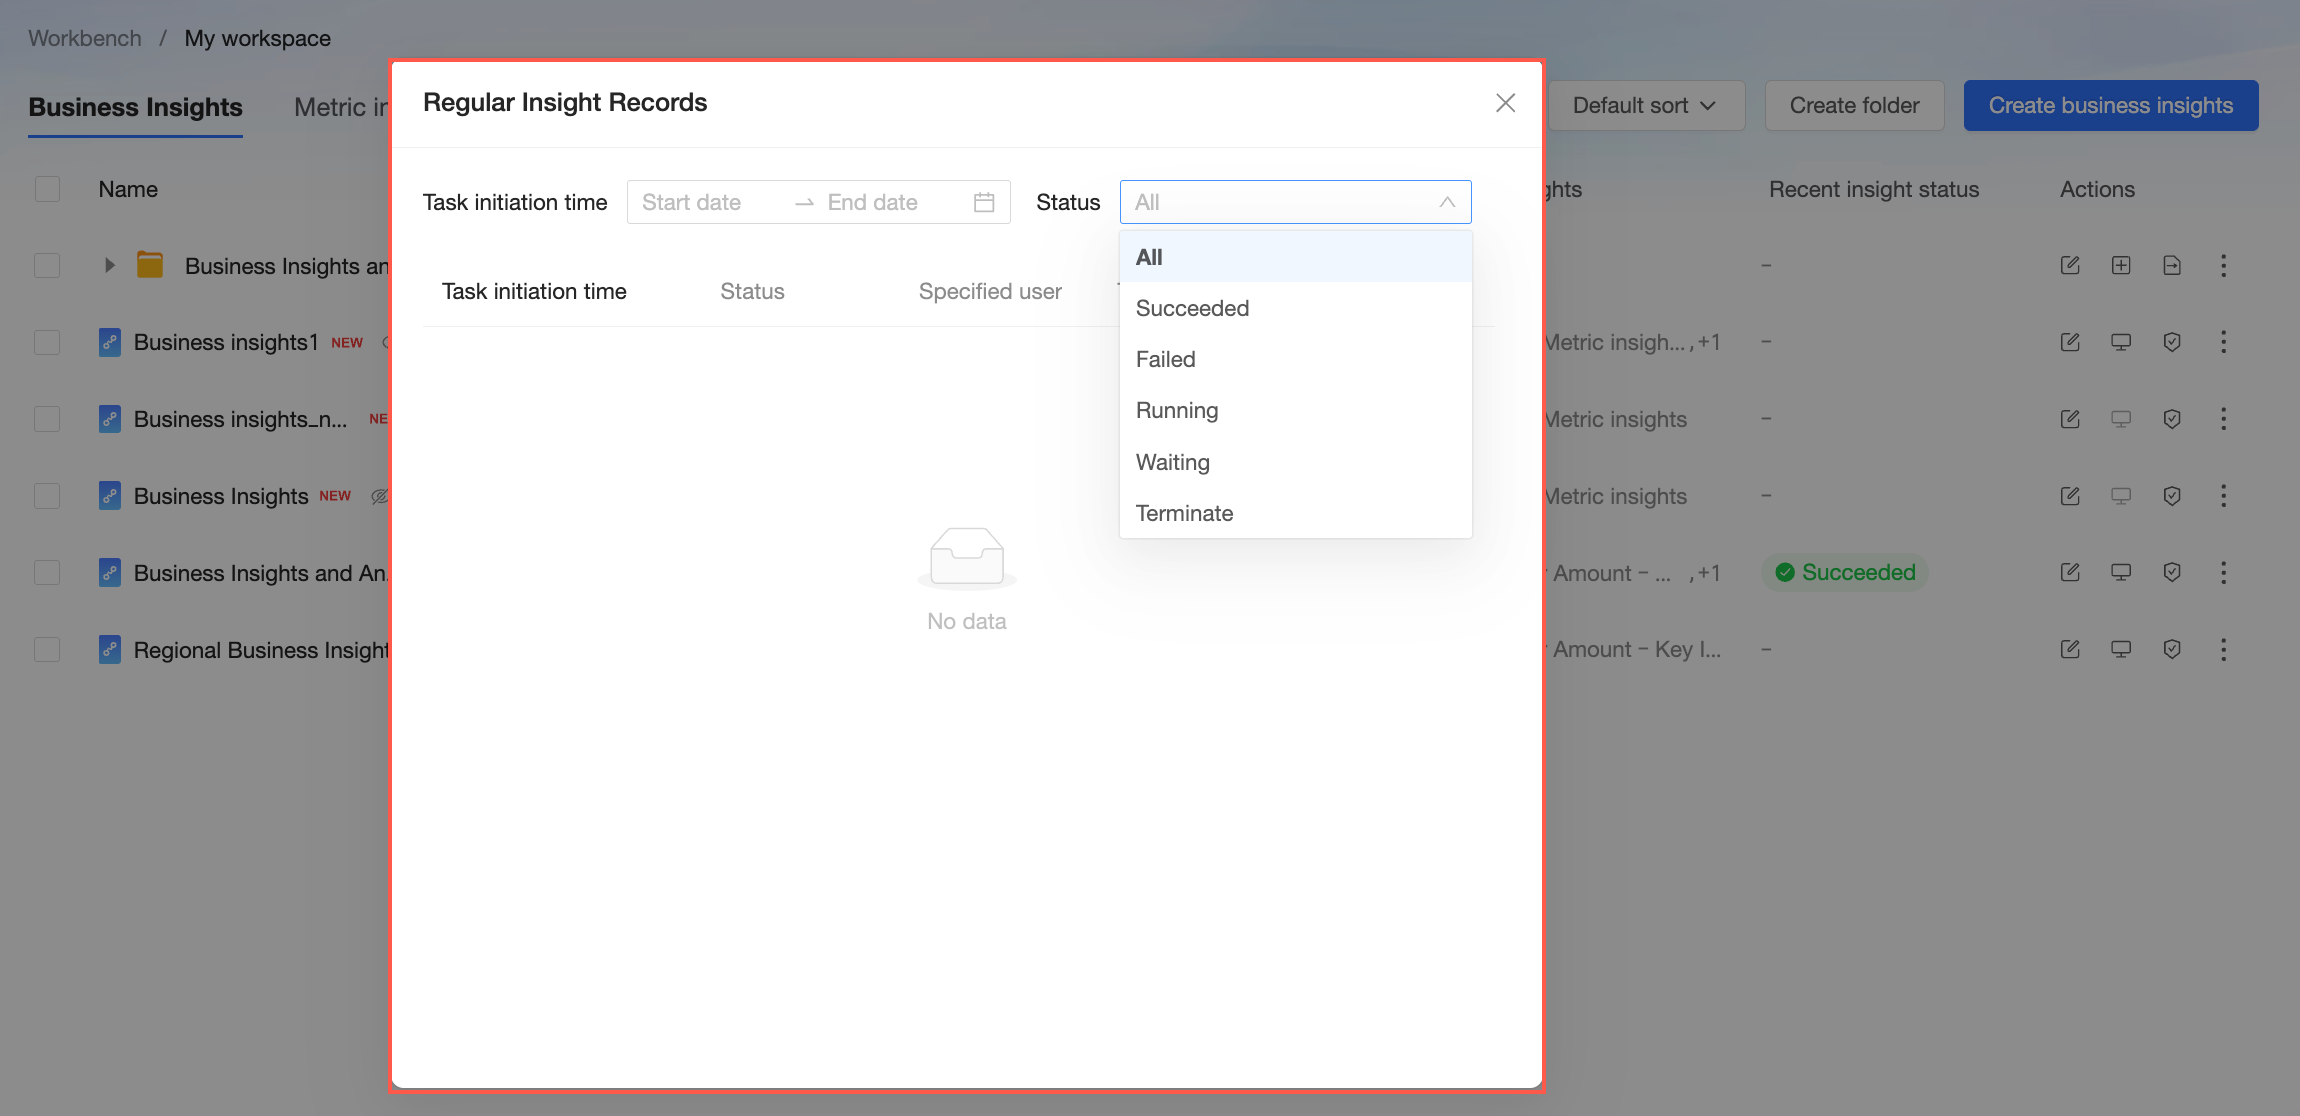
Scheduled Insight Records
After you enable Scheduled Insights, you can view scheduled insight records.
In the Operations column, click the
icon and select Scheduled Insight Records.You can filter records by Task Initiation Time and different Insight Statuses.
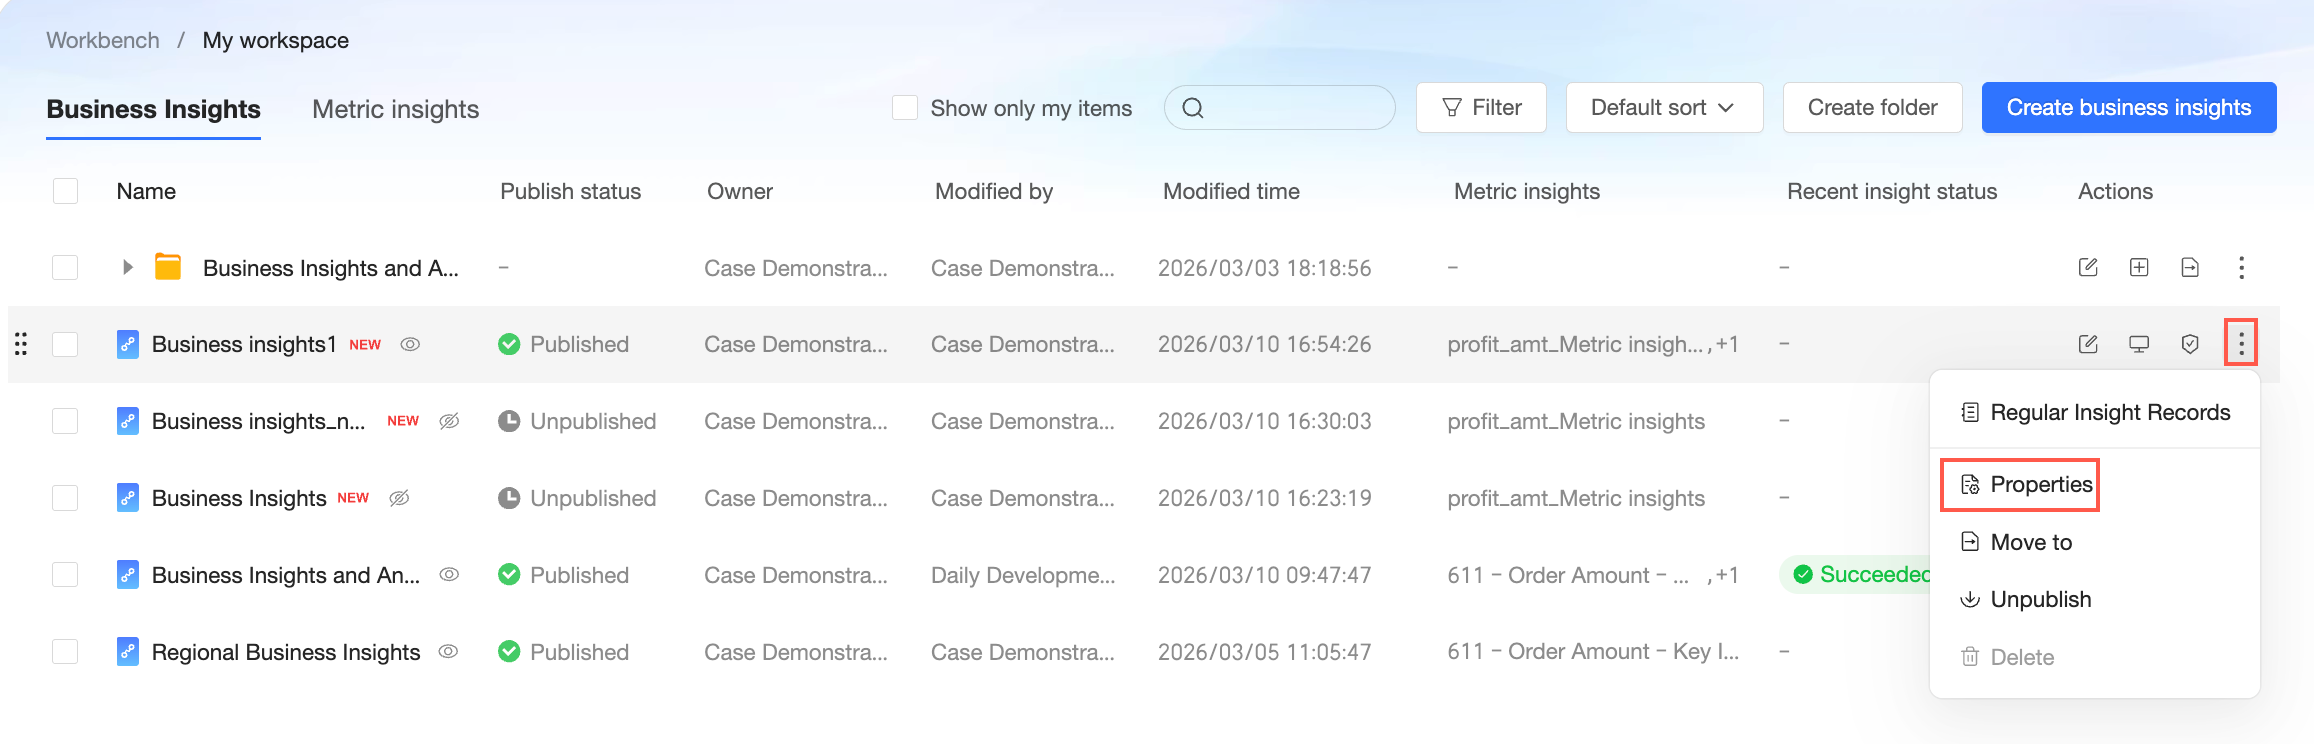
Properties
In the Operations column, click the
icon and select Properties.On the properties configuration page, you can modify the indicator insight's Name, transfer the Owner, and add a Description.
Click Confirm to complete the property configuration.

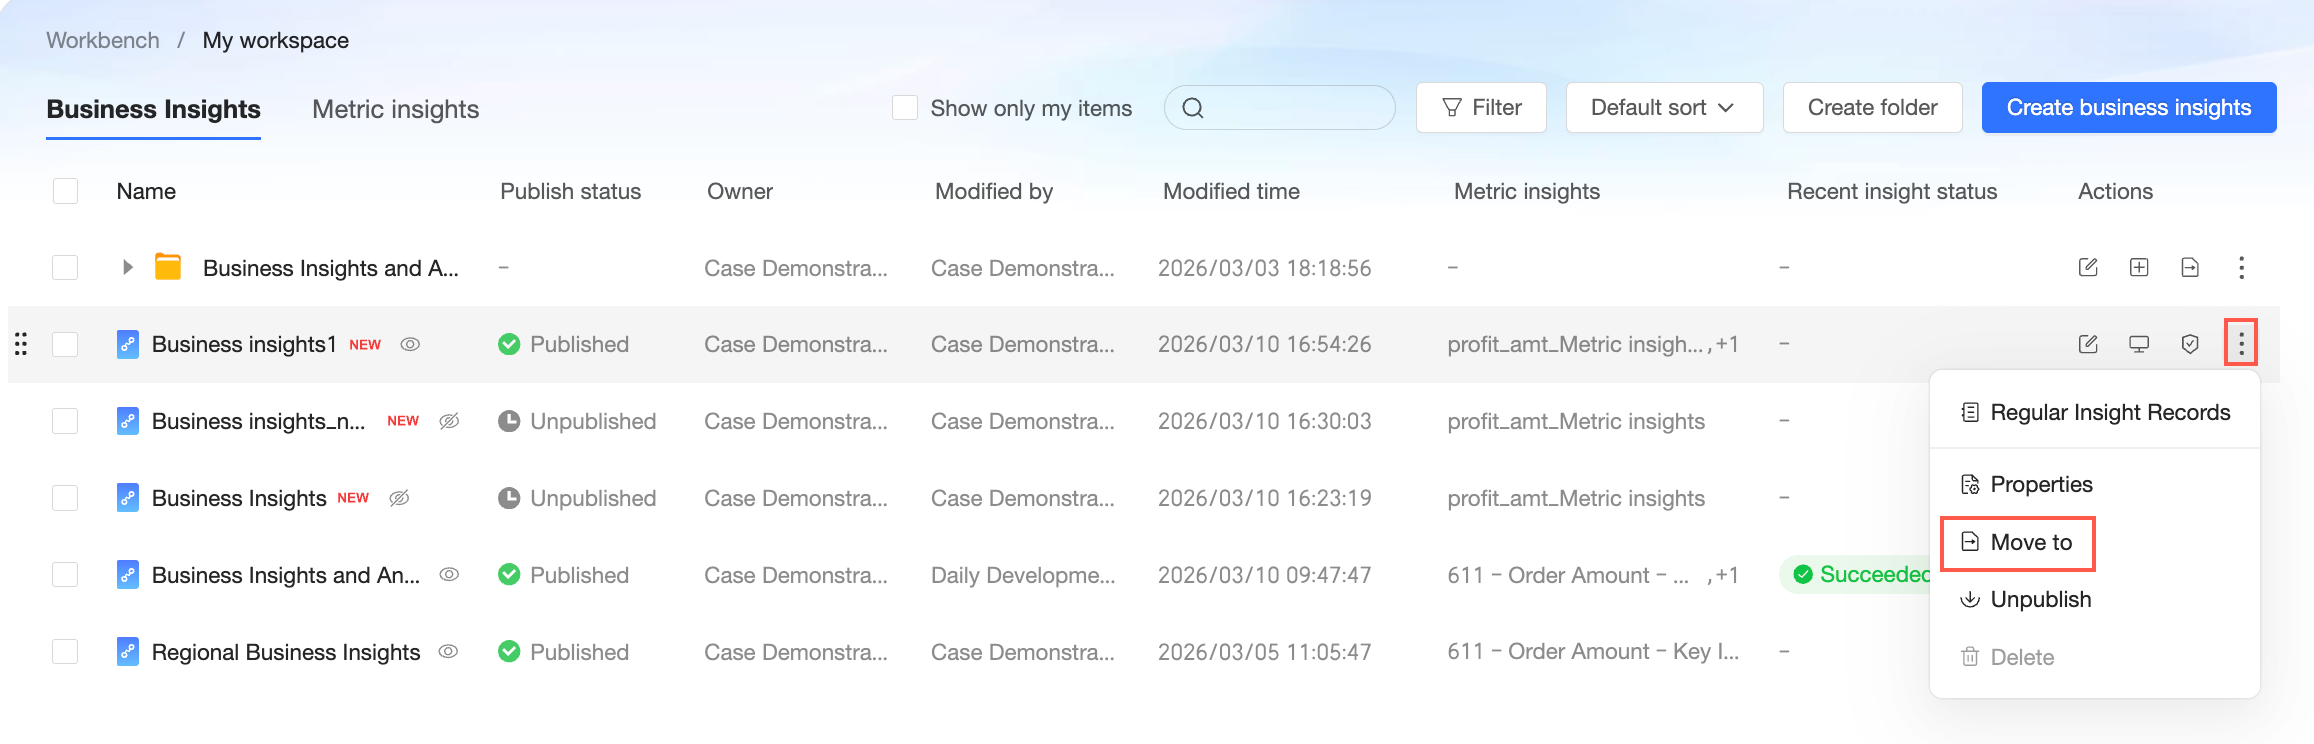
Move To
In the Operations column, click the
icon and select Move To.Move the resource to another folder.
Click Confirm to complete the move.

Unpublish
In the Operations column, click the ![]() icon and select Unpublish. After a business insight is unpublished, users cannot view it.
icon and select Unpublish. After a business insight is unpublished, users cannot view it.
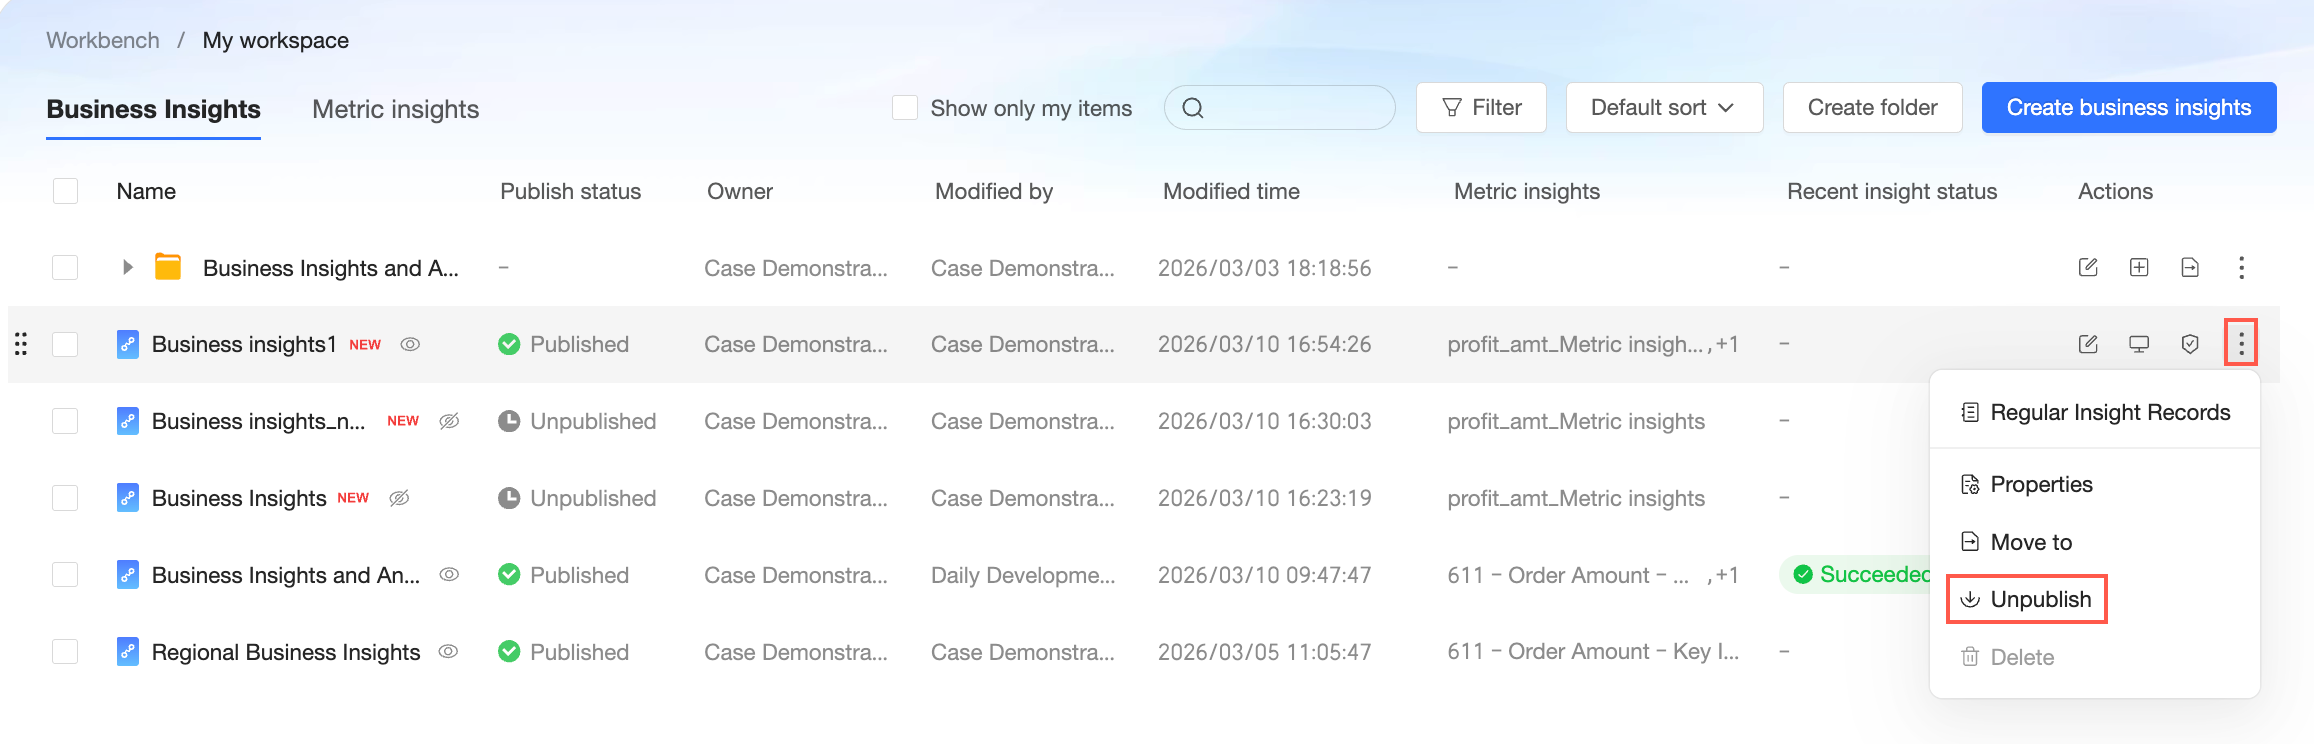
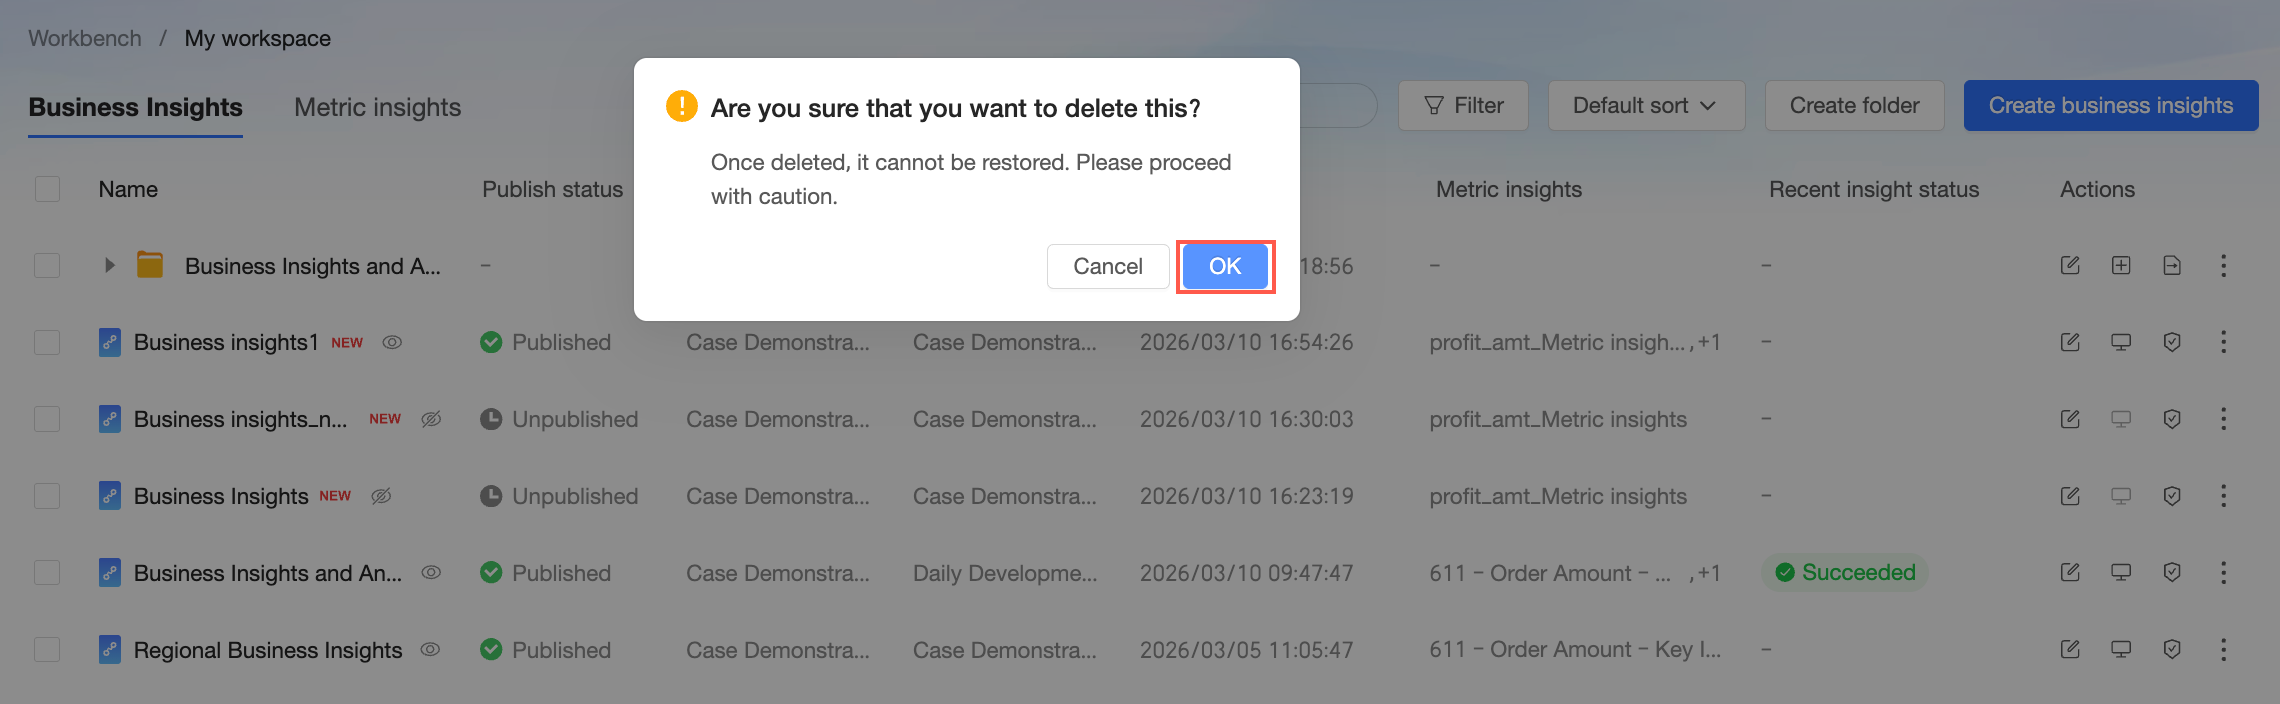
Delete
In the Operations column, click the
icon and select Delete.NoteOnly business insights that have a publication status of Unpublished can be deleted.
In the confirmation dialog box that appears, click Confirm.

What to do next
After you complete the Business Insights configuration, you can view and analyze it in XiaoQ Insights.