Column-level Permissions
Configure column-level permissions for a dataset to hide or mask sensitive fields such as phone numbers and ID card numbers. After permission rules are configured, users can view only the field values within the scope of the rules, ensuring data security.
Prerequisites
-
A dataset is created. For more information, see Create a dataset.
-
Users can view data only when they have both dataset permissions and organization-level permissions. For information about organization-level column permissions, see Column-level permissions.
Procedure
-
Log on to the Quick BI console. You can access the Column-level Permissions configuration page from the following entry points.
-
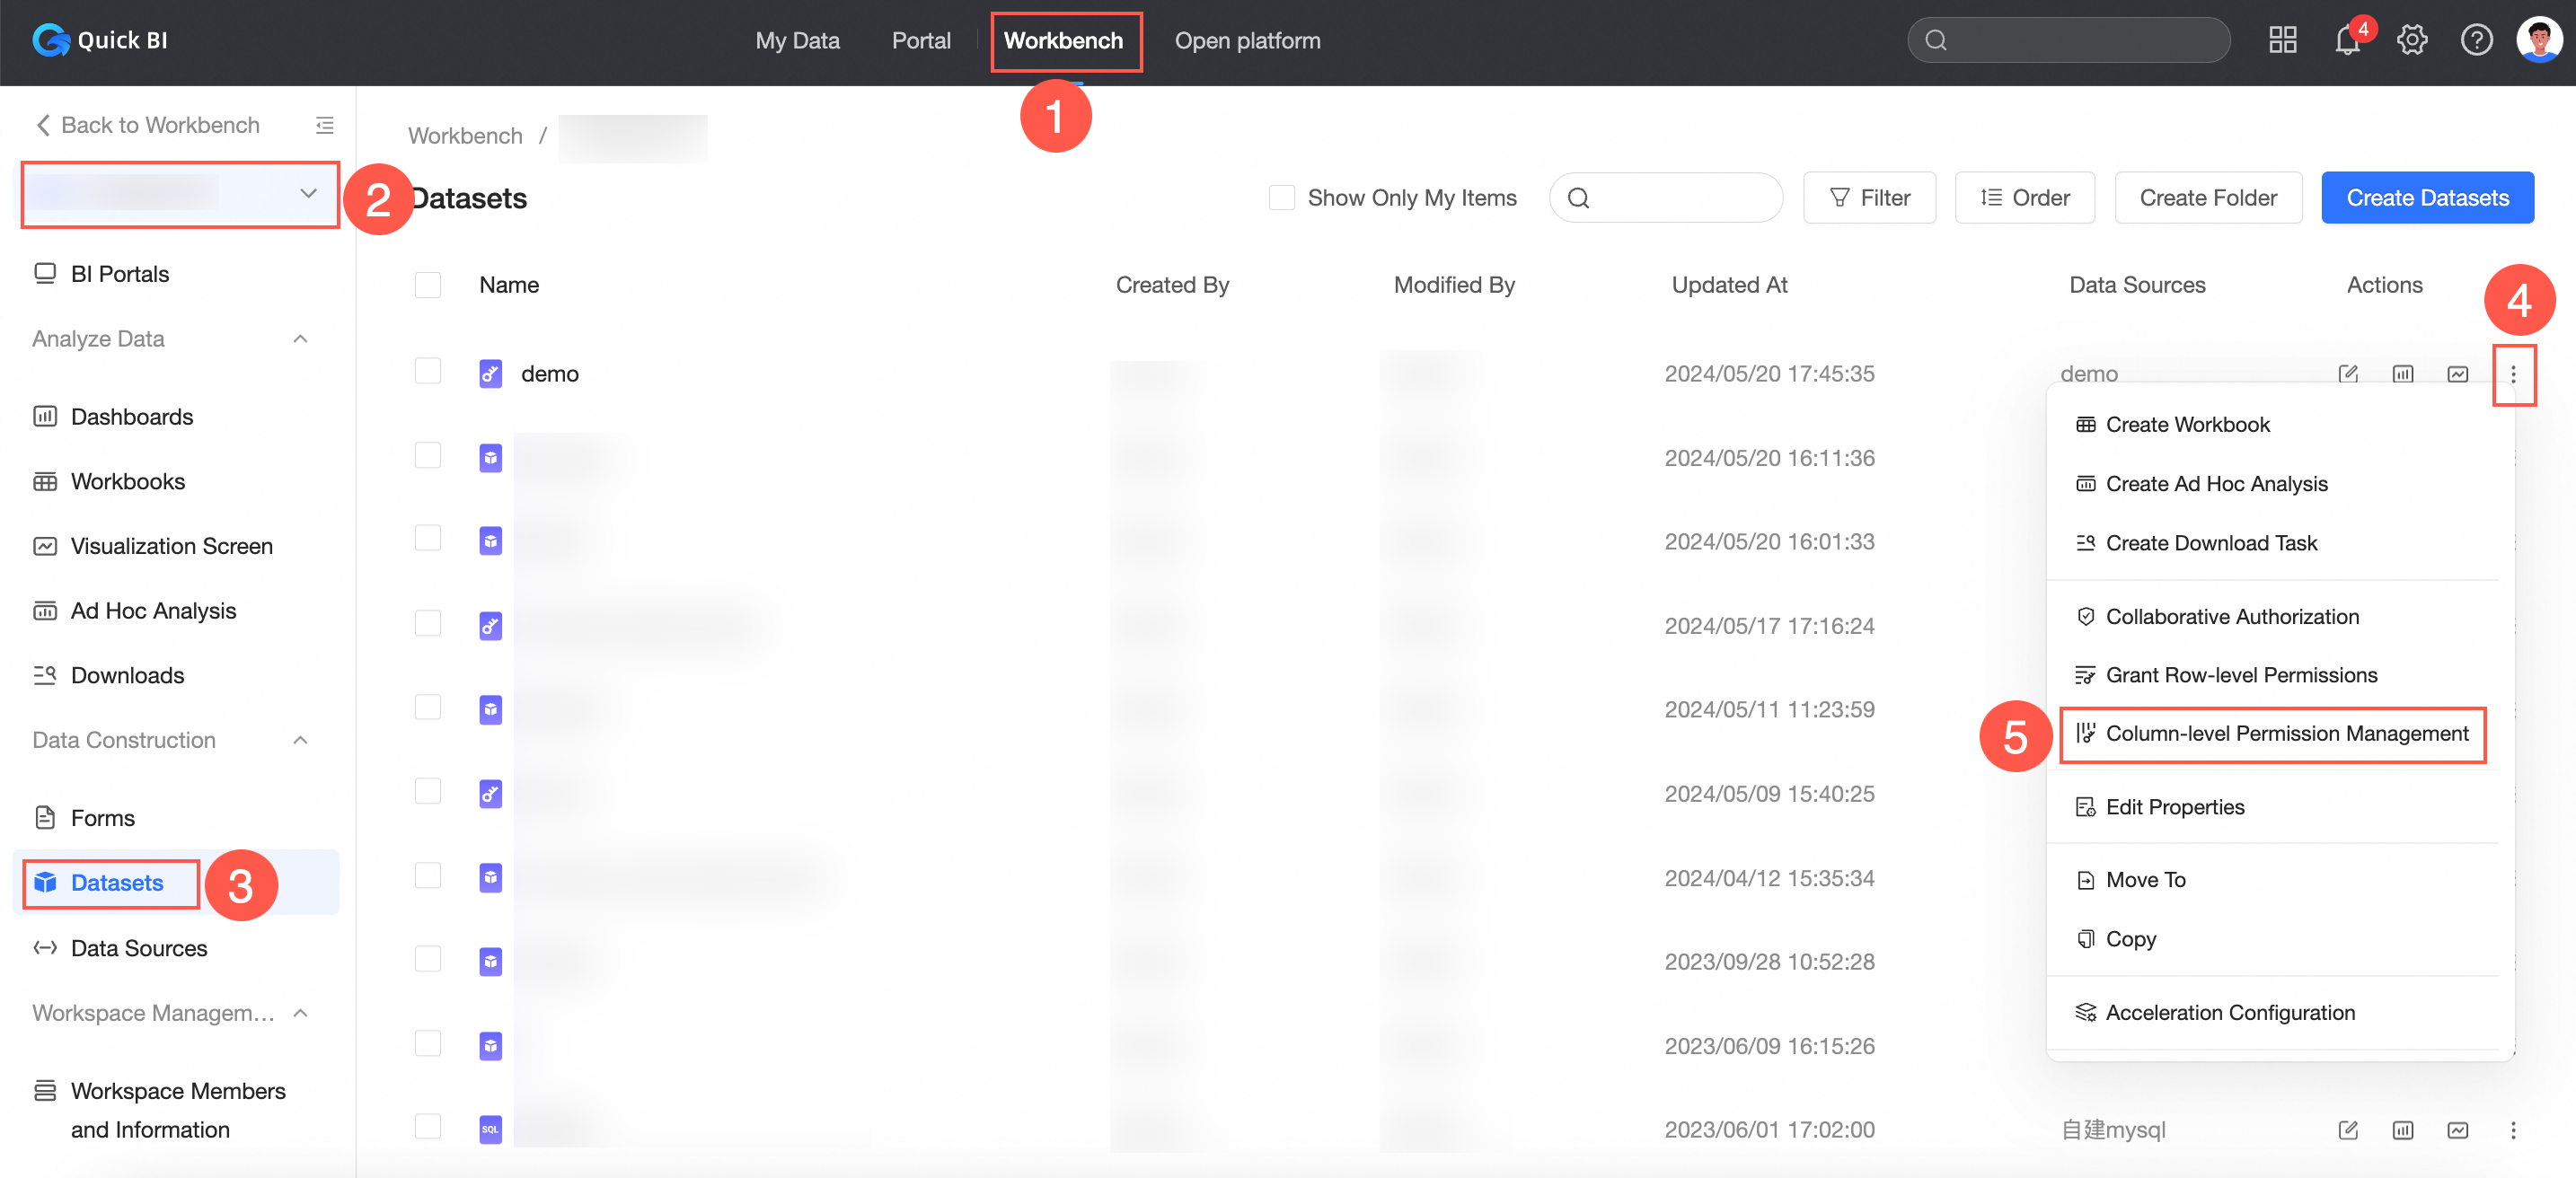
Entry point 1: In the dataset list on the Workbench tab, select the target dataset to access the Column-level Permissions configuration page.
-
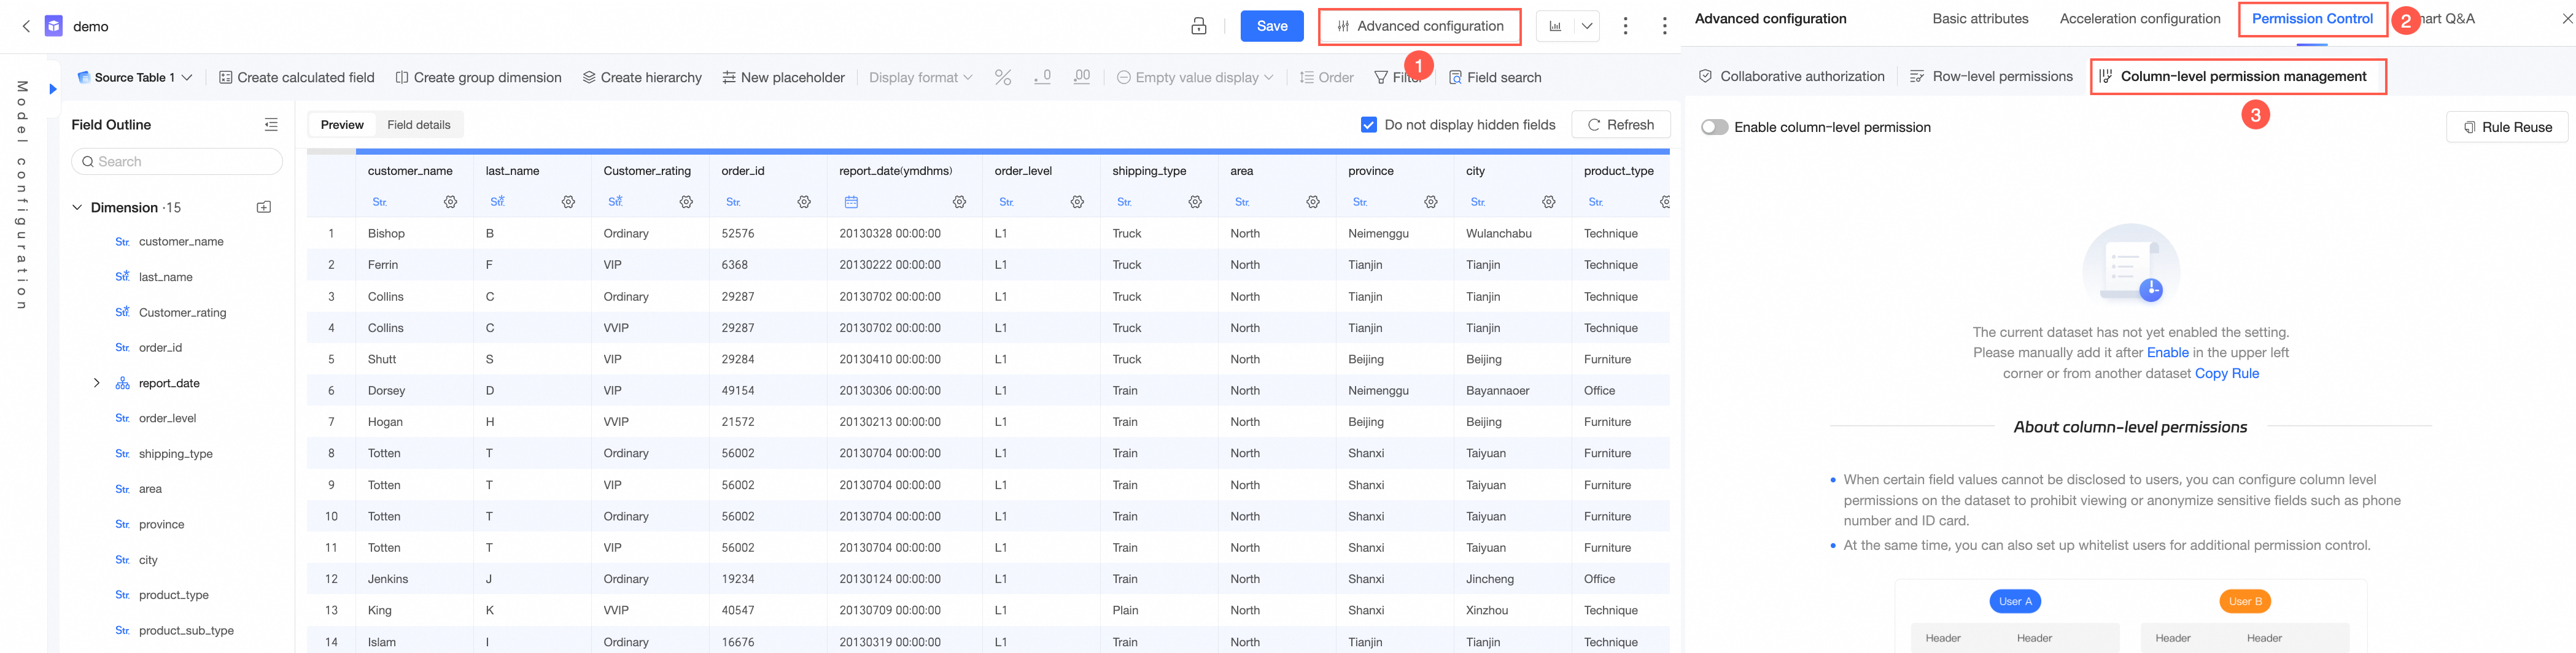
Entry point 2: On the dataset editing page, click Advanced Configuration in the top toolbar and select Permission Control -> Column-level Permissions.
-
Entry point 3: When you create a dataset, click the
 icon to access the Column-level Permissions configuration page.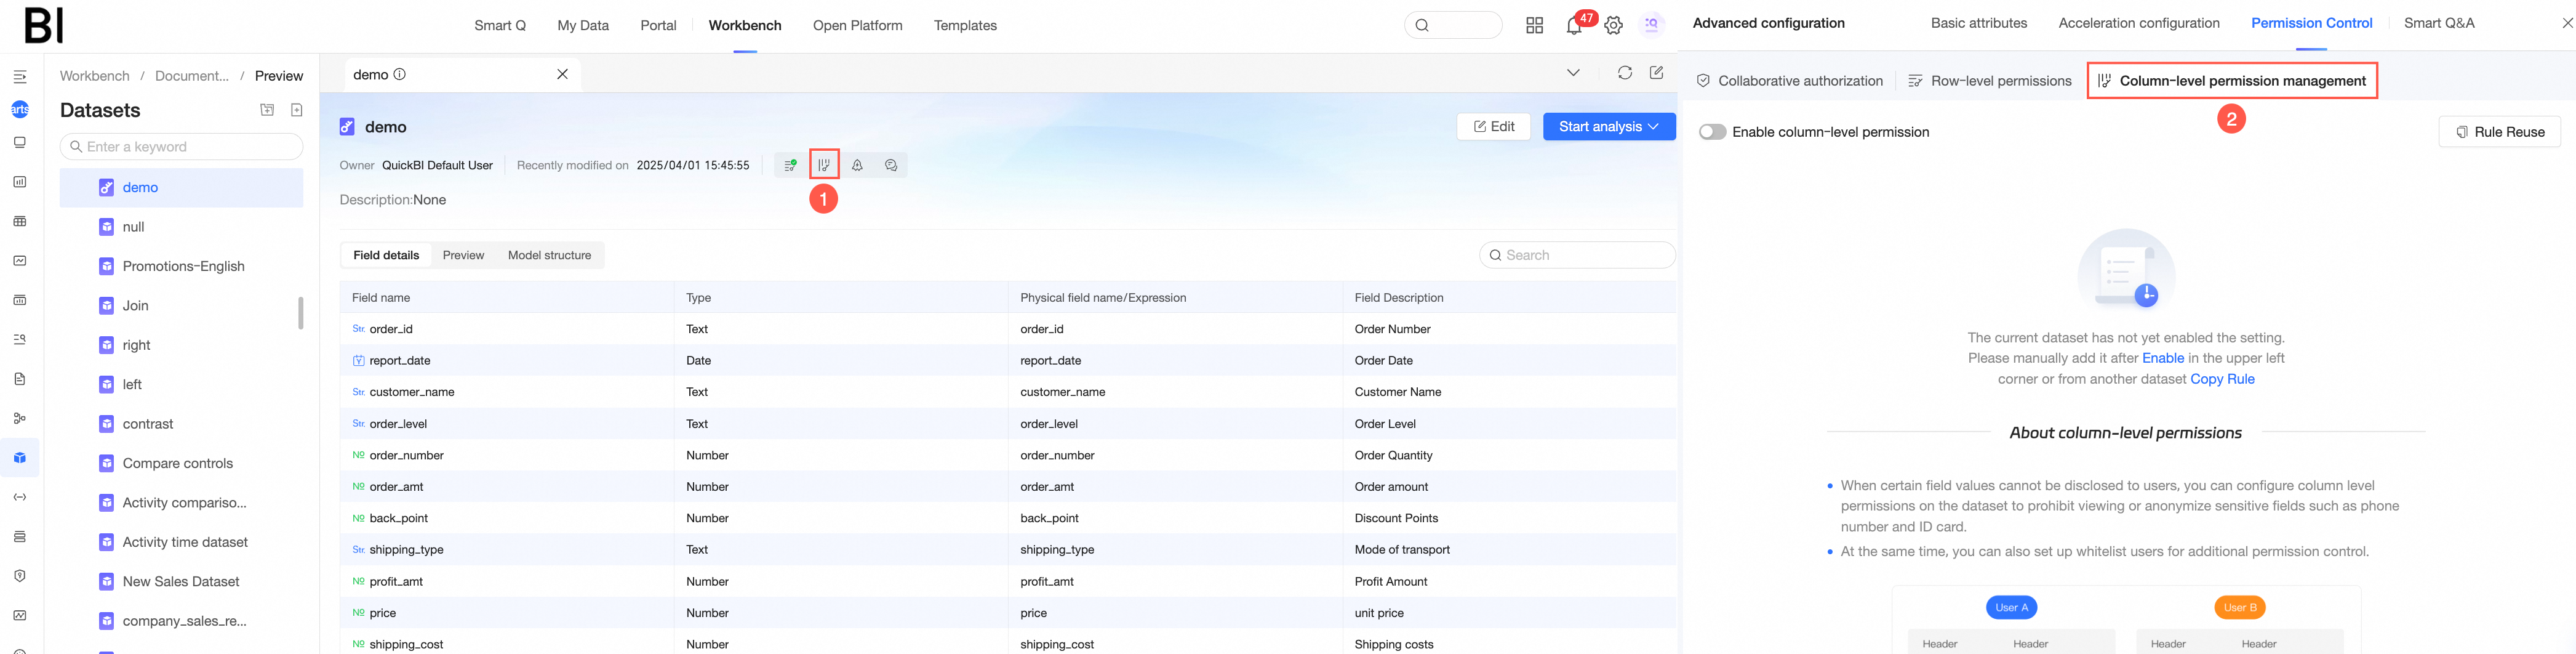
-
-
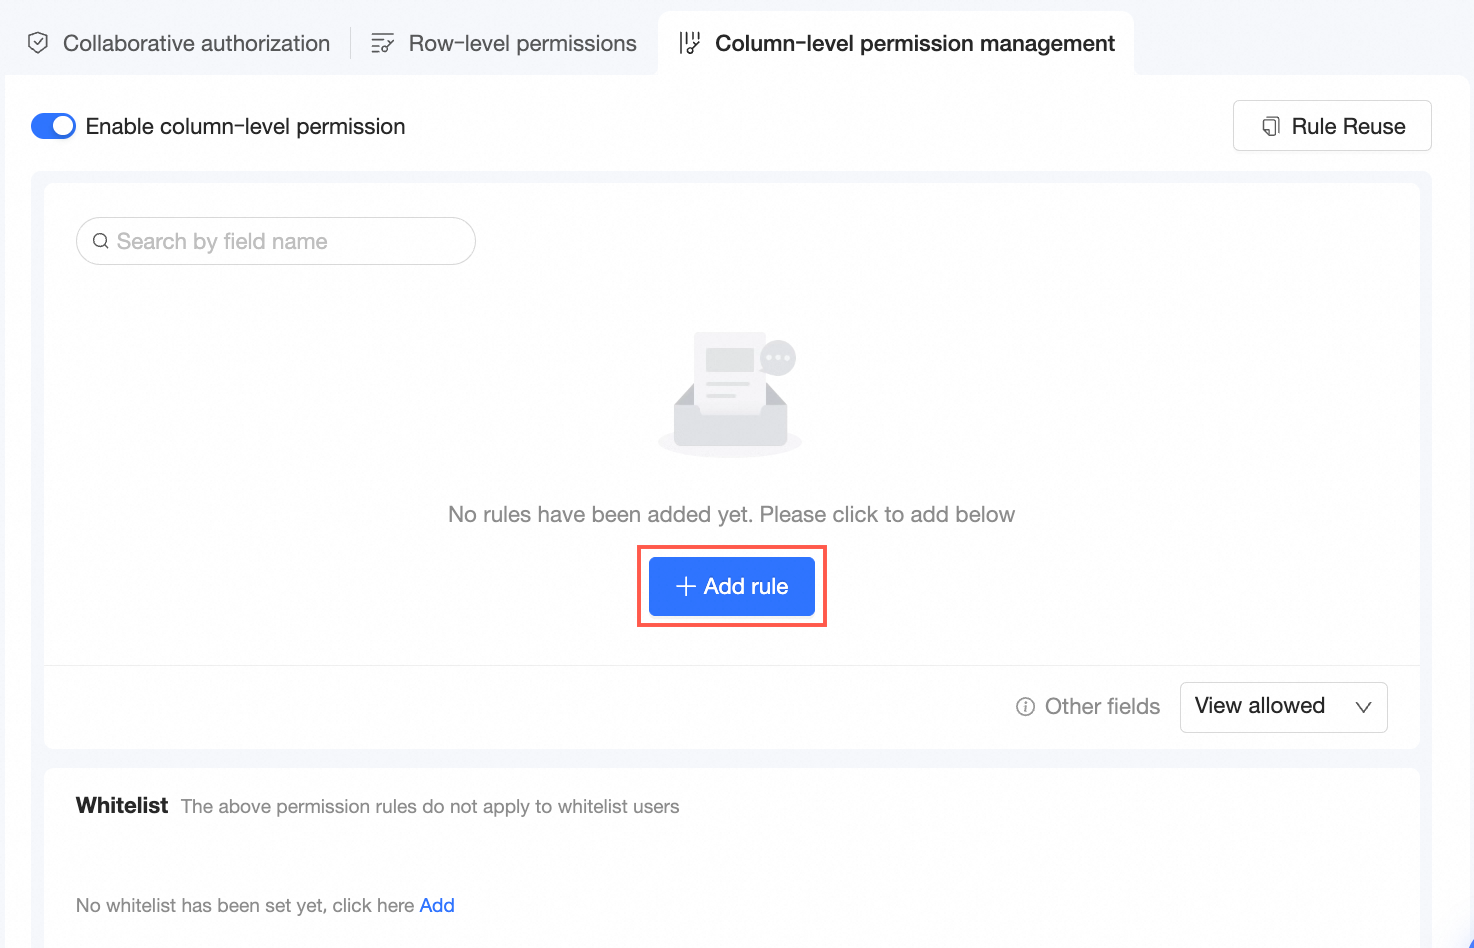
Turn on Enable Column-level Permission Management Feature.
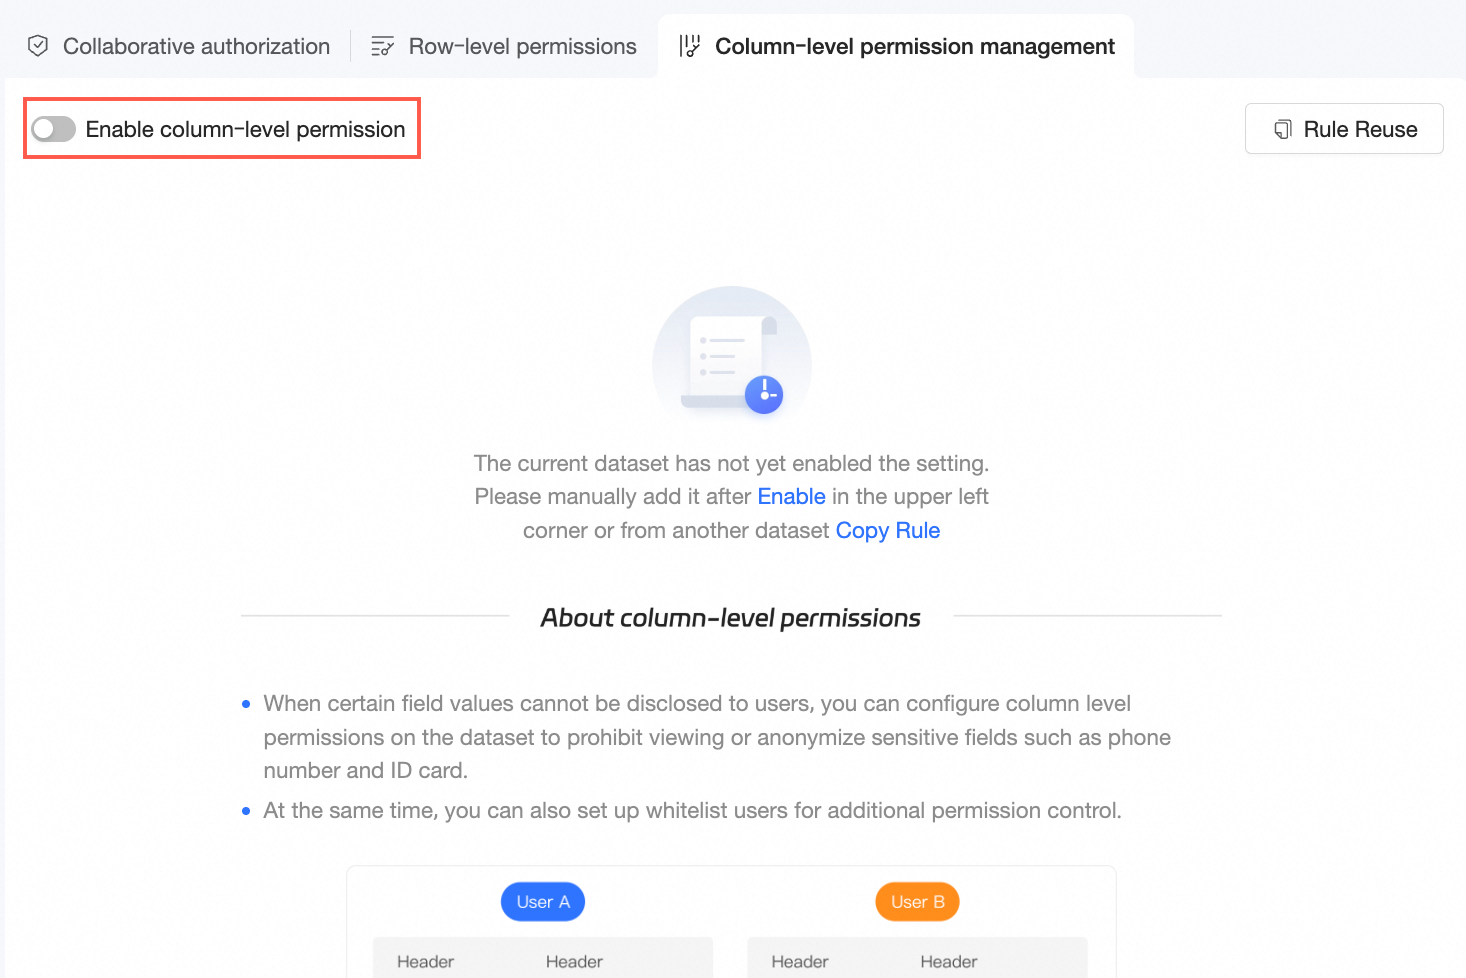
After you turn on Enable Column-level Permission Management Feature, you can configure permission rules for specific fields and other fields.
-
Click Add Rule.

-
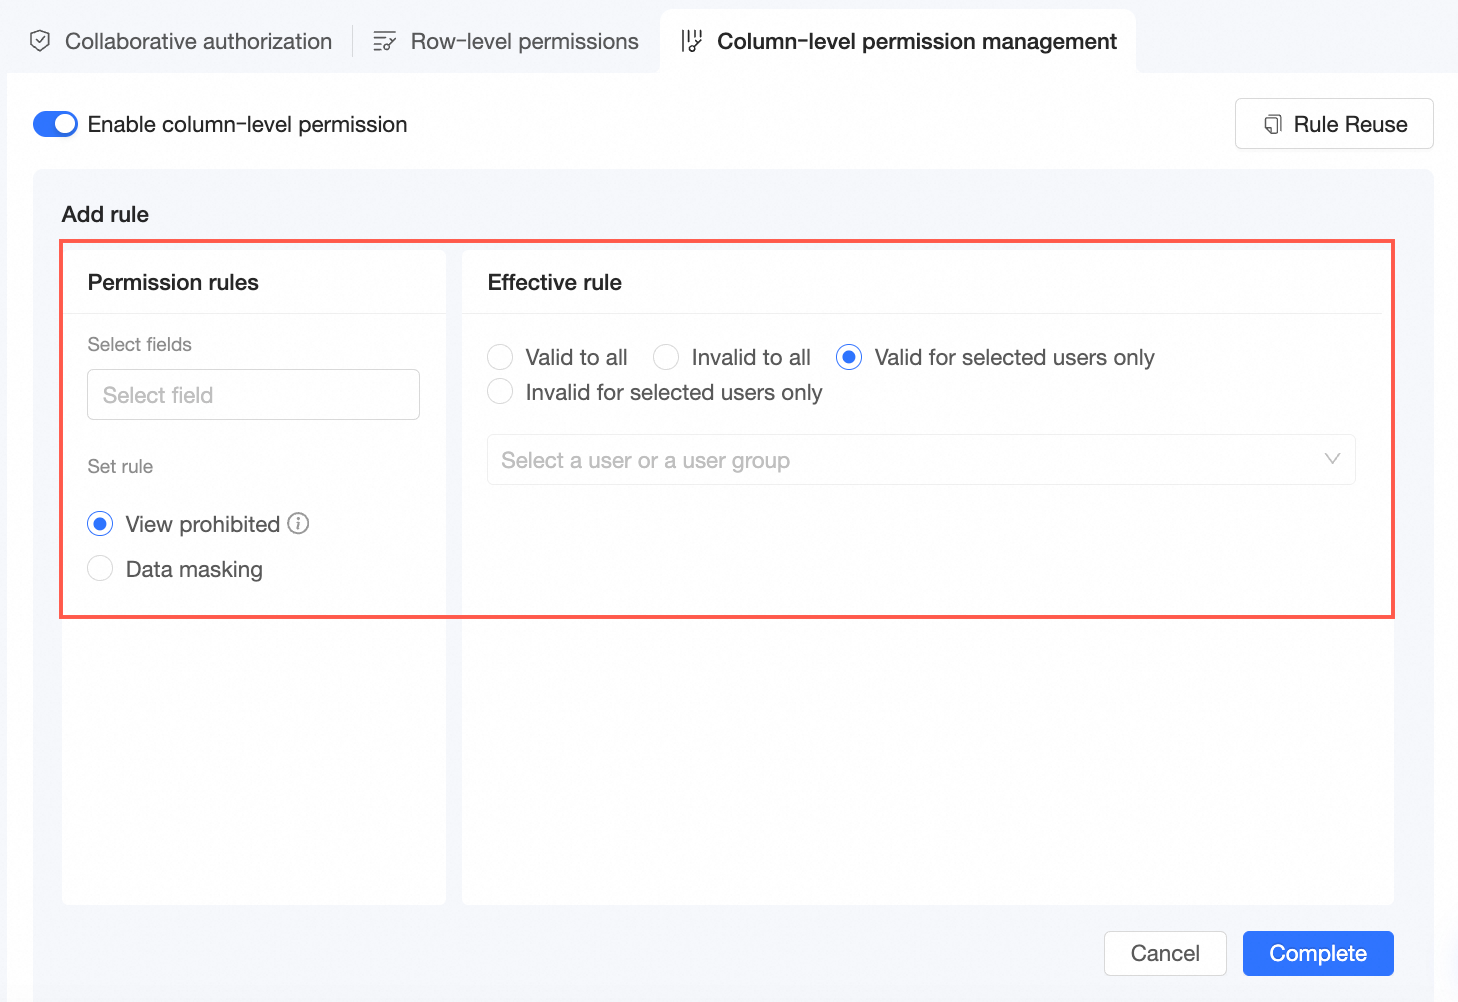
Configure permission rules for specific fields.
-
In the Column-level Permissions panel, select one or more fields. You can configure multiple fields at a time and configure date fields (which can be displayed only in workbooks or kanbans). Set View Rule to View Prohibited or Data Masking.
Affected users cannot view the selected fields or can view only masked values.
-
Specify the users for whom the permission rule takes effect.
Specify the users to whom the permission rule applies. Valid values: Valid to All, Invalid to All, Valid for Selected Users Only, and Invalid for Selected Users Only.
Authorization object
Description
Valid to All
For the specified fields:
-
The configured column-level permission rule takes effect for all users.
Invalid to All
For the specified fields:
-
The configured column-level permission rule does not take effect for any user.
Valid for Selected Users Only
After you specify users or groups:
-
For the specified user or user group:
The field values are restricted based on the configured permission rule. Users cannot view the fields for which View Prohibited is selected or can view only the masked field values.
-
For users other than the specified user or outside of the specified user group:
You can view the complete field values without being restricted by permission rules.
Invalid for Selected Users Only
After you specify a user or user group:
-
For the specified user or user group:
You can view the complete field values without being restricted by permission rules.
-
For users other than the specified user or outside of the specified user group:
The field values are restricted based on the configured permission rule. Users cannot view the fields for which View Prohibited is selected or can view only the masked field values.
-
-
Click Complete.
-
-
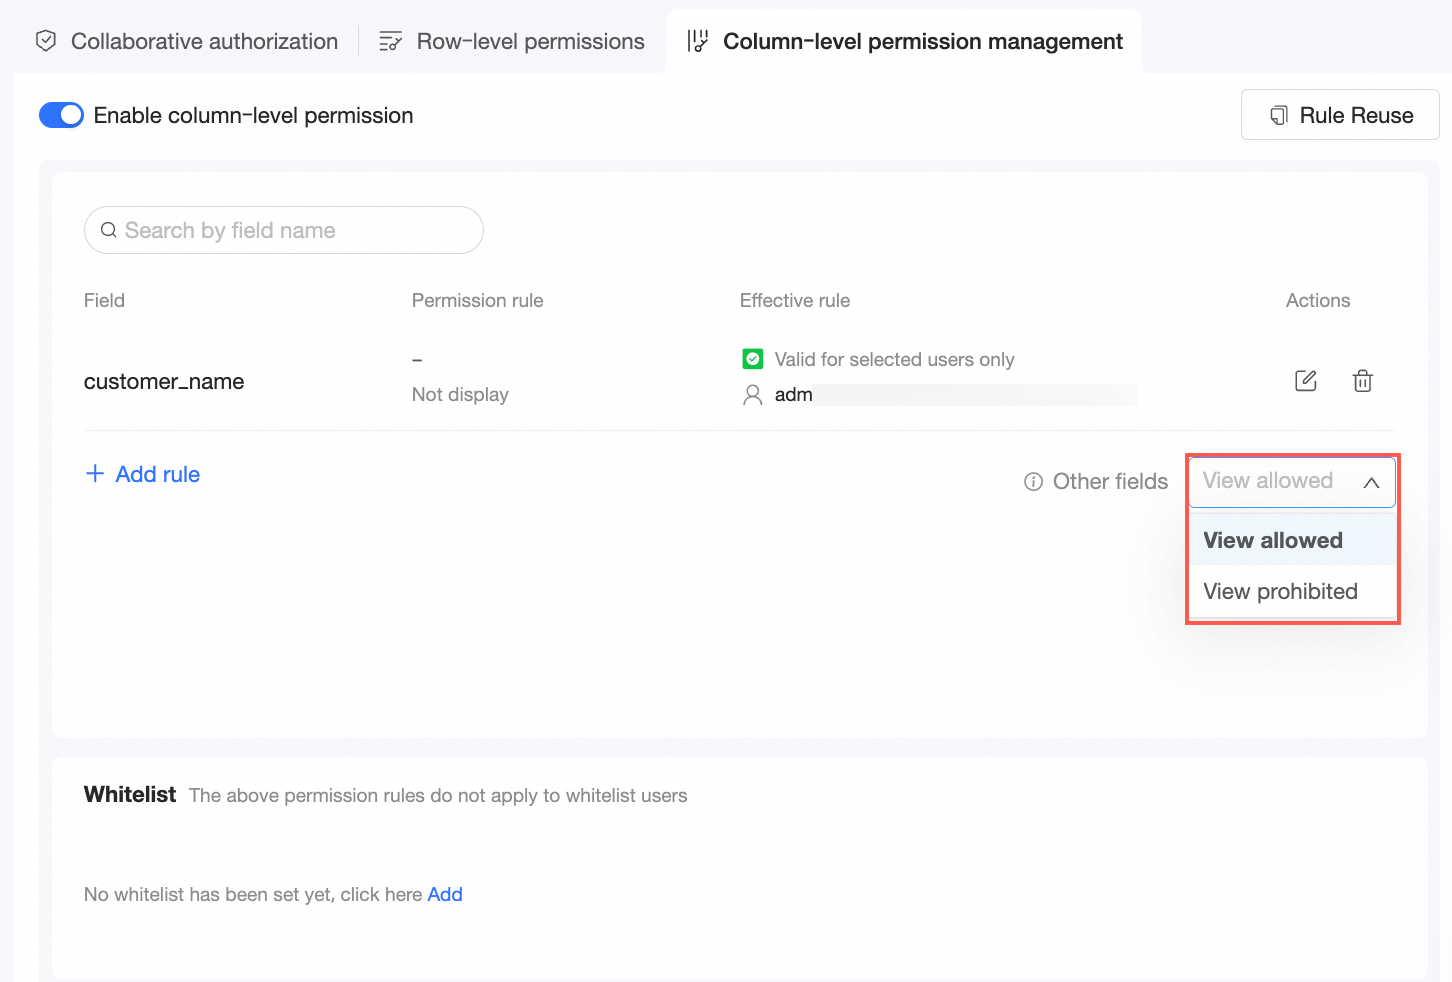
Configure permission rules for other fields.
Fields not selected in the Select Fields drop-down list are treated as other fields.
-
If you select View Allowed for Other Fields, users for whom a permission rule takes effect can view other fields.
-
If you select View Prohibited for Other Fields, users for whom a permission rule takes effect cannot view other fields.
-
-
Click Complete.
-
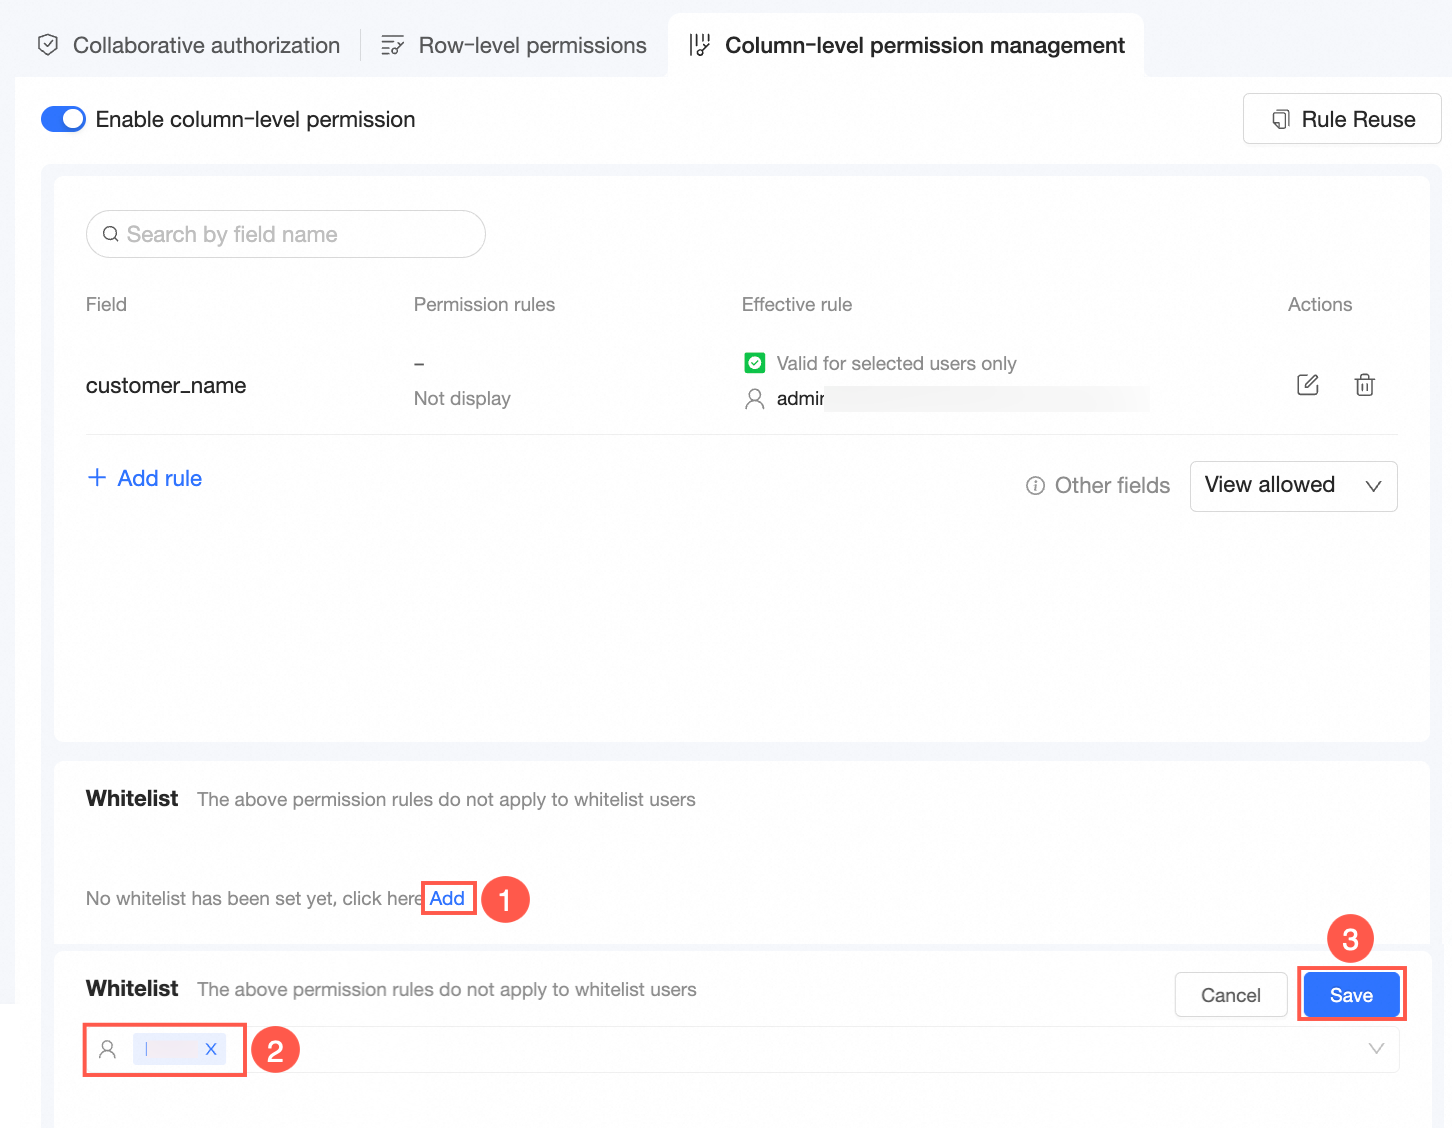
Add users to a whitelist.
Whitelisted users are not restricted by permission rules and can view all fields in the dataset.
Copy column-level permissions
-
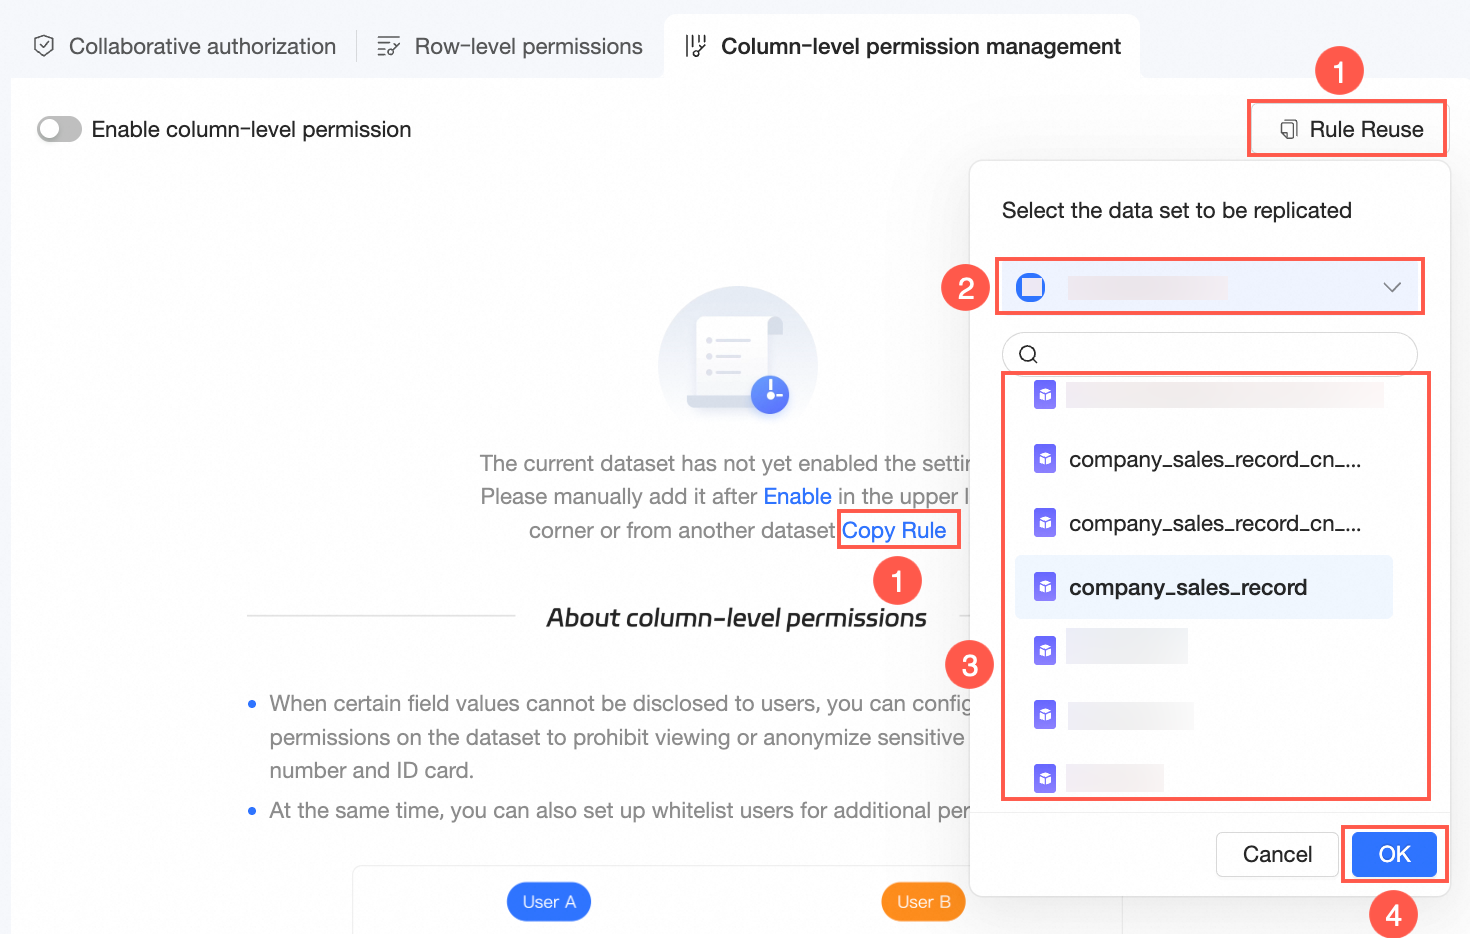
When column-level permissions are not enabled for this dataset, you can click Copy permission rule on the description page or Rule replication in the upper-right corner, select a dataset in a workspace, and click OK.
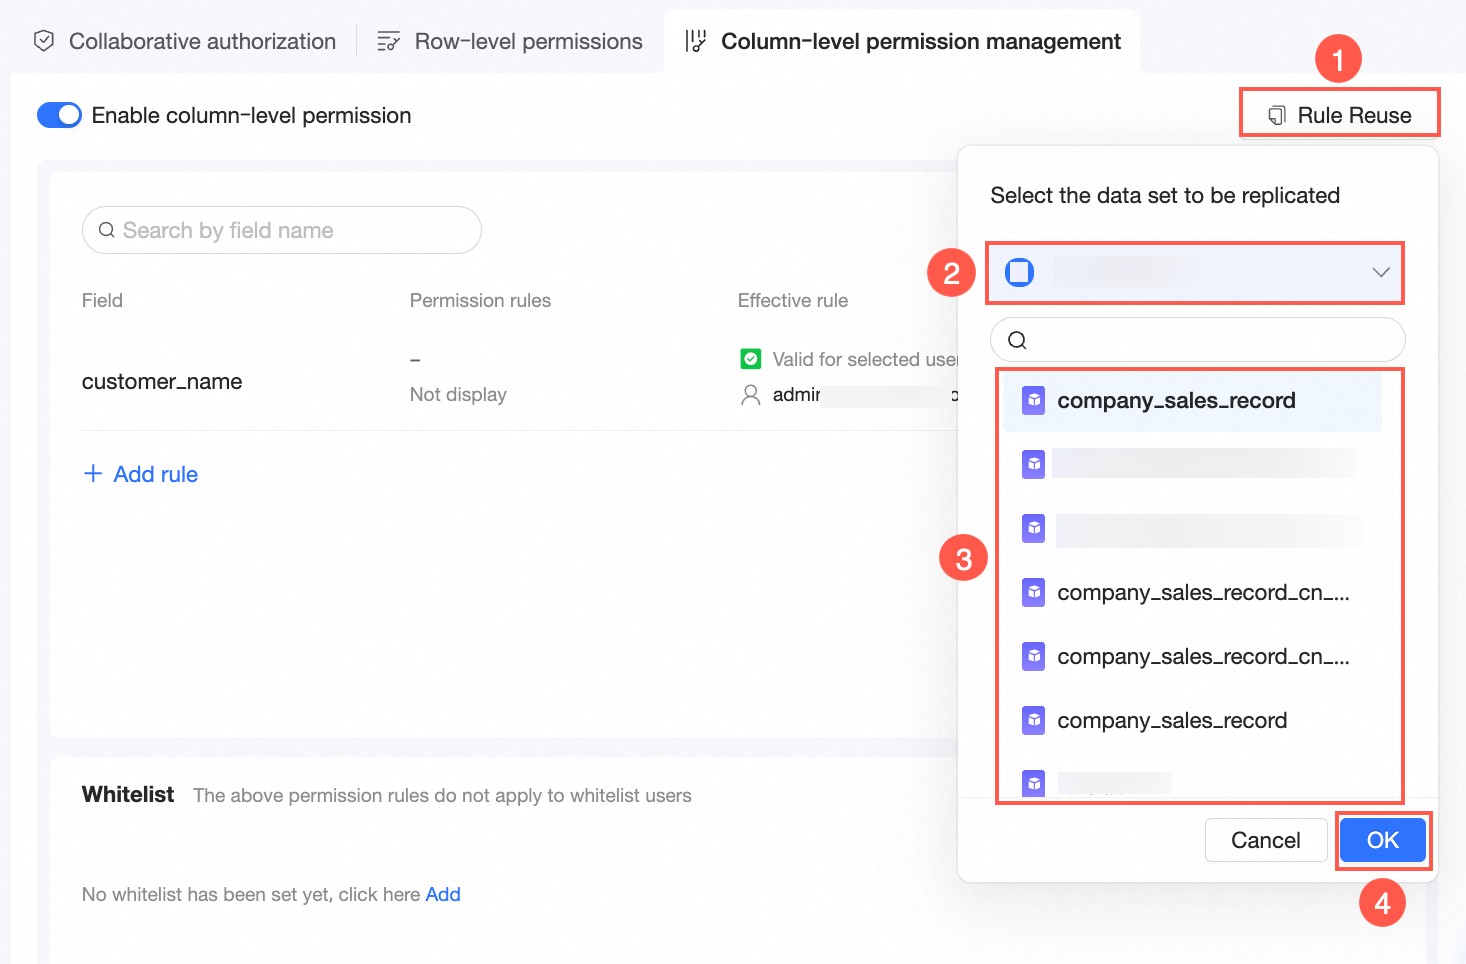
When the dataset has column-level permissions enabled, you can copy the column-level permissions through Rule Replication in the upper-right corner.
NoteYou can copy only the datasets for which you are a workspace administrator or dataset owner.
-
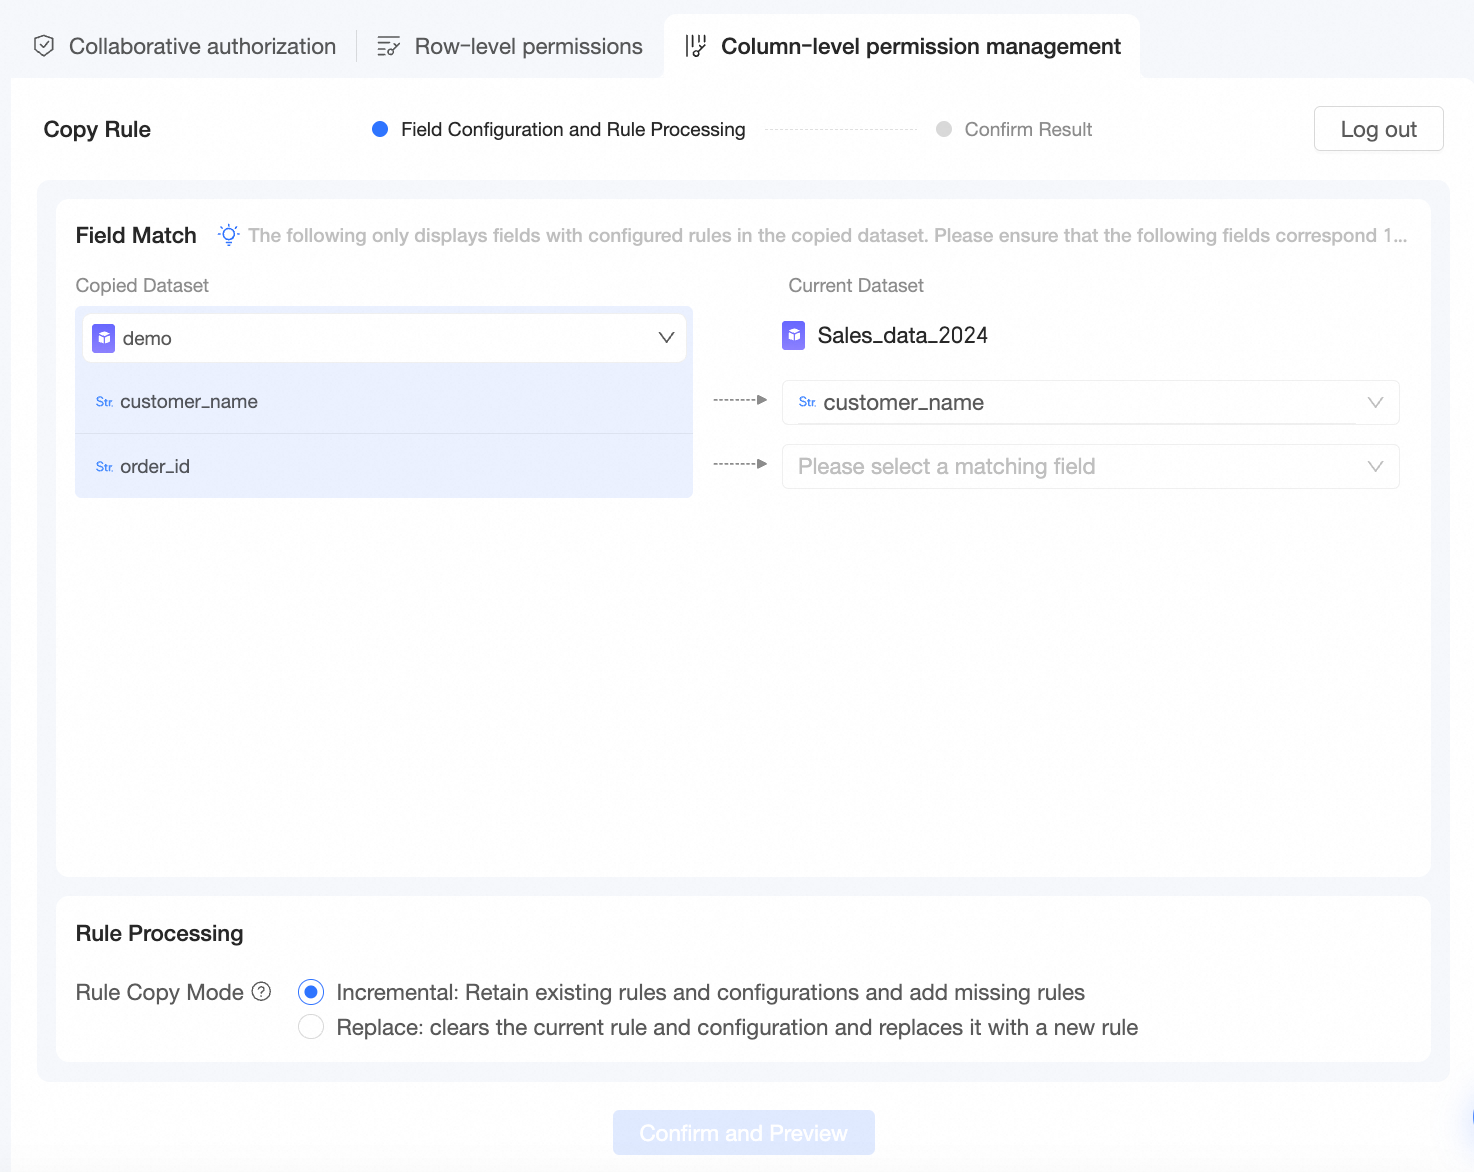
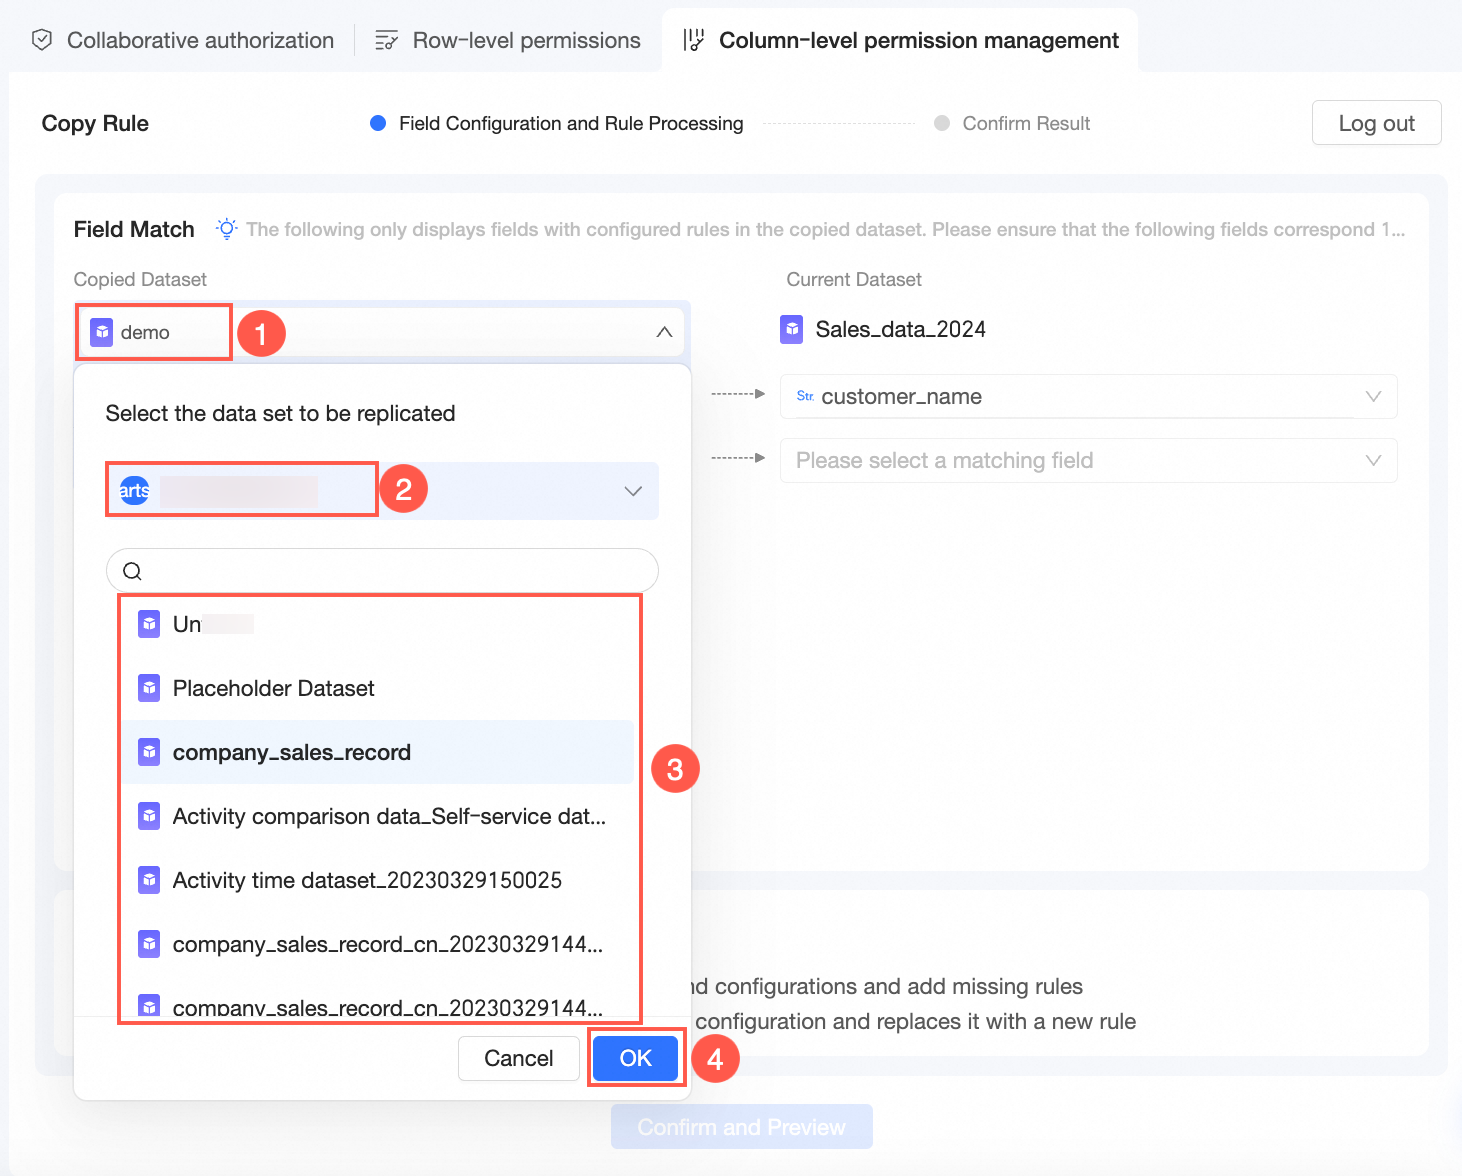
After you click OK, the column-level permission copy configuration page appears.
The copied dataset can be modified.
-
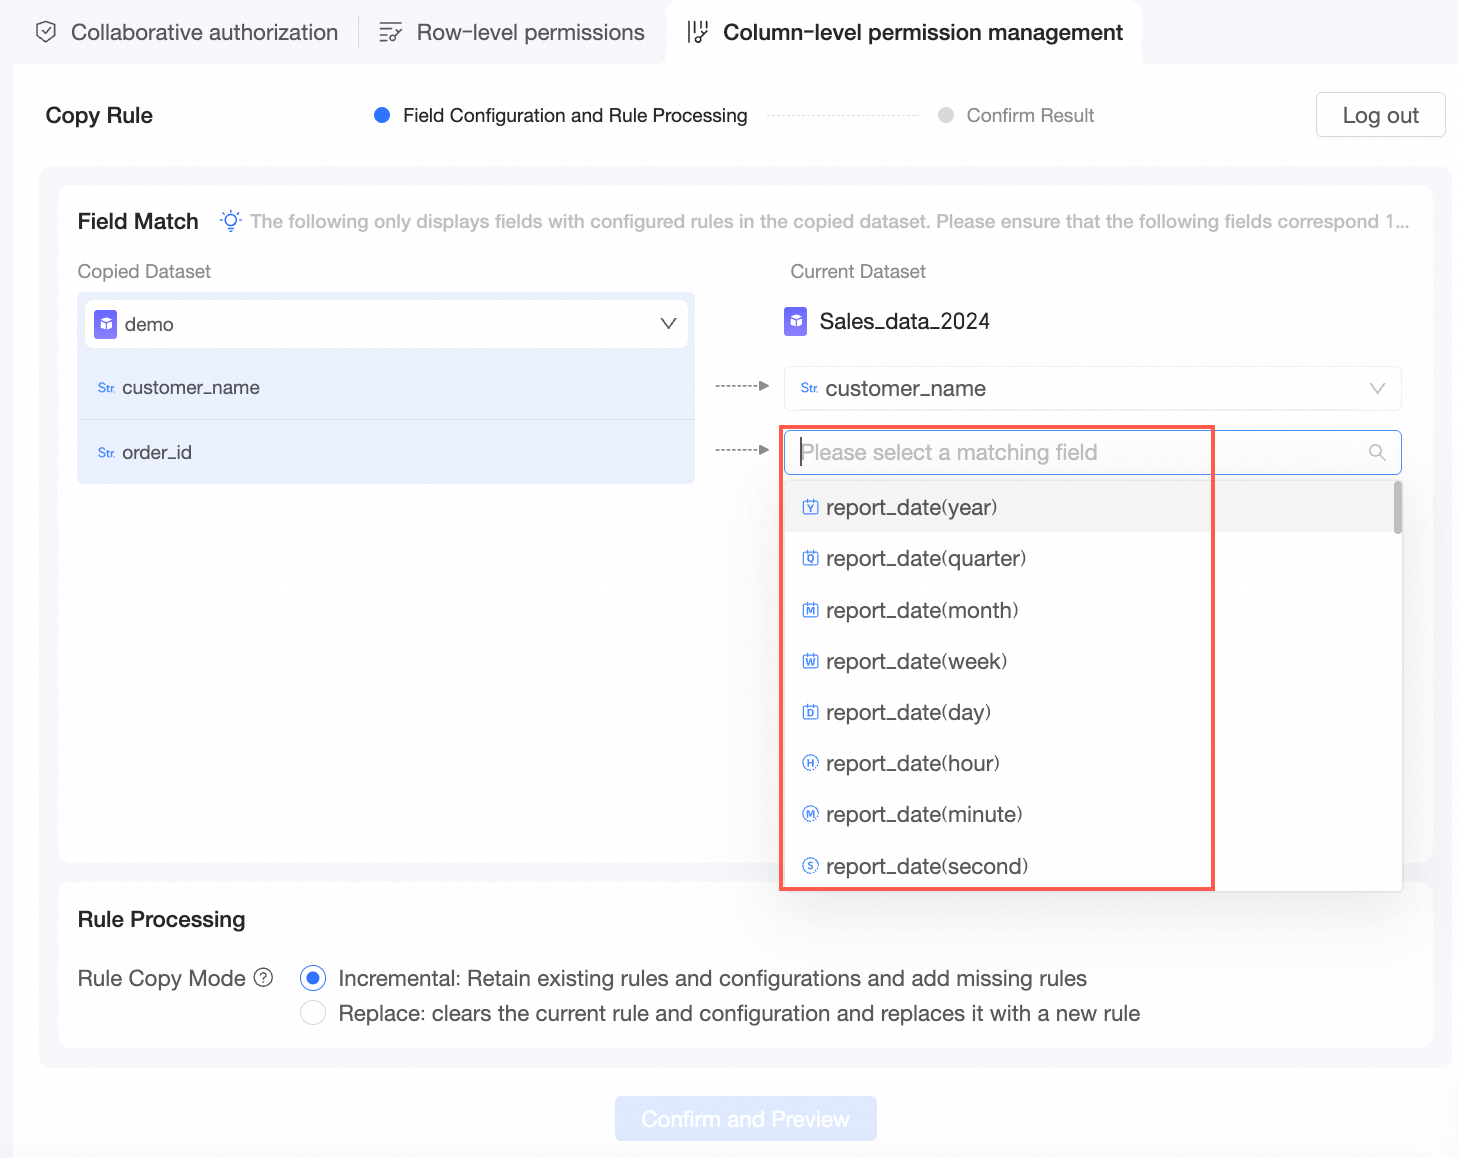
Field Matching
The system automatically matches field rules. You can manually select fields to modify.
NoteOnly the fields with configured rules in the copied dataset are displayed. Make sure that the fields can be mapped one-to-one.
-
Rule Processing
-
The Rule Copy Method can be Incremental or Replace.
Incremental retains existing rules and configurations and adds missing rules.
Replace clears current rules and configurations and replaces them with new rules.
-
The whitelist is synchronized based on the copy method.
-
-
-
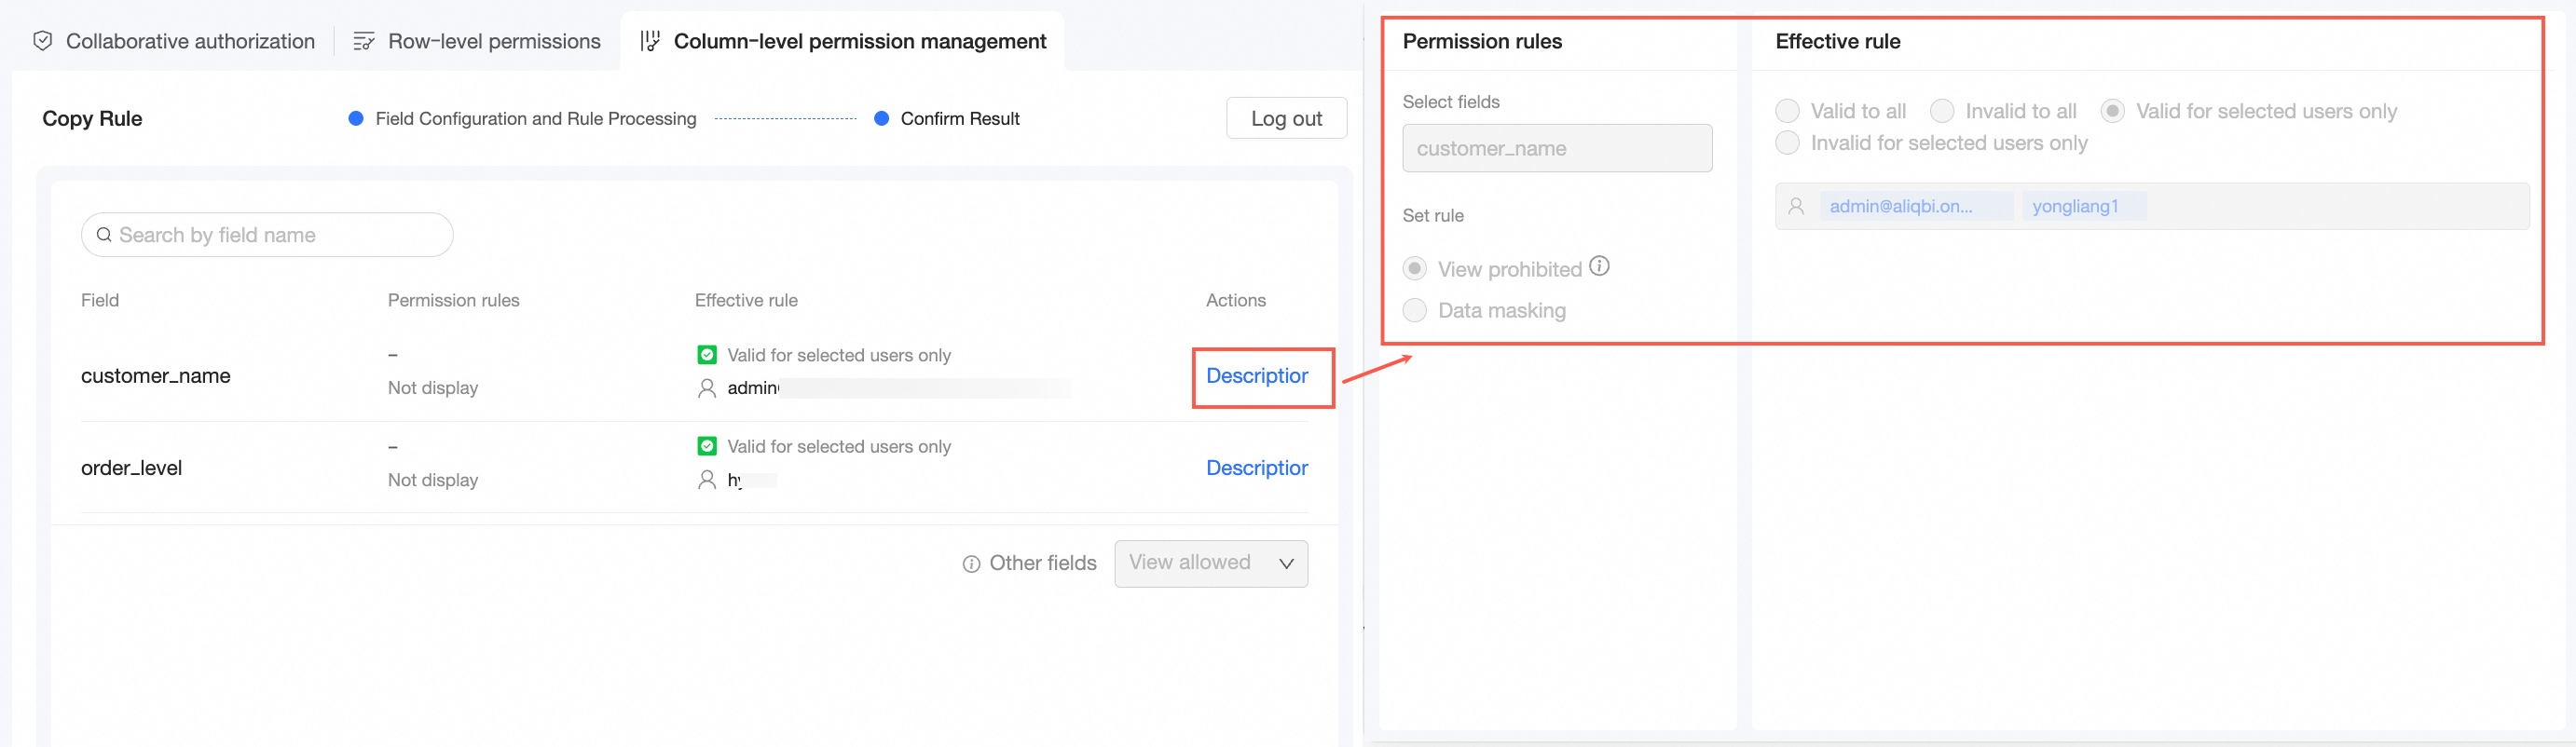
Click Confirm and Preview to complete the copy of column-level permissions.
You can click Details in the Actions column of a rule to view the specific rule content.
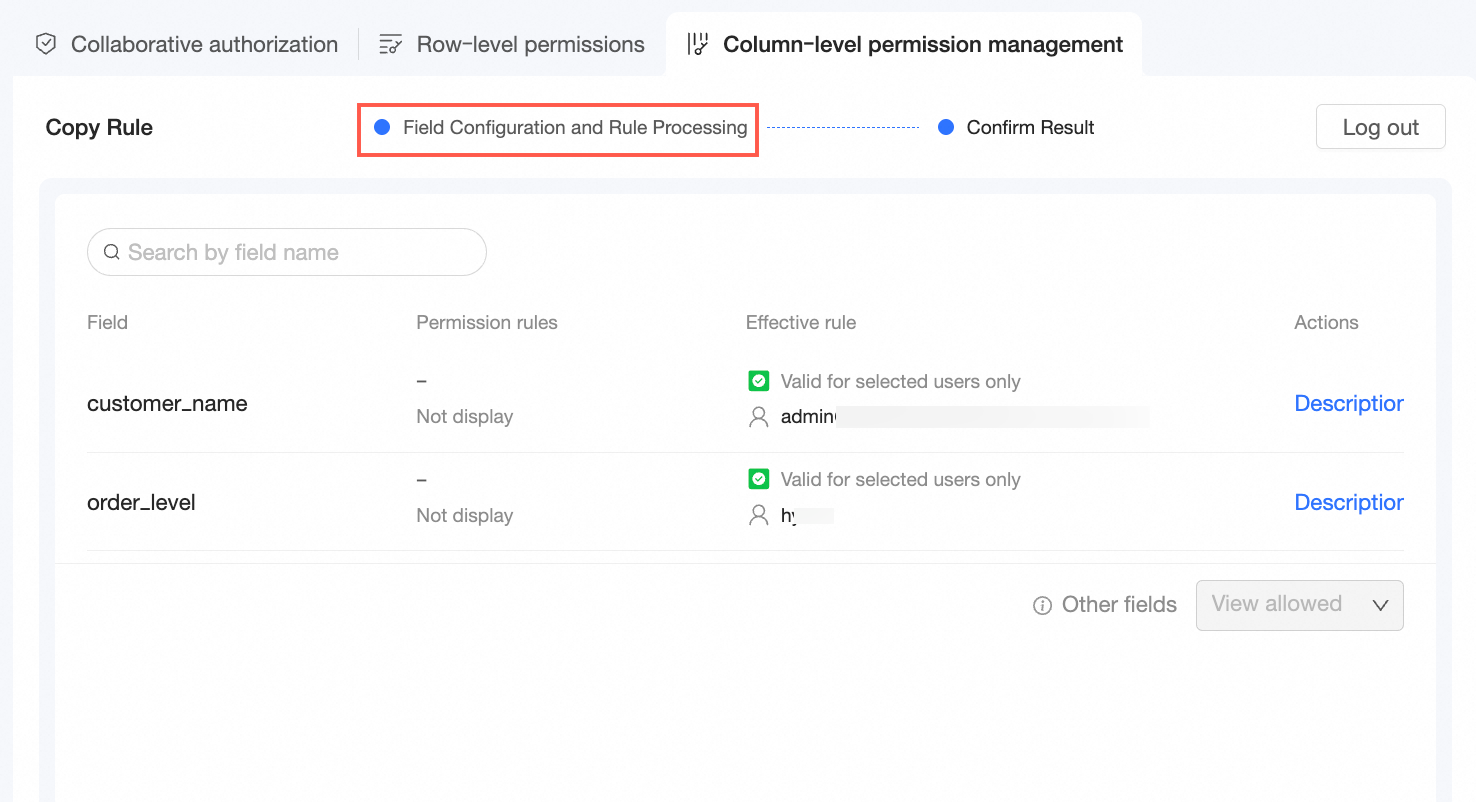
If you need to modify field configurations and rules, you can click Field Configuration and Rule Processing to return to the previous step.
-
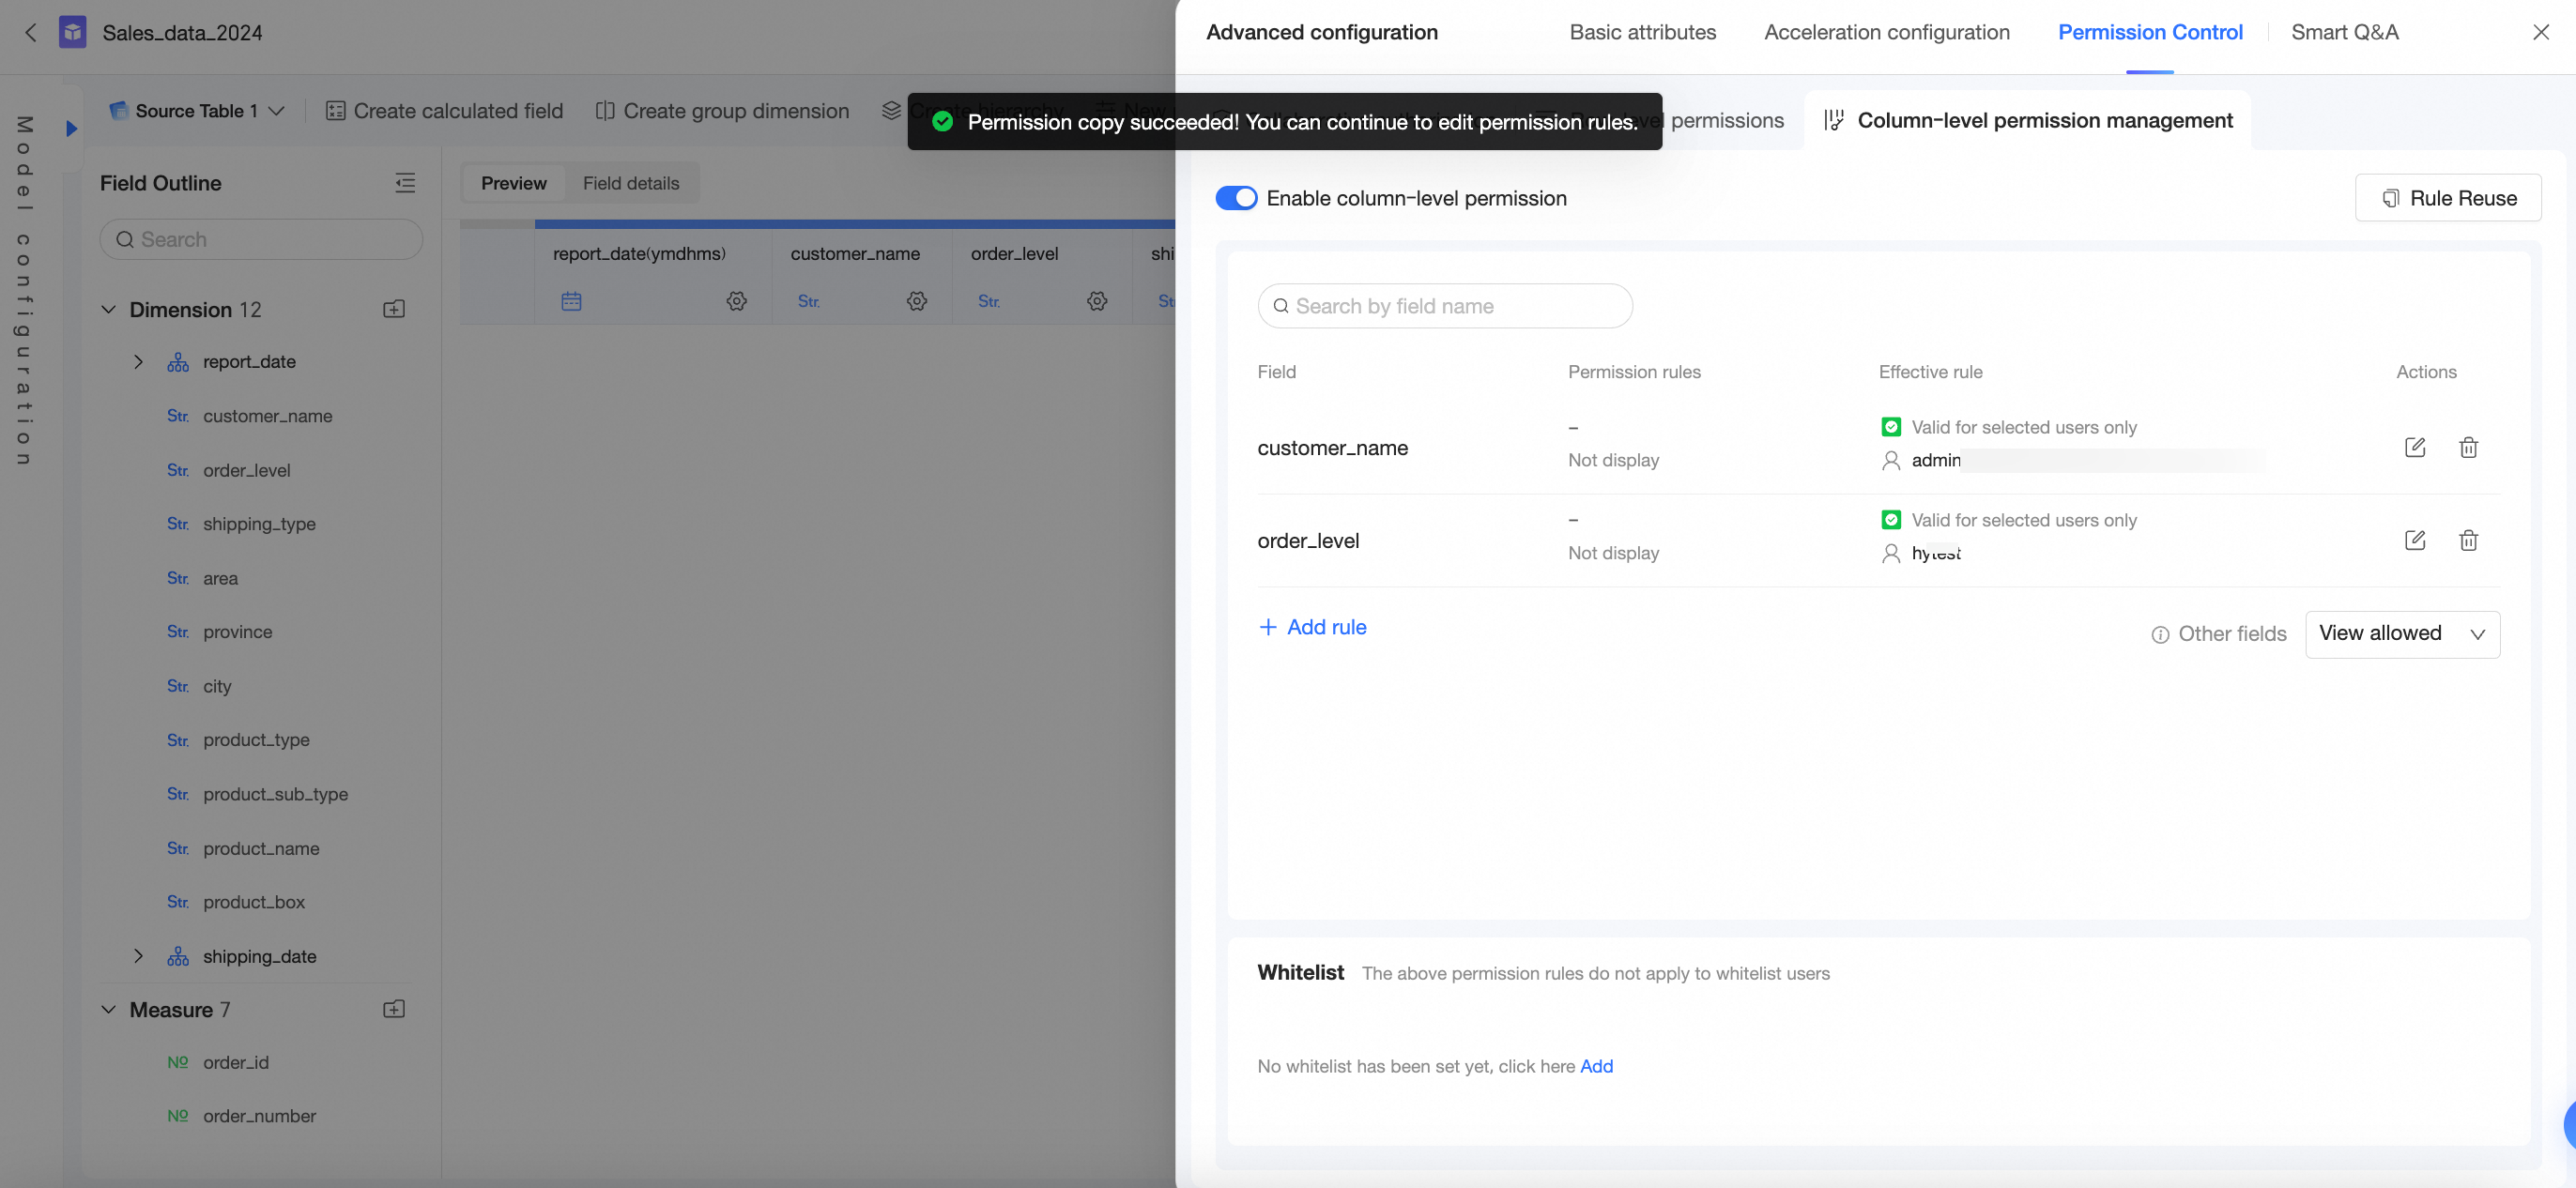
Click Confirm and Close to save the column-level permission settings. You can continue to edit the permission rules for the dataset. For more information, see Procedure.
Examples and rule descriptions
View prohibited
-
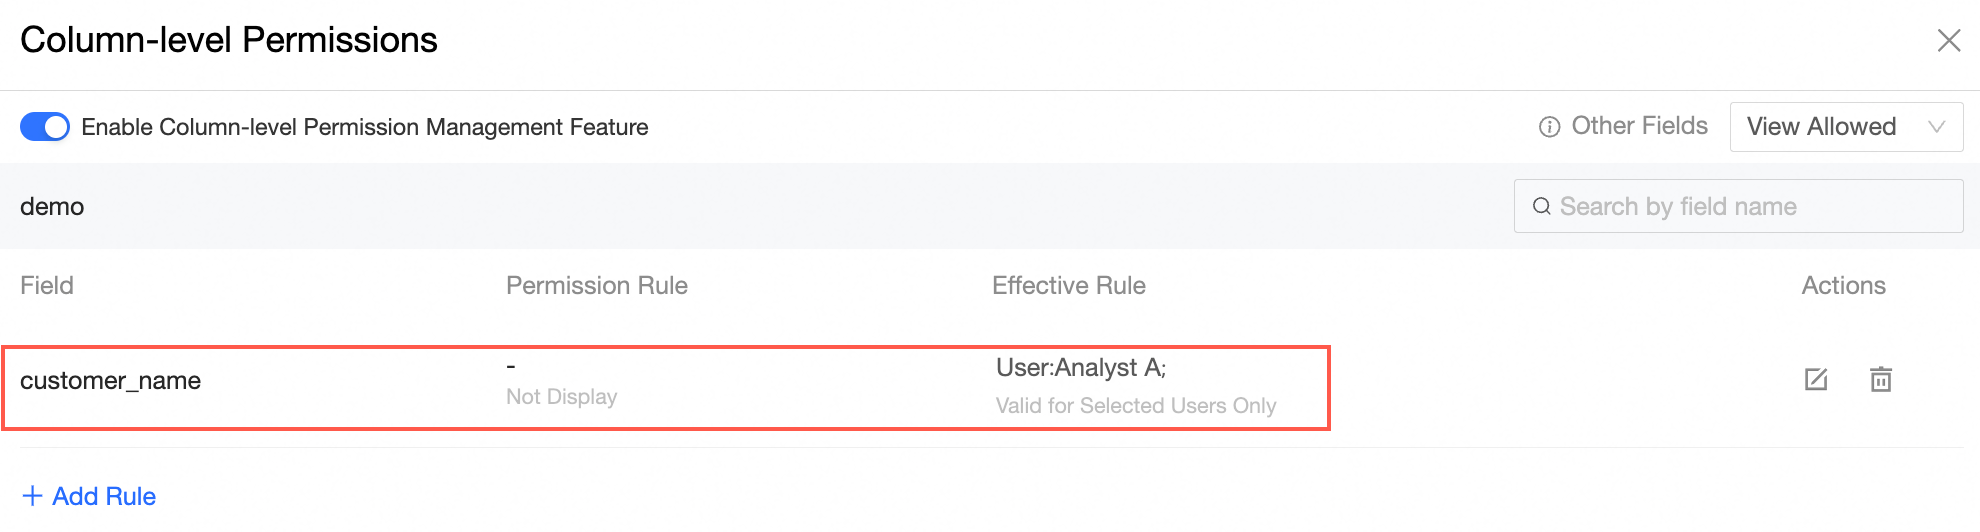
Prohibition rule
Configure Analyst A to be prohibited from viewing the Customer Name field.
-
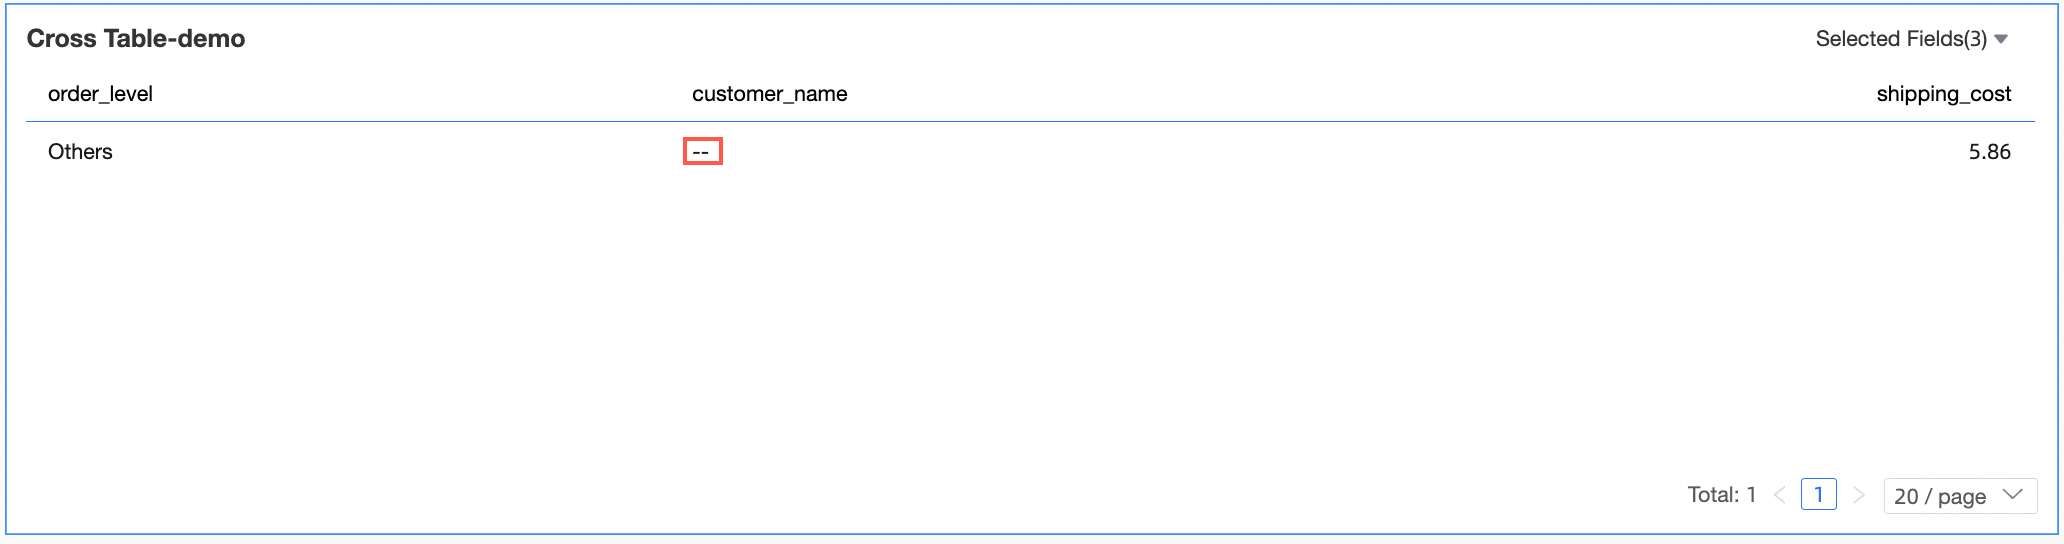
Example
In the pivot table, Analyst A cannot view the Customer Name field.
Data masking
You can mask fields for specific users and apply different masking rules per user.
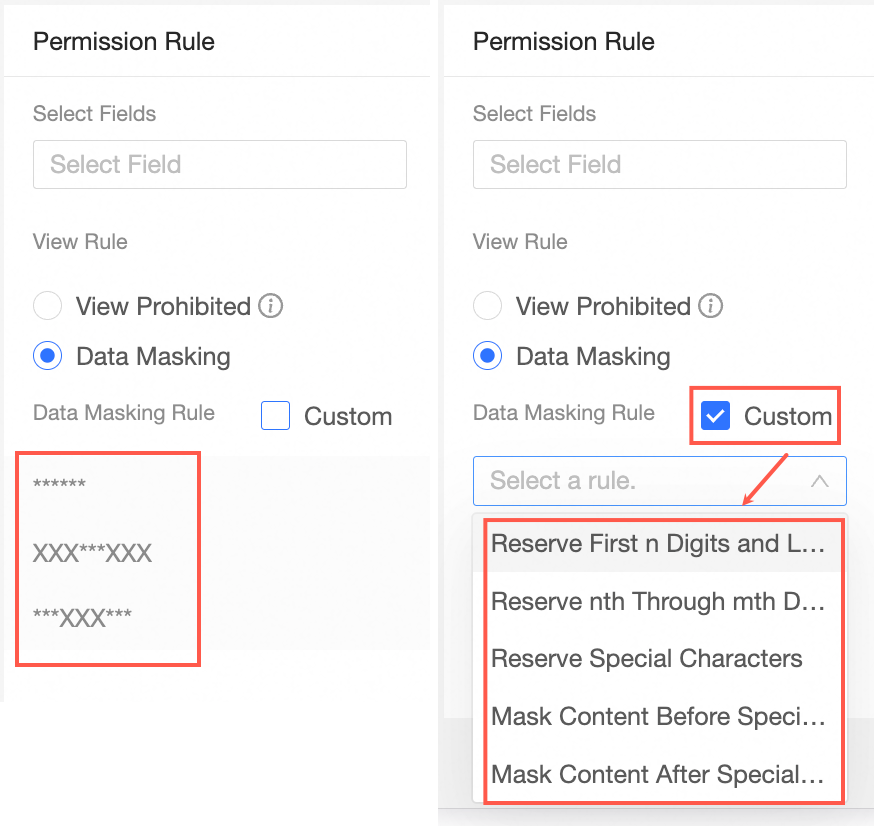
The following examples show each masking rule and its effect.
-
Masked field: Full Masking
The specified masked field is displayed as six asterisks (*), and the field value is completely hidden.
-
Masked field: Mask Middle Characters
The middle characters are hidden, and three characters are retained at the beginning and end.
-
Masked field: Mask Head and Tail Characters
The characters at the beginning and end are hidden, and three characters are retained in the middle.
-
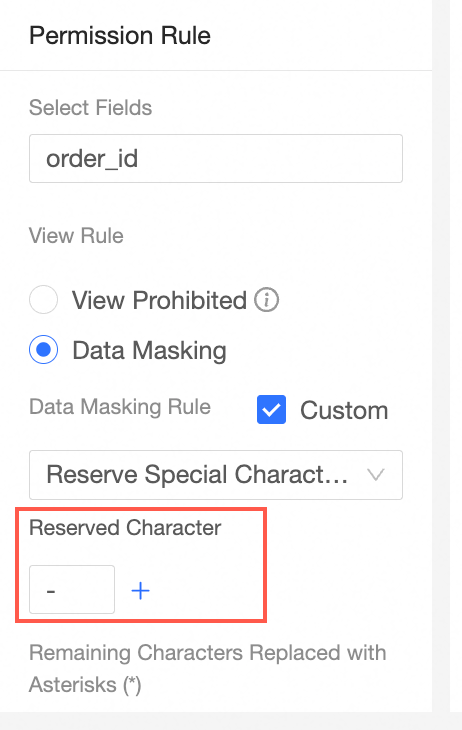
Masked field: Custom Masking Rule
All characters except the specified characters are hidden.
-
Keep First n Last m
In this example, the first two characters and the last two characters are retained.
-
Keep First n to m
In this example, characters from position 1 to position 3 are retained.
-
Mask Before Special Character
The following figure shows the output:
-
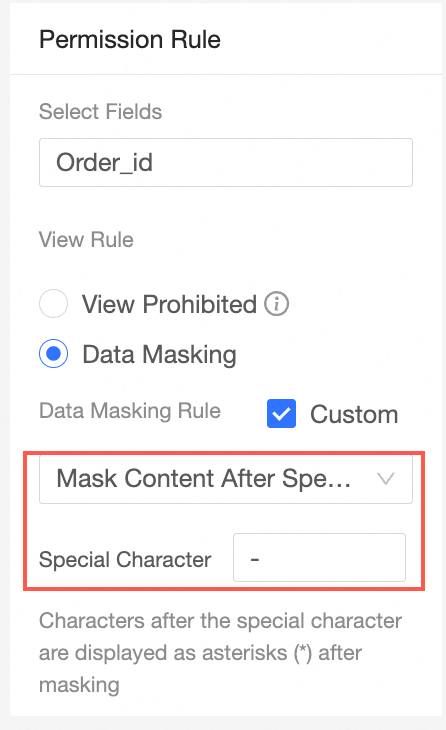
Mask After Special Character
The following figure shows the output: -
Keep Special Character
The following figure shows the output:
-







 The following figure shows the output:

What to do next
After you configure the dataset, you can analyze its data. For more information, see Create a dashboard and Create a chart.