You can create user groups by department (such as Sales, Operations, and Engineering) or by role (such as Analyst, Project Manager, and Project Director) to assign permissions in bulk. A member can belong to multiple user groups.
Prerequisites
Users are added to your organization. For more information, see Add a user.
Procedure
-
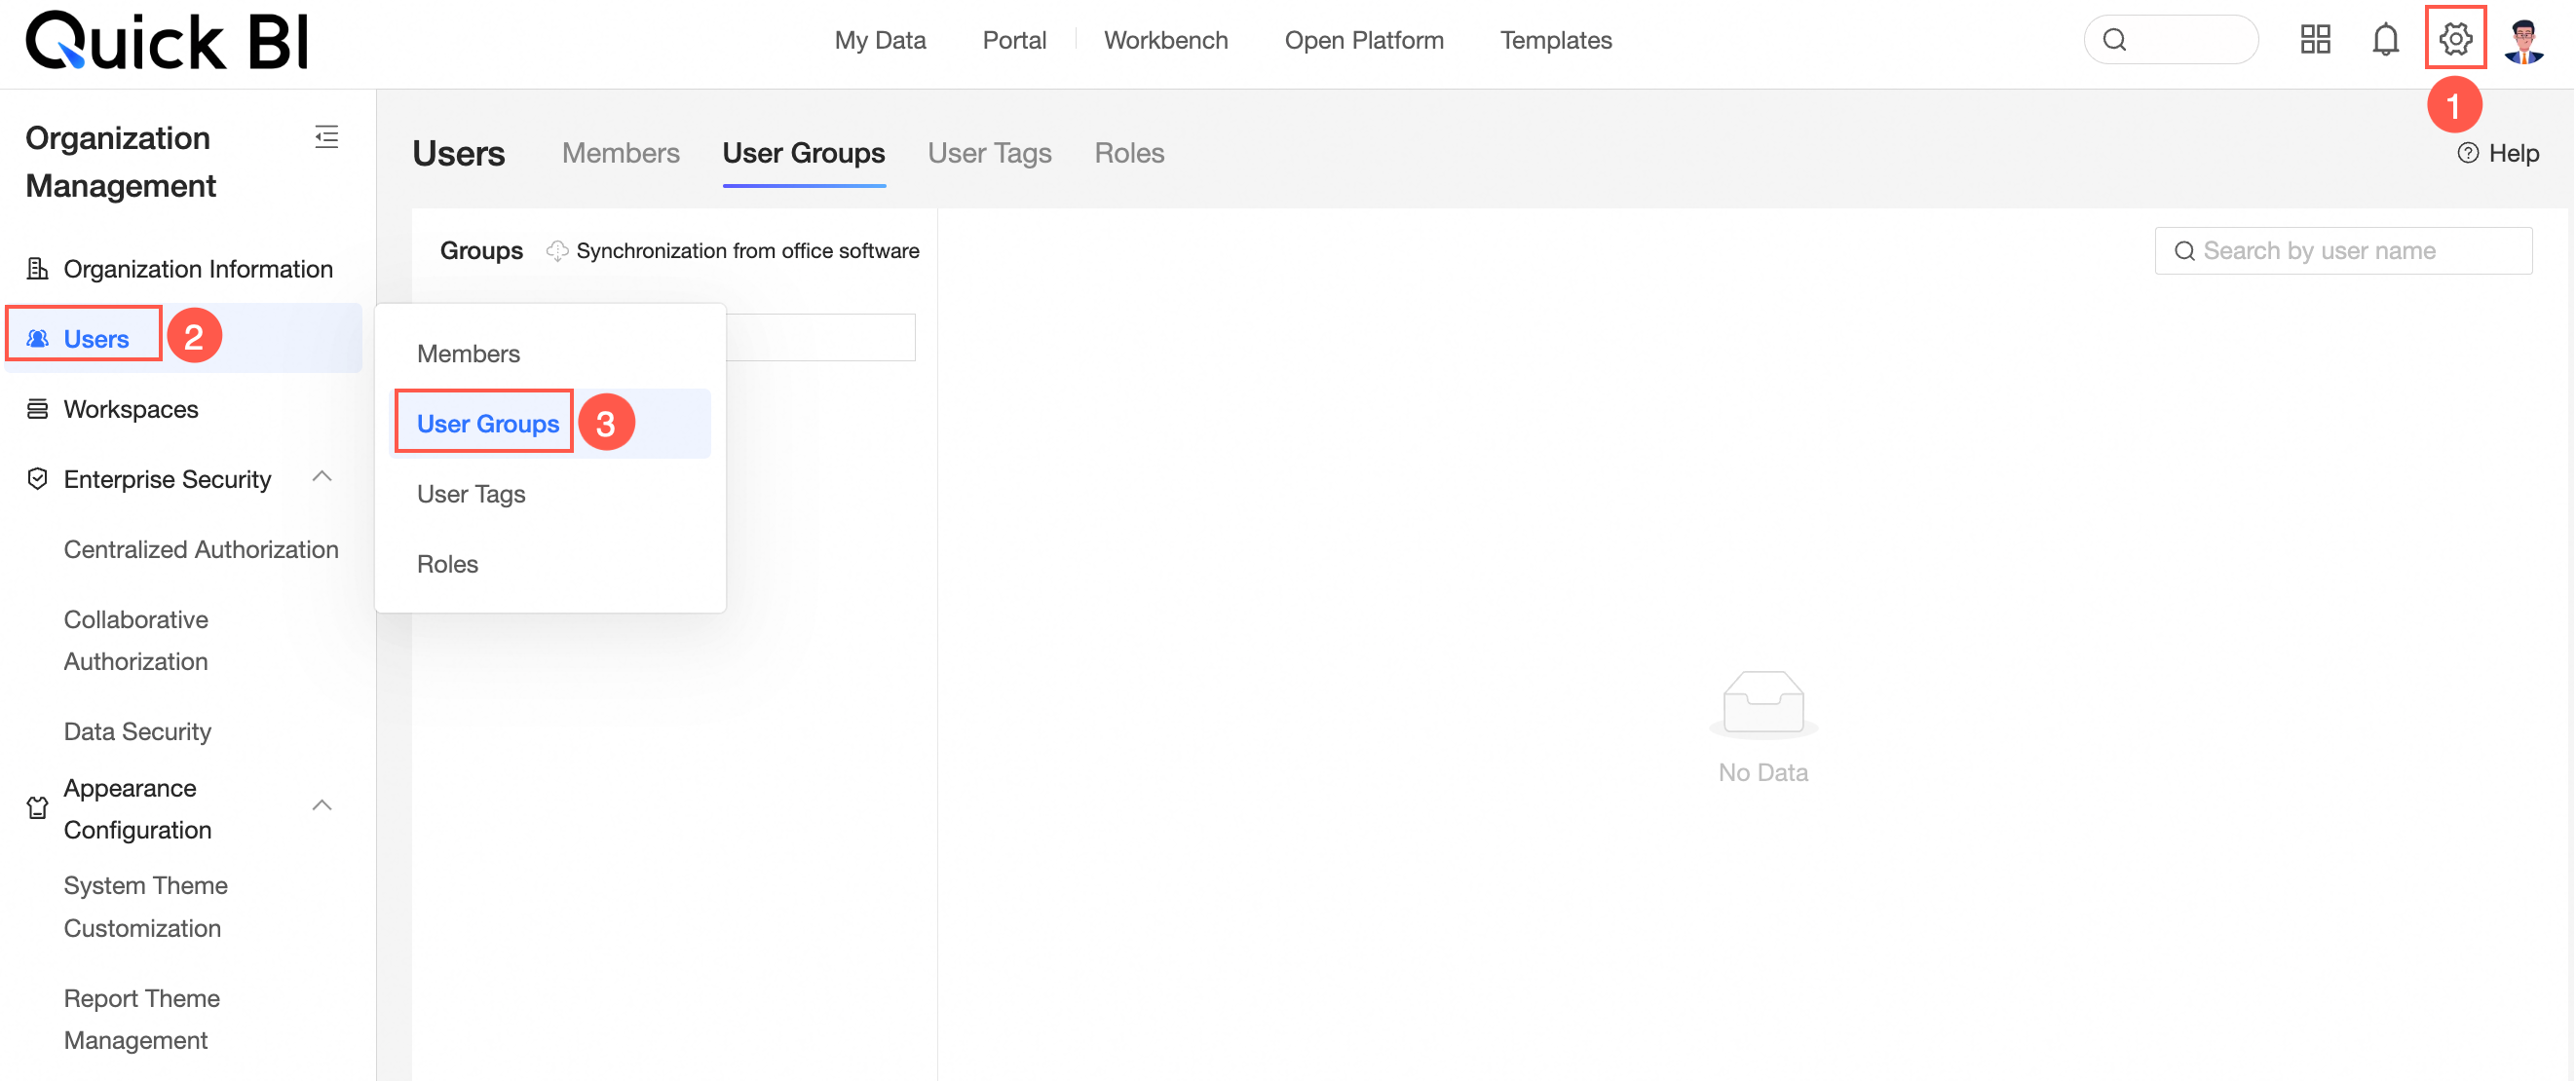
Log on to the Quick BI console.
-
Navigate to the user management page as shown in the following figure.
-
On the User group tab, you can perform the following operations:
-
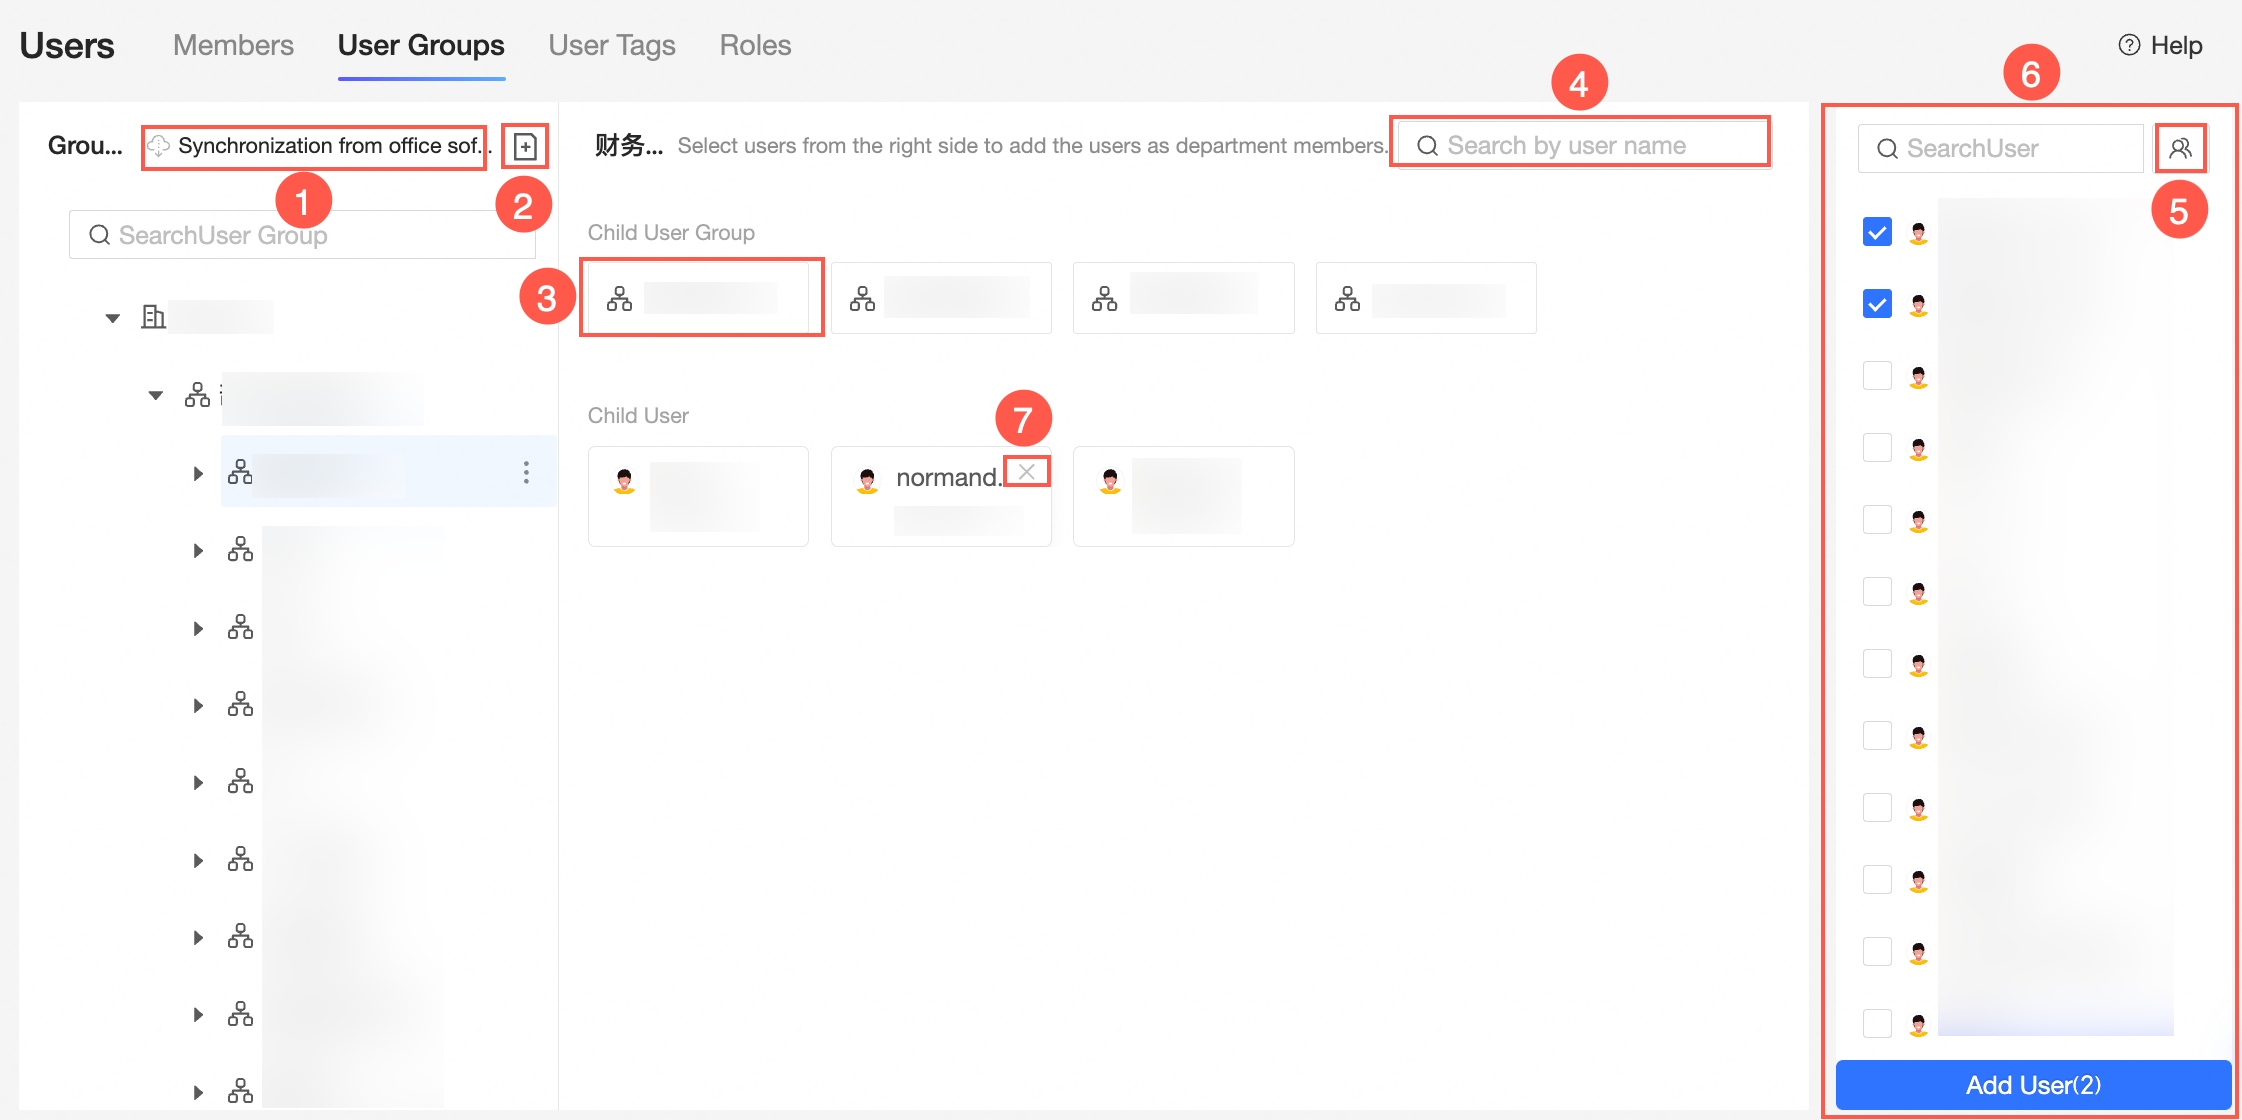
In the user group list, select a group. The user group structure area on the right displays the subgroups and users in the selected group.
 Note
NoteThe user group list supports a hierarchy of up to five levels.
-
Sync from productivity software (①): Select a group and click the Sync from productivity software icon to synchronize the organization structure. For more information, see Sync from productivity software.
-
Add a subgroup (②): Select a group and click the
 icon at the top to add a subgroup.Note
You cannot manually add subgroups to user groups that are synchronized from productivity software.
-
View a subgroup (③): In the user group structure area, click a subgroup to view its members.
-
Search for users in the current user group (④): Enter a keyword in the Search box to find a user within the group.
-
Batch import (⑤): Click the
 icon to batch import users.
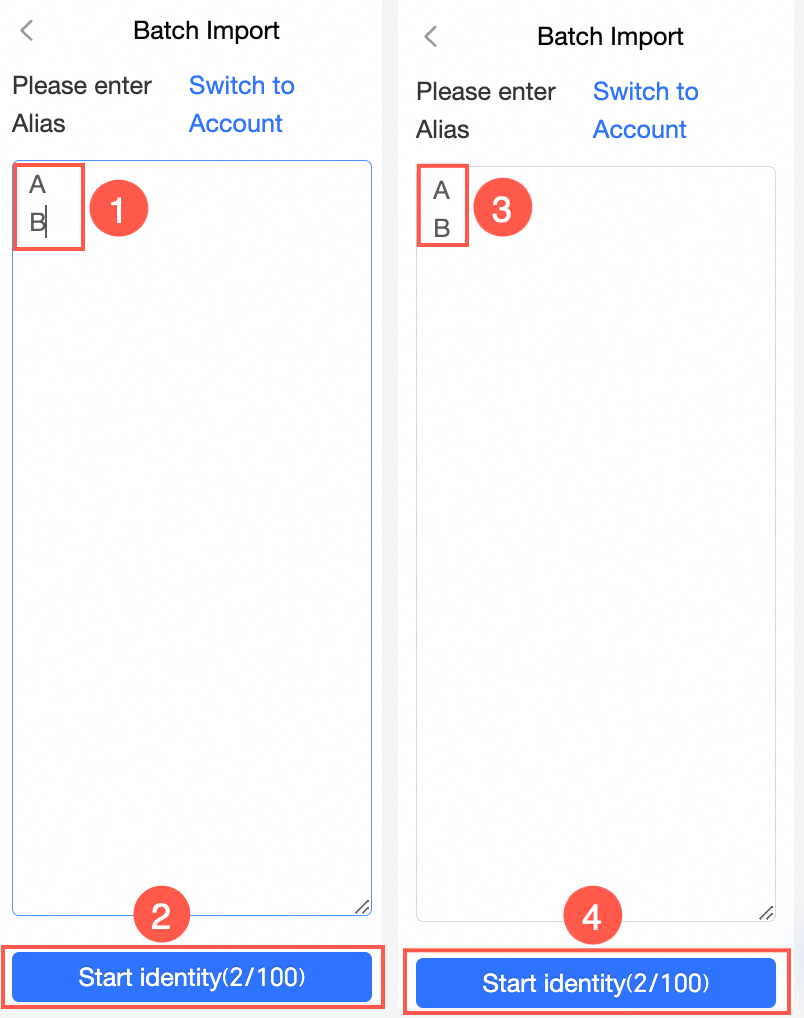
Follow the steps in the following figure to batch import users.
 Note
Note-
You can identify users by their nickname or account.
-
To import multiple users, enter each nickname or account on a new line. You can import a maximum of 100 users at a time.
-
-
Add users to a user group (⑥): In the user group list, select the target user group. In the user information list area on the right, select the users and click Add User at the bottom.
-
Remove a user from a user group (⑦): In the user group list, select the target user group. In the user group structure area, locate the user and click the
 icon on their card.
-
-
In the user group list, you can perform the following operations on a user group or subgroup.
-
Add a subgroup (①): Select a group, click the
icon on the right, and select Add Subgroup. -
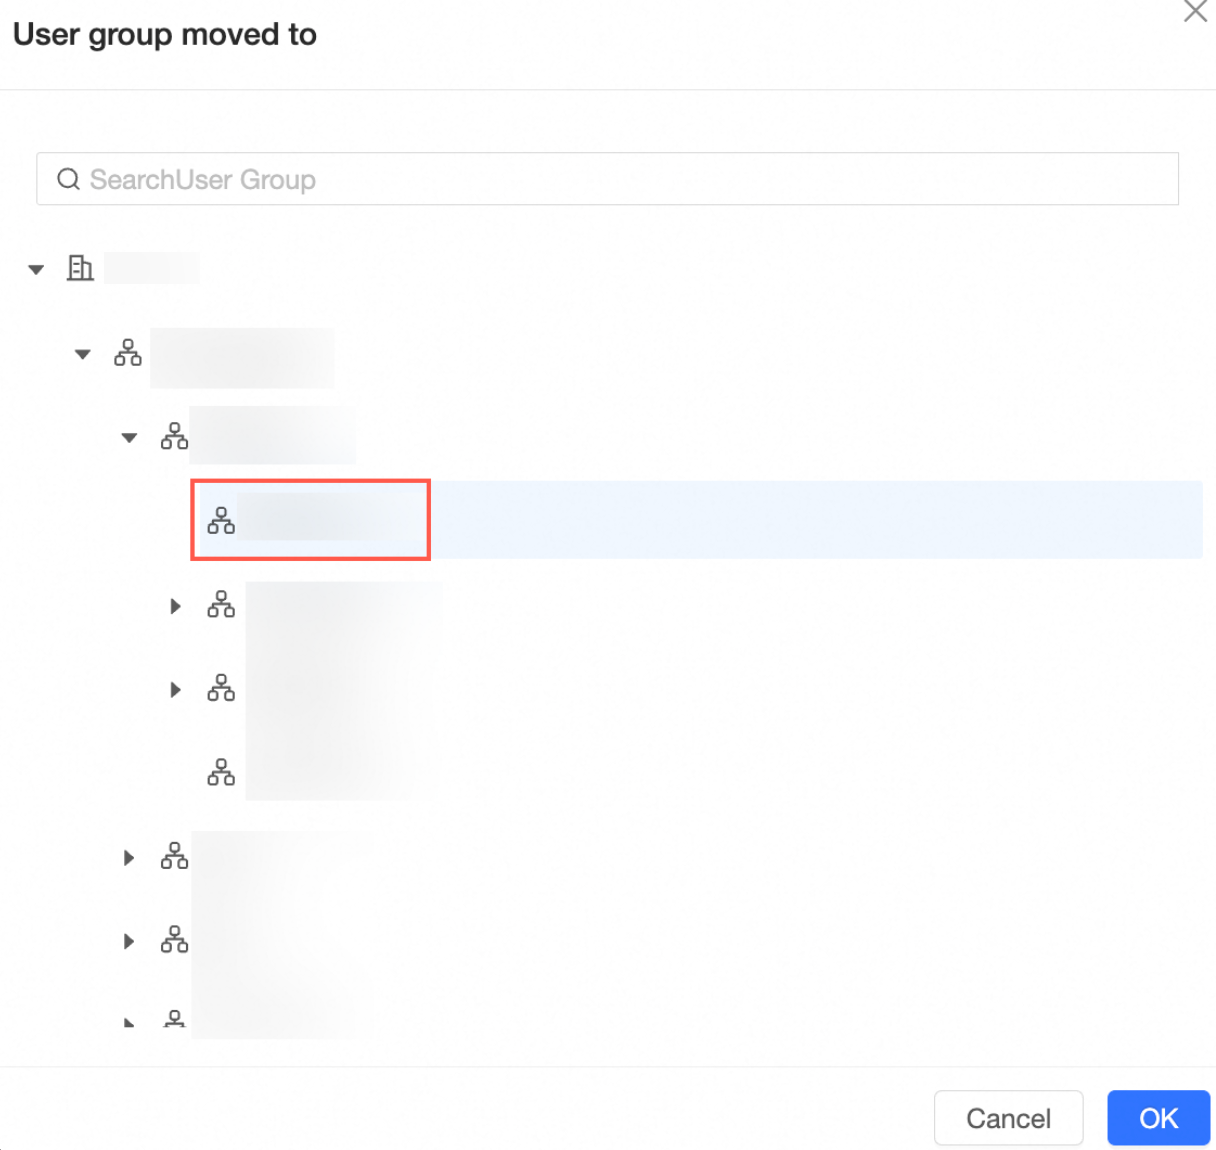
Move to (②): Select a user group, click the
icon on the right, and select Move to. Choose a new location for the user group and click OK. -
Delete user group (③): Select a user group, click the
icon on the right, and select Delete User Group.NoteYou can only delete groups that do not contain any subgroups.
-
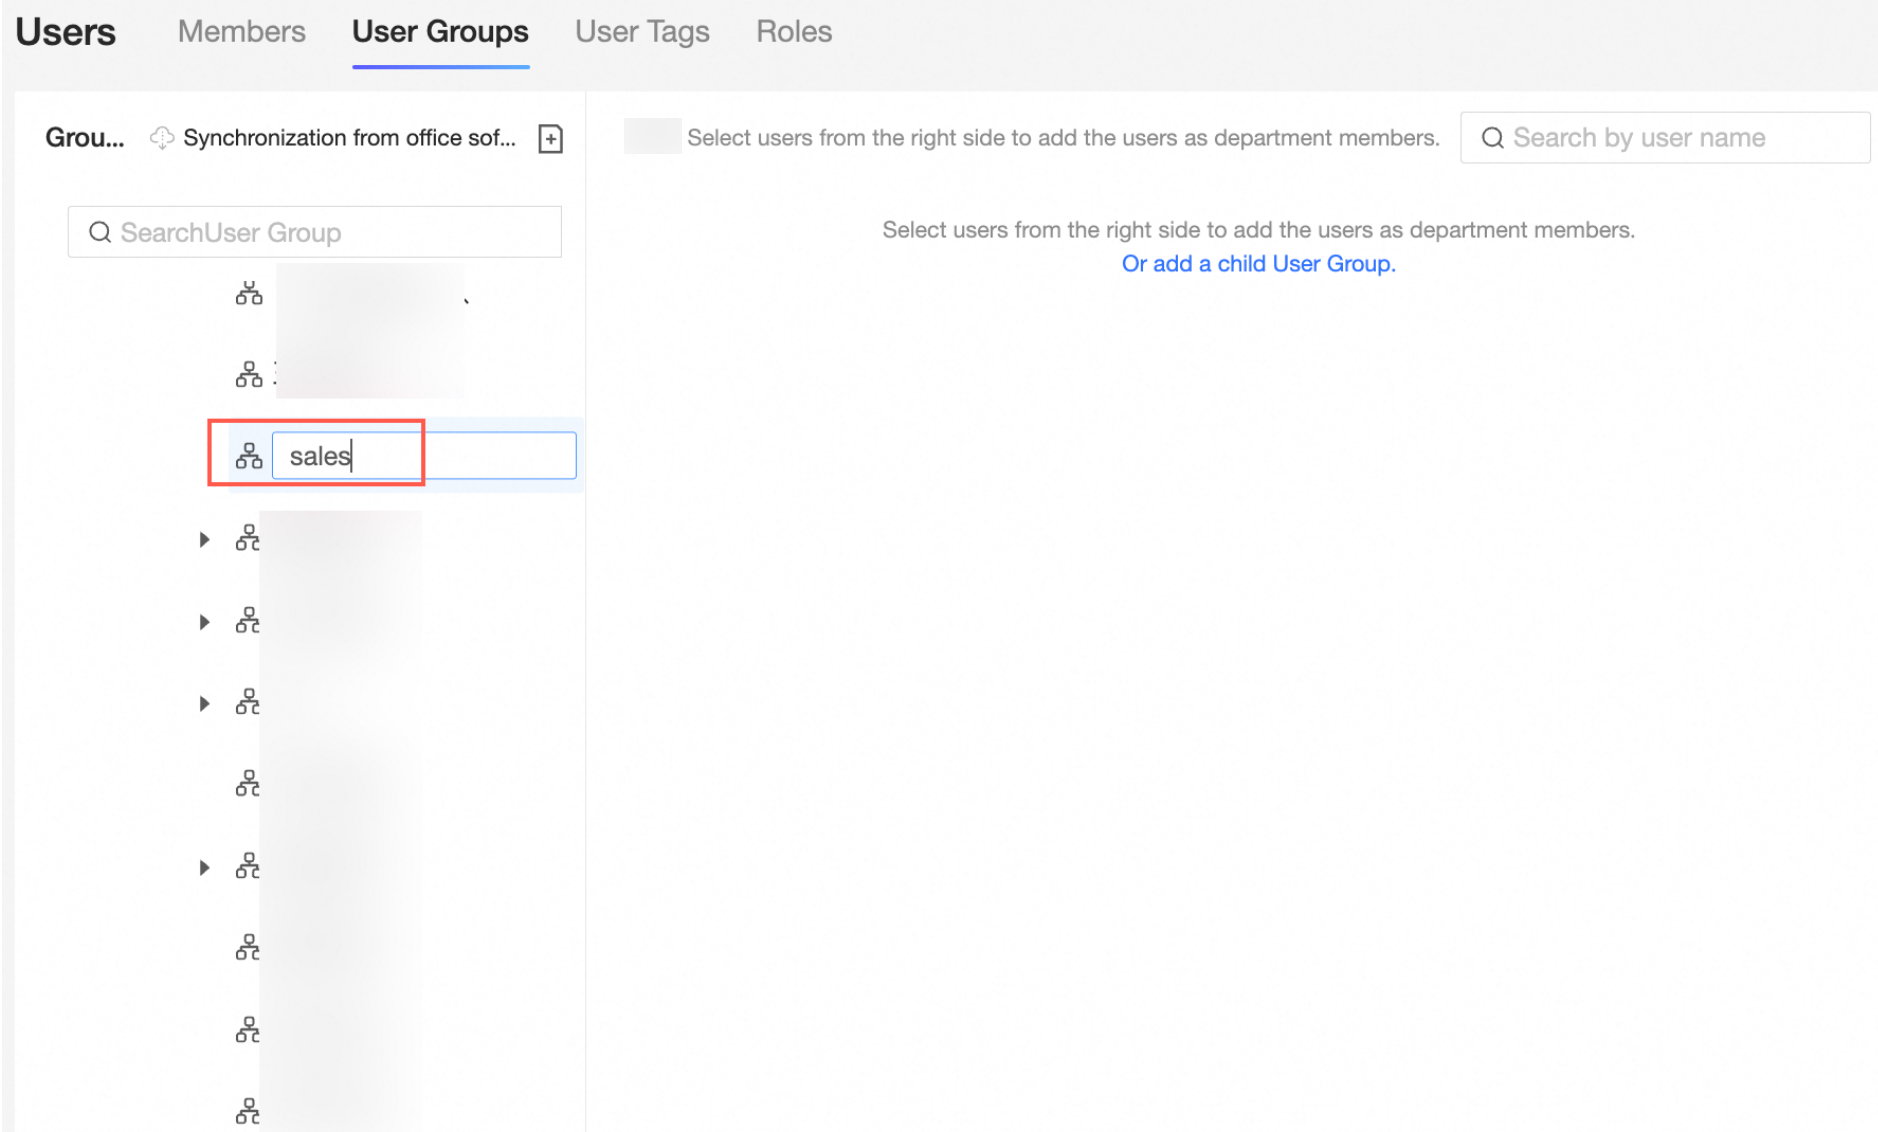
Edit user group: Double-click a user group in the list to edit its name.
-
-
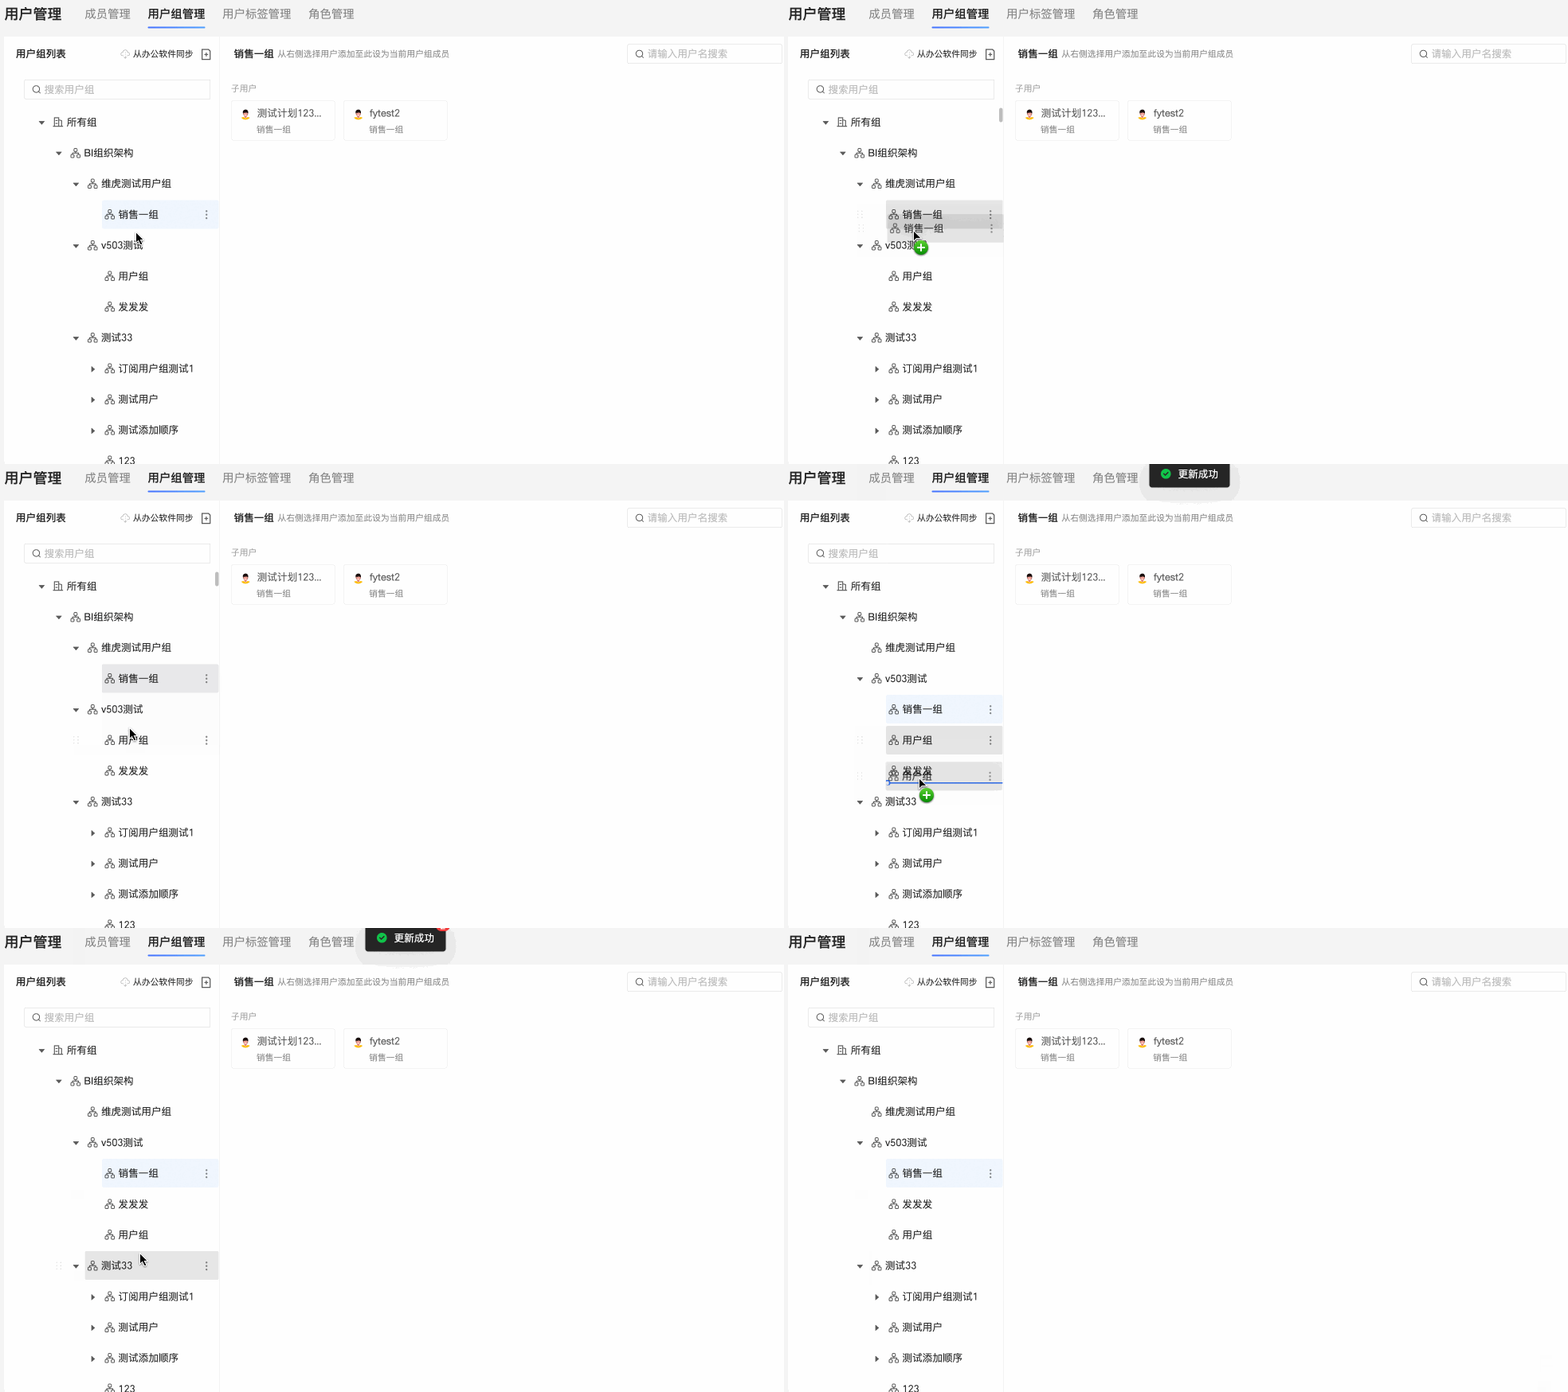
You can drag and drop groups in the user group list to reorder or restructure them.
Important-
Administrators cannot remove themselves.
-
You cannot remove a user who is currently in a workspace.
-
You cannot remove a user who is an organization administrator or a workspace owner.
-
-
 icon on their card.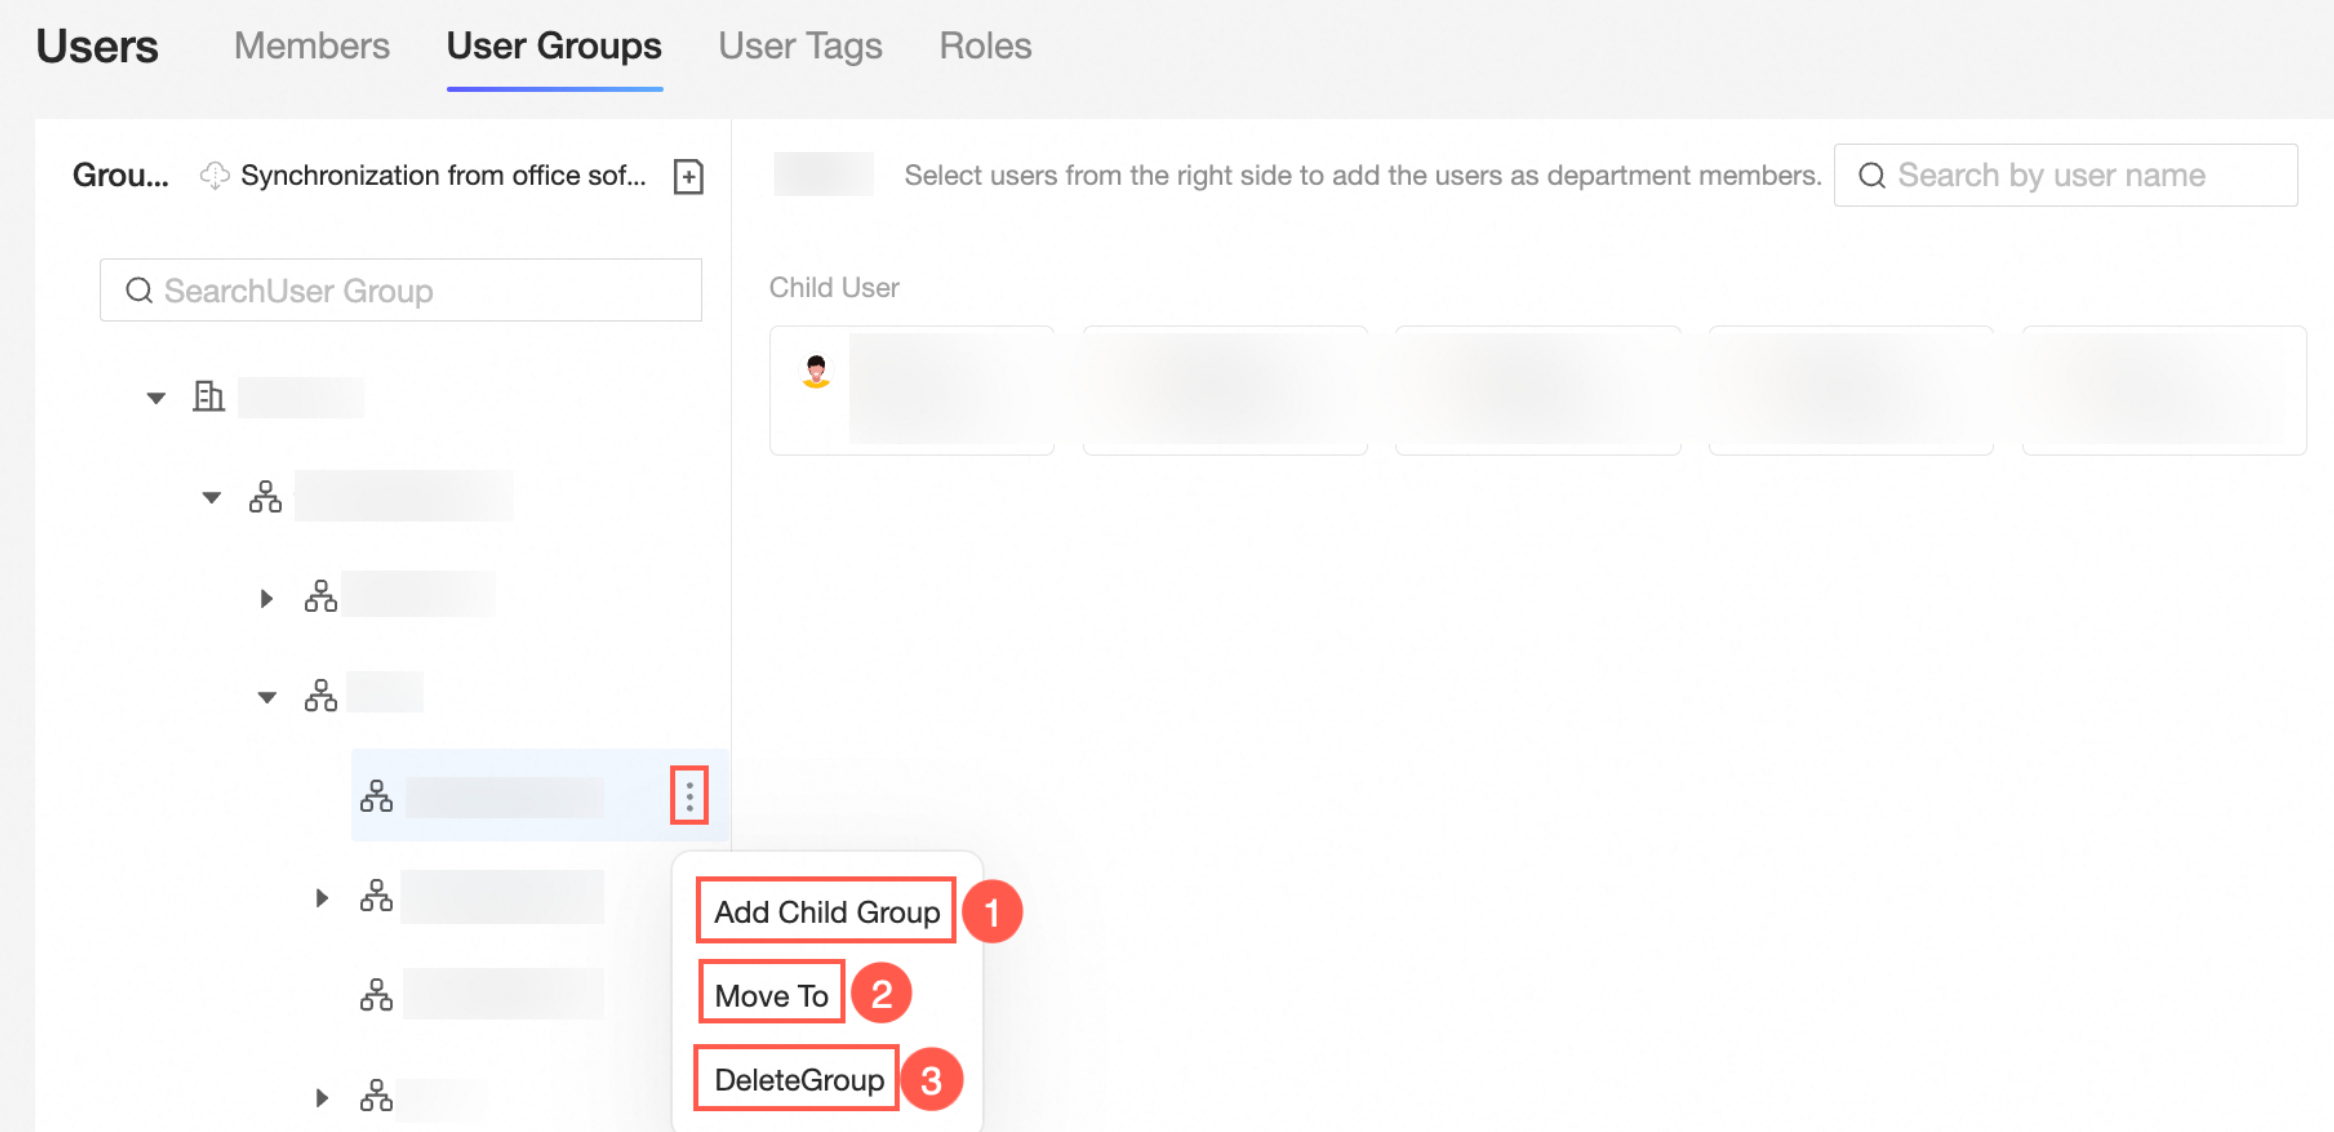
 icon on the right, and select Add Subgroup.