Workspaces allow you to group and manage resources. Resources in different workspaces are isolated from each other. An organization administrator can assign separate management permissions to each workspace. This topic describes how to create and manage workspaces.
Prerequisites
You have activated Quick BI Advanced Edition or Professional Edition. For more information, see Activate Quick BI.
You must be an organization administrator to create a workspace.
Limitations
Only organization administrators can create and manage workspaces in Quick BI Advanced Edition or Professional Edition.
Create a workspace
Log on to the Quick BI console.
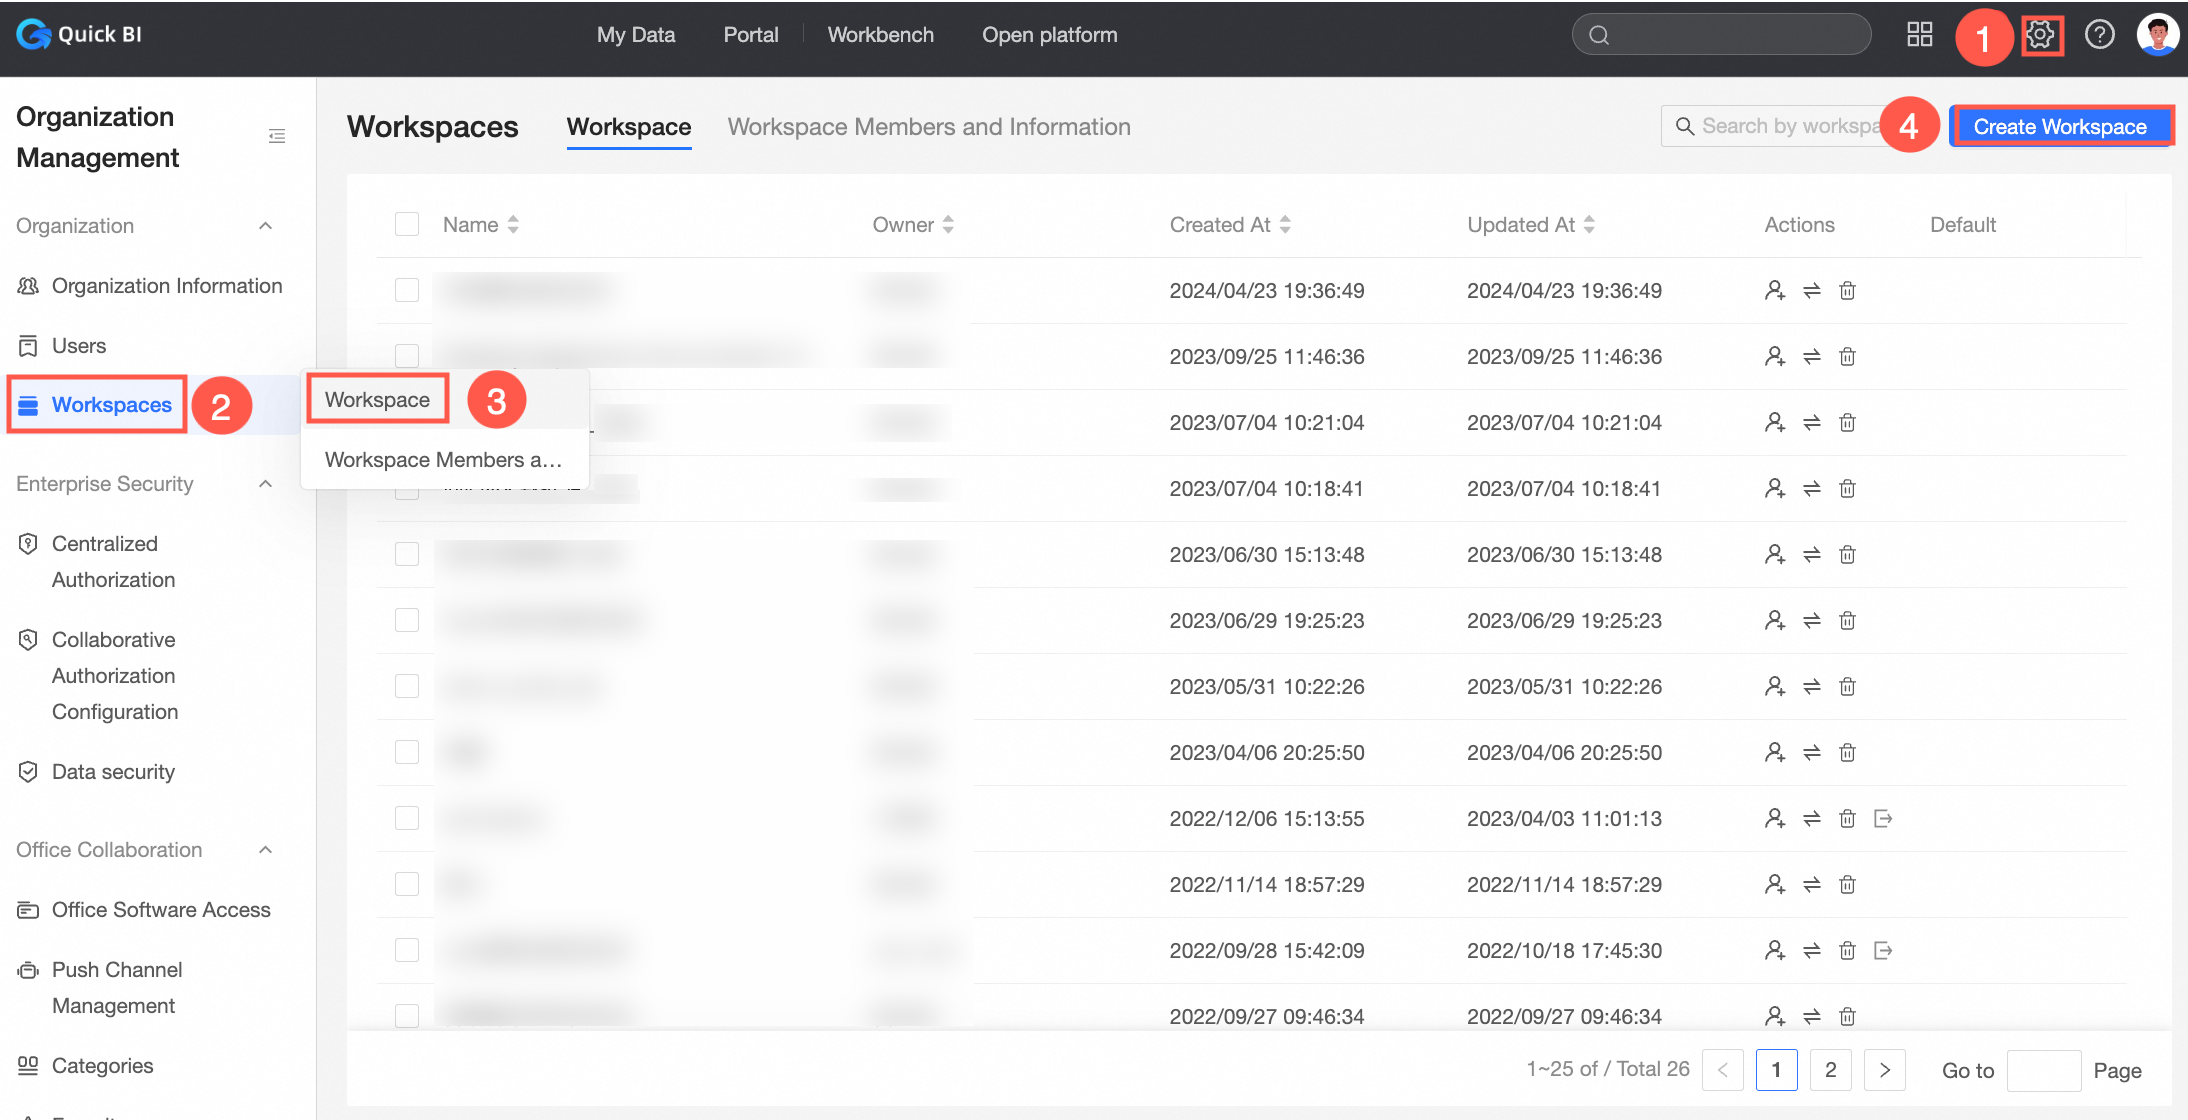
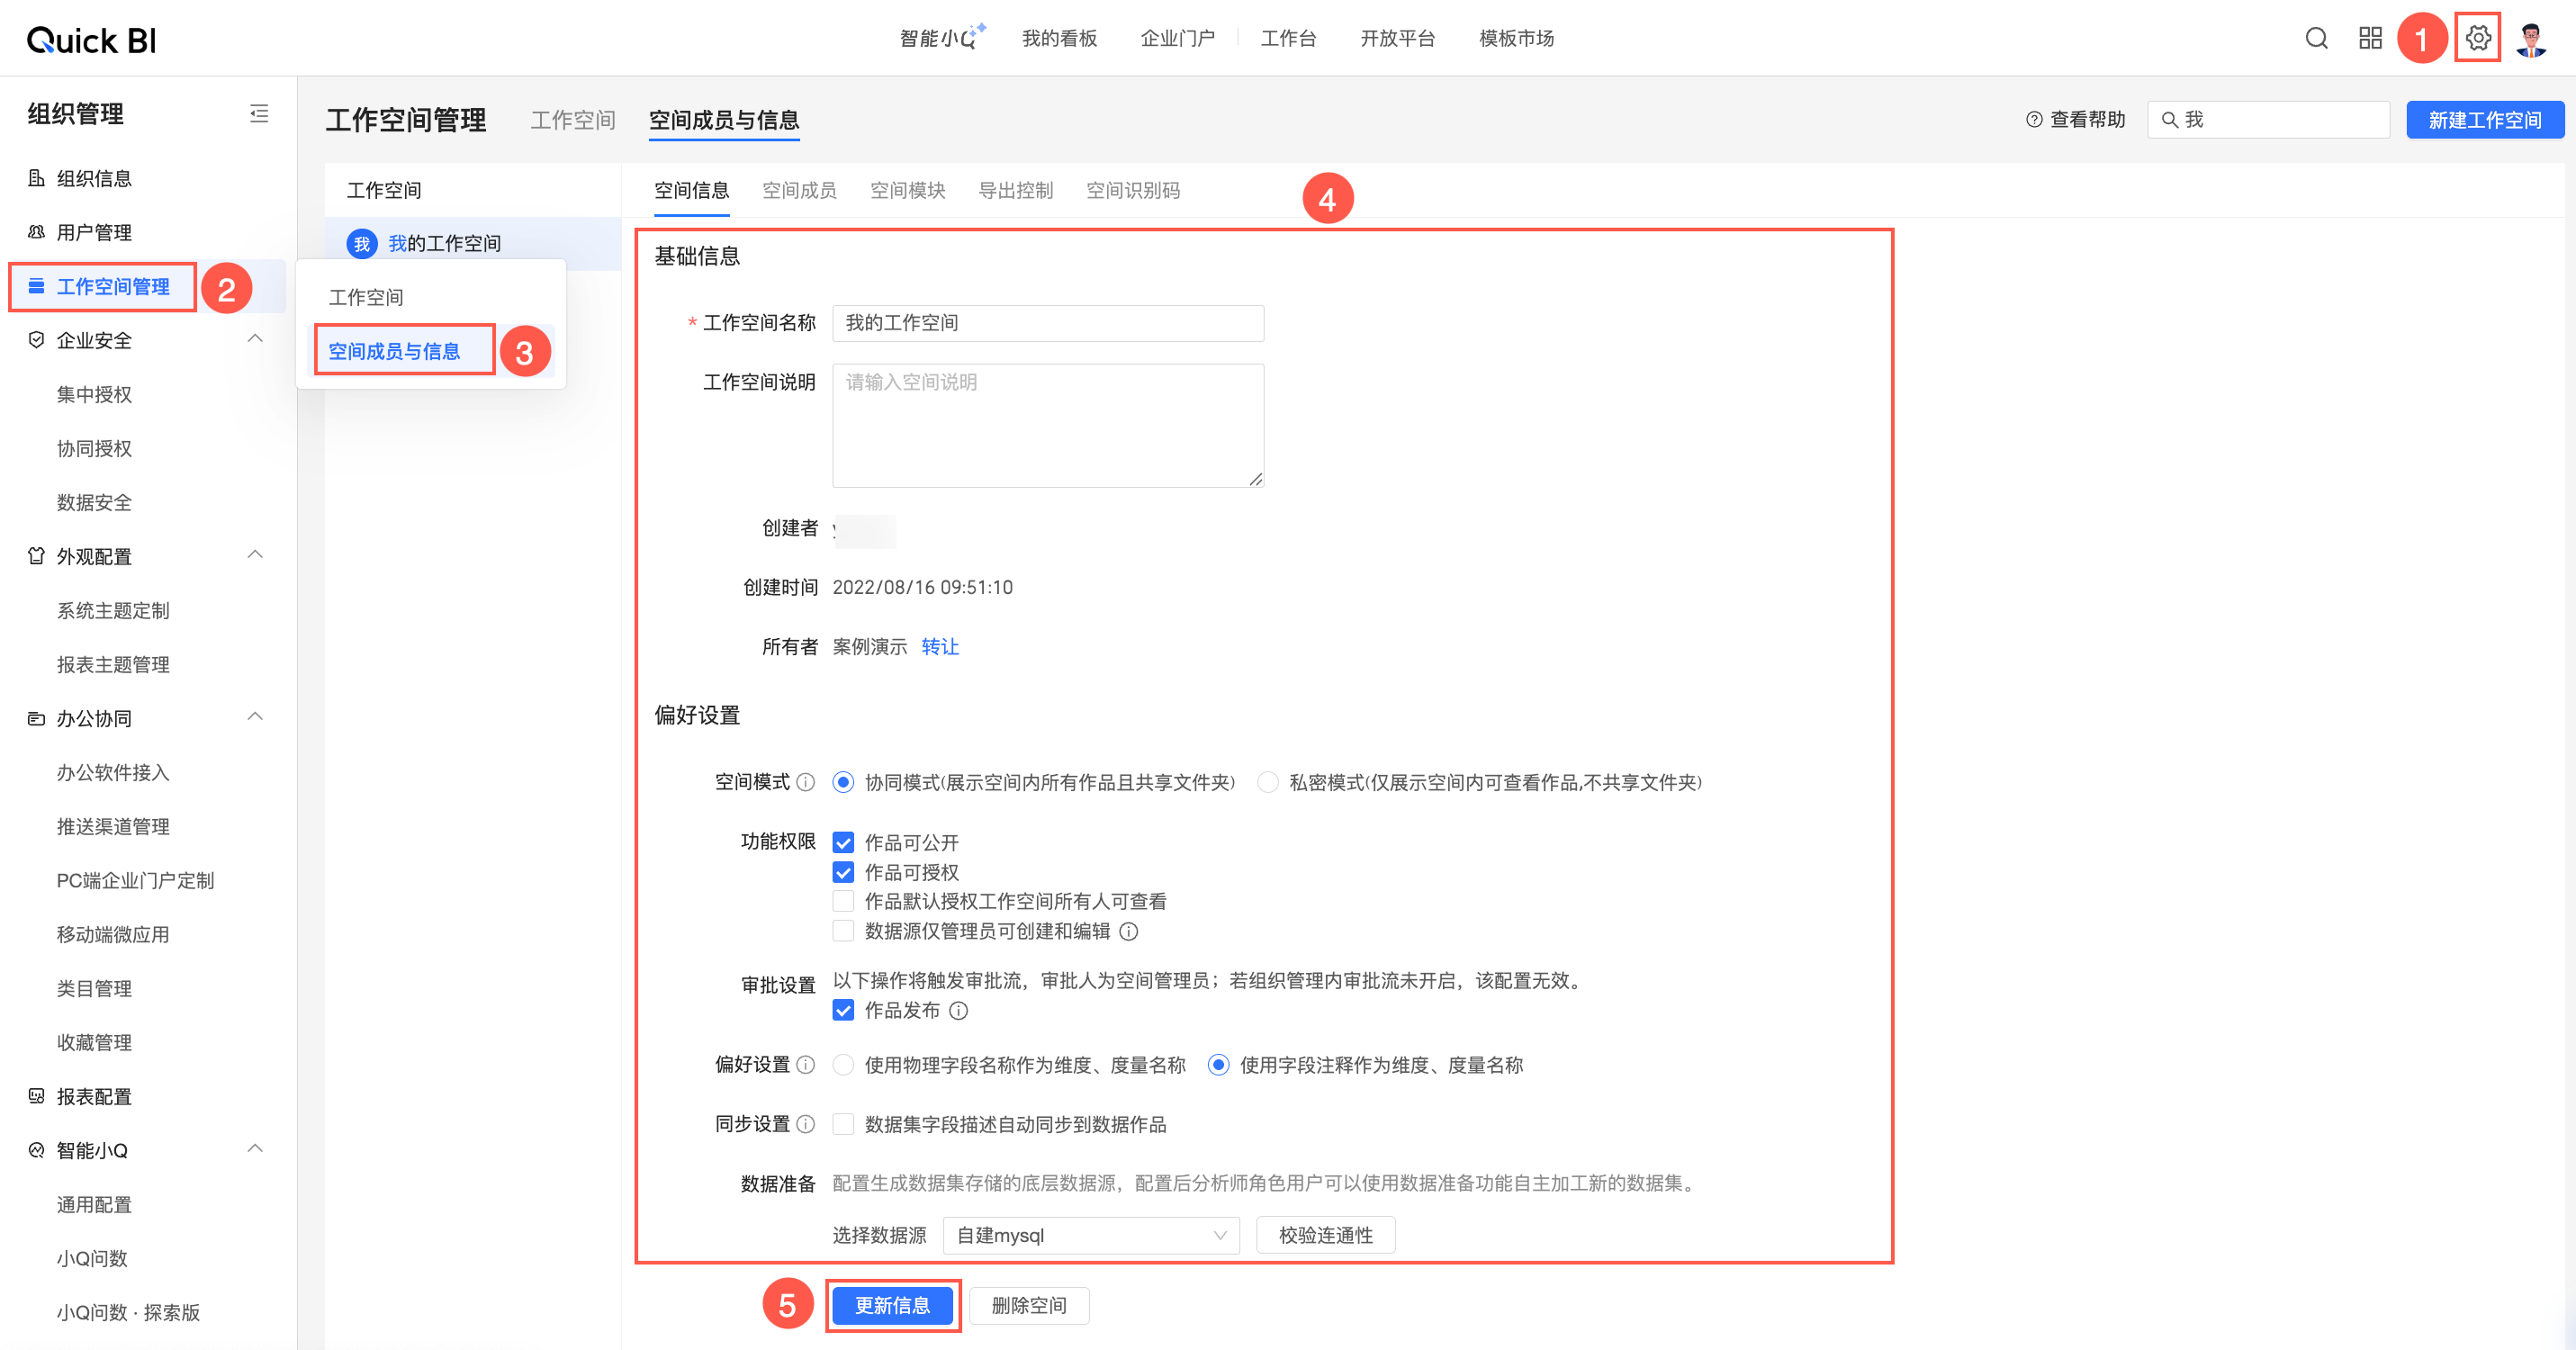
On the Quick BI homepage, as shown in the following figure, click the settings panel icon > Workspace Management > Workspaces > Create Workspace.
On the Create Workspace page, configure the following parameters.
Parameter
Description
Workspace name
The display name of the workspace in the workspace list.
The name can contain only Chinese characters, English letters, digits, underscores (_), forward slashes (/), backslashes (\), vertical bars (|), parentheses (()), and square brackets ([]). The name must be no more than 50 characters in length.
Workspace description
A description of the workspace, such as its purpose.
Owner
Select an owner for the workspace from the drop-down list.
Space mode
Sets the visibility of works within the workspace. You can select collaboration mode or private mode.
In collaboration mode, users can see all works in the workspace.
Select private mode: Users can only see works that they have permission to view.
ImportantThe space mode is a new feature introduced in v4.1 that controls the visibility of the works list. Therefore:
If you create a workspace in v4.1 or a later version, you must select a space mode. We recommend that you do not switch the space mode after the workspace is created. Switching the space mode may change work ownership or frequently change work visibility.
If you created a workspace before v4.1, you did not need to select a space mode. When you modify the workspace information, you can change the space mode as needed.
Feature permissions
Defines permissions for works within the workspace.
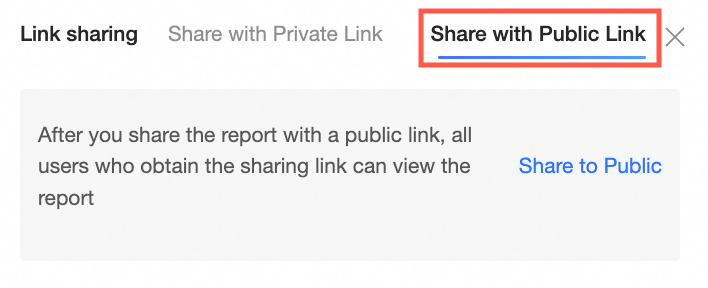
Works to Be Made Public: Allows works in this workspace to be made public.
If this option is selected, anyone can view the work through the link on the Public Link Sharing tab without logging in to an Alibaba Cloud account. If your workspace contains works with sensitive business data, clear this option to prevent members from sharing them externally through public links.
Works to Be Shared: Allows works in this workspace to be shared. You can select Can Be Shared with All Users in the Organization or Can Be Shared Only with Users in the Workspace.
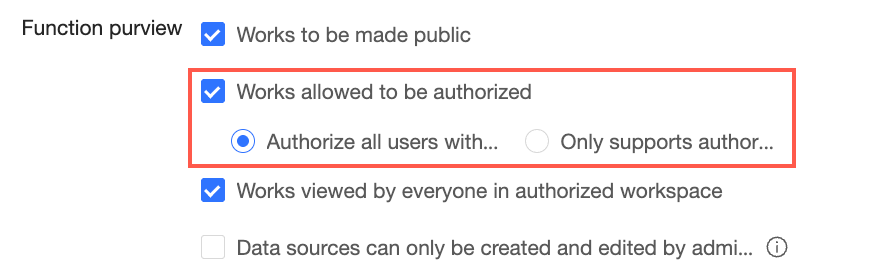
Can Be Shared with All Users in the Organization: Allows you to share works with all members in the organization through collaborative sharing.
Can Be Shared Only with Users in the Workspace: Allows you to share works, but only by user with members in the workspace, using collaborative sharing.
NoteThis setting affects only the collaborative sharing page for reports and does not apply to centralized authorization.
This setting does not apply to API operations.
Users outside the workspace who receive a report link can still request permissions.
If this option is selected, you can use collaborative sharing for data works.

Works are viewable by everyone in the workspace by default: If this option is selected, all works created in the workspace are visible to everyone in the workspace.
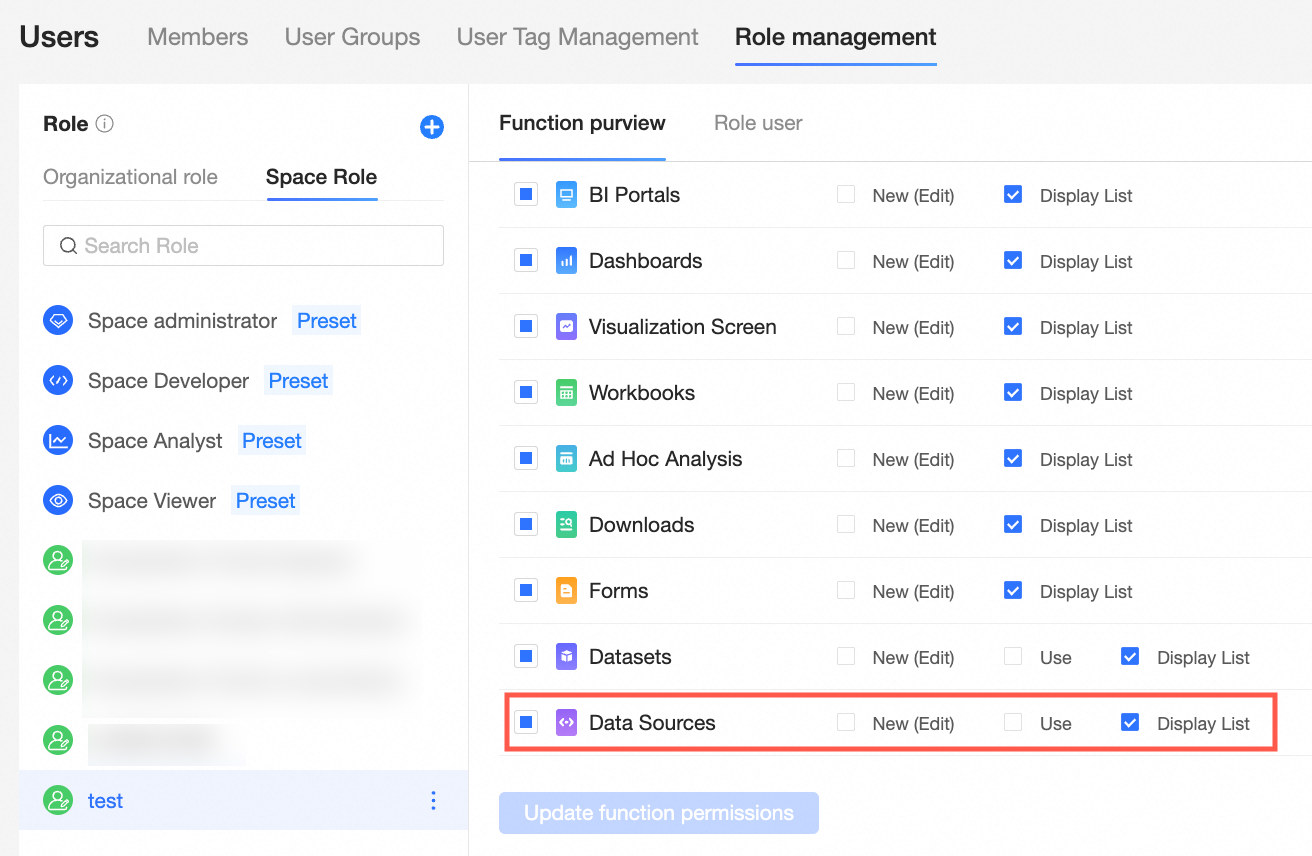
Only administrators can create and edit data sources: If this option is selected, only users with workspace management permissions can create and edit data sources in this workspace.
 Note
NoteIf you select this option, members other than administrators cannot create, edit, replace, or synchronize data sources. Any existing edit permissions for data sources, including permissions inherited from edit access, are automatically revoked.
To grant data source edit permissions to specific members, you can create a custom role and assign it as a workspace role. For more information, see Role management.

Approval settings
You can select Work Publishing. If selected, every publication (including initial and subsequent publications) of a dashboard, spreadsheet, data screen, or ad hoc analysis in the workspace requires approval.
NoteThis action triggers an approval workflow, and the approvers are the workspace administrators. This setting has no effect if the approval workflow is disabled in the organization settings. To enable the approval workflow, see Approval settings.
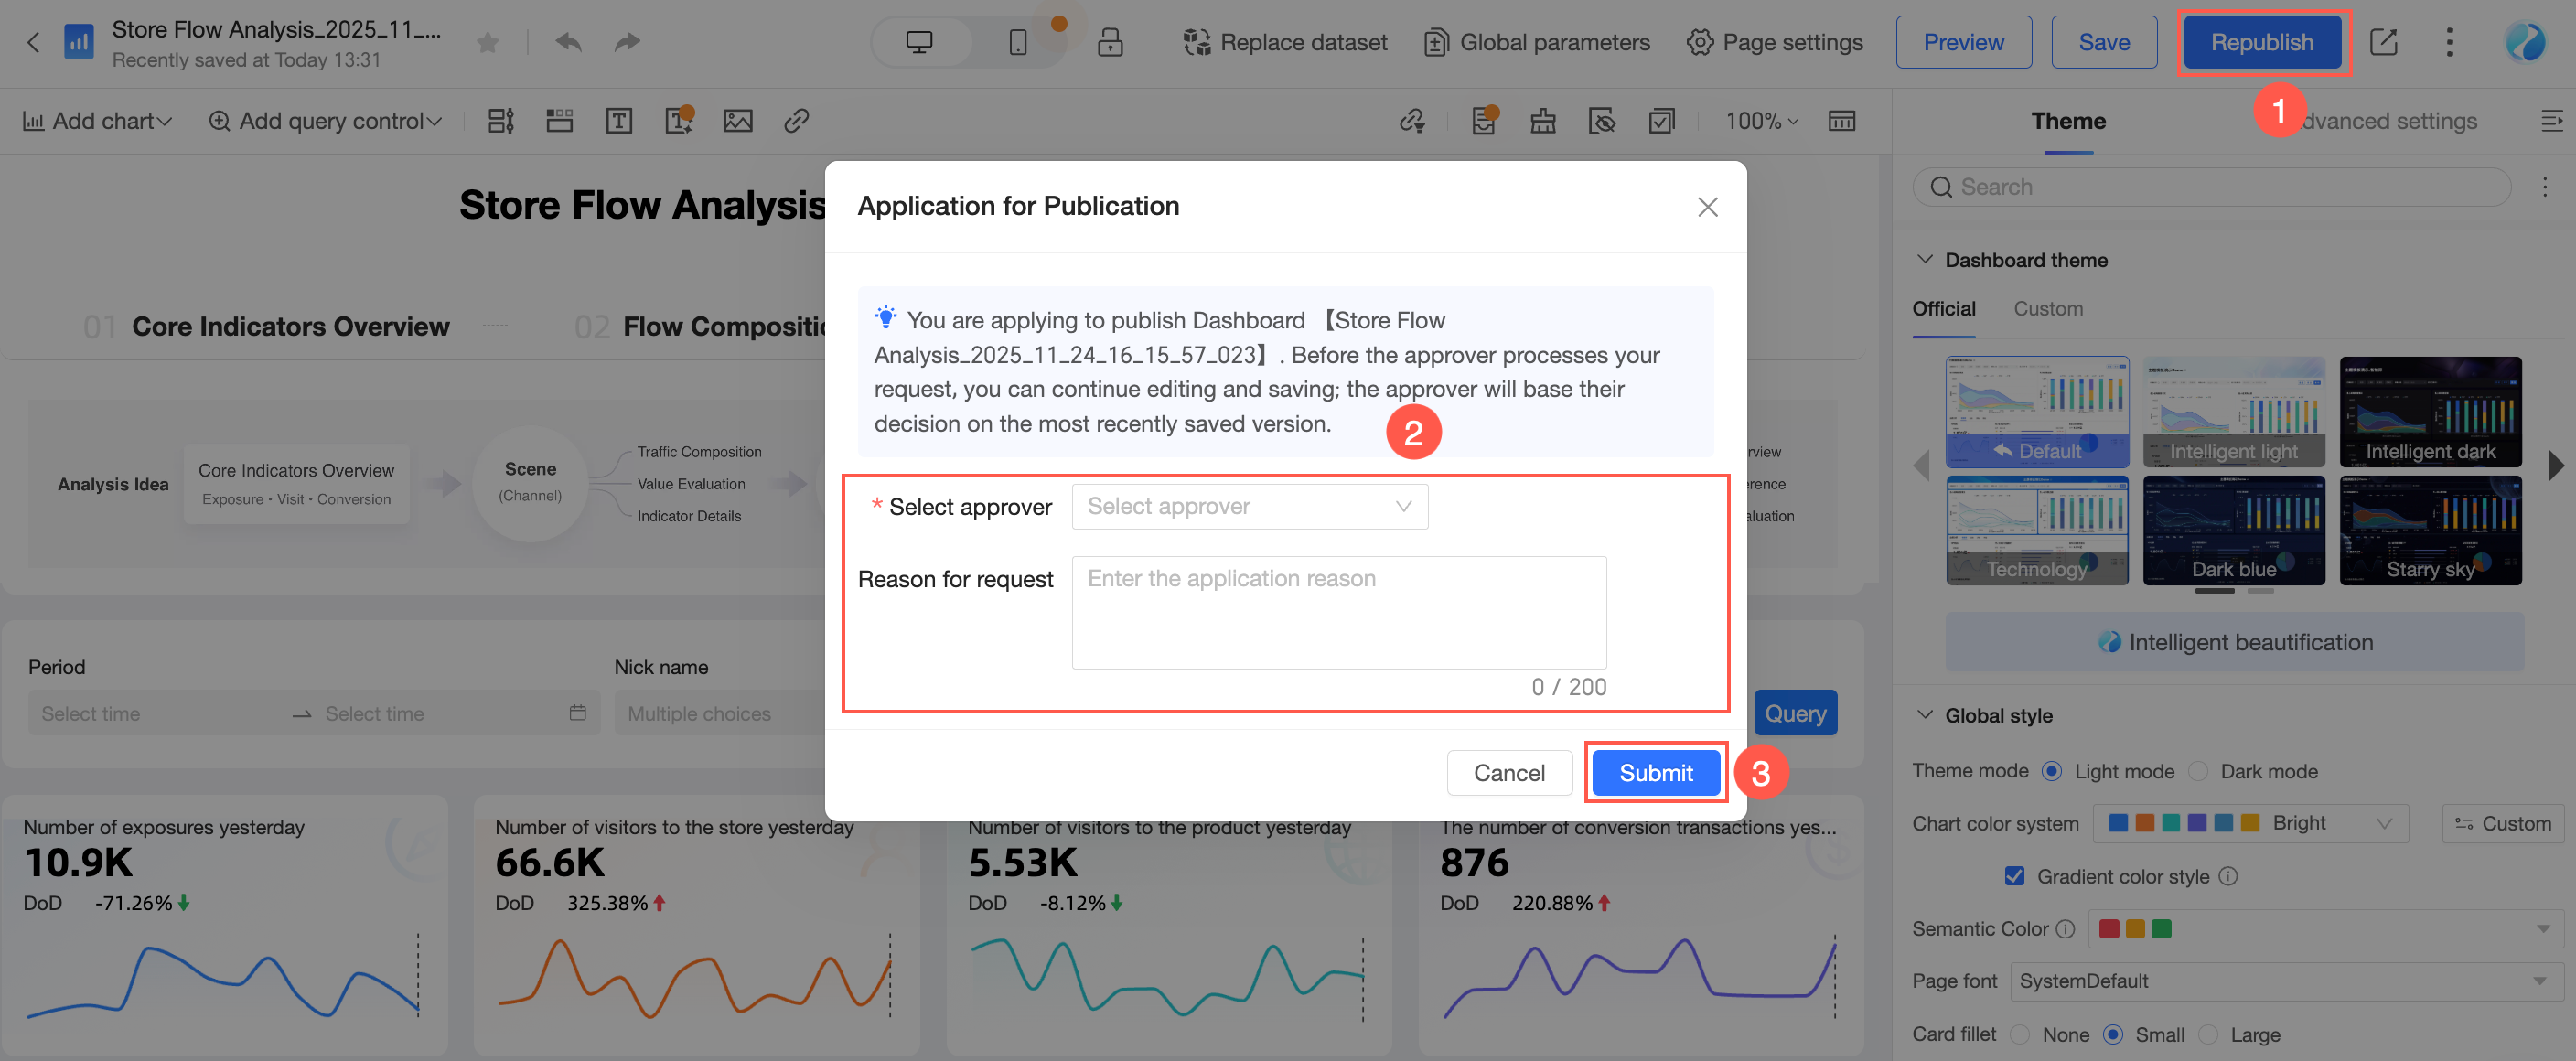
The following uses dashboard publishing as an example:
If this option is selected, to publish a report, you must select an approver, enter an application reason if needed, and then click Submit Application.
NoteYou can continue to edit the work after you submit the application. If you save the changes, the last saved version is submitted for approval.
Workspace administrators can publish works without approval.
After you submit an application, the approver receives an approval notification in the Message Center.
After the approver clicks Approve, the report is published.
You can check the approval status in Message Center > My Applications.
Preference settings
Specifies how dataset fields are displayed. You can choose Use physical field names as dimension and measure names or Use field comments as dimension and measure names.
For example:
If you select Use physical field names as dimension and measure names, the system uses values from the Field Name column as the names for the dimension and measure fields in the dataset.
If you select Use field comments as dimension and measure names, the system uses values from the Field Description column as the names for the dimension and measure fields in the dataset.
NoteThis setting takes effect only if the database table contains a Field Description column.
Sync settings
You can select Automatically sync dataset field descriptions to data works.
This setting controls whether dataset field descriptions are synchronized to data works.
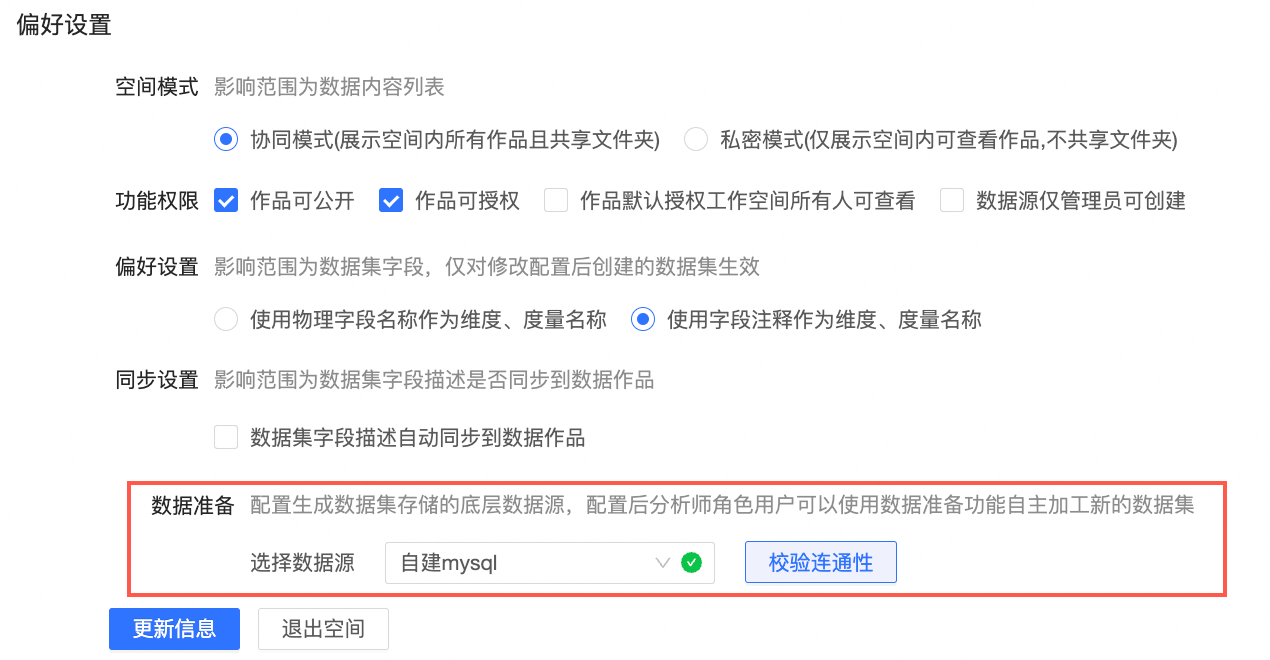
Data preparation
Configure the underlying data source for storing generated datasets. After configuration, users with the analyst role can use the data preparation feature to process and create new datasets. For more information, see Output data.
NoteConfigure Data Preparation after the workspace is created.
Click OK.


Modify a workspace
Only workspace administrators can modify workspace settings.
If you need to change the space mode when you modify a workspace, read the following information carefully.
The space mode is a new feature introduced in v4.1 that controls the visibility of the works list. Therefore:
If you create a workspace in v4.1 or a later version, you must select a space mode. We recommend that you do not switch the space mode after the workspace is created. Switching the space mode may change work ownership or frequently change work visibility.
If you created a workspace before v4.1, you did not need to select a space mode. When you modify the workspace information, you can change the space mode as needed.
You can modify a workspace in the following ways:
Modify the workspace configuration from the settings panel.
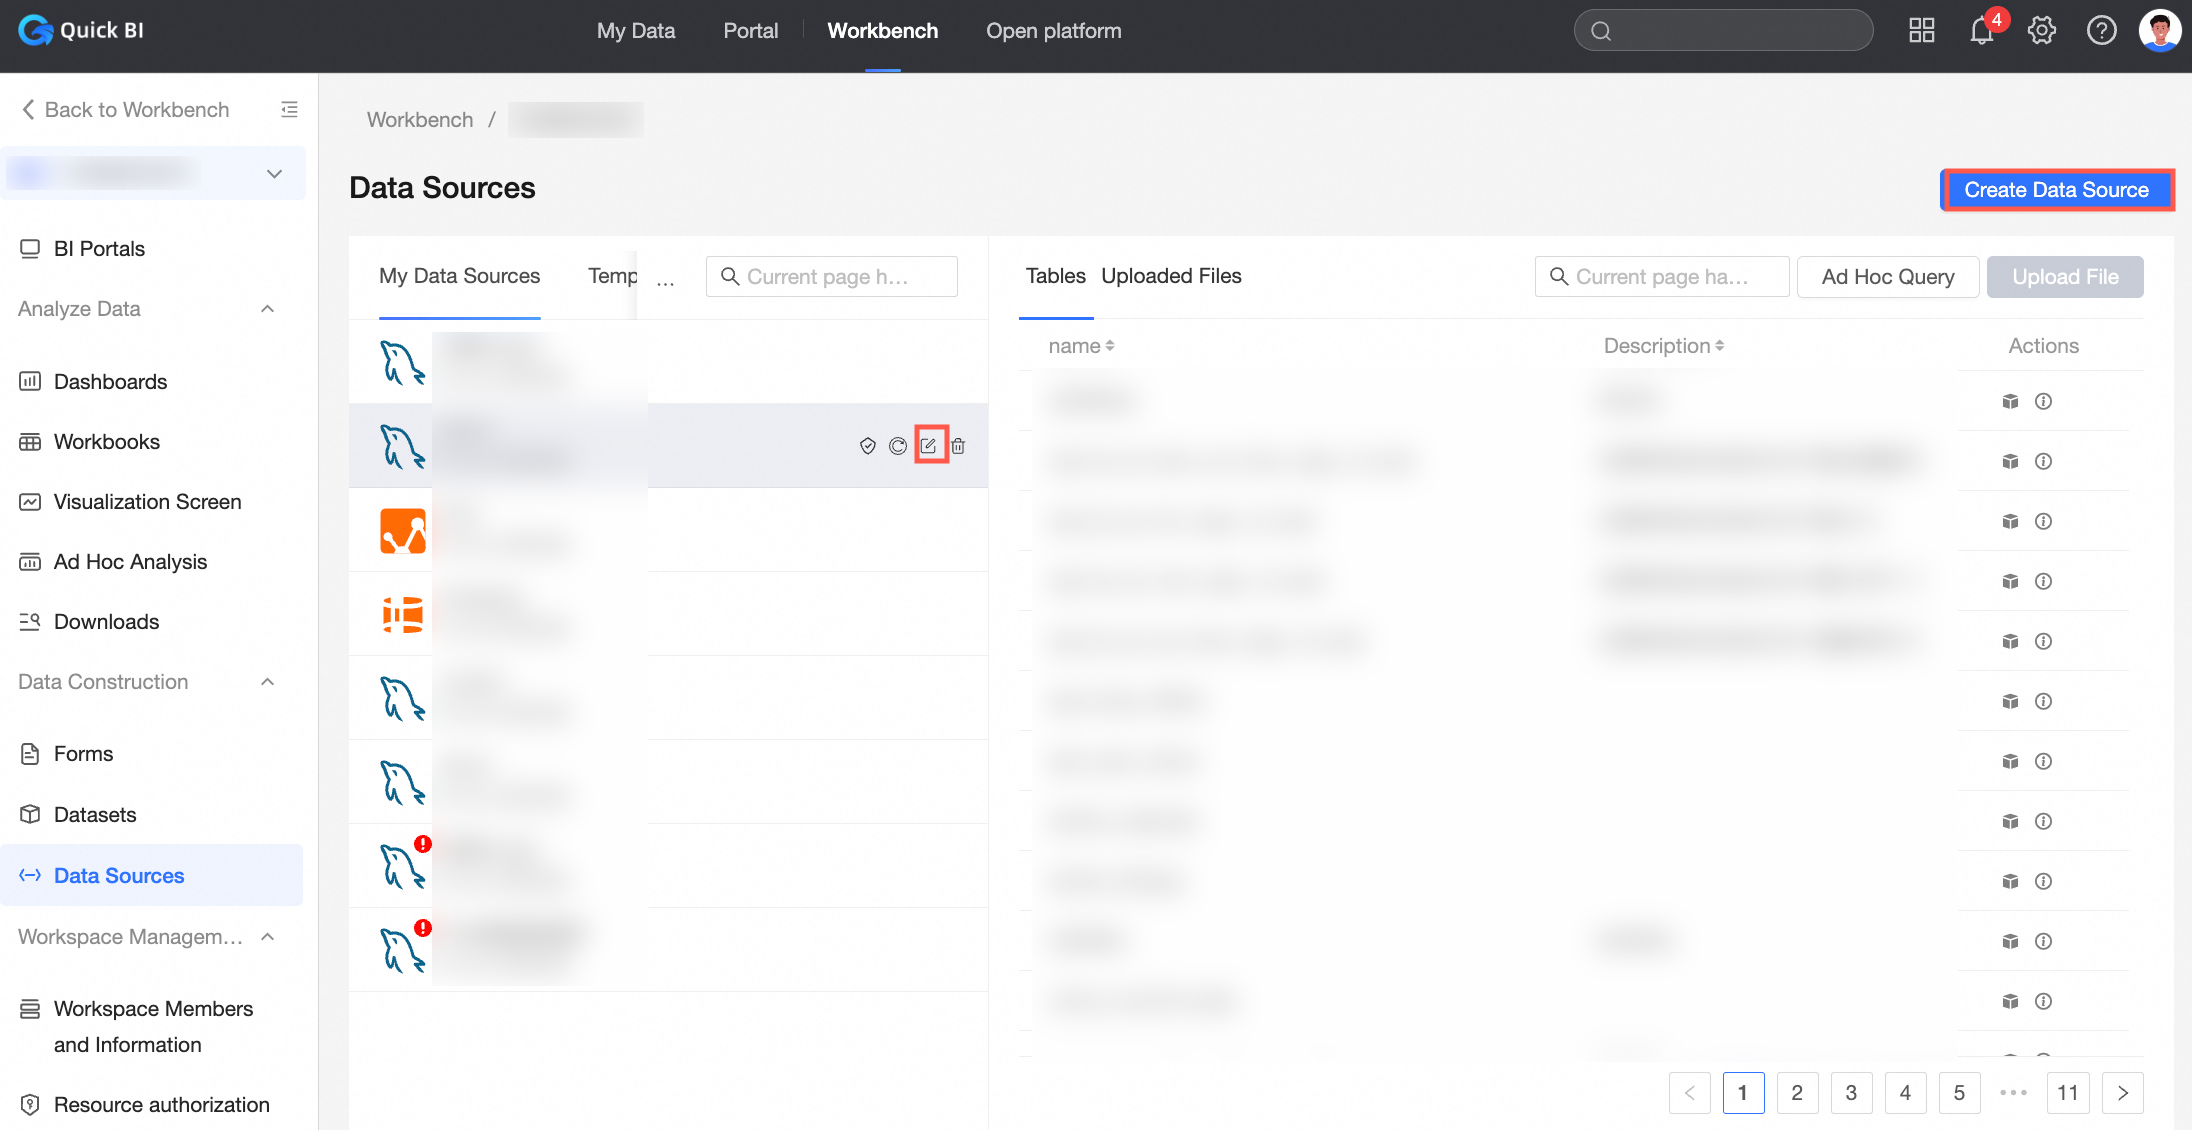
Modify the workspace configuration from the workbench.
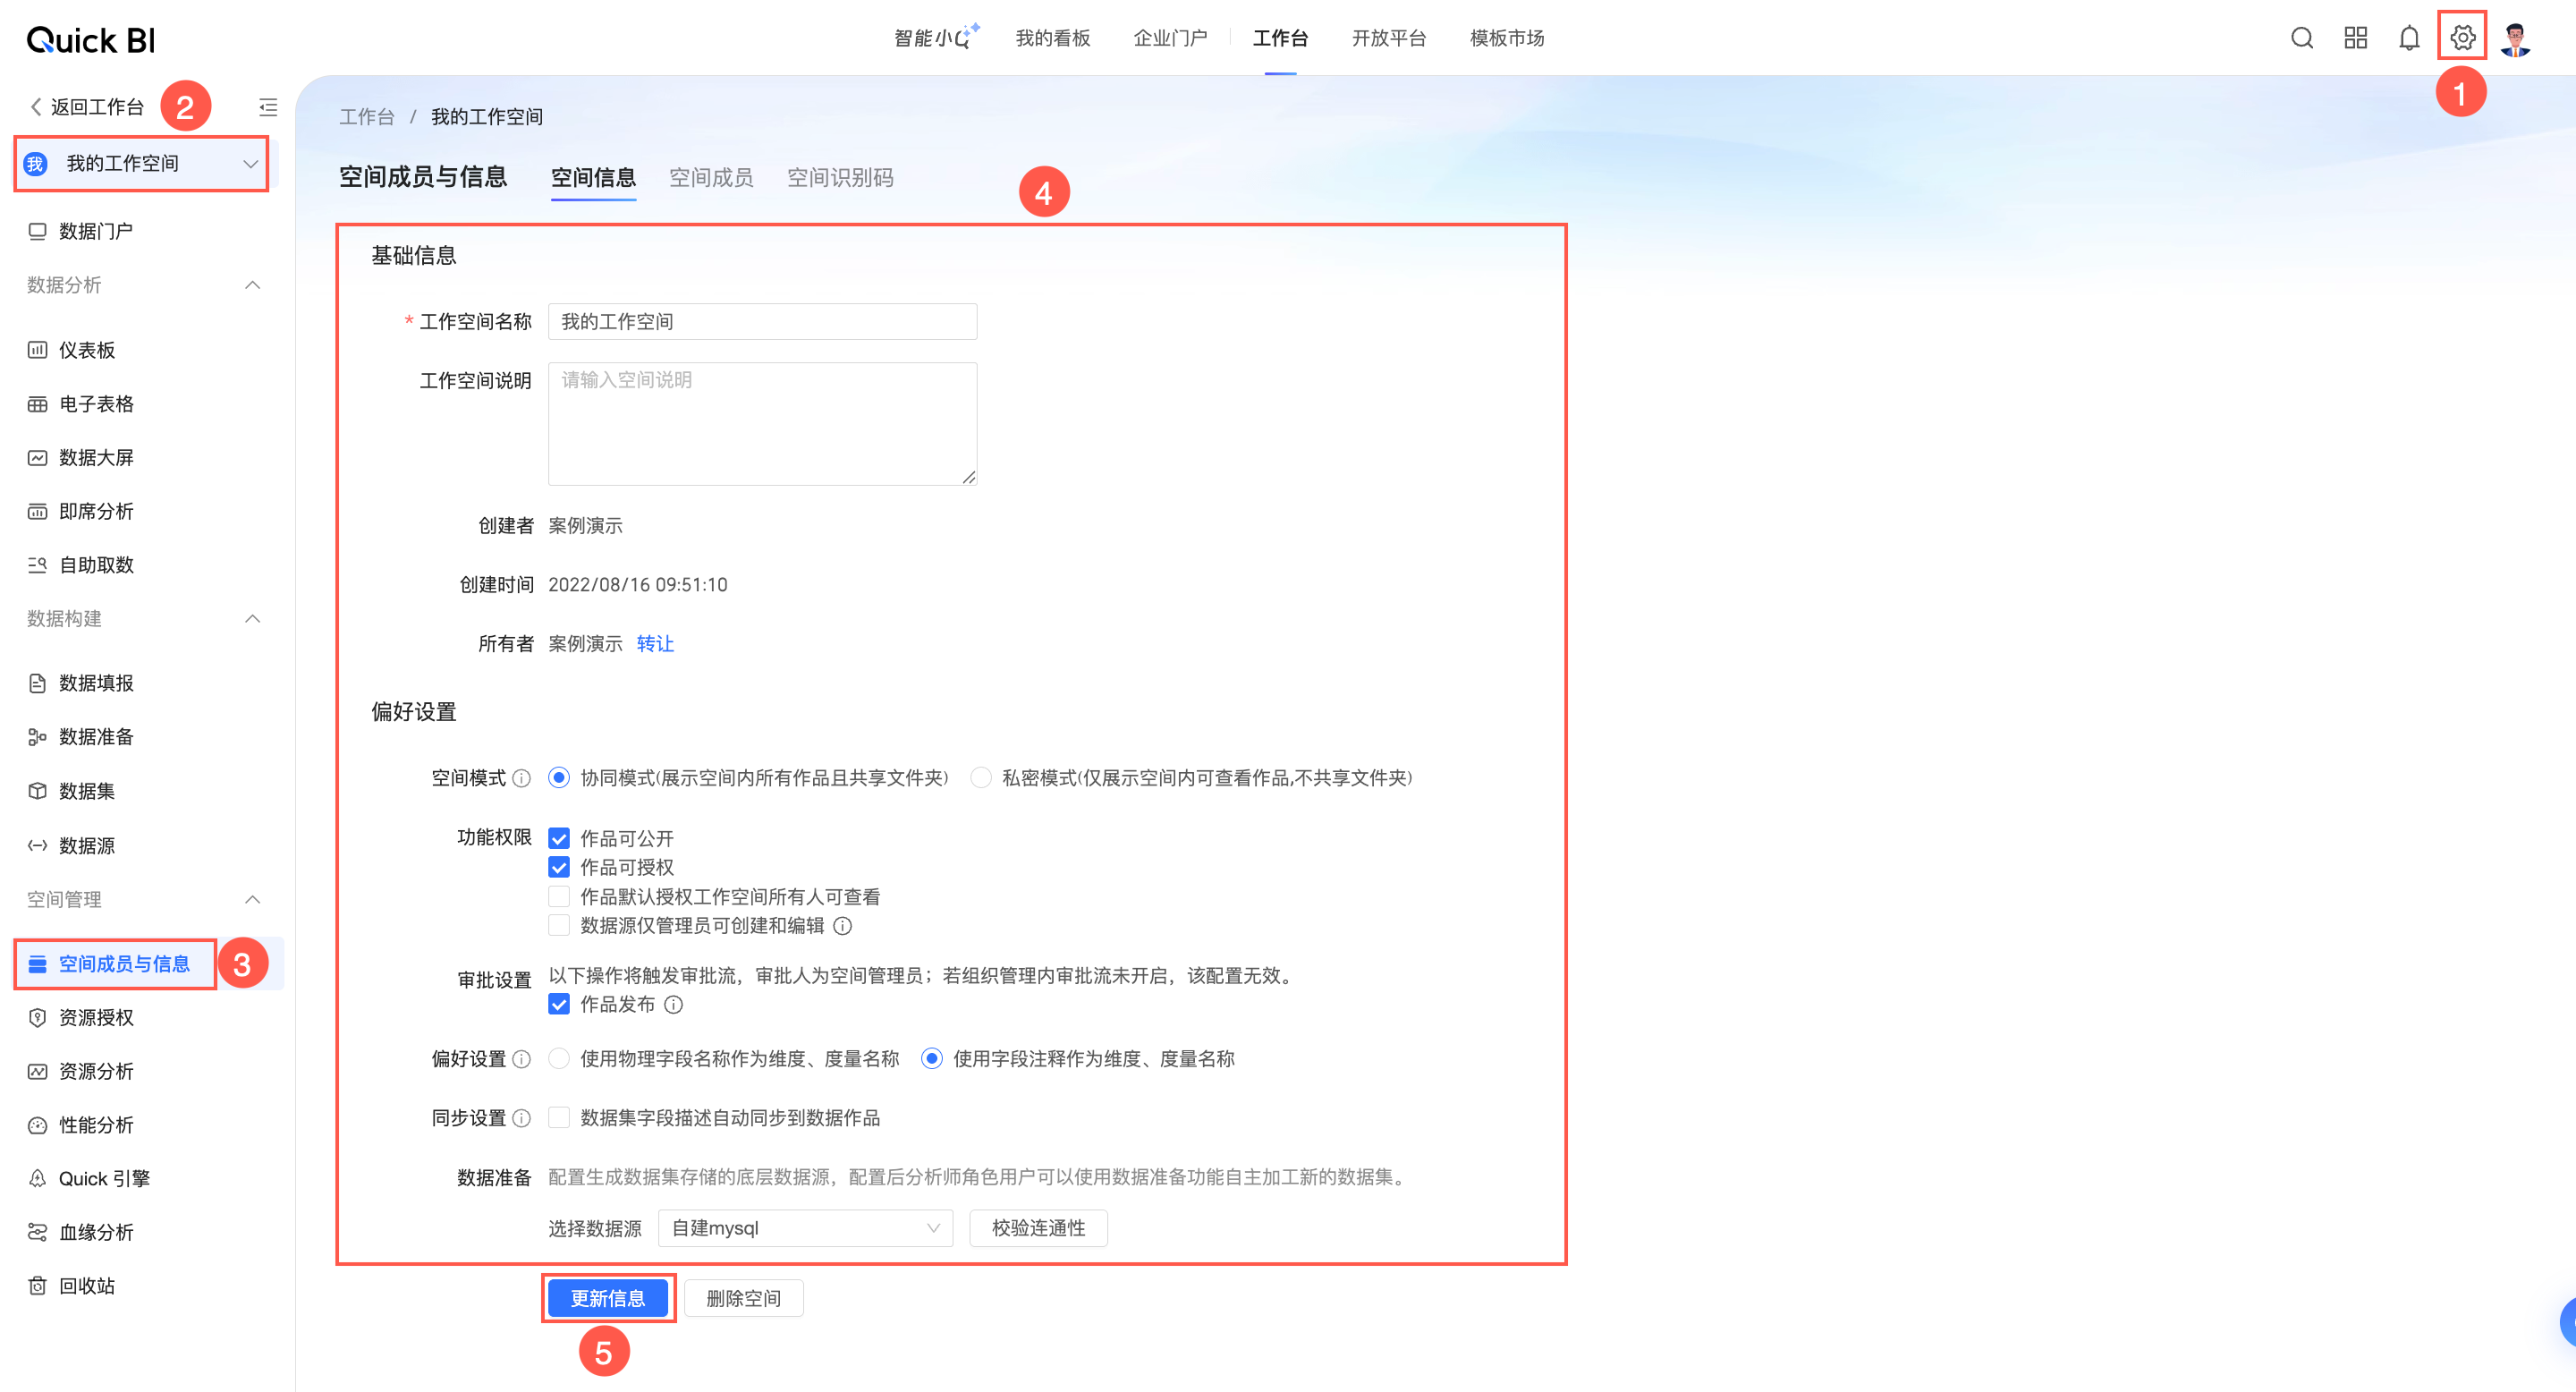
For parameter descriptions, see Parameter descriptions.
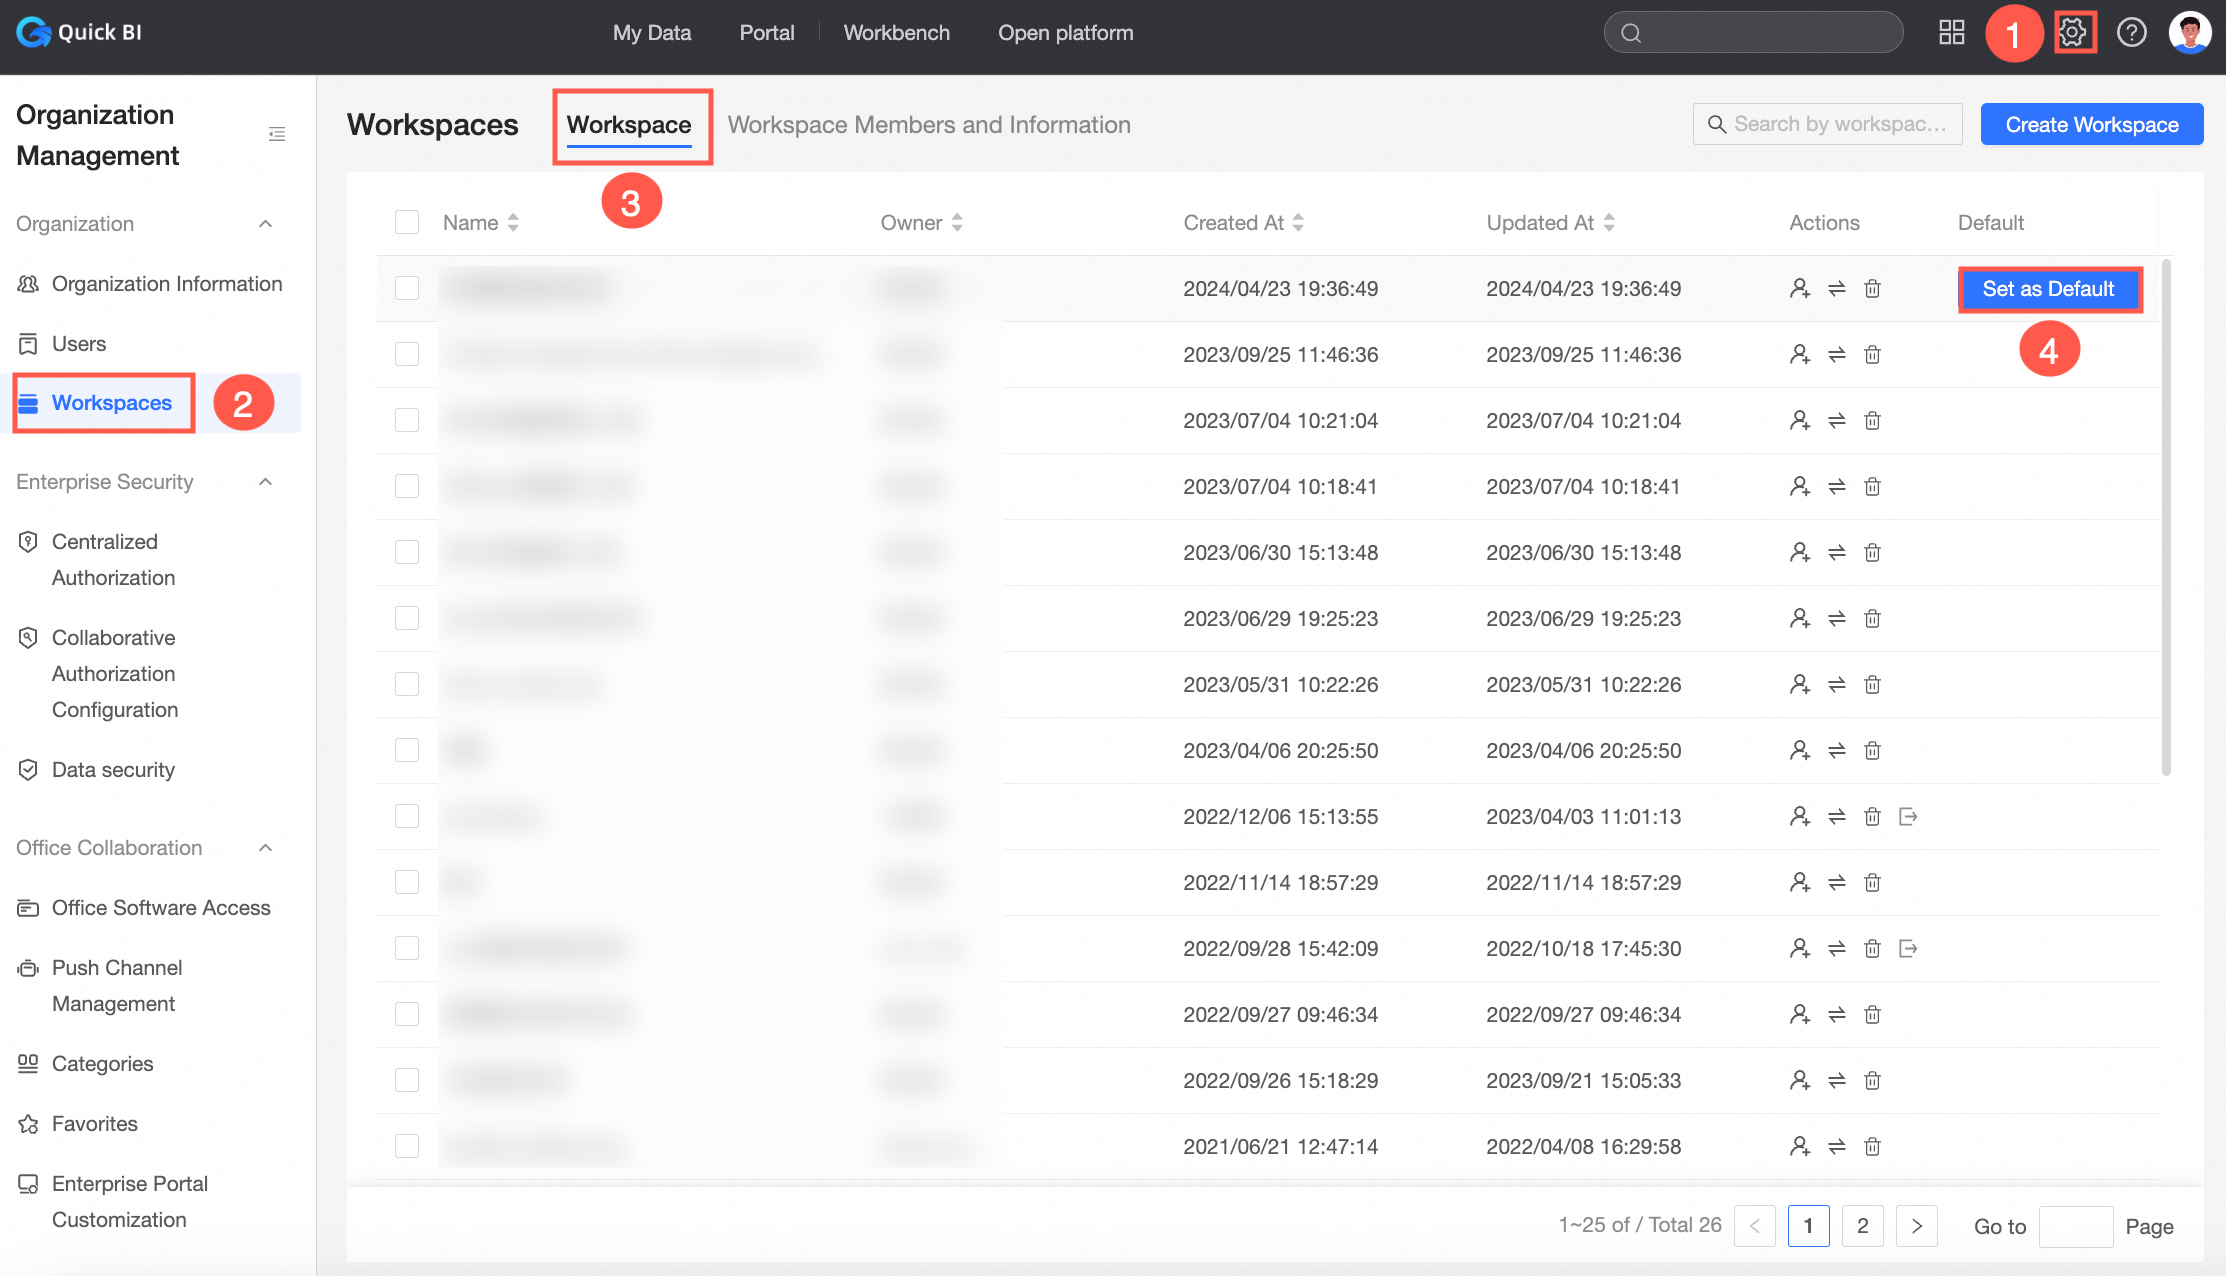
Set a default workspace
When you set a workspace as the default, new members who join the organization are automatically added to it.
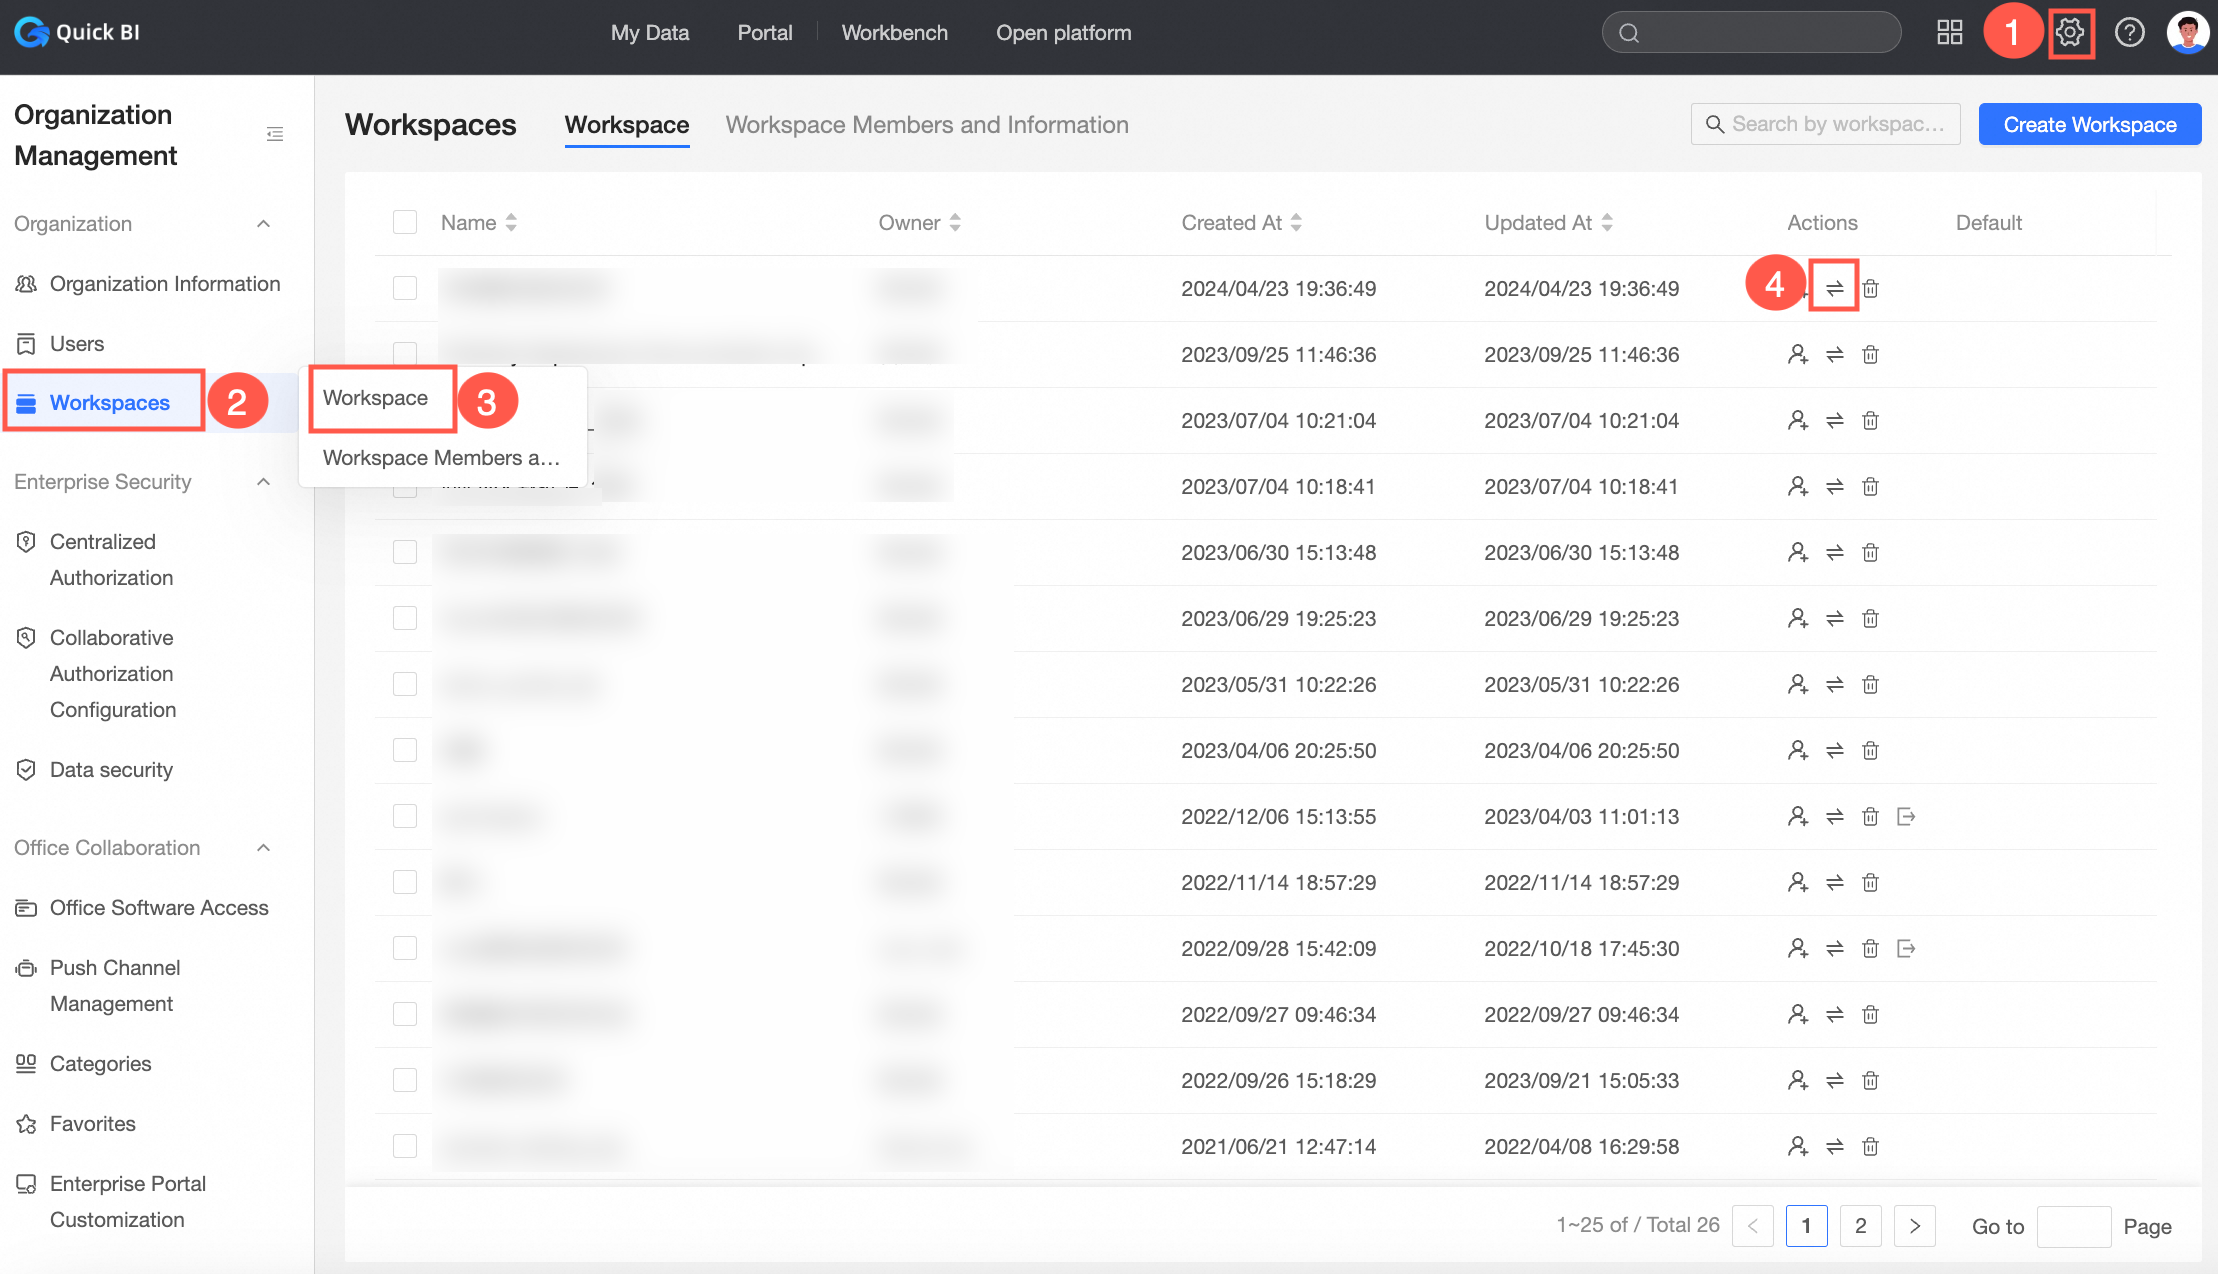
Transfer a workspace
If a workspace owner plans to leave the organization, they can transfer ownership of the workspace to another member. Any member of the Quick BI organization can become the new owner.
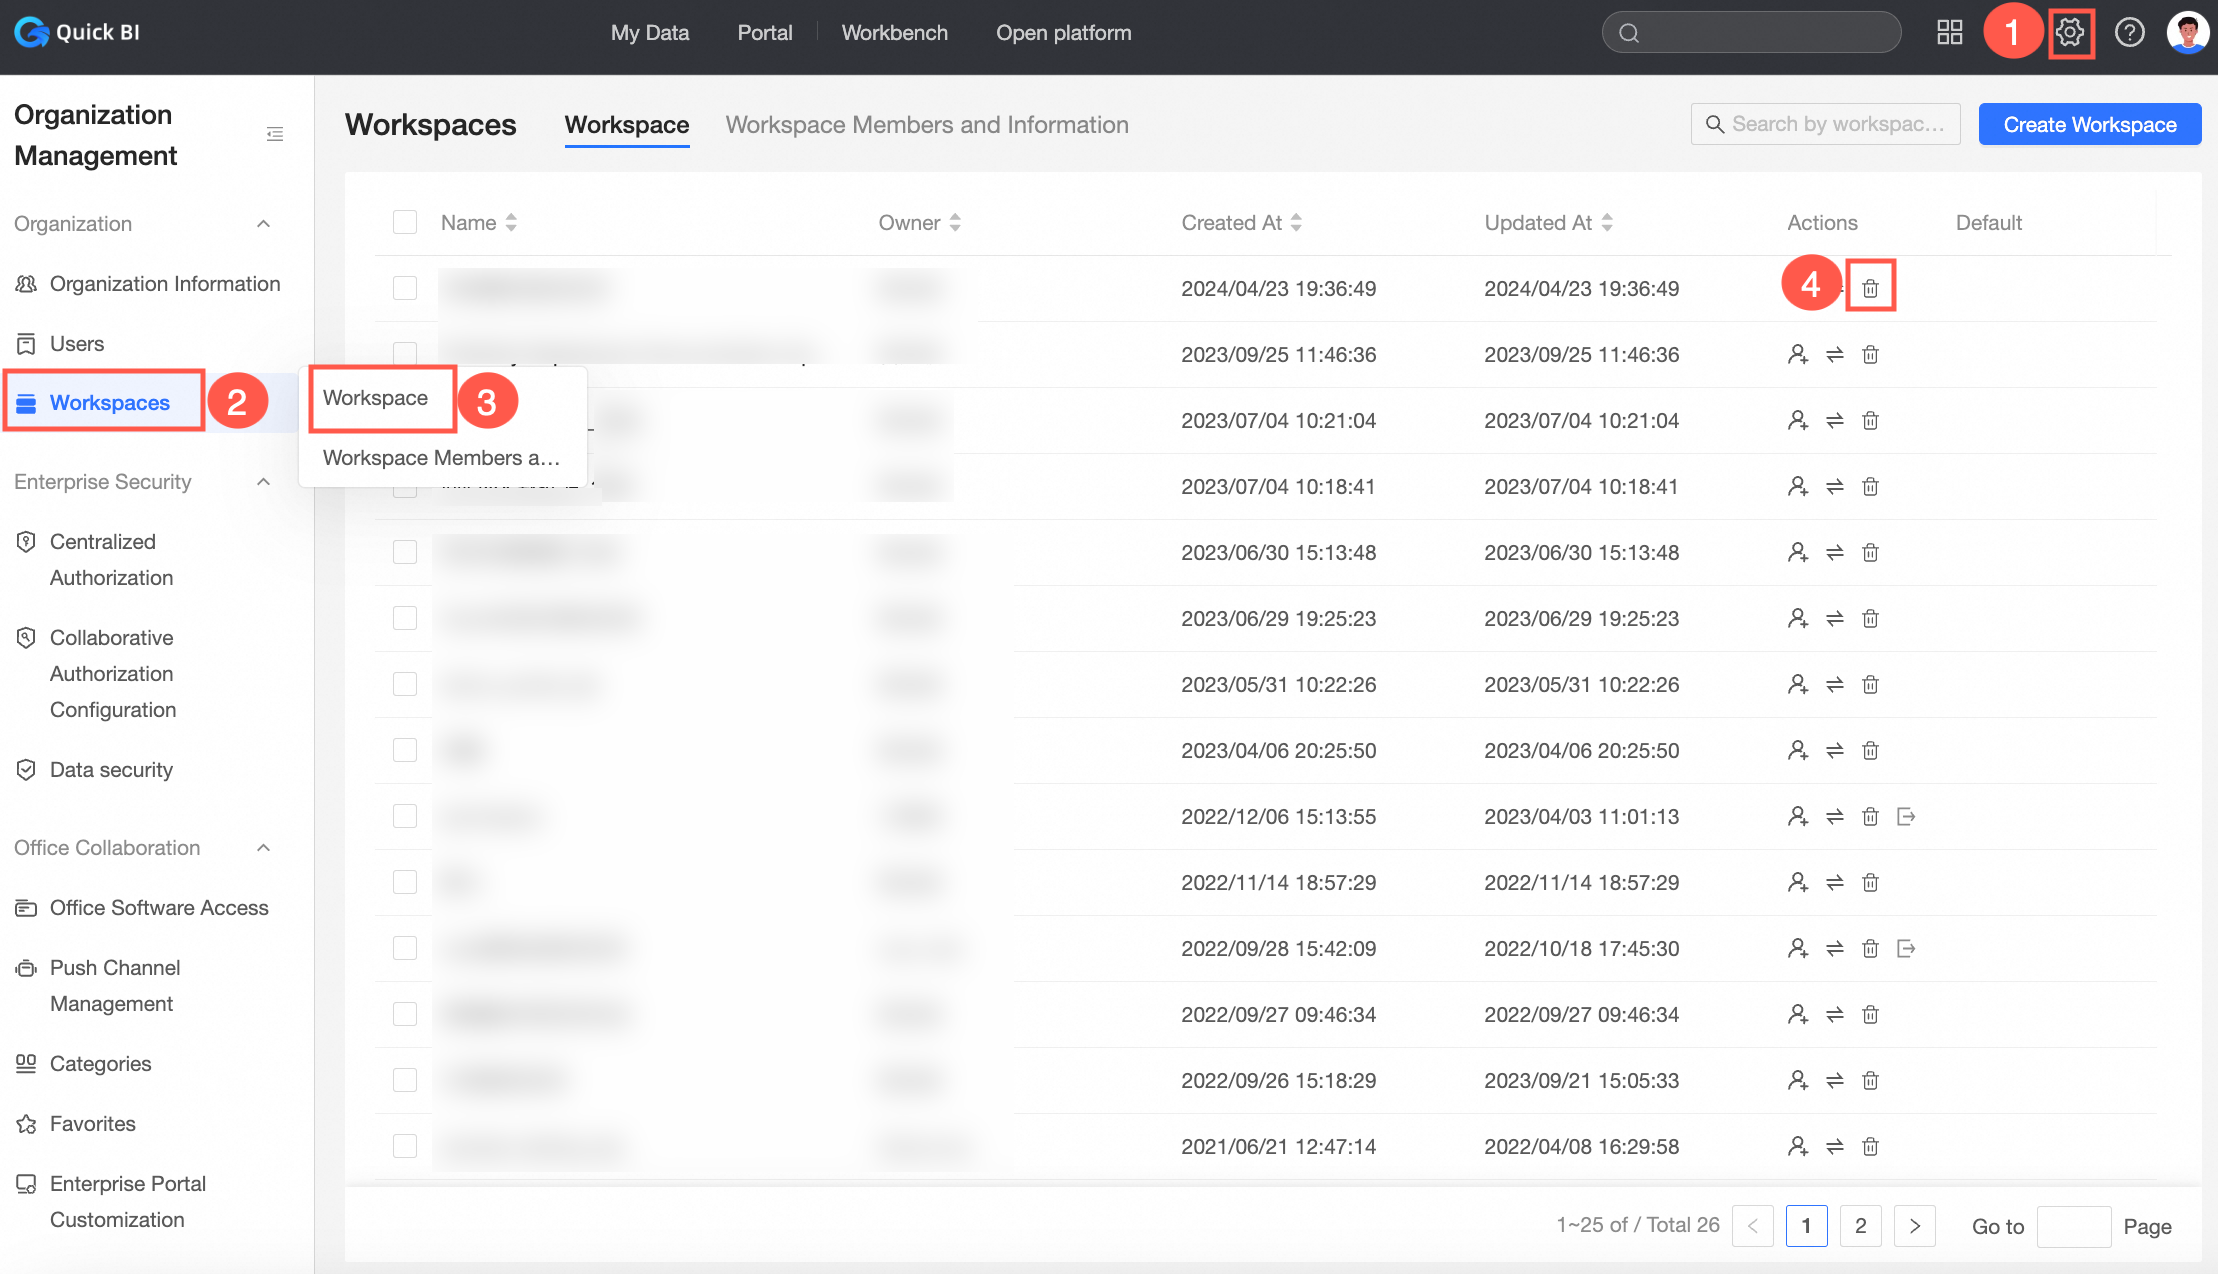
Delete a workspace
Only an organization administrator can delete a workspace.
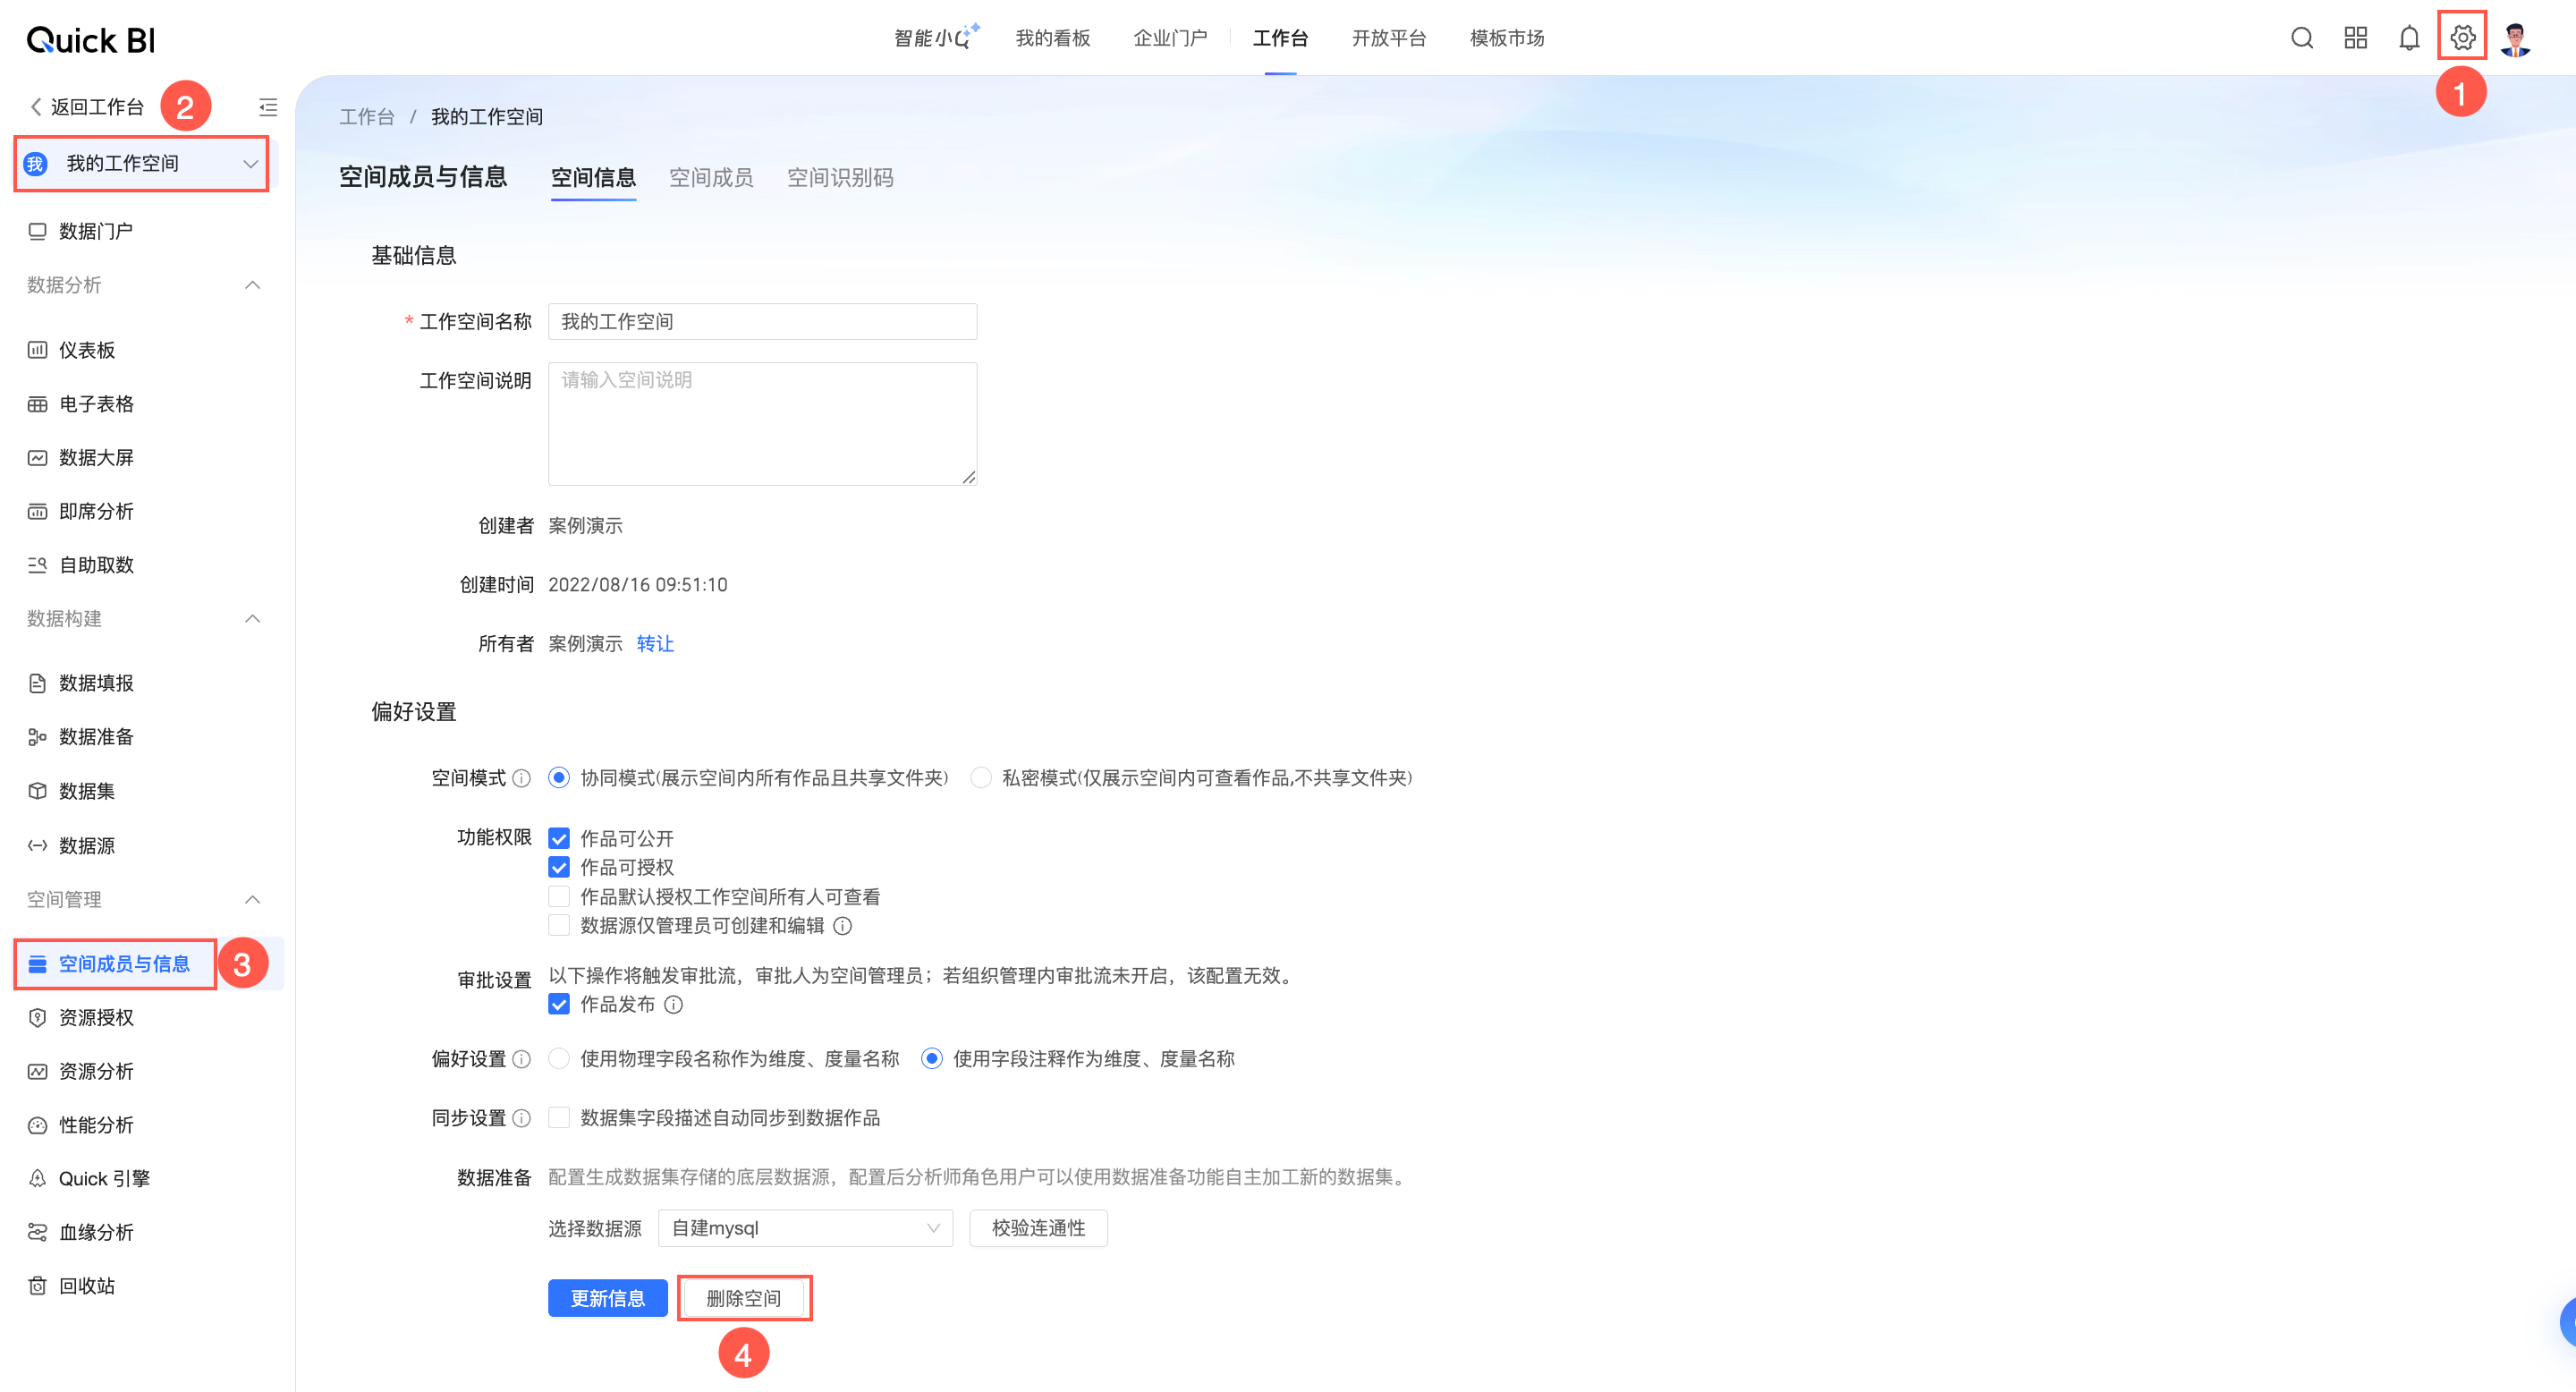
On the settings panel, go to Workspace Management > Workspaces, and delete the workspace.
On the settings panel, go to Workspace Management > Space Members and Information, and delete the workspace.
Go to the workbench and delete the workspace.

In Quick BI, users must be members of a workspace to create works. After configuring a workspace, you must add users to it. For more information, see Manage workspace members.