MCP management
When performing AI analysis, you often need to connect to external resources, such as retrieving deal data from a CRM or sending reports to an instant messaging group. MCP connectors extend the AI's capabilities by integrating data and functions from an external system into your workflow. On the MCP management page, administrators can view, manage, and add connectors for their organization.
Prerequisites
Subscription: Your organization has purchased the Quick BI AIPro edition.
Permissions: Only an administrator (a user with AIPro centralized management permissions) can access the Management Center to add and manage MCP connectors. For details on configuring permissions, see user permissions.
Access the feature
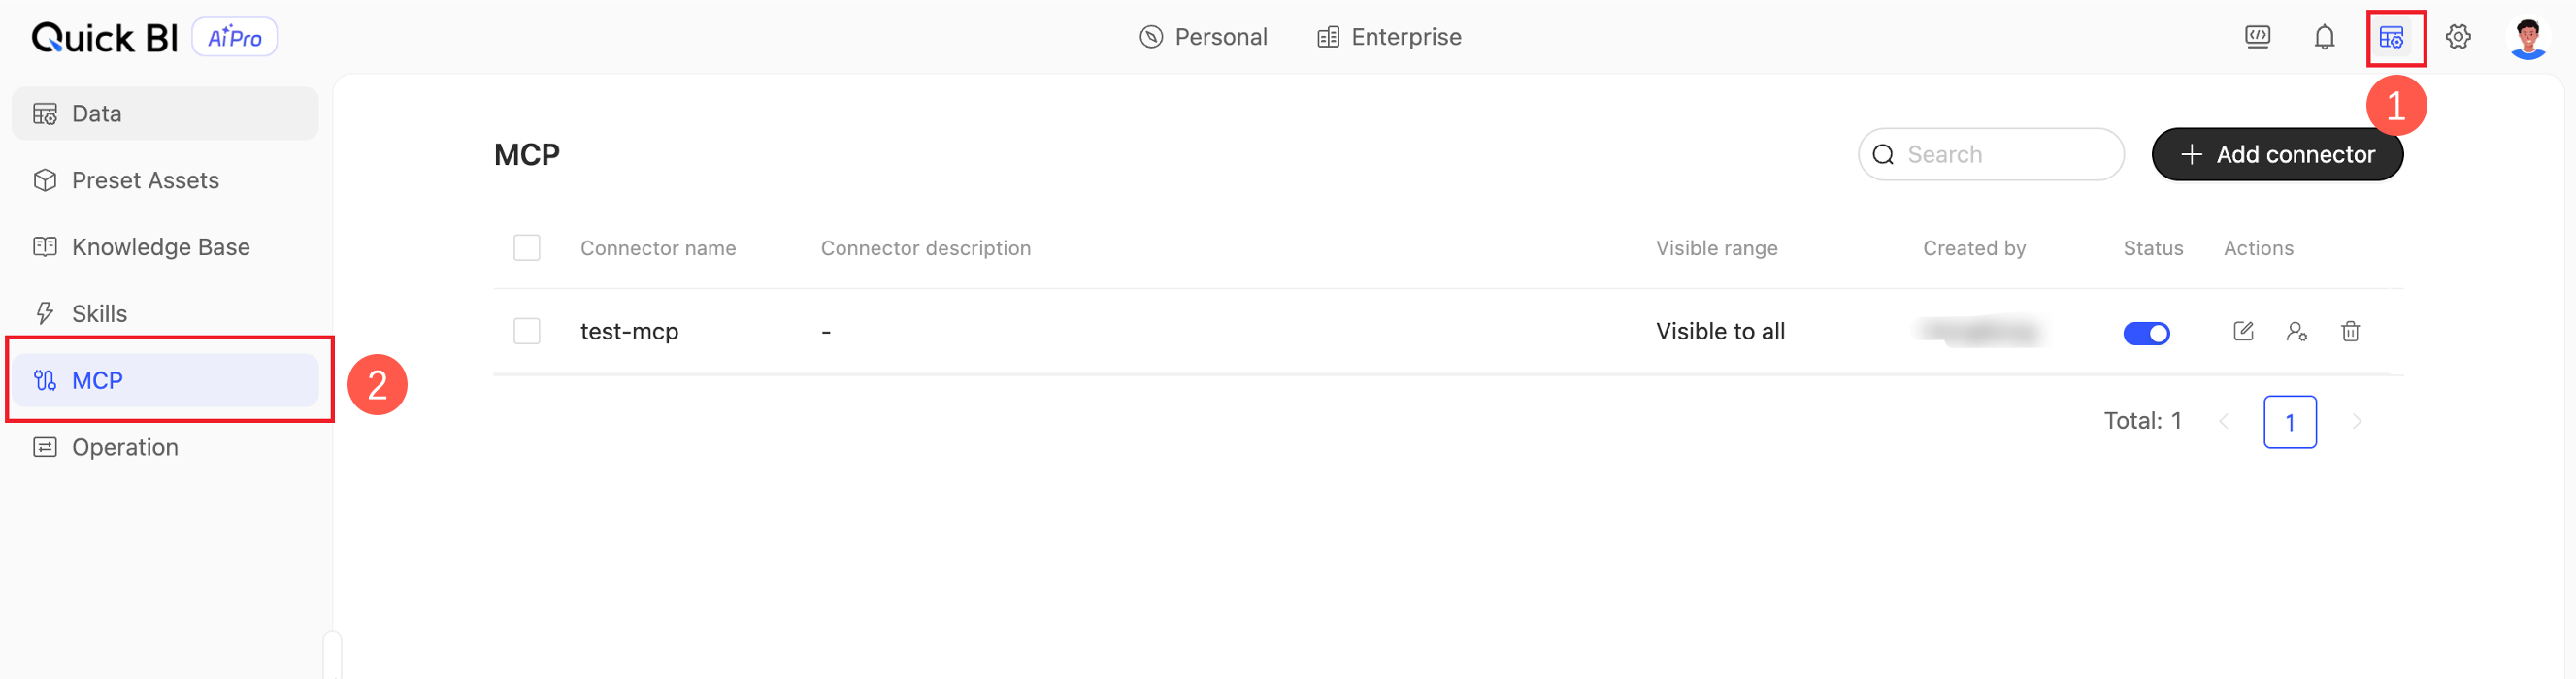
Go to the Quick BI AIPro Management Center and click MCP management in the left-side navigation pane.
Add an MCP connector
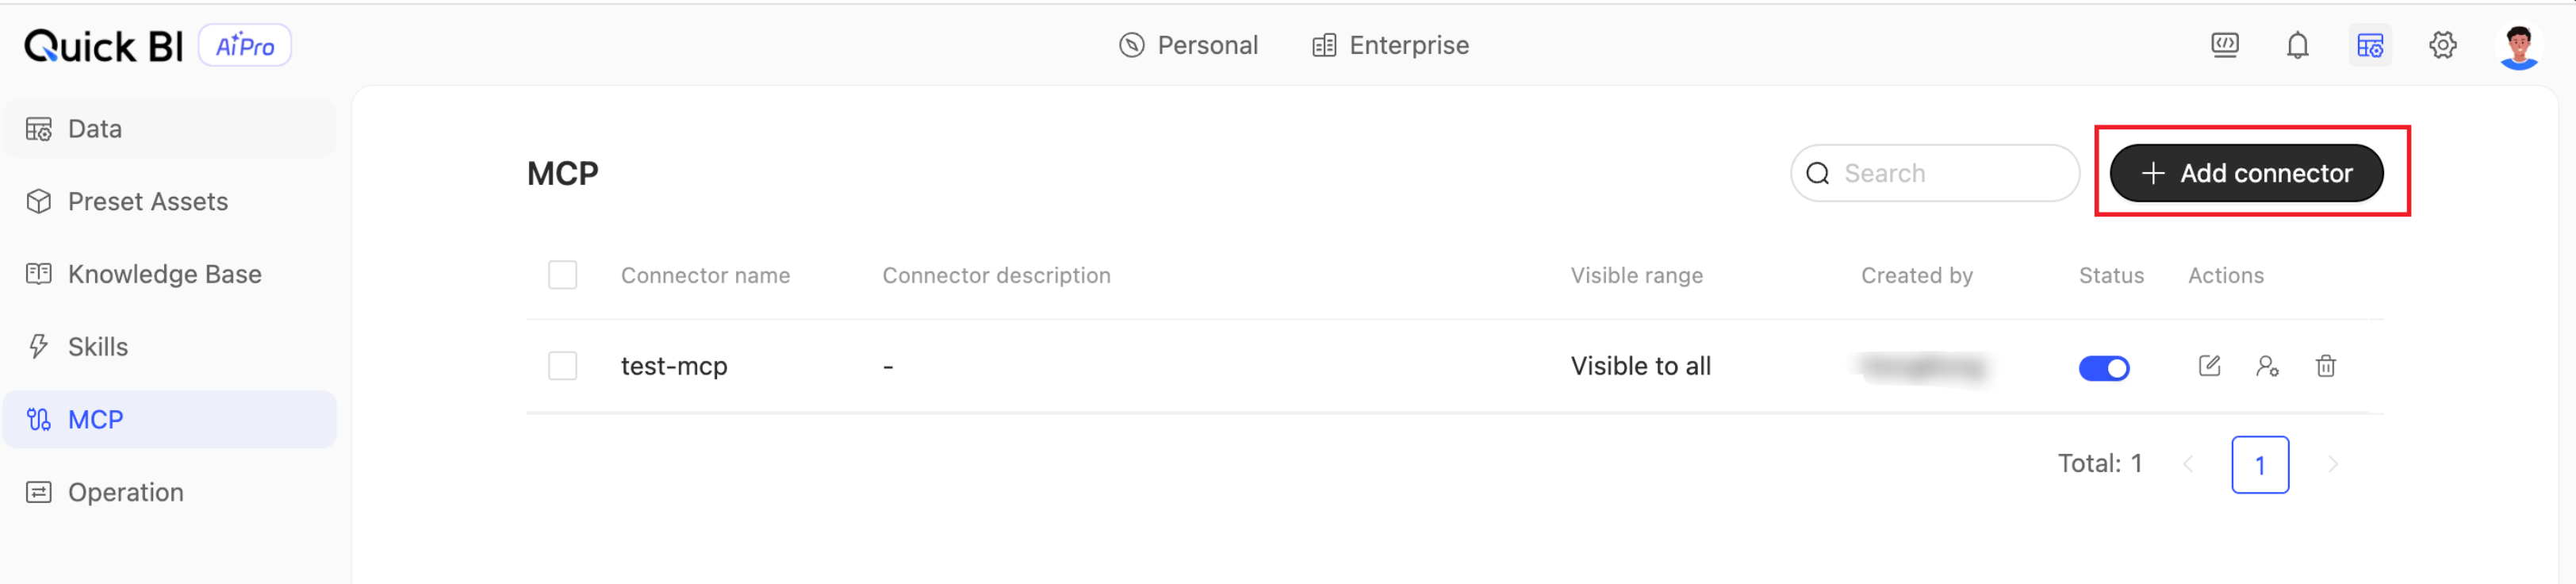
On the MCP management page, click the Add Connector button in the upper-right corner.
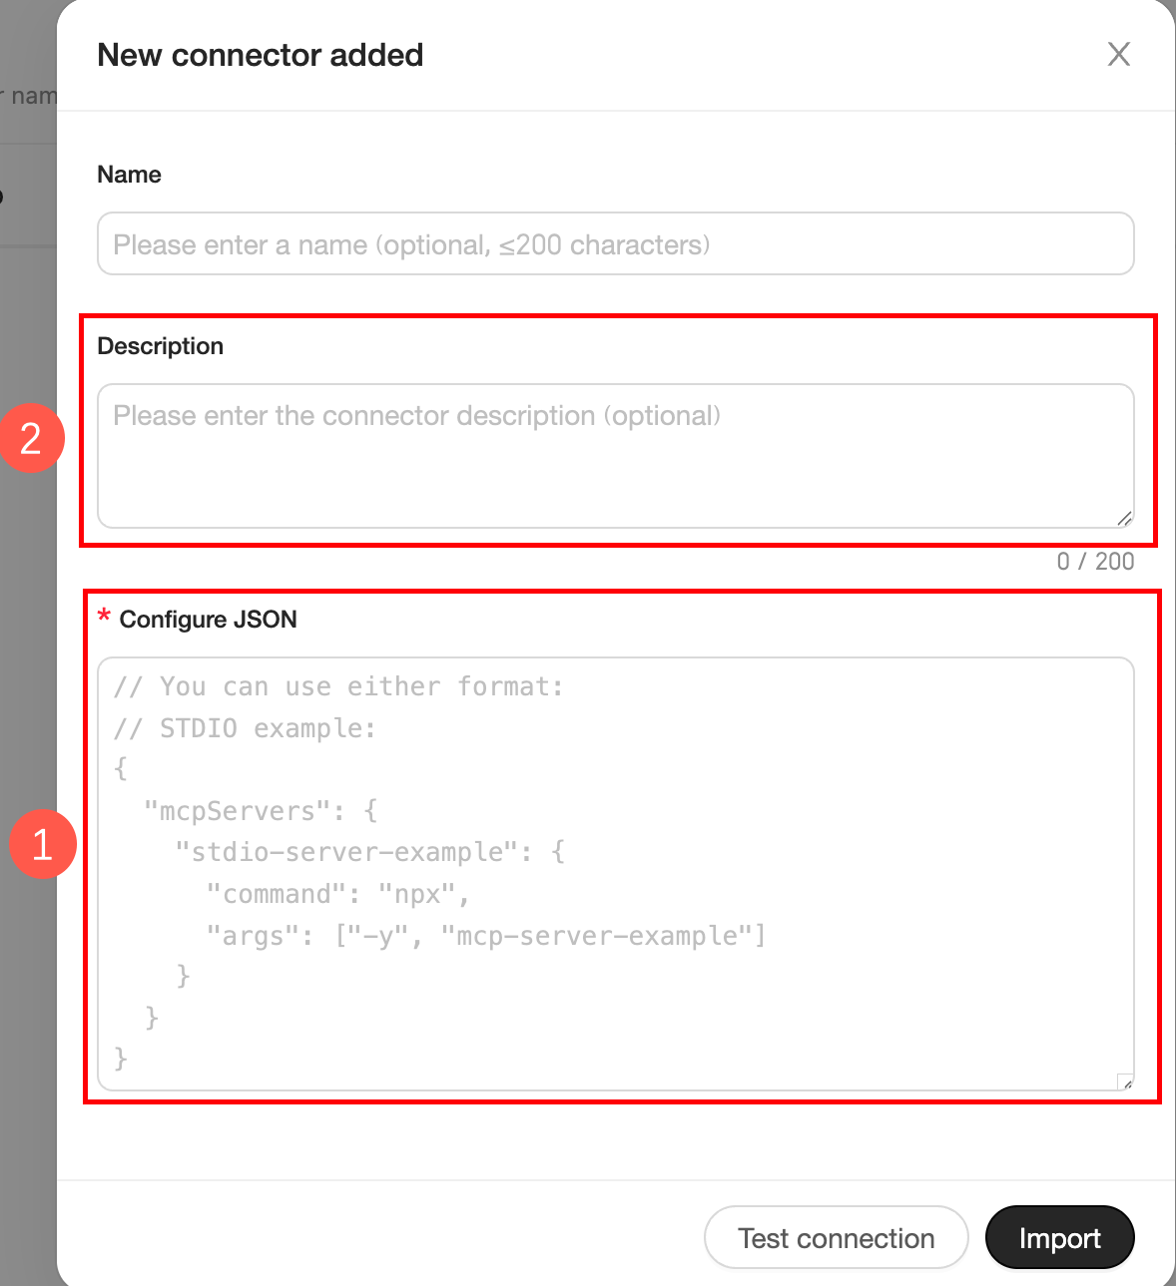
In the Add Connector dialog box, configure the new connector.
Parameter
Description
① Connector name
Enter a name to identify the connector. You can use a name that reflects its business purpose, such as "Excel Assistant" or "Document Intelligence Helper".
③ JSON configuration
Enter the JSON configuration for the connector. Two communication modes are supported: STDIO and SSE.
STDIO: The client and server communicate directly through standard input and output streams without using a network port. This mode is suitable for local development, debugging, and single-machine deployments. Supported startup commands include
npxanduvx. The following code provides an example configuration:// stdio example: { "mcpServers": { "stdio-server-example": { "command": "npx", "args": ["-y", "mcp-server-example"] } } }NoteWhen you add a connector that uses
npxto start, the system performs a pre-check and displays a message: "This connector uses npx, which may increase the startup time for future sessions." This message does not affect the process of adding the connector.SSE: Server-Sent Events (SSE) allows a server to push event messages to a client over a single, long-lived HTTP connection. This mode is ideal for scenarios that require server-pushed data, remote deployments, or services shared by multiple clients. The following code provides an example configuration:
// SSE example:
{
  "mcpServers": {
    "sse-server-example": {
      "url": "http://localhost:8080/sse"
    }
  }
}
② Connector description
Enter a description for the connector, such as its function, business purpose, or usage notes.
Click Test Connection. The system validates the configuration and tests connectivity. After the test passes, click Create to save the connector. Saving a connector enables it by default and publishes it to organization members according to its visibility scope.

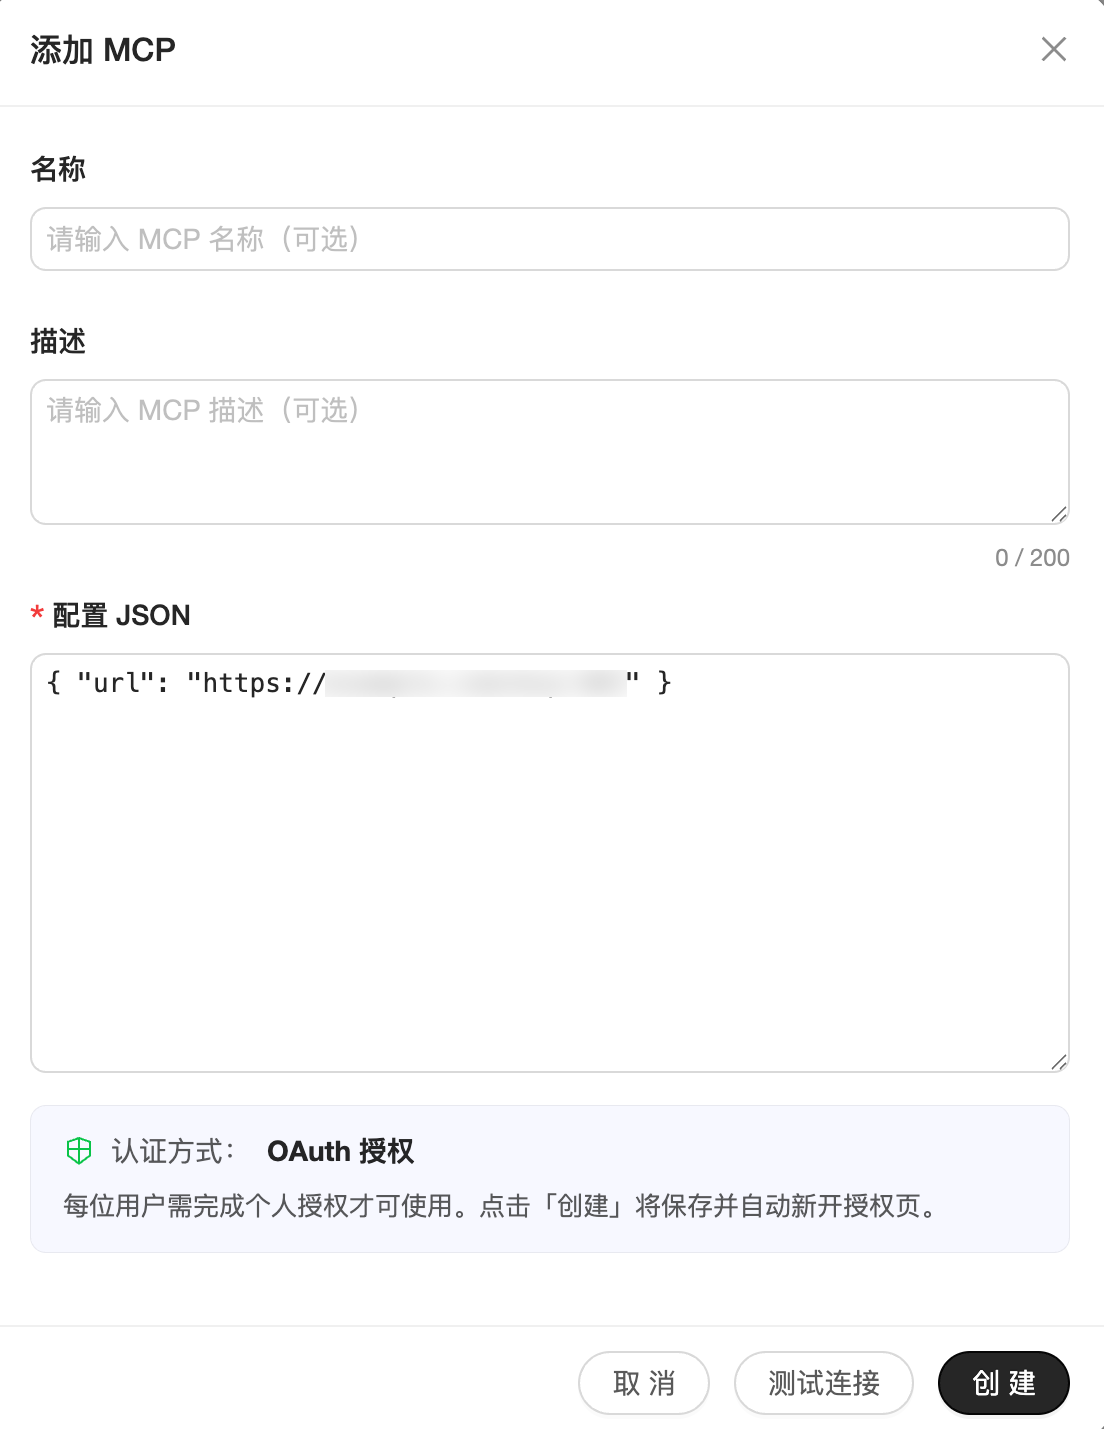
If the connector you are adding requires user-level OAuth authorization, the system detects this and displays a notification in the configuration dialog box. Users can then complete the authorization when they install the connector.
 Note
NoteUsers must grant OAuth authorization themselves. An administrator cannot grant it on their behalf.
Users cannot select the connector in the new task dialog box until they complete the authorization.
After you save the connector, the system publishes it to the MCP Marketplace. Organization members can grant personal authorization and install the connector by clicking Authorize and Install in the MCP Marketplace. For detailed instructions, see MCP Marketplace.
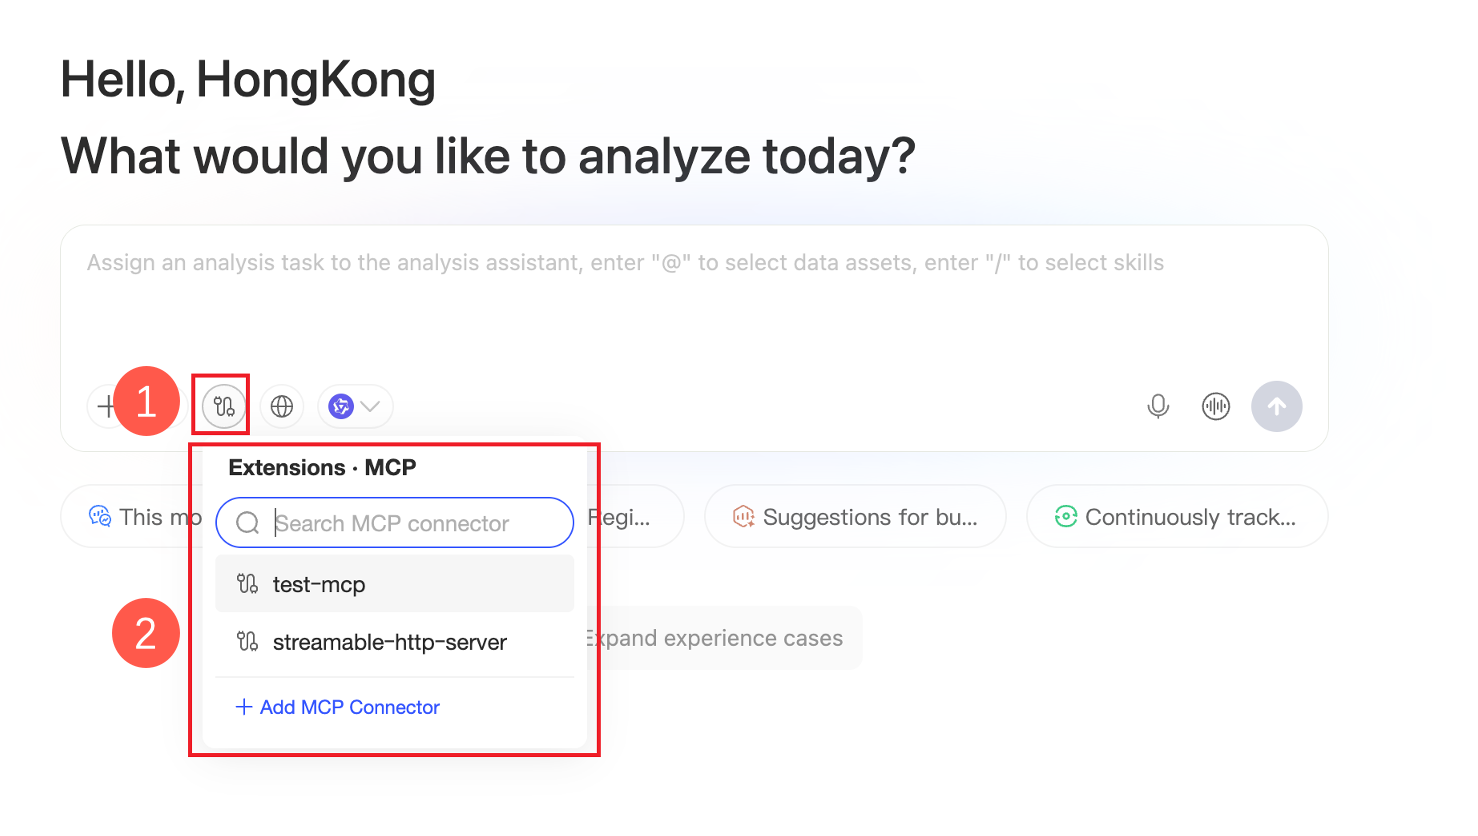
When creating a new analysis task, organization members can select an MCP connector in the task dialog box as needed.

Manage MCP connectors
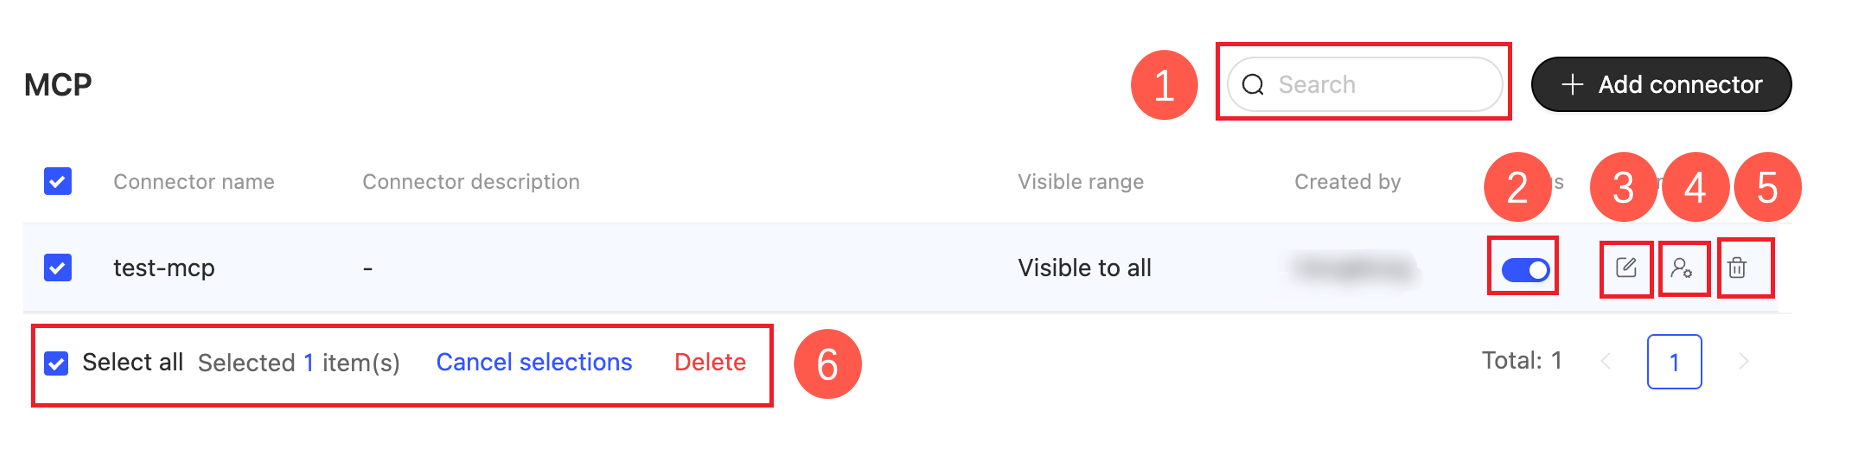
The MCP management page lists all connectors added to your organization, along with their description, visibility scope, creator, and status.
Actions | Description |
① Search for a connector | If you have many connectors, use the search box to find them by keyword. |
② Set status | Connectors are enabled by default. Use the toggle in the Enabled column to enable or disable one. |
③ Edit | Click the |
④ Set visibility scope | Click the
|
⑤ Delete | Click the |
⑧ Batch operation | You can select and delete multiple connectors at once. |
 icon to open the Edit Connector dialog and modify the connector's configuration.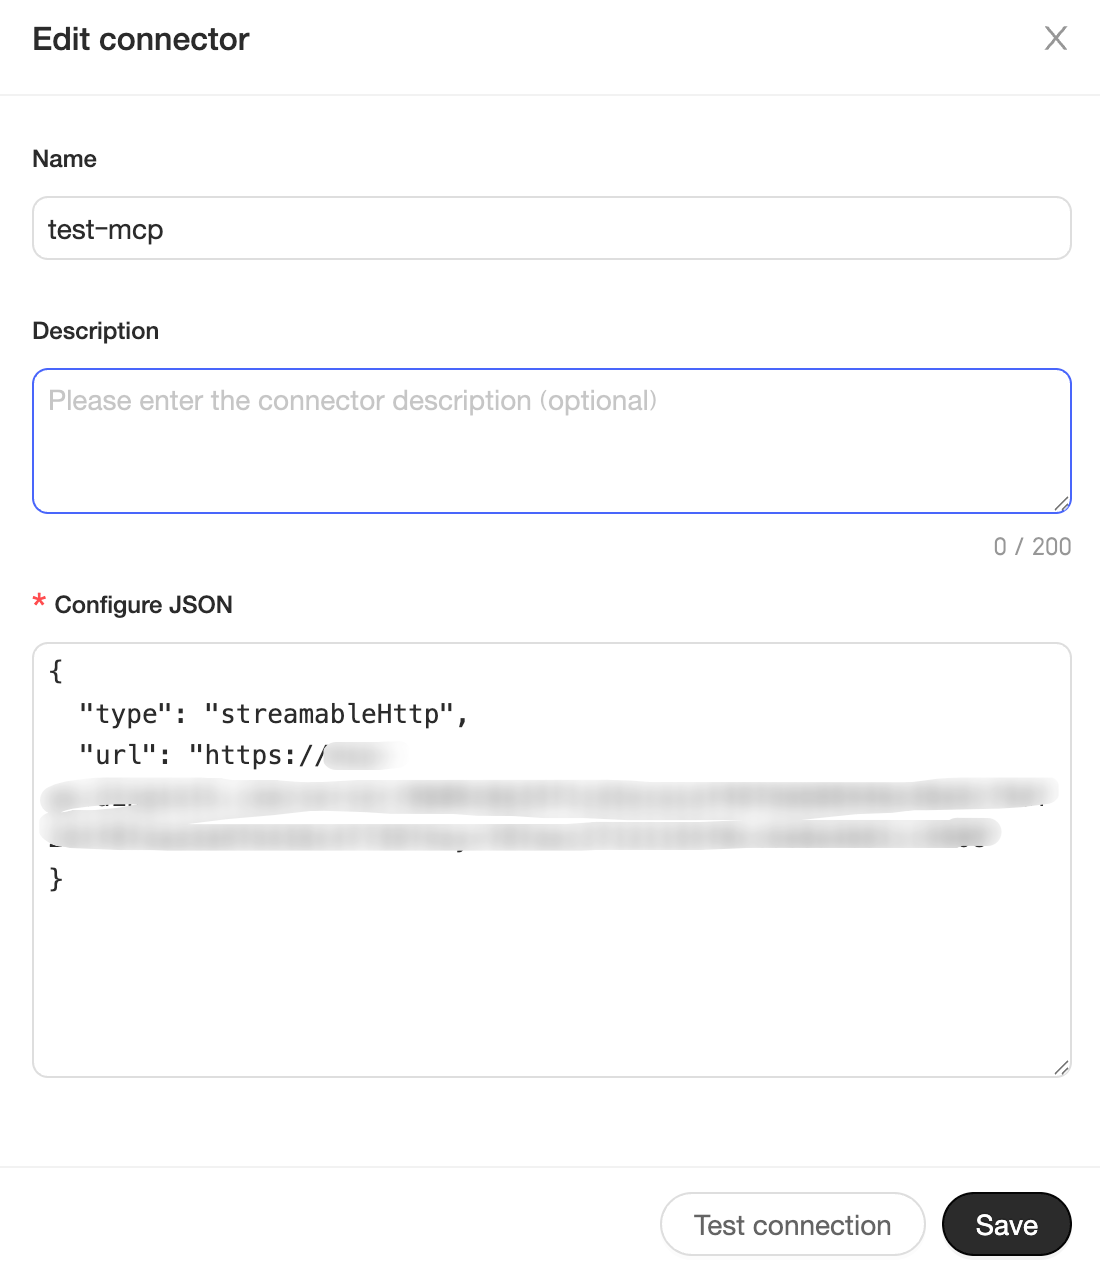
 icon to open the Set Visibility Scope dialog and modify the connector's visibility scope.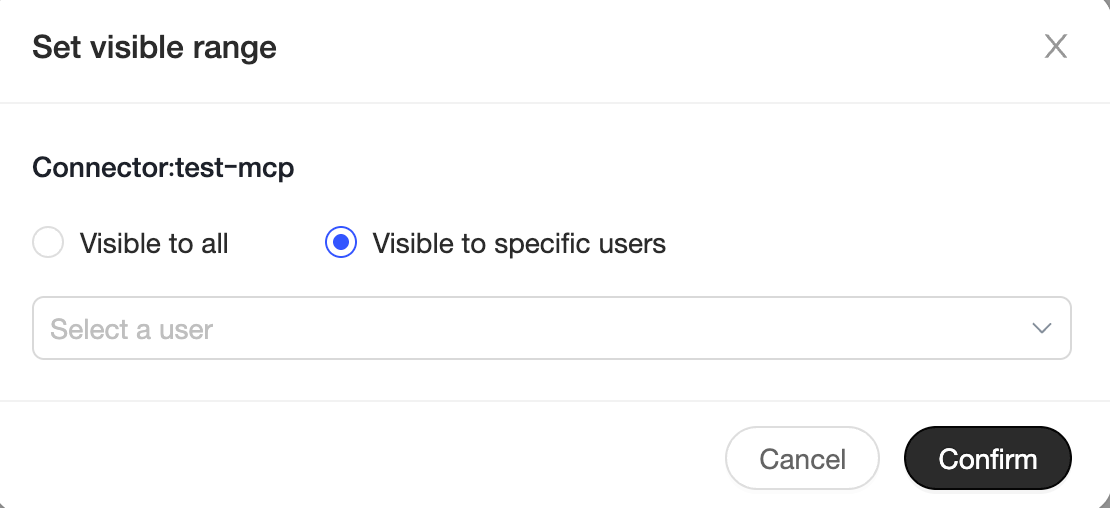
 icon and confirm the prompt to delete a connector you no longer need.