My data
My Data is a dedicated space in Quick BI AIPro for managing your personal data assets. Here, you can add, manage, and share your data files, and enable the AI to learn from them, improving analysis accuracy.
Prerequisites
You are logged in to Quick BI AIPro.
To add a corporate data asset, you must first obtain the required permissions from an administrator.
Entry point
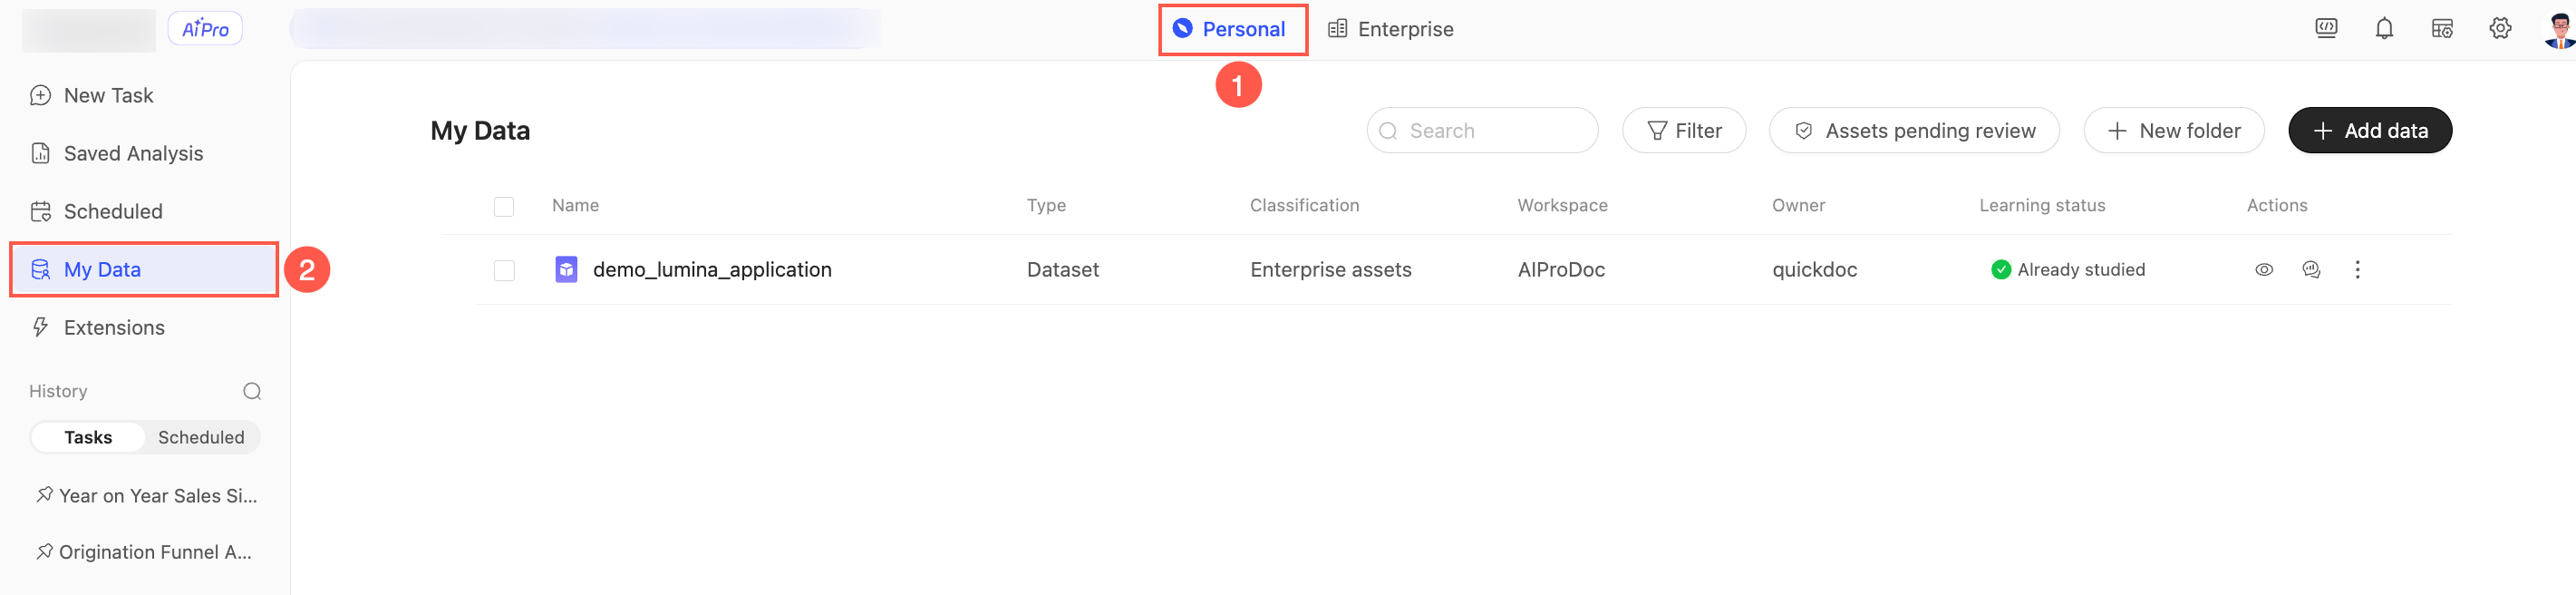
Log in to Quick BI AIPro and go to My > My Data.
Create a folder
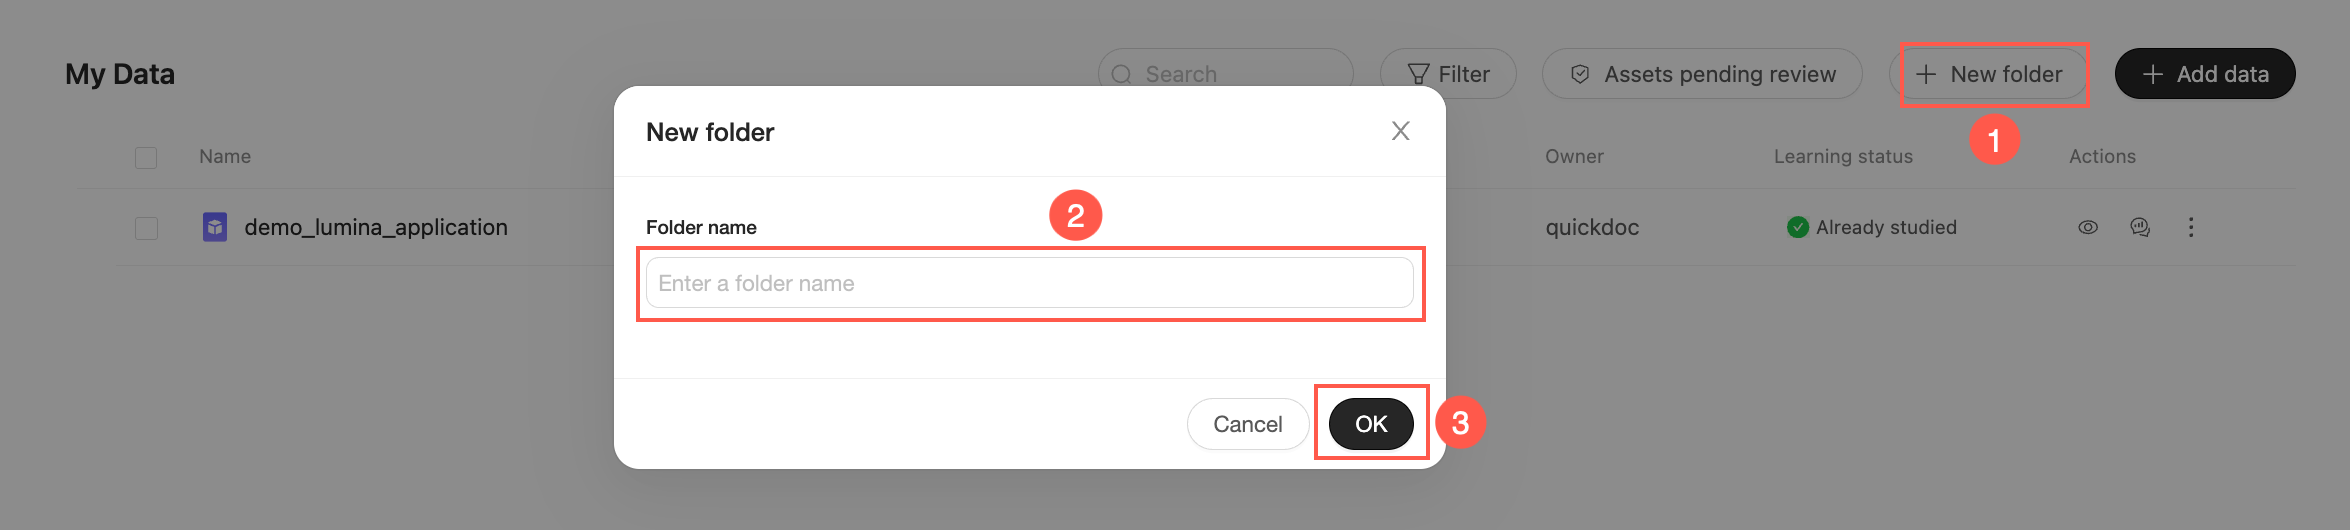
Click New Folder, enter a Folder Name, and then click OK.
Add data
Click Add Data in the upper-right corner. You can add data from the following sources: Corporate Data Square, Local upload, and API data source.

Corporate data square
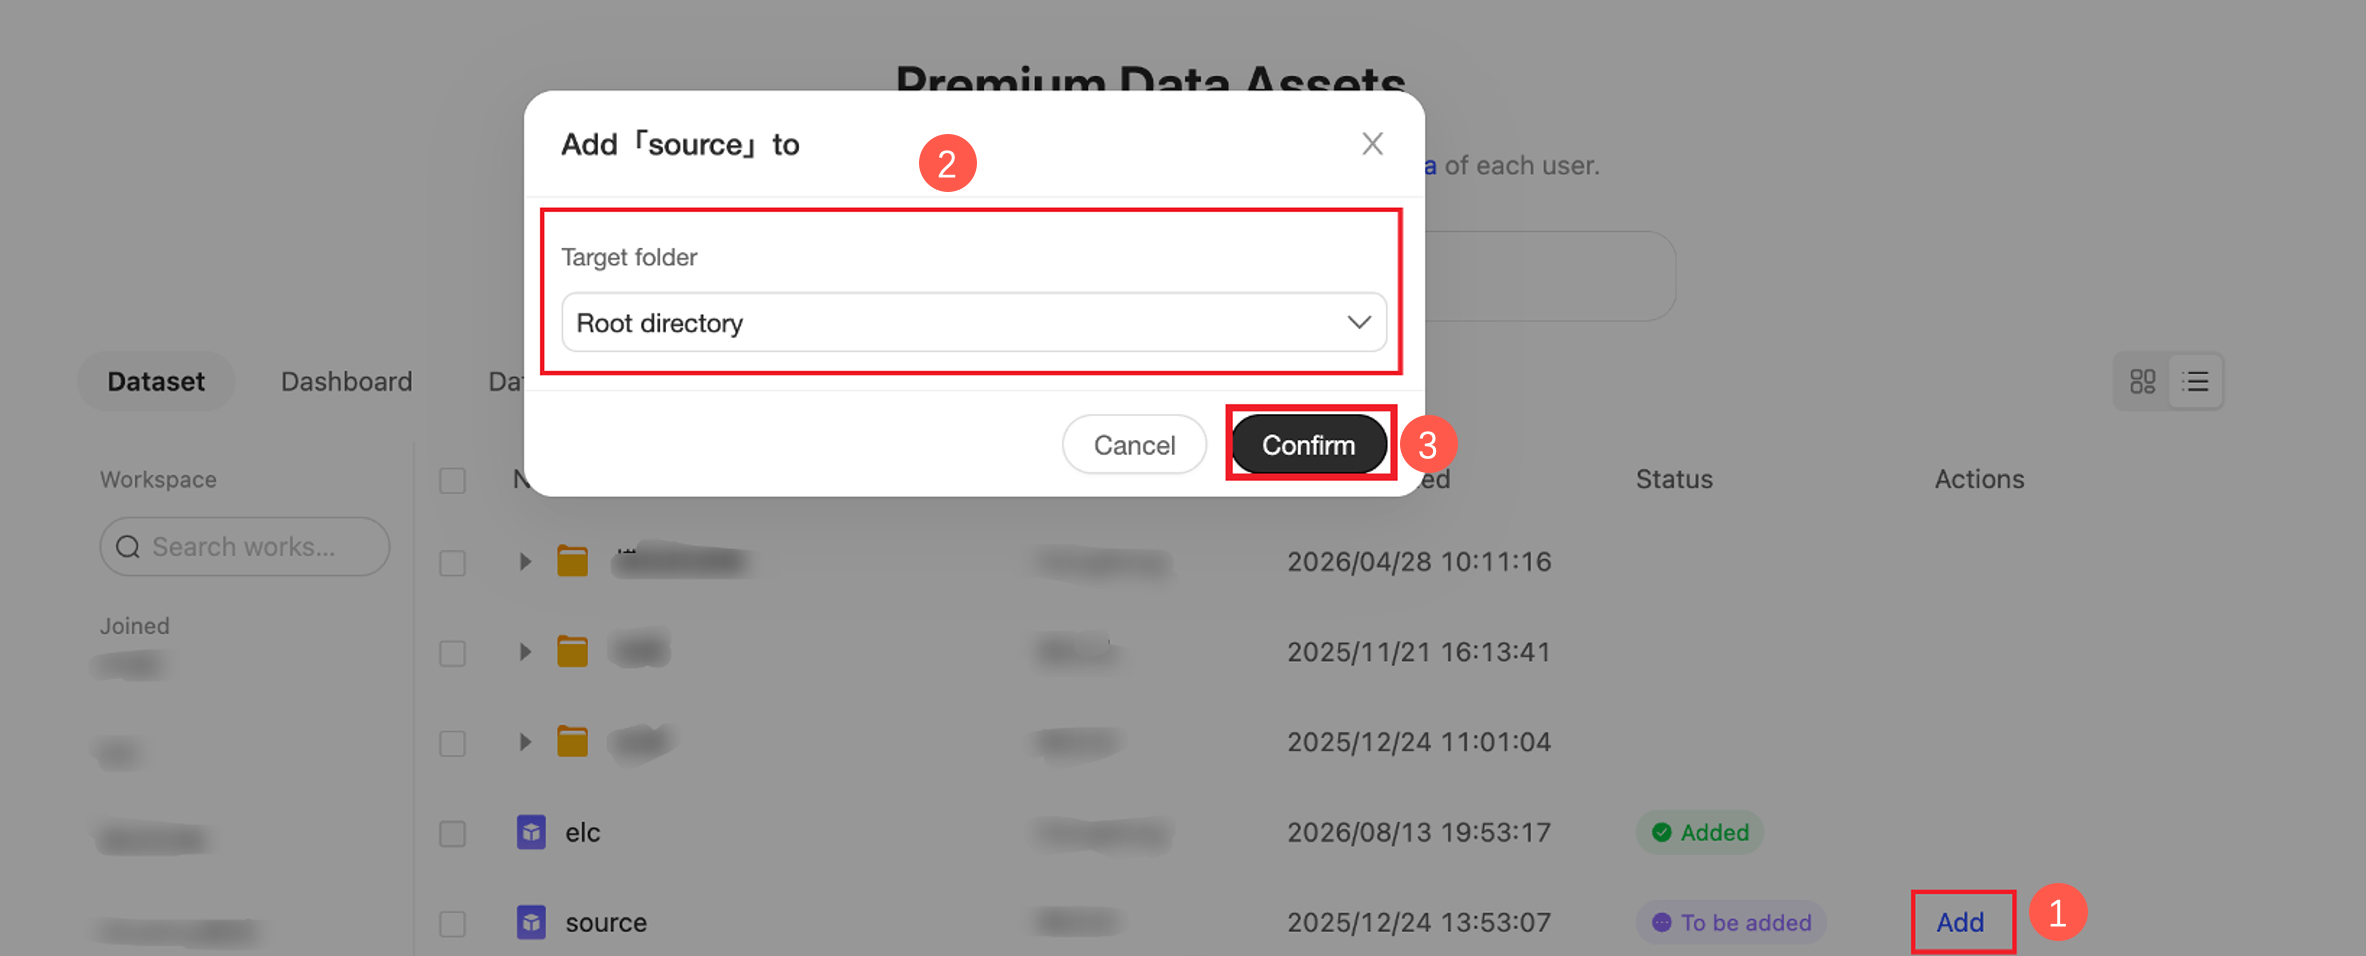
The Corporate Data Square centralizes your organization's internal data assets, such as datasets, dashboards, combined data tables, and files. You can request permission for these assets and switch between spaces to view space-specific data.
You can add assets to My Data on demand. For detailed instructions, see Data Marketplace.
Local upload
This feature allows you to upload local files as data assets to Quick BI AIPro. It is ideal for quickly analyzing a local file, such as an Excel file exported from a third-party platform.
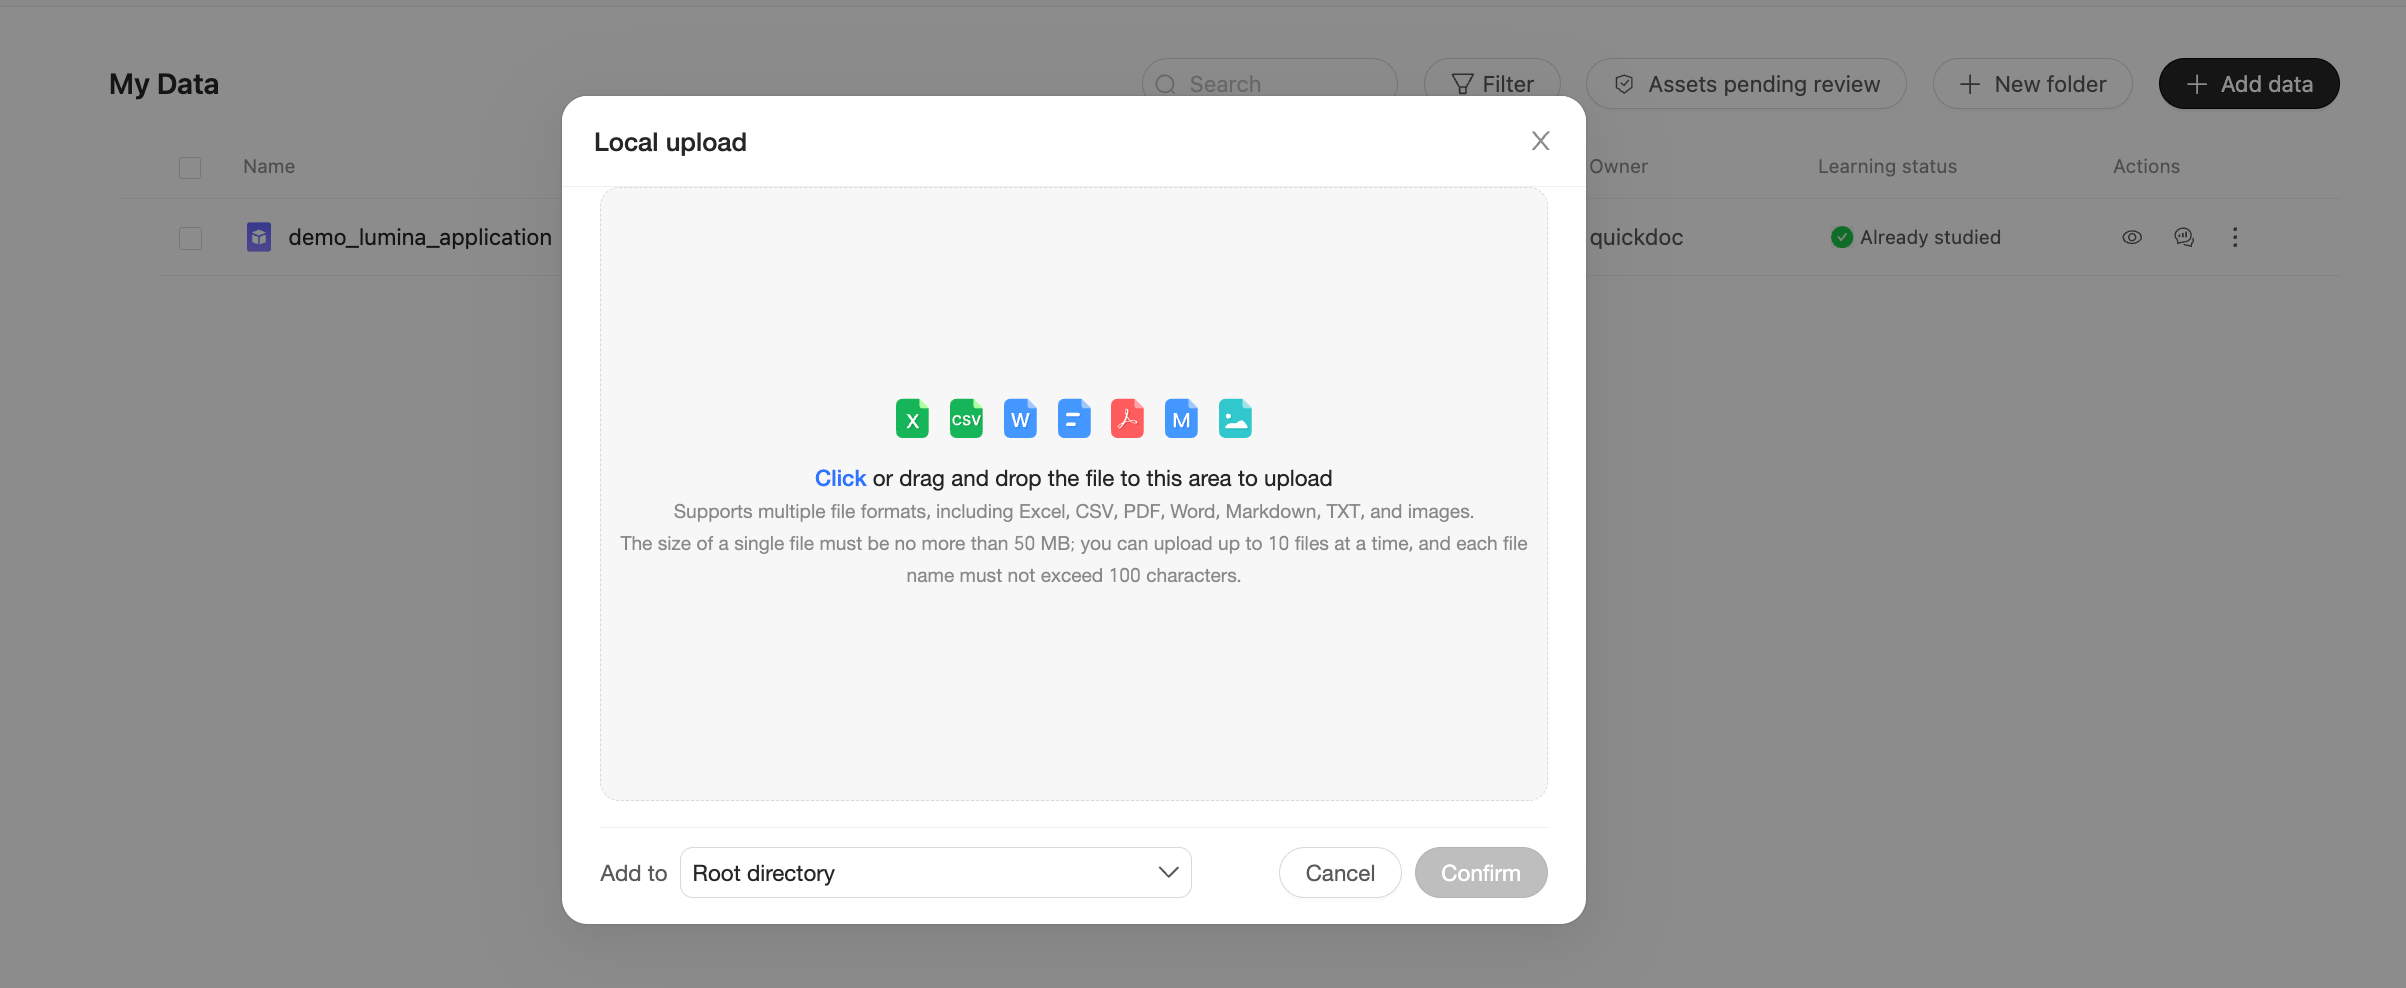
Follow these steps:
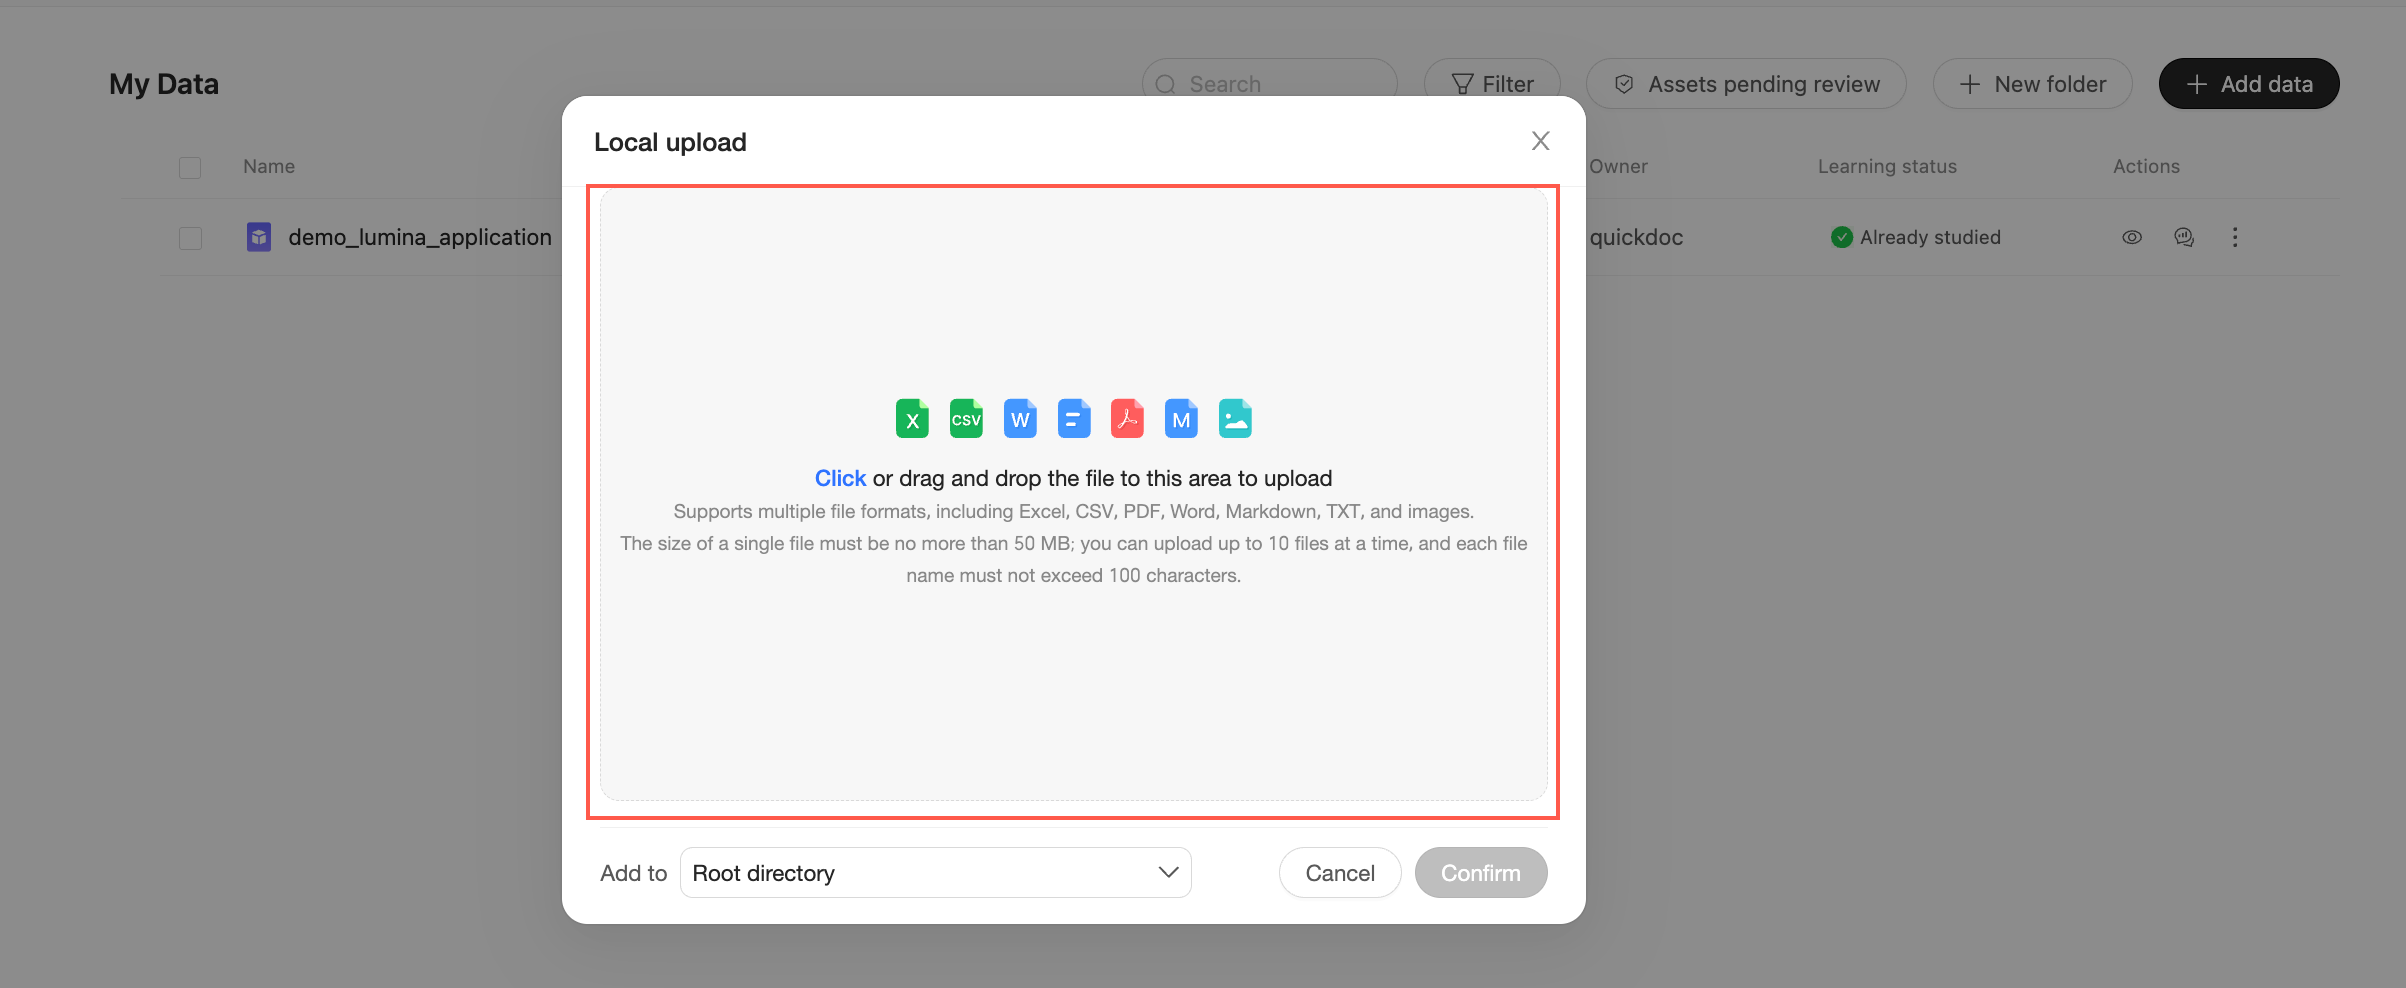
In the Local File dialog box, click the upload area or drag and drop files into it.
 Note
NoteSupported file formats include Excel, CSV, PDF, Word, Markdown, TXT, and various image formats.
The maximum size for a single file is 50 MB.
You can upload multiple files at once.
NoteYou can upload a maximum of 10 local files at a time.
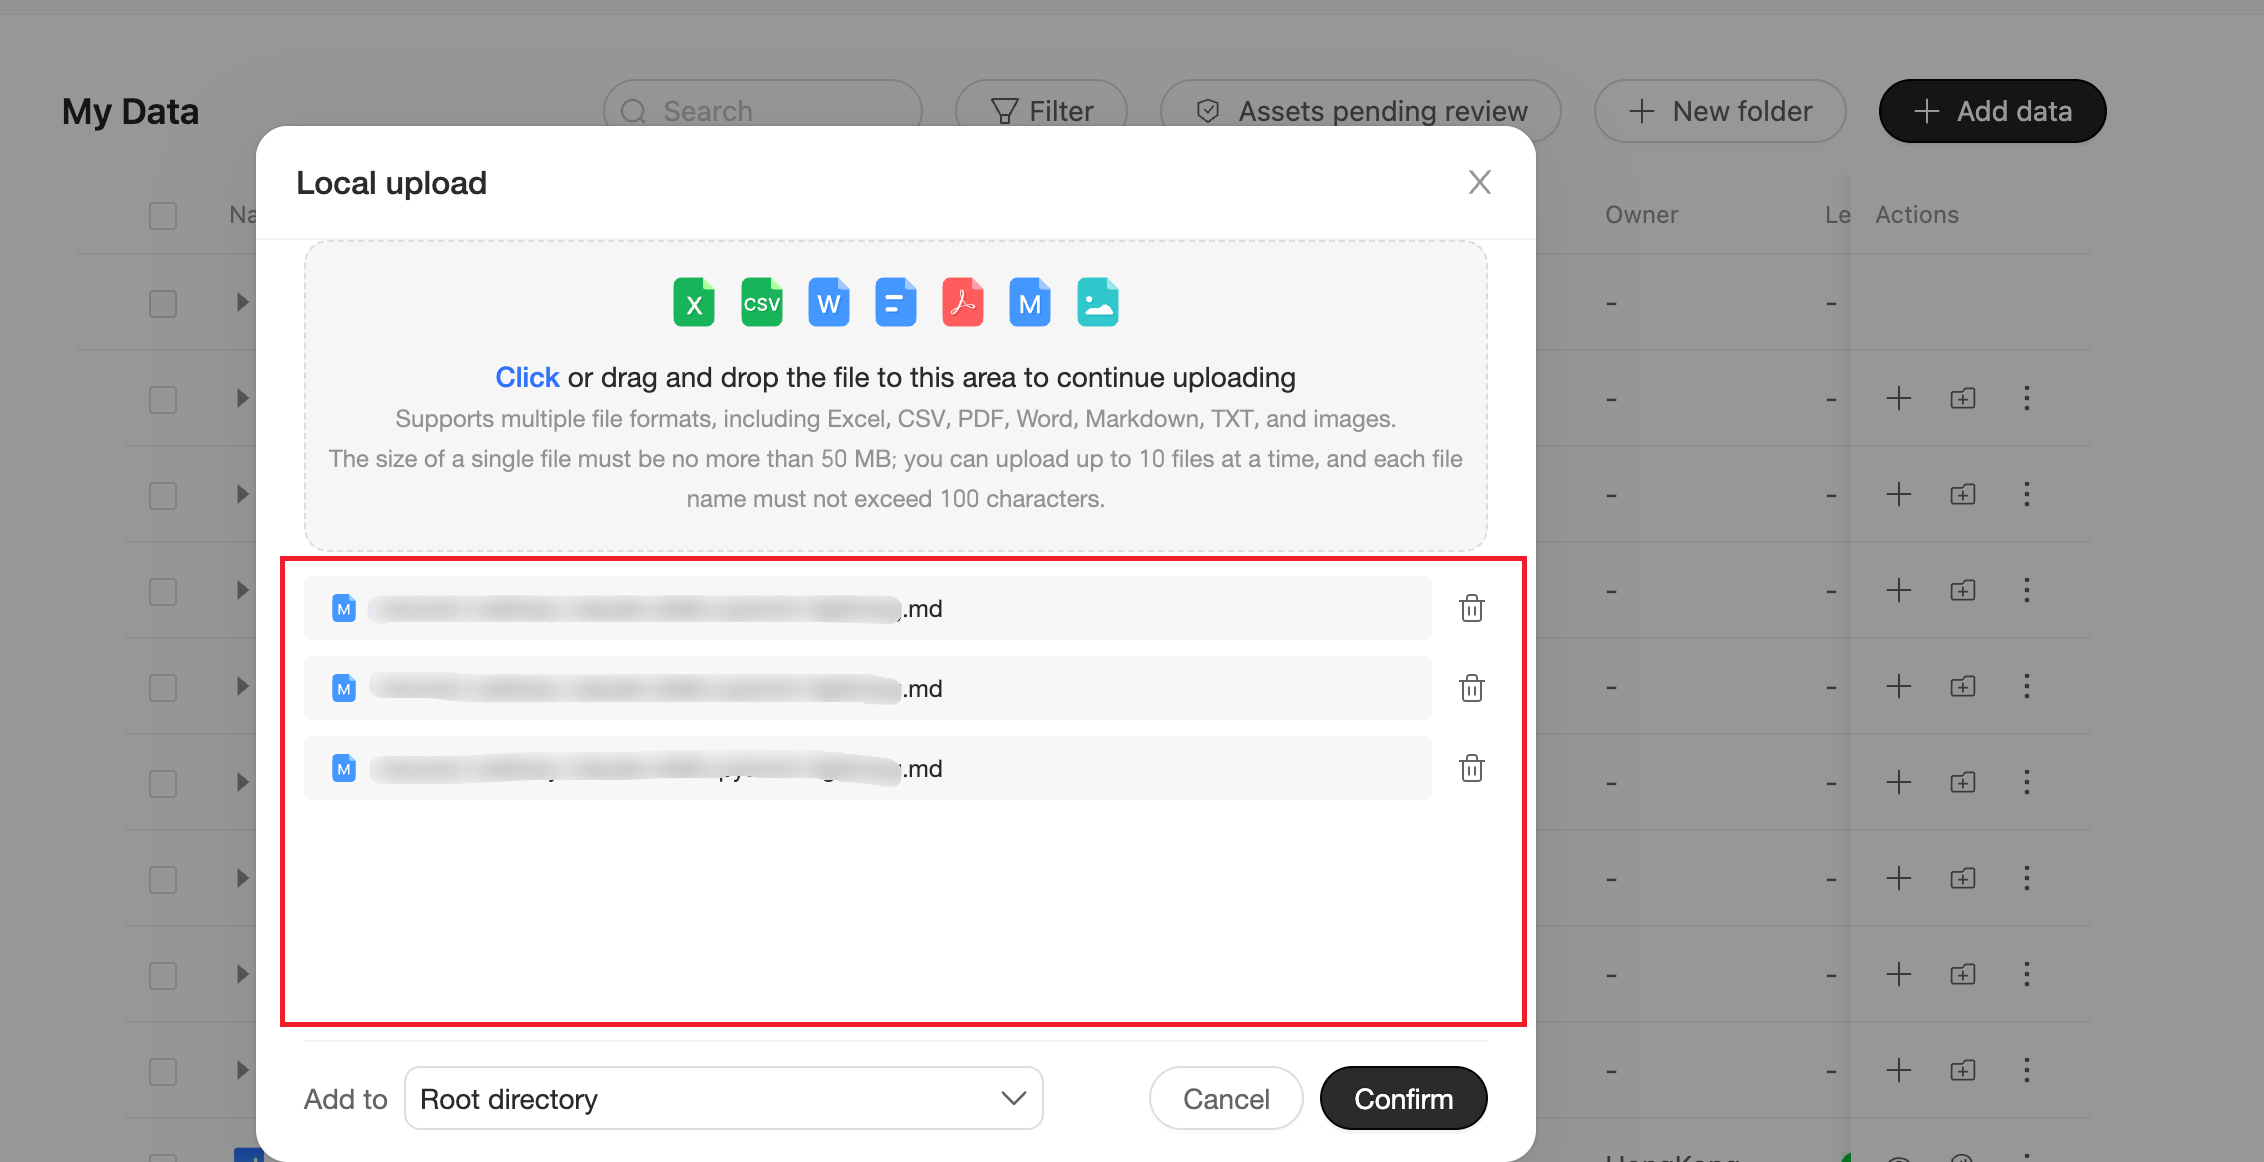
This area shows the queue of files selected for upload. To remove an unwanted file, click the
icon to its right.Select the destination folder under Add to. The default is the root directory, but you can choose an existing folder to organize your files.
Click Confirm to finish the upload. The system automatically learns from the uploaded files. Once learning is complete, you can use the data asset for analysis.
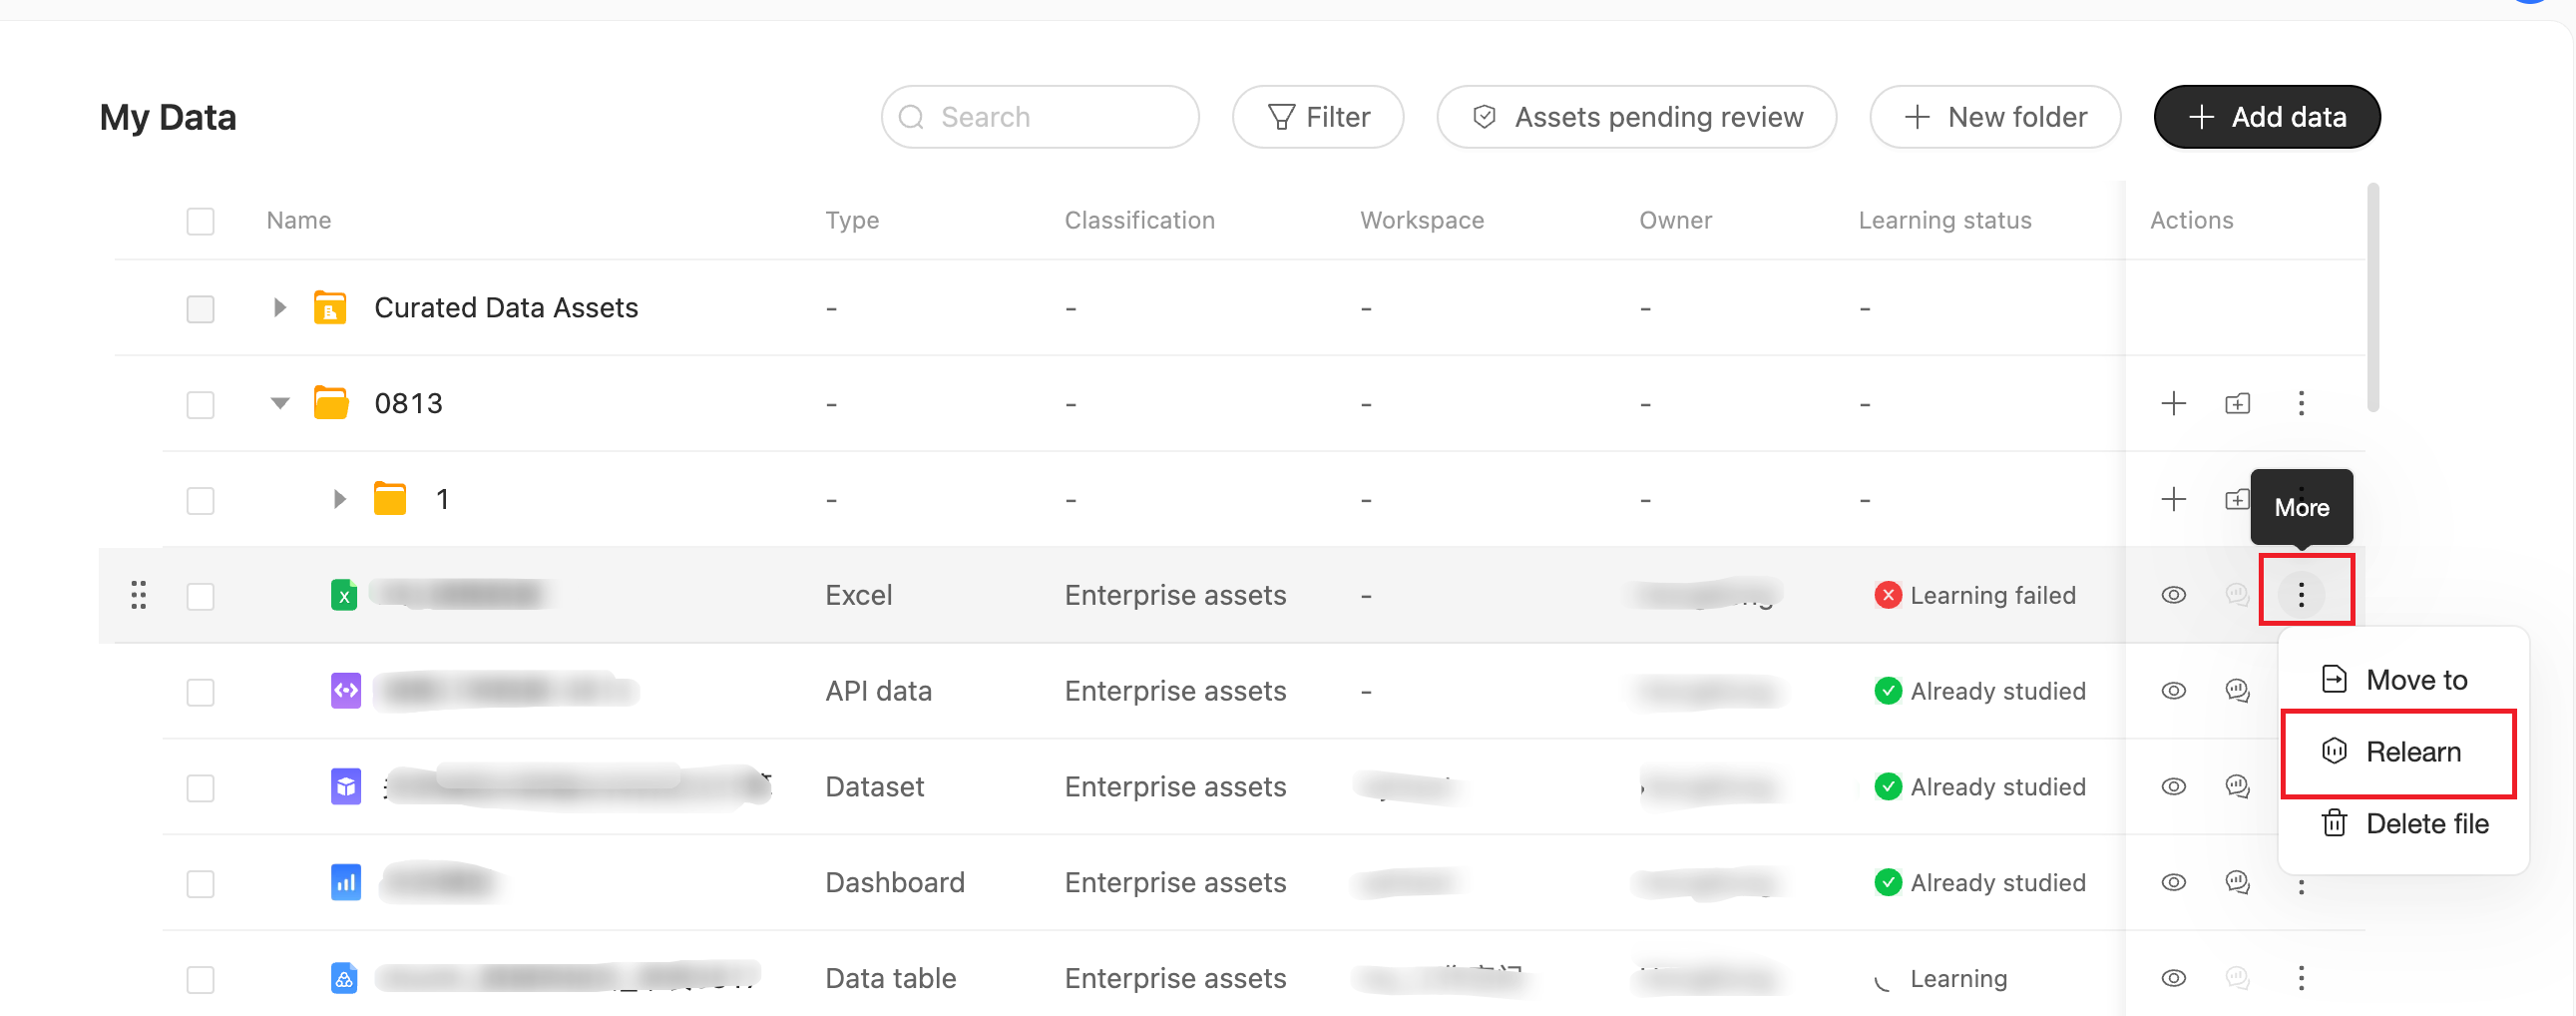
If the learning process fails or your data is updated, you can initiate a re-learn.
 icon to its right.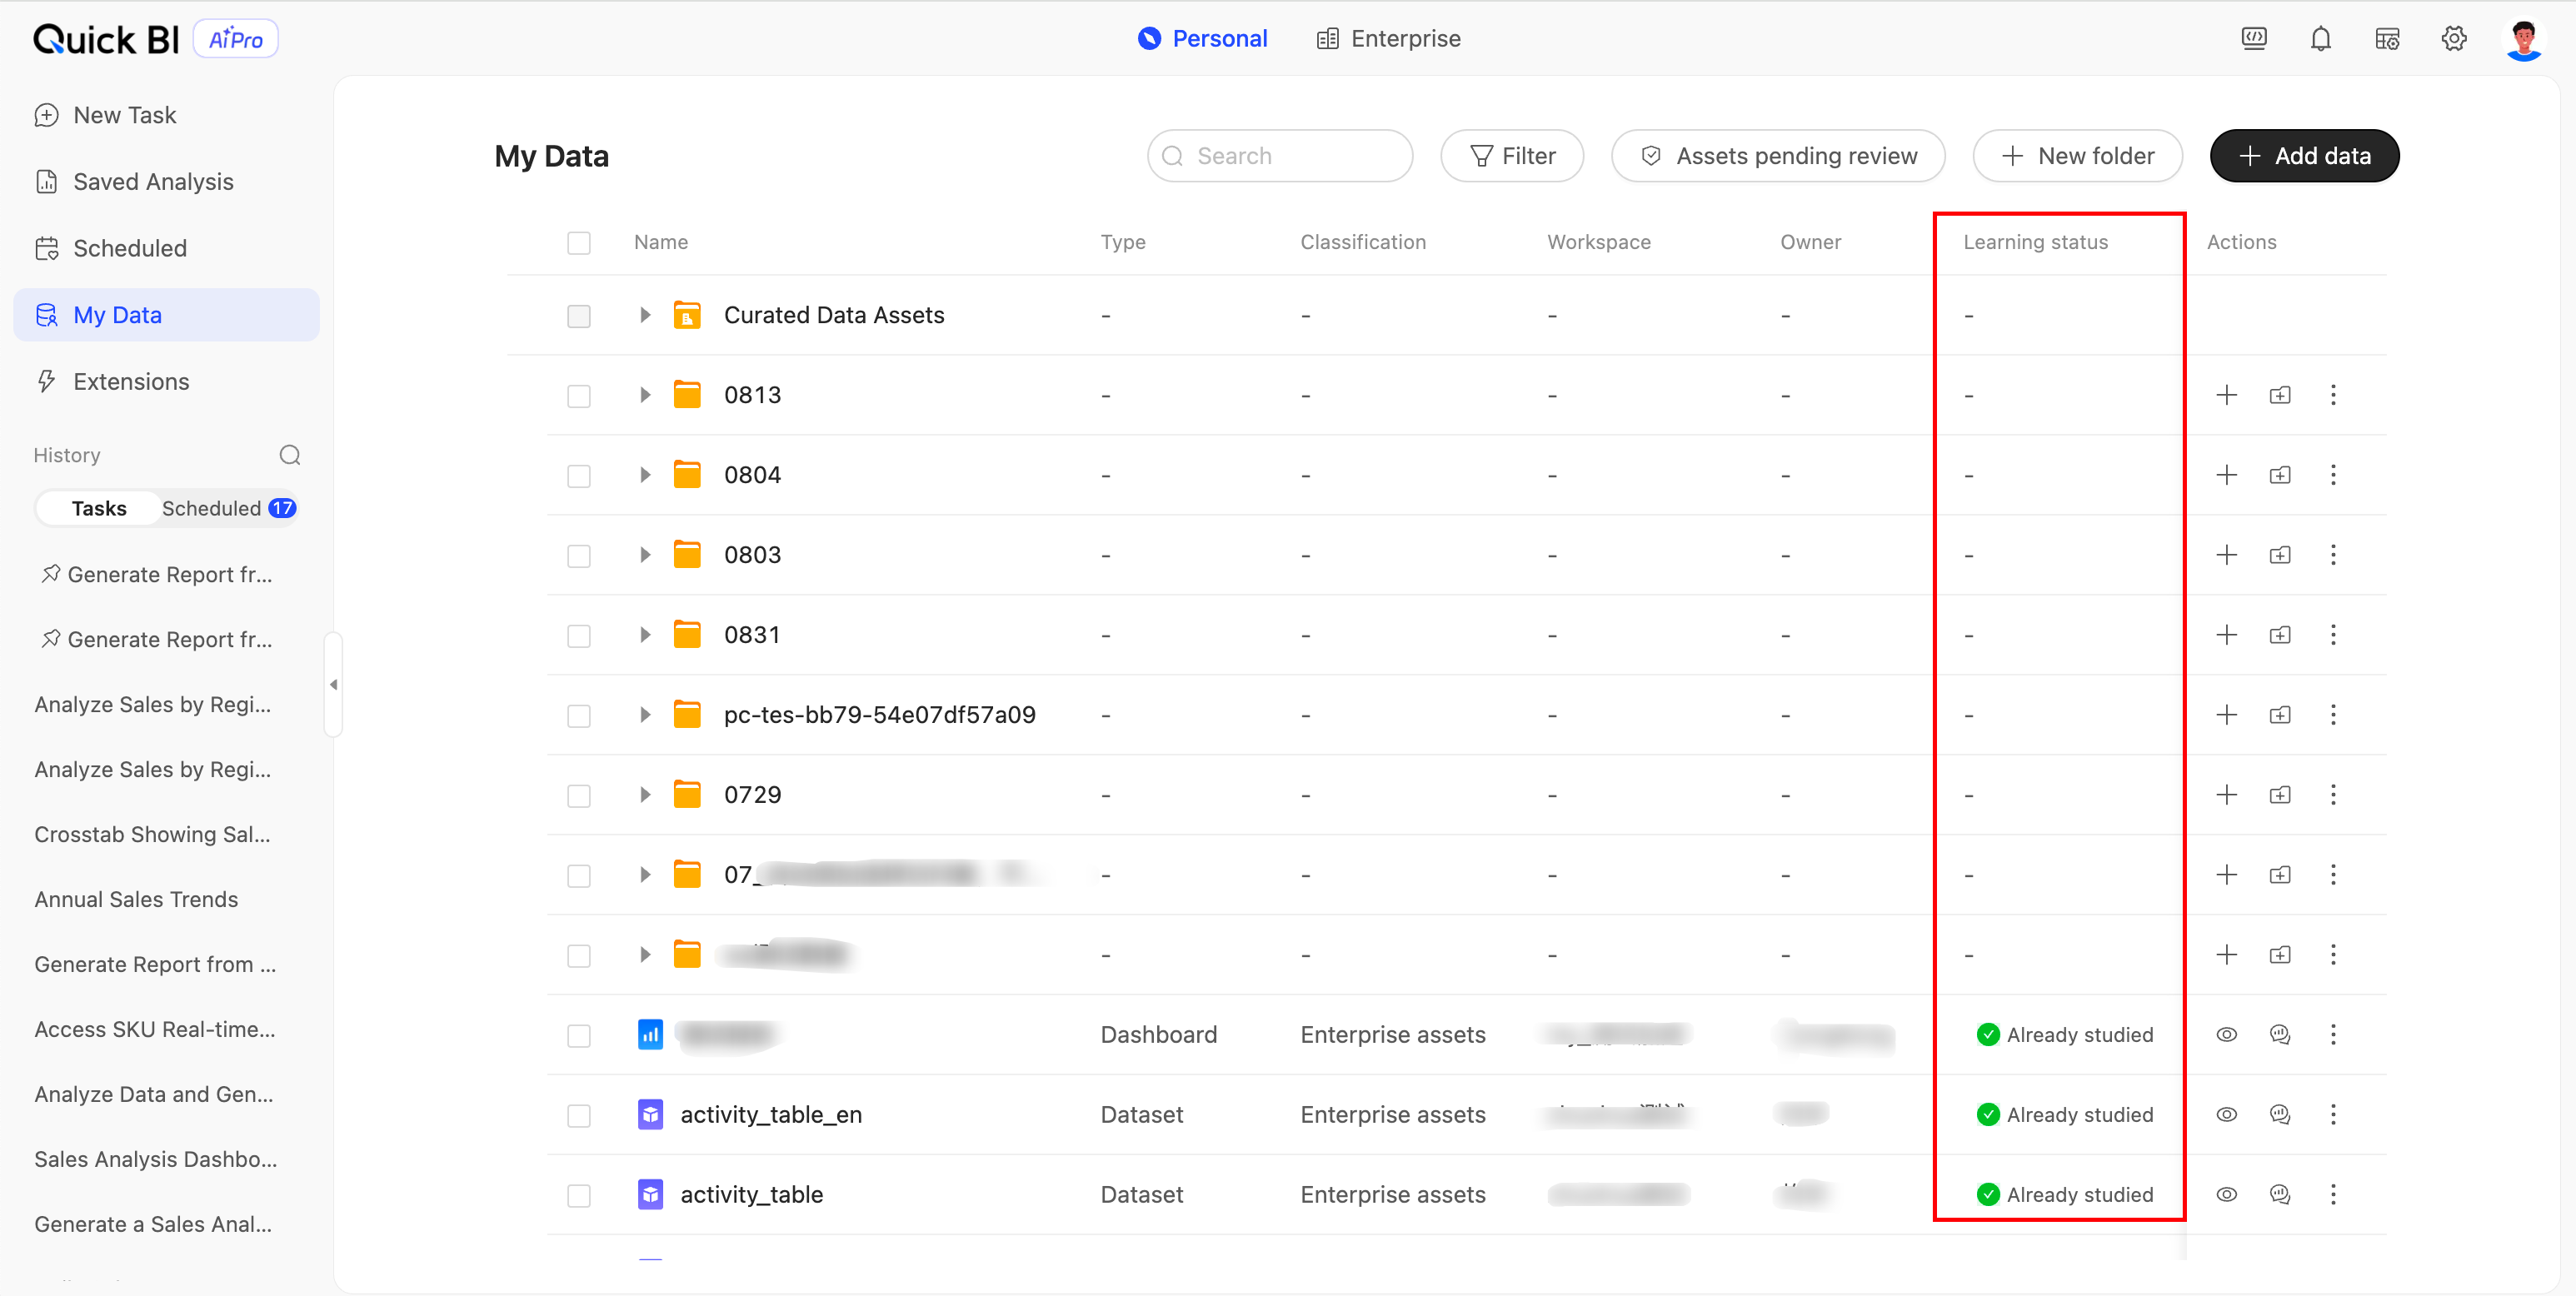
API data source
An API data source connects you to external data assets through an API. This is useful for scenarios that require connecting to third-party systems, such as pulling the latest customer follow-up records from a CRM system.
You can enter the API address or documentation in the dialog box. Before connecting, check the API port and add the necessary IP addresses to the IP whitelist.
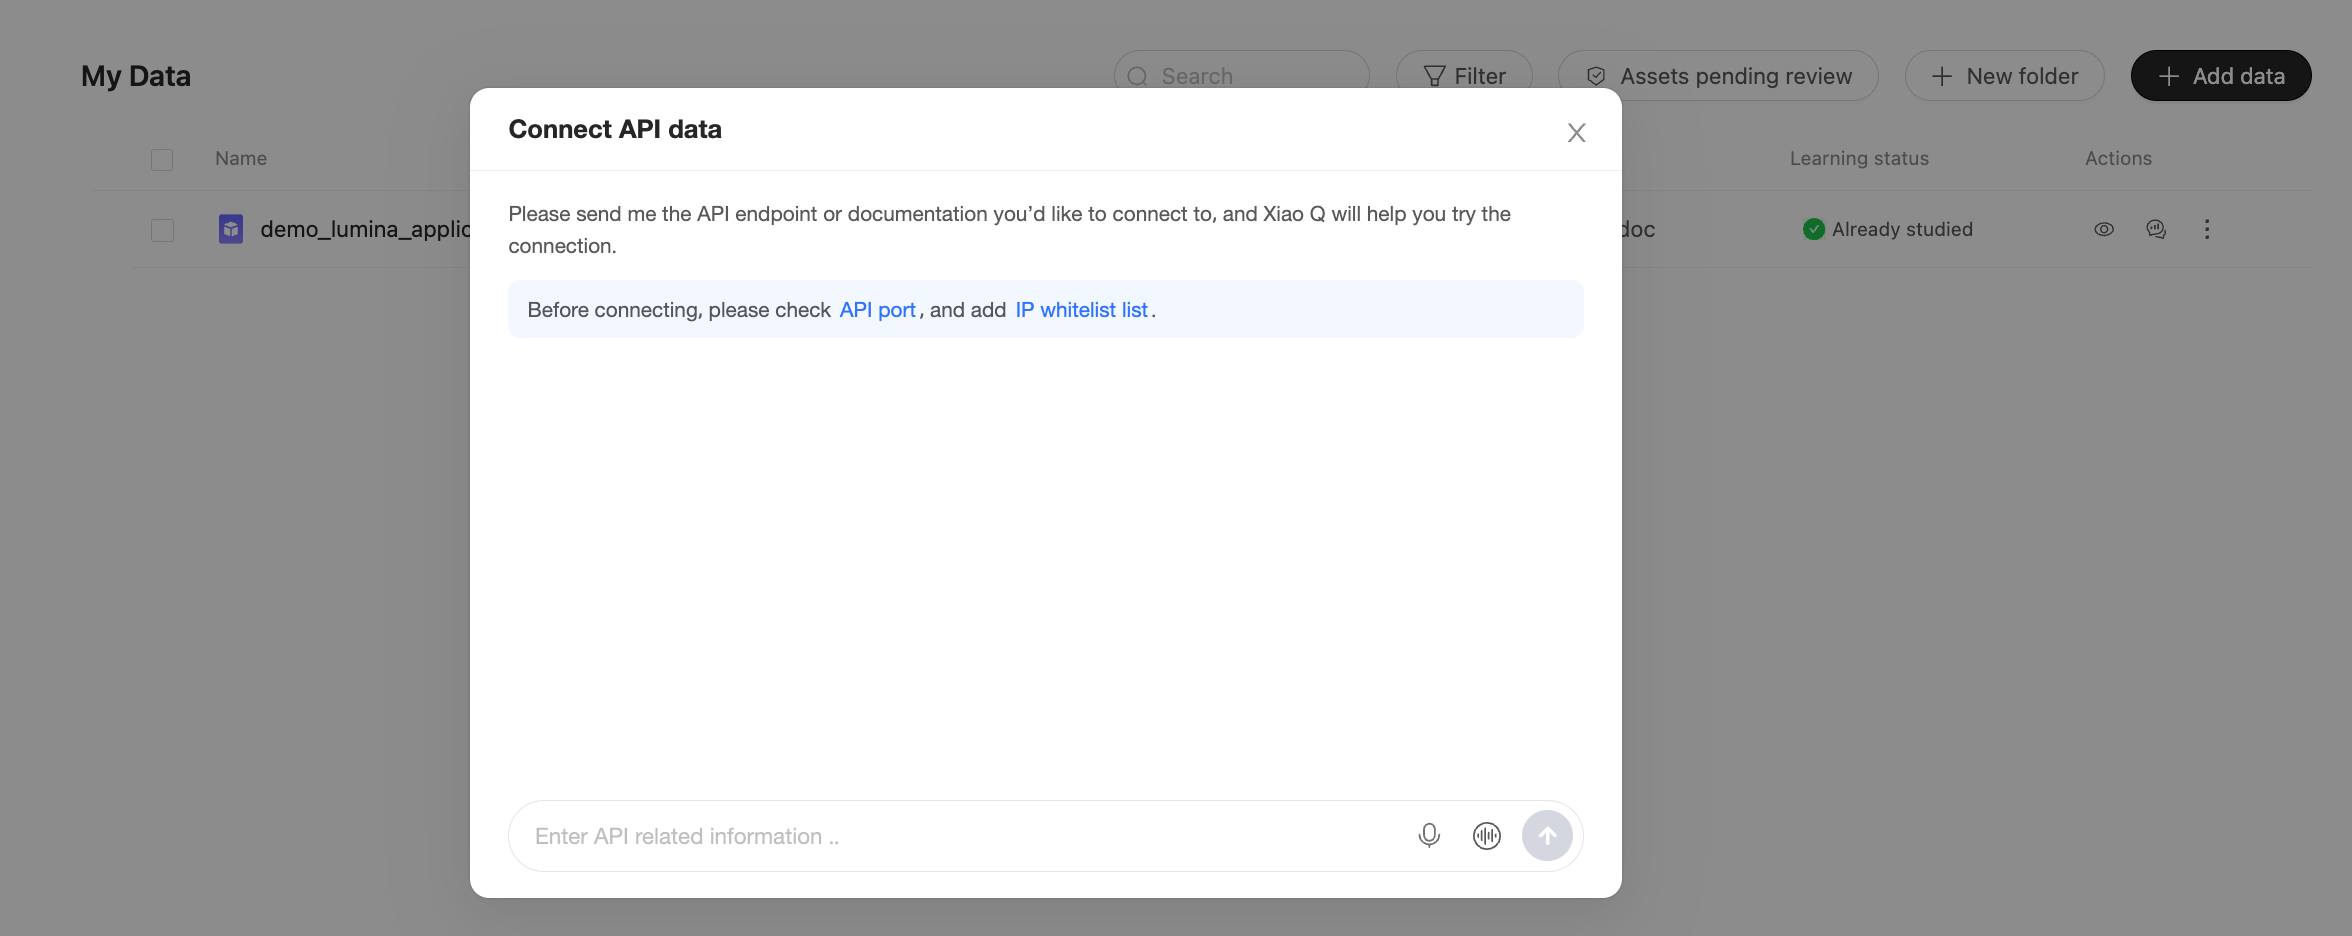
Follow these steps:
In the Connect API Data dialog box, enter the API address or documentation you want to connect to, and then click the
send icon. The intelligent assistant Xiao Q automatically parses the connection parameters from the API and attempts to connect.NoteBefore you connect, check the API port and add the required IP addresses to the IP whitelist.
Only the following ports are supported: 443, 80, 3306, 465, 587, 5432, and 7001.
You must add the following Quick BI IP address ranges for different network environments to the API's IP whitelist: 47.101.108.0/24, 101.132.48.0/24, 47.101.107.0/24, 139.224.92.0/24, 139.224.4.0/24, 106.15.146.0/24, 106.15.145.0/24, 106.15.143.0/24, 106.15.14.0/24, 106.15.13.0/24, 11.193.48.0/24, 11.197.244.0/24, 10.152.69.0/24, 10.152.163.0/24, and 100.104.0.0/16.
Both Voice Input and Real-time Chat are supported.
Click the
icon to use Voice Input.Click the
icon to start a Real-time Chat.
After the process is complete, Xiao Q provides a connection plan and a field list from the API. You can review this information in the dialog box. If everything is correct, set a Name and Save Path for the API data source. If the plan requires changes, you can adjust the configuration by continuing the conversation with Xiao Q.
Click Confirm and Save to execute the connection. The system then learns from the API data source. We recommend waiting for the learning process to complete before analyzing this data asset.
 send icon. The intelligent assistant Xiao Q automatically parses the connection parameters from the API and attempts to connect.
 icon to use Voice Input.
 icon to start a Real-time Chat.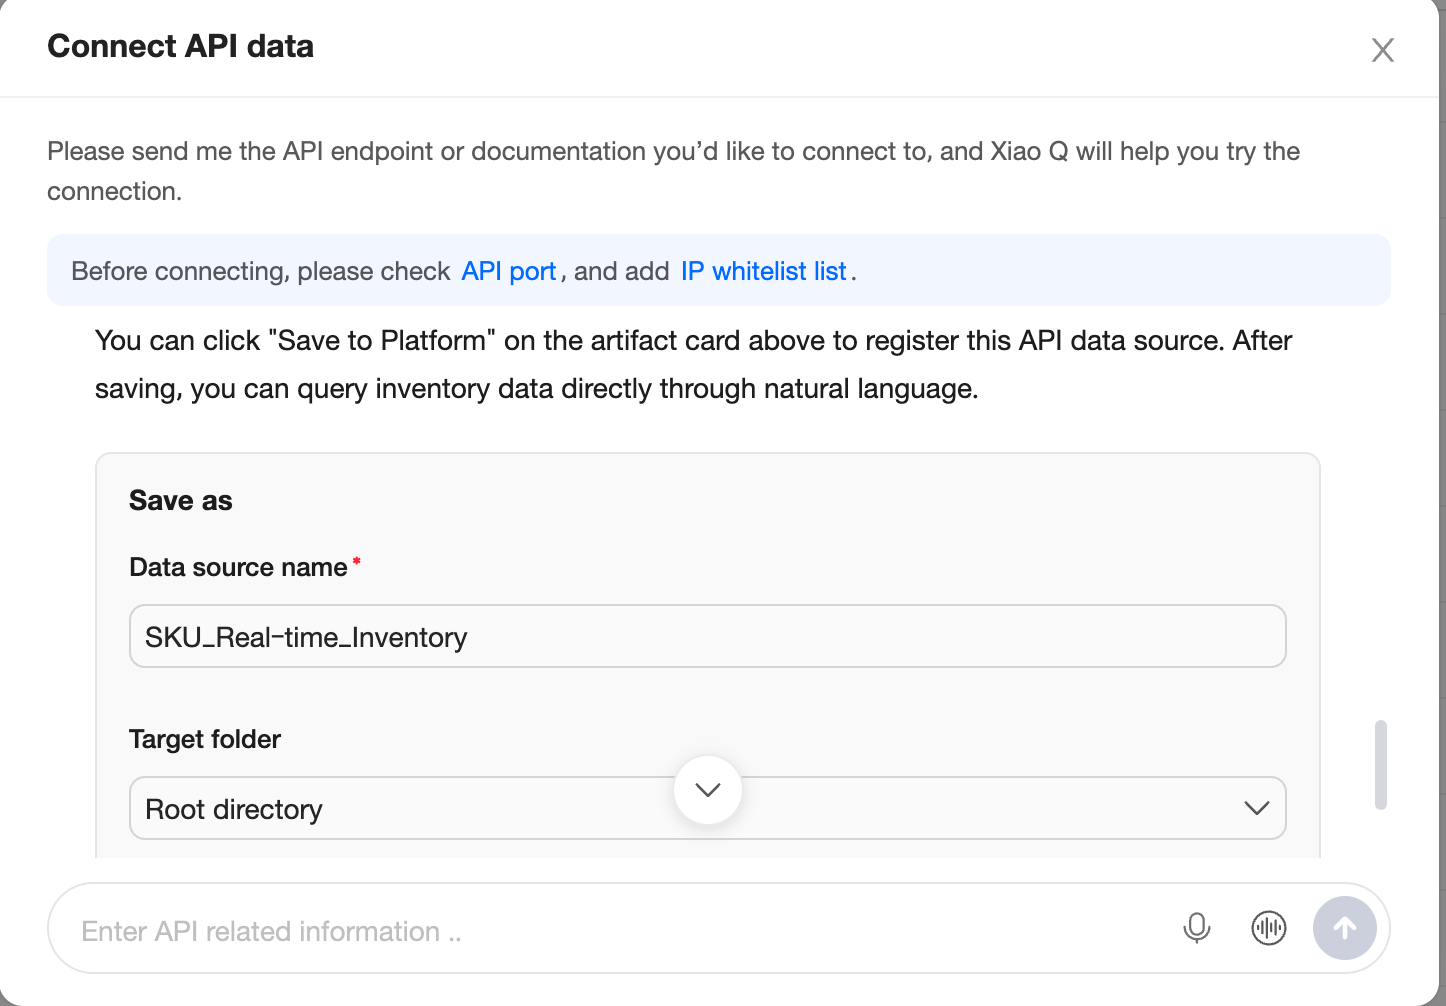
View and manage data
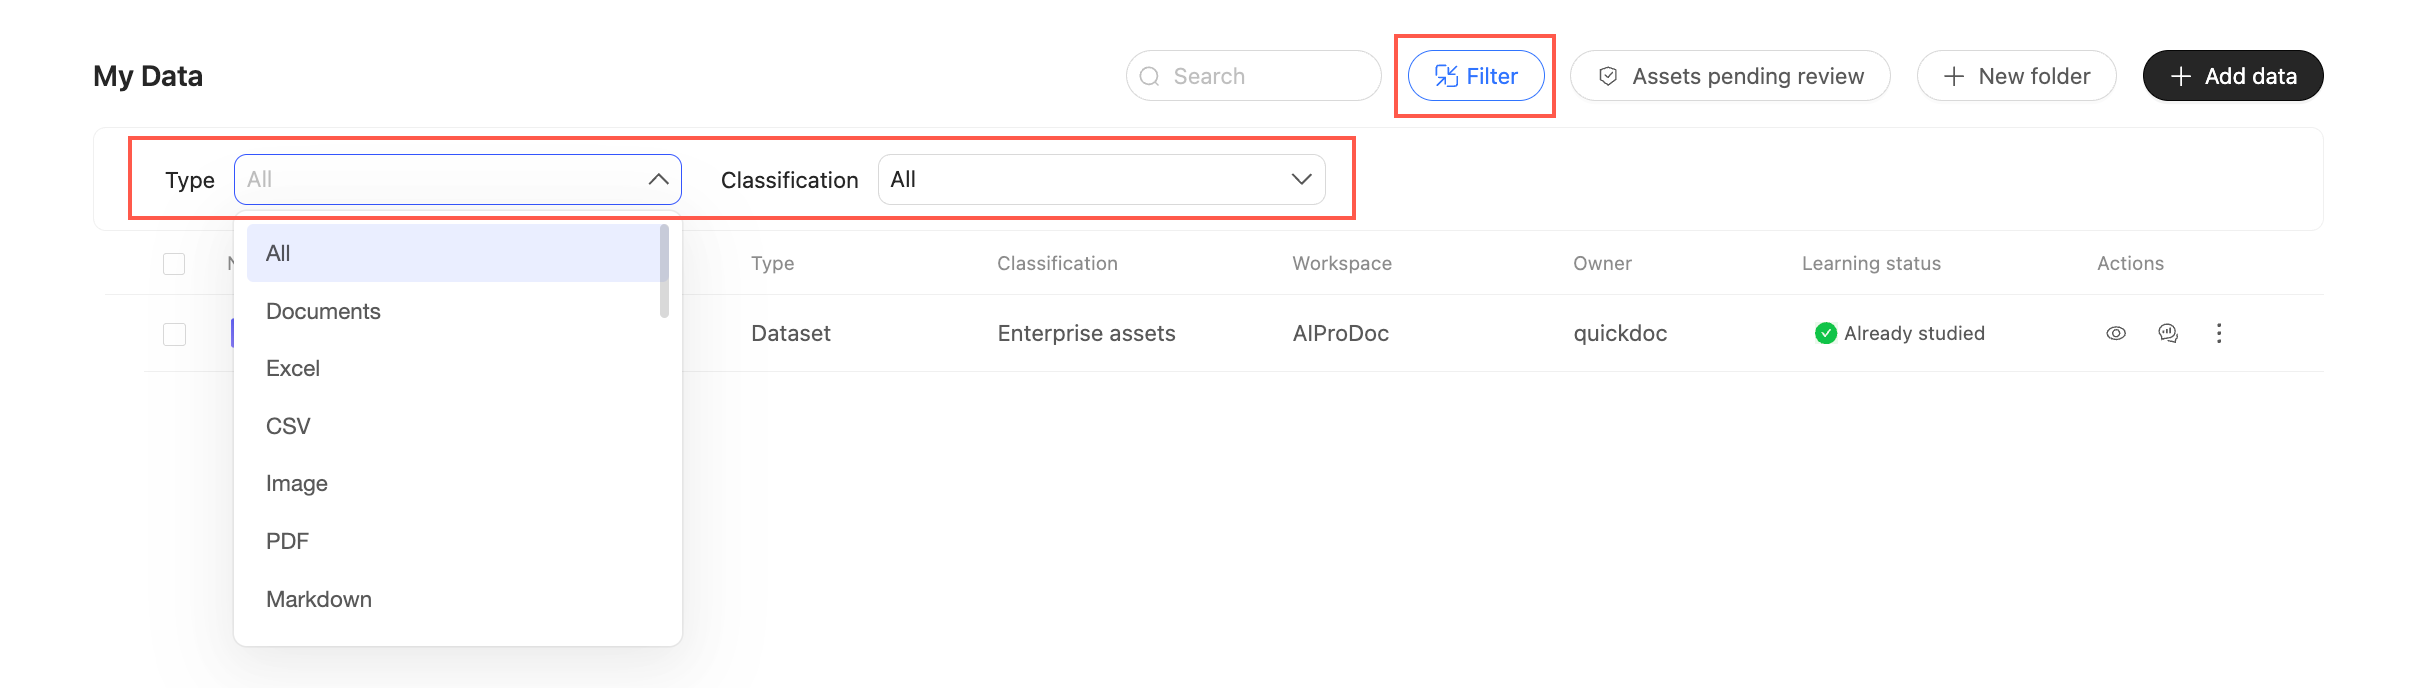
Search for data assets using keywords.
Filter by Asset Type and Asset Category to quickly locate the data resources you need.
Asset Type includes Document, Excel, CSV, Image, PDF, Markdown, TXT, dataset, dashboard, API data source, and data table.
Asset Category includes Corporate Asset, Added by Me, and Shared with Me.
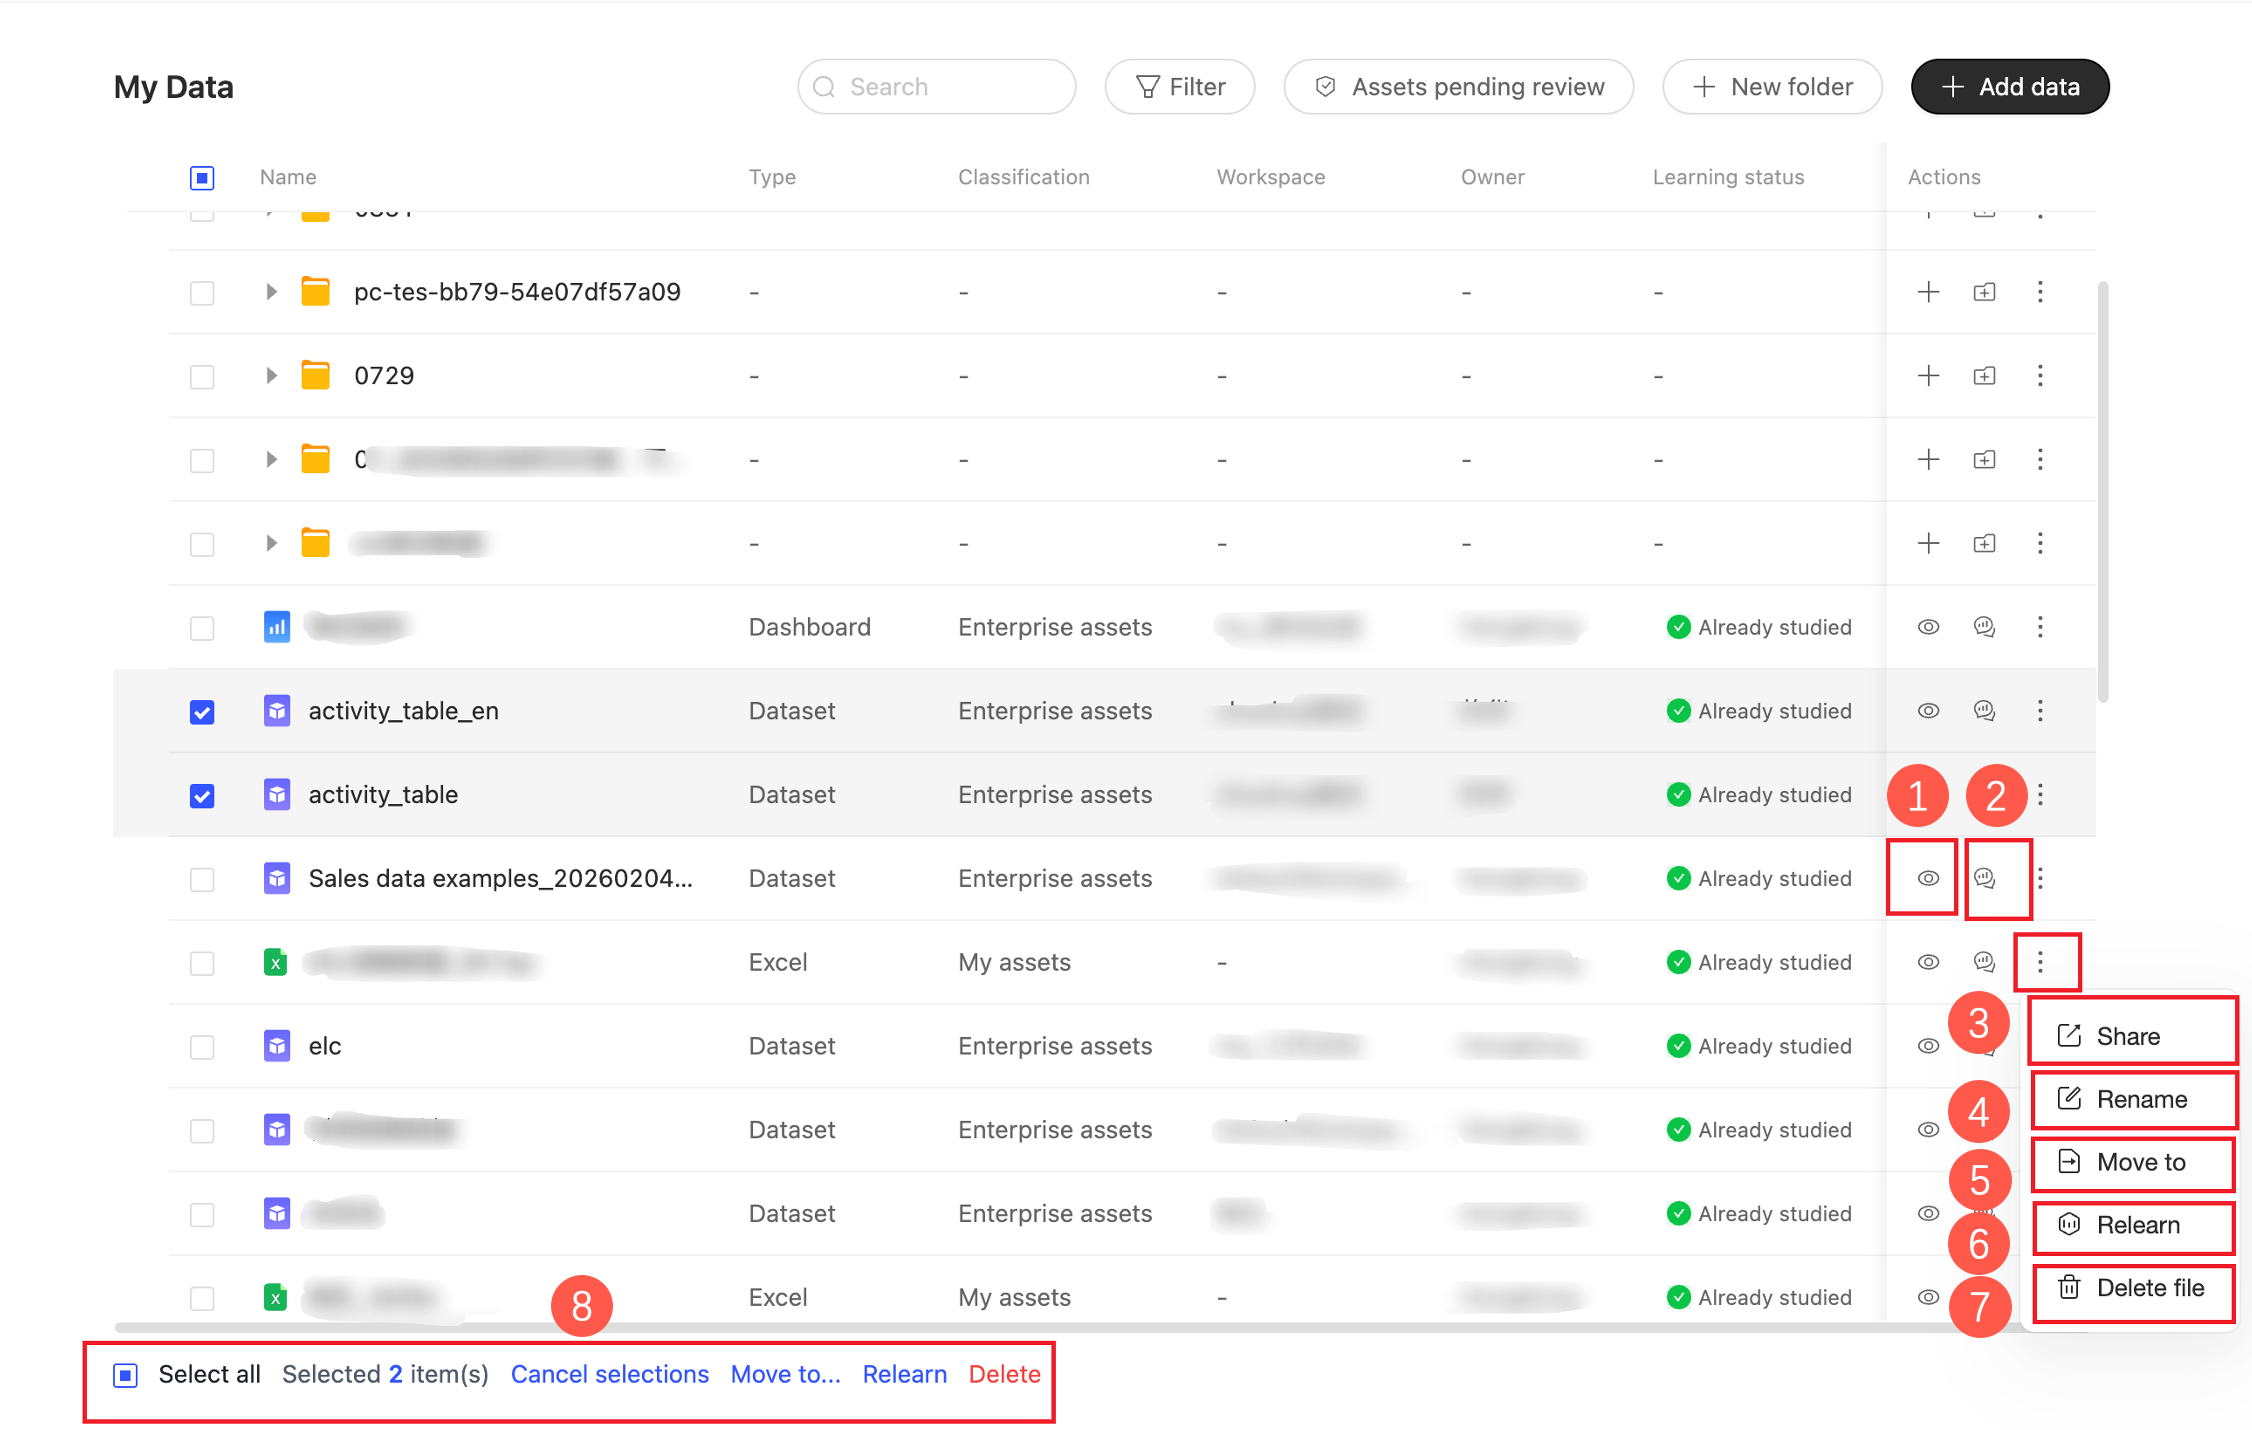
You can view details for each data asset, such as its asset type, asset category, associated space, source, owner, and learning status. You can also perform the following actions.
NoteThe Share and Rename actions are available only for data assets that you added.
No.
Actions
Description
①
Preview
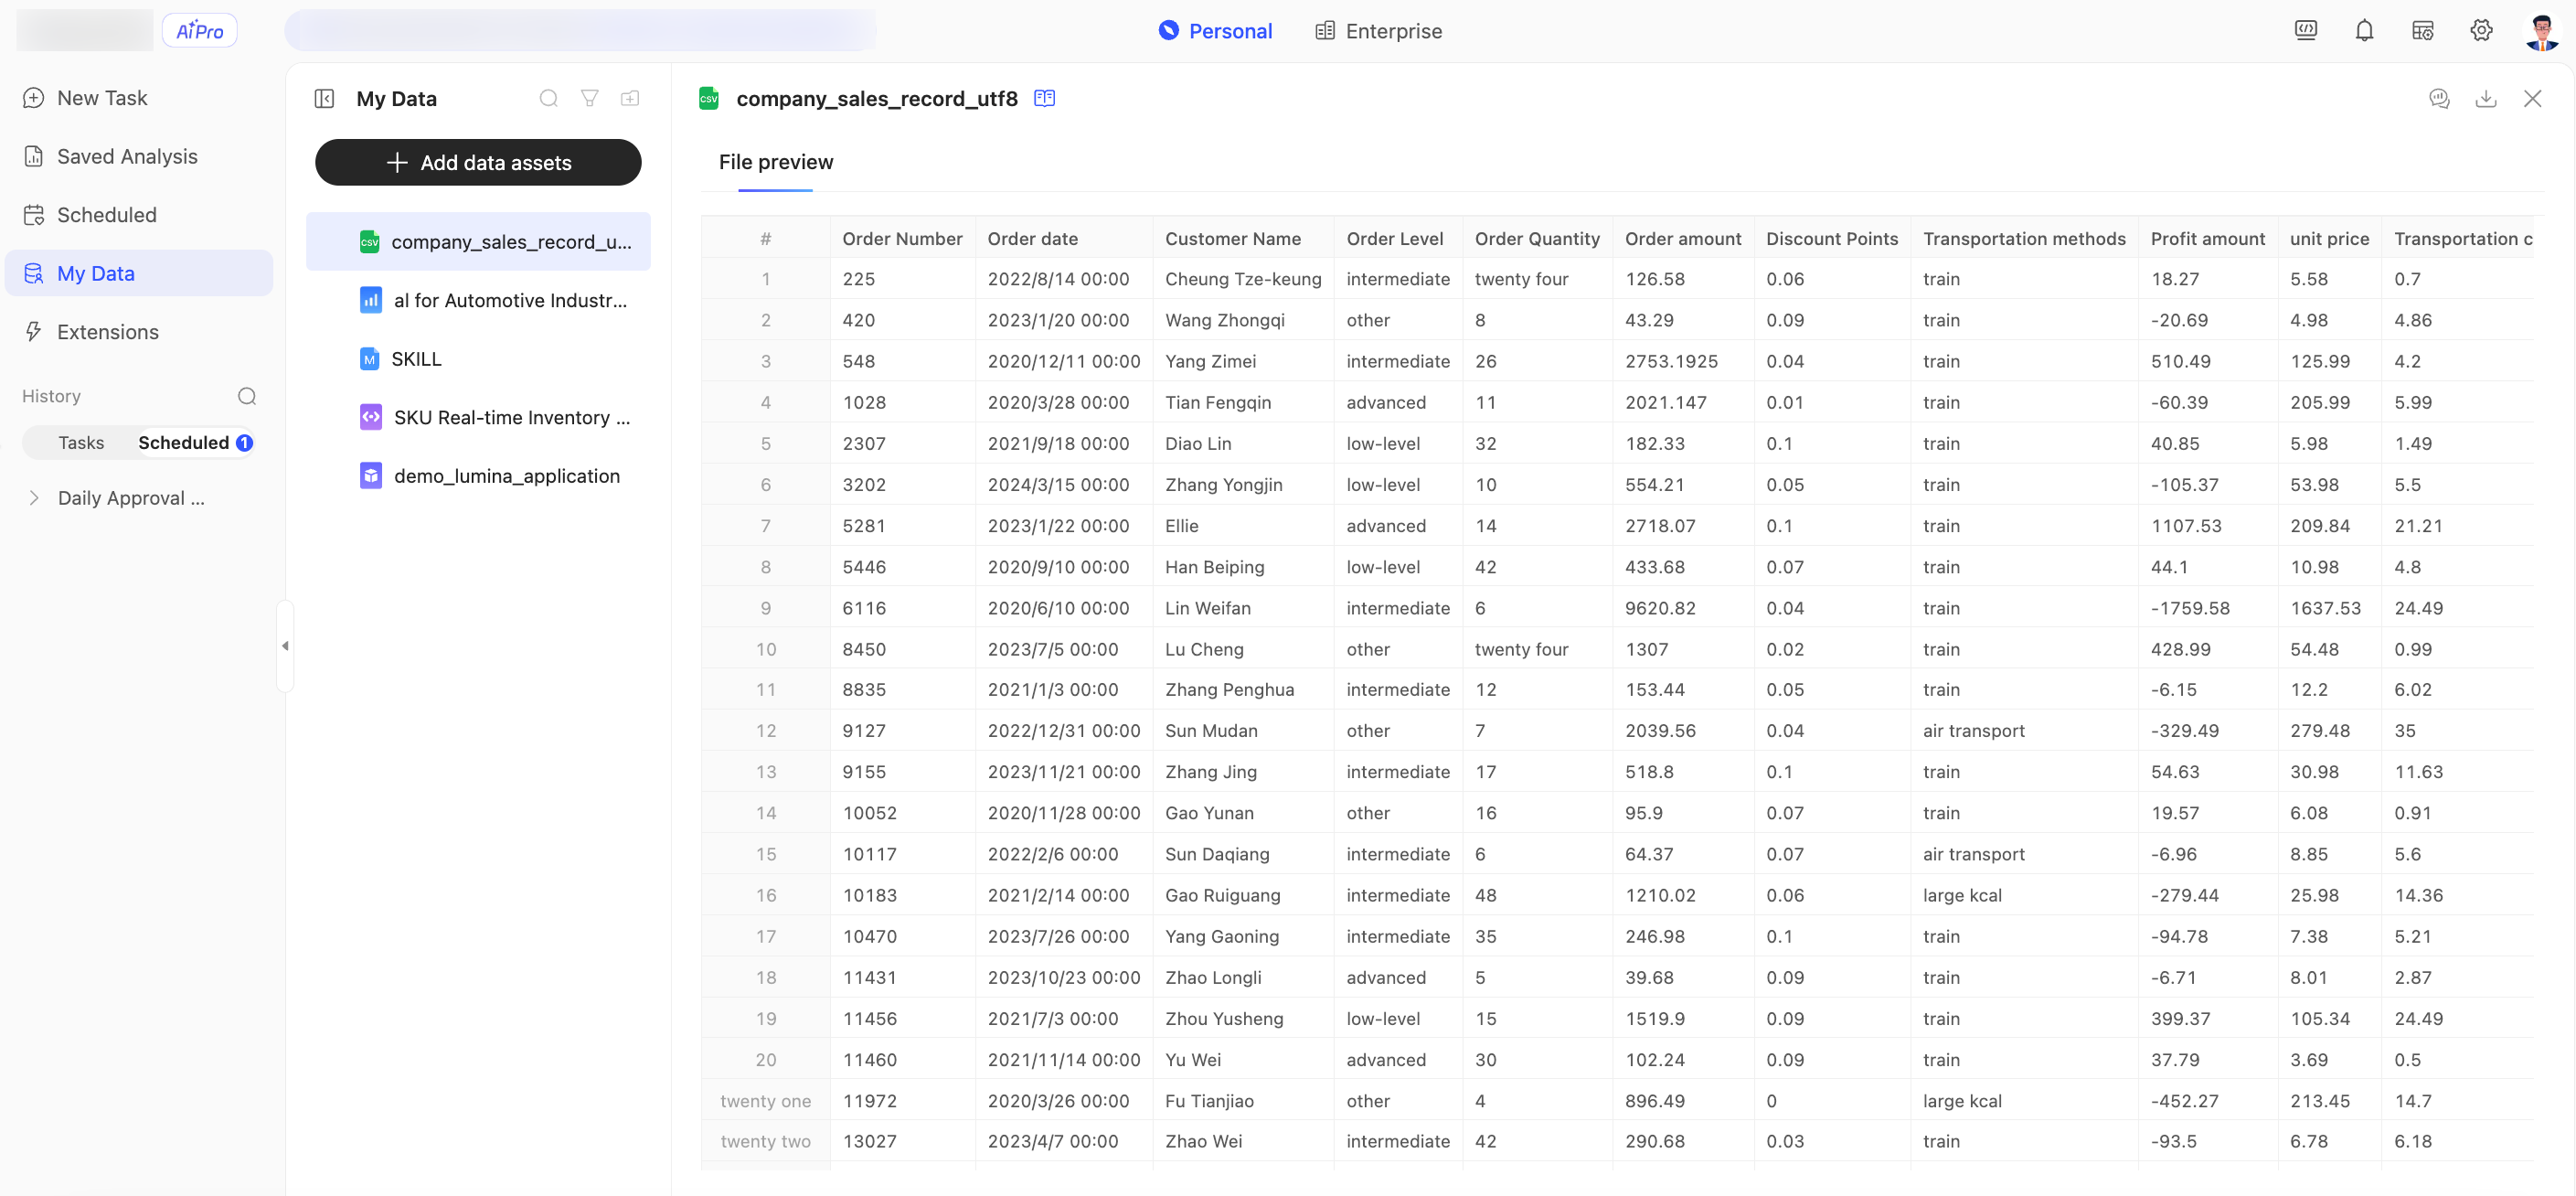
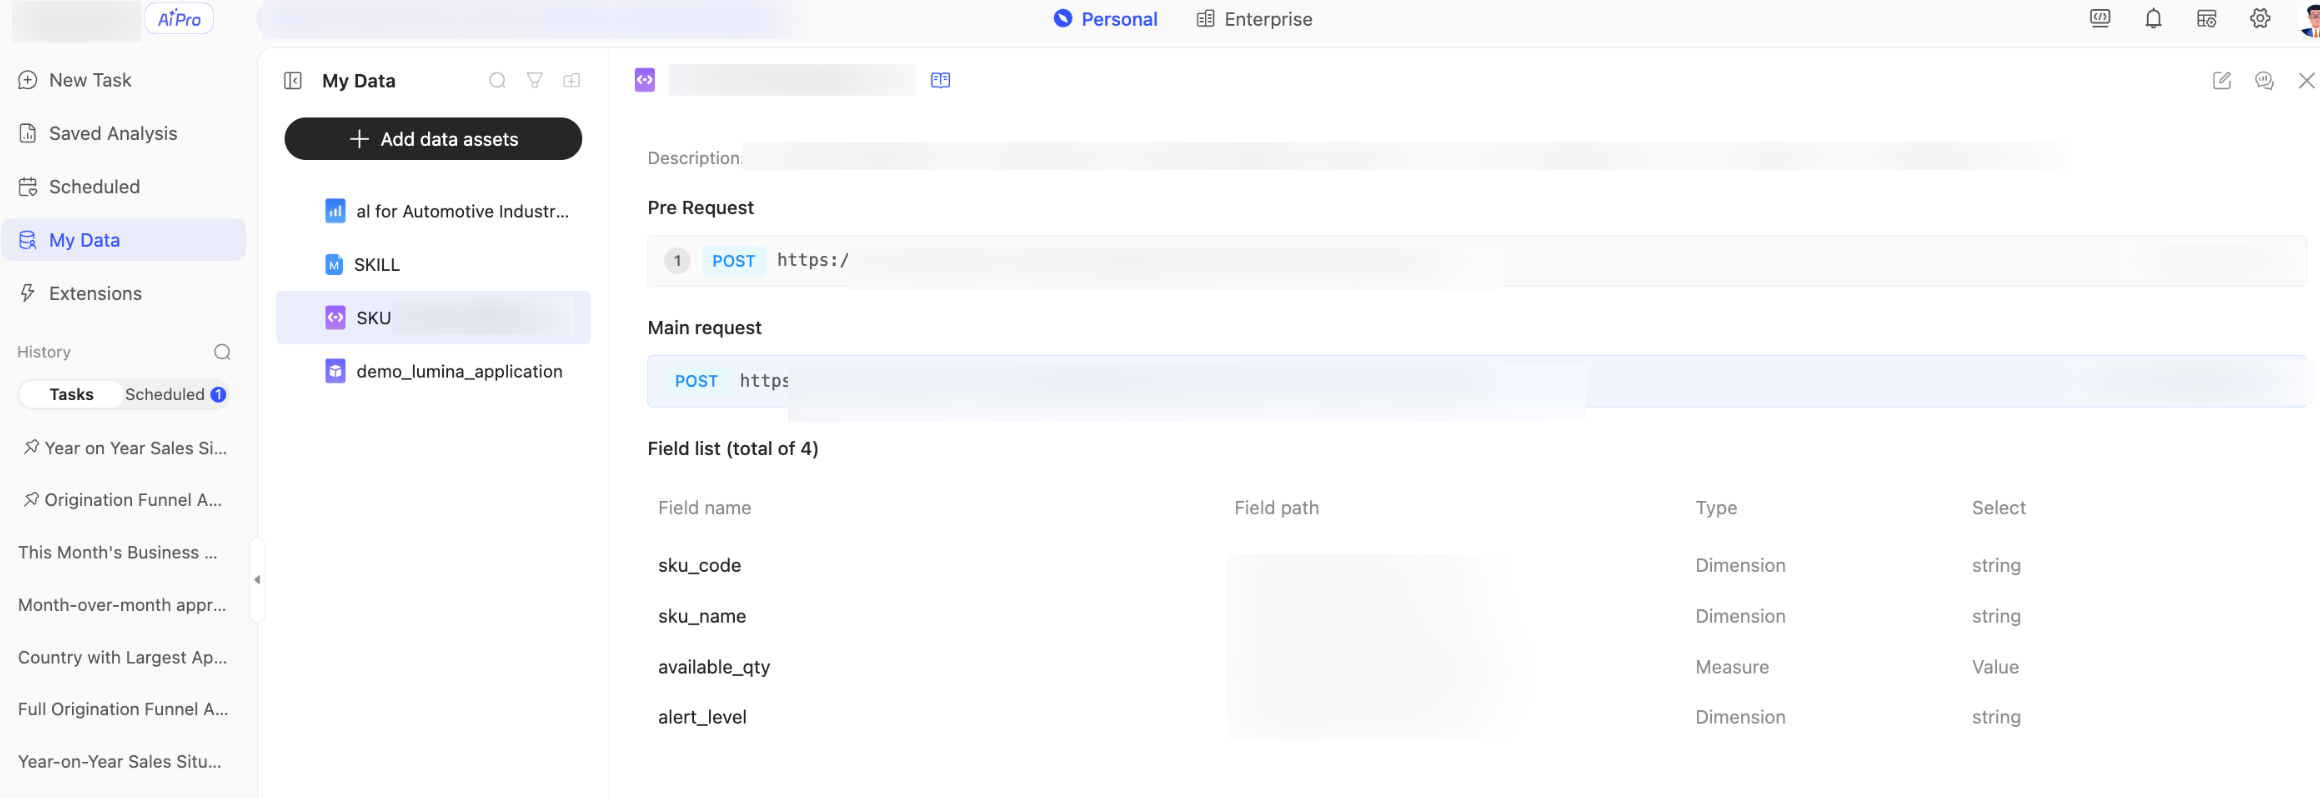
The preview varies by asset type.
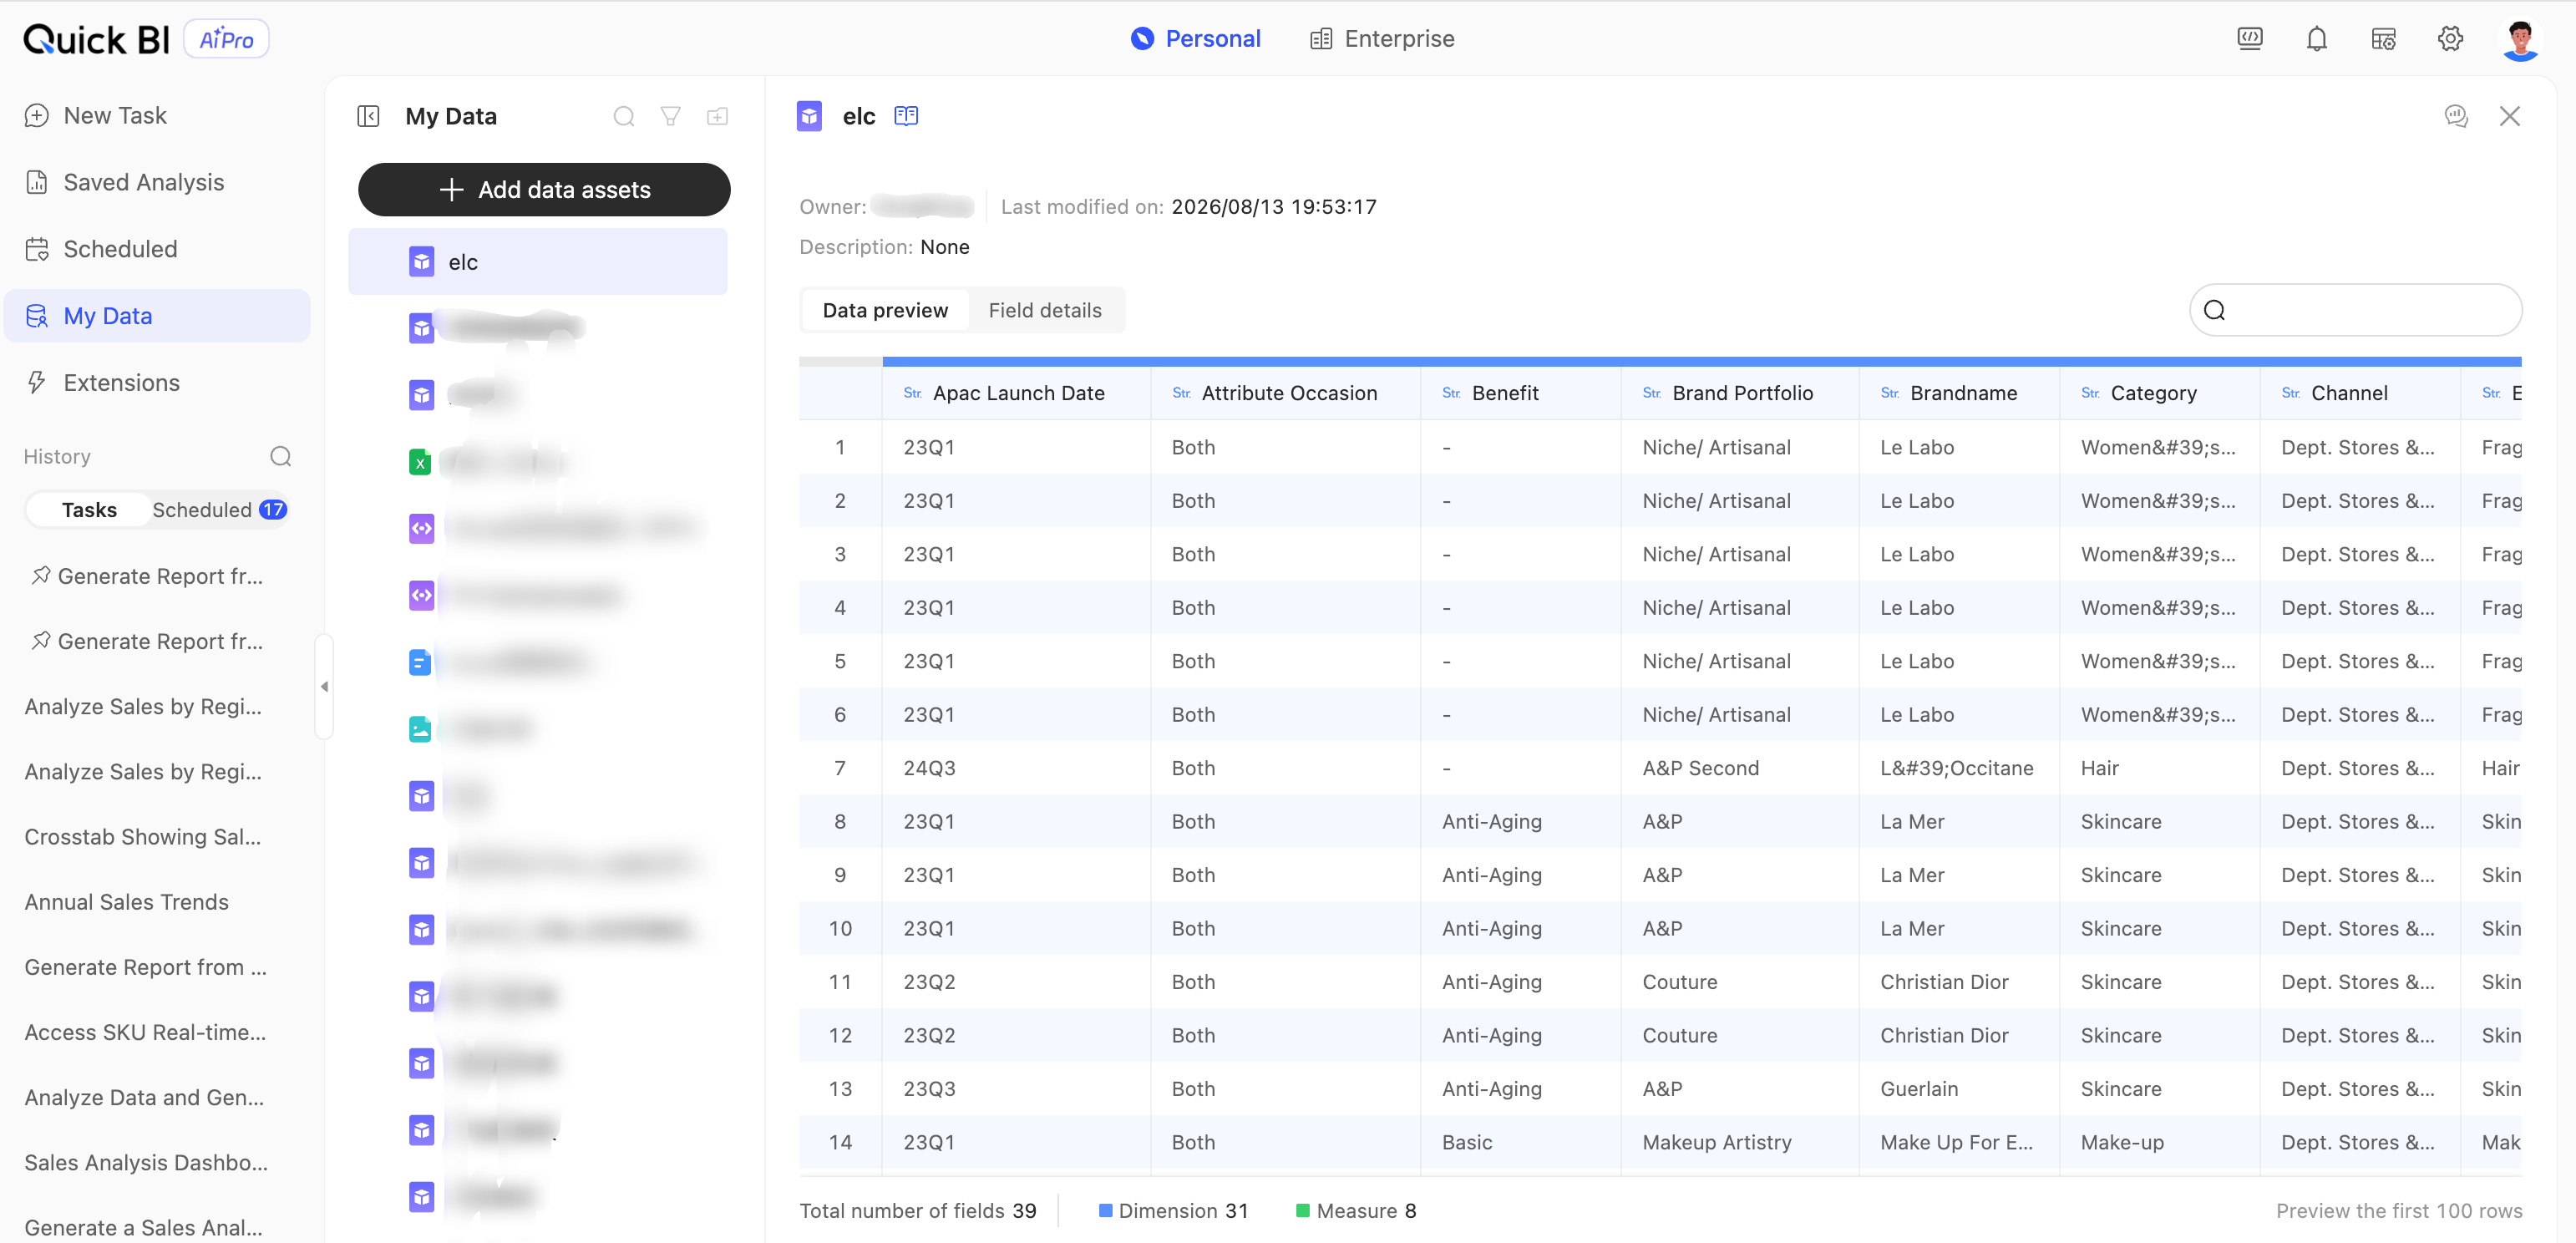
Data table
You can preview the details of the data, including Data Preview and Field Details.
NoteThe preview is limited to the first 100 rows of data.
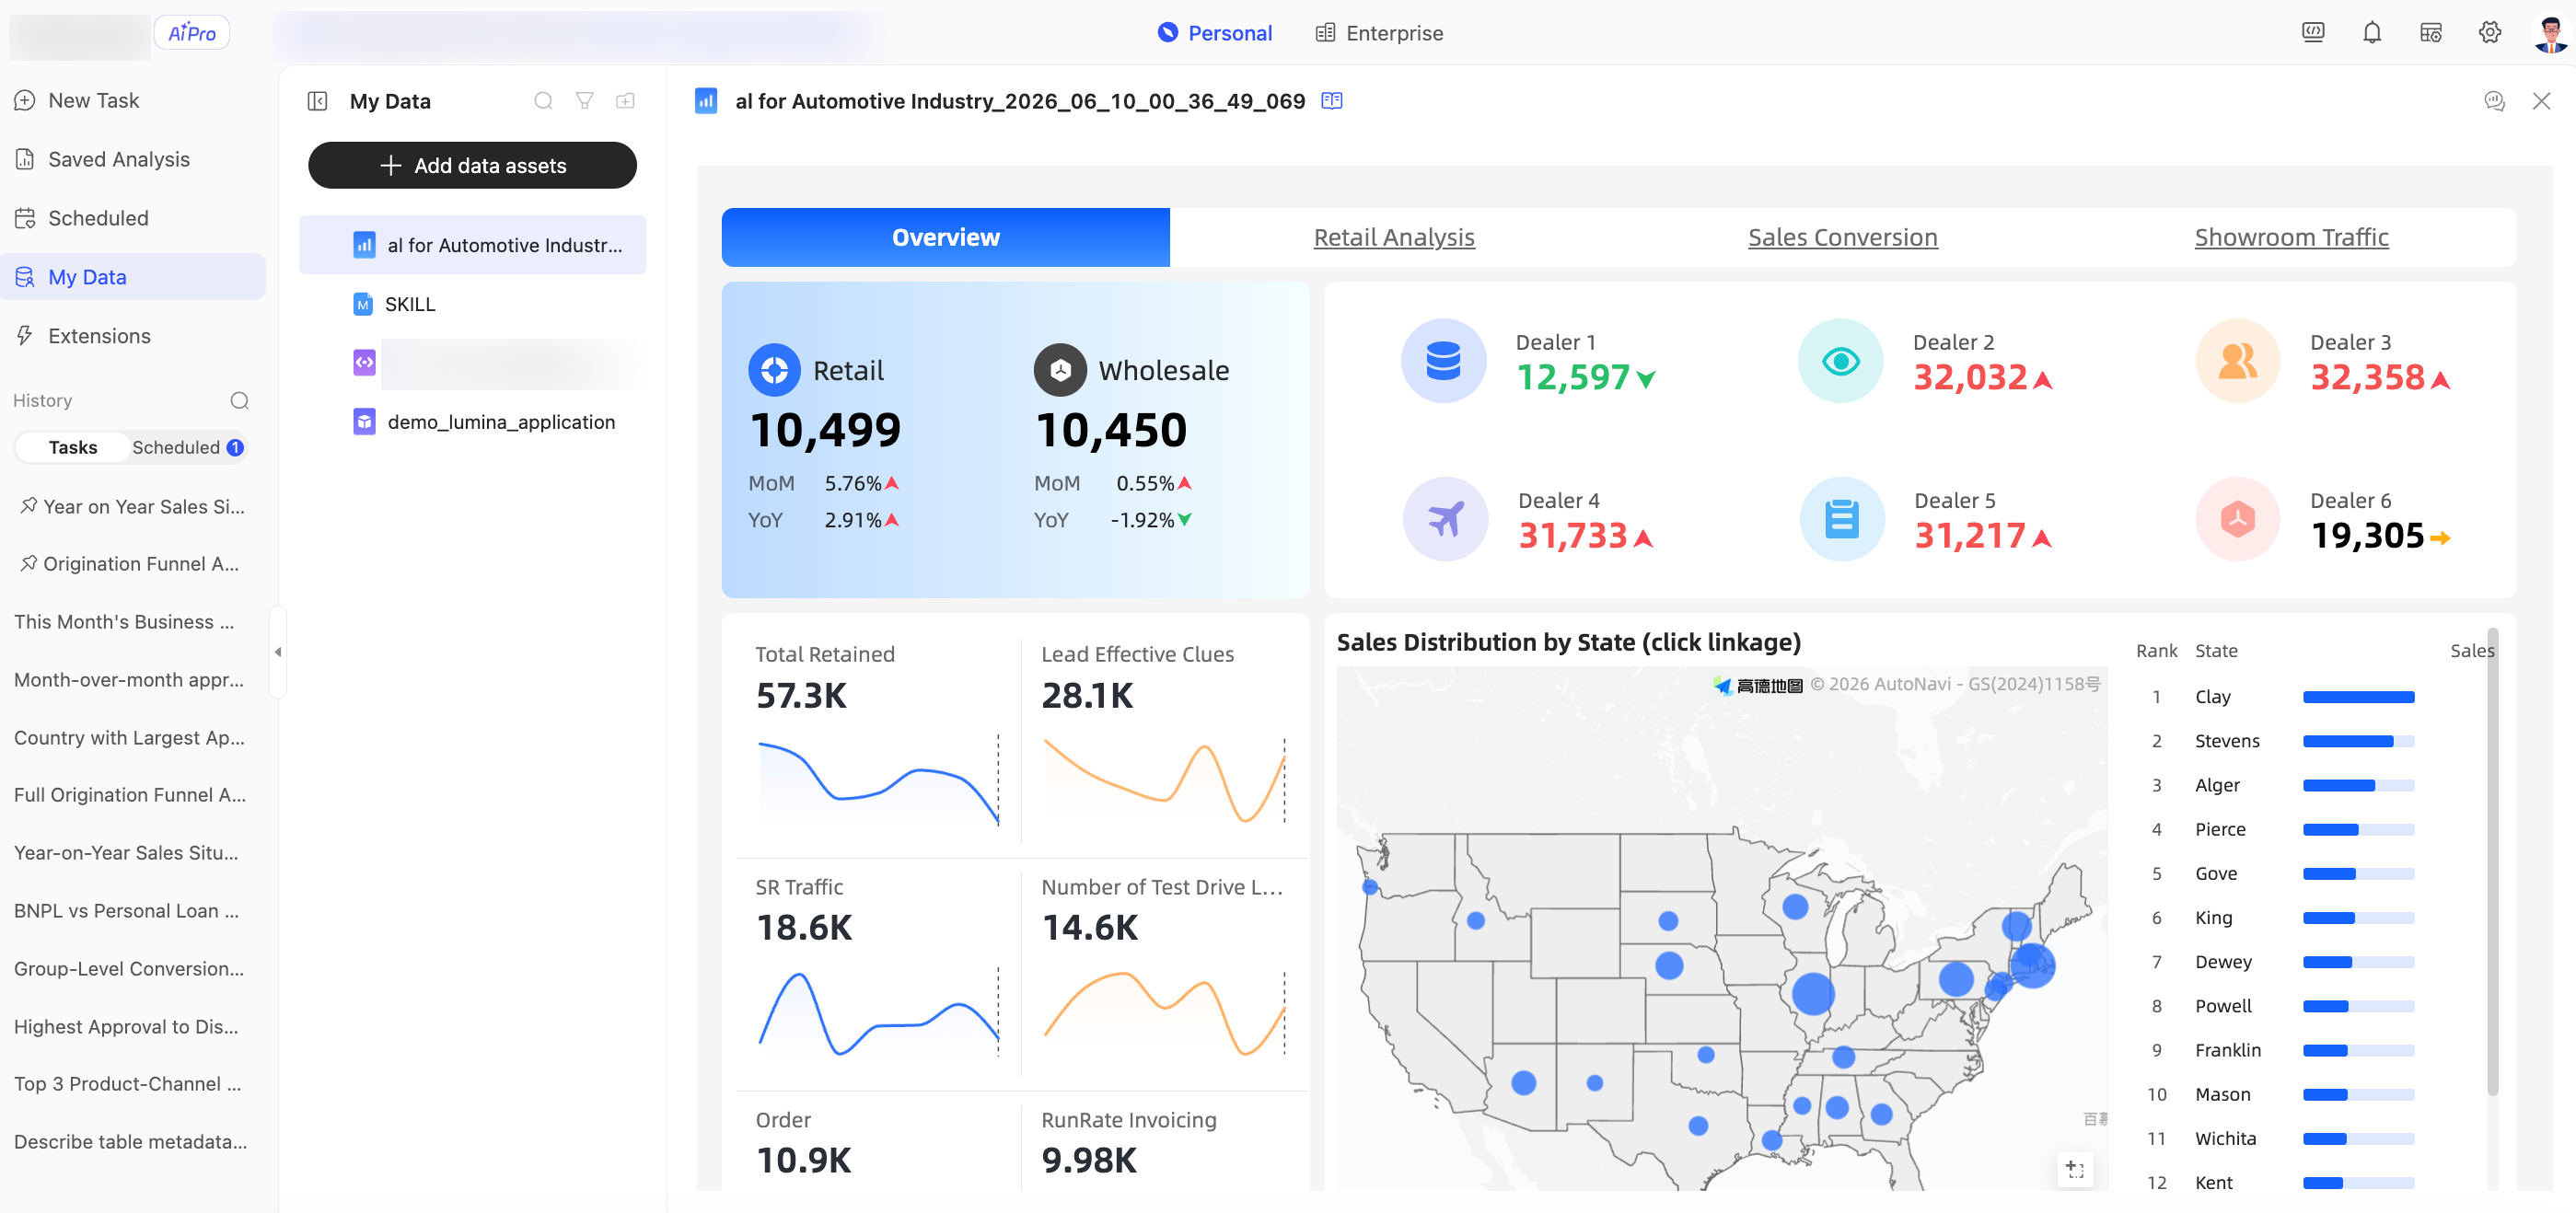
Dashboard
Local file
API data source
②
Analyze
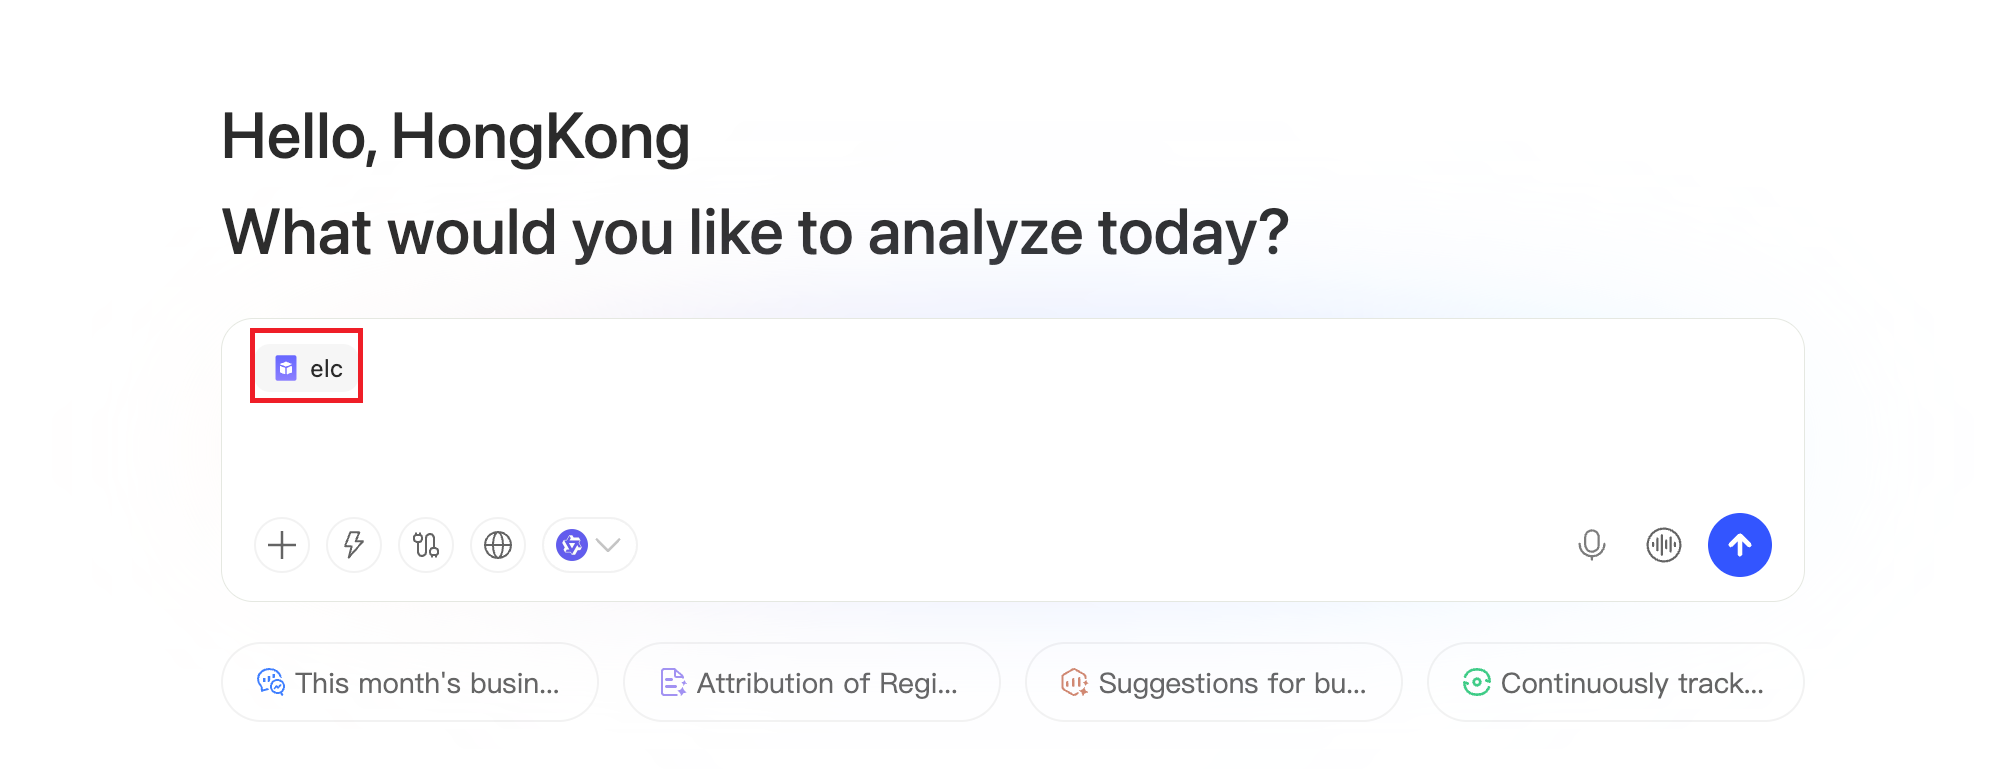
Selects the current data asset and opens the analysis page.
③
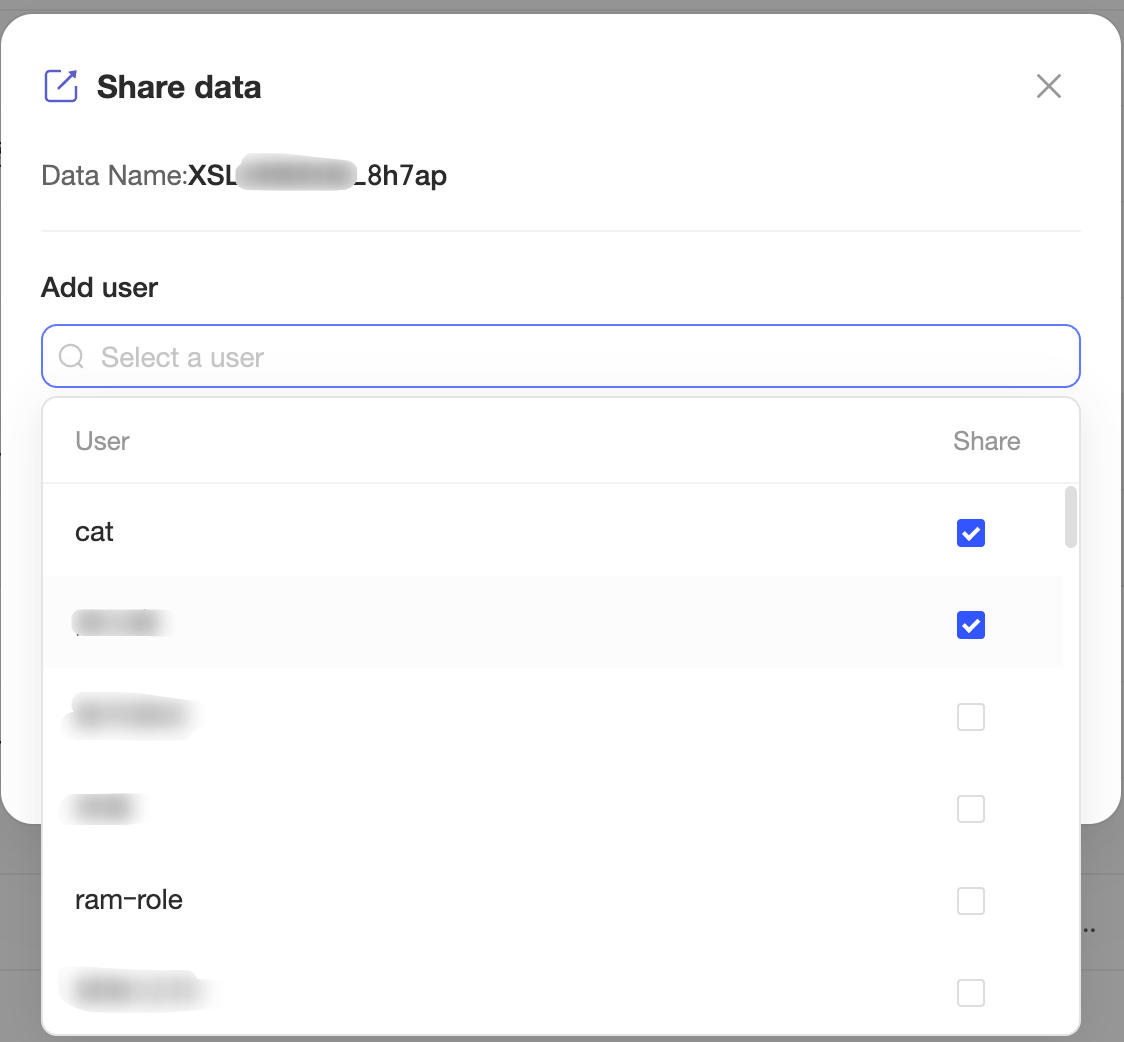
Share
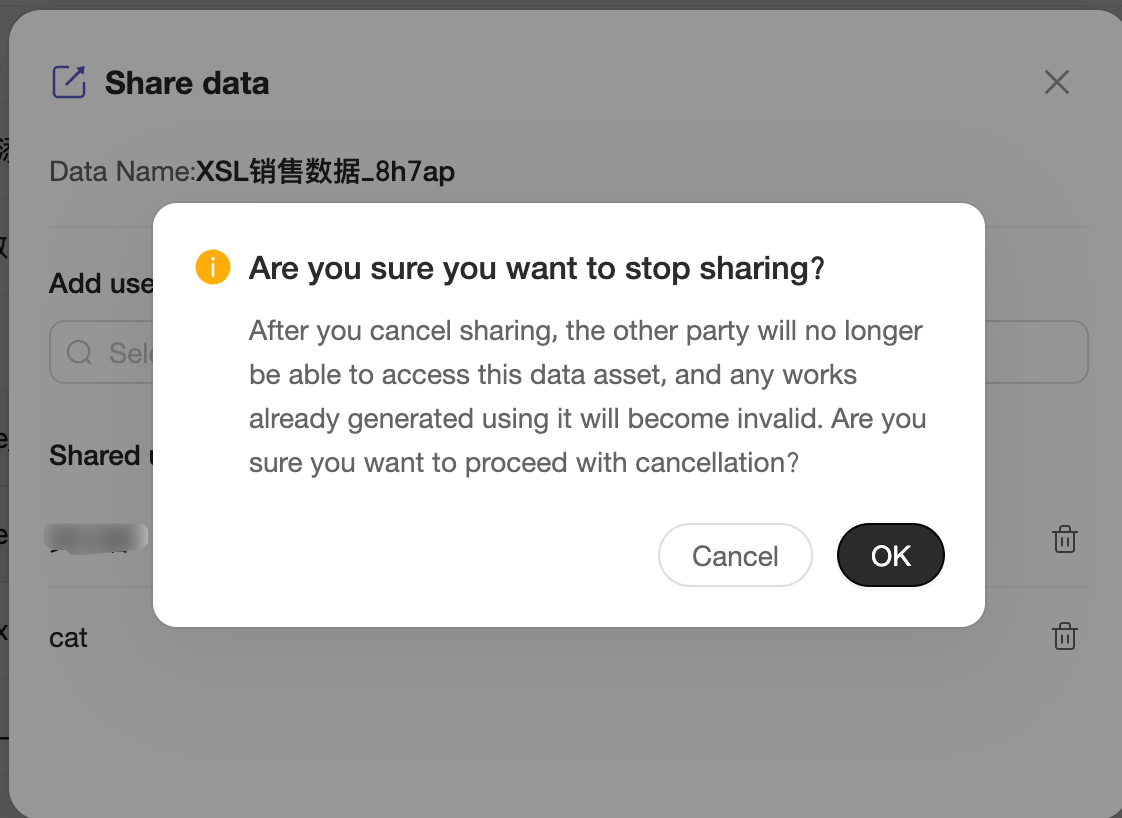
Lets you share a data asset with other users.
Only files and API data sources that you have personally added can be shared. Data assets added from the Data Marketplace cannot be shared.
After an asset is shared, you can also unshare it.
④
Rename
Lets you rename the current file.
⑤
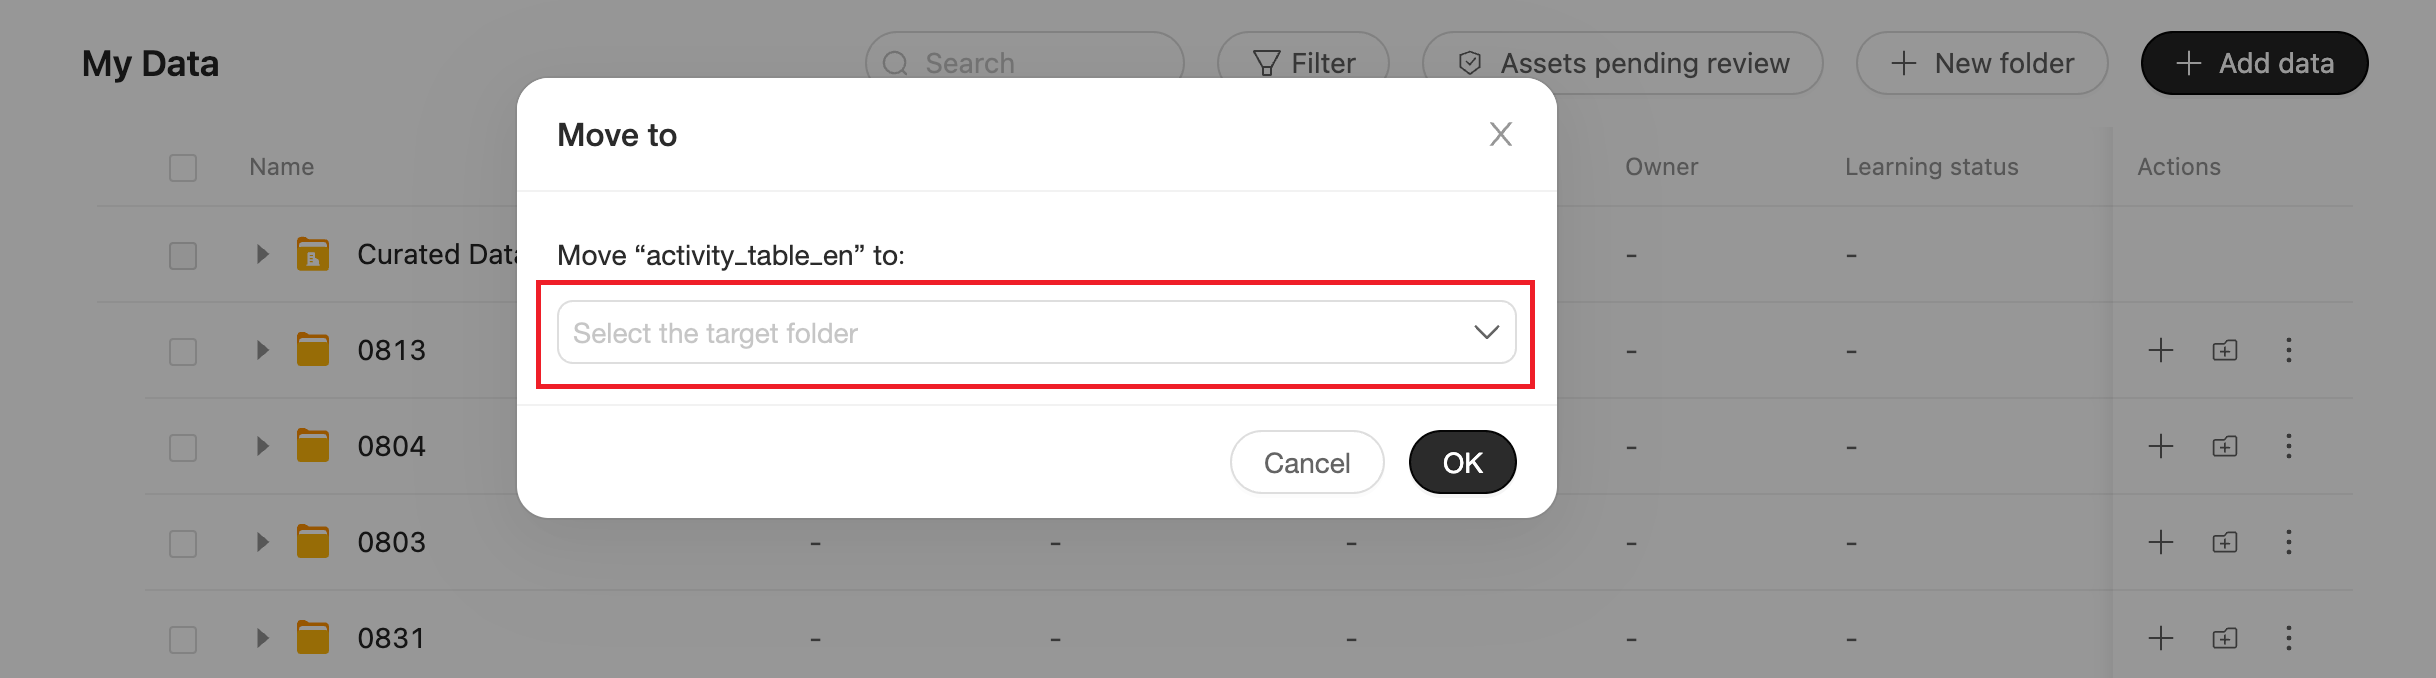
Move to
Lets you move the current data asset to another destination folder.
⑥
Re-learn
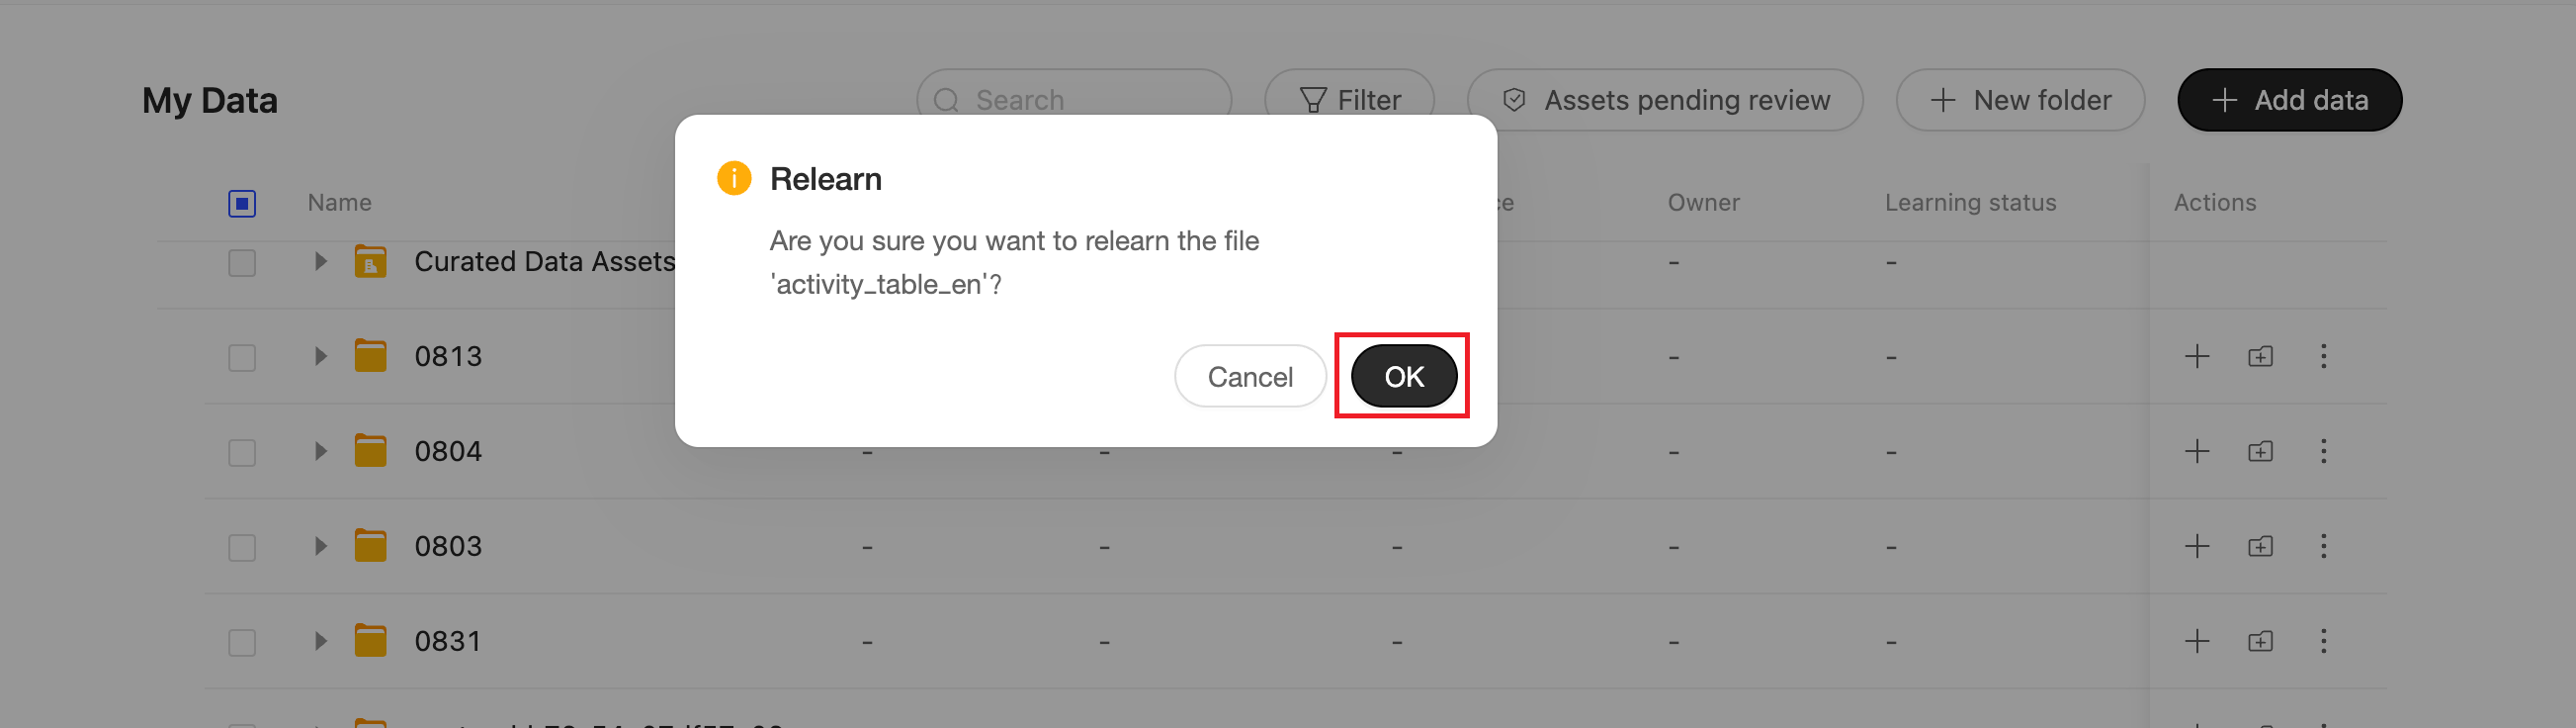
After you add data, the system automatically learns from it. If the learning process fails or the data is updated, you can start a re-learn.
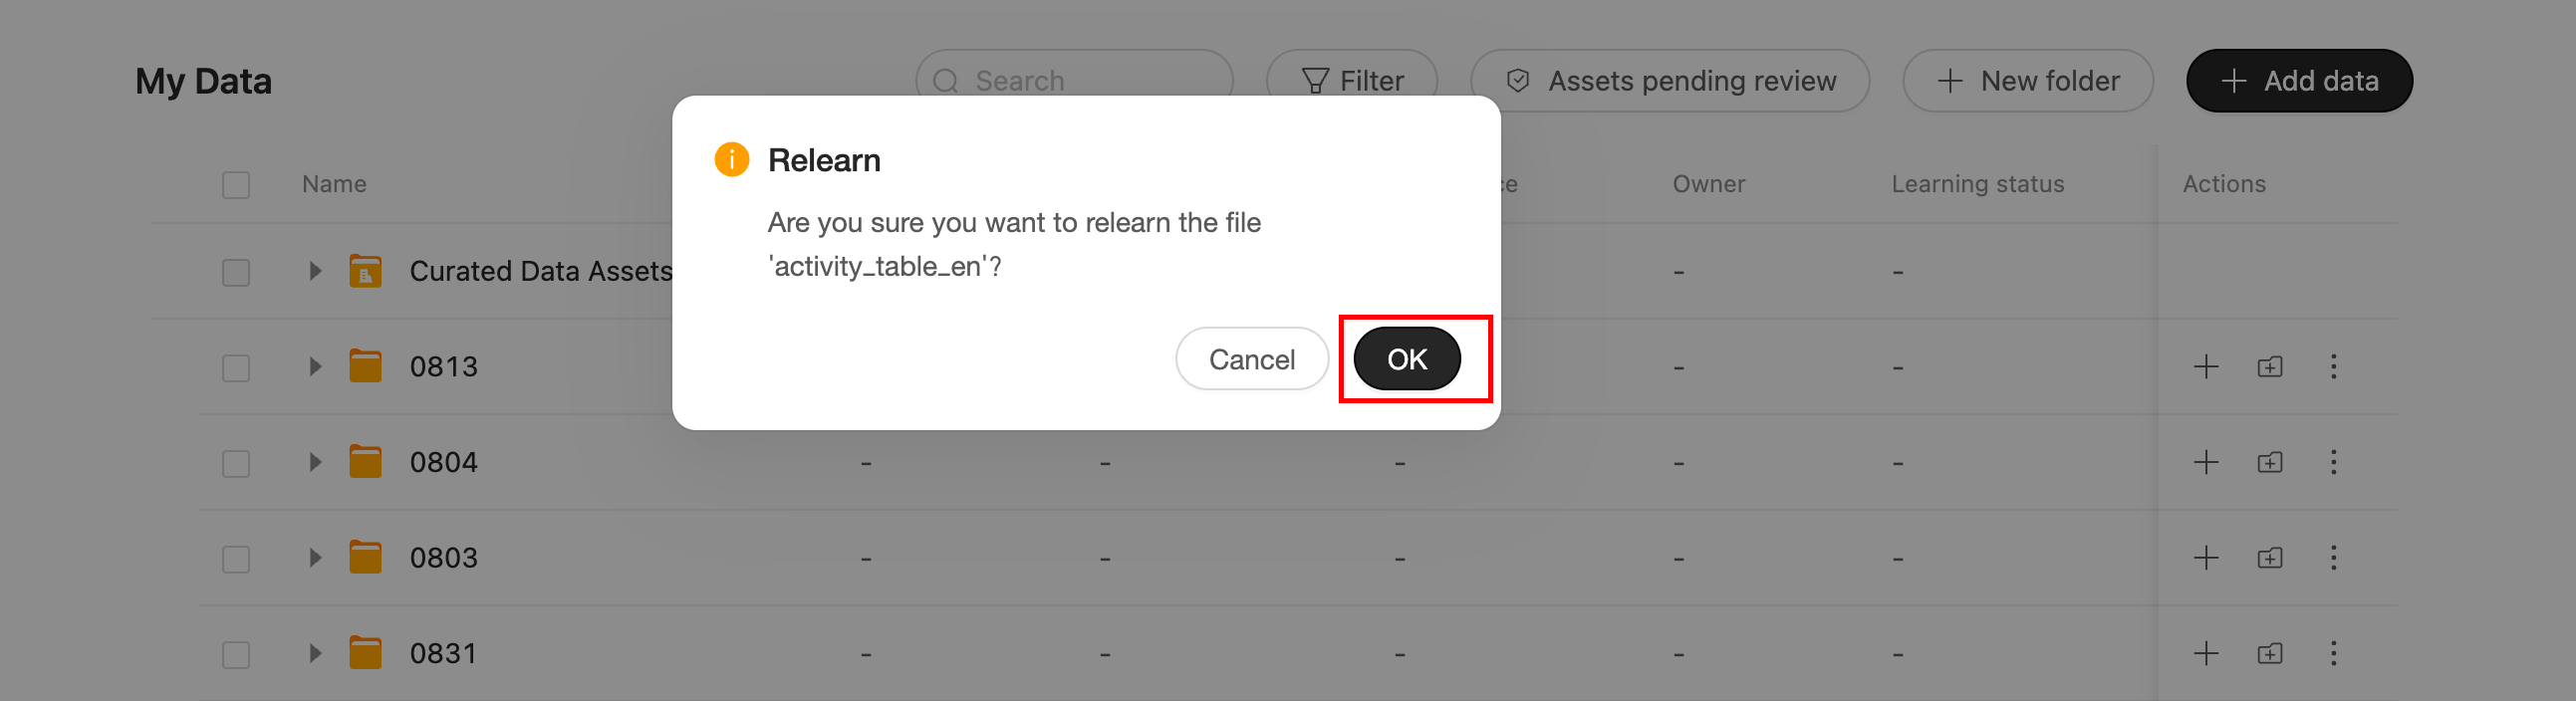
Click the Re-learn button, and then click OK in the confirmation dialog box. The system then re-learns from the data.
⑦
Delete
Click Delete and then OK to delete the data asset.
⑧
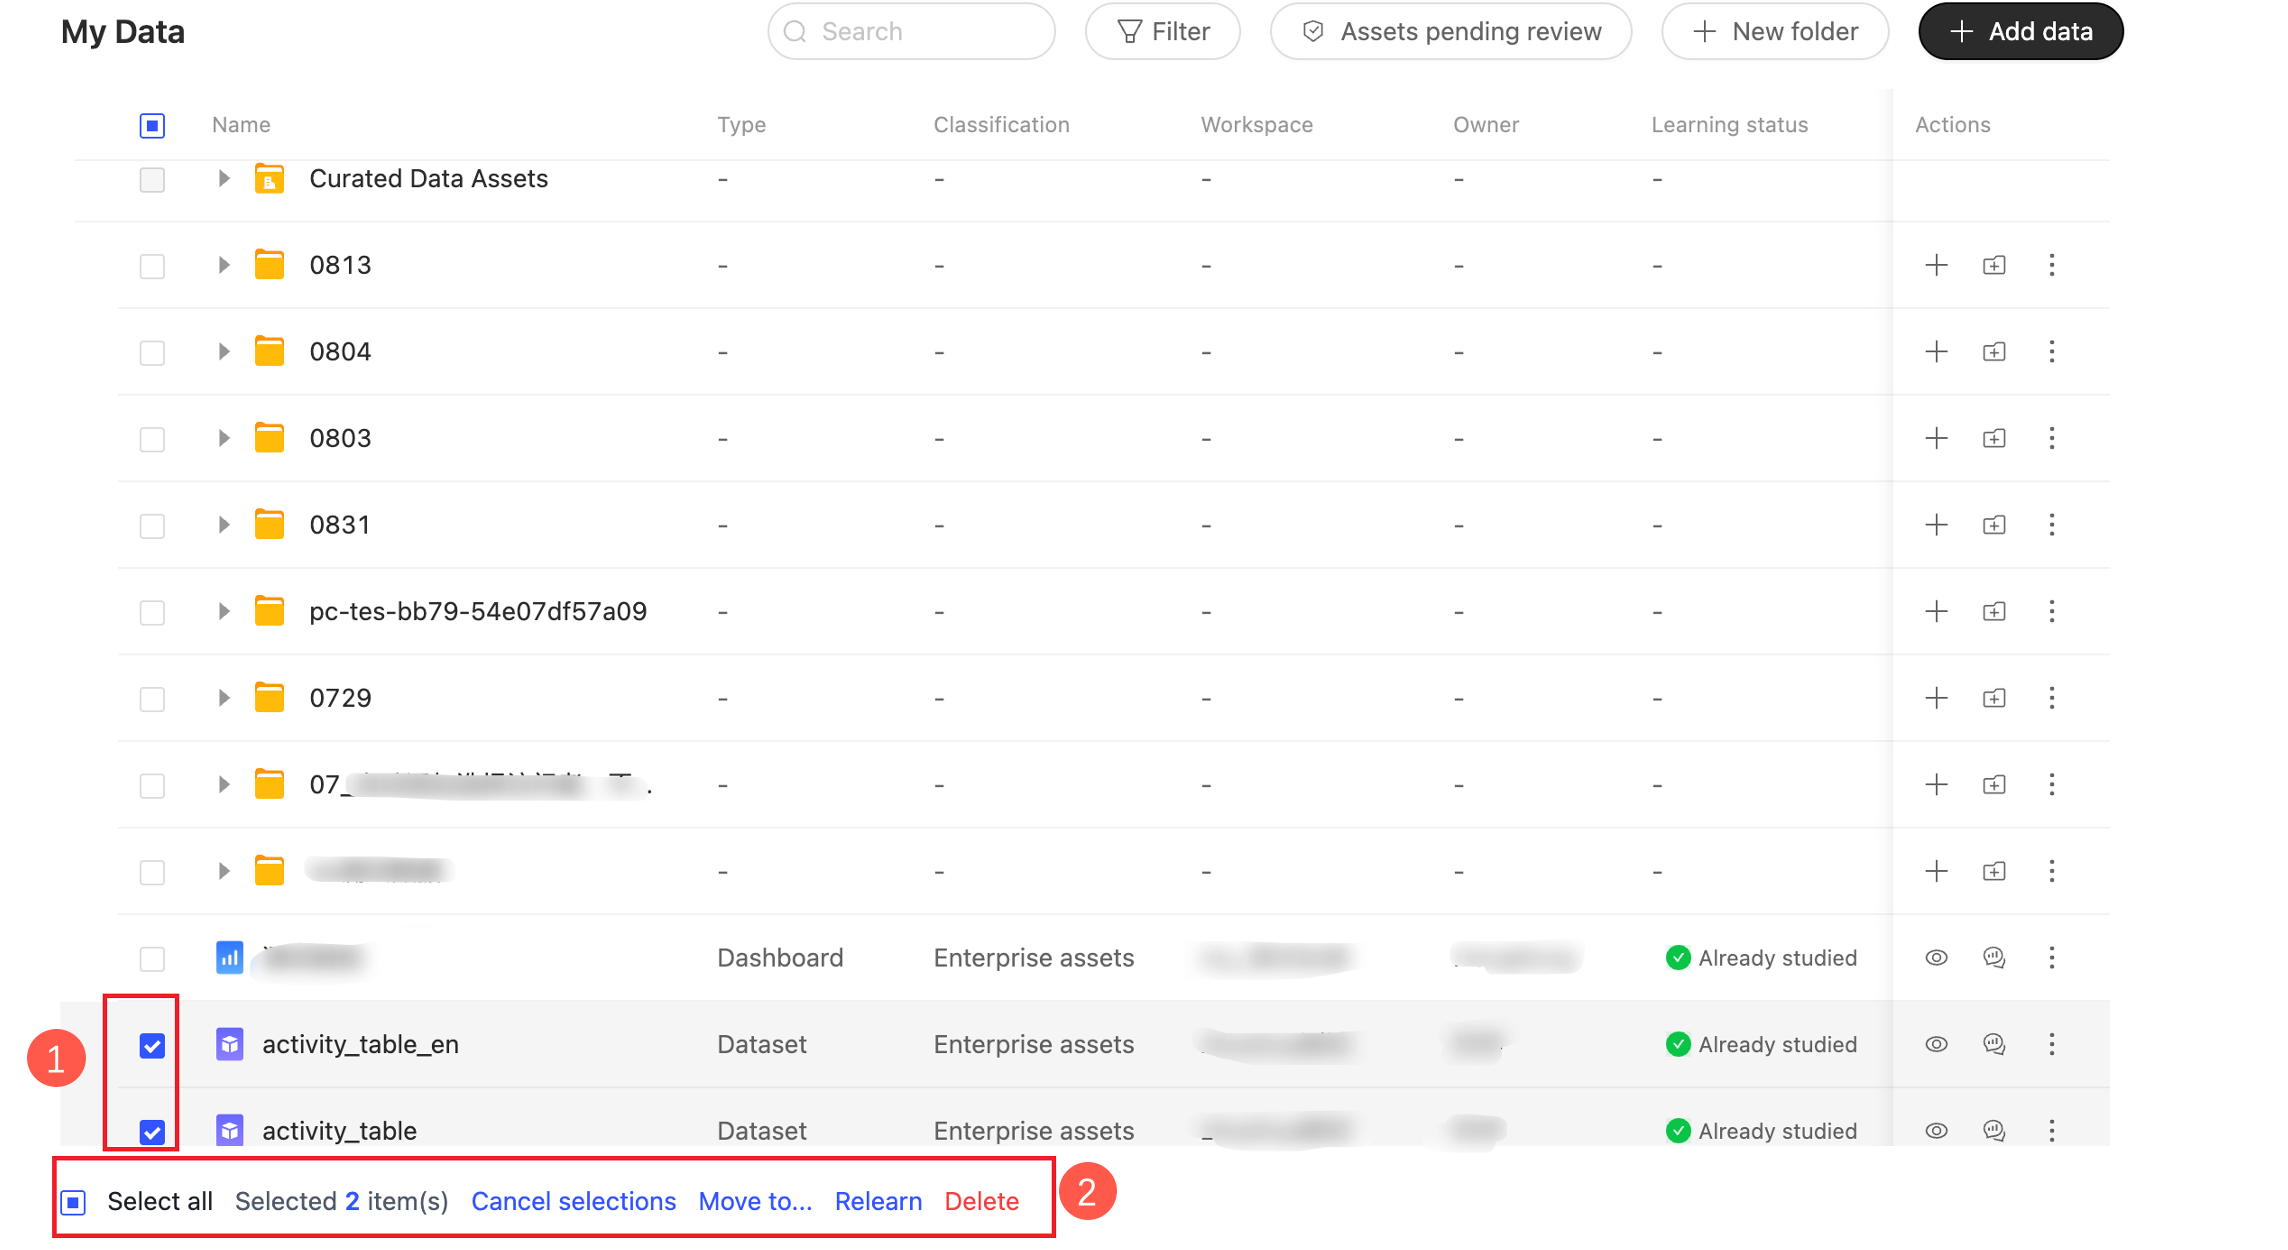
Batch operation
You can select multiple data assets to perform batch operations, such as Move to, Re-learn, and Delete.