Preset assets
The Preset Assets feature lets administrators bundle frequently used data resources from a department or business module into a standardized asset package and deliver it to target business users. This lets them directly use curated, pre-filtered, and governance-validated data assets when creating analysis tasks, without needing to manually search for or configure data. This topic describes how to create and manage asset packages.
Prerequisites
Subscription: Your organization must have a Quick BI AIPro subscription.
Permissions: Only administrators with both centralized management and Enterprise Security permissions can access the Management Center to manage Preset Assets. For more information about configuring permissions, see User Permissions.
Access the feature
In Quick BI AIPro, go to the Management Center and click Preset Assets in the top navigation bar.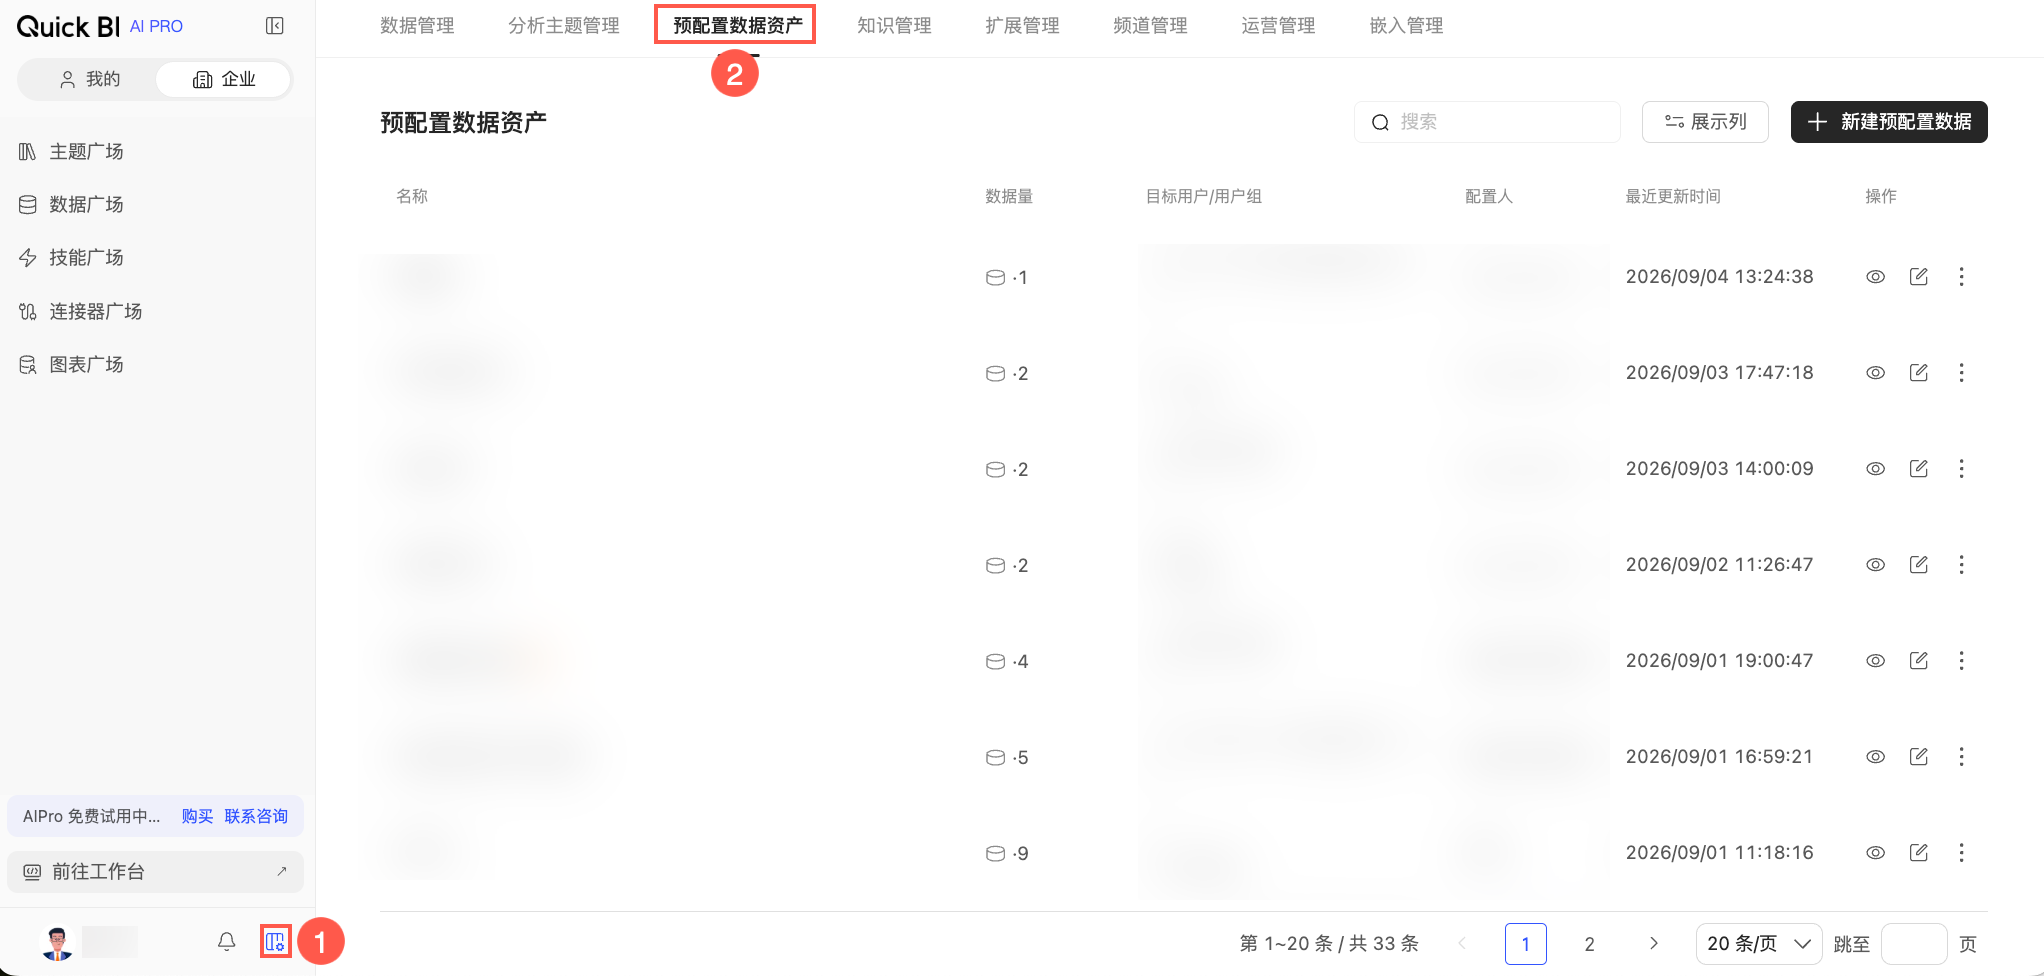
Create an asset package
When you create an asset package, you can select any data asset from your organization. If a target user lacks the required permissions for some selected assets, the system automatically grants the necessary permissions when creating the package. This ensures target users can use all data within the package.
On the Preset Assets page, click the Create Asset Package button in the upper-right corner.
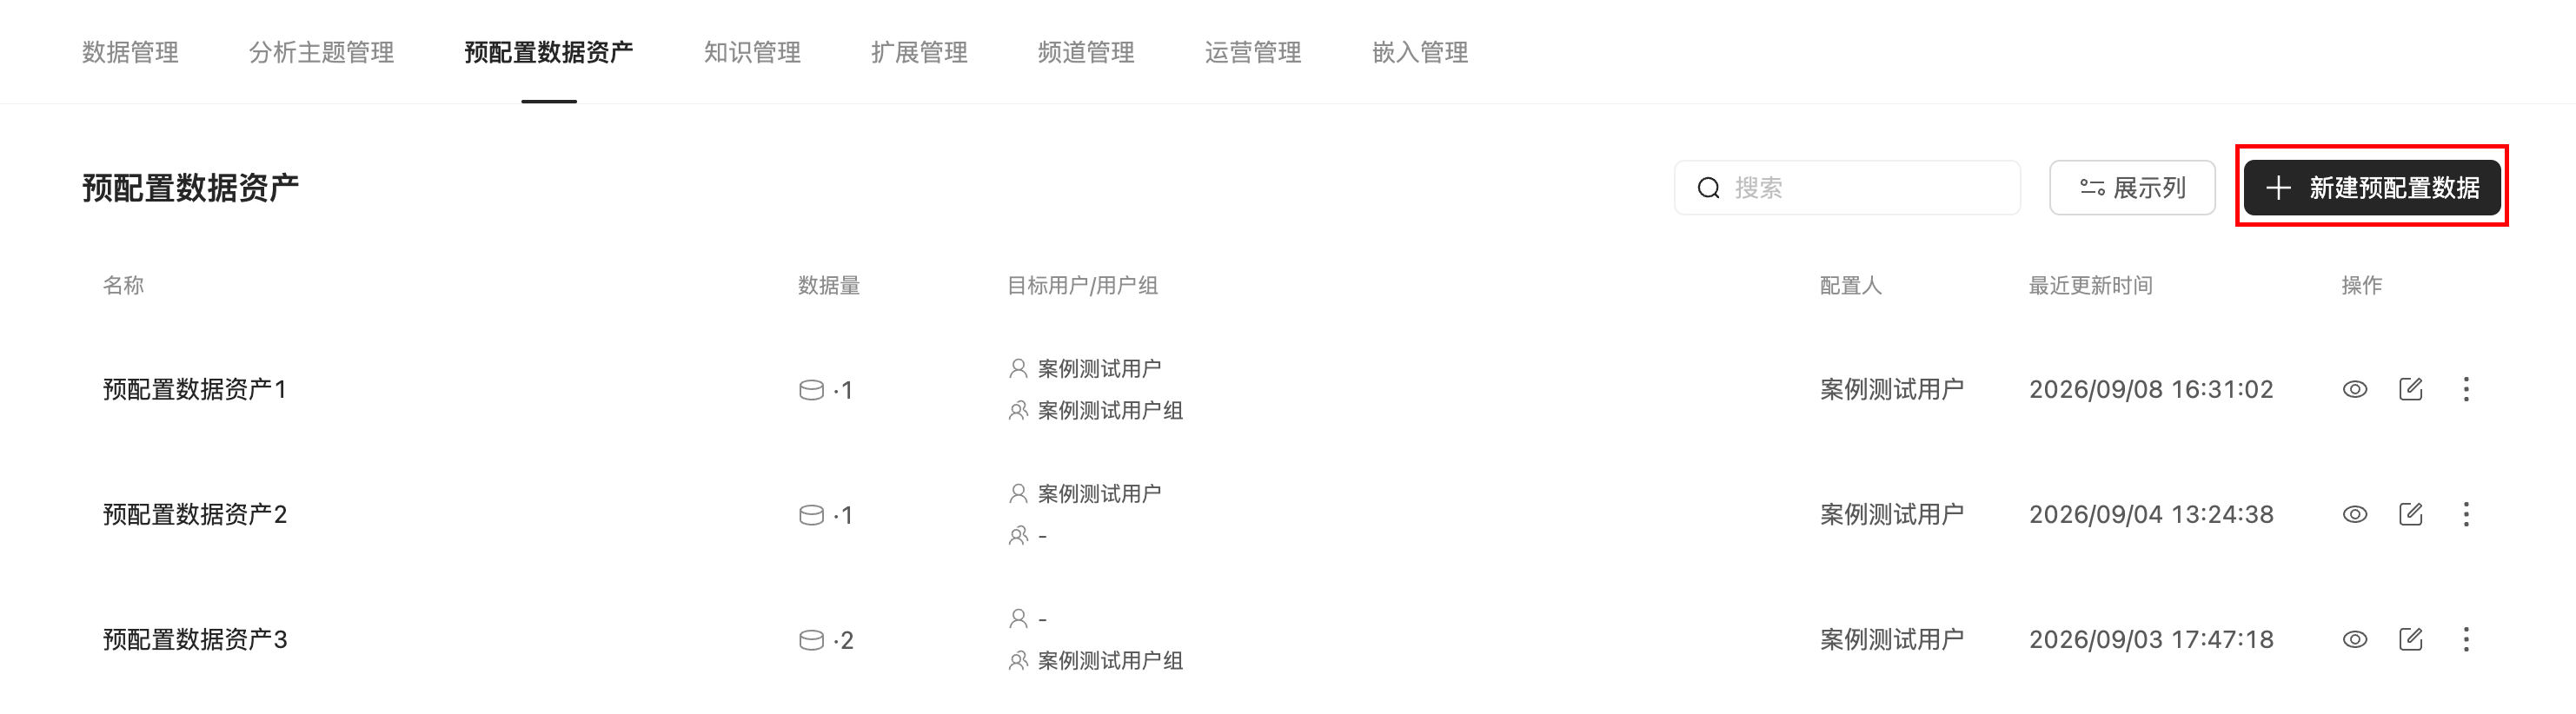
On the Create Asset Package page, configure the following information for the asset package:
In the Basic Information section at the top of the page, configure the Name and Target Users for the asset package.
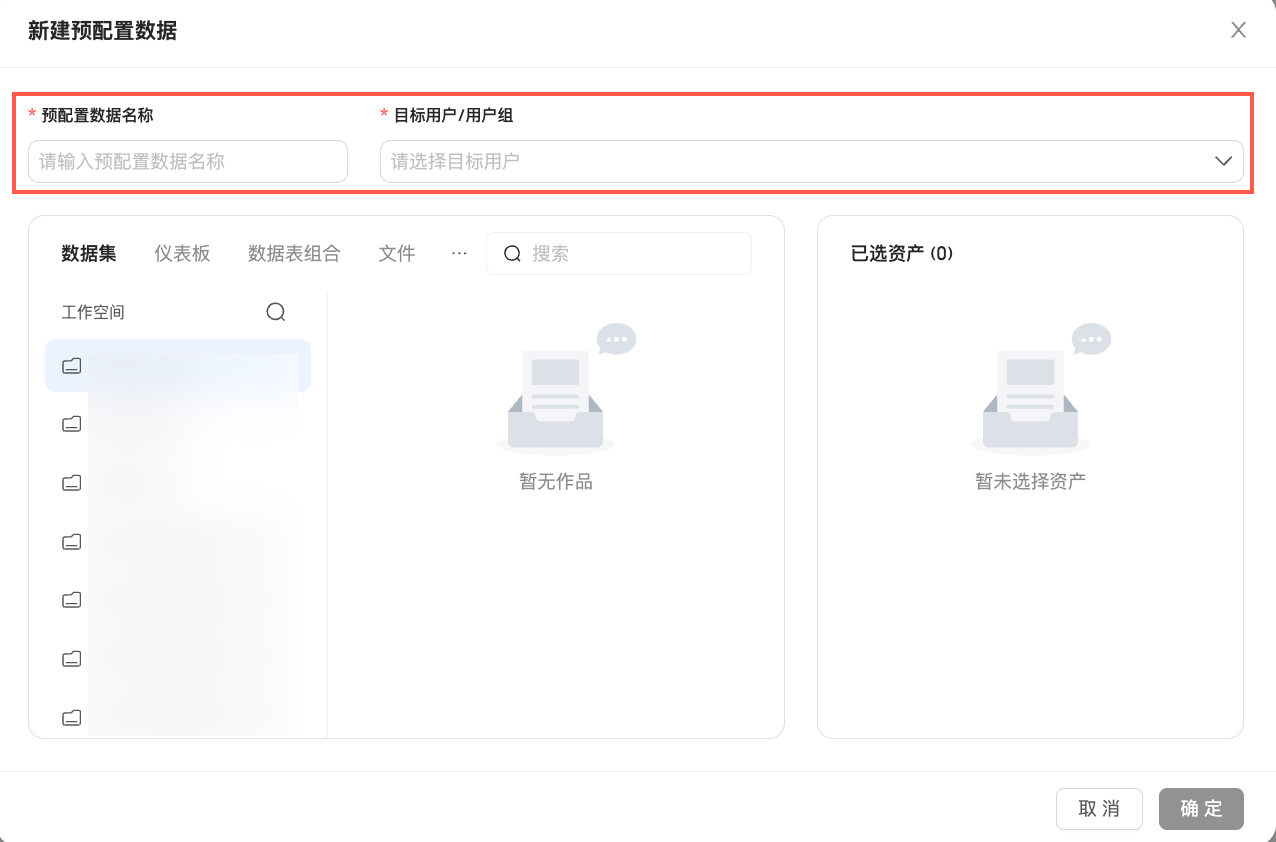
Parameter
Description
Asset package name
Enter a custom name for the asset package. Use a name that reflects its business purpose, for example,
Sales Department Monthly Business Analysis Package.NoteThe asset package name must be unique.
Target user/user group
Select the users and user groups to receive this asset package. Click the Select Target Users drop-down list and select the recipients from the list. You can select an unlimited number of users and user groups. When you select a user group, all members of the group receive the asset package.
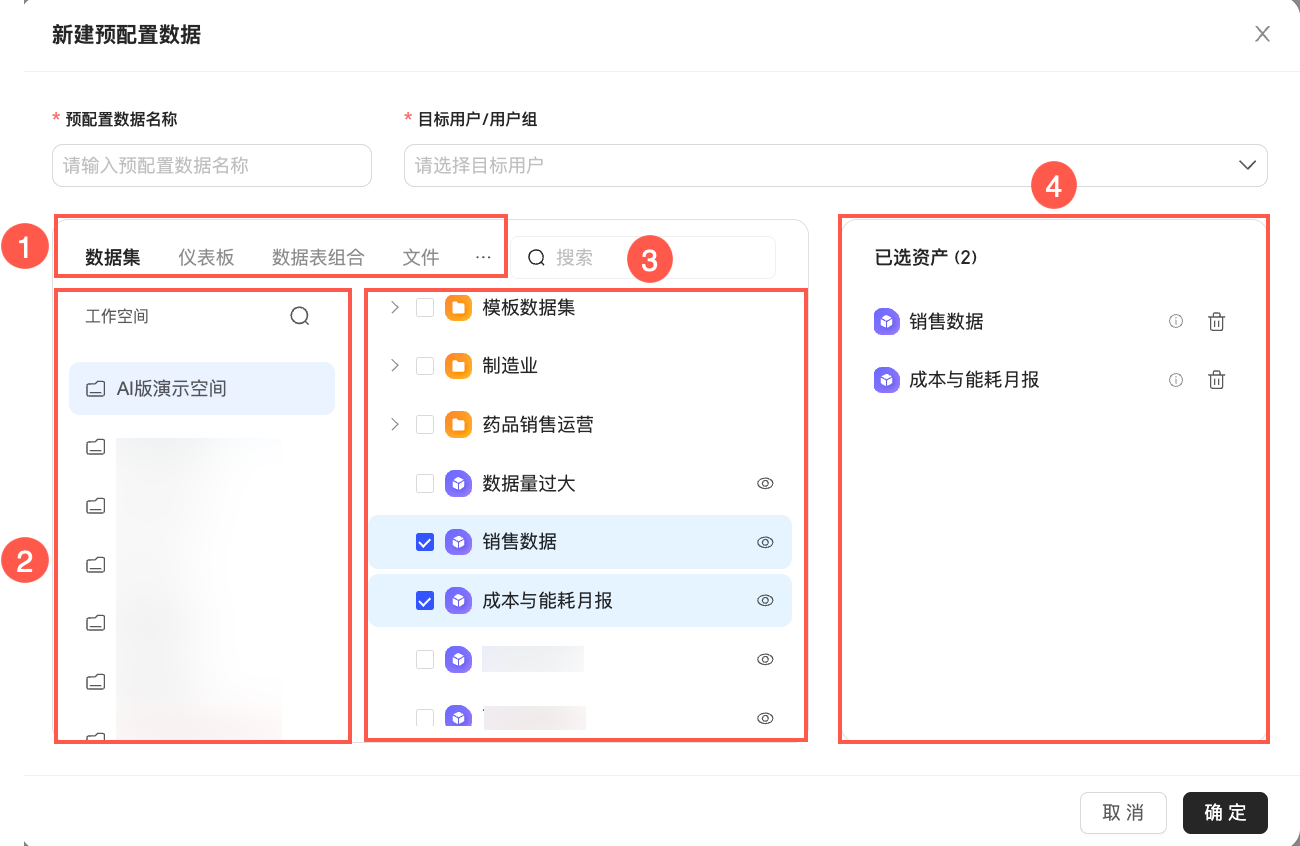
In the Select Assets section, select the data resources to bundle, such as datasets, dashboards, or data table combinations. This section displays all data assets in your organization, regardless of workspace visibility or private space settings.
Area
Actions
① Asset type tabs
You can add data assets of types such as dataset, dashboard, data table combination, file, and API data to the asset package. Switch between the tabs to select assets of a specific type.
② Workspace list
When the asset type is Dataset or Dashboard, the workspaces containing these assets appear on the left. You can switch between workspaces to find the data resources you need. If you have many workspaces, you can also search by keyword to quickly locate one.
③ Asset list
This area lists all data assets in your organization. You can perform the following actions.
Select an asset: Select the data assets you want to deliver. Selected assets are automatically added to the Selected Assets list (④).
Select in bulk: When data assets are displayed in a folder structure, you can select a folder to add all assets within it. The folder hierarchy is not preserved in the package; only the selected assets are added.
Quick search: Enter a name or keyword to quickly locate a target asset.
Preview data: Click the
 icon next to a data asset to view and confirm its contents in a pop-up window.
④ Selected assets list
This list provides a real-time summary of the assets you have selected. To remove an asset that you no longer need or selected by mistake, click the
 icon next to it.
Click a selected data asset to open a preview page. From the asset list on the left, you can select a different asset to preview it, or add and remove assets. Click Create Asset Package to return to the editing page.
Click Create. The system then creates the asset package, delivers it to the specified target users, and grants them the necessary permissions for all assets within it. After delivery, users can find the package under Resident Data in the dialog box when they create a new analysis task. They can also access it by typing
@to open the data asset list.
 icon next to it.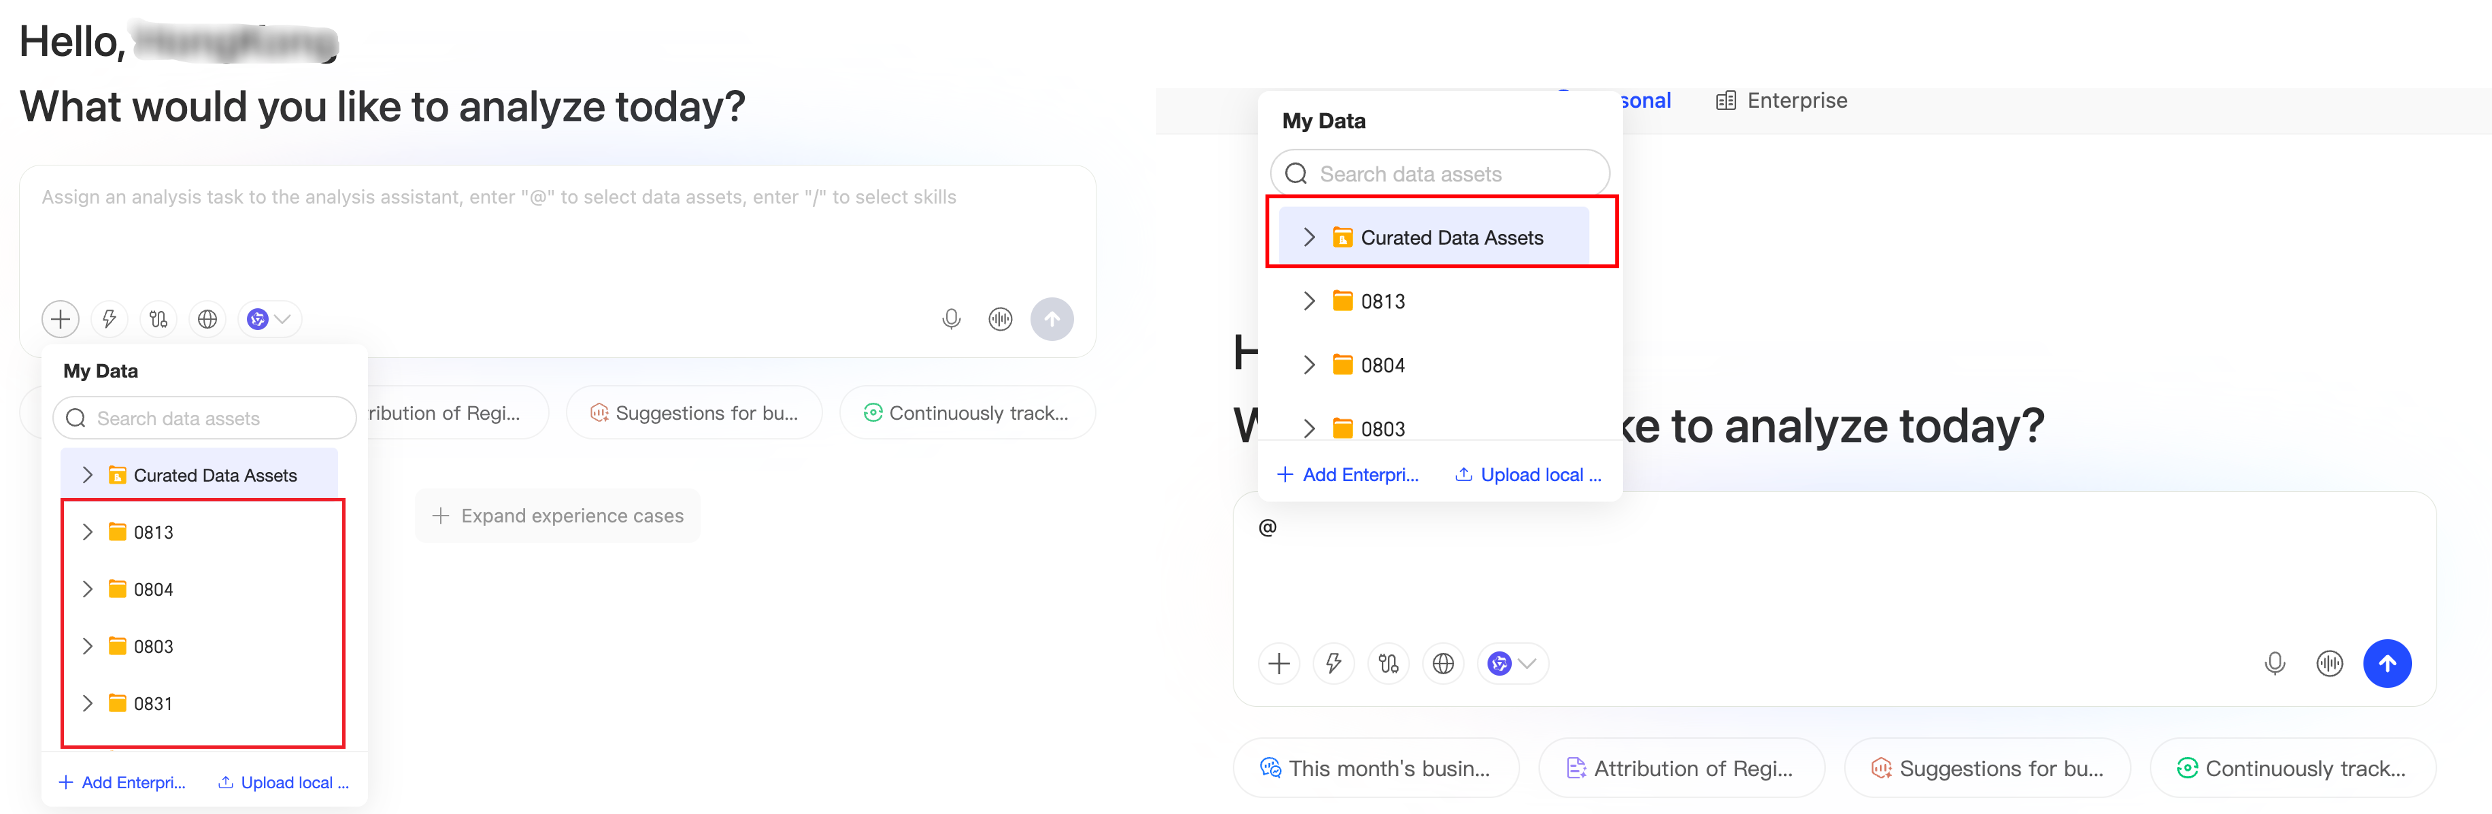
When the system grants permissions to target users, it assigns View permission for dashboards and Use permission for datasets, data table combinations, files, and API data. Once authorized, target users can view the corresponding data. Before creating the package, confirm that the assets within it do not pose any unauthorized access risks.
When a dashboard is included as a data asset, users can only analyze the data already presented in it. If a target user needs to perform in-depth analysis using dimensions not available in the dashboard, you must also include the underlying dataset in the asset package.
When an asset package is assigned to a user group, new members automatically receive it, and removed members automatically lose access.
Manage asset packages
The Preset Assets list displays the Name, data volume, target user or user group, Creator, and last updated time for each asset package, along with available actions. A delivery status appears for packages that are in progress, partially successful, or have failed. No status is shown for successfully delivered packages. You can perform the following management actions on this page.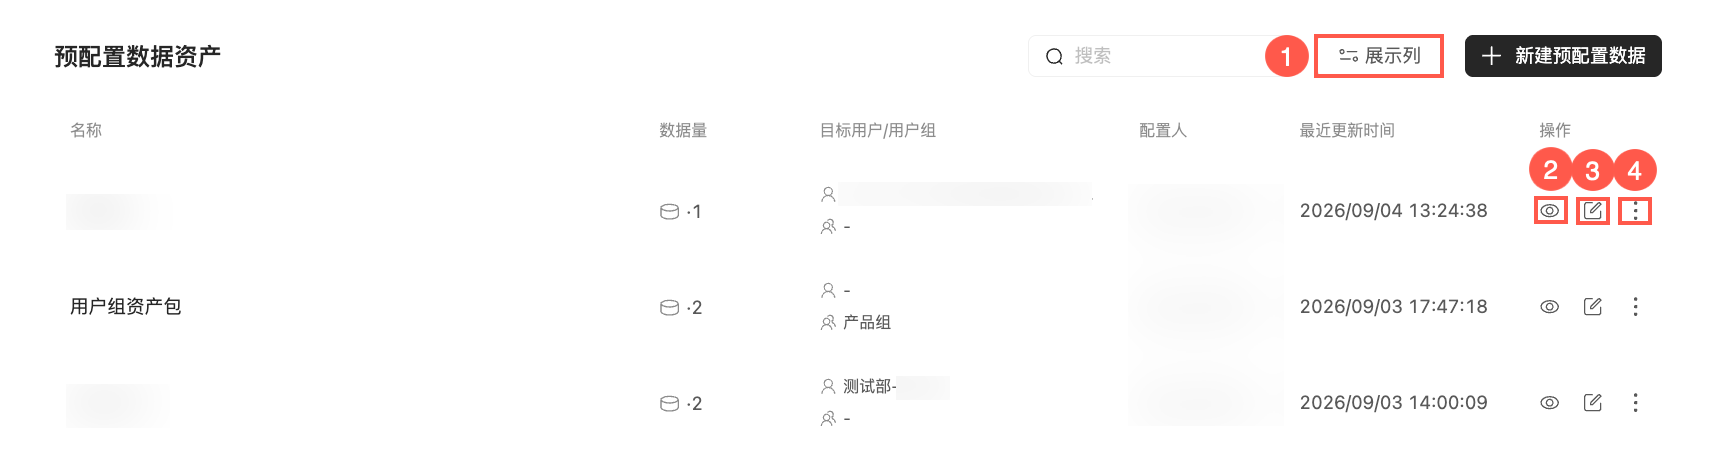
Action | Description |
① Displayed columns | You can customize the columns displayed in the list to fit your needs.
|
② View details | Click the The top of the dialog box displays the asset package name, data volume, creator, and last updated time. The bottom lists the data assets and their types. You can click an asset to preview its content. In the asset list on the left, you can select different assets to preview their content. Click View Asset Package Details to return to the details dialog box. |
③ Edit | Click the |
④ More | Click the
|
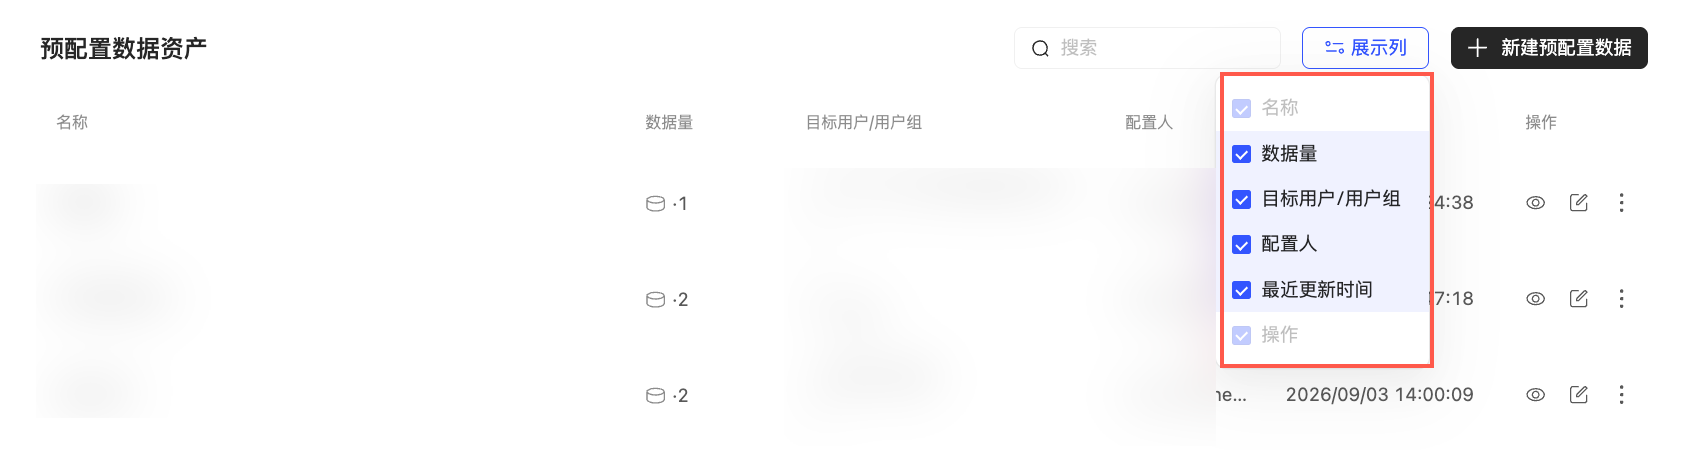
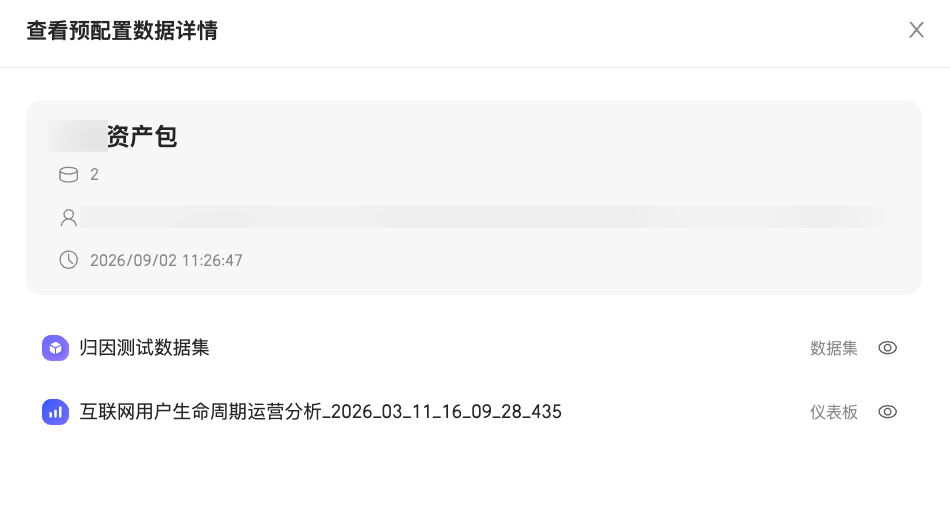
 icon to open the Edit Asset Package dialog box. You can modify the basic information and the included assets. The steps are the same as those for
  icon to open a drop-down list with the following options.
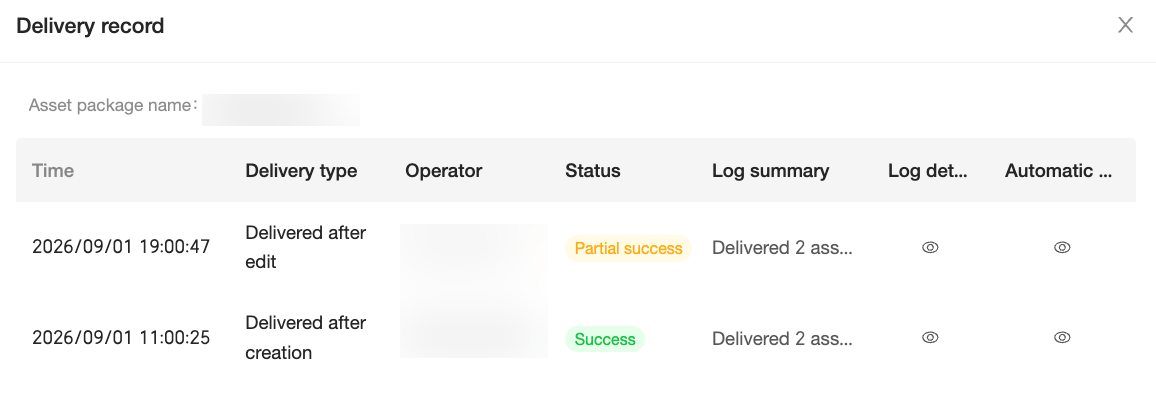 If a delivery has an abnormal status, you can click the
  icon in the Log Details column to view and copy the delivery logs to troubleshoot the issue.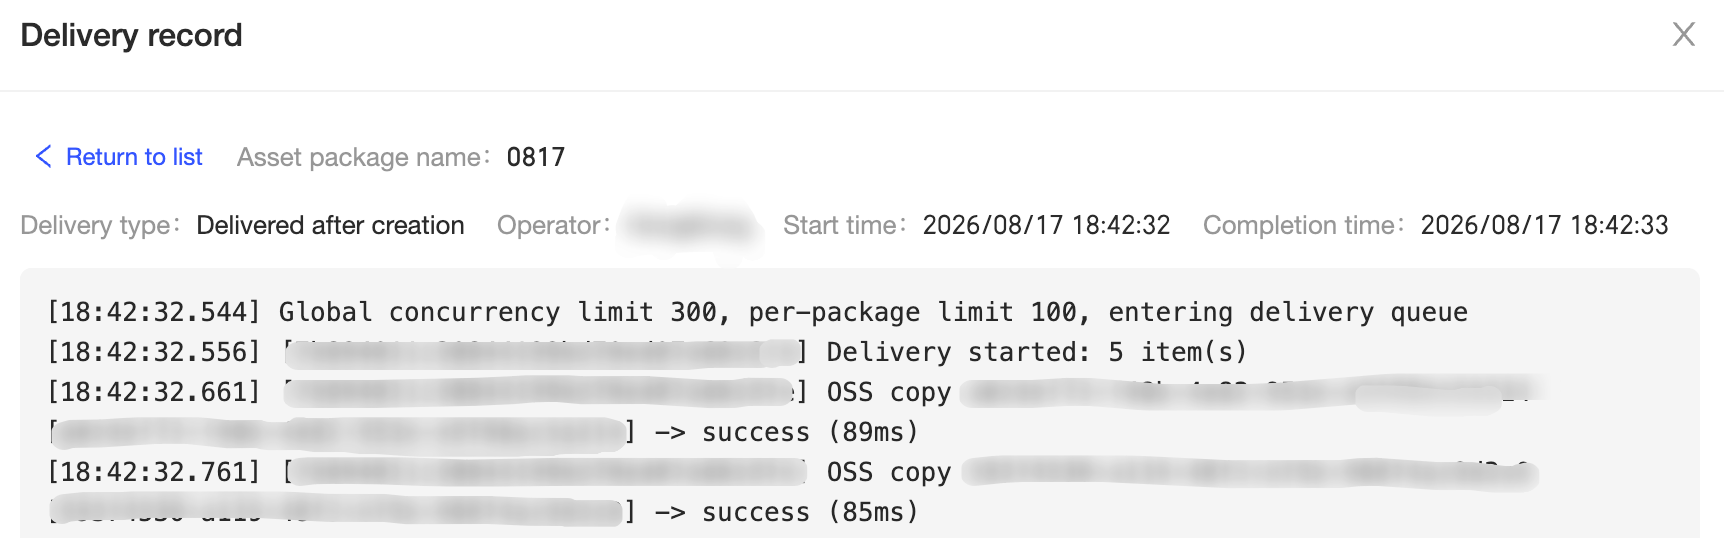
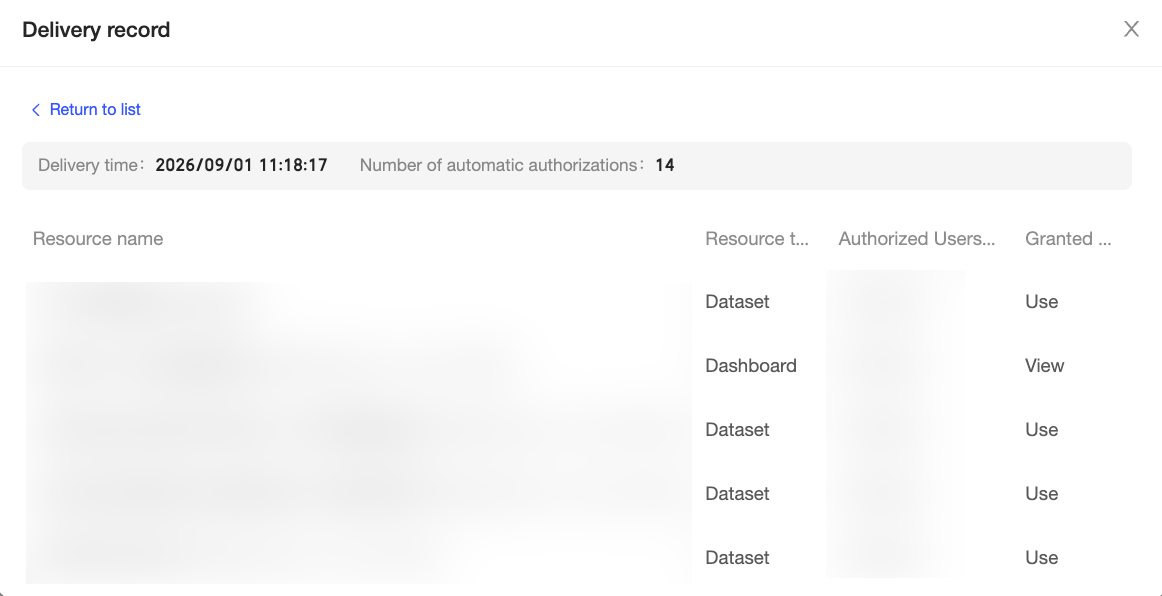 The top of the list shows the delivery time and the number of automatic authorizations. The details include the following: