Enable Feishu mini app (public cloud)
Quick BI offers a Feishu mini app for viewing reports on mobile devices. After employees bind the mini app or are added as organization members in Quick BI, they can view reports in the Feishu mobile client. This topic describes how to enable the Feishu mini app and authorize its API in Quick BI.
Prerequisites
You must be a Feishu administrator who has downloaded and registered with Feishu.
Limitations
Due to Feishu platform limitations, starting from October 31, 2024, the Feishu Basic Free Edition has a monthly API call limit of 10,000. If you require a higher volume, you can upgrade to another Feishu edition to increase the call quota. For more information, see the Feishu notice on changes to the API call limit for self-built apps.
With Quick BI Professional Edition, you can add up to five authorized organizations. This is useful if your company has multiple entities, like subsidiaries or branches, that need to share one Quick BI instance.
If you have purchased multiple Quick BI instances, you can bind the same authorized application to multiple tenants. By default, you can bind an authorized application to a maximum of five tenants.
Procedure
On the Feishu API Authorization page, click Add Authorization to open the Add New Authorization dialog box. Follow the steps below to authorize your enterprise.
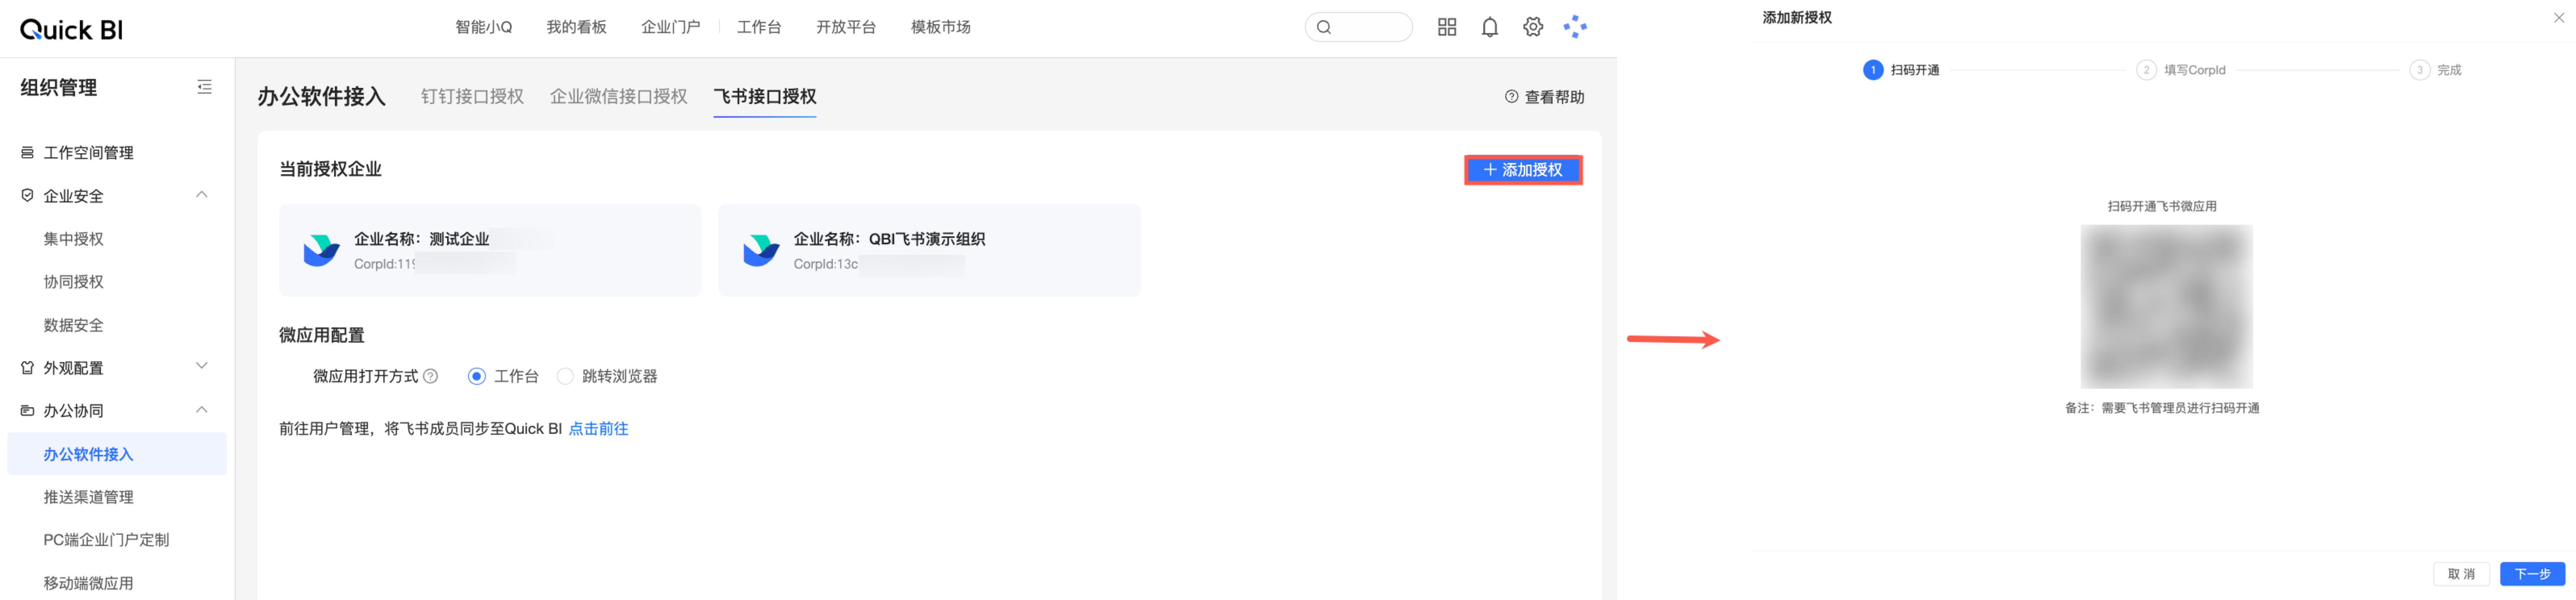
Step 1: Enable Quick BI mini app
Open the Feishu mobile client and scan the QR code in the Add New Authorization dialog box.
NoteThe QR codes for enabling the app differ for the public cloud and international site. Be sure to use the QR code provided for your specific environment.
On the App Details page, click Get to install the application.
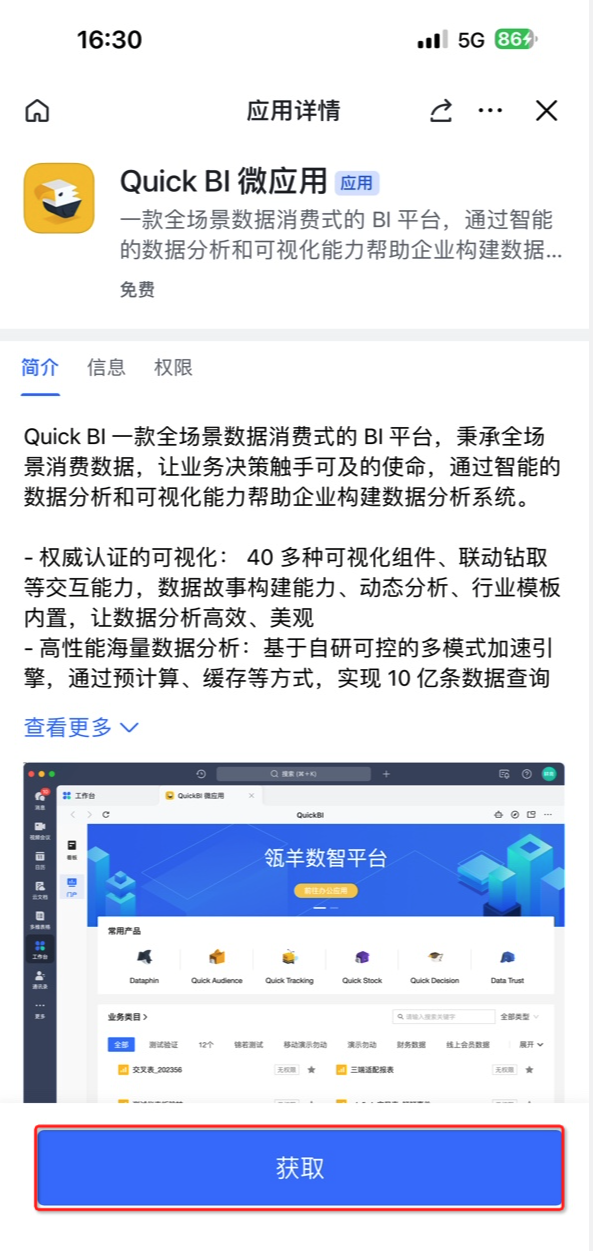
Step 2: Feishu API authorization
After the mini app is installed, click Next in the Add New Authorization dialog box to proceed from the Scan to Enable step to the Enter CorpId step. In this step, do the following:
You can bind the same authorized application to a maximum of 5 tenants.
Get the CorpId for your Feishu enterprise
Log on to the Lark Admin Console as an administrator. On the Enterprise Overview page, find your enterprise's CorpId.
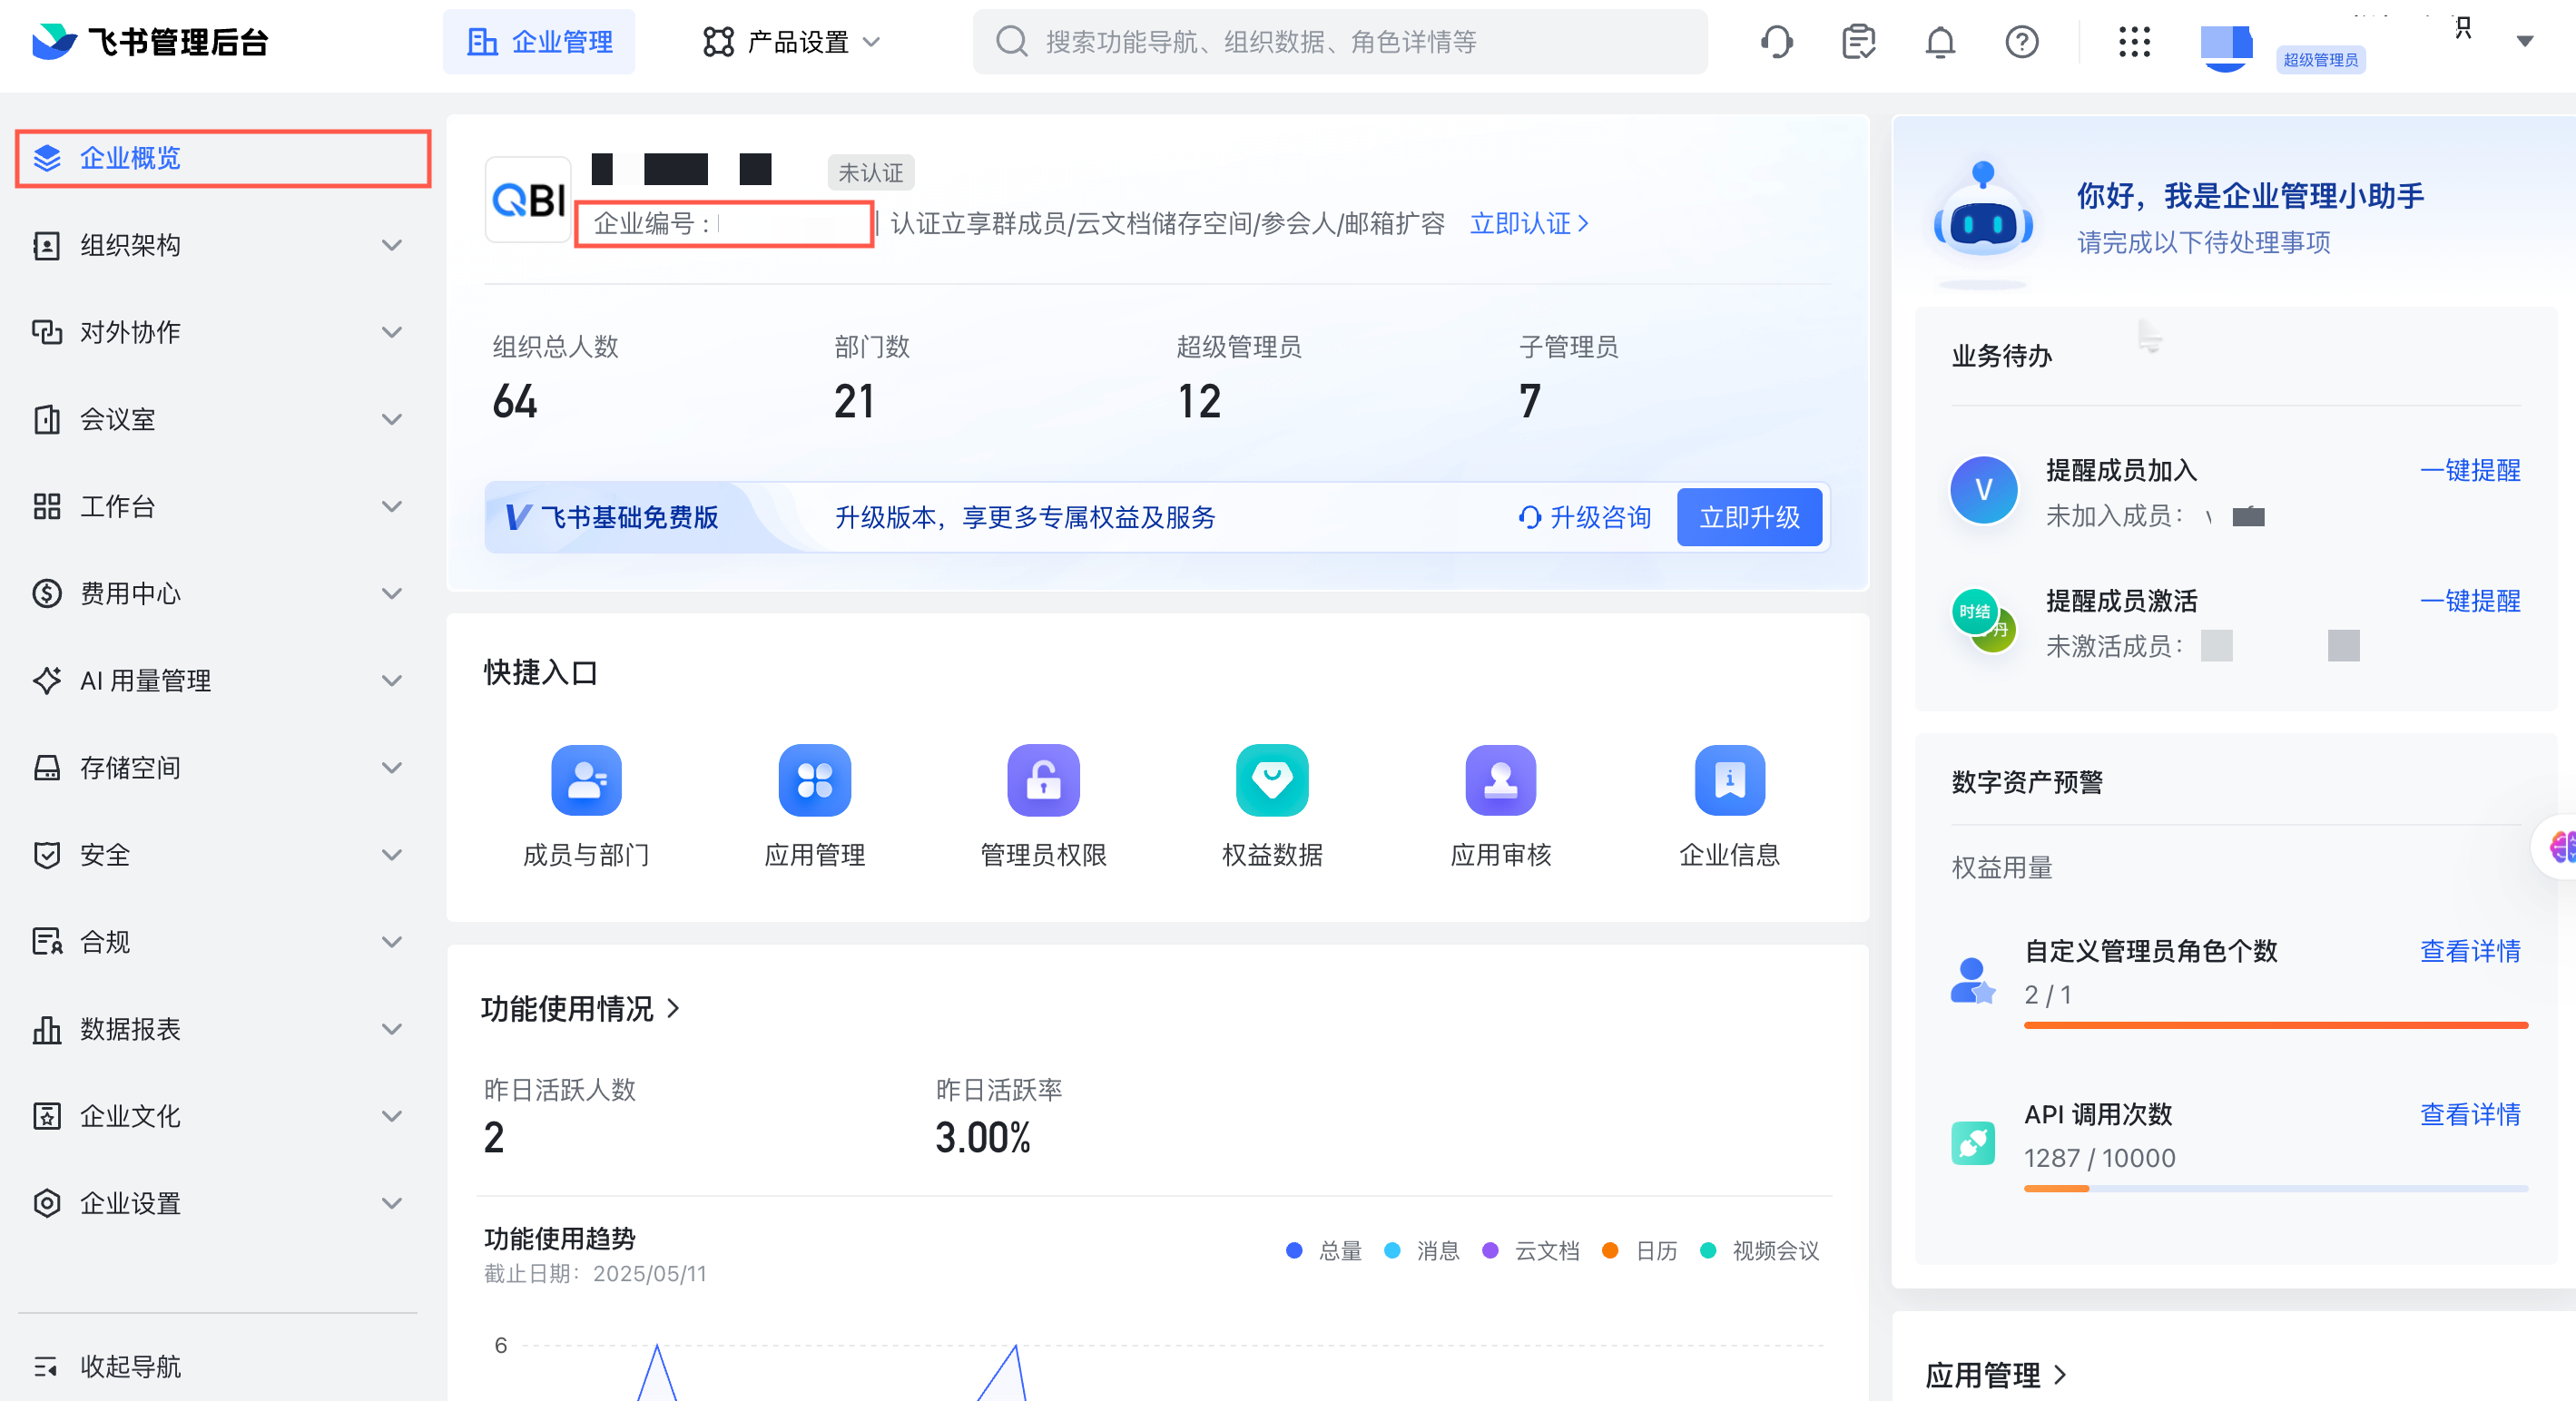
Enter the CorpId
In the Add New Authorization dialog box, enter the ID you obtained in the CorpId field and click Verify. Quick BI automatically identifies and displays your organization's name.
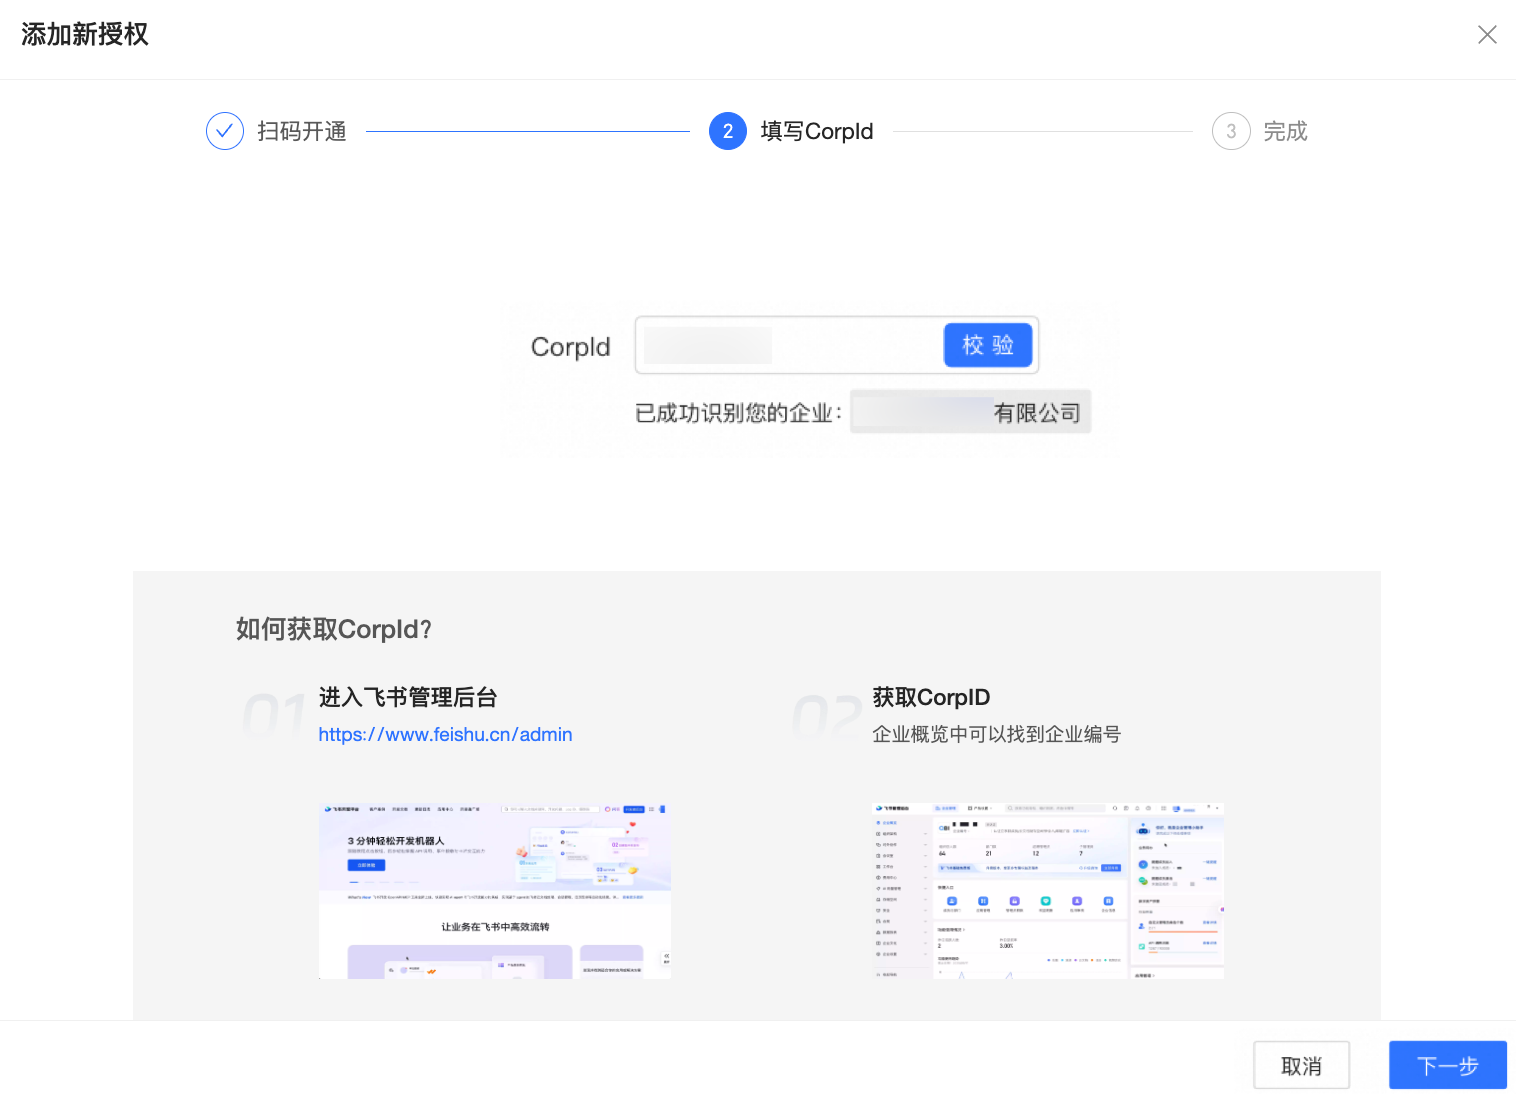
After you confirm that the organization is correct, click Next to authorize the new enterprise.
Quick BI then synchronizes your Feishu organization's information. You can click Go to User Management to navigate directly to the User Management page and quickly sync members from your organization. For detailed instructions, see Add Feishu users.
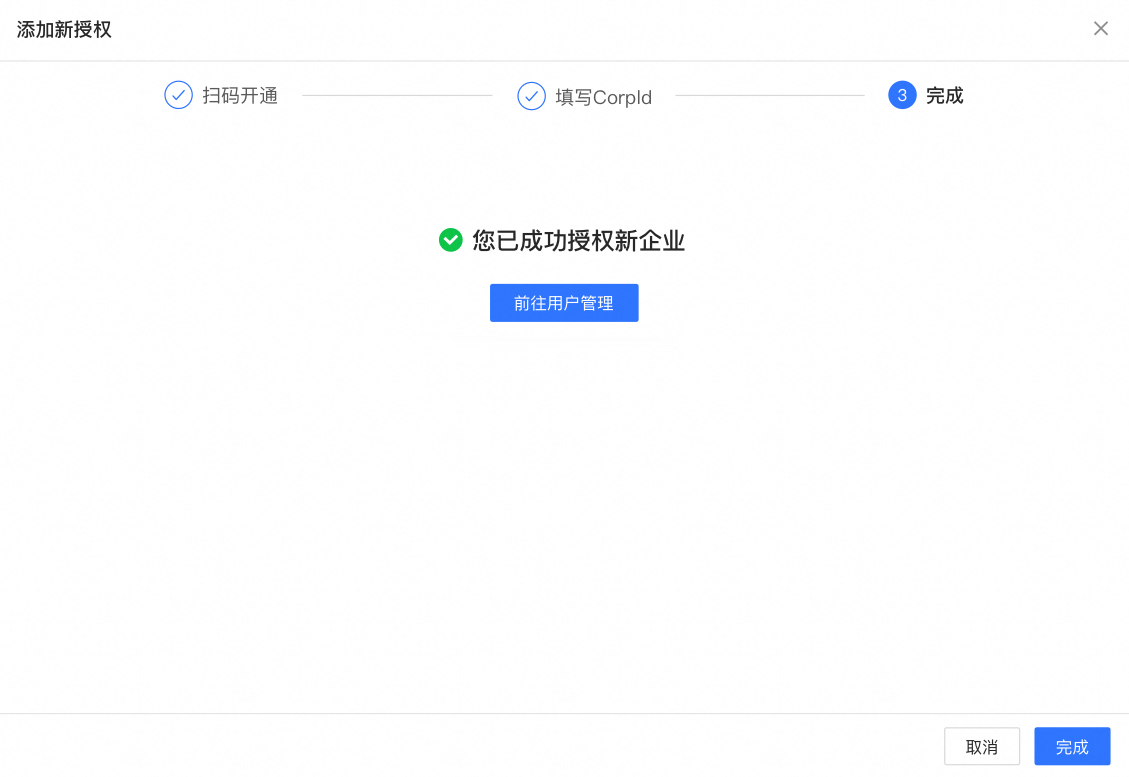
Step 3: Configure mini app
Users with edit permissions whose accounts are synced from office suites (like DingTalk, WeCom, or Feishu) can create and edit reports in the mini app on a PC.
By default, the mini app opens in the Workbench. You can also configure it to Open in Browser.
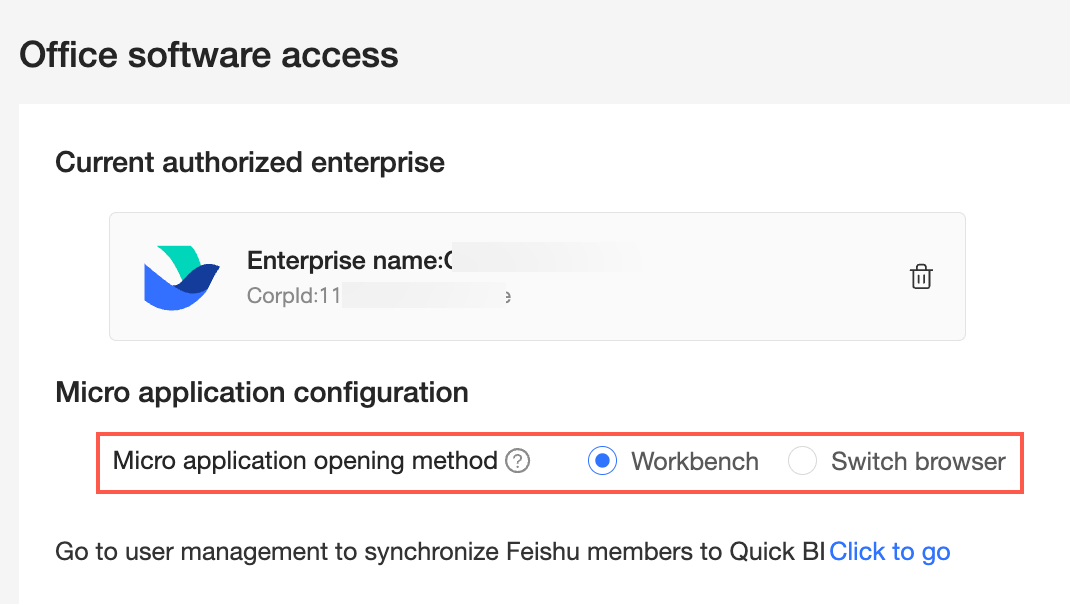
This open method configuration only applies to the PC client.
When the mini app is set to open in the Workbench, you can view and edit reports within the workbench.
When the mini app is set to Open in Browser, clicking the mini app redirects you to a browser to view and edit reports.
What to do next
After authorizing an enterprise, you can also edit its information, revoke its authorization, or sync its members.
Revoke enterprise authorization
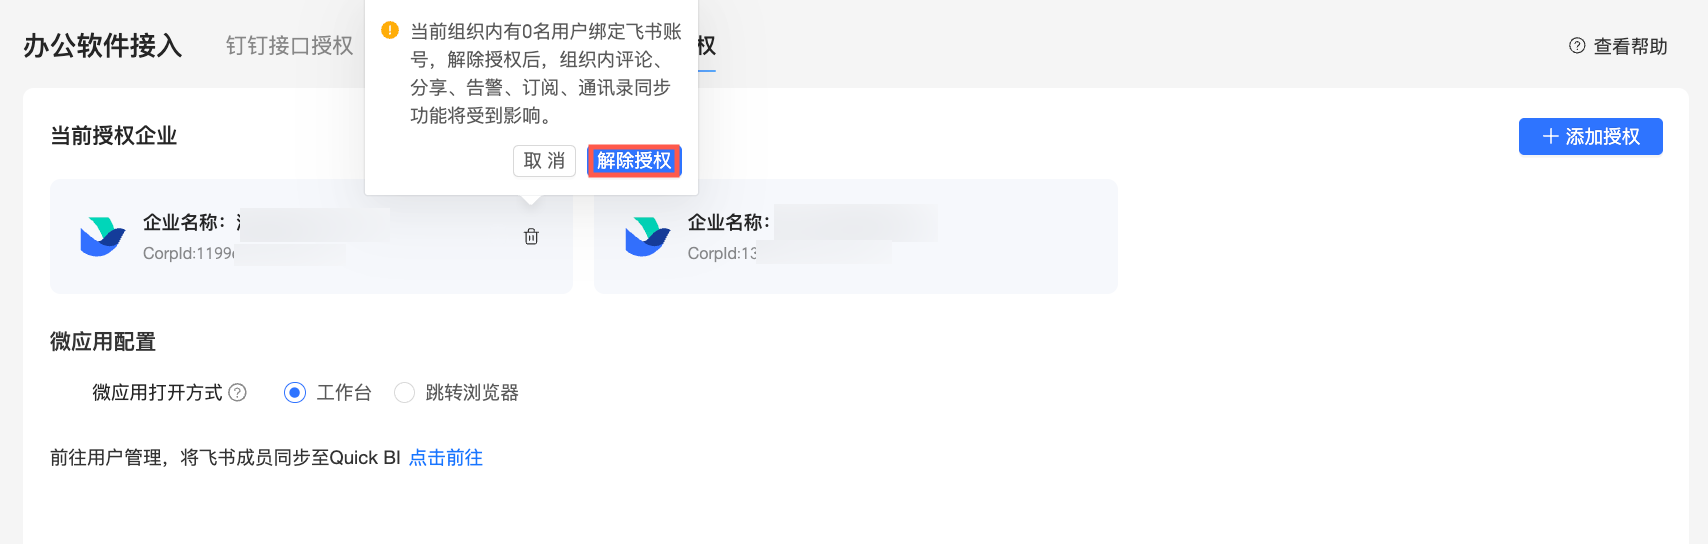
Click the  icon on the right of the target enterprise's card, and then click Revoke Authorization in the confirmation dialog box to unbind it.
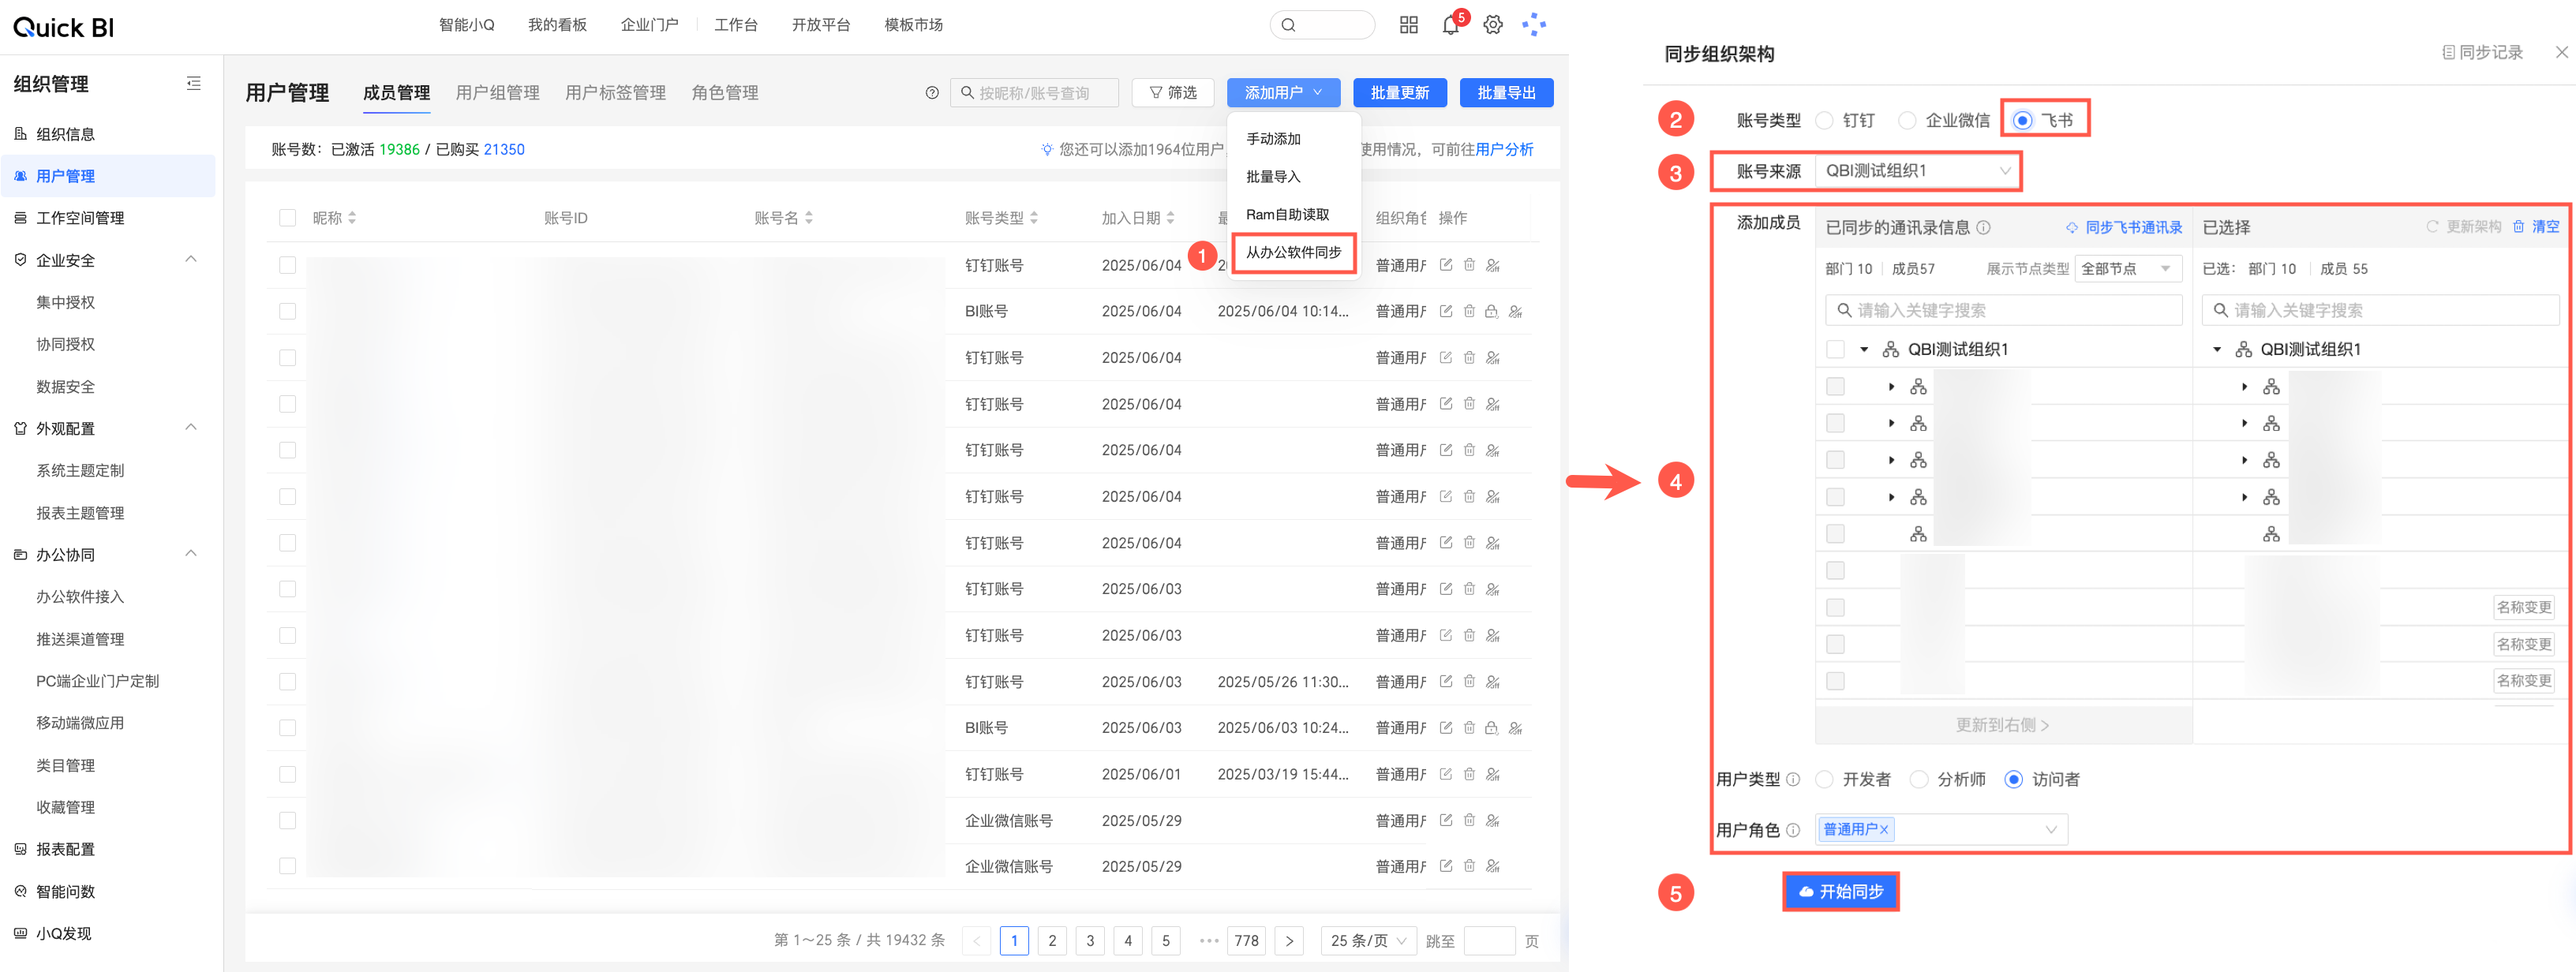
Sync Feishu members
On the Add User page, you can use the Sync from Office Suite option to add Feishu users.
Bind Lark account
After completing the Feishu API authorization, go to personal settings. You can then bind your account by scanning the QR code under the Bind Lark Account option.
 Organization administrators can bind Lark accounts for other users in user management.
