Example: Quickly aggregate multiple Excel sheets
Example scenario
This example demonstrates how to use visual components to aggregate data from multiple Excel files with the same format into a single file.
For detailed steps, watch the video tutorial:
Example description
A test table and data are required for this sample.
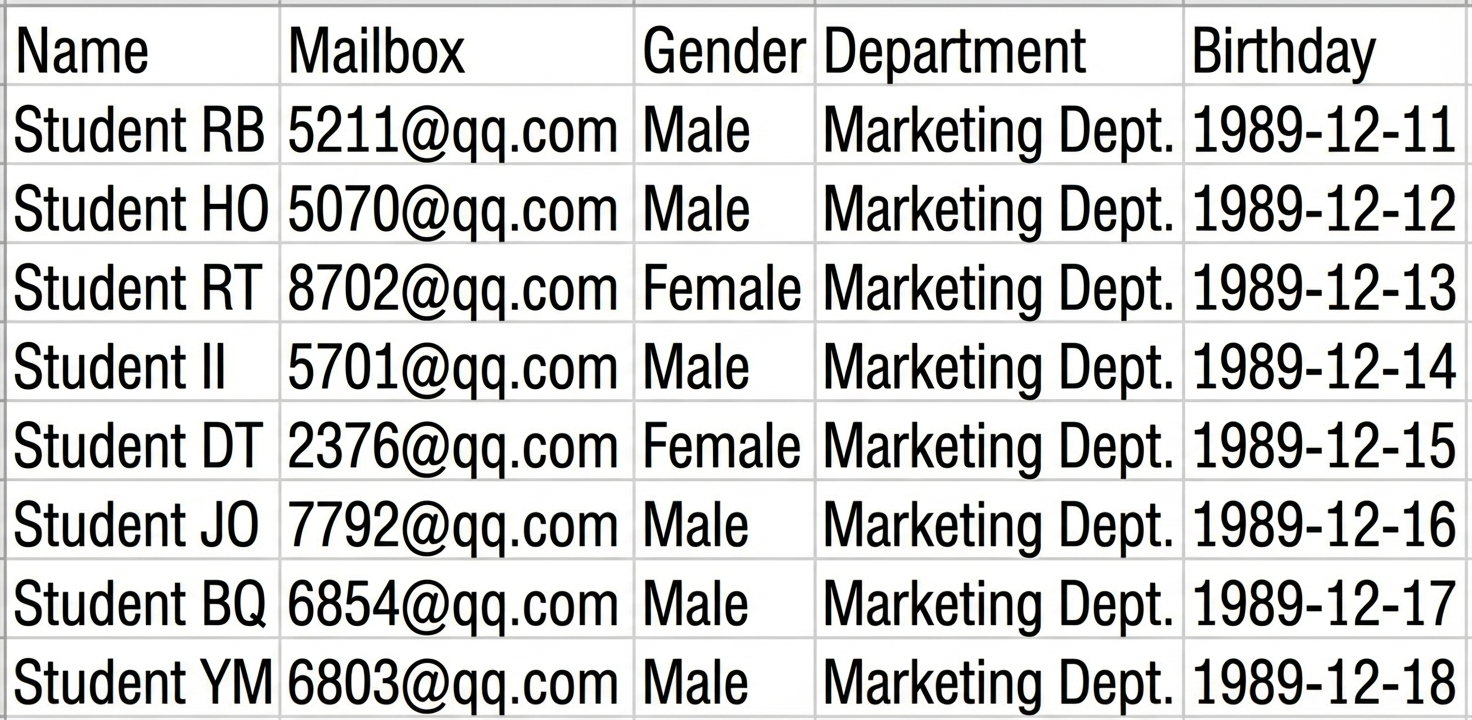
The sheets in this example have a uniform format, as shown in the following figure. Each sheet has column titles in the first row, and the data starts from the second row.
The tables are stored in the 'Table Preparation' folder, along with non-Excel files and subfolders.
The "Teaching Department Sheets" subfolder contains two of the Excel sheets to be aggregated.
Step 1: Create a new Excel file as the aggregate table
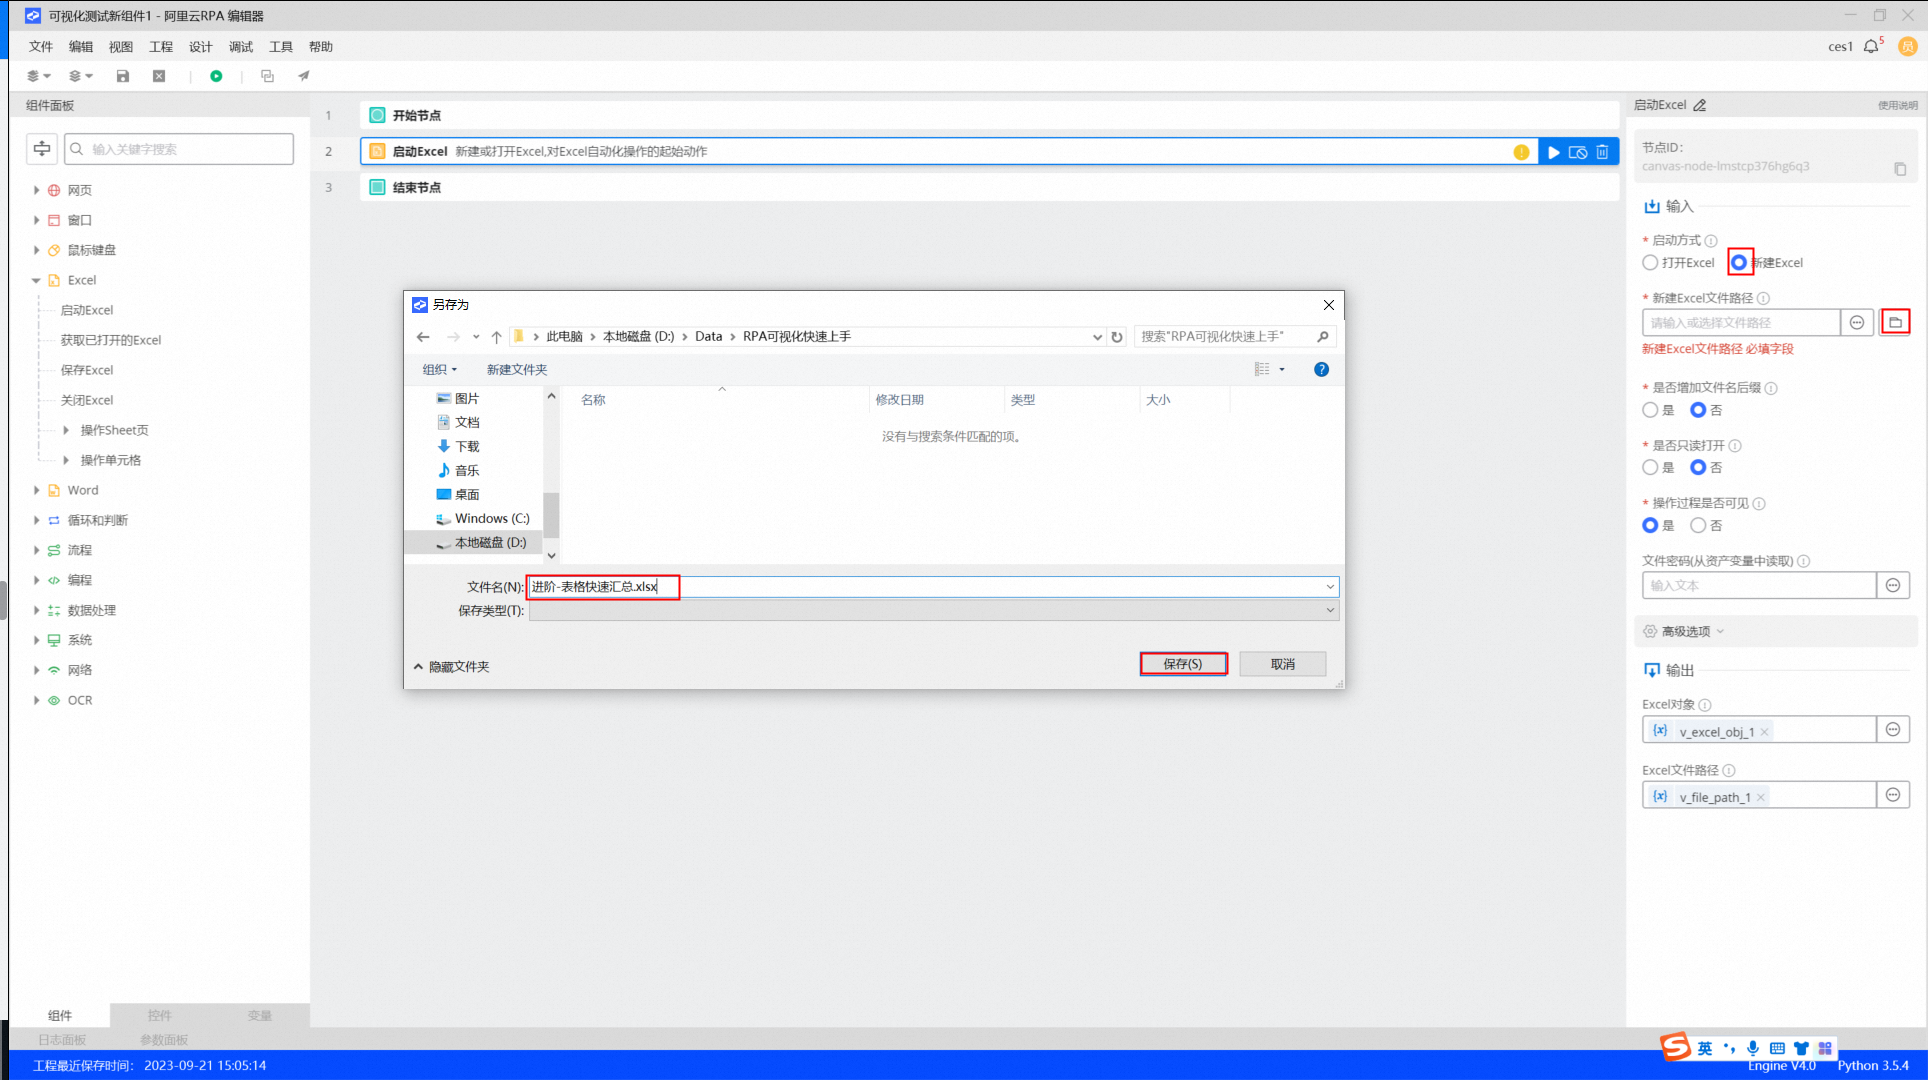
1. Add the Start Excel component. In the Properties pane, select Create new Excel. Click the browse button to select a folder, and then enter a file name with an extension. For this example, enter `advanced-quick_aggregation.xlsx`.
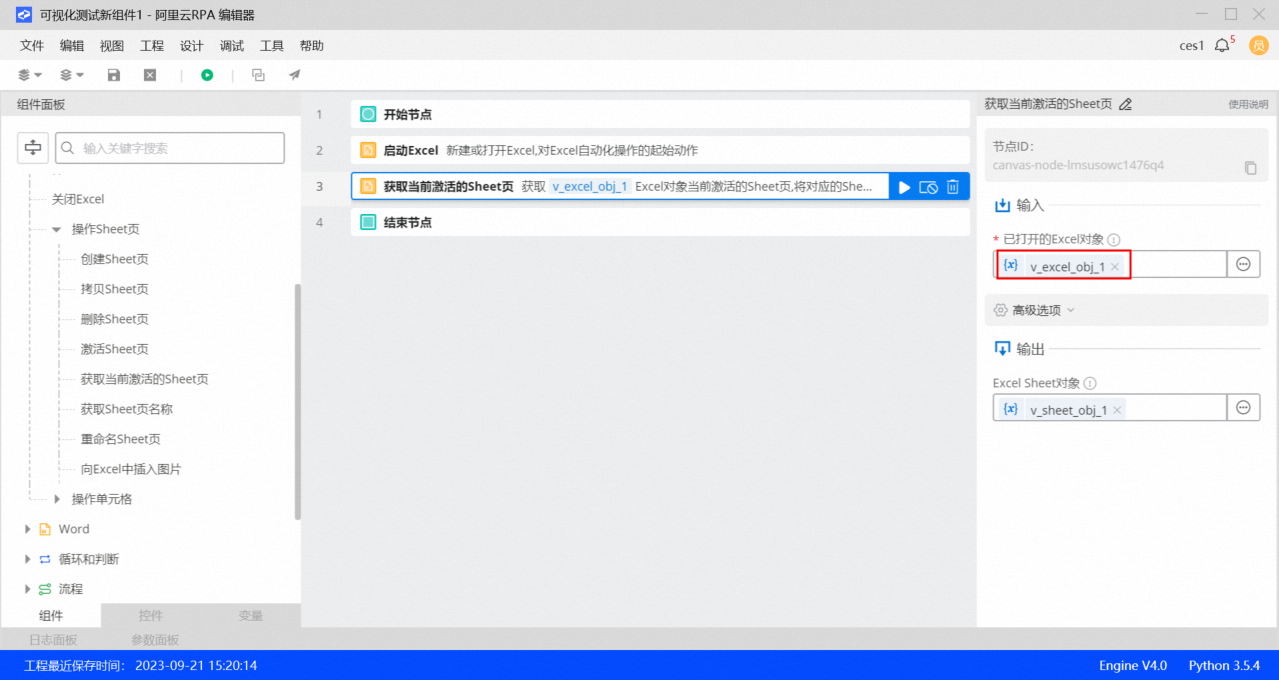
 2. Add the Get active sheet component. In the Properties pane, set Opened Excel object to `v_excel_obj_1`, which is the output from the previous component.
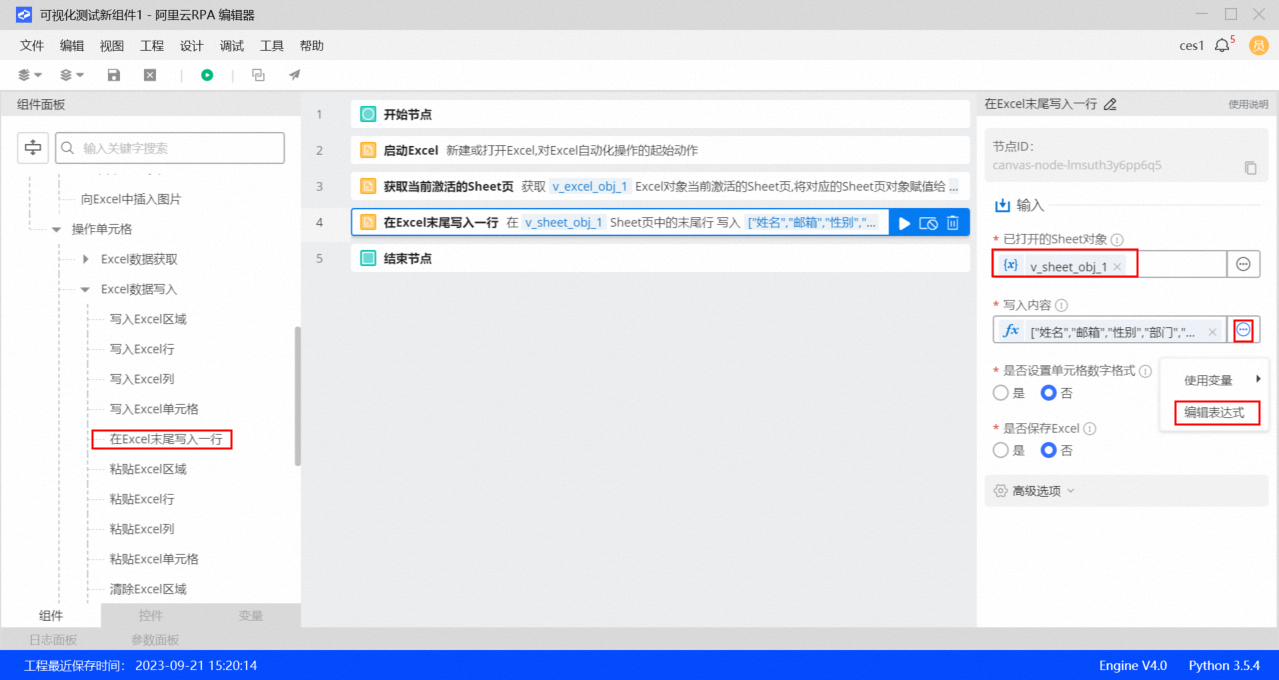
3. Add the Write a row to the end of Excel component. In the Properties pane, set Opened Sheet object to `v_sheet_obj_1`, which is the output from the previous component. In the Content to write field, click the button on the right and select Edit expression. In the expression editor, enter `["Name","Email","Gender","Department","Birthday"]`. This entry creates the title row for the aggregate table.
Step 2: Aggregate multiple Excel sheets
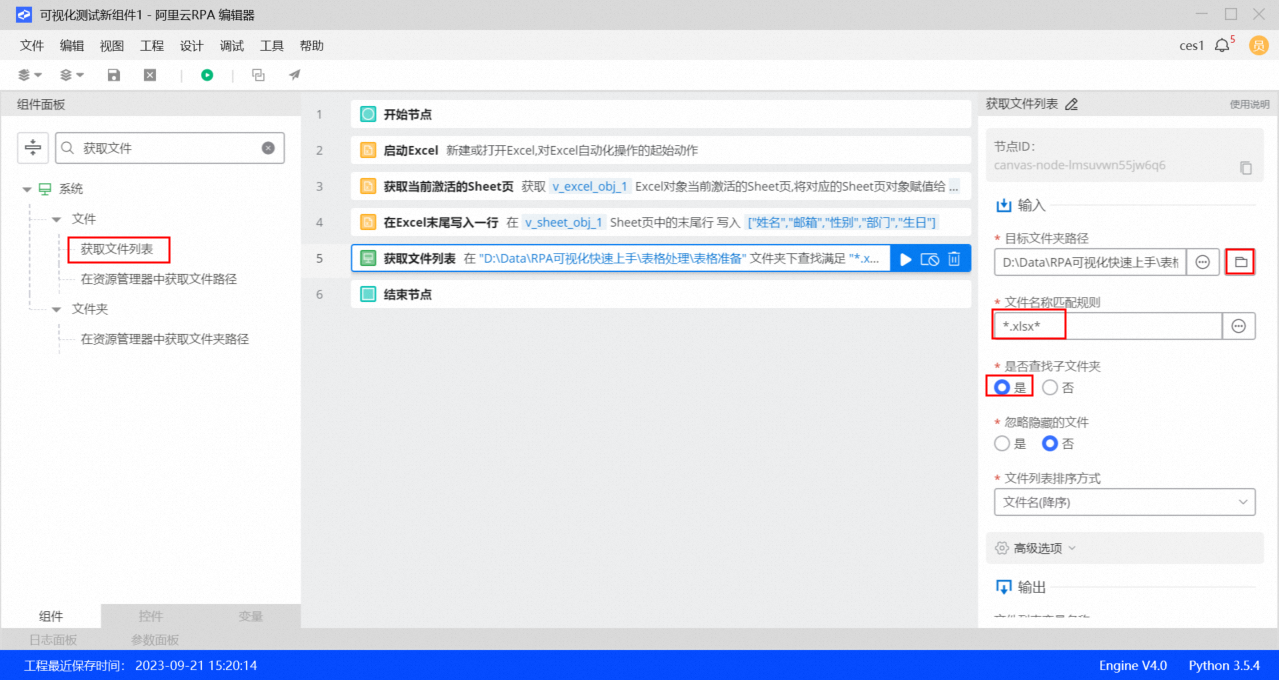
1. Add the Get file list component. In the Properties pane, for the Target folder path field, select the folder that contains the sheets to be aggregated. Enter *.xlsx* as the file name matching rule. Set Find in subfolders to Yes.
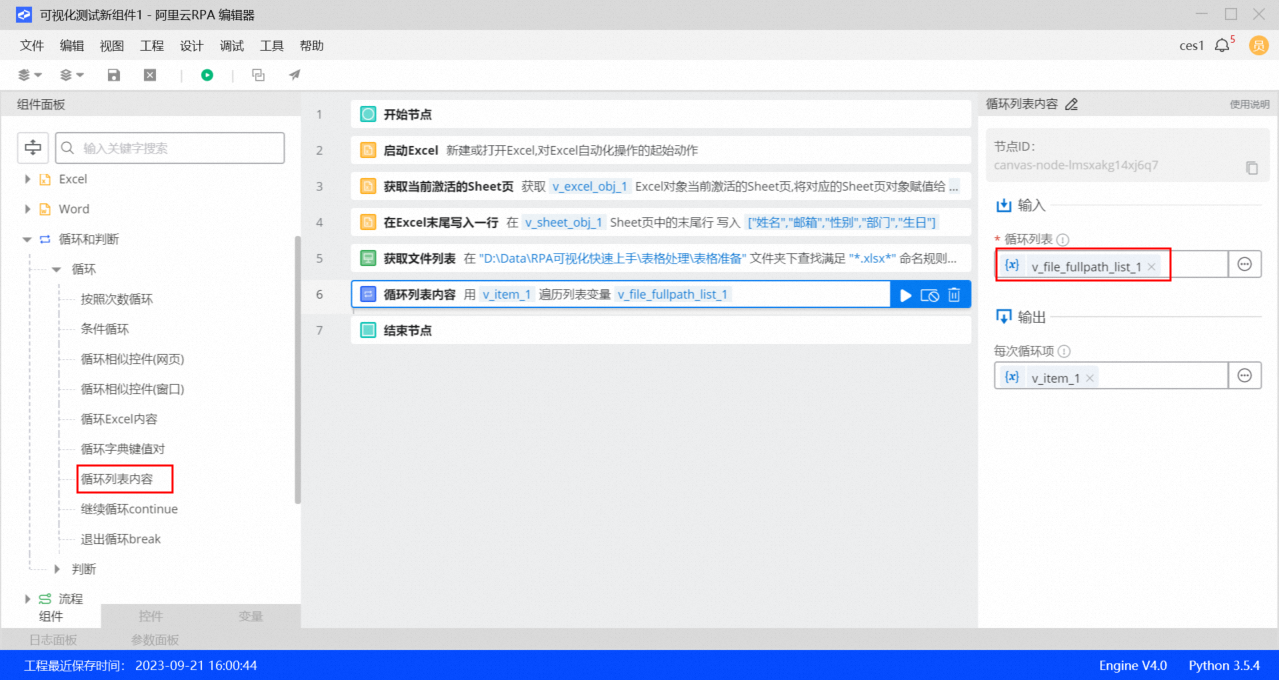
2. Add the Loop through list component. In the Properties pane, set Loop list to `v_file_fullpath_list_1`, which is the output from the previous component.
`v_file_fullpath_list_1` contains a list of absolute paths for all files that match the specified rule, such as `["D:\RPA Visual Quick Start\Sheet Processing\Sample Sheets\Logistics Department.xlsx", "D:\RPA Visual Quick Start\Sheet Processing\Sample Sheets\Marketing Department.xlsx", ...]`.
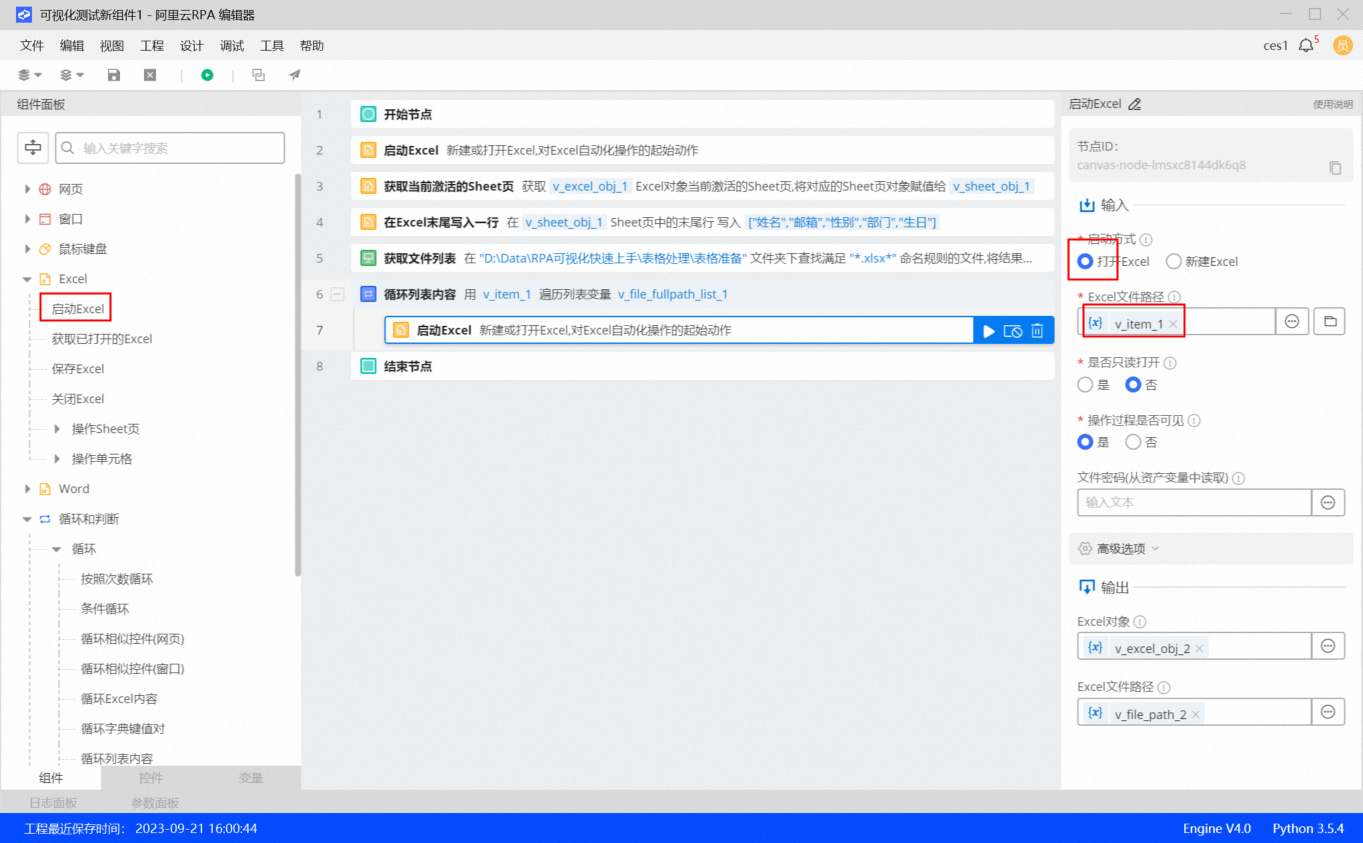
3. Inside the Loop through list component, add a Start Excel component. In the Properties pane, select Open Excel. Set Excel file path to `v_item_1`, which is the current item in the loop.
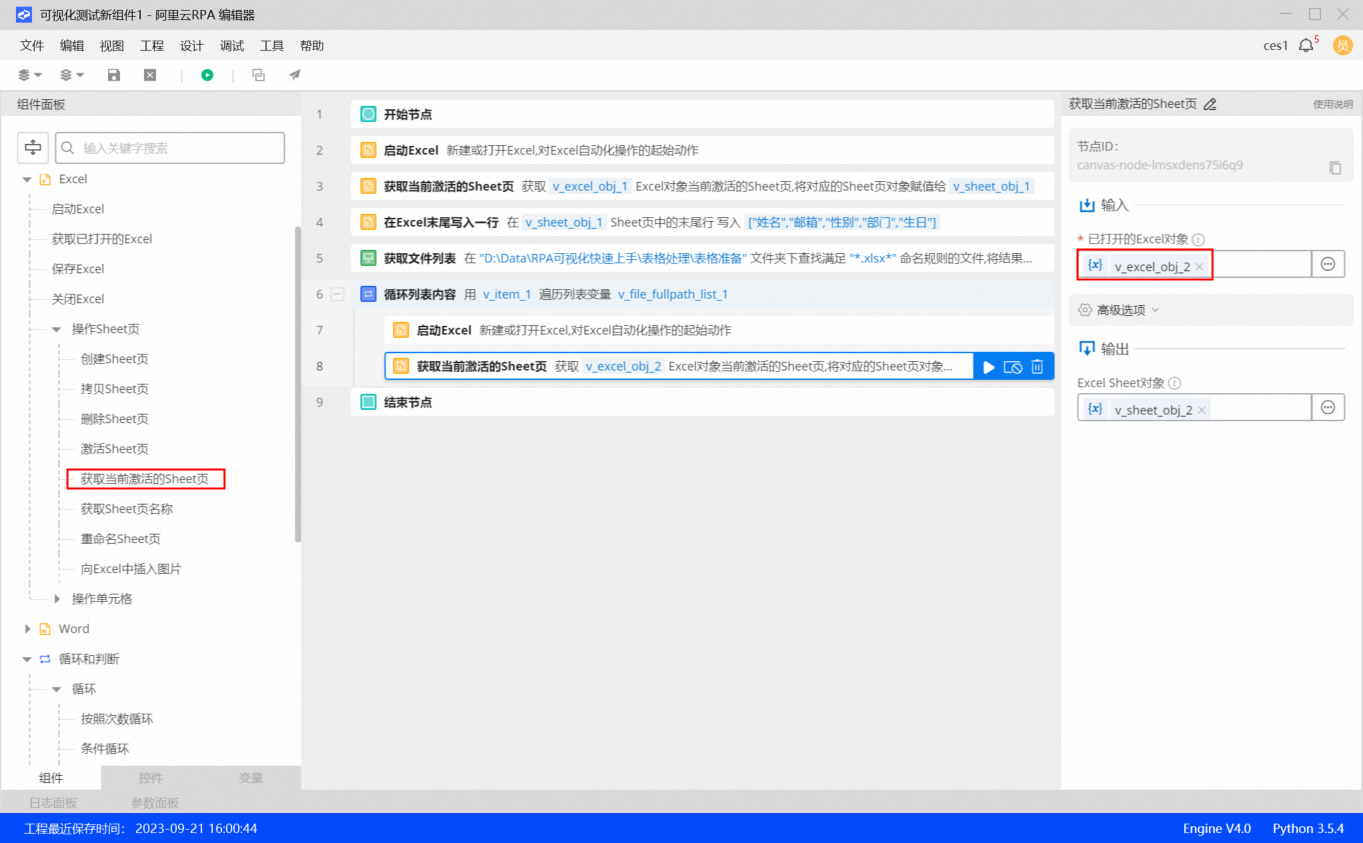
4. Add the Get active sheet component. In the Properties pane, set Opened Excel object to `v_excel_obj_2`, which is the output from the previous component.
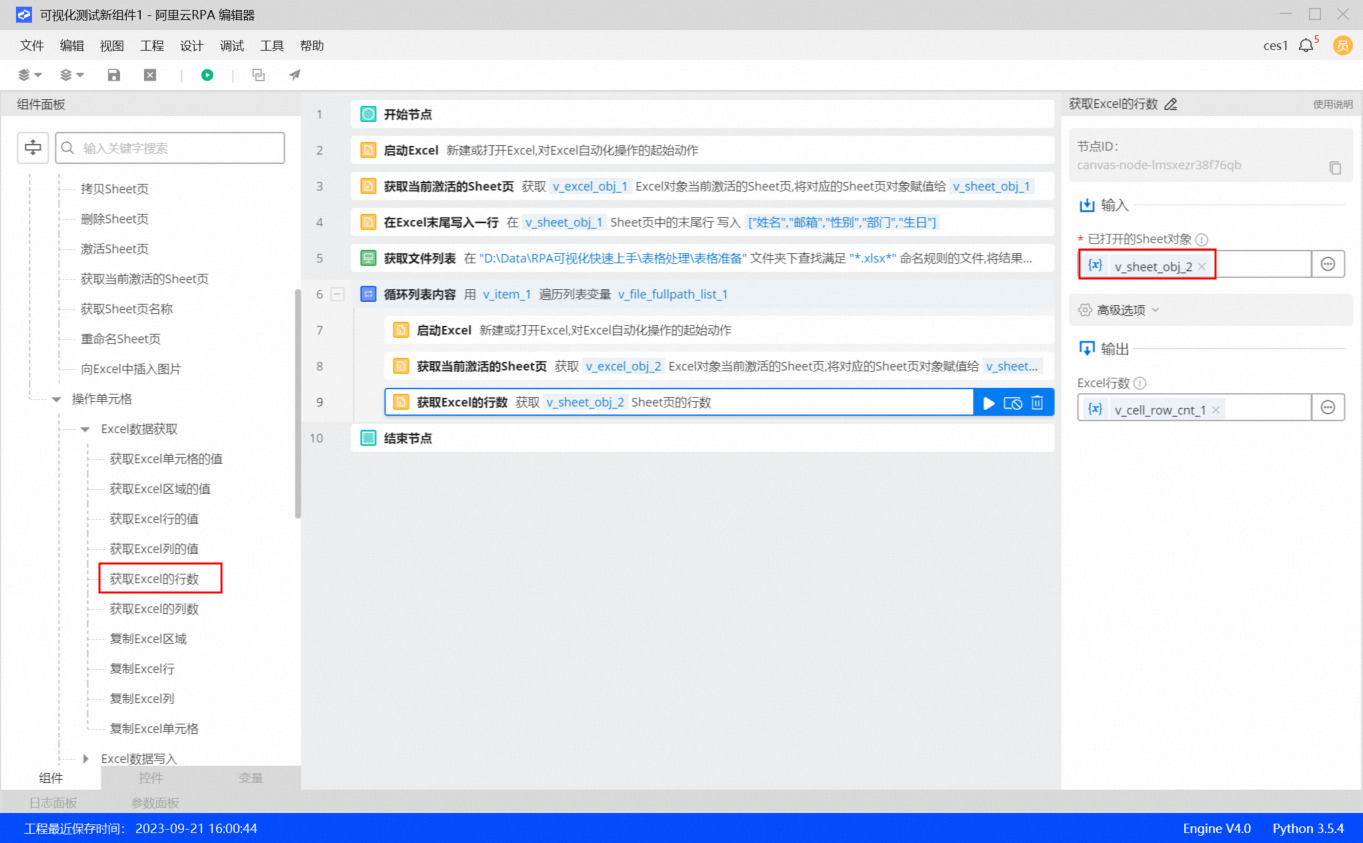
5. Add the Get Excel row count component. In the Properties pane, set Opened Sheet object to `v_sheet_obj_2`, which is the output from the previous component.
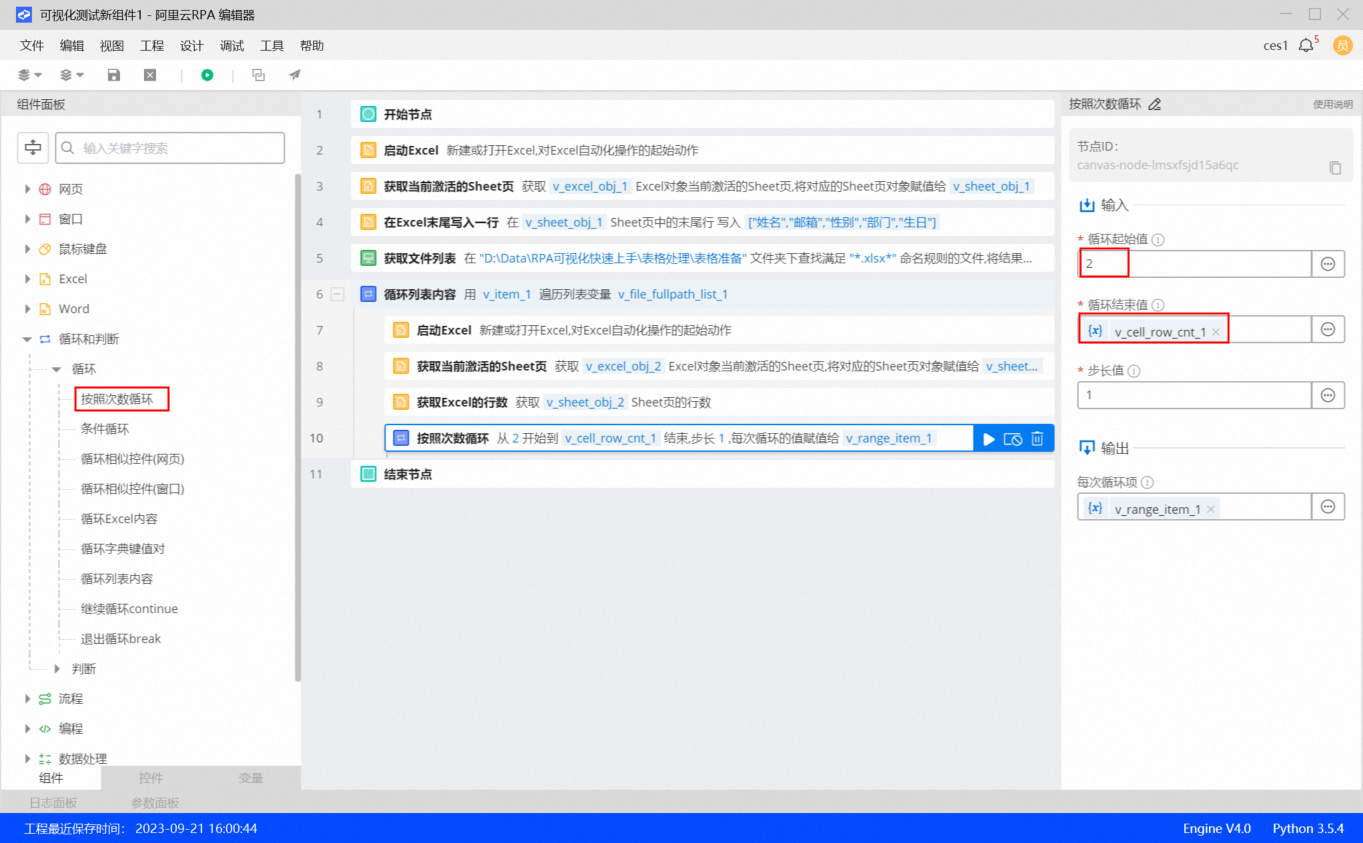
6. Add the Loop by number of times component. In the Properties pane, set the loop start value to 2 and the loop end value to `v_cell_row_cnt_1`, which is the output from the Get Excel row count component.
The start value is set to 2 because the first row of each source sheet is a title row. Data aggregation begins from the second row and ends at the last non-empty row.
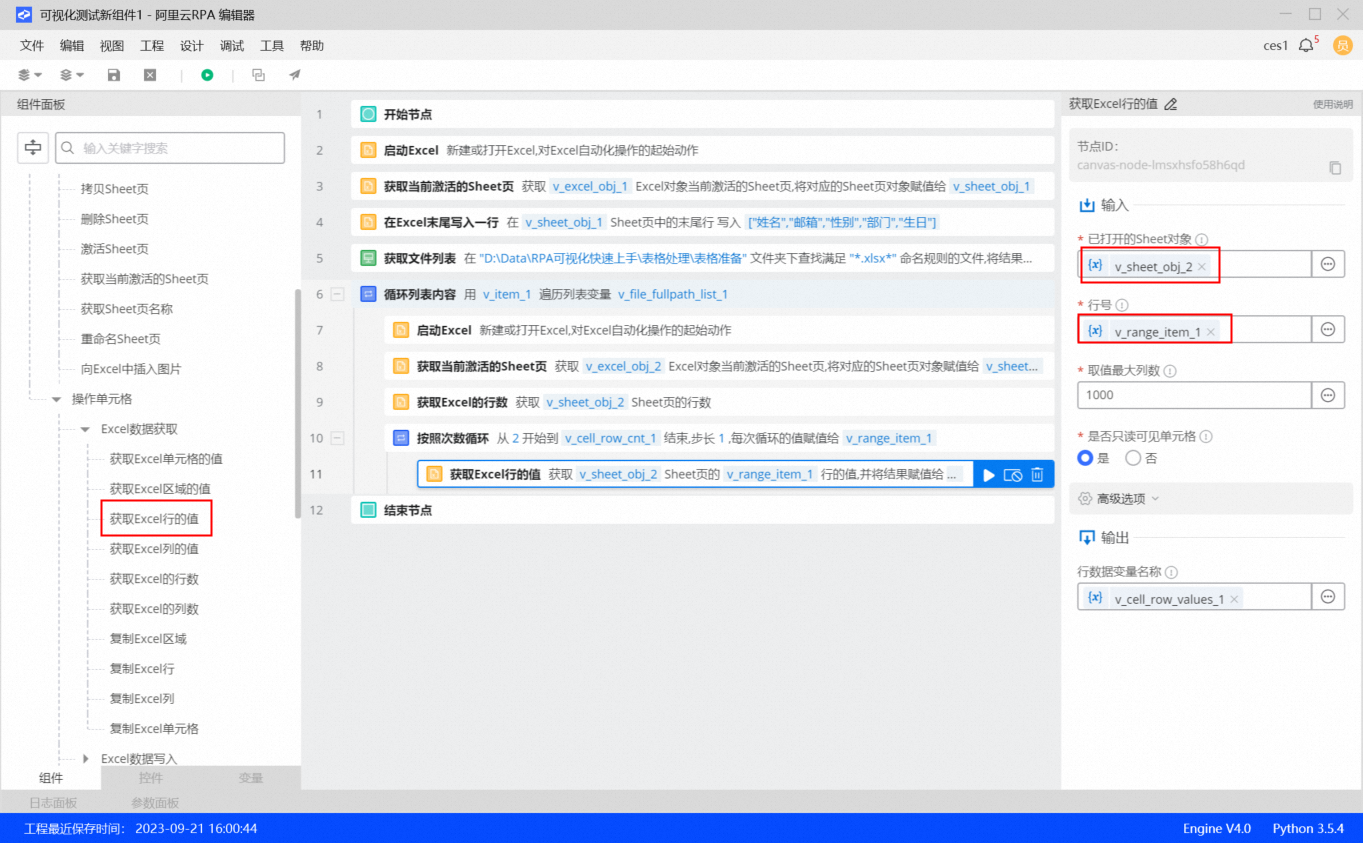
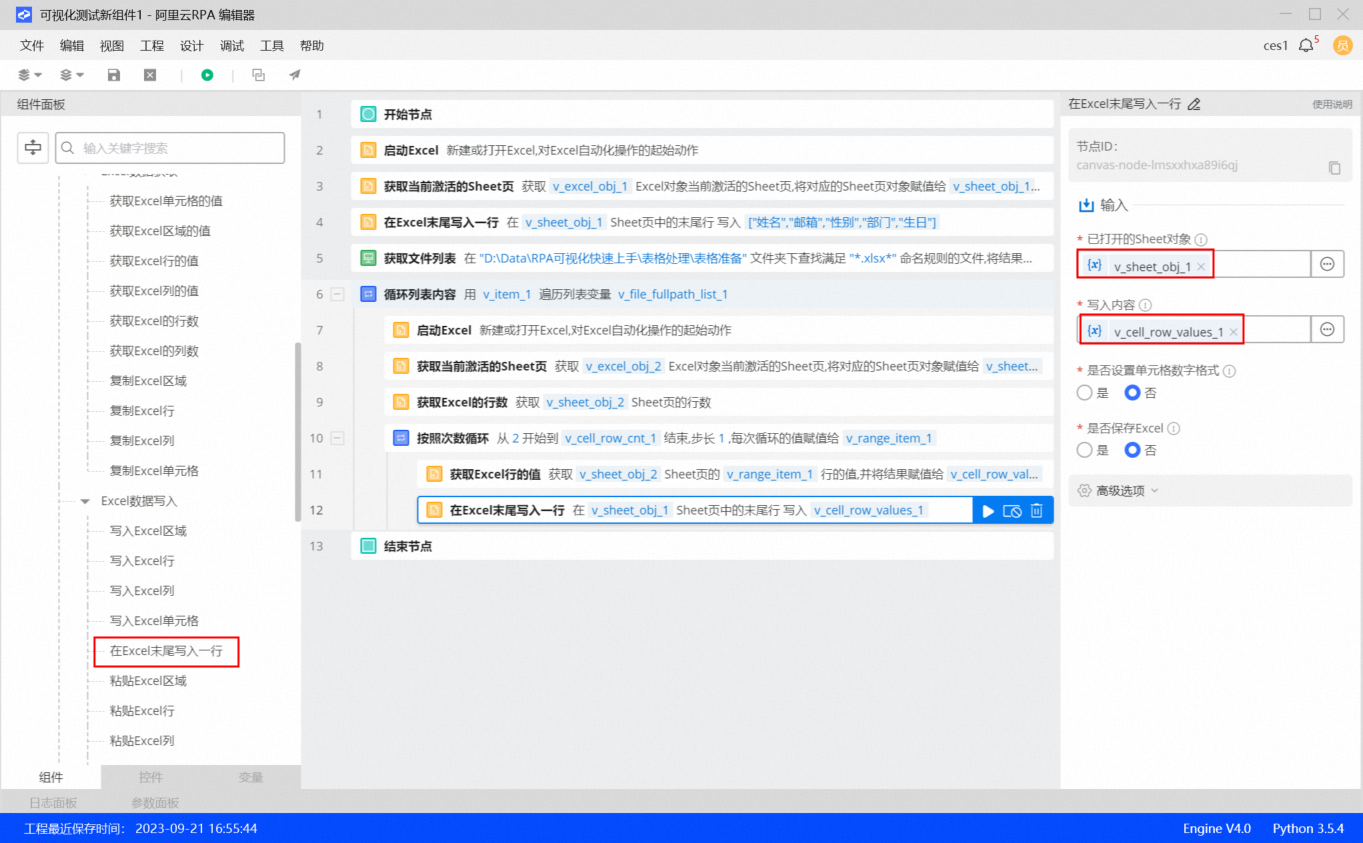
7. Inside the Loop by number of times component, add the Get Excel row value component. In the Properties pane, set Opened Sheet object to `v_sheet_obj_2` (the sheet to be aggregated). Set Row number to `v_range_item_1`, which is the output from the Loop by number of times component.
8. Add the Write a row to the end of Excel component. In the Properties pane, set Opened Sheet object to `v_sheet_obj_1` (the aggregate table). Set Content to write to `v_cell_row_values_1`, which is the output from the Get Excel row value component.
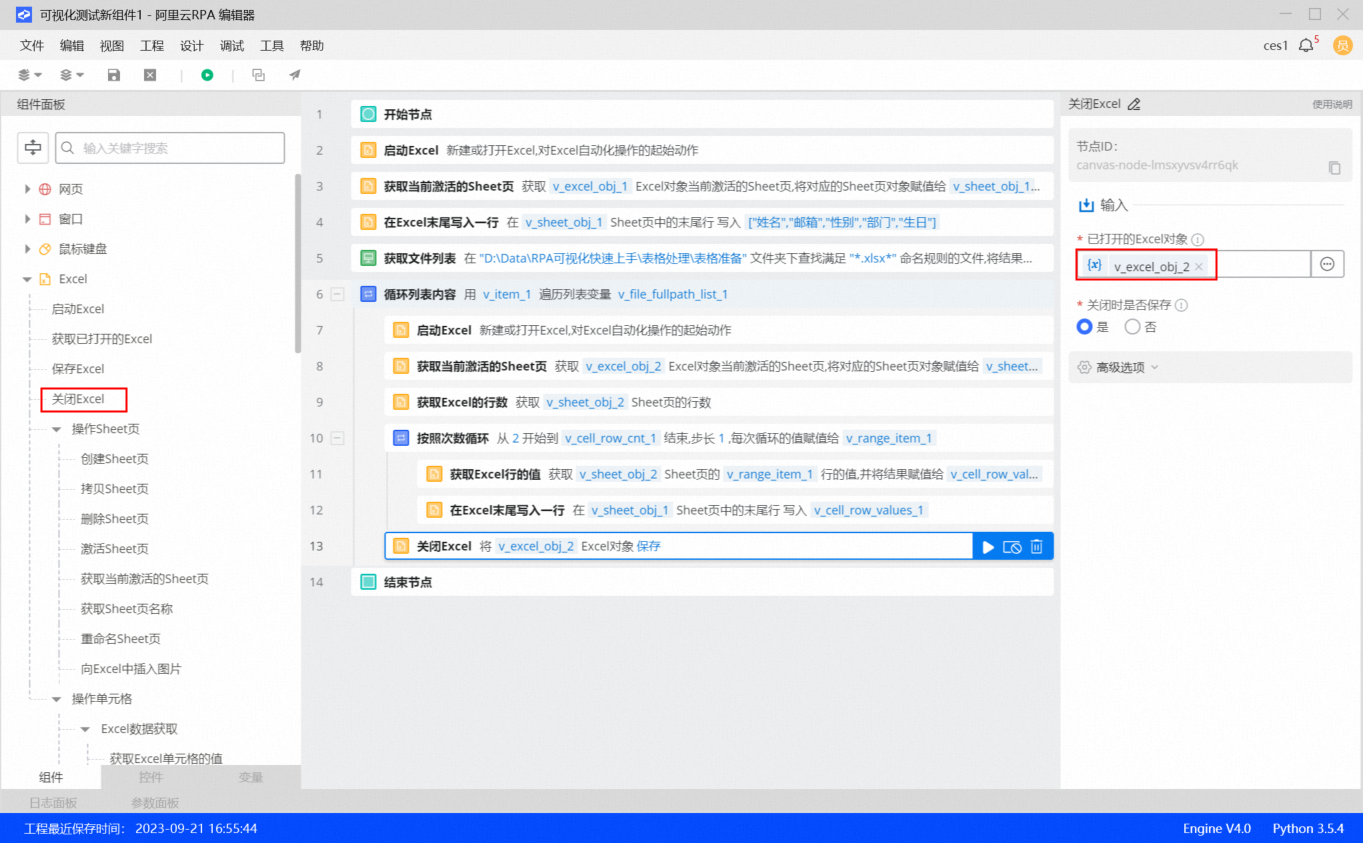
9. After the Loop by number of times component, add a Close Excel component. In the Properties pane, set Opened Excel object to `v_excel_obj_2` (the sheet to be aggregated).
This step closes each source sheet after its data has been processed. This prevents too many Excel files from being open simultaneously.
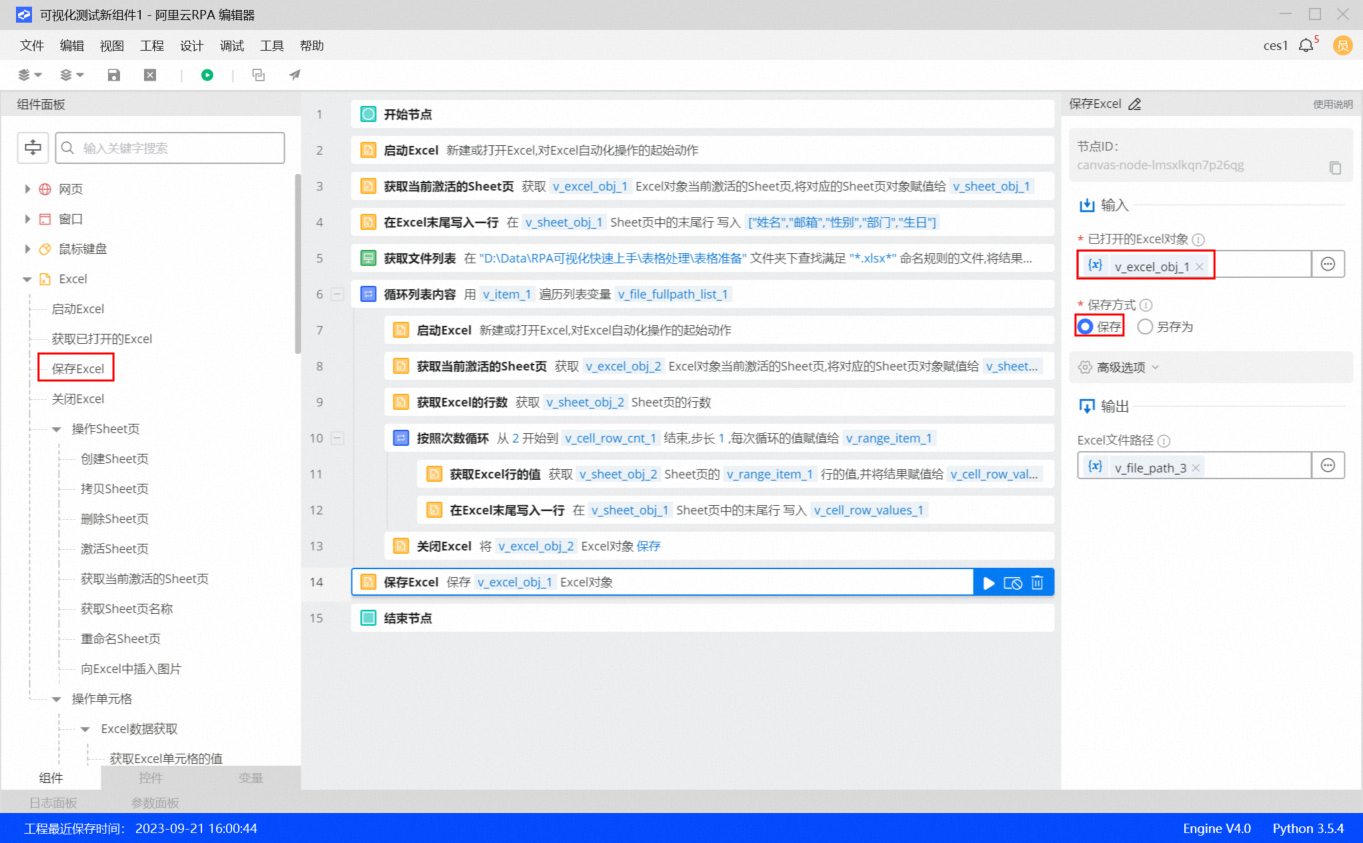
10. Outside the main loop, add a Save Excel component.
In its Properties pane, set Opened Excel Object to `v_excel_obj_1` (the aggregate table). The flow is now complete. Click the green triangle Run button in the shortcut button area to debug and run the flow.