Import Linux system log data
To import Linux server system logs into Agentic SOC for security analysis, you first need to create a Linux system log data source instance in the Security Center console, and then configure the LoongCollector collection component in the Simple Log Service (SLS) console. After the configuration is complete, Linux system logs are automatically collected and synchronized to Agentic SOC.
Import process
First, create a data source in Agentic SOC and configure an Alibaba Cloud Simple Log Service (SLS) Logstore to receive Linux system logs. Then, configure a LoongCollector collection task to continuously collect Linux system logs into that Logstore. After verification, enable the product access policy for continuous collection.

Create a data source
Create a dedicated Agentic SOC data collection channel data source instance for Linux log data collection.
Access the Security Center console - Agentic SOC - Management - Integration Settings. In the upper-left corner of the page, select the region of your assets: Chinese Mainland or Outside Chinese Mainland.
Switch to the Data Source tab. In the search box to the right of Data Source Name, search for Linux system log.
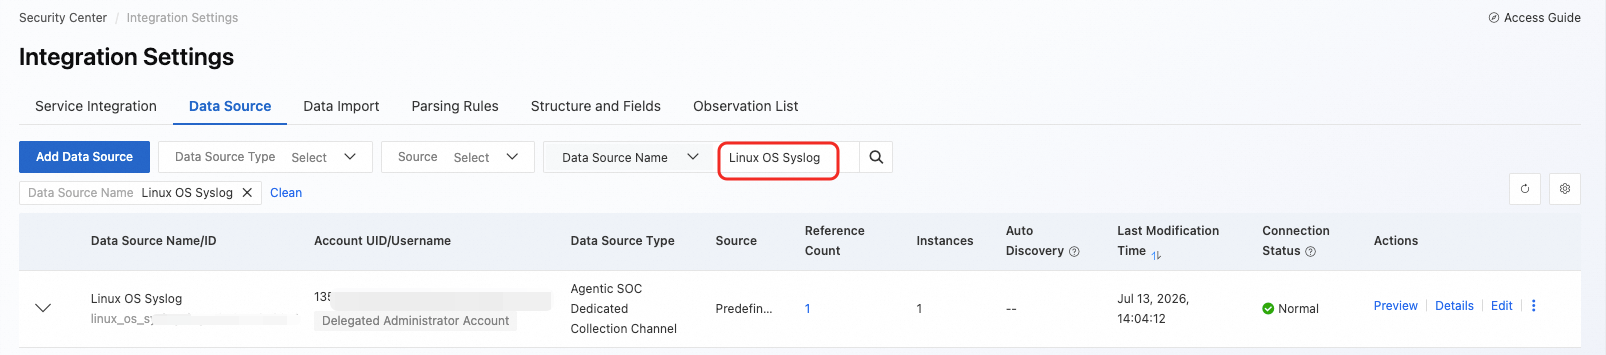
Find the corresponding Linux system log data source and click Edit on the right side.
Click Create Instance. Select or create a Logstore to receive Linux system log data. In this example, a Logstore named linux_syslog is created. After the configuration is complete, click OK.
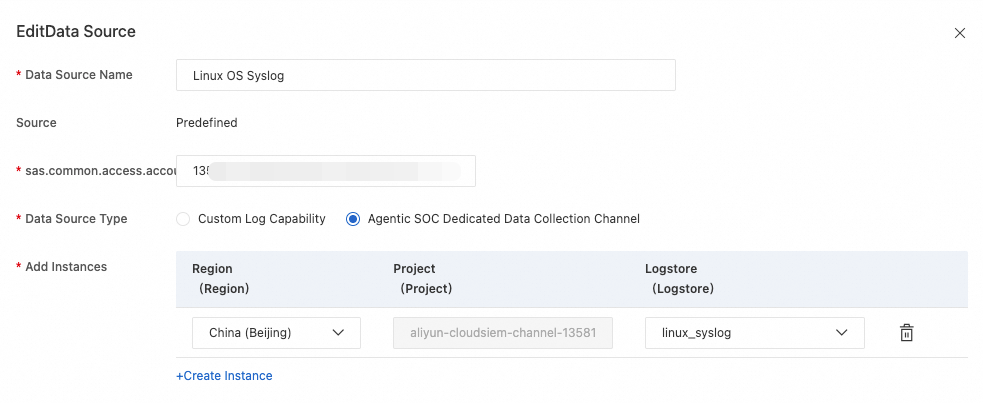
After the data source is configured, note the region, project, and Logstore information of the new instance. You will need this information when configuring LoongCollector in the next section.
Configure LoongCollector collection
In the SLS console, find the Logstore that corresponds to the instance created above, and configure LoongCollector to collect logs from the corresponding Linux machine. For more information, see LoongCollector collection configuration.
Log on to the SLS console. Use the region and project information noted above to filter and find the corresponding project.
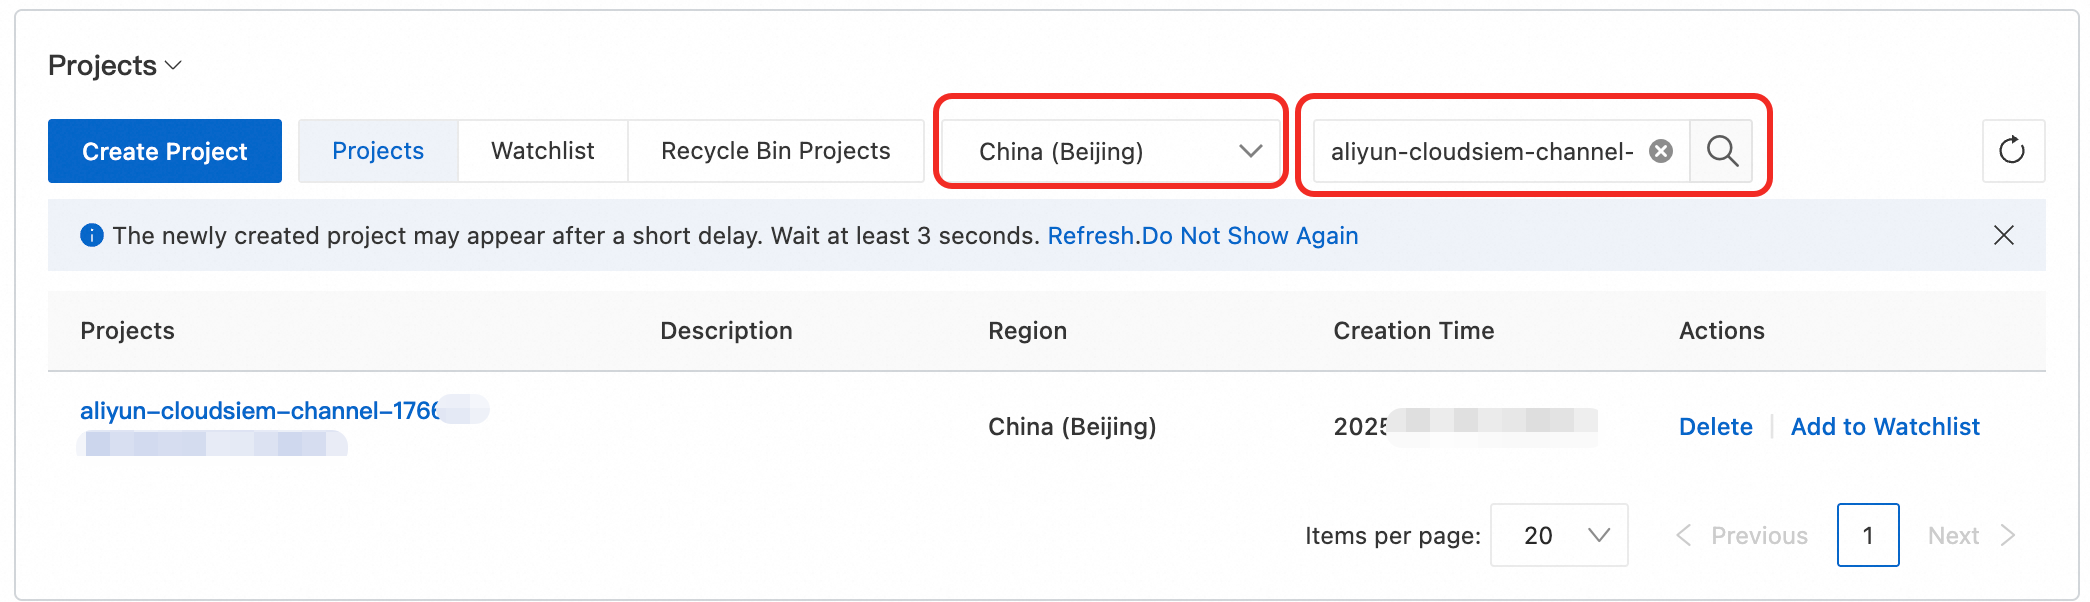
Click the corresponding Project to go to the Project details page. Filter for the corresponding Logstore and click the Logtail configuration for that Logstore.

On the Logtail configuration details page, click Add Logtail Configuration. In the dialog box that appears, select SysLog - Plugin, and then click Integrate Now.
On the Machine Group Configurations page, select Custom Machine - Linux and click Create Machine Group. Follow the Linux installation steps to install LoongCollector. After the installation is complete, click OK.
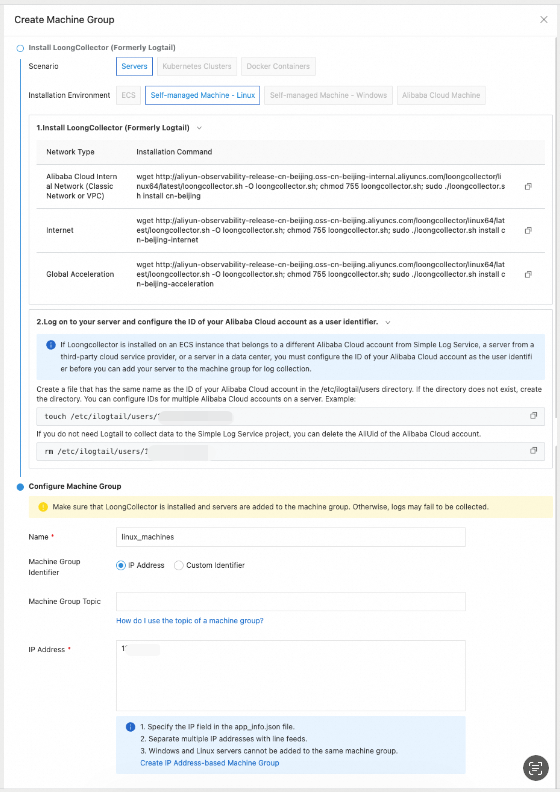
Enter the Name and IP Address for the machine group. Configure other options as needed, and then click Next.
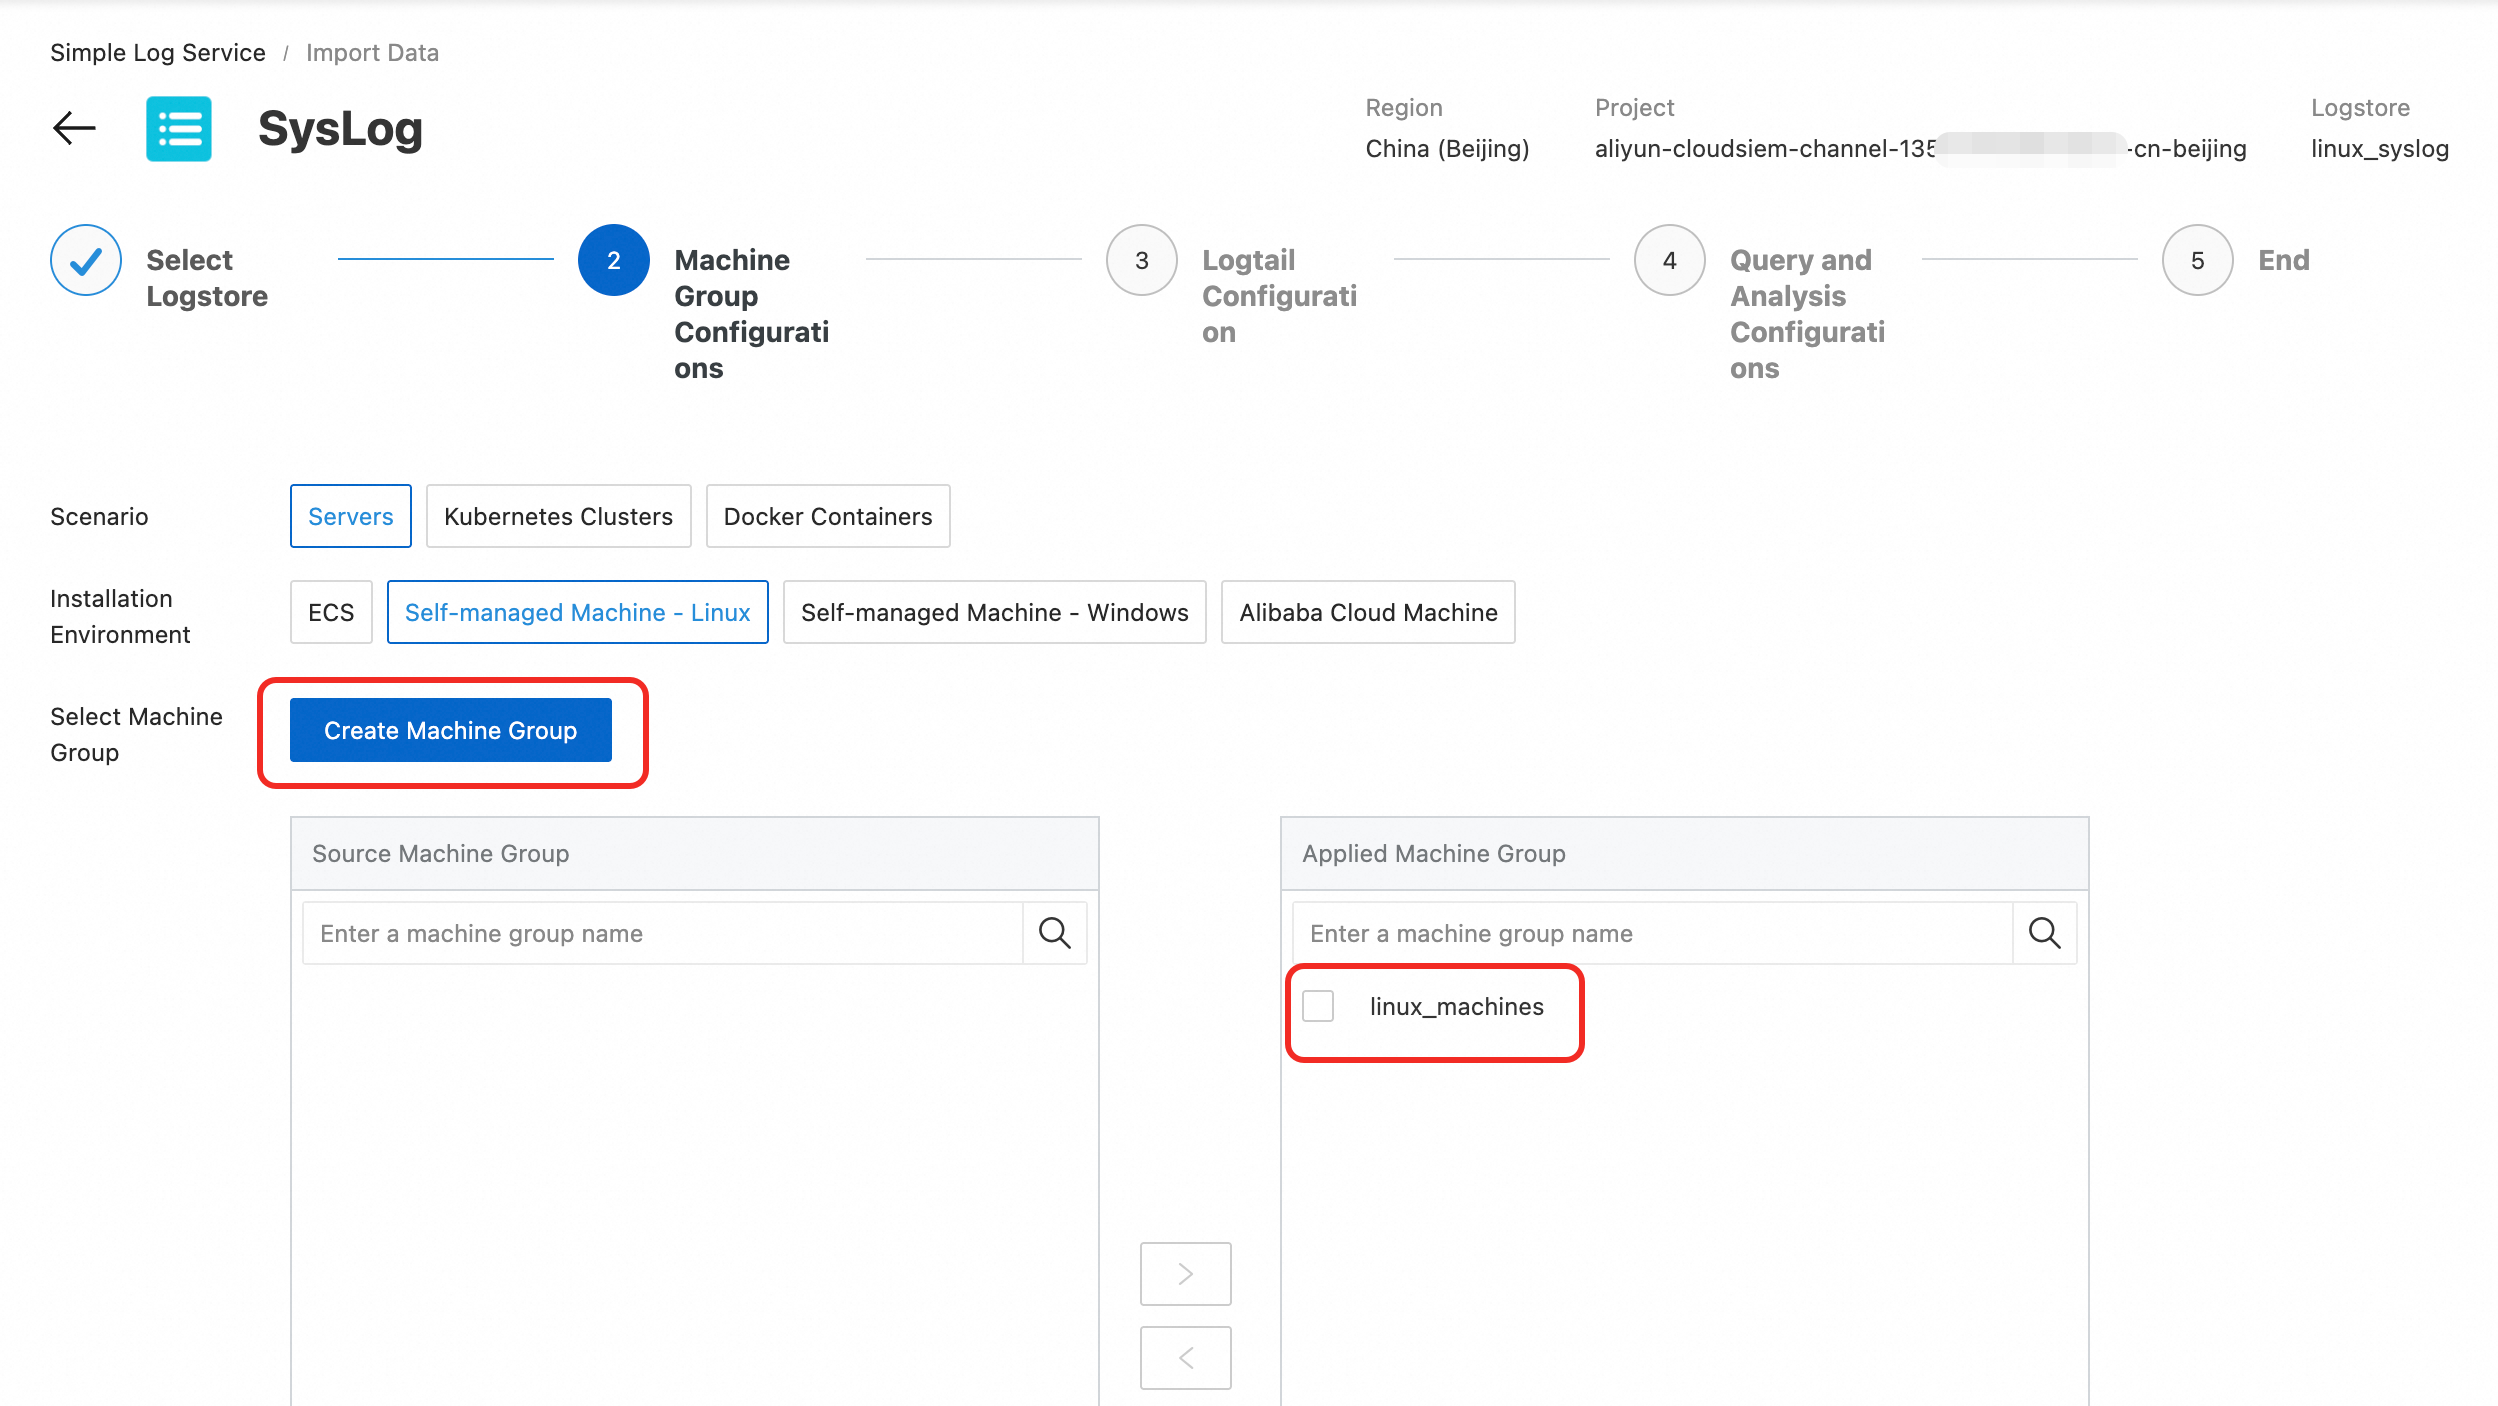
On the machine group configuration page, confirm that the machine group created in the previous step is selected by default. Check the Machine Group Heartbeat section at the bottom of the page to ensure the heartbeat status of all machines is OK. If the heartbeat status is abnormal, check whether LoongCollector is installed correctly on the corresponding machine. After confirming everything is correct, click Next.
On the Logtail Configuration page, click to switch to Editor Configuration mode in the upper-right corner.

Replace the plugin configuration with the following content (you can adjust the __severity__ and __facility__ in the processors as needed):
{
    "inputs": [
        {
            "Type": "service_syslog",
            "detail": {
                "ParserProtocol": "rfc3164",
                "Address": "tcp://127.0.0.1:19999",
                "IgnoreParseFailure": true
            }
        }
    ],
    "processors": [
        {
            "Type": "processor_filter_regex",
            "detail": {
                "Exclude": {},
                "Include": {
                    "__severity__": "1|2|3|4|5|6|7",
                    "__facility__": "1|4|10"
                }
            }
        }
    ]
}
After completing the plugin configuration, you need to configure rsyslog on the server to forward system logs to the LoongCollector listening address. In this example, the listening address is tcp://127.0.0.1:19999. Create the rsyslog forwarding configuration file /etc/rsyslog.d/60-forward-to-loongcollector.conf.
Add the following content:
*.* @@127.0.0.1:19999Then restart the task.
sudo systemctl restart rsyslogAfter the modification is complete, click Next to go to the Query and Analysis Configurations page.
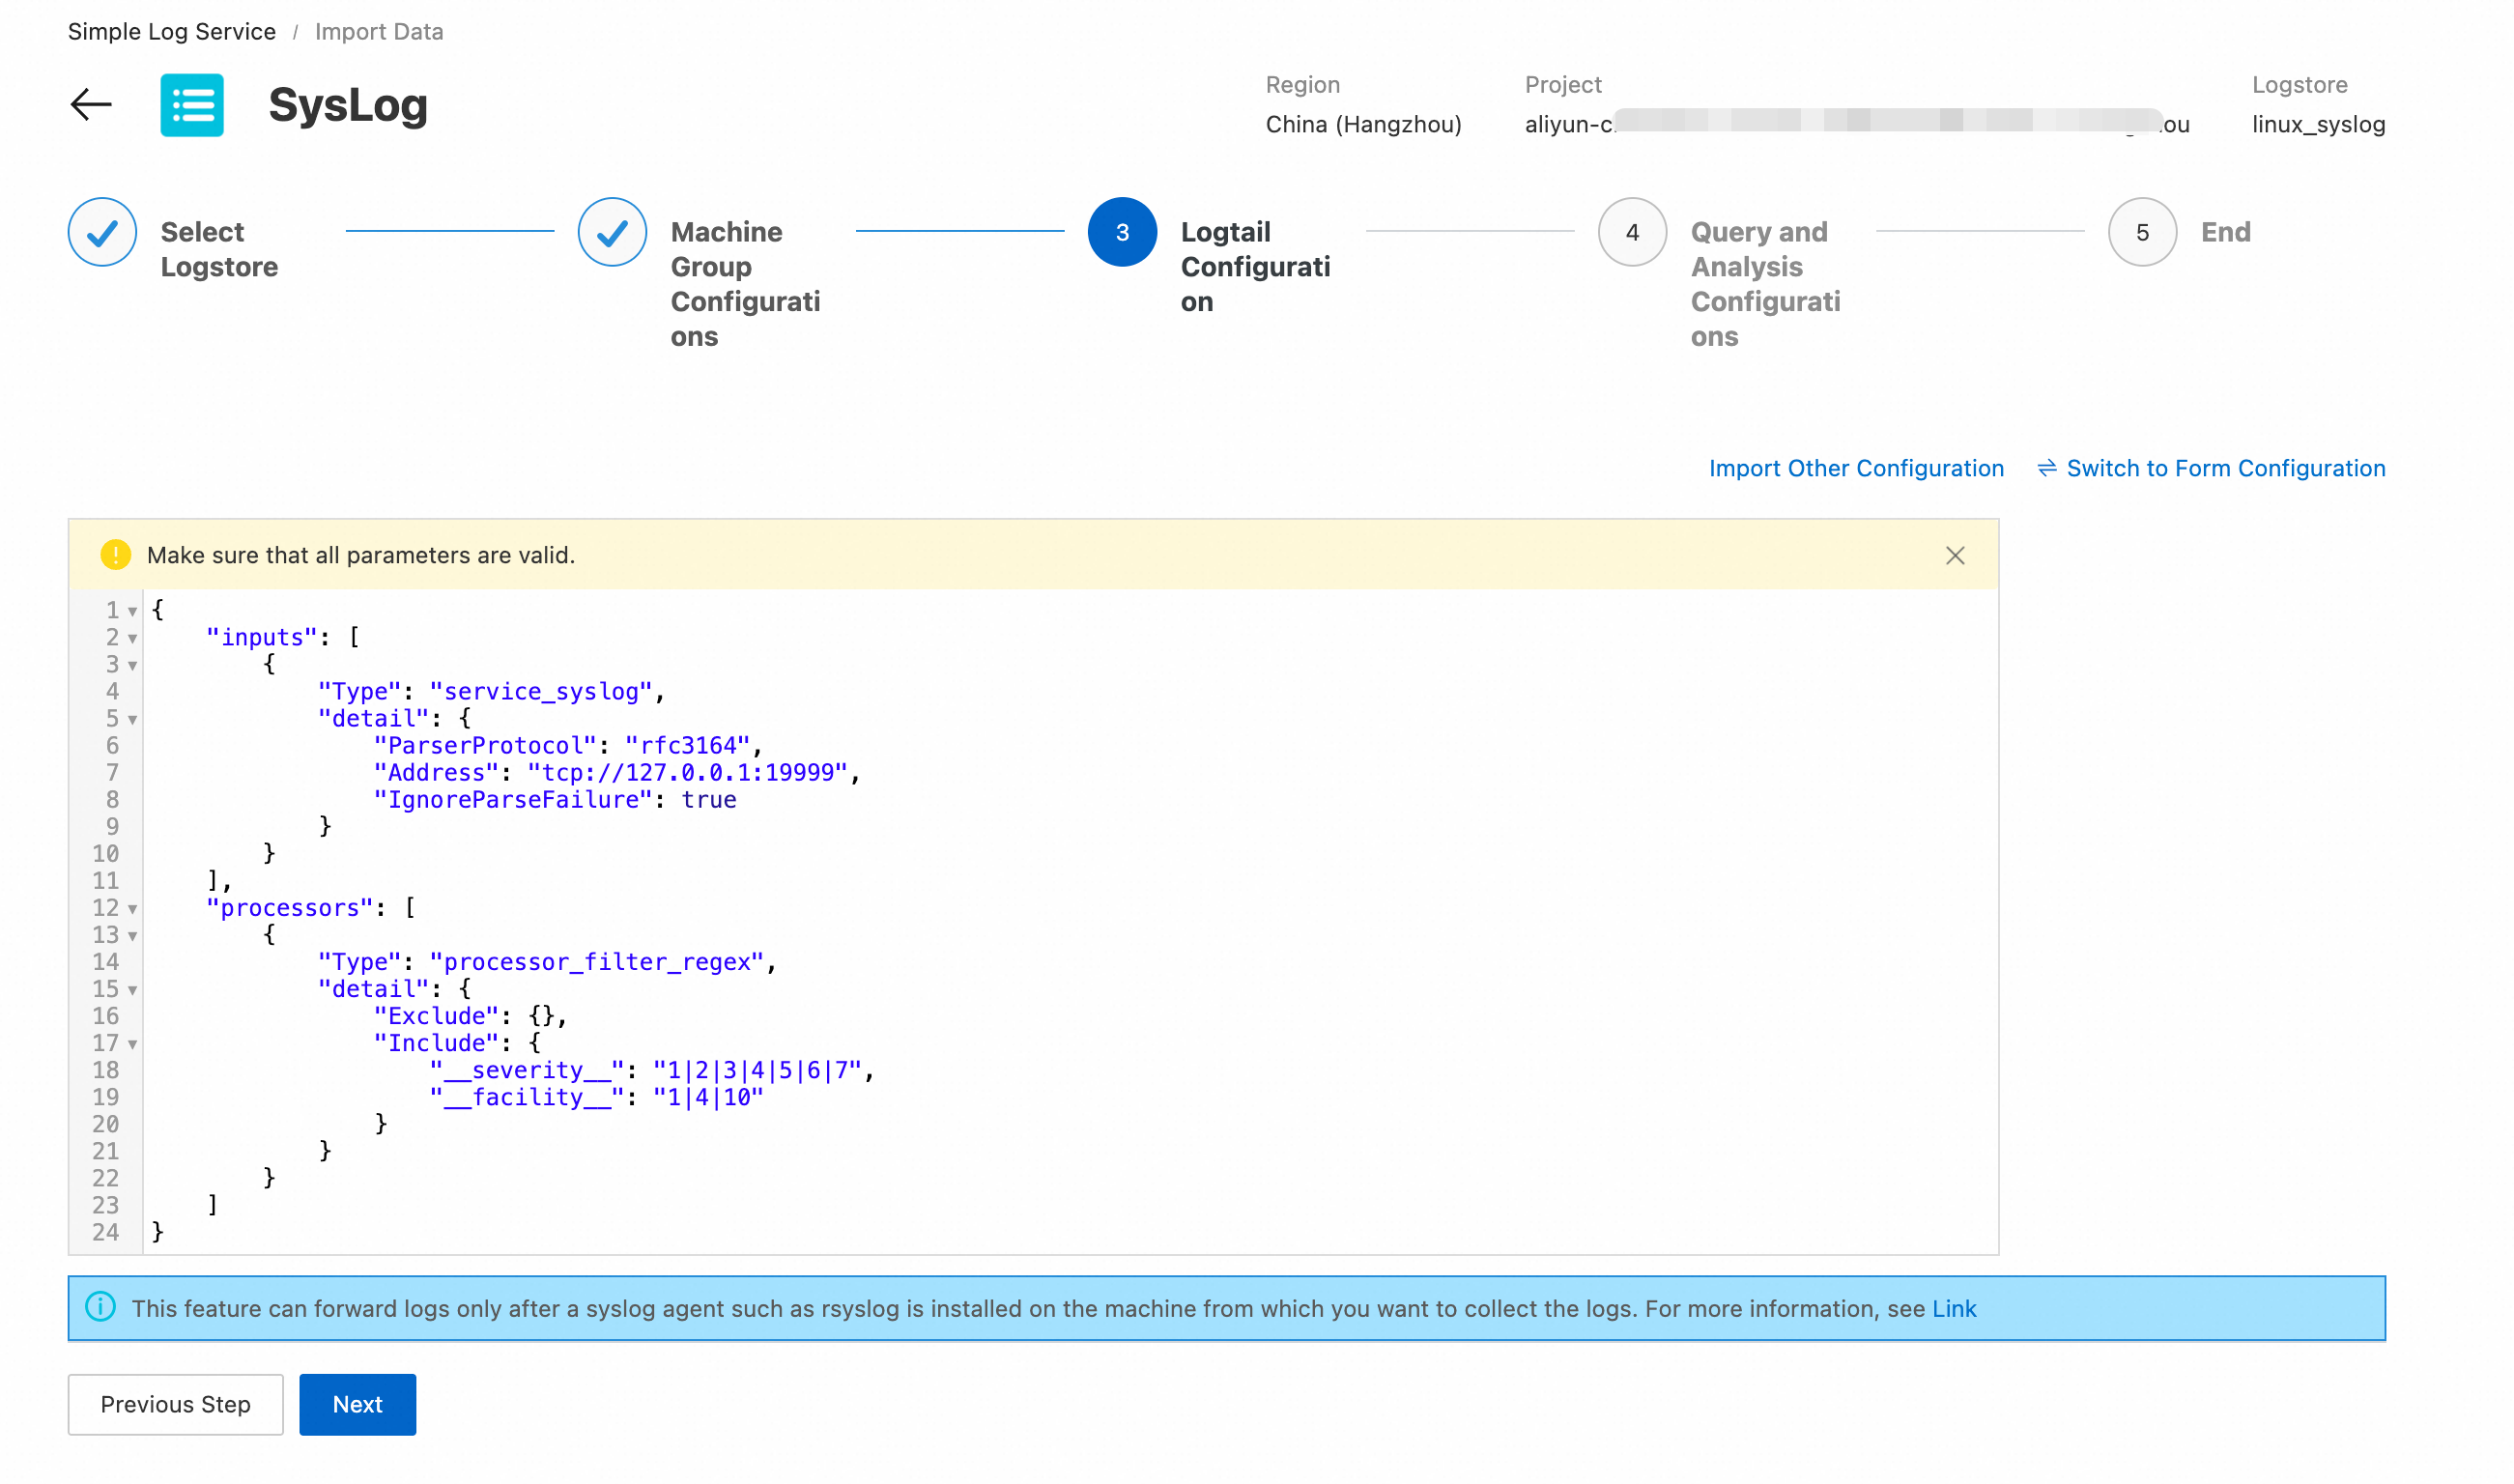
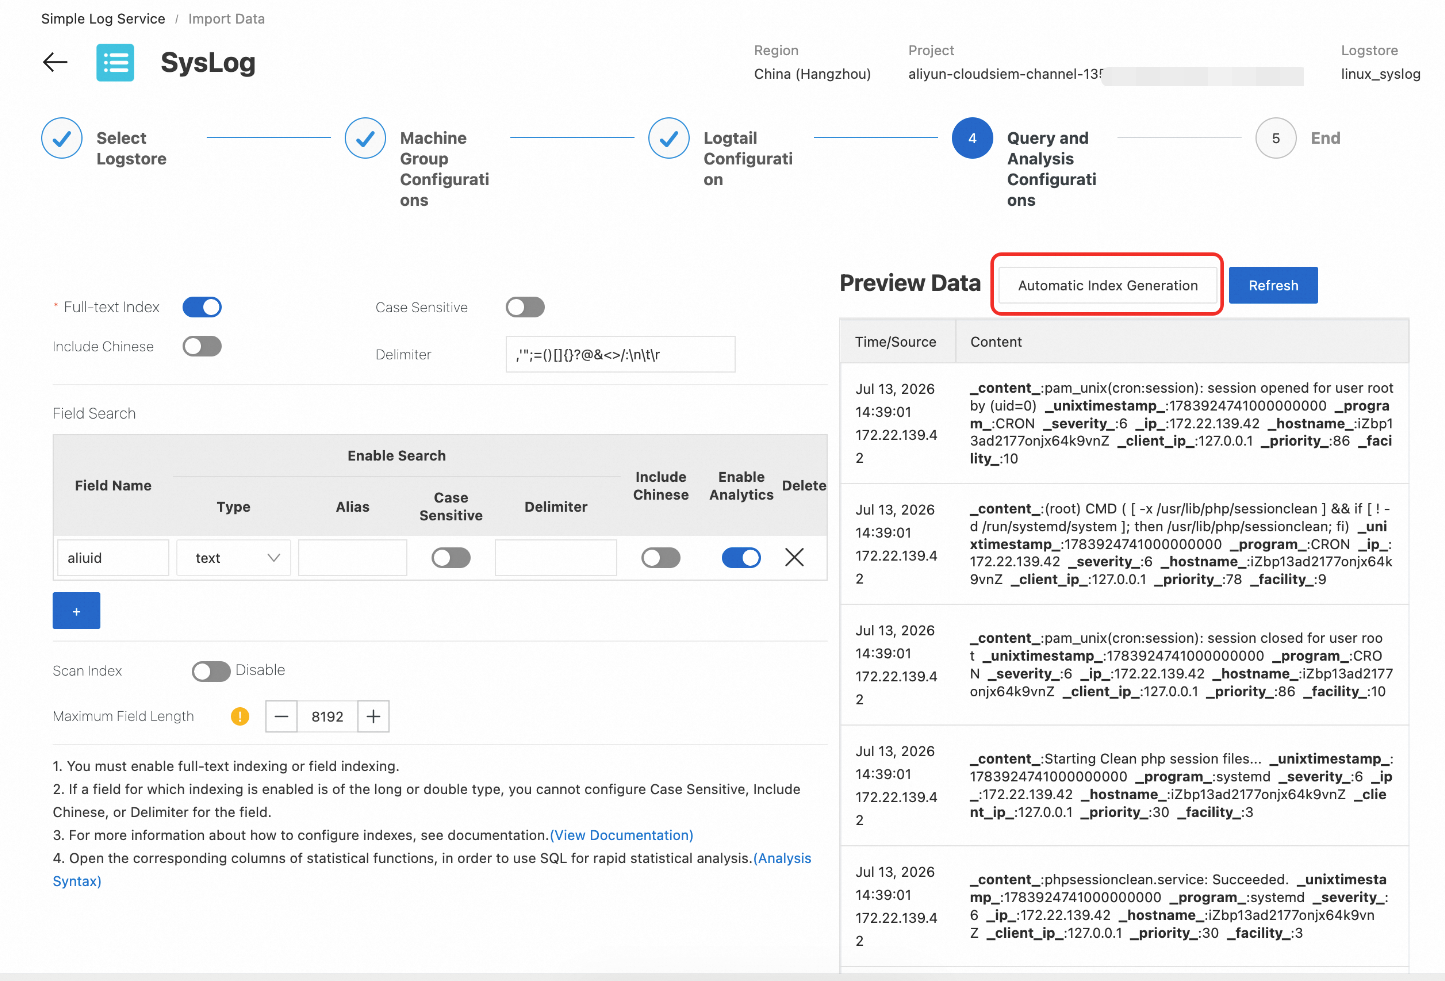
After the configuration is complete, click Next to finish.
Verify data collection
Access the Security Center console - Agentic SOC - Management - Integration Settings. In the upper-left corner of the page, select the region of your assets: Chinese Mainland or Outside Chinese Mainland.
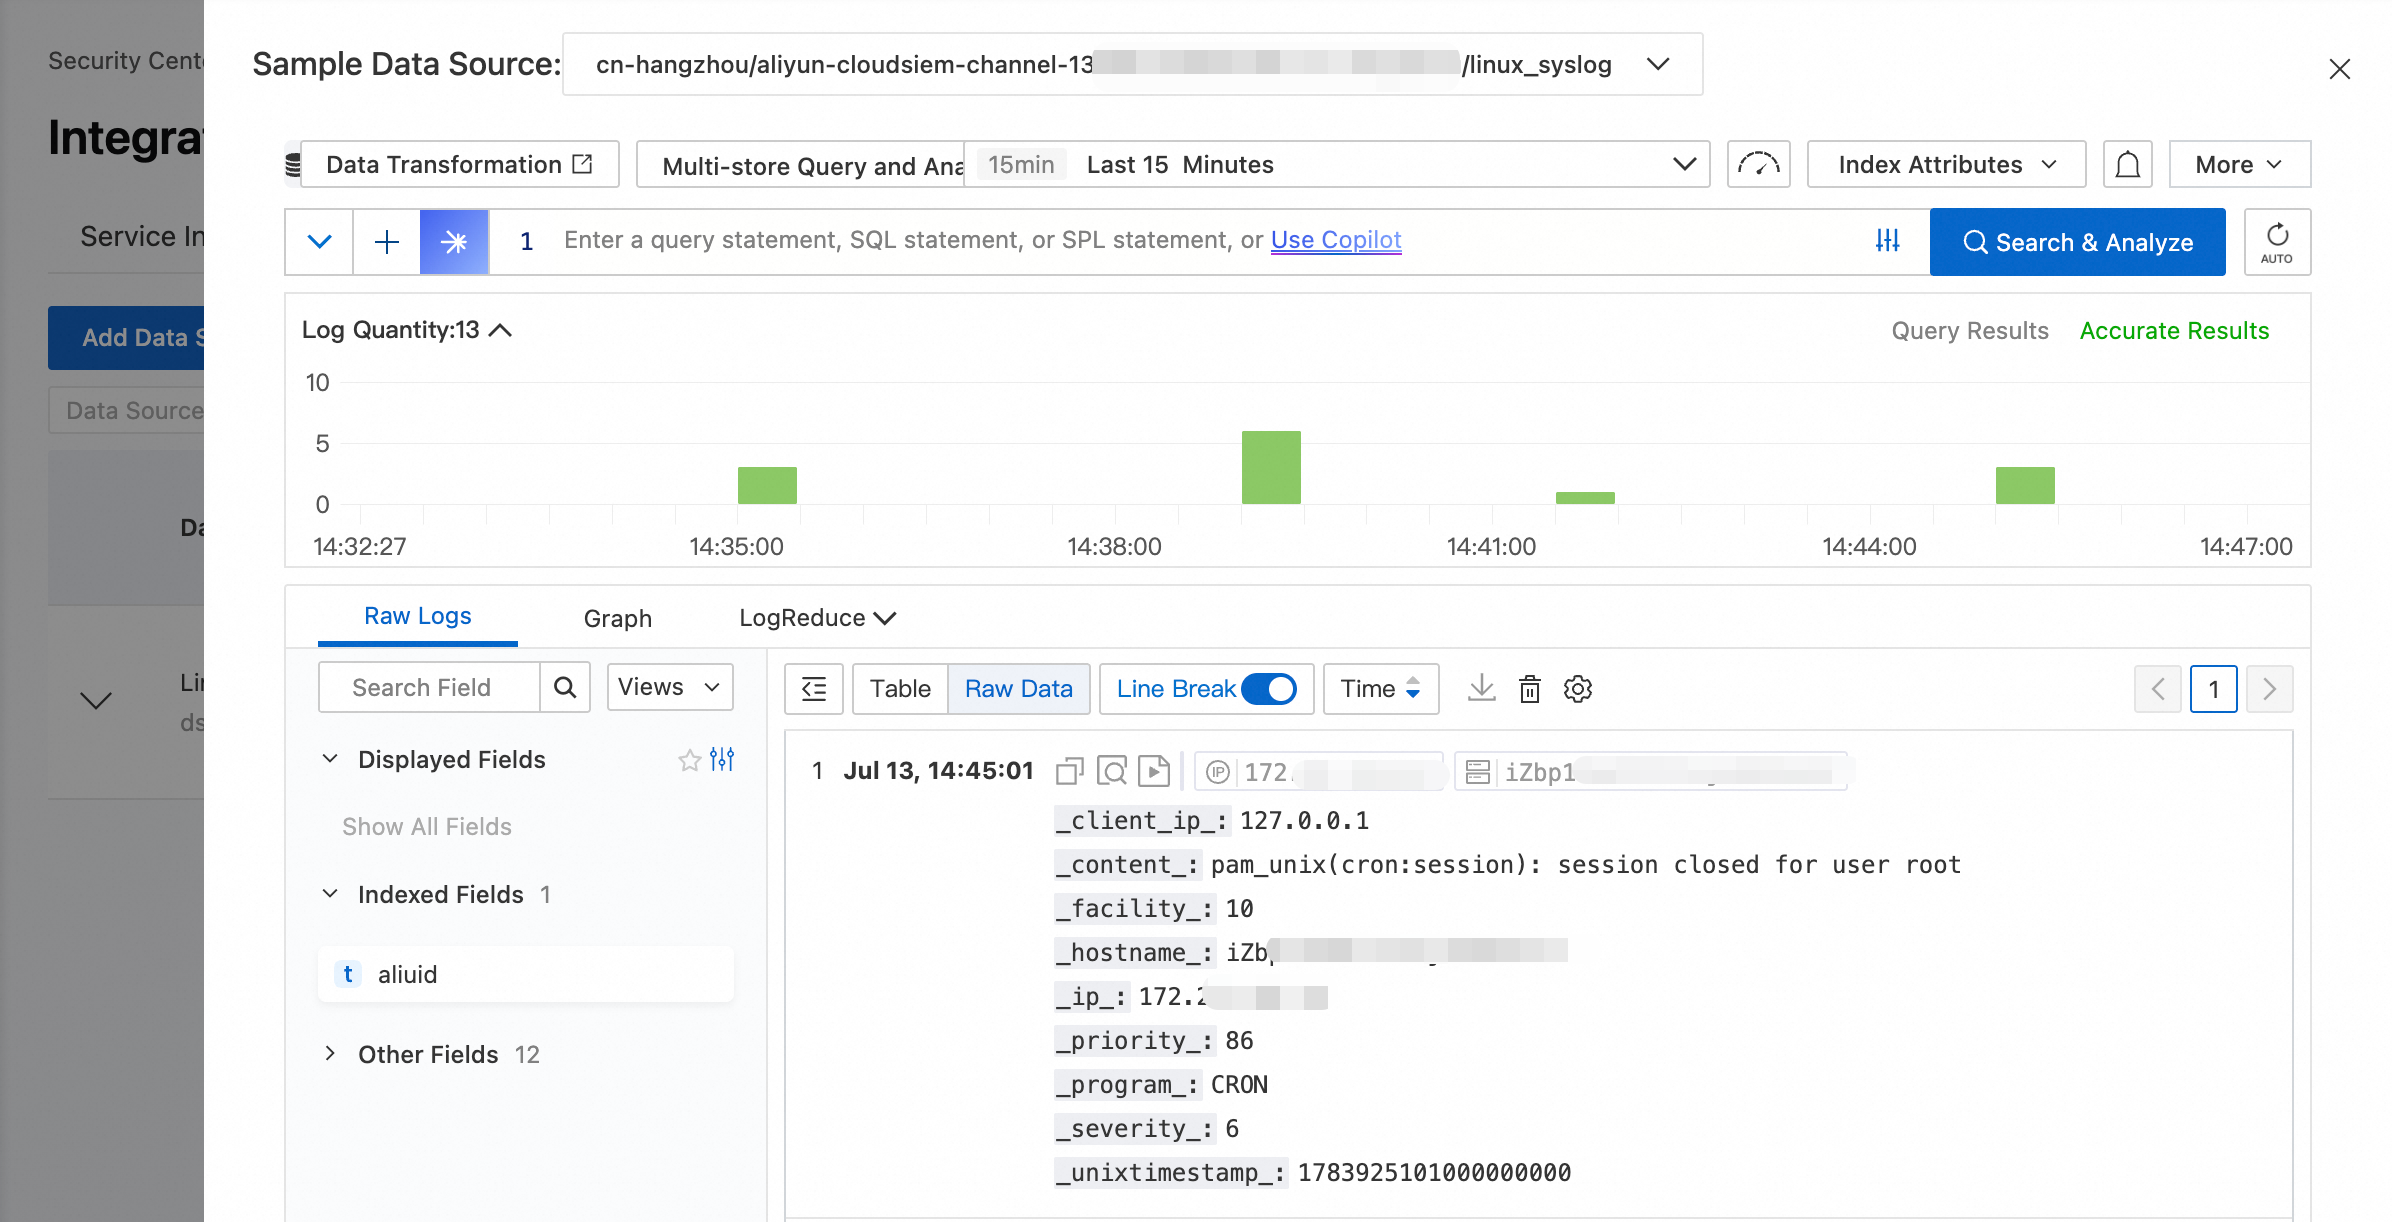
Switch to the Data Source tab. In the search box to the right of Data Source Name, search for Linux_syslog.
In the Actions column, click Preview. If data is displayed, the Linux system log collection is configured correctly.
Enable the product access policy
Access the Security Center console - Agentic SOC - Management - Integration Settings. In the upper-left corner of the page, select the region of your assets: Chinese Mainland or Outside Chinese Mainland.
Switch to the Service Integration tab. In the product search box, search for Linux.
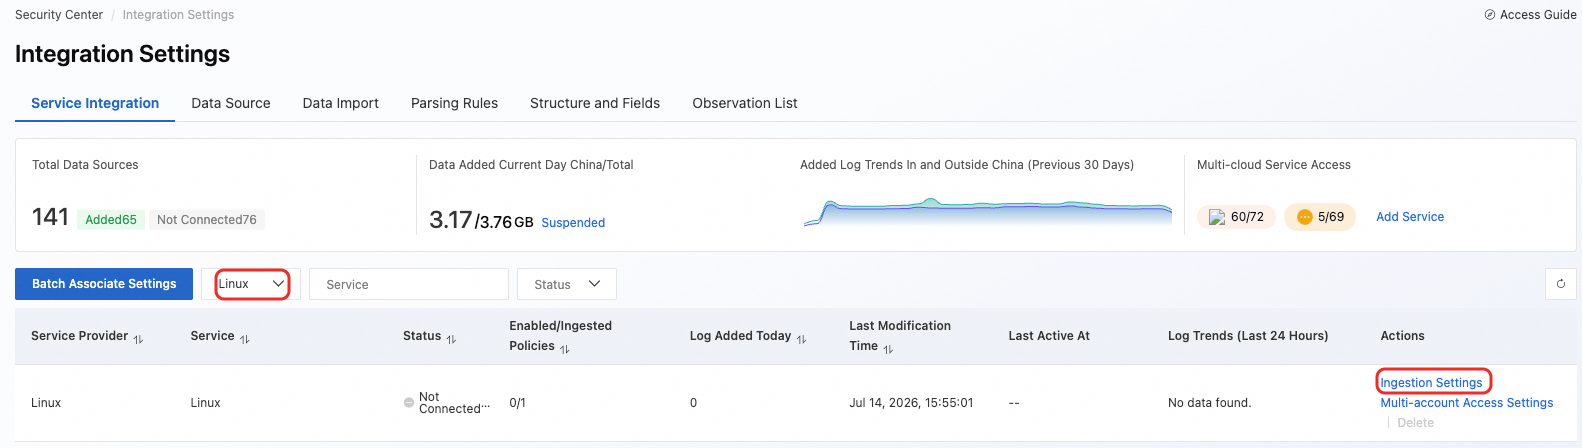
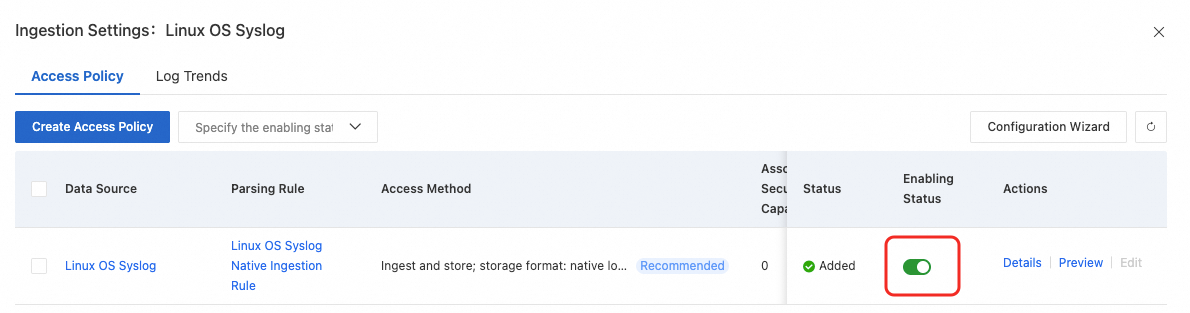
In the Actions column, click Access Settings. On the page that appears, find the Linux system log data source entry and turn on the Enabling Status switch on the right side.