Handle failed check items
After running cloud service configuration checks, review the details of failed check items in the Security Center console and fix risky cloud service configurations based on the provided remediation steps. This improves the security, performance, and reliability of your cloud environment and helps ensure normal business operations and data security.
View check results
Follow these steps to review the details of failed check items and identify the risk items and affected cloud services that require remediation.
-
Log on to the Security Center console. In the top navigation bar, select the region of the assets you want to manage: China or Outside China.
-
(Optional) Go to Risk Governance > CSPM > Risk Overview tab. Select a cloud provider to filter the assets you want to view. Leave the selection empty to view all. Review the risk report data to get a comprehensive view of configuration risks in your cloud assets.
The risk overview dashboard contains Detected Threat Types, At-risk Asset Statistics, Check Item Pass Rate, Trend of Check Item Pass Rate, Asset Pass Rate Trend, and Top 5 Over-Authorized Objects.
In the At-risk Asset Statistics area, the pay-as-you-go mode displays Used Quota. The subscription mode displays Remaining Quota. Click Scale Out to purchase more quota.
In the Scanned Check Items area, click Scan Now to run a security check. The Check Item Pass Rate area shows pass rates categorized by KSPM, security risks, CIEM, compliance risks, and baseline risks. The Top 5 Objects with Excessive Permissions area contains Users and Roles tabs.
-
Go to Risk Governance > CSPM > Cloud Service Configuration Risk to review specific check items.
-
At the top of the page, view the pass rate of each check item. Hover over the pass rate segments to see the counts of high-risk (red), medium-risk (orange), low-risk (yellow), and not passed (gray) check items.
ImportantHigh-risk items pose major threats to your assets. Address them as soon as possible.
The pass rate dashboard contains the following sections: Kubernetes Security Posture Management (KSPM), Cloud Infrastructure Entitlement Management (CIEM), Security Risks, Compliance Risks, and AISPM. Each section shows the pass rate for corresponding check items by cloud provider or compliance standard.
-
Find the risk items to address.
 Alternatively, click Fix Now in the Check Item Pass Rate area on the Risk Overview tab to go directly to the Cloud Service Configuration Risk tab filtered to items that support one-click fixing.
-
In the All Check Items list on the left, click a check item type to see its associated risks in the list on the right.
-
Use the filter options above the list to narrow results by risk level, status, check item name, or check item type. For example, to view risk items that support one-click fixing in Security Center:
In the Fixable drop-down list, select Yes.
-
-
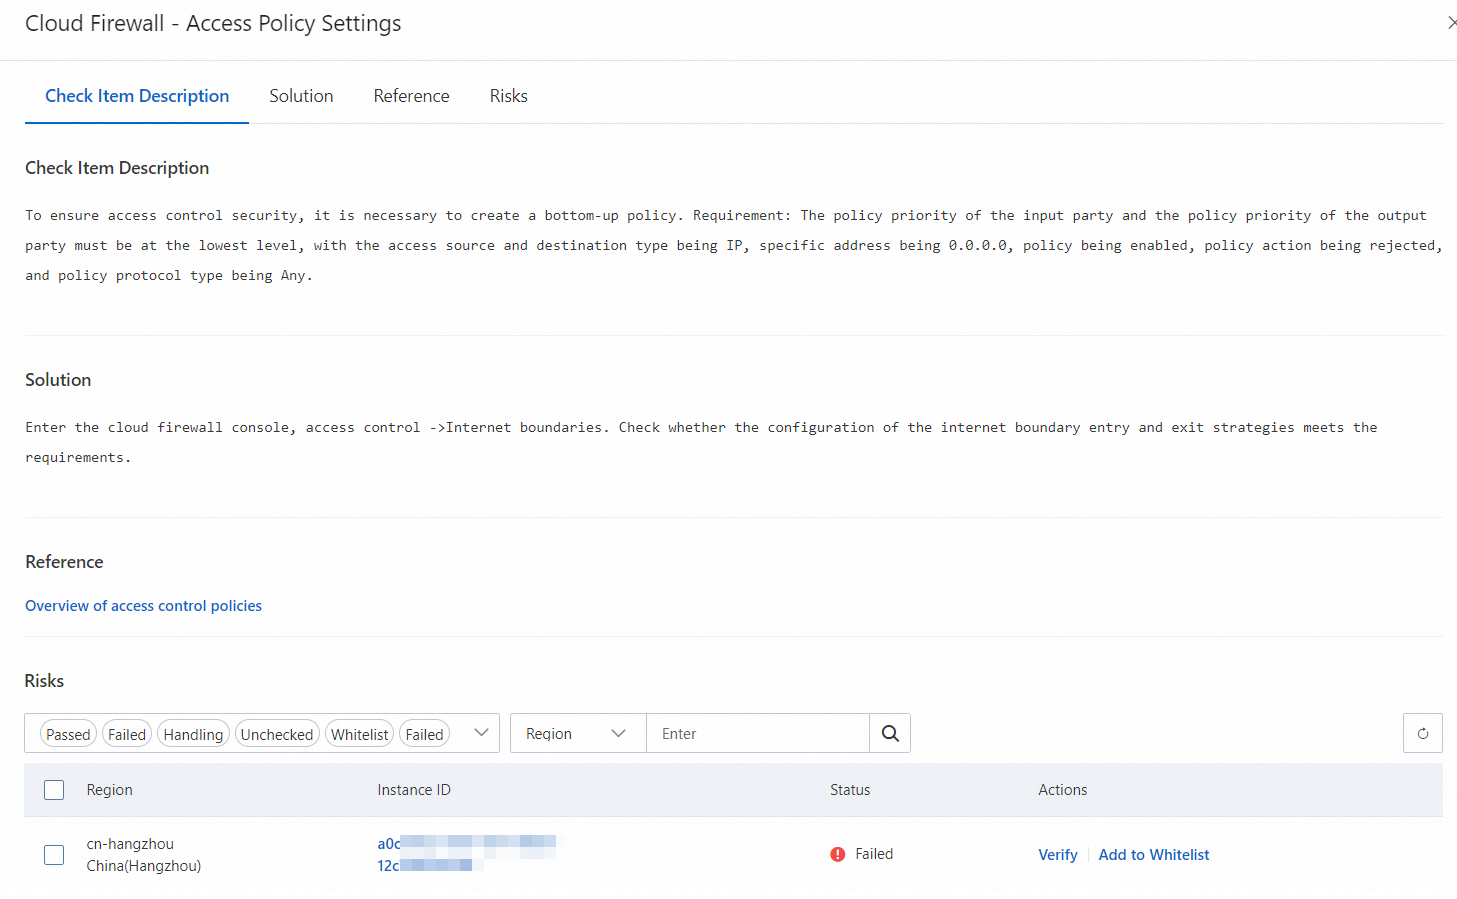
In the Actions column of a risk item, click Details to open the check item details panel. The panel contains four sections:
-
Check Item Description — what the check item evaluates and why it matters
-
Solution — step-by-step remediation guidance
-
Help — additional reference information
-
Impact — the cloud service instances affected by this risk
On the Impact tab, you can filter check results by status (Passed, Not Passed, Processing, Not Checked, or Whitelisted). The table displays the account ID, account alias, and status. You can perform Verify or Add to Whitelist operations on specific resources.
-
-
In the check item details panel, you can also click Check Item Description to view the report automatically generated by the CSPM Risk Interpretation Agent.
-
Fix risky configurations
Based on the risk item details reviewed above, refer to the Solution and Help information to fix the cloud service configurations associated with the risk items promptly.
In the Impact area of the failed check item details panel, view the cloud services with configuration risks. In the Actions column, choose one of the following operations to handle the risk items.
Fix with one-click fix
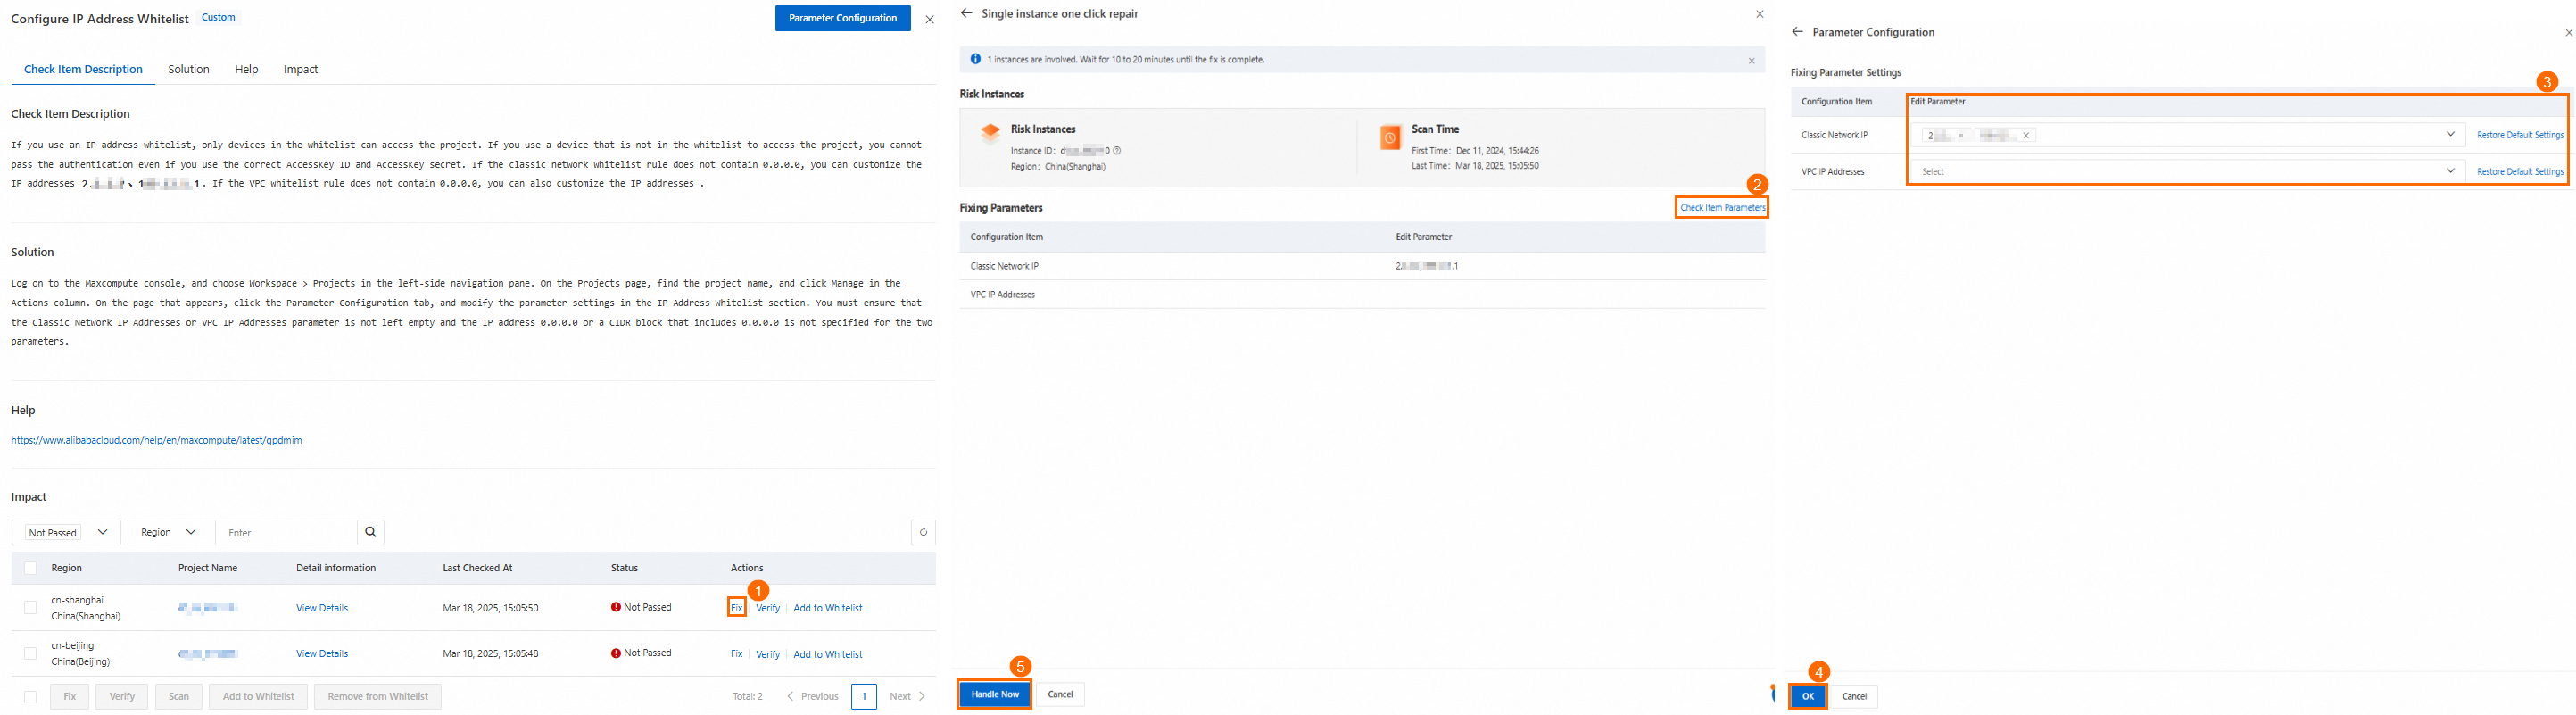
Security Center supports one-click fixes for over 100 check items. To check whether a check item supports one-click fixing, look for a Fix button in the Actions column of an instance with a Not Passed status. If no Fix button appears, the check item does not support one-click fixing — follow the manual remediation steps in the Solution section instead.
To fix an instance:
-
In the Actions column of the target instance, click Fix.
-
In the fix panel, review the risky instance information, scan time, and fix parameters.
-
If you need to adjust parameters before fixing, click Check Item Parameters, set Edit Parameter in the Parameter Configuration panel, and click OK.
-
Click Handle.
-
If your account lacks authorization to modify another account's configurations, click Authorize in the dialog that appears.
-
If there is no notice about rollback restrictions, you can click Rollback later to restore the previous configuration.
-
If prompted after the fix, restart the instance.
-
To fix multiple instances at once, select the risk items for multiple instances and click Fix at the bottom of the risk list.
Fix in the cloud service console
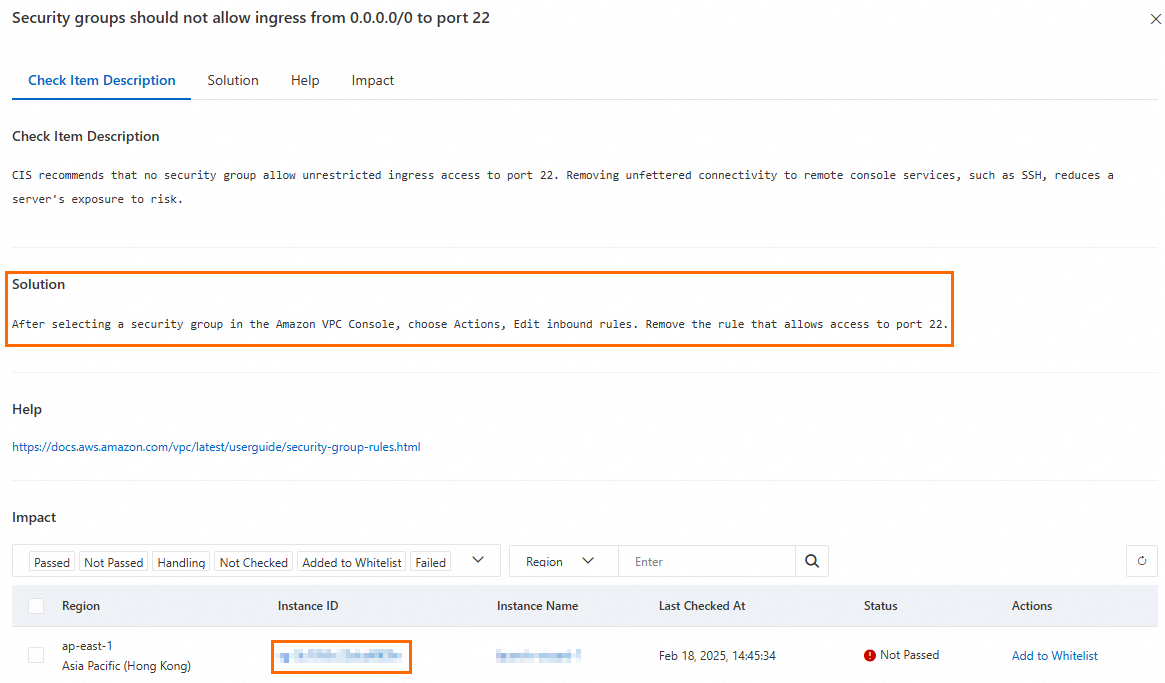
Click the at-risk instance ID, account ID, or policy name to navigate to the console of the affected cloud service and apply fixes manually.
The target Instance ID is in the check results table in the Impact area of the check item details page.
Whitelist risks
After you add a risk item to the whitelist, CSPM stops reporting risks related to that check item. Only add items to the whitelist after you confirm they pose no security risk, or the check item cannot be fixed, for example, when a fix requires you to purchase a service.
If a risk item does not pose a security risk, or the check item cannot be fixed, for example, when a fix requires you to purchase a service, click Add to Whitelist to add the cloud service instance's risk item to the whitelist. Whitelisted risk items are excluded from the total risk count.
On the Impact tab of the check item details, find the target risk item and click Add to Whitelist in its Actions column.
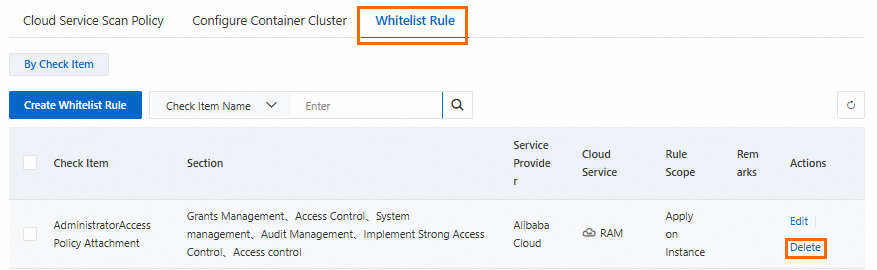
To view all whitelisted check items, go to Policy Management > Whitelist Rule. To remove an item from the whitelist, click Delete.
Verify fixes
After modifying an instance's configuration, verify the fix:
-
In the Actions column of the target risk item, click Verify. To verify multiple items at once, select them and click Verify at the bottom of the list.
-
Once verification passes, the instance status changes to Passed. When all instances under a risk item pass verification, the risk item status also changes to Passed.

Review fix history
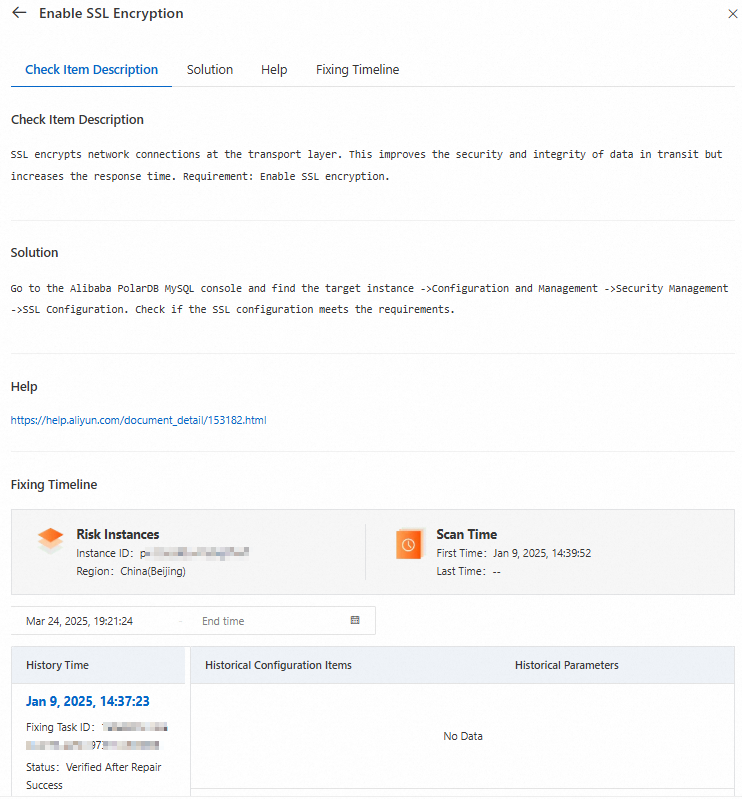
For risk items fixed with one-click fix, click Fixing Task Management in the upper-right corner of the CSPM page to view your fix history.
The Fixing Task Management panel shows the fix task ID, check item, and status. From here, you can Roll Back or Verify any fix.
The panel also displays the Risk Level, Instance ID/Region, Latest Check Time, and Processing Time columns. In addition to rollback and verification, batch operations also support Scan.
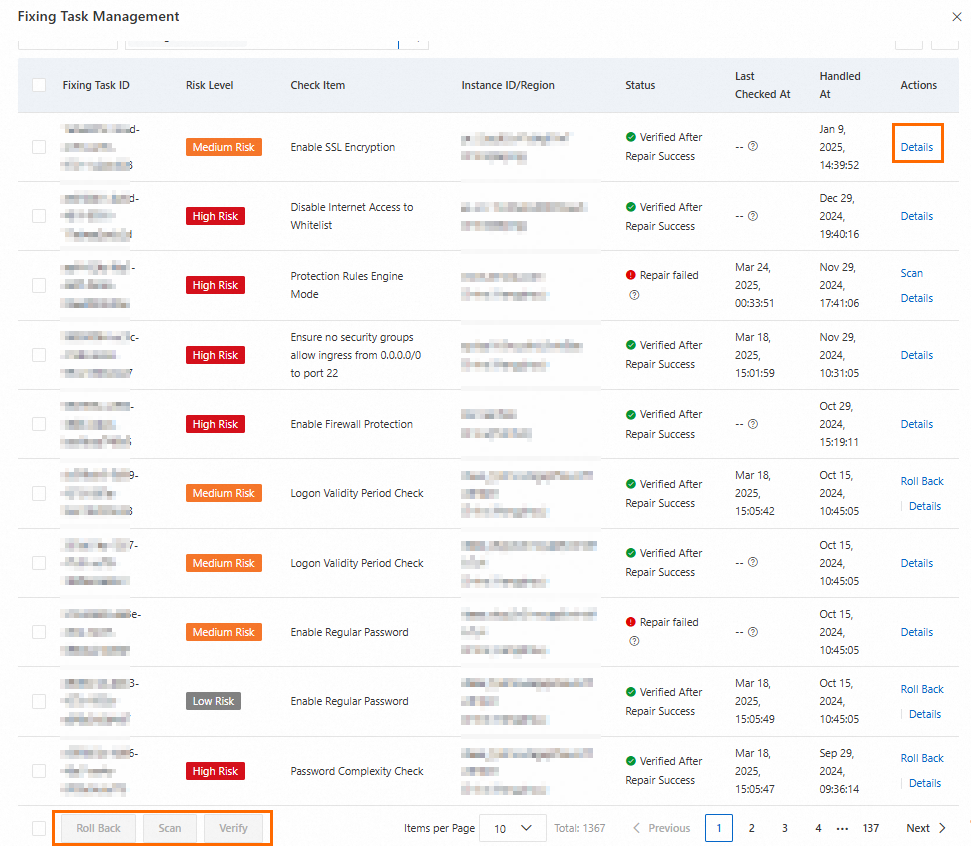
Click Details to view the Check Item Description, Solution, Help, and Fixing Timeline for a specific fix task.