This topic describes how to integrate the OpenClaw service with WeCom. This allows you to interact with OpenClaw directly in group chats using natural language.
Before you begin
Before you configure a channel, you must purchase and configure a Simple Application Server instance with the OpenClaw application image by following the steps below or the instructions in Deploy an OpenClaw image. If you have already done this, you can skip this section.
Integrate with WeCom
The OpenClaw plugin integration method is only supported for instances with image version OpenClaw 2026.2.9 or later. To integrate this channel on an older version, see Integrate a channel by using AppFlow. You can view the current image version of your instance in the section of the Simple Application Server overview page.
OpenClaw provides two methods to integrate with WeCom. Select a tab based on your image version to view the corresponding procedure.
OpenClaw 2026.5.19 and later (Recommended)
We recommend using the QR code method in the new console. This method requires no developer registration and is activated automatically after you scan the QR code to grant authorization.
-
Log on to the Simple Application Server console, find the target OpenClaw server, and go to the Application Details tab.
-
In the Channels card, click Add Channel.
-
From the channel drop-down list, select WeCom.
-
Keep the default Connect IM via QR Code tab selected and click QR Code Configuration.
-
Use WeCom to scan the QR code in the pop-up window and follow the prompts to grant authorization. This completes the bot creation and configuration.
OpenClaw earlier than 2026.5.19
Use the Channel Configuration section in the old console to integrate with WeCom. The following three methods are supported:
QR code method
This method is supported only for OpenClaw 2026.3.13 and later versions.
-
In the Simple Application Server console, go to the instance details page. On the , and click Scan to Configure.
-
The page shows a QR code. Use WeCom to scan the QR code and follow the prompts to grant authorization. This completes the bot creation and configuration.
Persistent connection method
This method is supported only for OpenClaw 2026.3.13. For other versions, use the URL callback method.
-
Go to the WeCom admin console. In the left-side navigation pane, choose . Click Create Bot, and then click Create Manually.

-
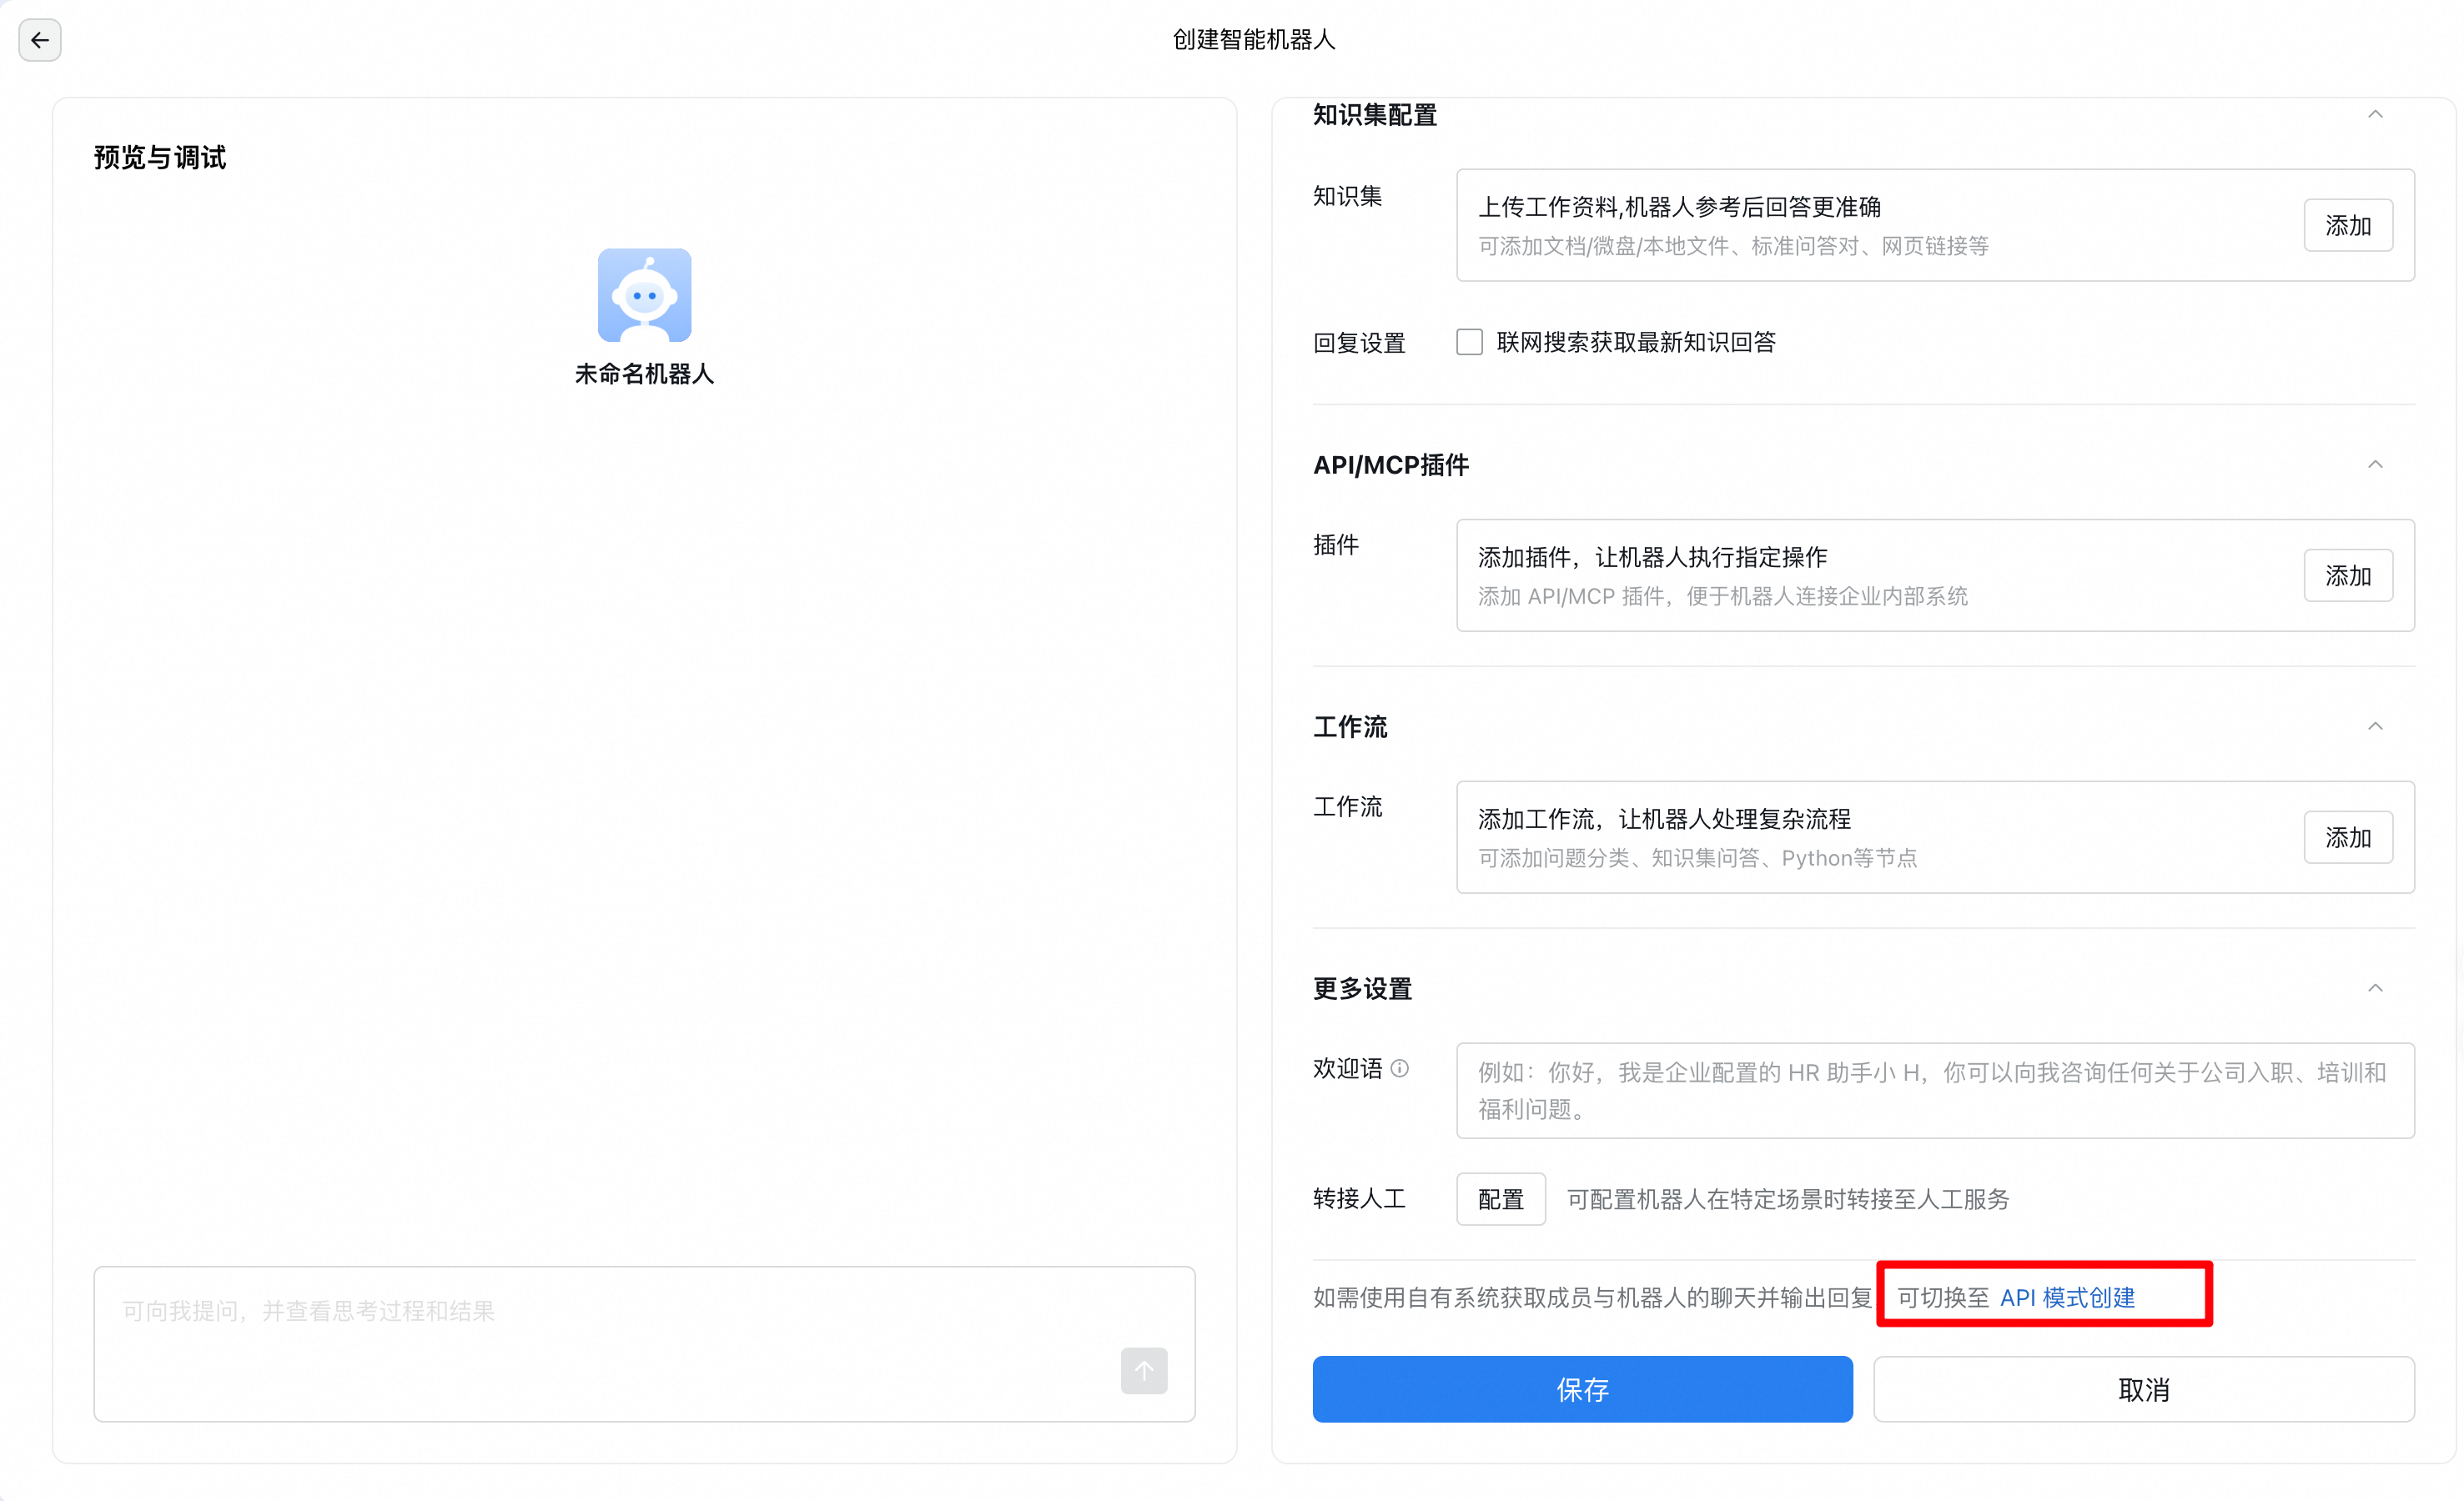
Create a chatbot in API mode.
-
Scroll to the bottom of the page and click Create with API Mode.
-
Configure the following parameters and click Save.
-
Visible Scope: Configure the visibility scope of the bot.
-
API Configuration: In the Connection Method section, select Use Persistent Connection. In the Configuration Method section, under Secret, click Get Code and save the Bot ID and Secret.
-
Available Permissions: Configure permissions for the bot as needed.
-
-
In the Simple Application Server console, go to the instance details page. On the , enter the Bot ID and Secret that you obtained in the previous step, and click Application.
-
URL callback method
-
Go to the WeCom admin console. In the left-side navigation pane, choose . Click Create Bot, and then click Create Manually.
-
Create a chatbot in API mode.
-
Scroll to the bottom of the page and click Create with API Mode.
-
In the Connection Method section, select Use URL Callback.
-
Click Generate Randomly for both Token and Encoding-AESKey, and save the generated Token and Encoding-AESKey.
-
In the Simple Application Server console, go to the instance details page. On the , enter the Token and Encoding-AESKey that you obtained in the previous step, and click Application.
-
Return to the Create with API Mode page, enter the URL, leave the Token and Encoding-AESKey fields unchanged, and click Create.
The URL format is
http://<IP_ADDRESS>:<PORT>/webhooks/wecom. Replace<IP_ADDRESS>and<PORT>with the IP address and port number of your OpenClaw server. For more information about how to obtain the port number, see How do I view the port number of OpenClaw?ImportantIf you receive a "Domain ownership verification failed" error, see What do I do if the domain ownership verification fails?.
-
Verification
-
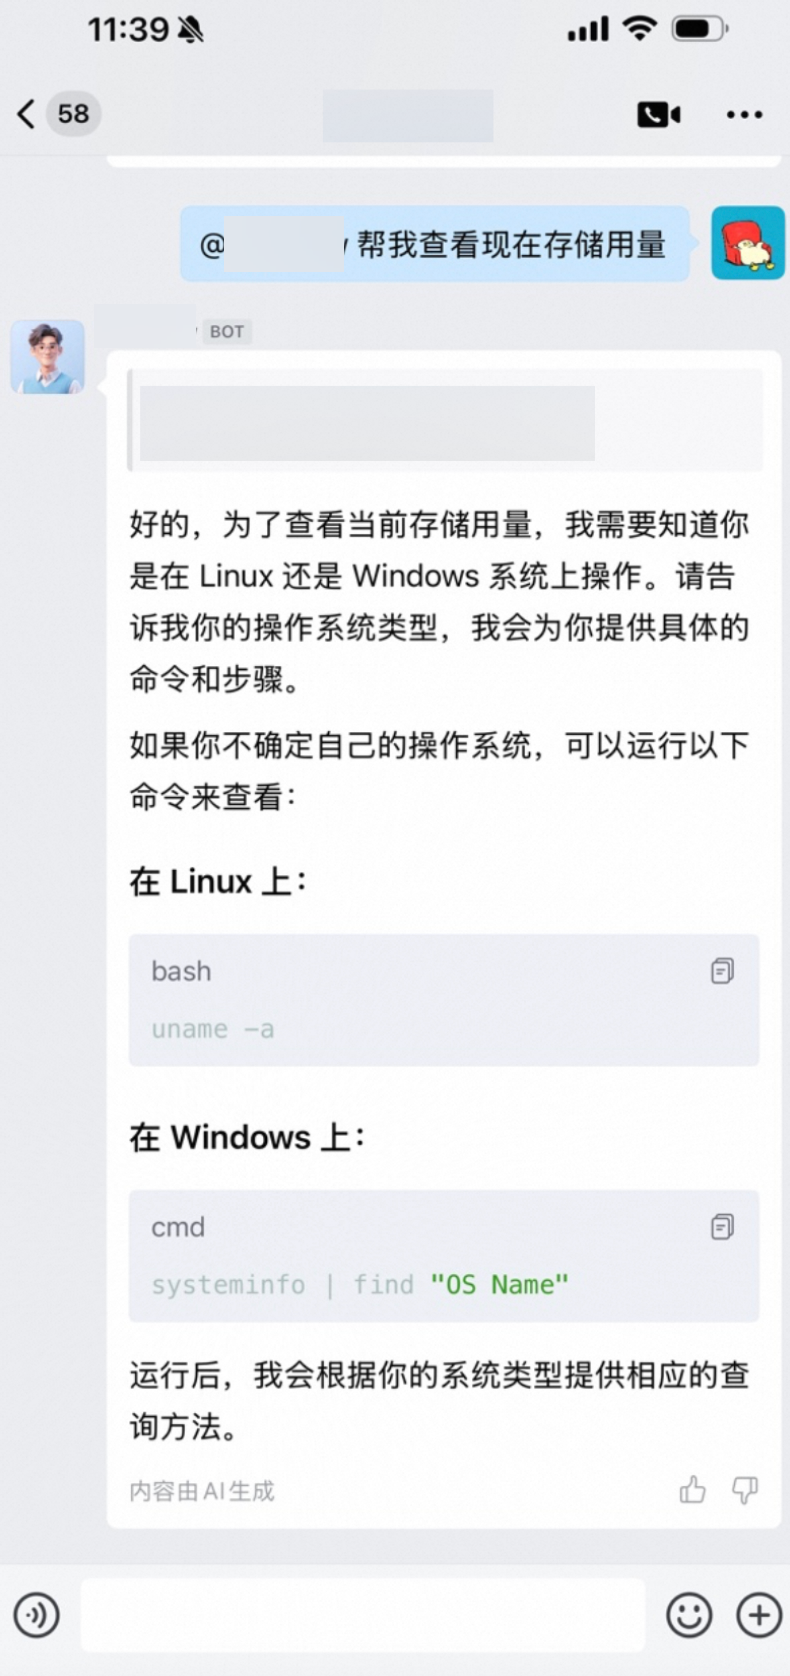
In a WeCom group chat, add the bot you created as a member.
-
In the group chat containing the bot, @mention it to start a streaming conversation. The following figure shows an example:
FAQ
Scheduled tasks for WeCom
You can create a scheduled task by starting a conversation with OpenClaw.
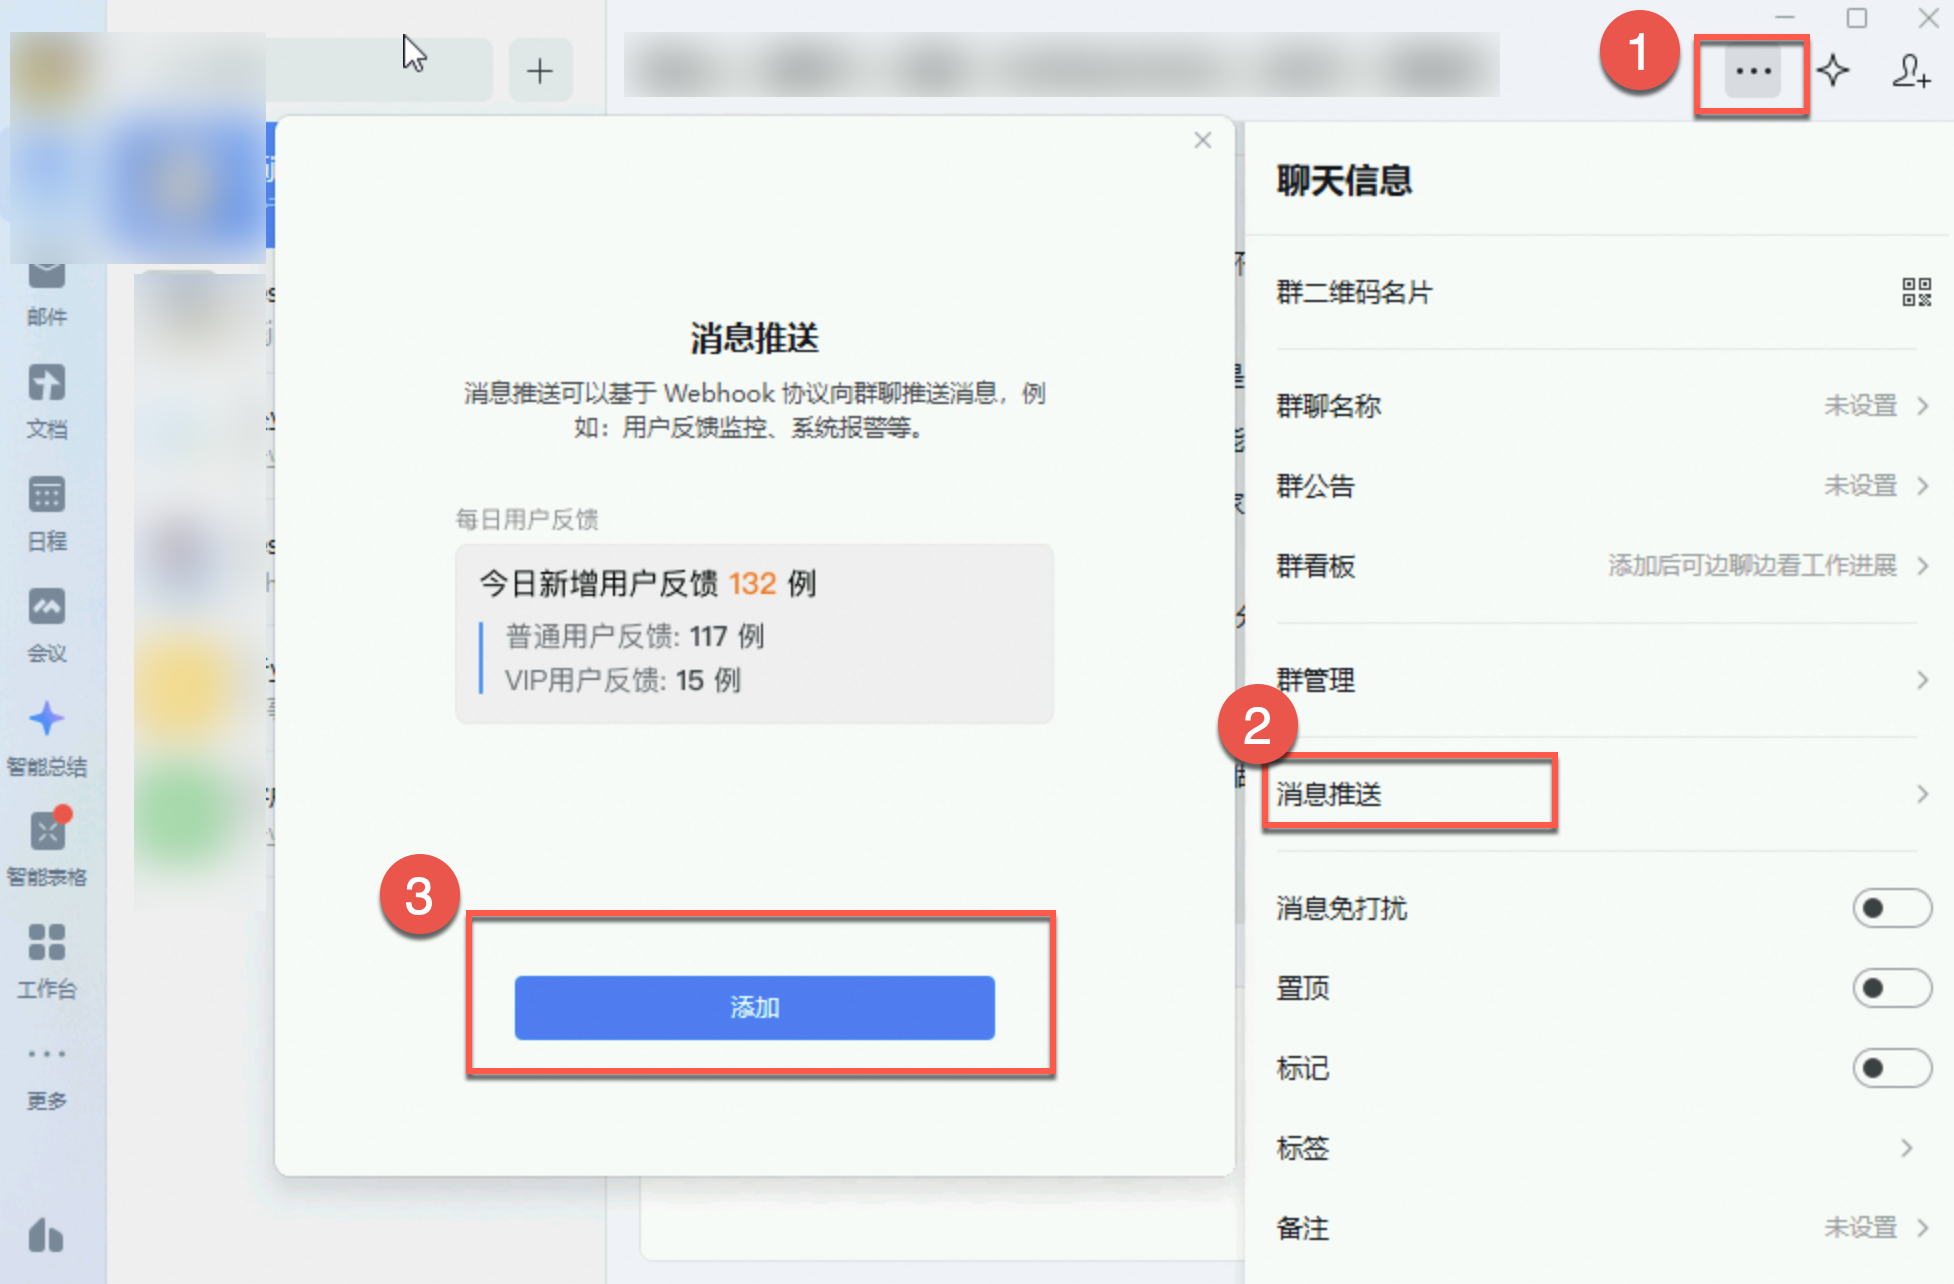
-
Obtain the webhook URL of the group bot: Click the group settings, enable message push, enter a name and description for the bot, and copy the webhook URL.

-
In the conversation with OpenClaw, create the task using the format: [scheduled task content] + [group bot's webhook URL]. The following example shows how to create a scheduled task to query the real-time weather.
-
Verify the message delivery. You can ask the Agent to send a message immediately to test the scheduled task. Verify that the task runs and sends a message to the group chat.
To modify or cancel a scheduled task, you can instruct the Agent directly in the conversation.
To configure a scheduled task by using AppFlow, see How to use AppFlow to configure a scheduled task.
Handling domain verification failure
When you save the chatbot you are creating, you may encounter the error "Domain ownership verification failed. The domain name must be registered under the same entity as the current enterprise or an affiliated entity." This issue is typically caused by WeCom restrictions and can be resolved by configuring a company-owned domain name.
If the domain name is filed with Alibaba Cloud, you can follow these steps to create a second-level domain to use as the company-owned domain name.
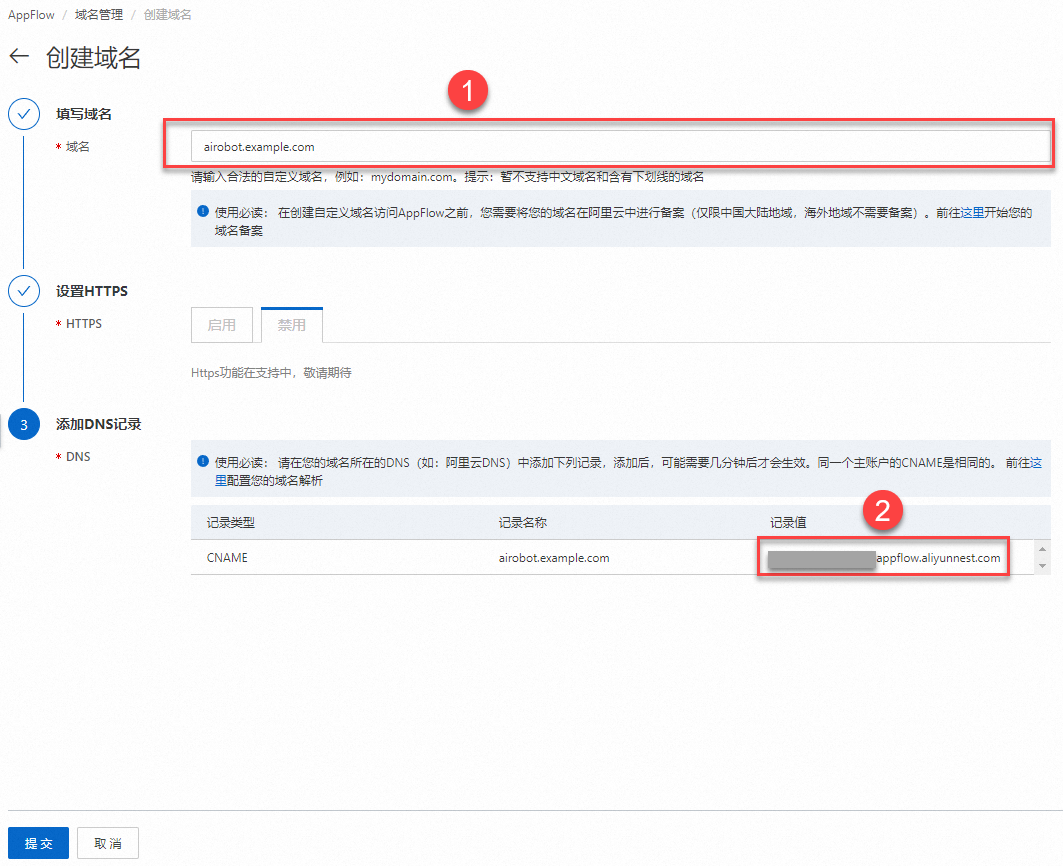
-
Go to the AppFlow domain management page and click Add Domain. On the Add Domain page, enter an available second-level domain, such as
airobot.example.com. -
Create a CNAME record to resolve this second-level domain to the record value from the previous step.
-
After you configure the DNS resolution, return to the Create Domain page and click Submit.
-
Use this second-level domain to replace the hostname in the webhook URL you obtained in the Configure API to receive messages step. For example, if the webhook URL obtained from AppFlow is
https://123123123.appflow.aliyunnest.com/webhook/a479a8f17and your company domain name isairobot.example.com, the final URL you need to enter ishttp://airobot.example.com/webhook/a479a8f17.