Connect to a database on a server using DMS
You can use Alibaba Cloud Data Management (DMS) to maintain databases on your Simple Application Server. This method applies to both pre-installed and self-managed databases. This topic uses the pre-installed MySQL database in a WordPress application image as an example to demonstrate how to connect to a database on a server using DMS.
Prerequisites
-
You have created a WordPress server. For more information, see Quickly build a website using a WordPress application image.
-
After you create the WordPress server, you must allow traffic on the MySQL listening port, 3306, in the firewall. For more information, see Firewall settings.
Background information
DMS is a service that provides features such as data management, structure management, user authorization, security audits, data trend analysis, and data tracking. For more information about DMS features, see What is Data Management (DMS)?.
Step 1: View MySQL logon information
Some application images provided by Simple Application Server, such as WordPress, include a pre-installed MySQL database. Follow the steps in this section to view the MySQL logon information. If you installed the database yourself, you can skip this section and use the database administrator password that you set during installation.
-
Log on to the Simple Application Server console.
-
In the left-side navigation pane, click Servers.
-
On the card for the WordPress server, click the instance ID.
-
Click the Application Details tab.
-
On the Application Details tab, in the MySQL Information section, find the command to query the MySQL password. Hover over the command, click the
 icon, and then click Remote Connection.
 -
In the command line of the remote server, right-click to paste the command and press Enter. The password for the database administrator is displayed.
-
Select the database administrator password. Then, right-click and select Copy. Paste the password to your local host for later use.
ImportantKeep the password in a safe place.
Step 2: Set up a database user for the DMS connection
-
Run the following command to log on to the MySQL database.
mysql -uroot -p -
At the Enter password: prompt, enter the database administrator password.
NoteFor data security purposes, no output is returned when you enter a password. You need only to enter the correct password and then press the Enter key.
-
In the command line of the MySQL application, run the following command to create a user for the DMS connection.
This example creates a user named
dmsand sets the password toEcs123!.ImportantSet a custom password and keep it in a safe place.
create user 'dms'@'%' IDENTIFIED BY 'Ecs123!'; -
Run the following command to grant the user remote connection permissions for DMS.
For data security, grant remote connection permissions only to DMS IP addresses.
In this example, the WordPress server is in the China (Hangzhou) region and connects to the DMS data source over the public network. Therefore, you must grant permissions only to the DMS IP address range
101.37.74.0/24. For more information, see DMS IP address ranges.grant all privileges on *.* to 'dms'@'101.37.74.0/24' identified by 'Ecs123!' with grant option; -
Run the following command to apply the configuration immediately.
flush privileges; -
Run the following command to exit the MySQL application.
\q
Step 3: Connect to the MySQL database using DMS
Log in to DMS 5.0.
-
In the Database Instances area on the left side of the console home page, click the Add Instance
 icon.Note
Alternatively, on the top menu bar, choose and then click Add.
-
In the Add Instance dialog box, configure the following key parameters.
This section describes only the key parameters. You can keep the default values for other parameters. For more information about all parameters, see Add a self-managed database or a database from another cloud.
Category
Configuration Item
Description
Data Source
-
Select Third-party Cloud/Self-managed.
Basic Information
Database Type
The default is MySQL.
Instance Source
Select Public Network.
Instance Region
Select the region where the Simple Application Server is located. In this example, select China (Hangzhou).
Logon Address
Enter the public IP address of the Simple Application Server. In this example, enter the public IP address of the WordPress server.
Port
The default MySQL listener port is 3306.
Database Account
The username of the database account used to connect to DMS. In this example, enter
dms.Database Password
The password for the database user that connects to DMS. In this example, enter
Ecs123!. -
Click Test Connection.
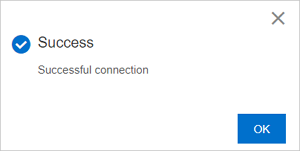
If a success message appears as shown in the following figure, it indicates that DMS can connect to the MySQL database on the WordPress server.
-
Click Confirm, and then in the lower-right corner of the Add Instance dialog box, click Submit.