向自建系统导出ASM链路追踪数据

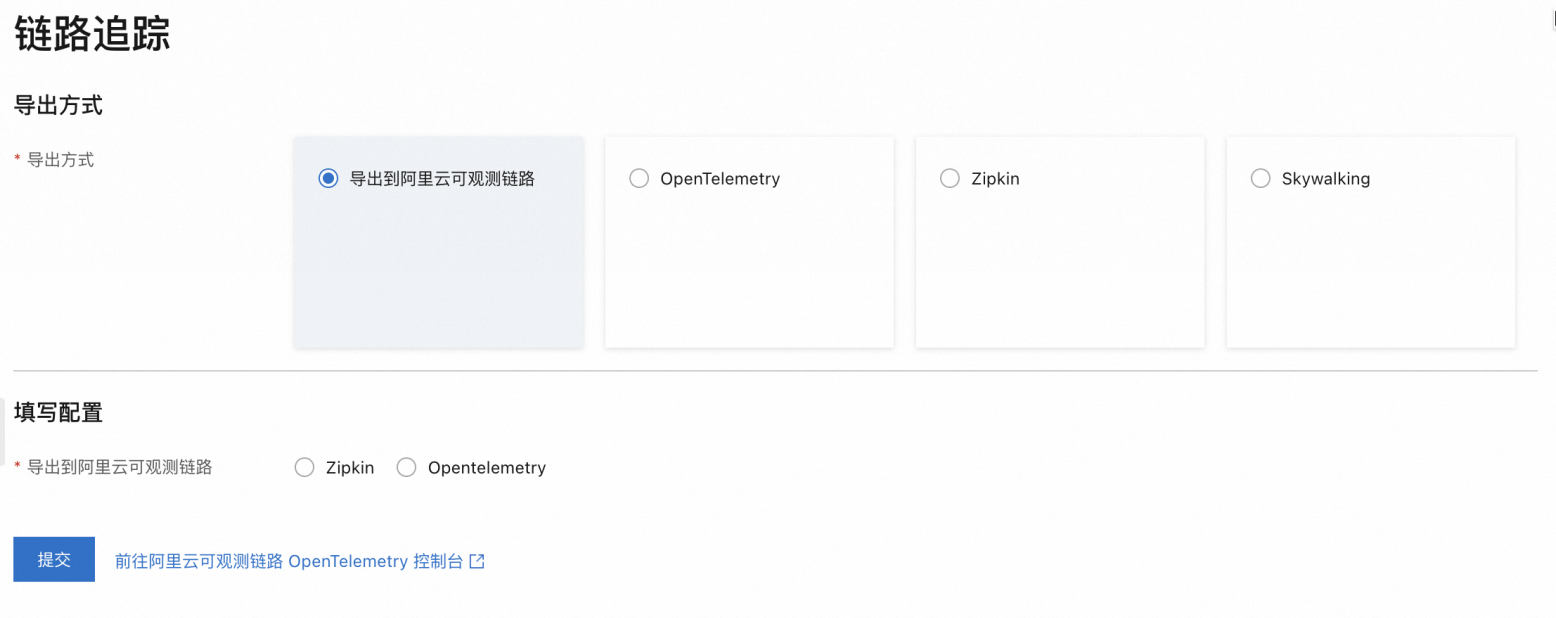
ASM实例为1.18.0.124版本以下,ASM仅支持向您自建的兼容Zipkin协议的系统导出追踪数据;1.18.0.124版本及以上,ASM仅支持向您自建的OpenTelemetry导出链路追踪数据。本文介绍如何向自建的Zipkin或者OpenTelemetry导出ASM链路追踪数据。

前提条件

  • 该自建系统支持标准Zipkin协议,并通过标准Zipkin端口9411监听。若您使用Jaeger,则需要部署Zipkin Collector。

  • 该自建系统部署于数据面集群内。

  • 已添加Kubernetes集群到ASM实例。具体操作,请参见添加集群到ASM实例

  • ASM实例已部署入口网关。具体操作,请参见创建入口网关

操作步骤

请按照实例版本选择相应操作。

ASM实例版本为1.18.0.124及以上

步骤一:部署Zipkin

  1. 执行以下命令,创建zipkin命名空间,用于部署Zipkin。

    kubectl create namespace zipkin
  2. 执行以下命令,通过Helm安装Zipkin。

    helm install --namespace zipkin my-zipkin carlosjgp/zipkin --version 0.2.0
  3. 执行以下命令,检查Zipkin是否正常运行。

    kubectl -n zipkin get pods

    预期输出:

    NAME                                   READY   STATUS    RESTARTS   AGE
    my-zipkin-collector-79c6dc9cd7-jmswm   1/1     Running   0          29m
    my-zipkin-ui-64c97b4d6c-f742j          1/1     Running   0          29m

步骤二:部署OpenTelemetry Operator

  1. 执行以下命令,创建opentelemetry-operator-system命名空间。

    kubectl create namespace opentelemetry-operator-system
  2. 执行以下命令,使用Helm在opentelemetry-operator-system命名空间下安装OpenTelemetry Operator。

    helm repo add open-telemetry https://open-telemetry.github.io/opentelemetry-helm-charts
    helm install  --namespace=opentelemetry-operator-system --set admissionWebhooks.certManager.enabled=false --set admissionWebhooks.certManager.autoGenerateCert=true opentelemetry-operator open-telemetry/opentelemetry-operator
  3. 执行以下命令,检查opentelemetry-operator是否正常运行。

    kubectl get pod -n opentelemetry-operator-system

    预期输出:

    NAME                                      READY   STATUS    RESTARTS   AGE
    opentelemetry-operator-854fb558b5-pvllj   2/2     Running   0          1m

    STATUSRunning,表明opentelemetry-operator正常运行。

步骤三:创建OpenTelemetry Collector

  1. 使用以下内容,创建collector.yaml文件。

    请将YAML中的${ENDPOINT}替换为gRPC协议的VPC网络接入点,${TOKEN}替换为鉴权Token。关于如何获取阿里云可观测链路OpenTelemetry版的接入点和鉴权Token,请参见接入和鉴权说明

    展开查看collector.yaml

    apiVersion: opentelemetry.io/v1alpha1
    kind: OpenTelemetryCollector
    metadata:
      labels:
        app.kubernetes.io/managed-by: opentelemetry-operator
      name: default
      namespace: opentelemetry-operator-system
      annotations:
        sidecar.istio.io/inject: "false"
    spec:
      config: |
        extensions:
          memory_ballast:
            size_mib: 512
          zpages:
            endpoint: 0.0.0.0:55679
        receivers:
          otlp:
            protocols:
              grpc:
                endpoint: "0.0.0.0:4317"
        exporters:
          debug:
          zipkin:
          	endpoint: http://my-zipkin-collector.zipkin.svc.cluster.local:9411/api/v2/spans
        service:
          pipelines:
            traces:
              receivers: [otlp]
              processors: []
              exporters: [zipkin, debug]
      ingress:
        route: {}
      managementState: managed
      mode: deployment
      observability:
        metrics: {}
      podDisruptionBudget:
        maxUnavailable: 1
      replicas: 1
      resources: {}
      targetAllocator:
        prometheusCR:
          scrapeInterval: 30s
        resources: {}
      upgradeStrategy: automatic
  2. 在ACK集群对应的KubeConfig环境下,执行以下命令,将collector部署到集群。

    kubectl apply -f collector.yaml
  3. 执行以下命令,检查collector是否正常启动。

    kubectl get pod -n opentelemetry-operator-system

    预期输出:

    NAME                                      READY   STATUS    RESTARTS   AGE
    opentelemetry-operator-854fb558b5-pvllj   2/2     Running   0          3m
    default-collector-5cbb4497f4-2hjqv        1/1     Running   0          30s

    预期输出表明collector正常启动。

  4. 执行以下命令,检查服务是否创建。

    kubectl get svc -n opentelemetry-operator-system

    预期输出:

    opentelemetry-operator           ClusterIP   172.16.138.165   <none>        8443/TCP,8080/TCP   3m
    opentelemetry-operator-webhook   ClusterIP   172.16.127.0     <none>        443/TCP             3m
    default-collector              ClusterIP   172.16.145.93    <none>        4317/TCP   30s
    default-collector-headless     ClusterIP   None             <none>        4317/TCP   30s
    default-collector-monitoring   ClusterIP   172.16.136.5     <none>        8888/TCP   30s

    预期输出表明服务已创建成功。

步骤四:部署测试应用

部署bookinfo和sleep应用。具体操作,请参见在ASM实例关联的集群中部署应用

  • bookinfo.yaml

  • sleep.yaml

    apiVersion: v1
    kind: ServiceAccount
    metadata:
      name: sleep
    ---
    apiVersion: v1
    kind: Service
    metadata:
      name: sleep
      labels:
        app: sleep
        service: sleep
    spec:
      ports:
      - port: 80
        name: http
      selector:
        app: sleep
    ---
    apiVersion: apps/v1
    kind: Deployment
    metadata:
      name: sleep
    spec:
      replicas: 1
      selector:
        matchLabels:
          app: sleep
      template:
        metadata:
          labels:
            app: sleep
        spec:
          terminationGracePeriodSeconds: 0
          serviceAccountName: sleep
          containers:
          - name: sleep
            image: curl:8.1.2
            command: ["/bin/sleep", "infinity"]
            imagePullPolicy: IfNotPresent
            volumeMounts:
            - mountPath: /etc/sleep/tls
              name: secret-volume
          volumes:
          - name: secret-volume
            secret:
              secretName: sleep-secret
              optional: true
    ---

步骤五:访问应用并查看上报的追踪数据

  1. 执行以下命令,访问productpage应用。

    kubectl exec -it deploy/sleep -c sleep -- curl  productpage:9080/productpage?u=normal
  2. 访问成功后,查看OpenTelemetry Collector日志,查看debug exporter打印的输出。

    2023-11-20T08:44:27.531Z	info	TracesExporter	{"kind": "exporter", "data_type": "traces", "name": "debug", "resource spans": 1, "spans": 3}

步骤六:配置ASM网关,通过Zipkin页面查看上报的追踪数据

  1. 创建网关规则。

    1. 使用以下内容,创建ingressgateway.yaml。

      展开查看ingressgateway.yaml

      apiVersion: networking.istio.io/v1beta1
      kind: Gateway
      metadata:
        name: ingressgateway
        namespace: istio-system
      spec:
        selector:
          istio: ingressgateway
        servers:
          - hosts:
              - '*'
            port:
              name: http
              number: 80
              protocol: HTTP
      ---
      apiVersion: networking.istio.io/v1beta1
      kind: VirtualService
      metadata:
        name: ingressgateway
        namespace: istio-system
      spec:
        gateways:
          - ingressgateway
        hosts:
          - '*'
        http:
          - route:
              - destination:
                  host: my-zipkin-collector.zipkin.svc.cluster.local
                  port:
                    number: 9411
      
    2. 在ASM实例对应的KubeConfig环境下,执行以下命令,为ASM网关创建80端口监听和指向Zipkin服务的路由。

      kubectl apply -f ingressgateway.yaml
  2. 通过网关地址访问Zipkin服务,查看已经上报的链路追踪数据。

    image.png

ASM实例版本为1.18.0.124以下

步骤一:为网格实例启用链路追踪

  • ASM实例版本为1.17.2.28以下:登录ASM控制台,在目标实例的基本信息页面,单击功能设置,选中启用链路追踪,按需进行配置,然后单击确定

  • ASM实例版本为1.17.2.28及以上:请参考链路追踪设置说明,启用链路追踪。

步骤二:在数据面集群部署Zipkin

  1. 使用以下内容,创建zipkin-server.yaml文件。

    展开查看zipkin-server.yaml

    apiVersion: apps/v1
    kind: Deployment
    metadata:
      name: zipkin-server
      namespace: istio-system
    spec:
      replicas: 1
      selector:
        matchLabels:
          app: zipkin-server
          component: zipkin
      template:
       metadata:
        labels:
          app: zipkin-server
          component: zipkin
       spec:
        containers:
         - name: zipkin-server
           image: openzipkin/zipkin
           imagePullPolicy: IfNotPresent
           readinessProbe:
                httpGet:
                  path: /health
                  port: 9411
                initialDelaySeconds: 5
                periodSeconds: 5
    说明

    如果您需要使用自行准备的追踪系统YAML文件部署,请确保Deployment处于istio-system命名空间下。

  2. 执行以下命令,将该配置应用到数据面集群。

    kubectl --kubeconfig=${DATA_PLANE_KUBECONFIG} apply -f zipkin-server.yaml
    说明

    命令中的${DATA_PLANE_KUBECONFIG}请替换为数据面集群的KubeConfig文件路径,${ASM_KUBECONFIG}请替换为网格实例的KubeConfig文件路径。

  3. 部署完毕后,确认ZipkinServer Pod正常启动。

步骤三:创建Service暴露ZipkinServer

您需要在istio-system命名空间下创建名为zipkin的服务,来接收ASM的链路追踪信息。

  • 若需要将Zipkin暴露于公网,请使用zipkin-svc-expose-public.yaml。

  • 若不希望暴露于公网,请使用zipkin-svc.yaml。

为了便于查看追踪数据,下文使用zipkin-svc-expose-public.yaml将Zipkin Server暴露于公网端口。

说明

创建的服务名称必须为zipkin。

  1. 按需选择以下内容,创建YAML文件。

    • 若需要将Zipkin暴露于公网,请使用zipkin-svc-expose-public.yaml。

      展开查看zipkin-svc-expose-public.yaml

      apiVersion: v1
      kind: Service
      metadata:
        labels:
          app: tracing
          component: zipkin
        name: zipkin
        namespace: istio-system
      spec:
        ports:
        - name: zipkin
          port: 9411
          protocol: TCP
          targetPort: 9411
        selector:
          app: zipkin-server
          component: zipkin
        type: LoadBalancer
    • 若不希望暴露于公网,请使用zipkin-svc.yaml。

      展开查看zipkin-svc.yaml

      apiVersion: v1
      kind: Service
      metadata:
        labels:
          app: tracing
          component: zipkin
        name: zipkin
        namespace: istio-system
      spec:
        ports:
        - name: zipkin
          port: 9411
          protocol: TCP
          targetPort: 9411
        selector:
          app: zipkin-server
          component: zipkin
        type: ClusterIP
    说明

    如果您需要使用自行准备的YAML文件部署Service,请确保Service处在istio-system命名空间下。

  2. 执行以下命令,将Zipkin Service应用到数据面集群。

    # 部署内网zipkin。
    kubectl --kubeconfig=${DATA_PLANE_KUBECONFIG} apply -f zipkin-svc.yaml
    # 部署公网可以访问的zipkin。
    kubectl --kubeconfig=${DATA_PLANE_KUBECONFIG} apply -f zipkin-svc-expose-public.yaml

步骤四:部署测试应用BookInfo

  1. 执行以下命令,将Bookinfo应用部署到数据面集群中。

    kubectl --kubeconfig=${DATA_PLANE_KUBECONFIG} apply -f bookinfo.yaml

    展开查看bookinfo.yaml

    apiVersion: v1
    kind: Service
    metadata:
      name: details
      labels:
        app: details
        service: details
    spec:
      ports:
      - port: 9080
        name: http
      selector:
        app: details
    ---
    apiVersion: v1
    kind: ServiceAccount
    metadata:
      name: bookinfo-details
      labels:
        account: details
    ---
    apiVersion: apps/v1
    kind: Deployment
    metadata:
      name: details-v1
      labels:
        app: details
        version: v1
    spec:
      replicas: 1
      selector:
        matchLabels:
          app: details
          version: v1
      template:
        metadata:
          labels:
            app: details
            version: v1
        spec:
          serviceAccountName: bookinfo-details
          containers:
          - name: details
            image: docker.io/istio/examples-bookinfo-details-v1:1.16.2
            imagePullPolicy: IfNotPresent
            ports:
            - containerPort: 9080
    ---
    ##################################################################################################
    # Ratings service
    ##################################################################################################
    apiVersion: v1
    kind: Service
    metadata:
      name: ratings
      labels:
        app: ratings
        service: ratings
    spec:
      ports:
      - port: 9080
        name: http
      selector:
        app: ratings
    ---
    apiVersion: v1
    kind: ServiceAccount
    metadata:
      name: bookinfo-ratings
      labels:
        account: ratings
    ---
    apiVersion: apps/v1
    kind: Deployment
    metadata:
      name: ratings-v1
      labels:
        app: ratings
        version: v1
    spec:
      replicas: 1
      selector:
        matchLabels:
          app: ratings
          version: v1
      template:
        metadata:
          labels:
            app: ratings
            version: v1
        spec:
          serviceAccountName: bookinfo-ratings
          containers:
          - name: ratings
            image: docker.io/istio/examples-bookinfo-ratings-v1:1.16.2
            imagePullPolicy: IfNotPresent
            ports:
            - containerPort: 9080
    ---
    ##################################################################################################
    # Reviews service
    ##################################################################################################
    apiVersion: v1
    kind: Service
    metadata:
      name: reviews
      labels:
        app: reviews
        service: reviews
    spec:
      ports:
      - port: 9080
        name: http
      selector:
        app: reviews
    ---
    apiVersion: v1
    kind: ServiceAccount
    metadata:
      name: bookinfo-reviews
      labels:
        account: reviews
    ---
    apiVersion: apps/v1
    kind: Deployment
    metadata:
      name: reviews-v1
      labels:
        app: reviews
        version: v1
    spec:
      replicas: 1
      selector:
        matchLabels:
          app: reviews
          version: v1
      template:
        metadata:
          labels:
            app: reviews
            version: v1
        spec:
          serviceAccountName: bookinfo-reviews
          containers:
          - name: reviews
            image: docker.io/istio/examples-bookinfo-reviews-v1:1.16.2
            imagePullPolicy: IfNotPresent
            env:
            - name: LOG_DIR
              value: "/tmp/logs"
            ports:
            - containerPort: 9080
            volumeMounts:
            - name: tmp
              mountPath: /tmp
            - name: wlp-output
              mountPath: /opt/ibm/wlp/output
          volumes:
          - name: wlp-output
            emptyDir: {}
          - name: tmp
            emptyDir: {}
    ---
    apiVersion: apps/v1
    kind: Deployment
    metadata:
      name: reviews-v2
      labels:
        app: reviews
        version: v2
    spec:
      replicas: 1
      selector:
        matchLabels:
          app: reviews
          version: v2
      template:
        metadata:
          labels:
            app: reviews
            version: v2
        spec:
          serviceAccountName: bookinfo-reviews
          containers:
          - name: reviews
            image: docker.io/istio/examples-bookinfo-reviews-v2:1.16.2
            imagePullPolicy: IfNotPresent
            env:
            - name: LOG_DIR
              value: "/tmp/logs"
            ports:
            - containerPort: 9080
            volumeMounts:
            - name: tmp
              mountPath: /tmp
            - name: wlp-output
              mountPath: /opt/ibm/wlp/output
          volumes:
          - name: wlp-output
            emptyDir: {}
          - name: tmp
            emptyDir: {}
    ---
    apiVersion: apps/v1
    kind: Deployment
    metadata:
      name: reviews-v3
      labels:
        app: reviews
        version: v3
    spec:
      replicas: 1
      selector:
        matchLabels:
          app: reviews
          version: v3
      template:
        metadata:
          labels:
            app: reviews
            version: v3
        spec:
          serviceAccountName: bookinfo-reviews
          containers:
          - name: reviews
            image: docker.io/istio/examples-bookinfo-reviews-v3:1.16.2
            imagePullPolicy: IfNotPresent
            env:
            - name: LOG_DIR
              value: "/tmp/logs"
            ports:
            - containerPort: 9080
            volumeMounts:
            - name: tmp
              mountPath: /tmp
            - name: wlp-output
              mountPath: /opt/ibm/wlp/output
          volumes:
          - name: wlp-output
            emptyDir: {}
          - name: tmp
            emptyDir: {}
    ---
    ##################################################################################################
    # Productpage services
    ##################################################################################################
    apiVersion: v1
    kind: Service
    metadata:
      name: productpage
      labels:
        app: productpage
        service: productpage
    spec:
      ports:
      - port: 9080
        name: http
      selector:
        app: productpage
    ---
    apiVersion: v1
    kind: ServiceAccount
    metadata:
      name: bookinfo-productpage
      labels:
        account: productpage
    ---
    apiVersion: apps/v1
    kind: Deployment
    metadata:
      name: productpage-v1
      labels:
        app: productpage
        version: v1
    spec:
      replicas: 1
      selector:
        matchLabels:
          app: productpage
          version: v1
      template:
        metadata:
          labels:
            app: productpage
            version: v1
        spec:
          serviceAccountName: bookinfo-productpage
          containers:
          - name: productpage
            image: docker.io/istio/examples-bookinfo-productpage-v1:1.16.2
            imagePullPolicy: IfNotPresent
            ports:
            - containerPort: 9080
            volumeMounts:
            - name: tmp
              mountPath: /tmp
          volumes:
          - name: tmp
            emptyDir: {}
    ---
  2. 通过kubectl执行以下命令,部署Bookinfo应用的VirtualServices。

    kubectl --kubeconfig=${ASM_KUBECONFIG} apply -f virtual-service-all-v1.yaml

    展开查看virtual-service-all-v1.yaml

    apiVersion: networking.istio.io/v1alpha3
    kind: VirtualService
    metadata:
      name: productpage
    spec:
      hosts:
      - productpage
      http:
      - route:
        - destination:
            host: productpage
            subset: v1
    ---
    apiVersion: networking.istio.io/v1alpha3
    kind: VirtualService
    metadata:
      name: reviews
    spec:
      hosts:
      - reviews
      http:
      - route:
        - destination:
            host: reviews
            subset: v1
    ---
    apiVersion: networking.istio.io/v1alpha3
    kind: VirtualService
    metadata:
      name: ratings
    spec:
      hosts:
      - ratings
      http:
      - route:
        - destination:
            host: ratings
            subset: v1
    ---
    apiVersion: networking.istio.io/v1alpha3
    kind: VirtualService
    metadata:
      name: details
    spec:
      hosts:
      - details
      http:
      - route:
        - destination:
            host: details
            subset: v1
    ---
  3. 通过kubectl执行以下命令,部署Bookinfo应用的DestinationRules。

    kubectl --kubeconfig=${ASM_KUBECONFIG} apply -f destination-rule-all.yaml

    展开查看destination-rule-all.yaml

    apiVersion: networking.istio.io/v1alpha3
    kind: DestinationRule
    metadata:
      name: productpage
    spec:
      host: productpage
      subsets:
      - name: v1
        labels:
          version: v1
    ---
    apiVersion: networking.istio.io/v1alpha3
    kind: DestinationRule
    metadata:
      name: reviews
    spec:
      host: reviews
      subsets:
      - name: v1
        labels:
          version: v1
      - name: v2
        labels:
          version: v2
      - name: v3
        labels:
          version: v3
    ---
    apiVersion: networking.istio.io/v1alpha3
    kind: DestinationRule
    metadata:
      name: ratings
    spec:
      host: ratings
      subsets:
      - name: v1
        labels:
          version: v1
      - name: v2
        labels:
          version: v2
      - name: v2-mysql
        labels:
          version: v2-mysql
      - name: v2-mysql-vm
        labels:
          version: v2-mysql-vm
    ---
    apiVersion: networking.istio.io/v1alpha3
    kind: DestinationRule
    metadata:
      name: details
    spec:
      host: details
      subsets:
      - name: v1
        labels:
          version: v1
      - name: v2
        labels:
          version: v2
    ---
  4. 通过Kubectl执行以下命令,部署Bookinfo应用的Gateway。

    kubectl --kubeconfig=${ASM_KUBECONFIG} apply -f bookinfo-gateway.yaml

    展开查看bookinfo-gateway.yaml

    apiVersion: networking.istio.io/v1alpha3
    kind: Gateway
    metadata:
      name: bookinfo-gateway
    spec:
      selector:
        istio: ingressgateway # use istio default controller
      servers:
      - port:
          number: 80
          name: http
          protocol: HTTP
        hosts:
        - "*"
    ---
    apiVersion: networking.istio.io/v1alpha3
    kind: VirtualService
    metadata:
      name: bookinfo
    spec:
      hosts:
      - "*"
      gateways:
      - bookinfo-gateway
      http:
      - match:
        - uri:
            exact: /productpage
        - uri:
            prefix: /static
        - uri:
            exact: /login
        - uri:
            exact: /logout
        - uri:
            prefix: /api/v1/products
        route:
        - destination:
            host: productpage
            port:
              number: 9080

步骤五:产生追踪数据

  1. 执行以下命令,获得入口网关地址。

    kubectl --kubeconfig=${DATA_PLANE_KUBECONFIG} get svc -n istio-system|grep ingressgateway|awk -F ' ' '{print $4}' 
  2. 使用地址入口网关地址/productpage访问Bookinfo应用。

步骤六:查看链路追踪数据

  1. 执行以下命令,获取Zipkin Service地址。

    kubectl --kubeconfig=${DATA_PLANE_KUBECONFIG}get svc -n istio-system|grep zipkin|awk -F ' ' '{print $4}'
  2. 使用Zipkin Service地址:9411,访问Zipkin控制台,查看追踪数据。

    链路追踪