AMQP(Advanced Message Queuing Protocol,高级消息队列协议)转储功能适用于生活物联网平台与企业服务器之间的消息流转。通过集成和使用AMQP SDK,即可实现身份认证、消息接收的能力。我们推荐使用AMQP的方式推送设备数据(如设备状态数据、设备控制记录等),用户信息数据等。
前提条件
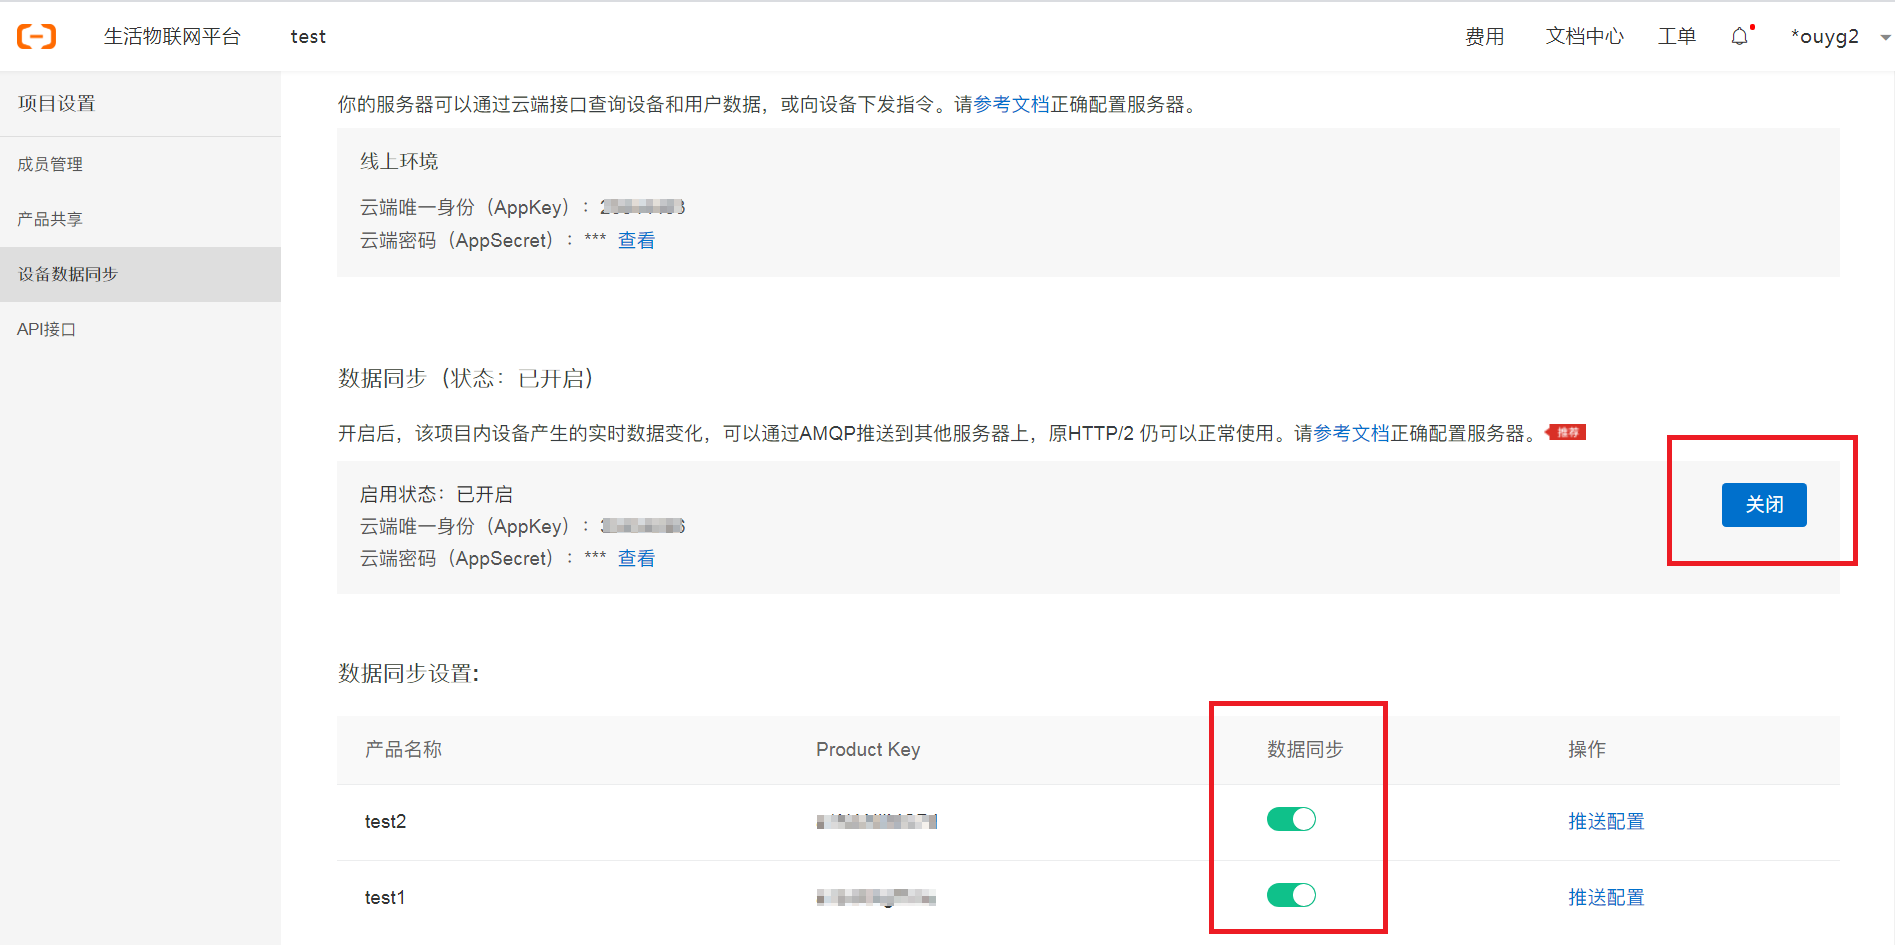
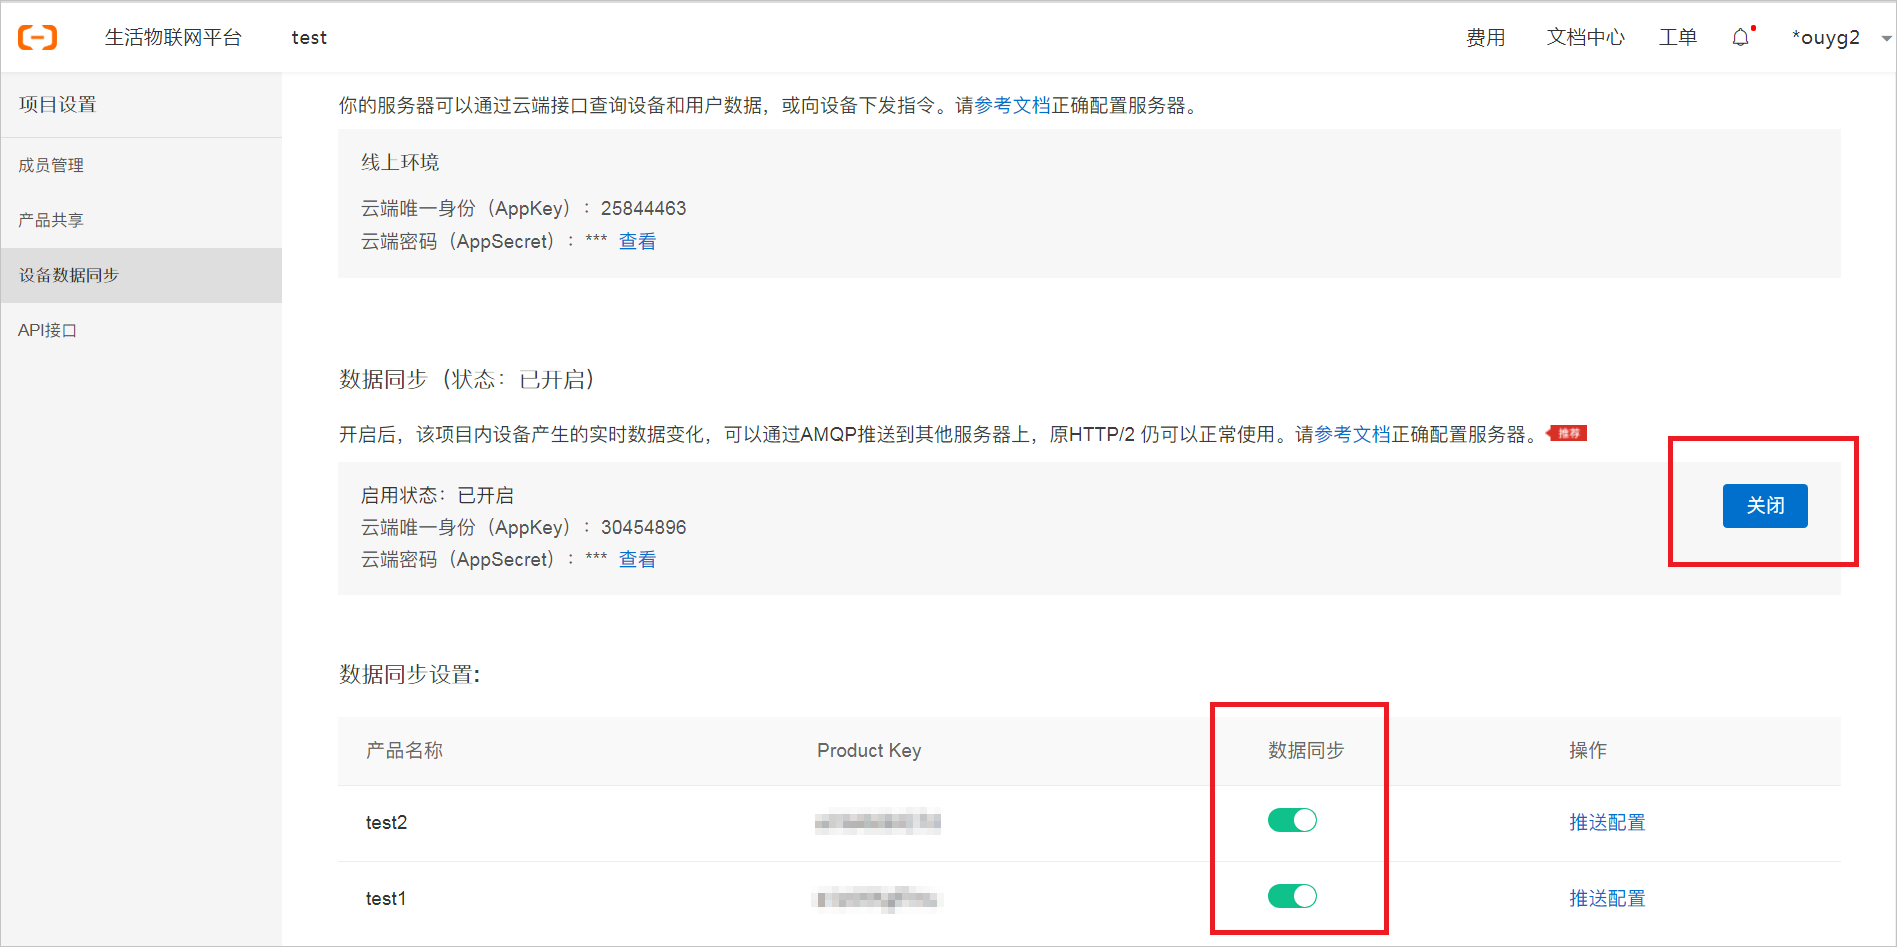
开启设备数据同步,并配置要同步数据的产品。详细参见设置数据同步。
当开启数据同步后,集成AMQP客户端SDK来订阅数据。如果通过控制台关闭数据同步再开启时,客户端SDK需要重新进行连接流程,否则无法正常接收数据。如果切换不同的AMQP客户端,需要把之前的客户端断开,再连接新的客户端。否则新客户端无法正常接收数据。
AMQP SDK使用
引入依赖。
AMQP SDK为开源SDK。如果您使用Java开发语言,推荐使用Apache Qpid JMS客户端。在项目中添加Maven依赖,Maven信息如下。
说明目前生活物联网平台仅支持Java语言开发,暂未提供其他语言版本,请以生活物联网平台官网为主。
<!-- amqp 1.0 qpid client -->
 <dependency>
   <groupId>org.apache.qpid</groupId>
   <artifactId>qpid-jms-client</artifactId>
   <version>0.47.0</version>
 </dependency>
 <!-- util for base64-->
 <dependency>
   <groupId>commons-codec</groupId>
  <artifactId>commons-codec</artifactId>
  <version>1.10</version>
</dependency>
认证身份信息。
身份认证需要使用AppKey和AppSecret,该信息可以从控制台中获取。

认证身份信息需要使用EndPoint、AppKey和AppSecret用于鉴权。
其中,EndPoint是连接节点,具体取值如下表所示。
区域
End Point
中国内地
amqps://ilop.iot-amqp.cn-shanghai.aliyuncs.com:5671
新加坡
amqps://ilop.iot-amqp.ap-southeast-1.aliyuncs.com:5671
美国(弗吉尼亚)
amqps://ilop.iot-amqp.us-east-1.aliyuncs.com:5671
德国(法兰克福)
amqps://ilop.iot-amqp.eu-central-1.aliyuncs.com:5671
接收云端消息。
首先需要创建消息接收的客户端对象client,并传入上面身份认证的profile信息。当消息接收的客户端和服务端建立连接后,服务端会立即向消息接收的客户端推送已订阅的消息,因此建立连接时需要提供默认消息接收的回调接口,用于处理云端推送的消息。
完整代码示例如下。
import java.net.URI; import java.util.Hashtable; import java.util.concurrent.ExecutorService; import java.util.concurrent.LinkedBlockingQueue; import java.util.concurrent.ThreadPoolExecutor; import java.util.concurrent.TimeUnit; import javax.crypto.Mac; import javax.crypto.spec.SecretKeySpec; import javax.jms.Connection; import javax.jms.ConnectionFactory; import javax.jms.Destination; import javax.jms.Message; import javax.jms.MessageConsumer; import javax.jms.MessageListener; import javax.jms.MessageProducer; import javax.jms.Session; import javax.naming.Context; import javax.naming.InitialContext; import org.apache.commons.codec.binary.Base64; import org.apache.qpid.jms.JmsConnection; import org.apache.qpid.jms.JmsConnectionListener; import org.apache.qpid.jms.message.JmsInboundMessageDispatch; import org.slf4j.Logger; import org.slf4j.LoggerFactory; public class AmqpJavaClientDemo { private final static Logger logger = LoggerFactory.getLogger(AmqpJavaClientDemo.class); //业务处理异步线程池,线程池参数可以根据您的业务特点调整,或者您也可以用其他异步方式处理接收到的消息。 private final static ExecutorService executorService = new ThreadPoolExecutor( Runtime.getRuntime().availableProcessors(), Runtime.getRuntime().availableProcessors() * 2, 60, TimeUnit.SECONDS, new LinkedBlockingQueue<>(50000)); public static void main(String[] args) throws Exception { String appKey = "${YourAppkey}"; //在控制台自有App,单击密钥对应的查看,可显示App的App Key和App Secret 创建App时系统 String appSecret = "${YourAppSecret}"; String consumerGroupId = "${YourAppkey}"; long random = xxxxx; //建议使用机器UUID、MAC地址、IP等唯一标识等作为clientId。便于您区分识别不同的客户端。 String clientId = "${YourClientId}"; String userName = clientId + "|authMode=appkey" + ",signMethod=" + "SHA256" + ",random=" + random + ",appKey=" + appKey + ",groupId=" + consumerGroupId + "|"; String signContent = "random=" + random; String password = doSign(signContent, appSecret, "HmacSHA256"); String connectionUrlTemplate = "failover:(${AMQPEndPointUrl}?amqp.idleTimeout=80000)" + "?failover.maxReconnectAttempts=10&failover.reconnectDelay=30"; Hashtable<String, String> hashtable = new Hashtable<>(); hashtable.put("connectionfactory.SBCF",connectionUrlTemplate); hashtable.put("queue.QUEUE", "default"); hashtable.put(Context.INITIAL_CONTEXT_FACTORY, "org.apache.qpid.jms.jndi.JmsInitialContextFactory"); Context context = new InitialContext(hashtable); ConnectionFactory cf = (ConnectionFactory)context.lookup("SBCF"); Destination queue = (Destination)context.lookup("QUEUE"); // 创建连接。 Connection connection = cf.createConnection(userName, password); ((JmsConnection) connection).addConnectionListener(myJmsConnectionListener); // 创建会话。 // Session.CLIENT_ACKNOWLEDGE: 收到消息后,需要手动调用message.acknowledge()。 // Session.AUTO_ACKNOWLEDGE: SDK自动ACK(推荐)。 Session session = connection.createSession(false, Session.AUTO_ACKNOWLEDGE); connection.start(); // 创建Receiver连接。 MessageConsumer consumer = session.createConsumer(queue); consumer.setMessageListener(messageListener); } private static MessageListener messageListener = new MessageListener() { @Override public void onMessage(Message message) { try { //1.收到消息之后一定要ACK。 // 推荐做法:创建Session选择Session.AUTO_ACKNOWLEDGE,这里会自动ACK。 // 其他做法:创建Session选择Session.CLIENT_ACKNOWLEDGE,这里一定要调message.acknowledge()来ACK。 // message.acknowledge(); //2.建议异步处理收到的消息,确保onMessage函数里没有耗时逻辑。 // 如果业务处理耗时过程过长阻塞住线程,可能会影响SDK收到消息后的正常回调。 executorService.submit(() -> processMessage(message)); } catch (Exception e) { logger.error("submit task occurs exception ", e); } } }; /** * 在这里处理您收到消息后的具体业务逻辑。 */ private static void processMessage(Message message) { try { byte[] body = message.getBody(byte[].class); String content = new String(body); String topic = message.getStringProperty("topic"); String messageId = message.getStringProperty("messageId"); logger.info("receive message" + ", topic = " + topic + ", messageId = " + messageId + ", content = " + content); } catch (Exception e) { logger.error("processMessage occurs error ", e); } } private static JmsConnectionListener myJmsConnectionListener = new JmsConnectionListener() { /** * 连接成功建立。 */ @Override public void onConnectionEstablished(URI remoteURI) { logger.info("onConnectionEstablished, remoteUri:{}", remoteURI); } /** * 尝试过最大重试次数之后,最终连接失败。 */ @Override public void onConnectionFailure(Throwable error) { logger.error("onConnectionFailure, {}", error.getMessage()); } /** * 连接中断。 */ @Override public void onConnectionInterrupted(URI remoteURI) { logger.info("onConnectionInterrupted, remoteUri:{}", remoteURI); } /** * 连接中断后又自动重连上。 */ @Override public void onConnectionRestored(URI remoteURI) { logger.info("onConnectionRestored, remoteUri:{}", remoteURI); } @Override public void onInboundMessage(JmsInboundMessageDispatch envelope) {} @Override public void onSessionClosed(Session session, Throwable cause) {} @Override public void onConsumerClosed(MessageConsumer consumer, Throwable cause) {} @Override public void onProducerClosed(MessageProducer producer, Throwable cause) {} }; /** * 计算签名,password组装方法,请参见AMQP客户端接入说明文档。 */ private static String doSign(String toSignString, String secret, String signMethod) throws Exception { SecretKeySpec signingKey = new SecretKeySpec(secret.getBytes(), signMethod); Mac mac = Mac.getInstance(signMethod); mac.init(signingKey); byte[] rawHmac = mac.doFinal(toSignString.getBytes()); return Hex.encodeHexString(rawHmac); } }说明消息推送失败时,平台会重新推送,重试策略如下。
如果对端不在线或未回复ack消息,则会造成消息堆积,堆积的消息转为离线消息。
离线消息每隔1min重试推送一次(每次推送10条)。对端如果成功接收了消息,则重试策略会继续推送剩余的离线消息(推送失败的消息,下一次继续推送)。
离线消息最多会保存 1 天,如果 1 天后仍然无法推送成功,则会被删除。
离线消息会进入单独的队列,不会影响后续消息的实时推送。
消息格式
物的属性变更消息
topic:
/${productKey}/${deviceName}/thing/event/property/post消息字段说明如下。
参数
子参数
子参数
类型
含义
deviceType
String
设备所属品类
gmtCreate
Long
数据流转消息产生时间,自1970-1-1起流逝的毫秒值
iotId
String
设备的唯一ID
productKey
String
设备所属产品的唯一标识符
deviceName
String
设备名称
items
JSON
变更的状态列表
attribute
String
发生变更的属性,具体取值由具体情况确定
value
具体数据类型由具体情况确定
变更值
time
Long
设备属性发生变化的时间,自1970-1-1起流逝的毫秒值
消息示例如下。
{
    "deviceType": "SmartDoor",
    "iotId": "Xzf15db9xxxxxxxxWR001046b400",
    "productKey": "a17xxxxTYNA",
    "gmtCreate": 153xxxx145304,
    "deviceName": "Xzf15xxxxucTHBgUo6WR",
    "items": {
        "WIFI_Rx_Rate": {
            "value": 74274,
            "time": 1534299145344
        }
    }
}
物的事件变更消息
topic:
/${productKey}/${deviceName}/thing/event/{tsl.event.identifier}/post消息字段说明如下。
参数
子参数
类型
含义
deviceType
String
设备所属品类
iotId
String
设备的唯一ID
productKey
String
设备所属产品的唯一标识符
deviceName
String
设备名称
identifier
String
事件标识符,对应事件的identifier
name
String
事件名称
type
String
事件类型
time
Long
设备上报value对应的时间,自1970-1-1起流逝的毫秒值
value
JSON
变更的事件属性列表:key-value键值对
key
String
属性key
value
具体数据类型由具体情况确定
属性取值
消息示例如下。
{
    "deviceType": "SmartDoor",
    "identifier": "Doorxxxxication",
    "iotId": "Xzf15db9xxxxxxxxx01046b400",
    "name": "开门通知",
    "time": 1534319108982,
    "type": "info",
    "productKey": "a17xxxxTYNA",
    "deviceName": "Xzf15xxxxucTHBgUo6WR",
    "value": {
        "KeyID": "x8xxxxxkDY",
        "LockType": 3
    }
}
设备服务返回消息
topic:
/${productKey}/${deviceName}/thing/downlink/reply/message消息字段说明如下。
参数
类型
含义
gmtCreate
Long
数据流转消息产生时间,自1970-1-1起流逝的毫秒值
iotId
String
设备的唯一ID
productKey
String
设备所属产品的唯一标识符
deviceName
String
设备名称
requestId
String
阿里云产生和设备通信的信息ID
code
Integer
调用的结果信息
message
String
结果信息说明
topic
String
服务调用下行时使用的topic
data
Object
设备返回的结果,非透传之间返回设备结果,透传则需要经过脚本转换
消息示例如下。
{
  "gmtCreate": 151xxxx39881,
  "iotId": "4z819VQHxxxxxxxxxxxx7ee200",
  "productKey": "p1gxxxxBd",
  "deviceName": "xxxxxxxxxx",
  "requestId": "1234",
  "code": 200,
  "message": "success",
  "topic": "/sys/p1gxxxxeUBd/xxxxxxxxxx/thing/service/property/set",
  "data": {}
}
物的状态变更消息
为了提高消息有效性,设备上下线过于频繁时,会对消息进行筛检。
topic:
/as/mqtt/status/{pk}/{dn}消息字段说明如下。
参数
类型
含义
status
String
设备状态。online:上线。offline:离线。
iotId
String
设备在平台内的唯一标识。
offlineReasonCode
Integer
设备下线时,返回的错误码。详细说明,请参见设备行为错误码。
productKey
String
设备所属产品的唯一标识。
deviceName
String
设备名称。
lastTime
String
该参数为历史存量字段,已无实际意义。
utcLastTime
String
time
String
设备上、下线的时间。
utcTime
String
设备上、下线的UTC时间。
clientIp
String
设备公网出口IP。
消息示例如下。
{
    "status":"offline",
    "iotId":"4z819VQHk6VSLmmBJfrf00107e****",
    "offlineReasonCode":427,
    "productKey":"al12345****",
    "deviceName":"deviceName1234",
    "time":"2018-08-31 15:32:28.205",
    "utcTime":"2018-08-31T07:32:28.205Z",
    "lastTime":"2018-08-31 15:32:28.195",
    "utcLastTime":"2018-08-31T07:32:28.195Z",
    "clientIp":"192.0.2.1"
}
用户绑定变更消息
用户绑定/解绑设备产生的回流消息,用于同步用户与设备的绑定、解绑。
topic:
/${productKey}/${deviceName}/thing/awss/enrollee/user消息字段说明如下。
参数
子参数
类型
含义
bind
bool
true-绑定;false-解绑
productKey
String
设备所属产品的唯一标识符
deviceName
String
设备名称
iotId
String
设备的唯一ID
messageCreateTime
Long
消息创建时间
identityInfos
list
用户信息列表
identityId
String
用户身份ID
scopeId
String
隔离ID
tenantId
String
租户ID
owned
Integer
拥有标记
0:分享者
1:拥有者
params
Map
扩展参数(暂未使用)
{
  "bind":true,
  "productKey": "123xxxx569",
  "deviceName": "deviceNamexxxx34",
  "iotId": "",
  "messageCreateTime": 151xxxx9881,
  "identityInfos":[
     {
       "identityId":"50xxxxxxxxxxxx62060259",
       "scopeId":"",
       "tenantId":"1D89B5xxxxxxxxxxxxxxxx861678FF",
       "owned":1
     }
  ],
  "params":{
  }
}
