This topic describes how to use the macOS streaming assistant, a low-code integration tool provided by AUI Kits, and includes sample code.
Background information
AUI Kits provides the macOS streaming assistant for interactive stream scenarios.
This client provides streamers with the following streaming features:
Ingests video streams captured by cameras. Streamers can switch to external camera devices.
Ingests audio streams collected by microphones. Streamers can switch to external microphone devices.
Lets streamers specify the live stream quality.
Supports online chat. Streamers can mute all viewers.
Lets streamers import local MP4 multimedia files for interlude playback.
You can use a URL to invoke the streaming assistant. If you want to perform custom development based on the streaming assistant, contact your account manager to discuss open source options.
For more information about AUI Kits and how to use it, you can join the AUI Customer Support DingTalk group (ID: 35685013712) to contact us.
Prerequisites
To ensure that the streaming assistant runs properly, make sure your device meets the following requirements:
Model: Use a model released in 2017 or later.
Operating system: Use macOS 11 or later.
Microphone: Use an external microphone or a headset with a microphone.
Network: Use an upstream bandwidth of 10 Mbps or higher.
Download and install
Download URL
To download the assistant, see macOS streaming assistant.
Installation instructions
During installation, drag the app to the Applications folder.
If the
"Unable to open streaming assistant.app"message appears, go to to manually open the application.
Obtain a streaming URL and create a live channel
Prepare the environment
Install the Node.js environment. For more information, see UmiJS Quick Start Tutorial.
The API operations used by the streaming assistant depend on the AppServer service. You must first deploy, run, and connect to the live channel AppServer. For more information, see Server-side configuration and running.
Run code to obtain a streaming URL
We provide genLiveUrl.zip, which you can run to obtain a streaming URL for the streaming assistant.
Decompress the downloaded file. In the genLiveUrl.js file, set the origin variable to the domain name (or IP address and port number) of your AppServer to obtain the streaming URL.
const axios = require('axios');
// Enter the domain name of your AppServer. Do not end it with a forward slash (/).
const origin = '';
Import the axios dependency into your project and run the code to obtain the streaming URL.
npm install axios --save
node genLiveUrl.js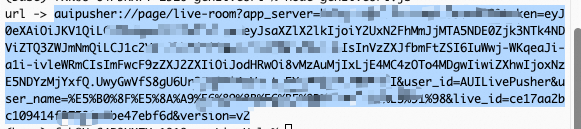
Copy the obtained URL into the streaming assistant and enter the live channel. The default codec for stream ingest in the streaming assistant is hardware encoding, but software encoding is also available. For more information about the differences between hardware and software encoding, see Codec.
Integrated invocation
We recommend that you invoke the streaming assistant based on the following logic. You must develop the following features based on your system:

We provide sample code for generating a streaming URL in the genLiveUrl.js file mentioned in Run code to obtain a streaming URL. You can use this sample code for custom development.
Example of invoking the client
You must import the custom-protocol-check dependency into your project. For example: npm install custom-protocol-check --save.
import customProtocolCheck from "custom-protocol-check";

// The URL is generated by genurl, or obtained by calling the getLiveJumpUrl API operation through other methods.
const url = `auipusher://page/live-room?xxxxxx`;

// For more information, see https://www.npmjs.com/package/custom-protocol-check
customProtocolCheck(
  url,
  () => {
    // We recommend that you implement a pop-up window to prompt the user to download the assistant.
    console.log("Custom protocol not found. Check whether the streaming assistant is installed.");
  },
  () => {
    console.log("Custom protocol found and successfully opened.");
  },
  5000,
  () => {
    console.log("The current environment does not support this feature.");
  },
);
Logon instructions
Enter the streaming URL and click Enter Live Channel. Key data is extracted from the streaming URL, and the server-side signature verification API operation is called to verify its validity. After the verification is successful, the get a single live channel API operation is called to verify other information. If no issues are found, you are directed to the live channel page.
If the logon fails, use a tool such as Postman to check whether the related API operations are working as expected based on the server-side API documentation.
The names of the API parameters and the returned fields must be consistent with those in the server-side documentation.

Start a live stream
Log on to the streaming assistant. You can log on using an external invocation or by manual entry.
External invocation: Open the streaming assistant using the invocation URL in a browser. The client automatically parses the server, live channel, and streamer information and logs you on.
Manual entry: Click the shortcut for the streaming assistant to go to the logon page. Enter the invocation URL and click Enter Live Channel. The client automatically parses the server, live channel, and streamer information and logs you on.
(Optional) Configure the camera device.
You must grant camera access the first time you use the assistant. You can also go to to allow the streaming assistant to access the camera.
Turn the camera on or off: Click the camera icon to switch the camera status. The camera is on by default when you enter a live channel.
Switch cameras: Click the triangle icon next to the camera icon to display the camera list. Click to select a video source input device.
(Optional) Configure the microphone device.
You must grant microphone access the first time you use the assistant. You can also go to to allow the streaming assistant to access the microphone.
Turn the microphone on or off: Click the microphone icon to switch the microphone status. The microphone is on by default when you enter a live channel.
Switch microphones: Click the triangle icon next to the microphone icon to display the microphone list. Click to select an audio source input device.
(Optional) Share your screen.
The first time you use the screen sharing feature, you must go to to grant screen recording permissions to the streaming assistant.
Share a screen or window: Click the screen sharing button. In the pop-up window, select a screen or window to share.
Stop sharing: While sharing your screen or a window, a button to stop sharing appears. Click it to stop sharing.
(Optional) Select a recommended stream quality based on your current network speed.
Click the settings icon to open the settings pop-up window.
Select the desired quality. If you select a custom quality, you can set the resolution, bitrate, and frame rate for the stream ingest.
NoteWe recommend that you complete the settings before you start the live stream. If you adjust the stream quality during a live stream, co-stream, or video recording, the viewing experience may be affected.
Complete the configurations and click Start Live Stream.
Viewing on the playback client
The streaming assistant uses the Opus audio format for stream ingest. Streams that use the Real-Time Streaming (RTS) protocol can be played back normally. However, the FLV, RTMP, and HTTP Live Streaming (HLS) protocols have poor support for Opus. If you play back streams that use these protocols, you will not hear any audio. Therefore, we recommend that you configure an audio transcoding template to ensure compatibility on the playback client.
The following steps describe how to configure the settings to watch a standard live stream:
Log on to the ApsaraVideo Live console.
In the navigation pane on the left, click to go to the Live Stream Transcoding page.
Select the streaming domain that you want to configure and click the Default Transcoding tab.
On the Default Transcoding tab, click Add.
On the Configure Transcoding Template page, select the Original Quality - Audio Only template and set the encoding format to AAC.
Click OK. After the configuration is complete, the corresponding transcoded streaming URL is returned in the API response for the live channel details.
To play back the live stream, add a recording configuration. For more information, see Live stream recording.
FAQ
For frequently asked questions about the streaming assistant and their solutions, see FAQ about the streaming assistant.