The Event Push service sends events that you subscribe to in Digital Employee to a specified message queue. You can analyze this data to monitor activity in real time, which helps improve work efficiency and service quality. This topic explains how to enable and disable the Event Push service.
Prerequisites
Complete the following steps:
Activate Message Queue for Apache RocketMQ.
Activate Digital Employee: Activate Cloud Contact Center – Digital Employee.
Digital Employee supports Message Queue for Apache RocketMQ 4.0 and 5.0. If you use version 5.0, purchase RocketMQ 5.0 (pay-as-you-go).
The serverless series of Message Queue for Apache RocketMQ 5.0 does not support VPC access in Digital Employee, because networks are not interoperable. You must use only the TCP public endpoint. Enable public network access before purchasing.

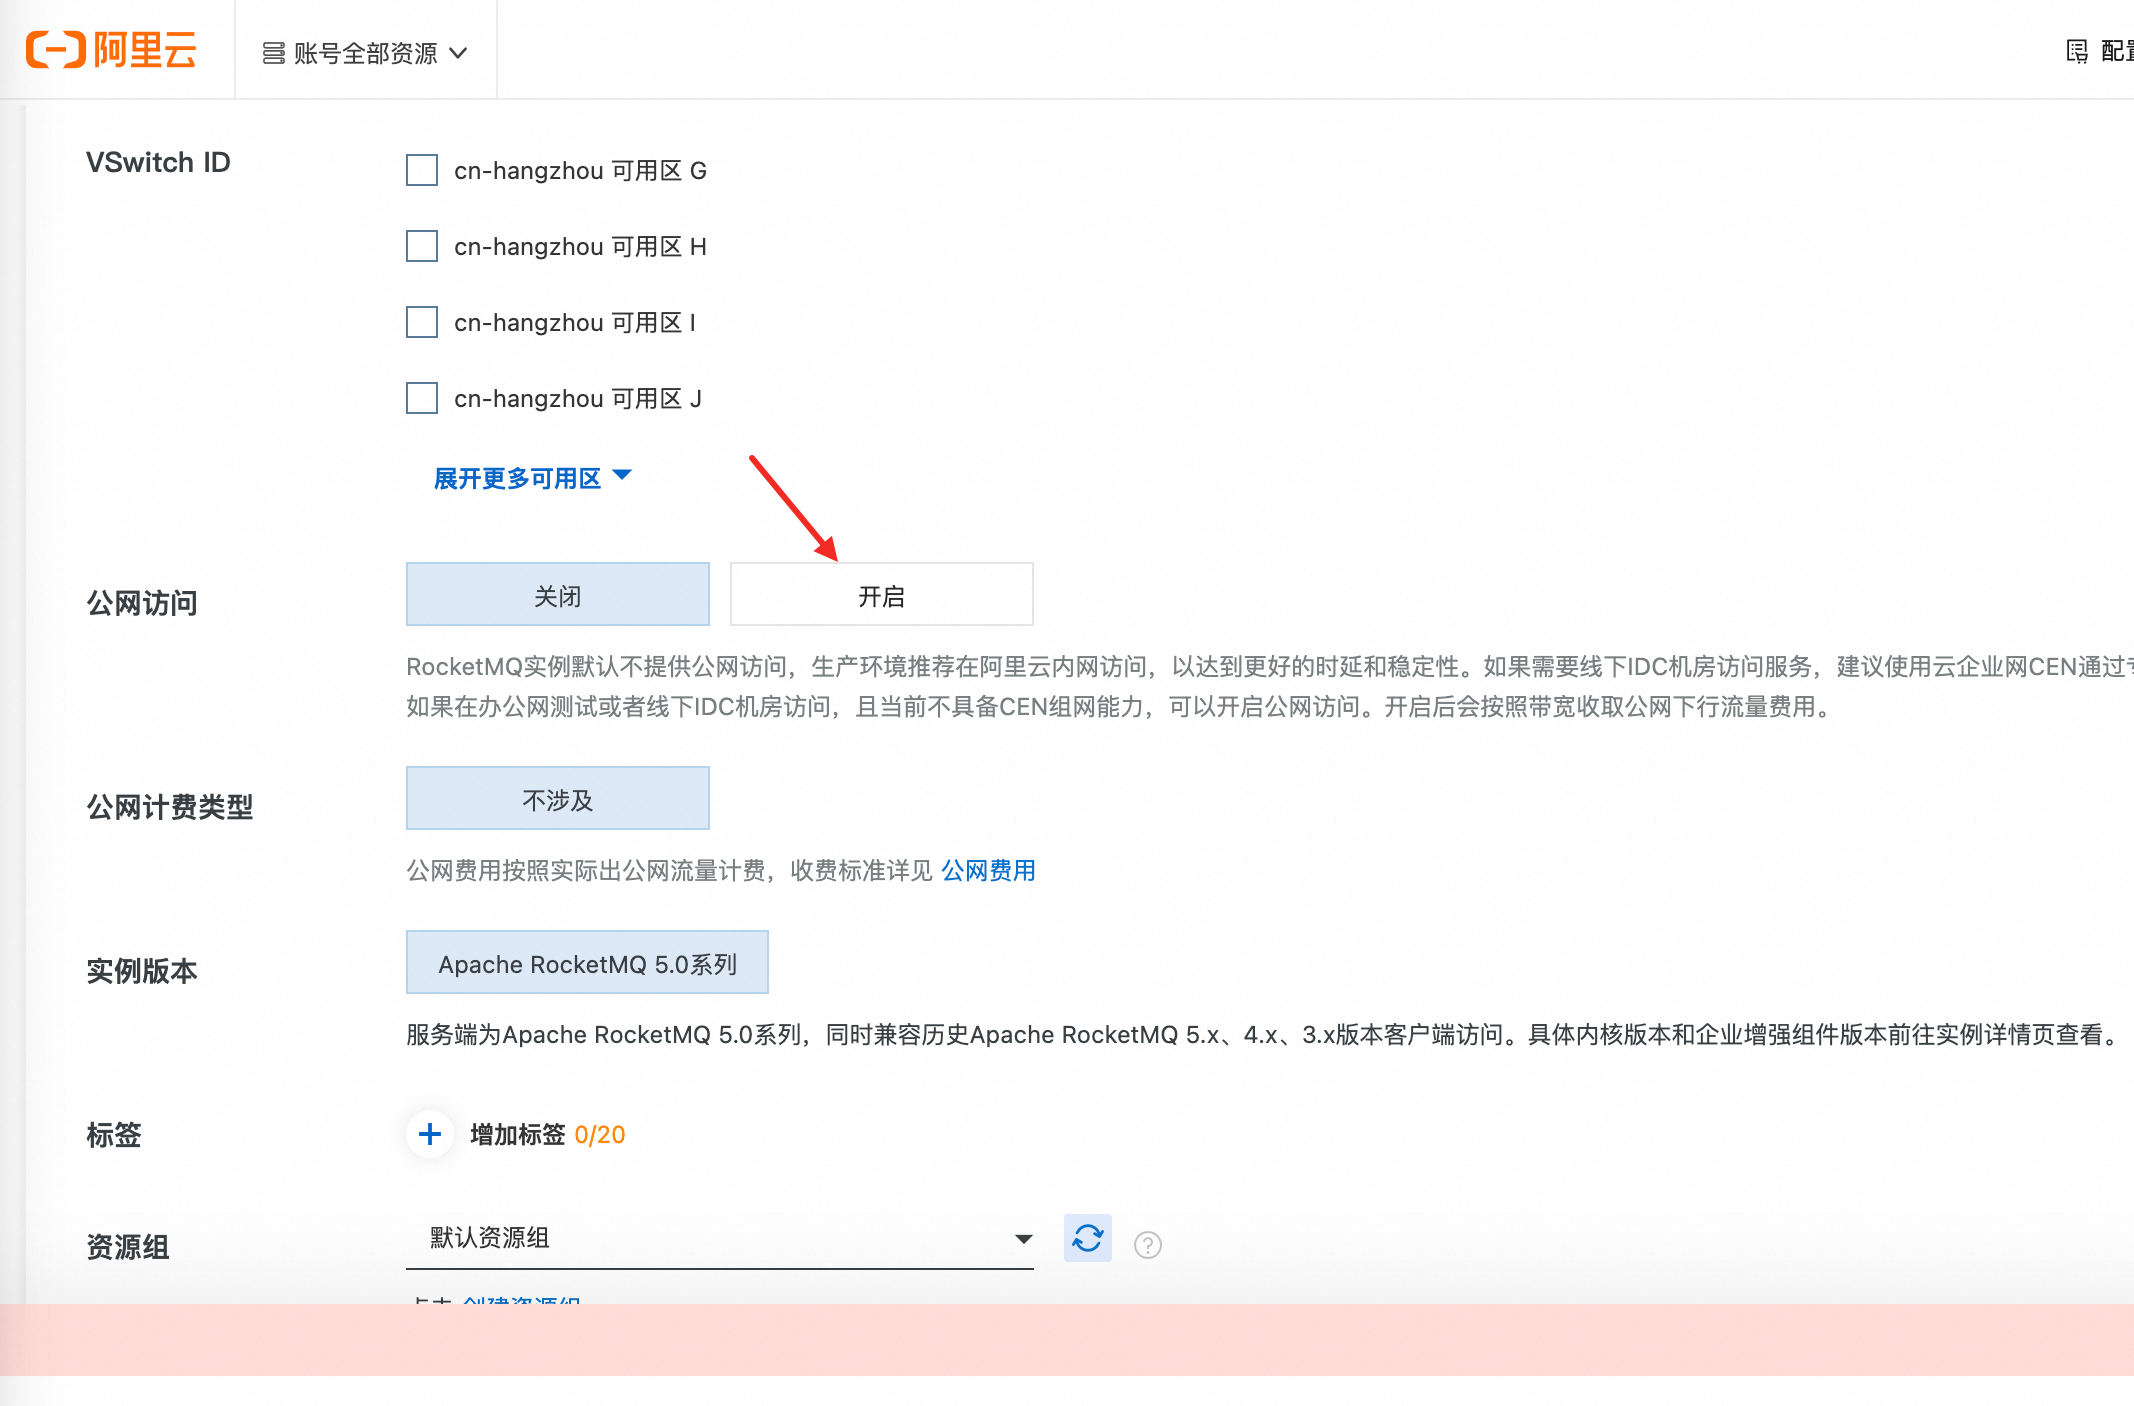
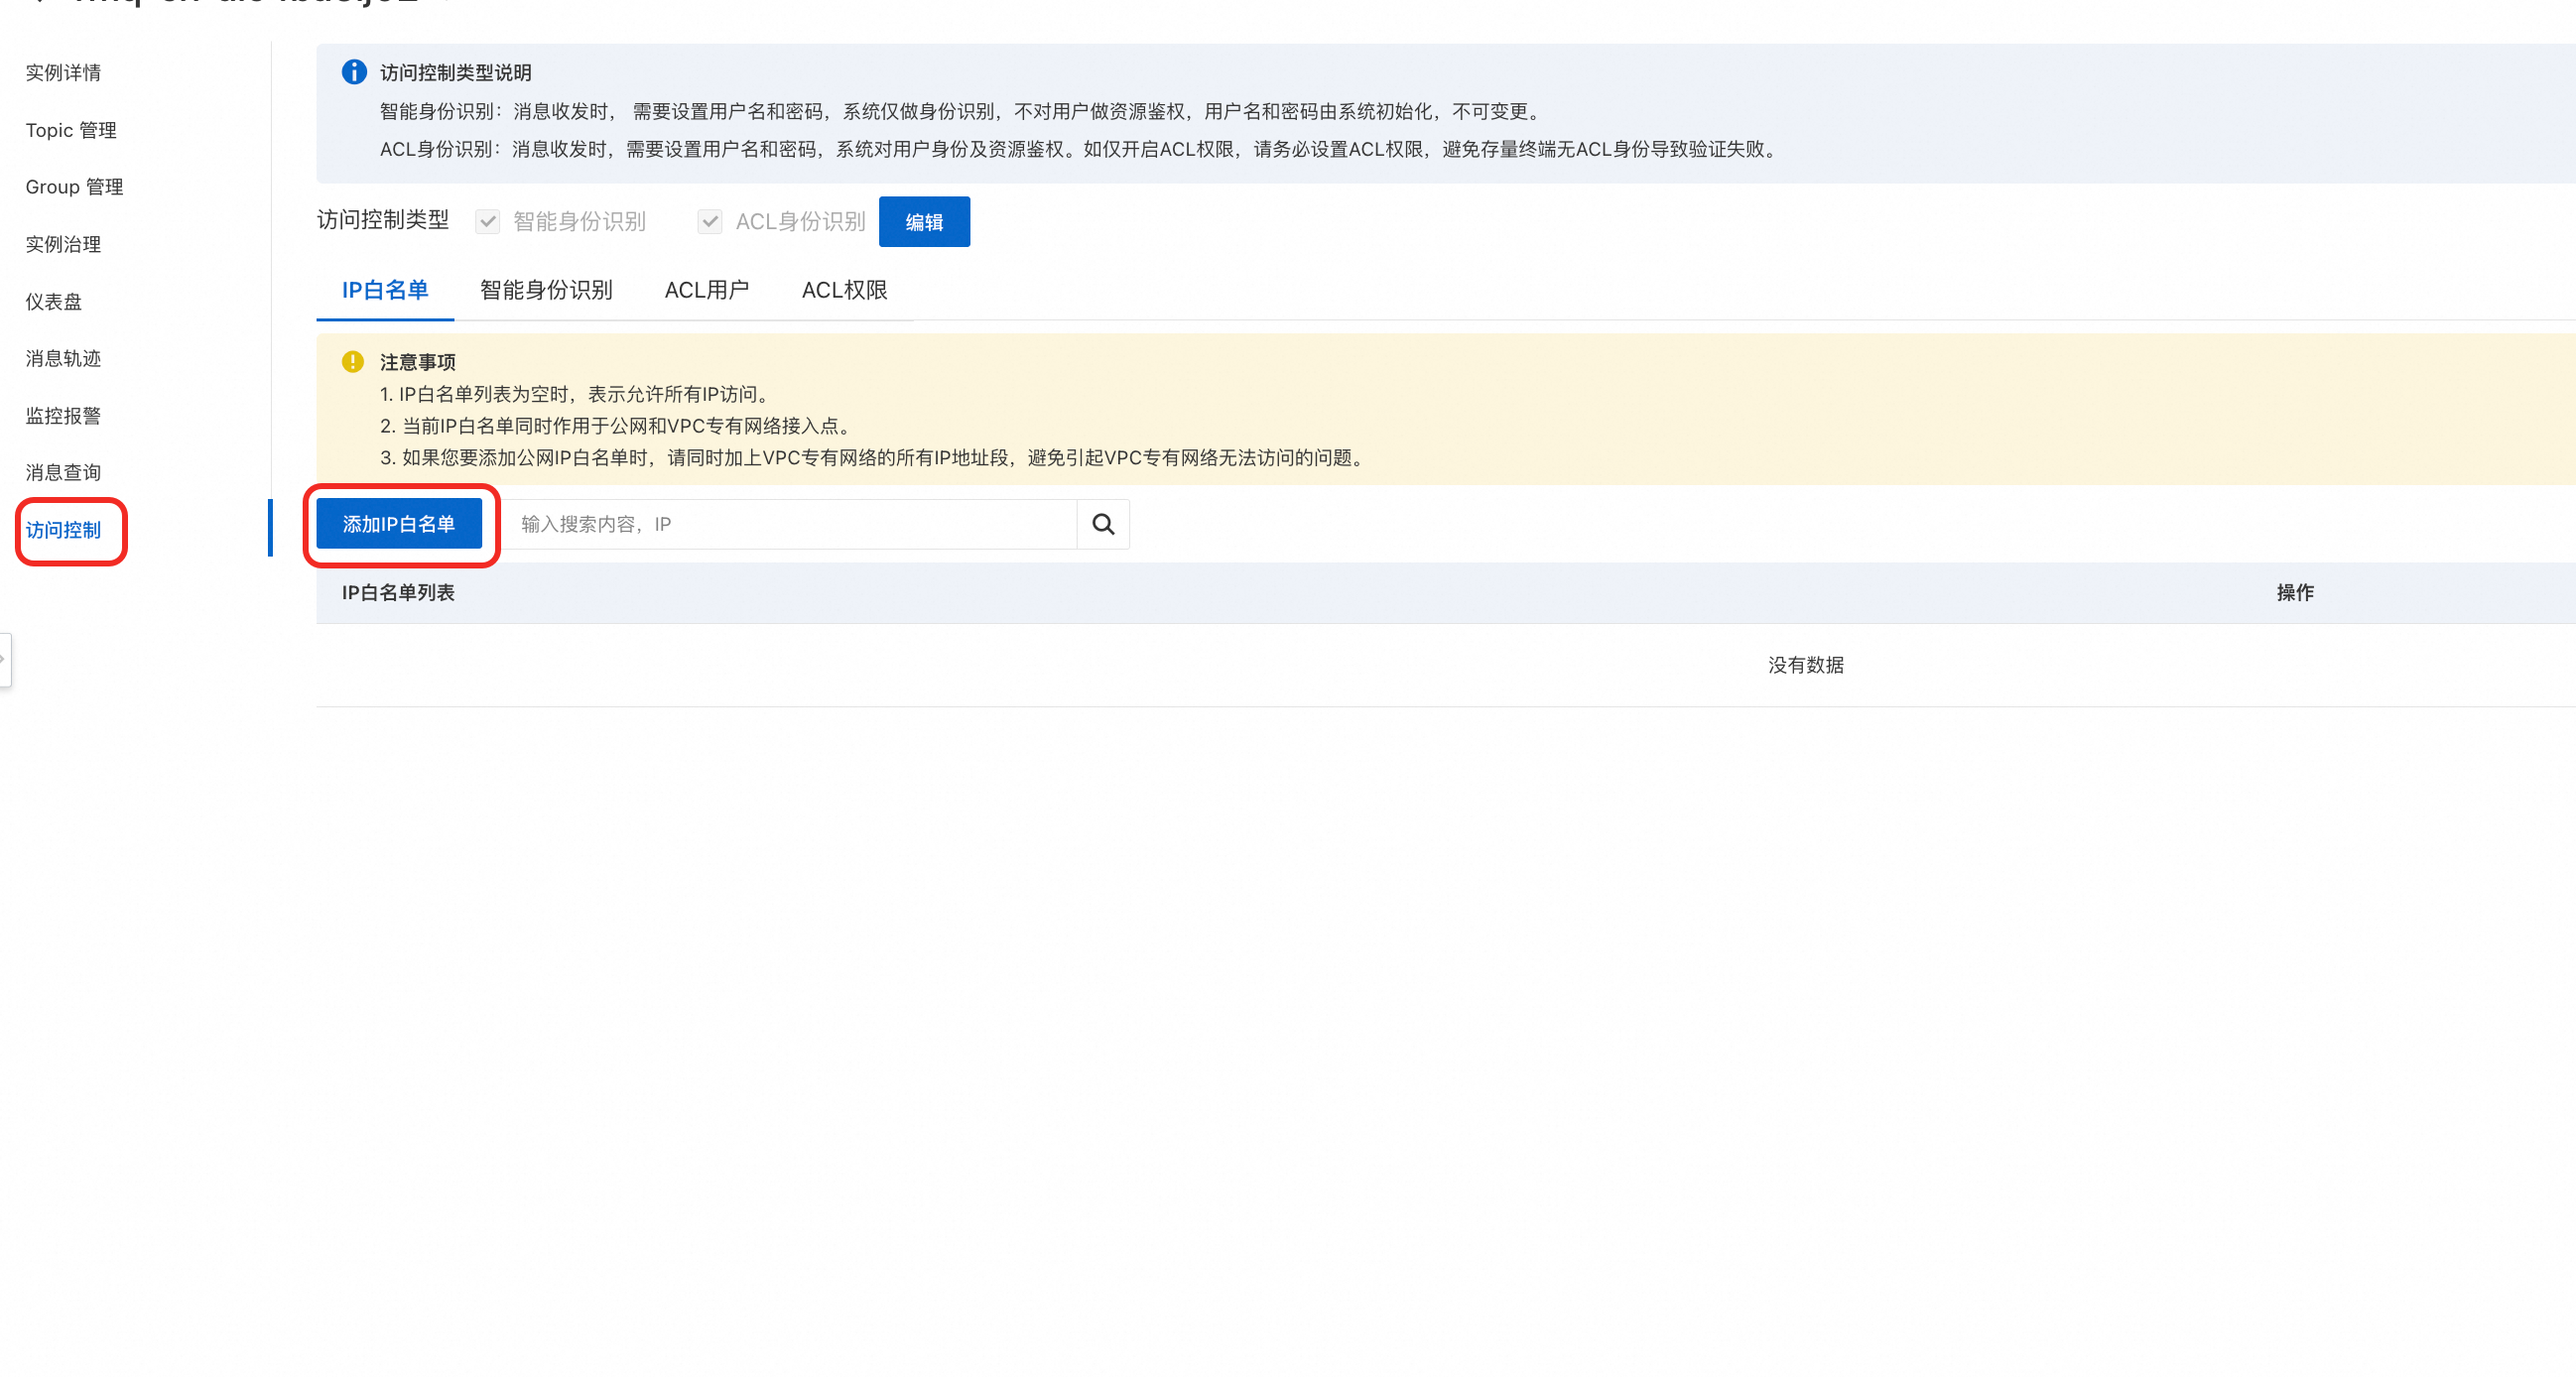
Digital Employee supports public network access for the serverless series of Message Queue for Apache RocketMQ 5.0. If you select a region other than Shanghai when creating an instance, add the IP address 47.103.12.130 to your IP allowlist.
Procedure
Step 1: Create a message queue instance in the Message Queue console
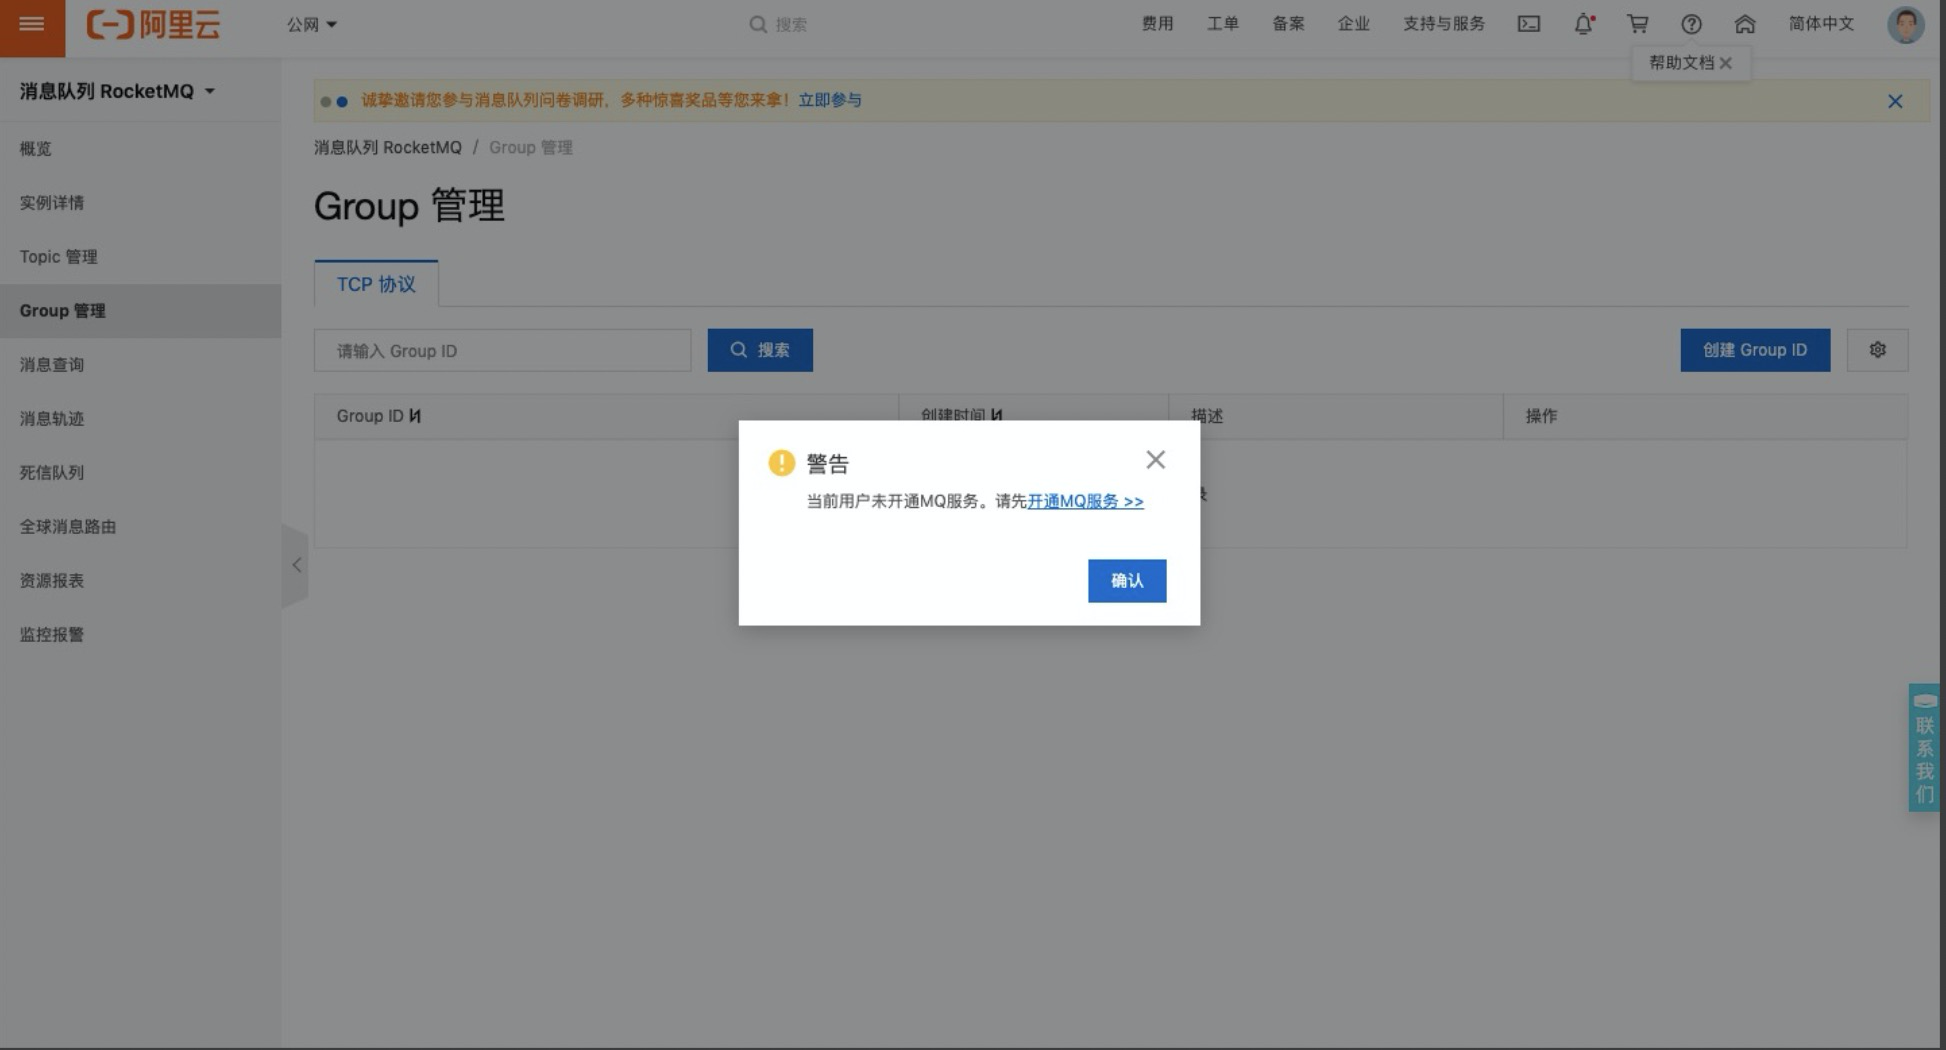
Log on to the Message Queue console with your Alibaba Cloud account. When you log on for the first time, a prompt appears to activate the Message Queue service. Click Activate Now . For pricing details, see Billing overview.
Create a message queue instance.
In the Message Queue console, in the navigation pane on the left, click Instances . Click Create Instance . Select version 4.0 or 5.0.
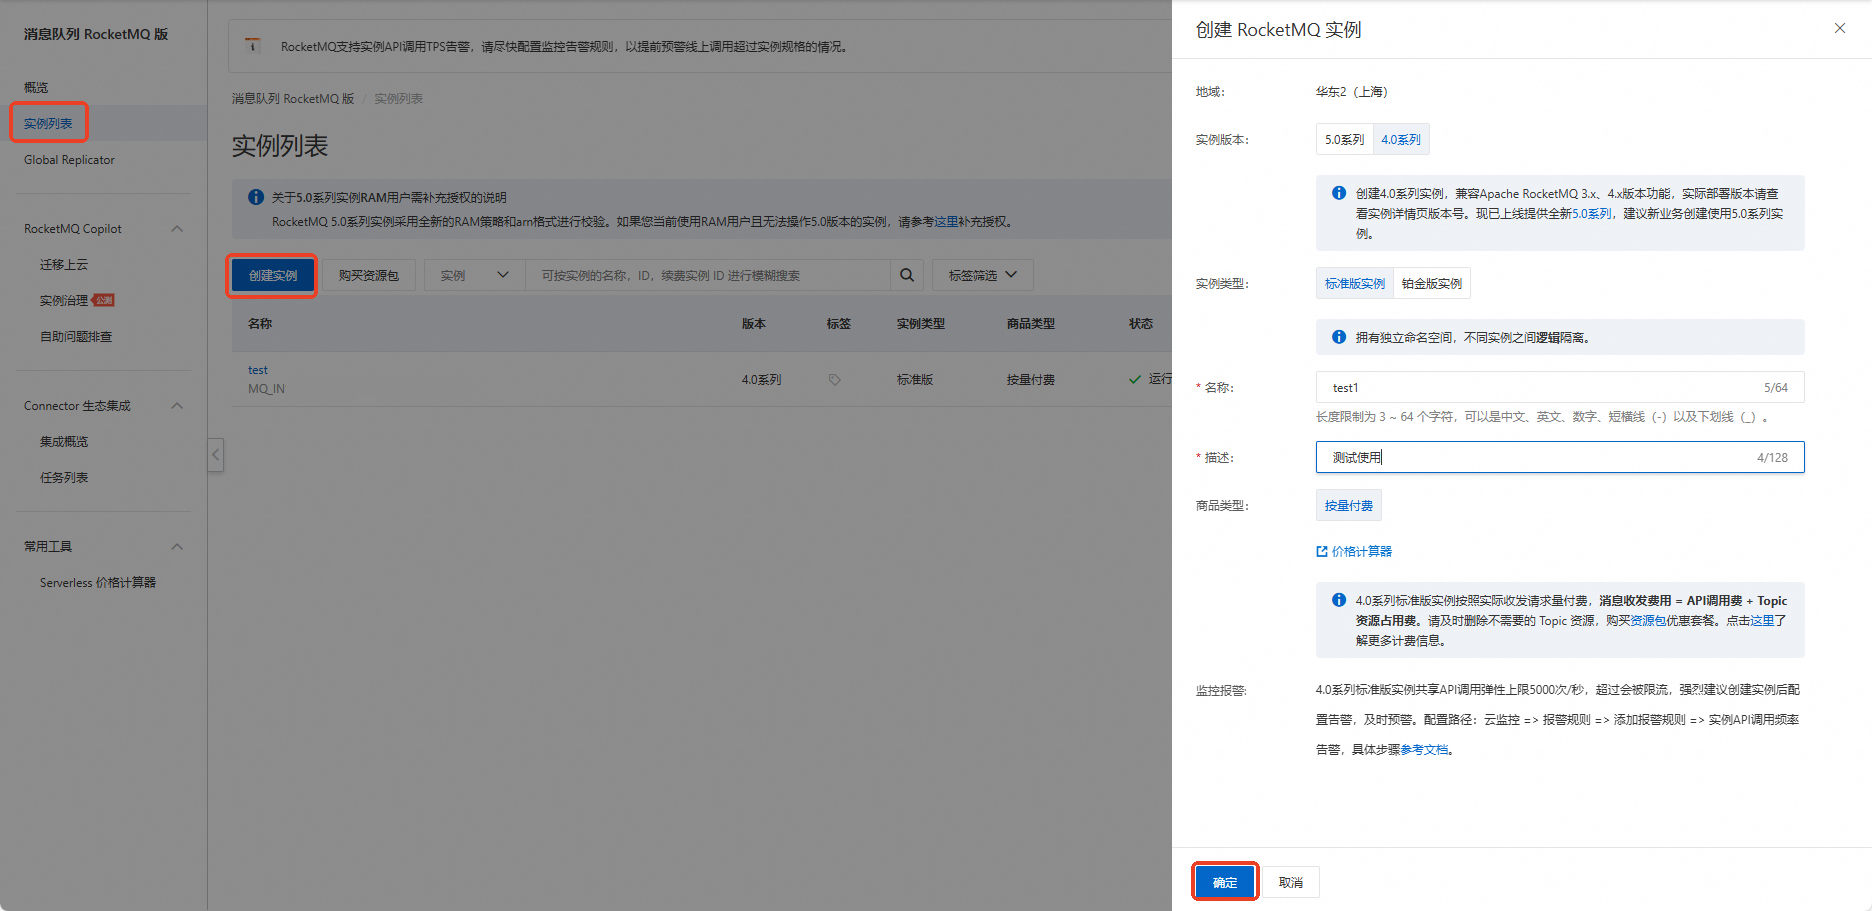
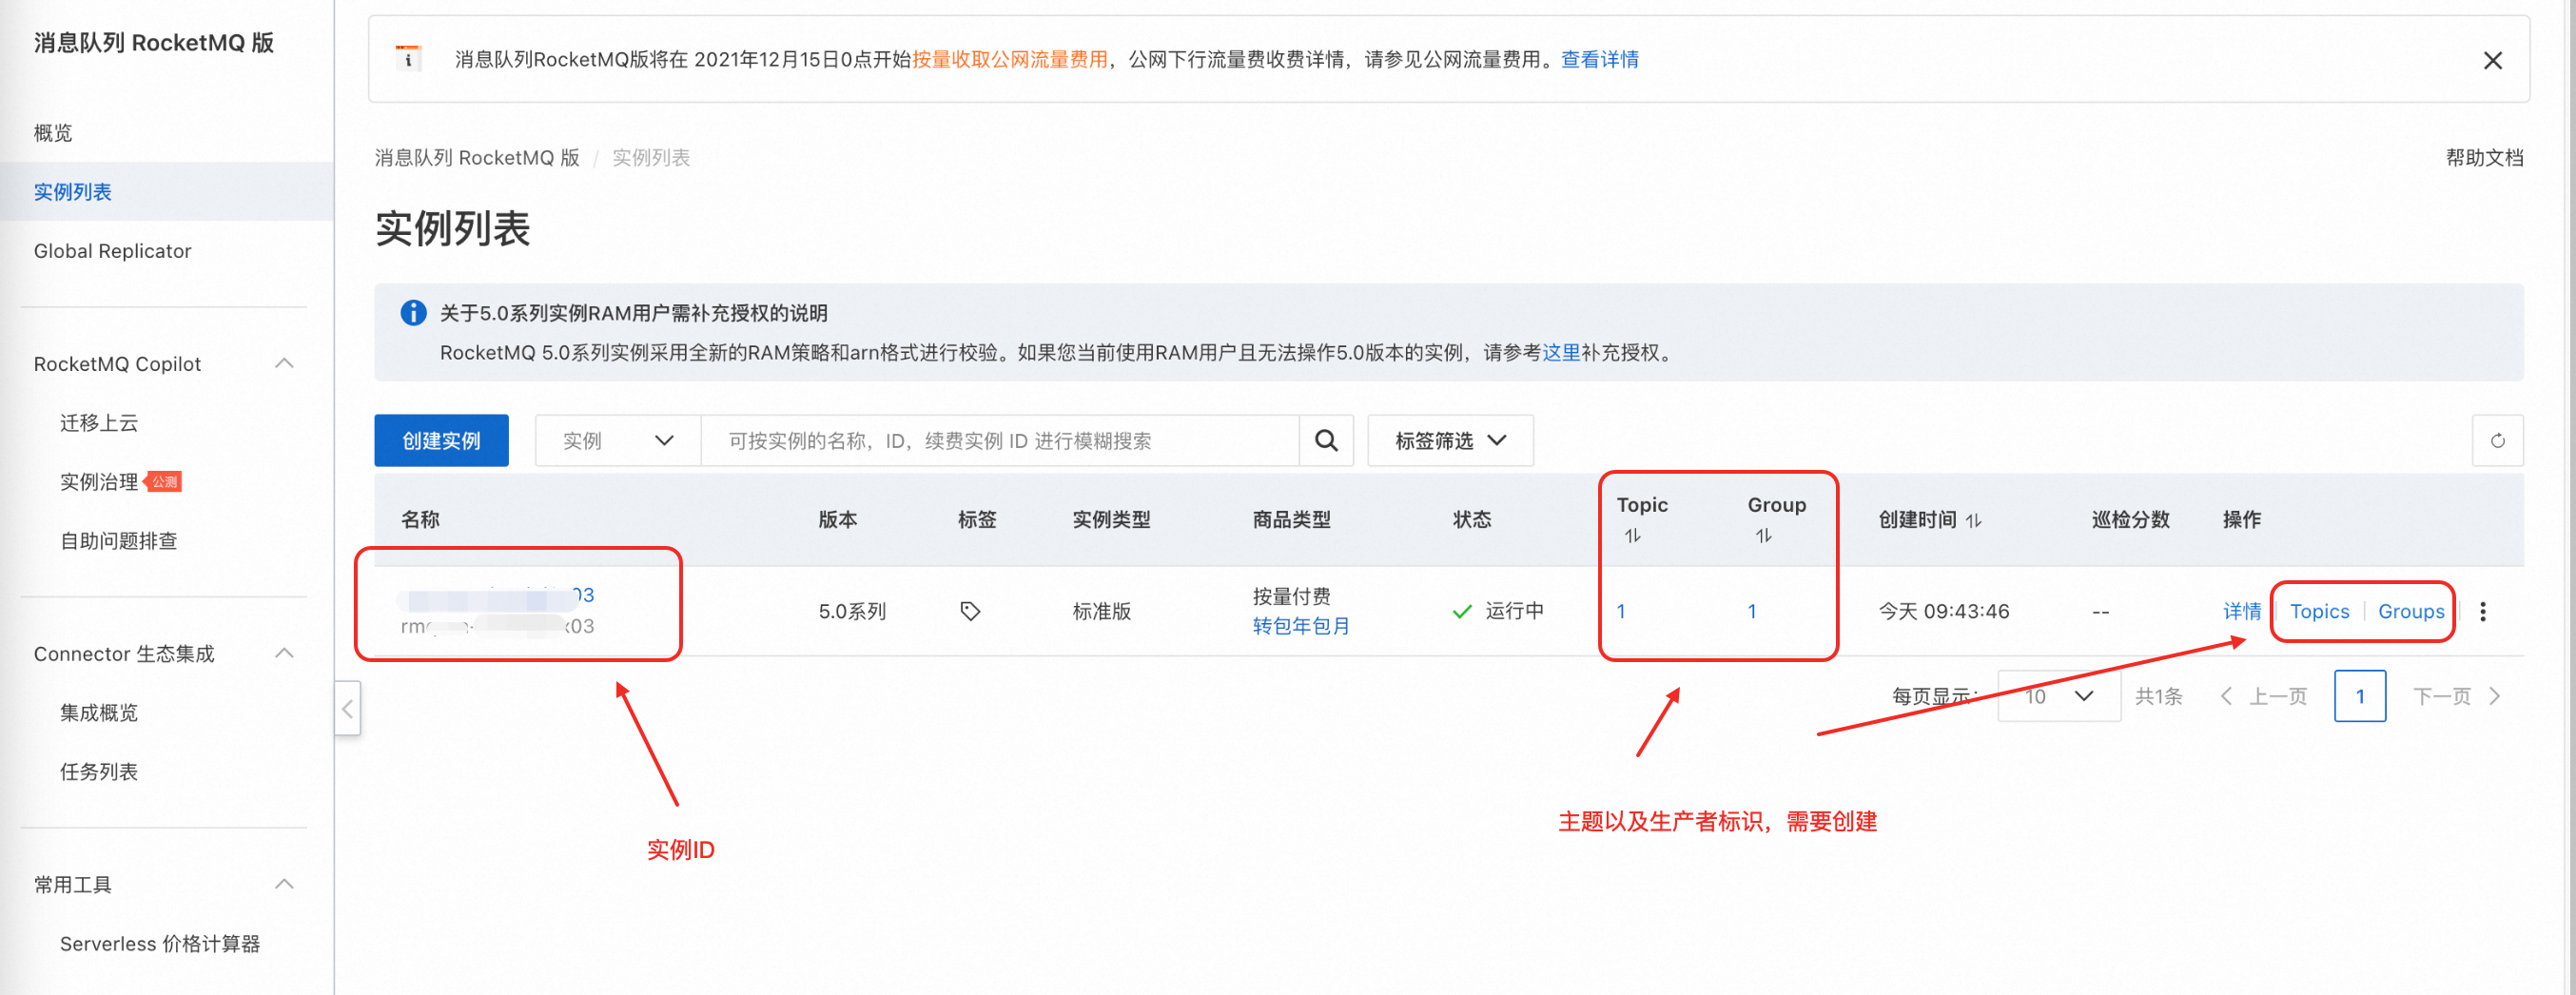
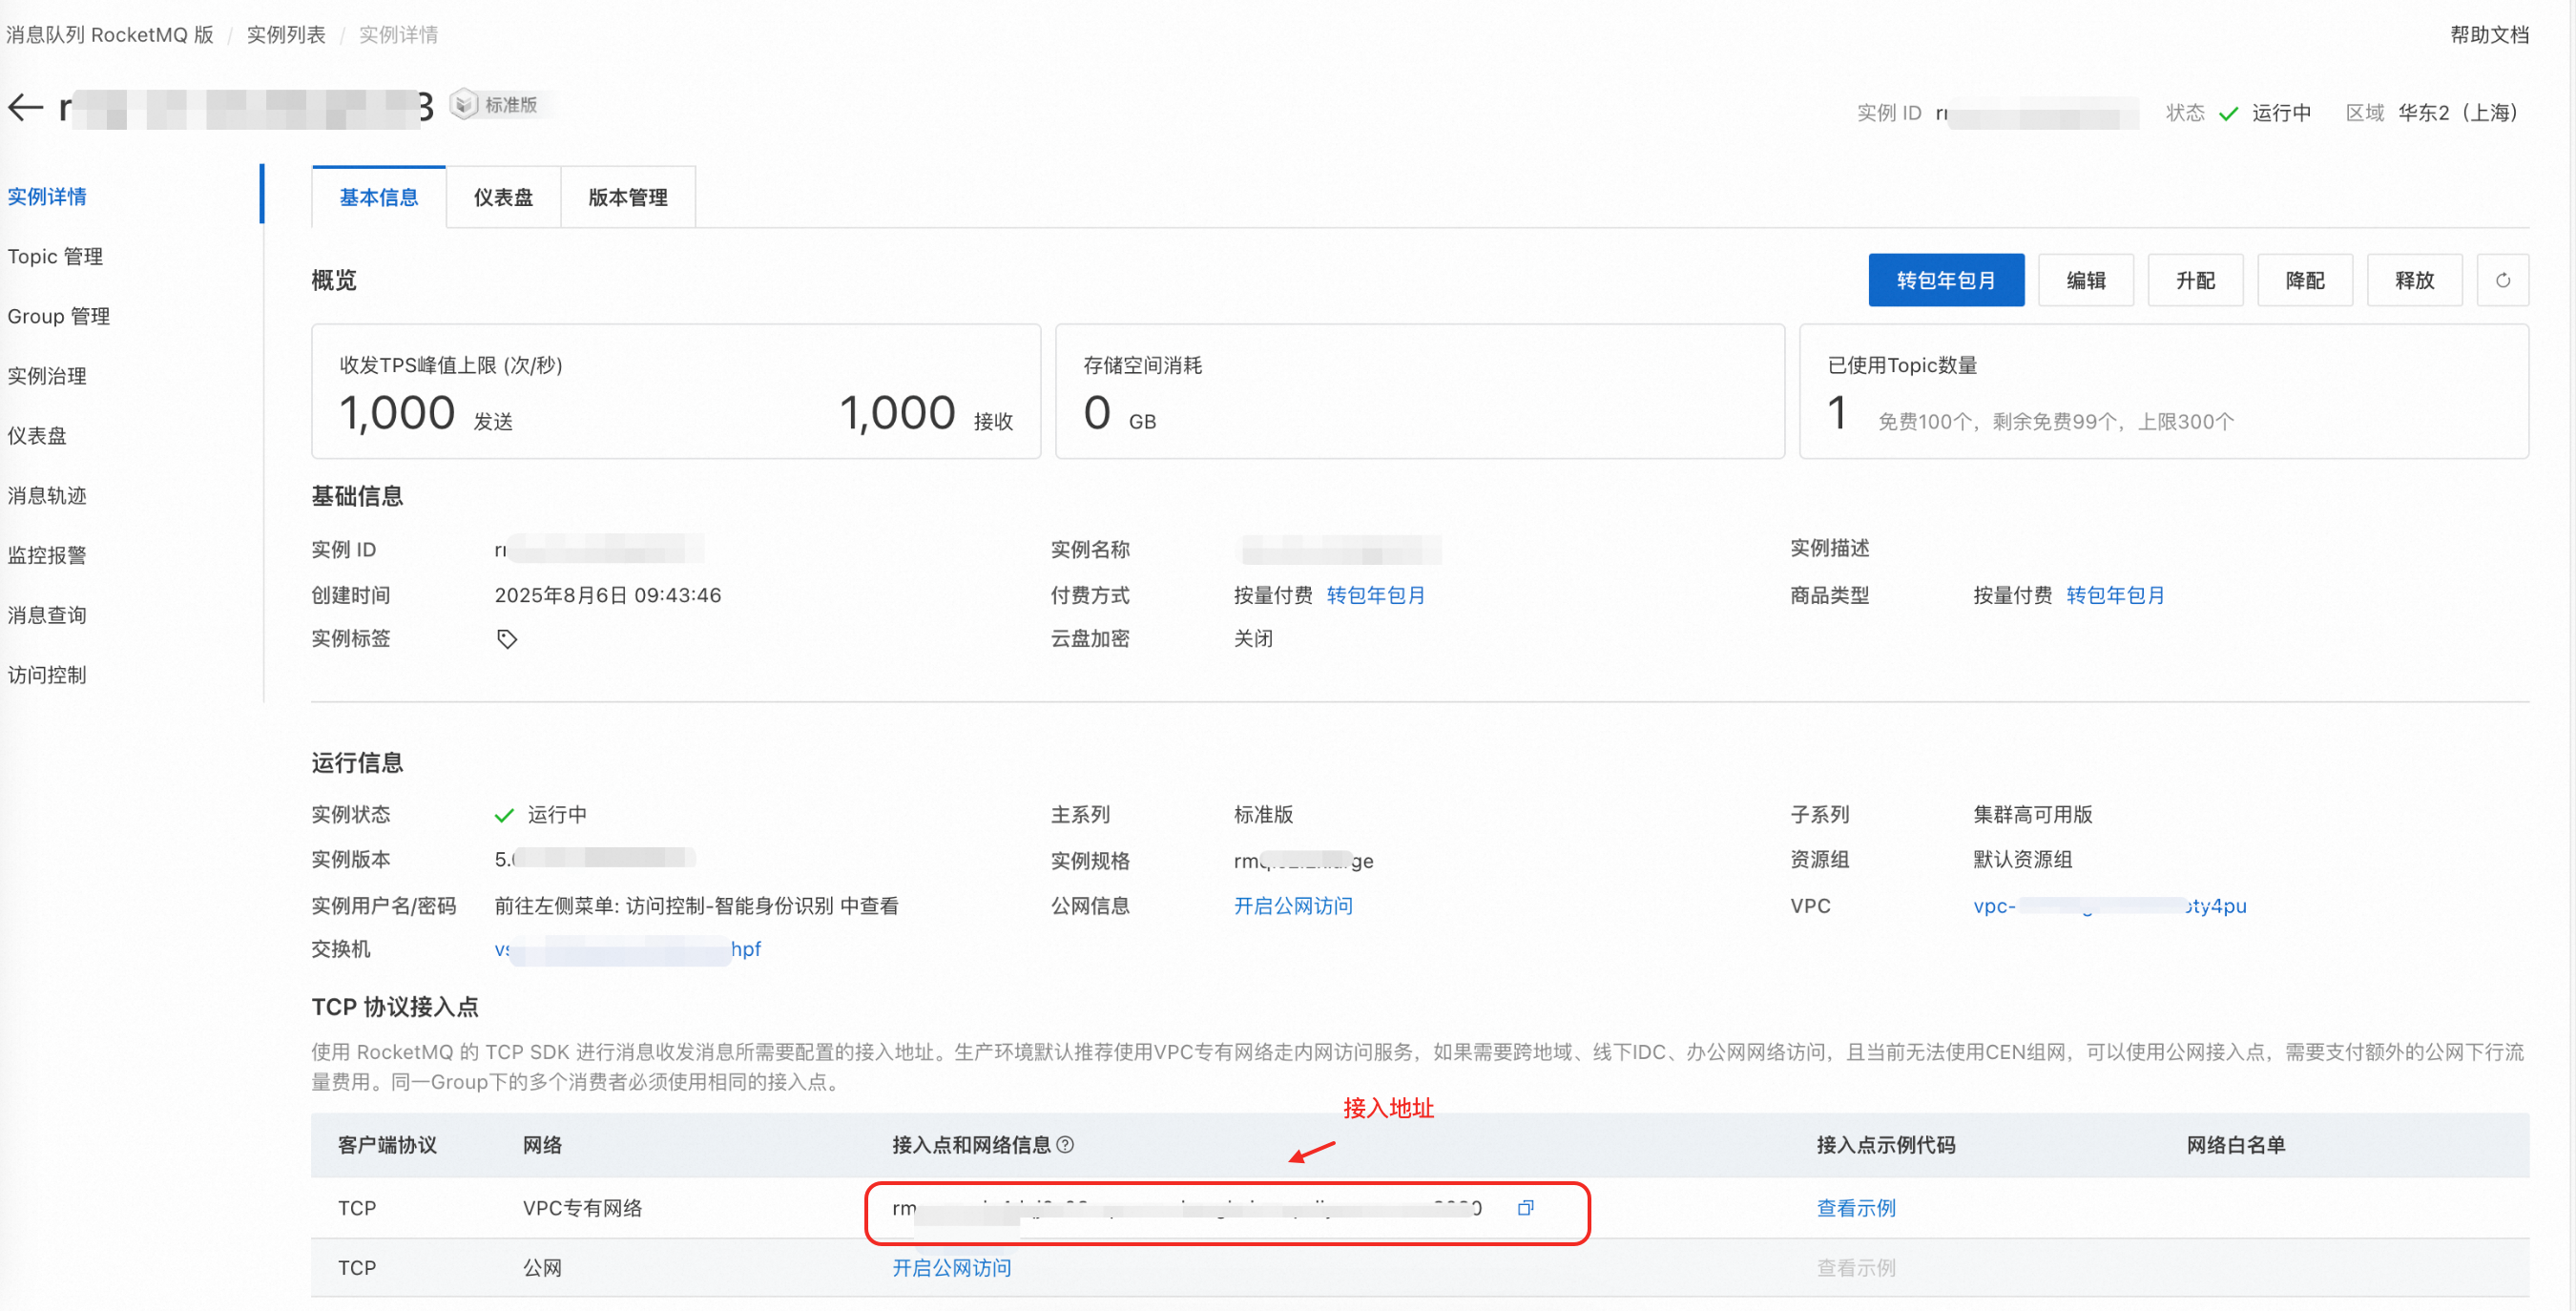
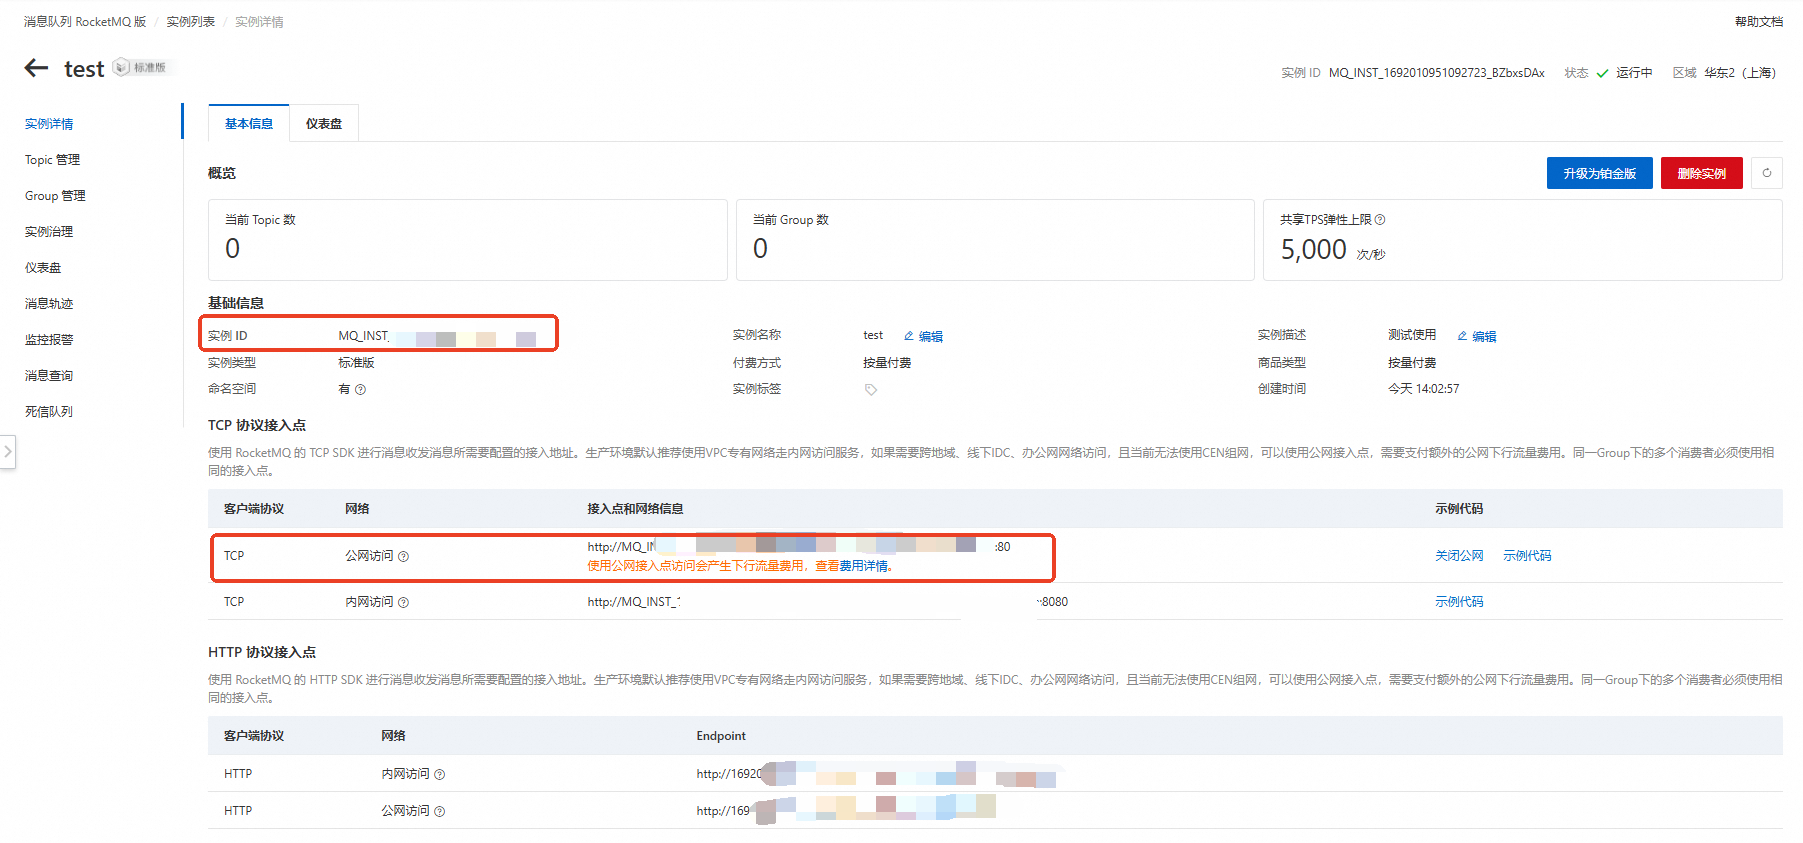
In the dialog box, enter your custom information. Click OK . For example, create a standard instance named test. You can view the instance ID and endpoint on the instance details page.
When you use Message Queue, note these network access restrictions: Topics and Group IDs must be created in the same instance and in the same region to communicate. For more information about regions, see Regions and zones.

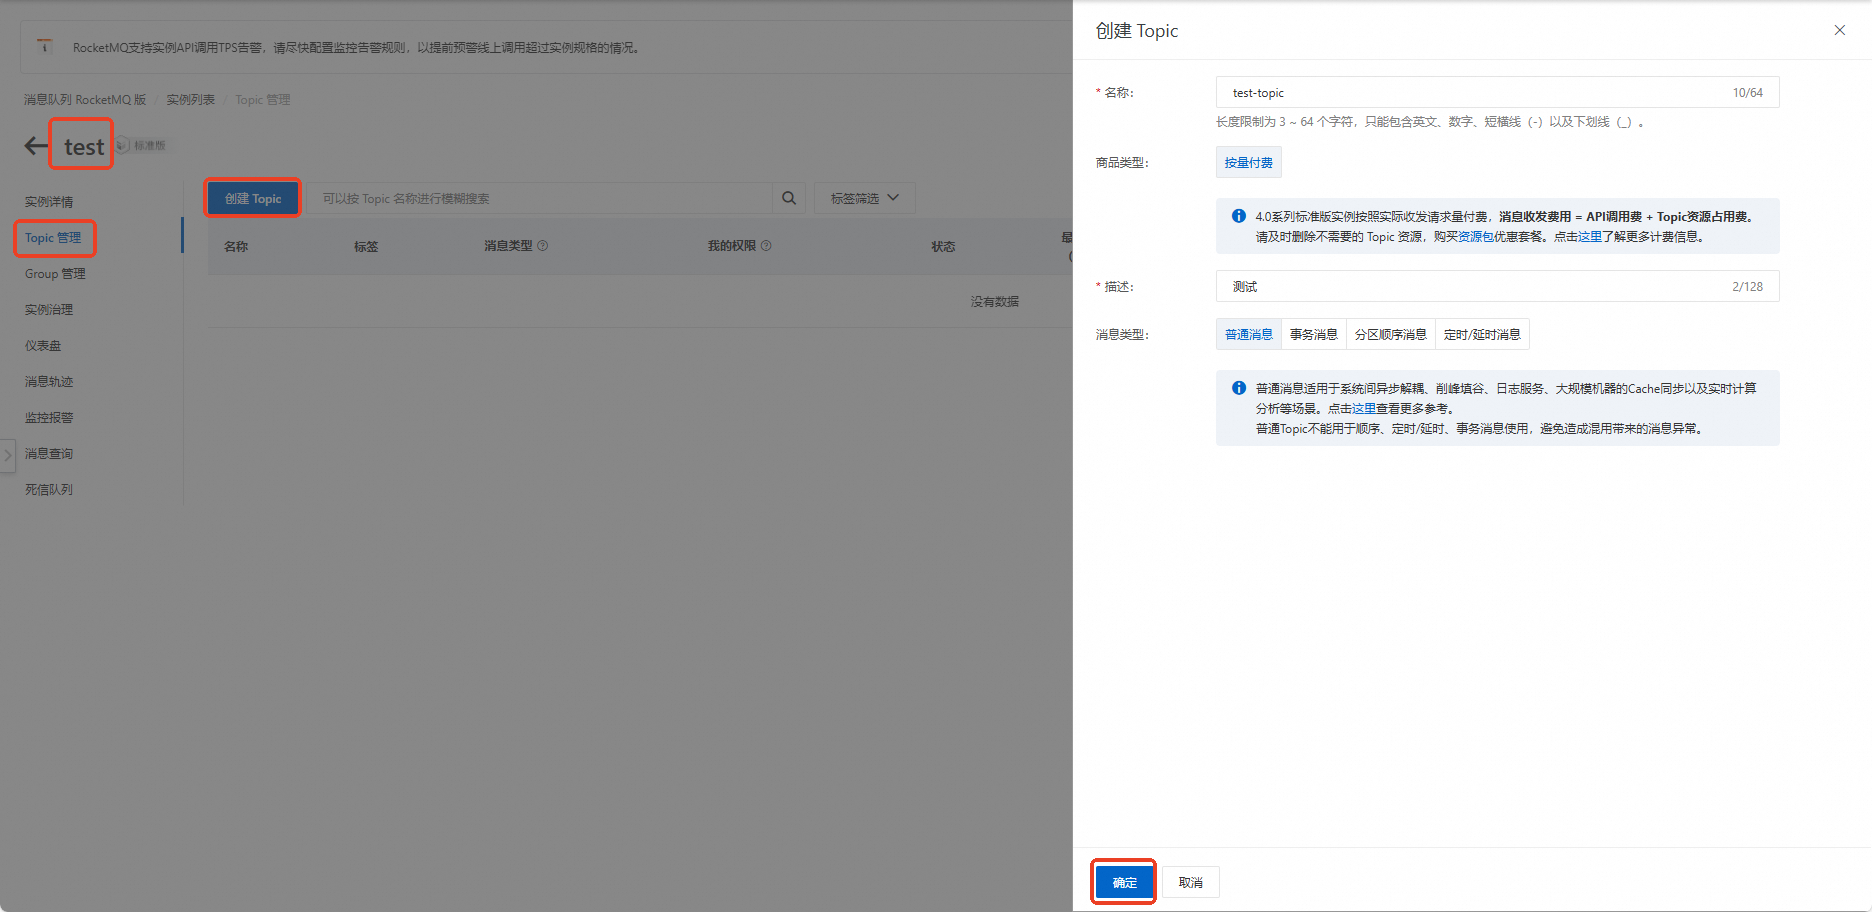
Create a topic in the new instance.
Go to the instance details page. In the navigation pane on the left, click the Topics tab.
On the Topics page, click Create Topic .
Enter your custom information as prompted. Click OK .
Delete topics that you no longer use. This helps avoid unnecessary charges. For topic resource fees, see Pricing.
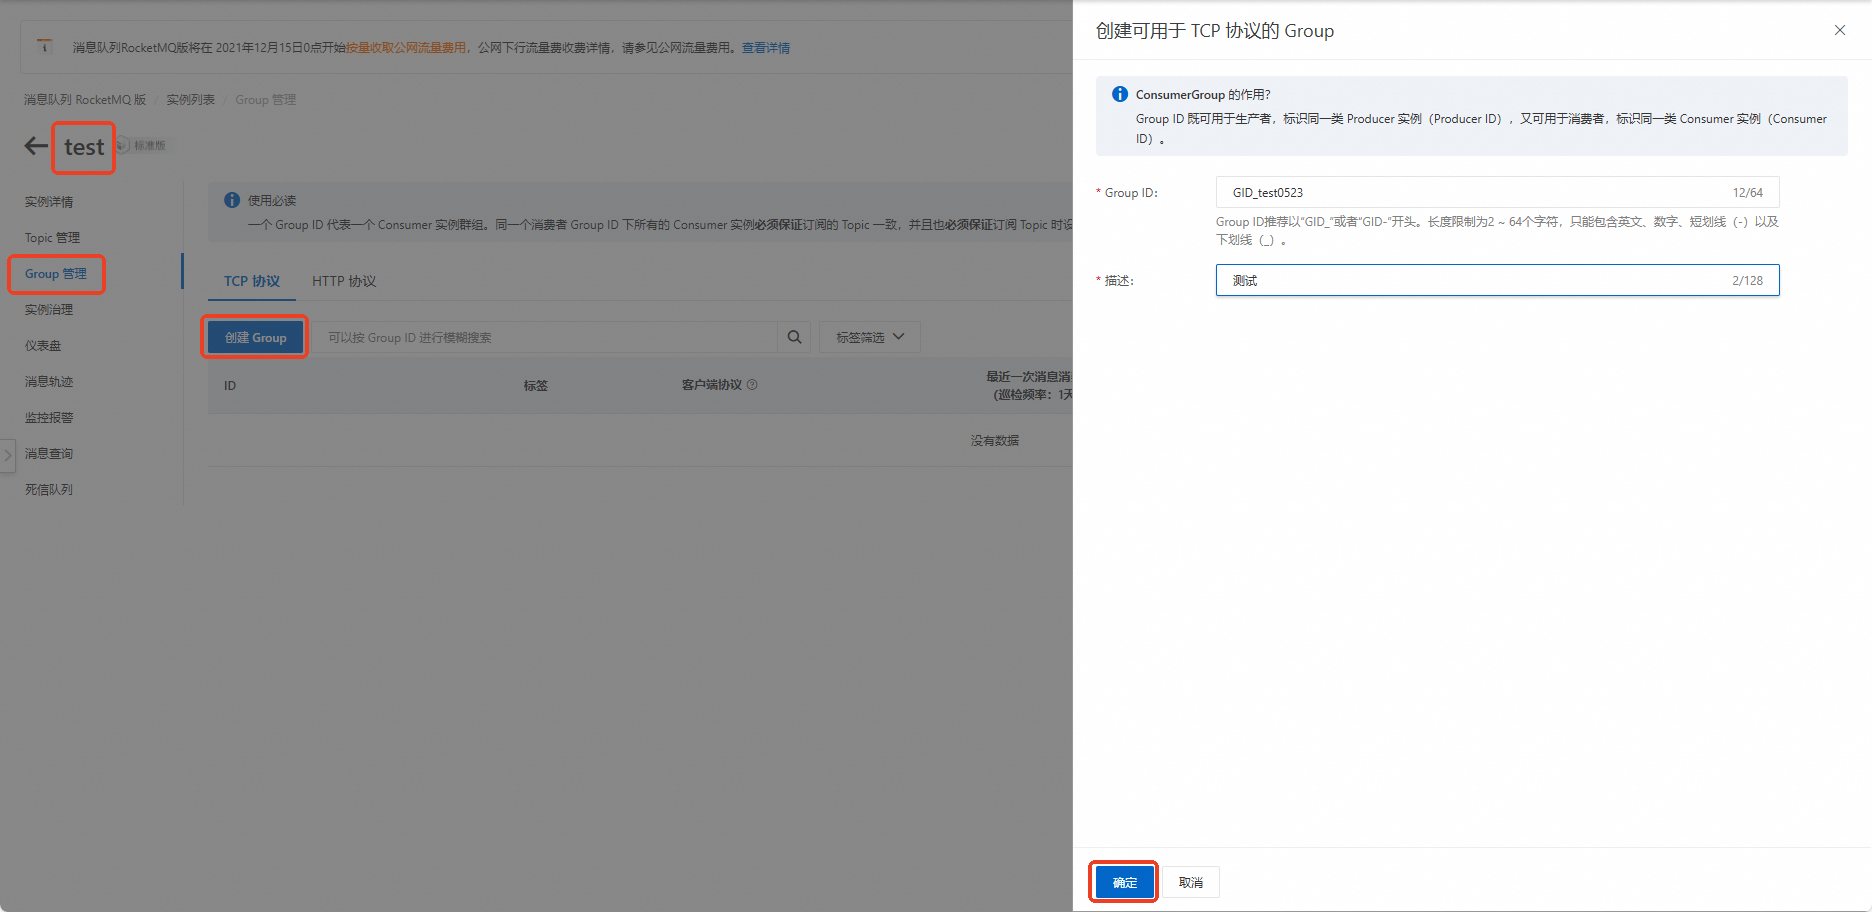
Create a group in the message queue instance.
In the navigation pane on the left, click the Groups tab.
By default, the TCP protocol tab appears. Click Create Group on that tab.
Enter your custom information as prompted. Click OK .
NoteYou can create groups only for the TCP protocol.
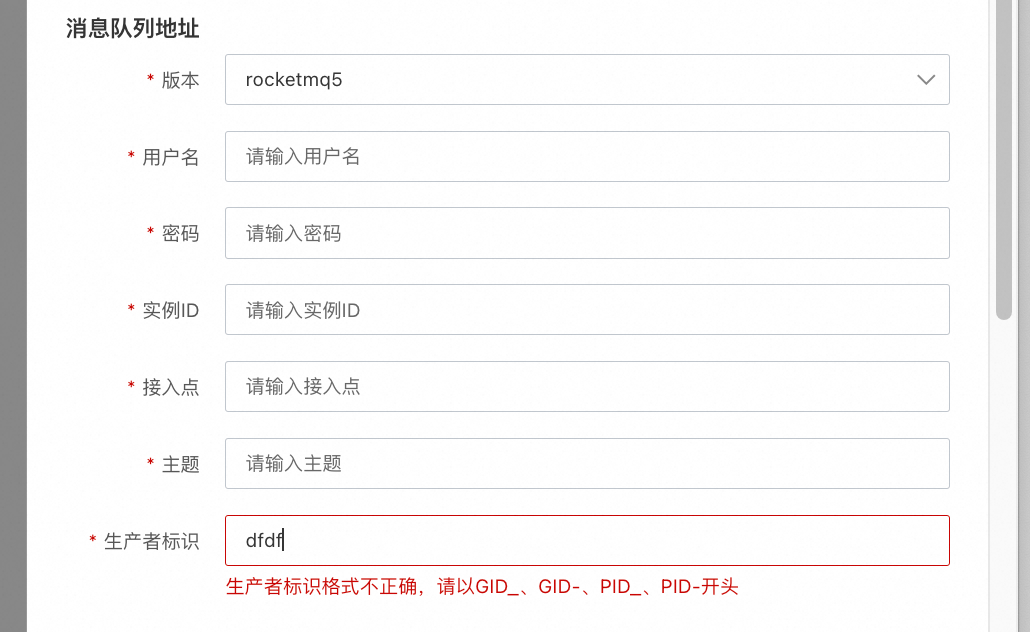
ImportantThe producer identity (GroupID) must start with GID_, GID-, PID_, or PID-.
Otherwise, an error message is displayed.
Step 2: Add the message queue instance to Digital Employee
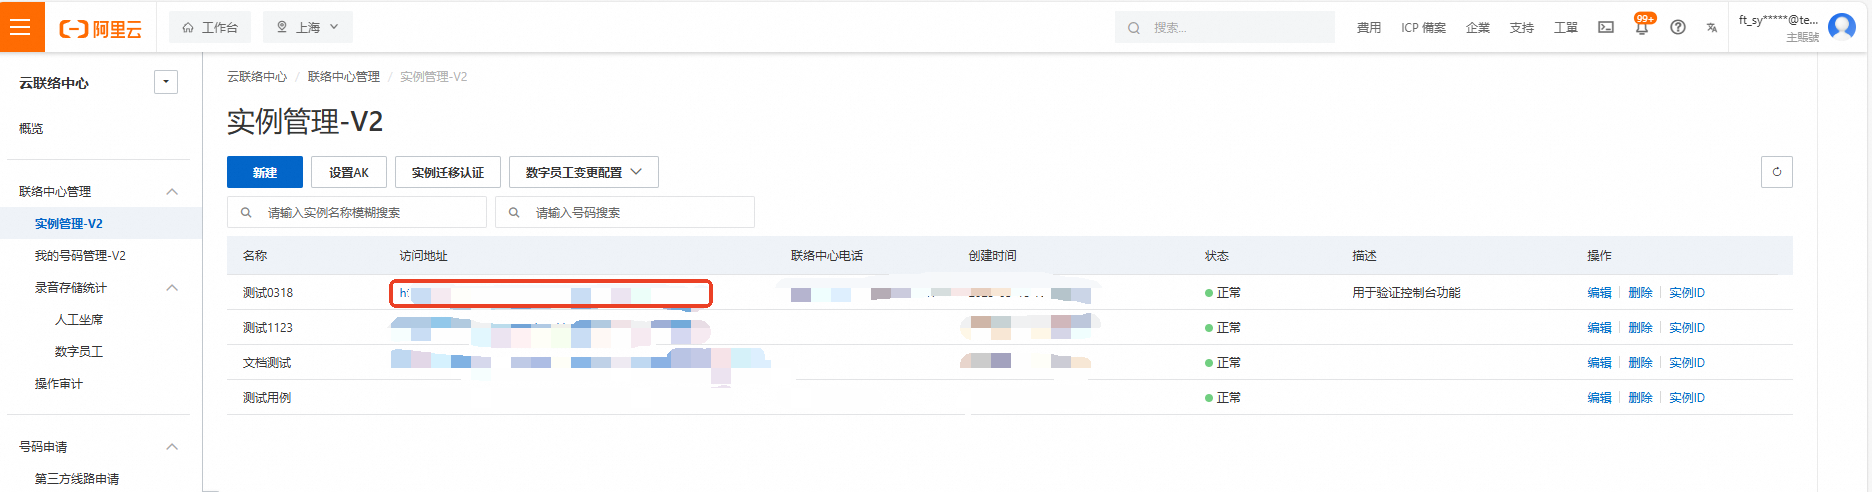
Log on to the Cloud Contact Center console. In the navigation pane on the left, click Instance Management – V2. Click the access point for your instance to open the instance console.
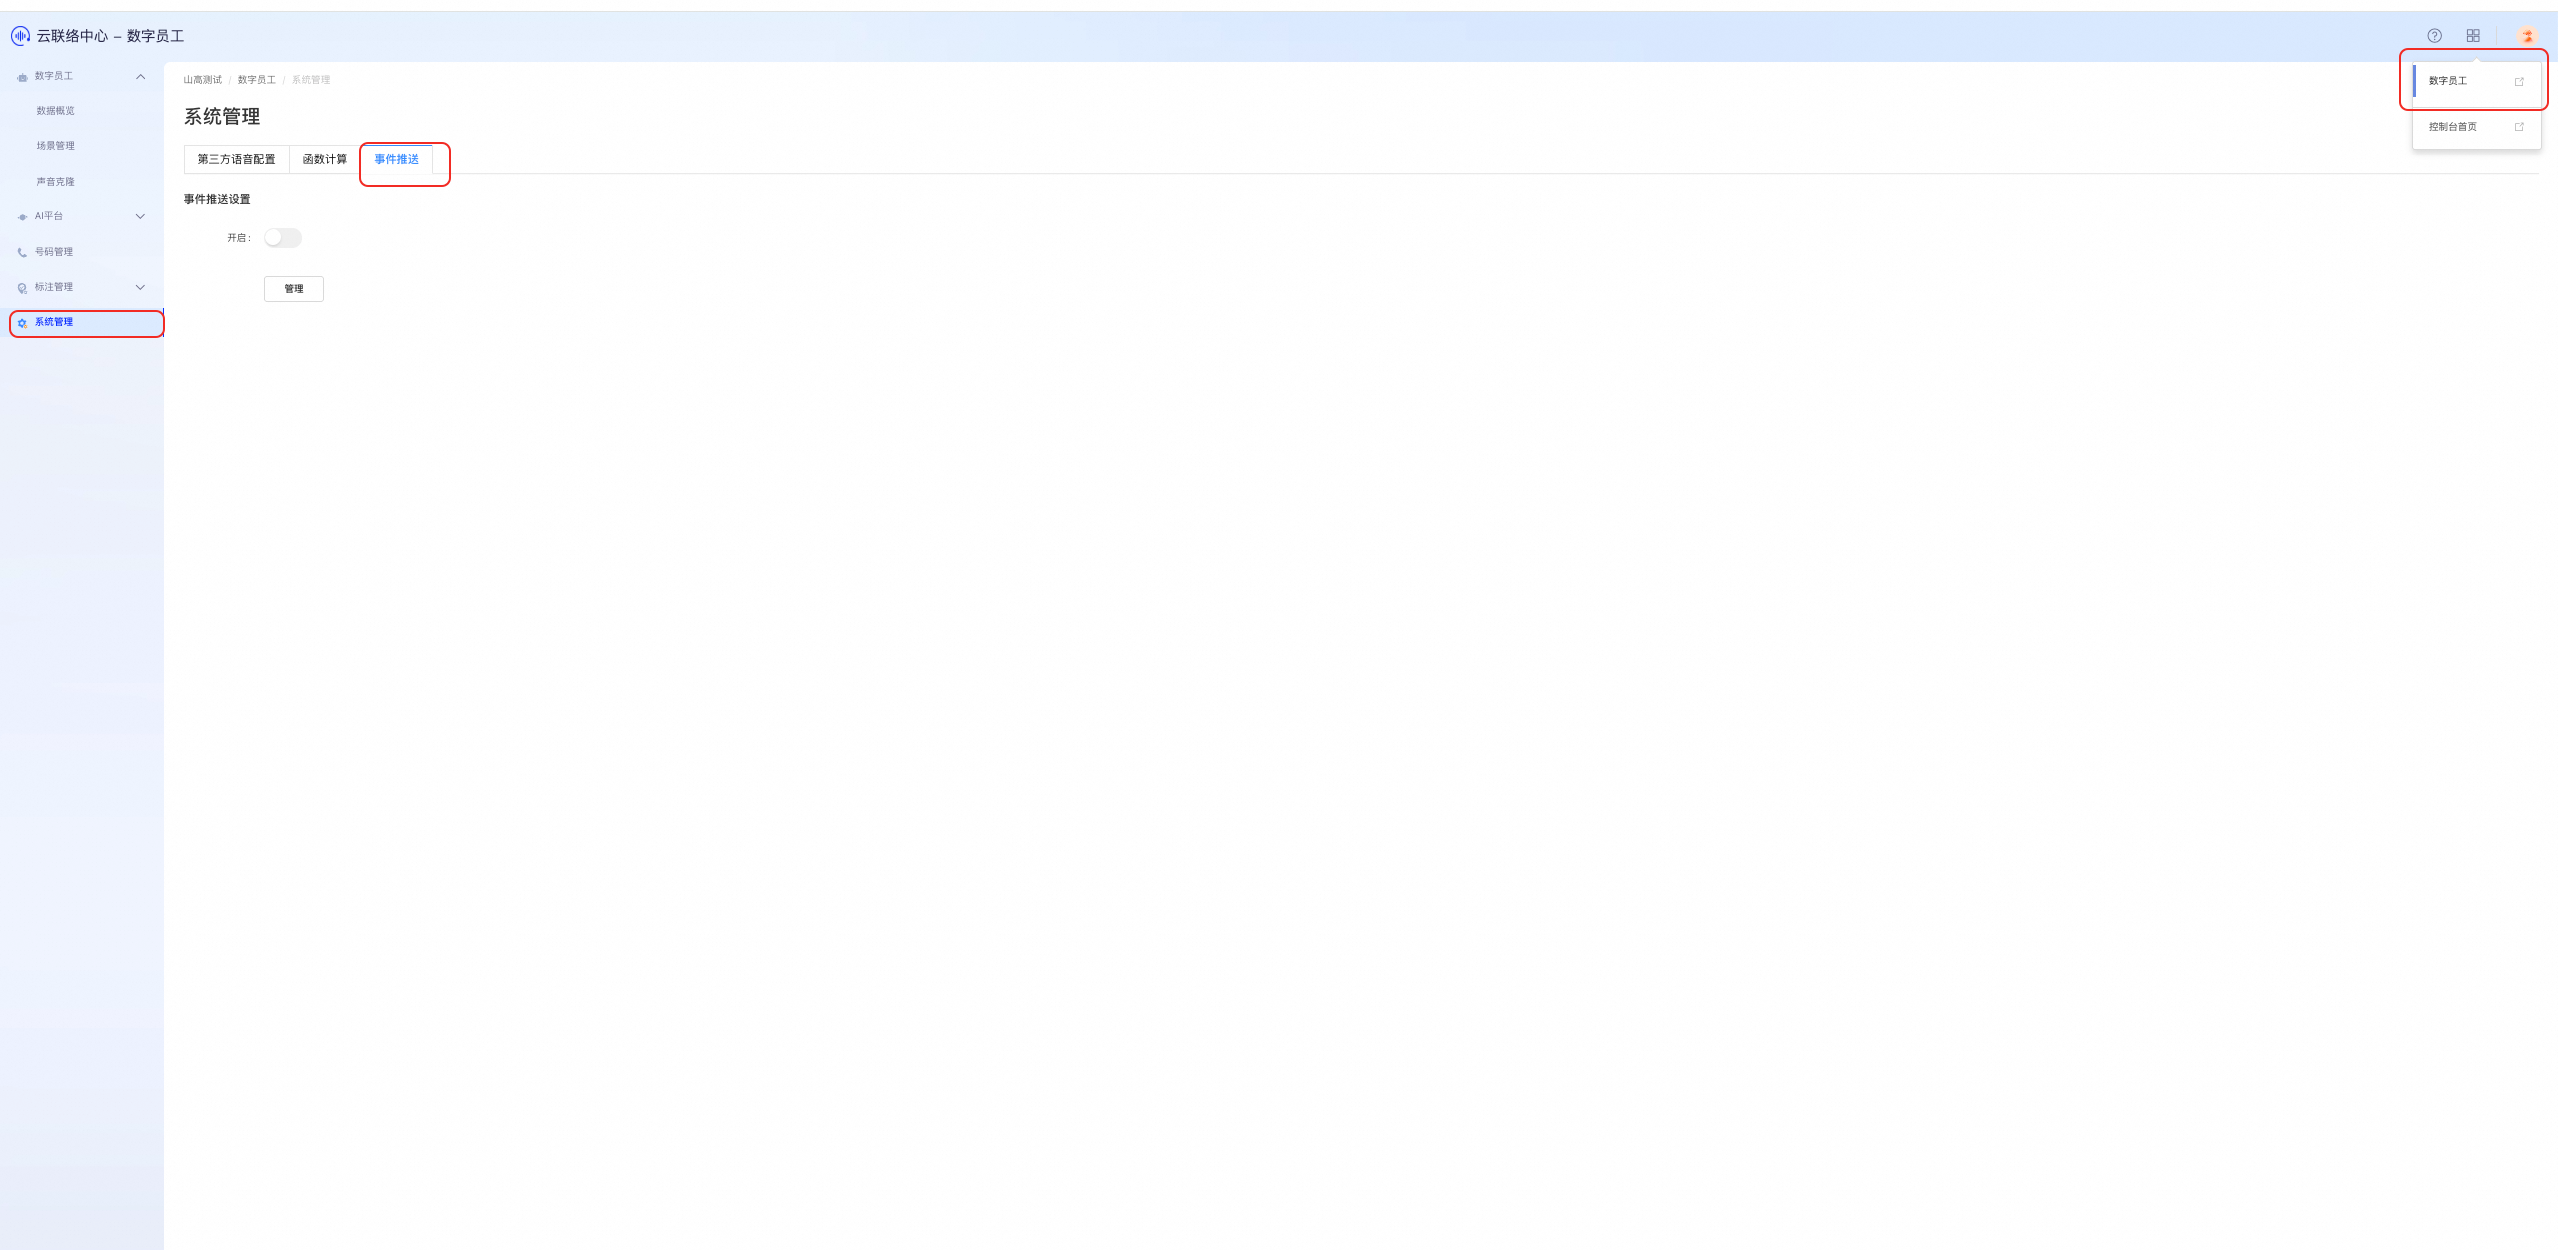
In the upper-right corner of the page, click the menu button. Then, go to the Digital Employee console. In the navigation pane on the left, click System administration .
On the Settings page, click the Event push tab. Click Manage .
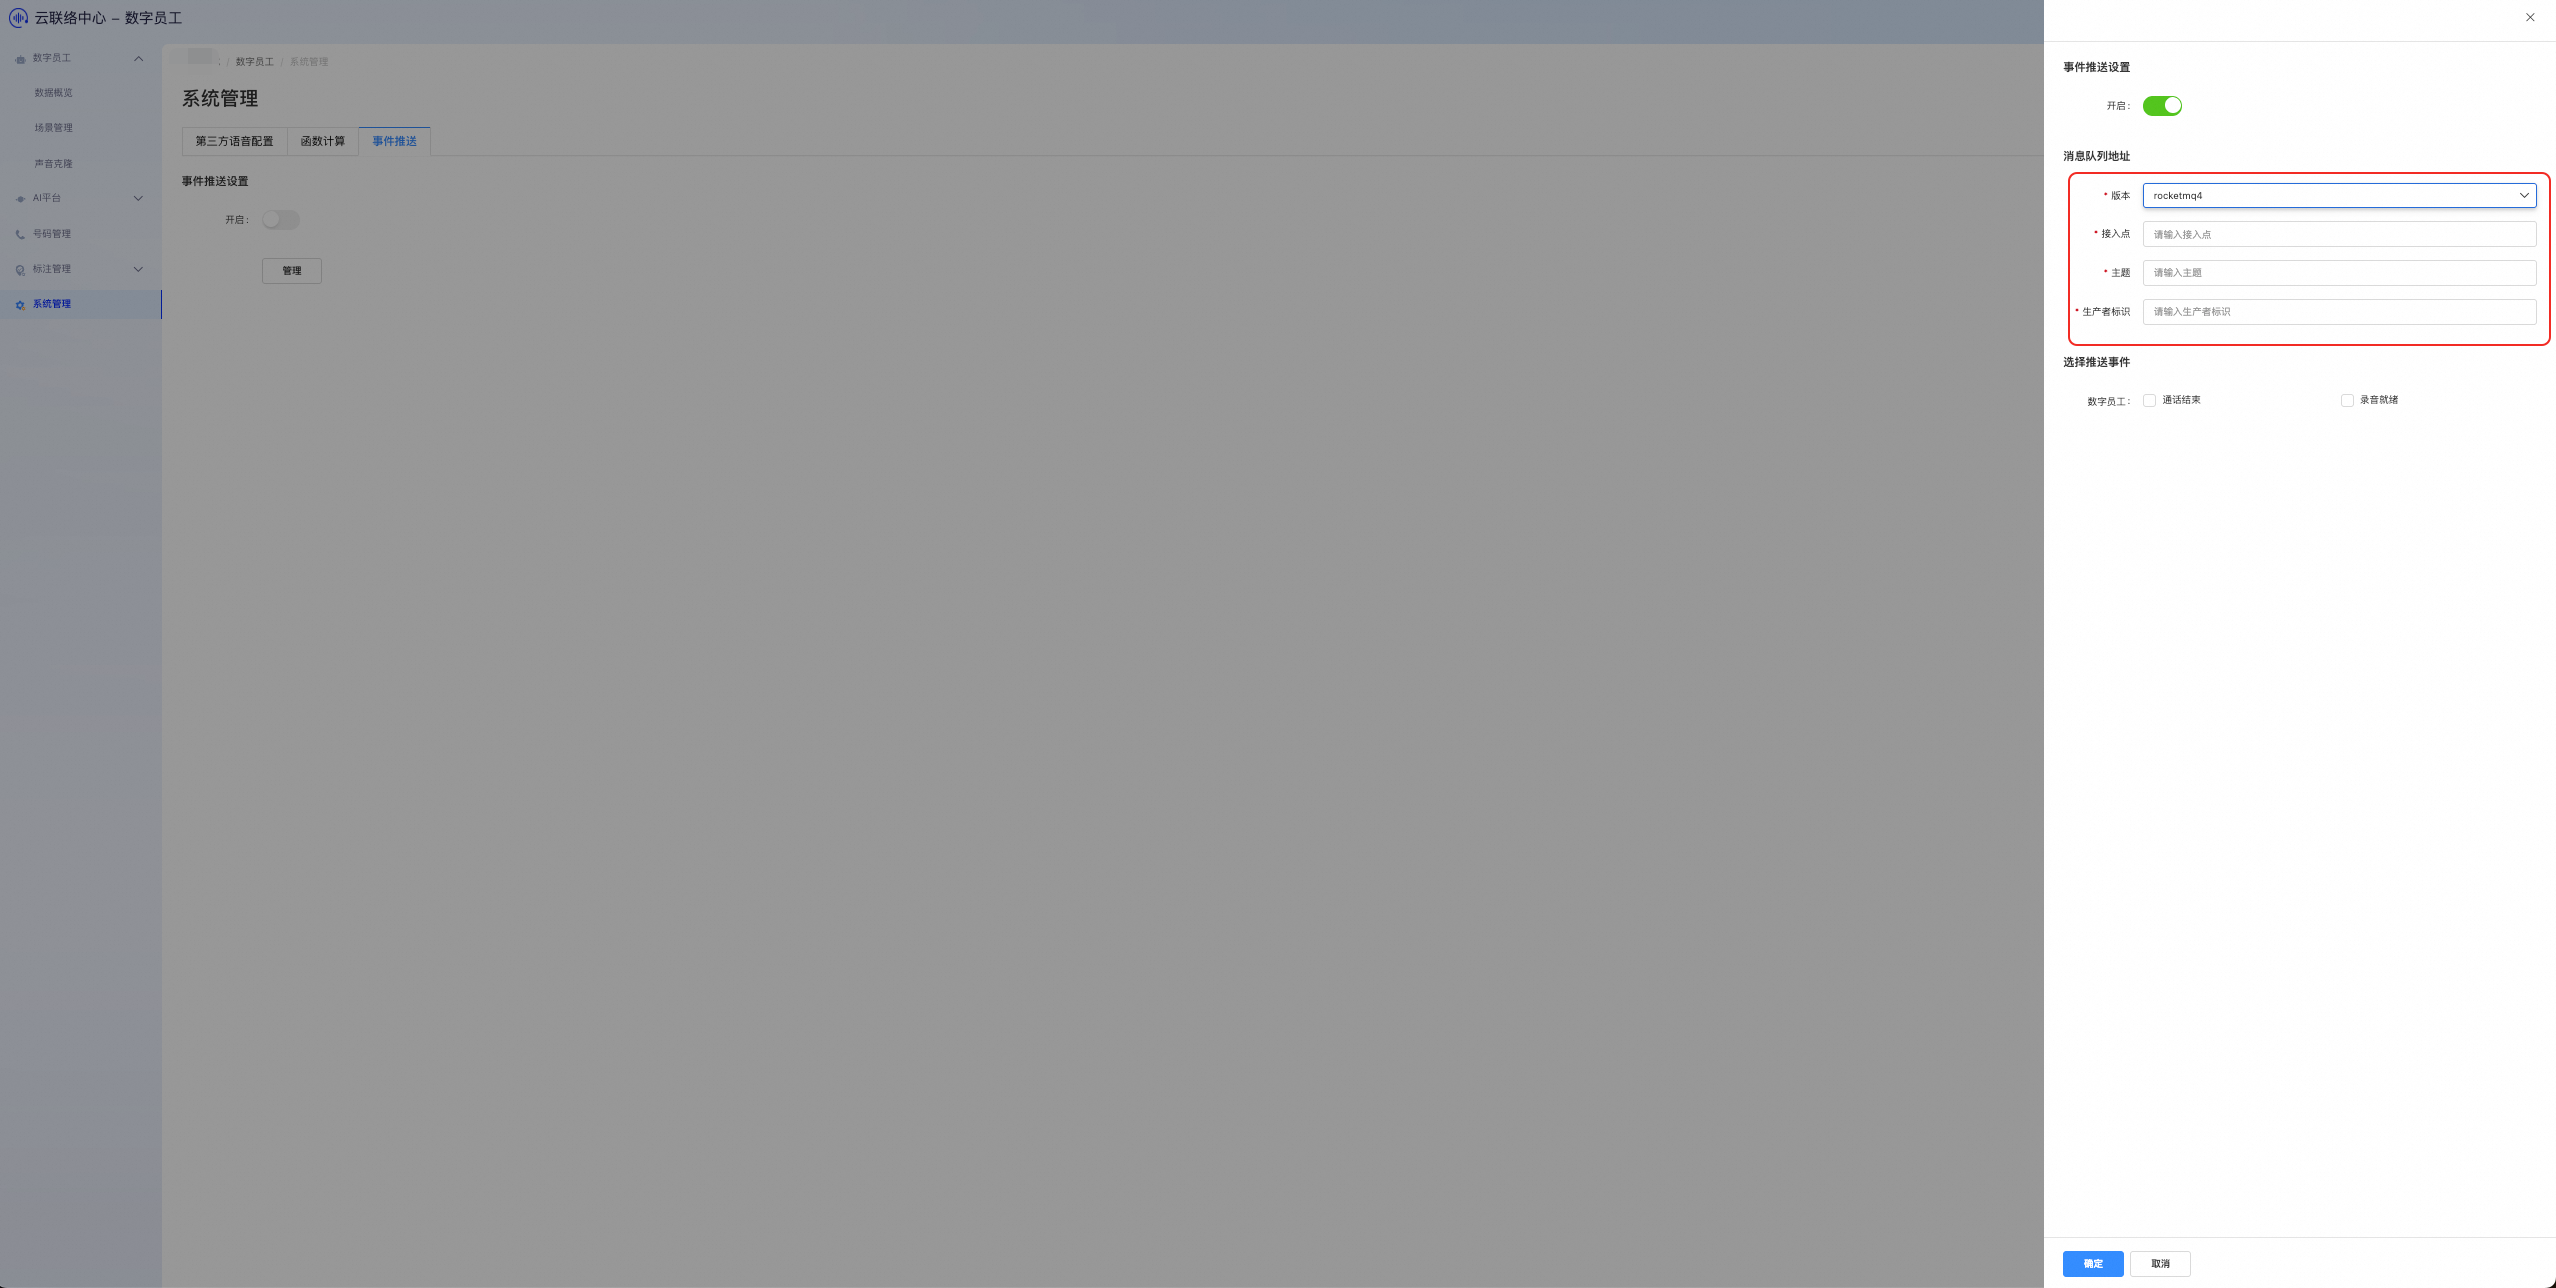
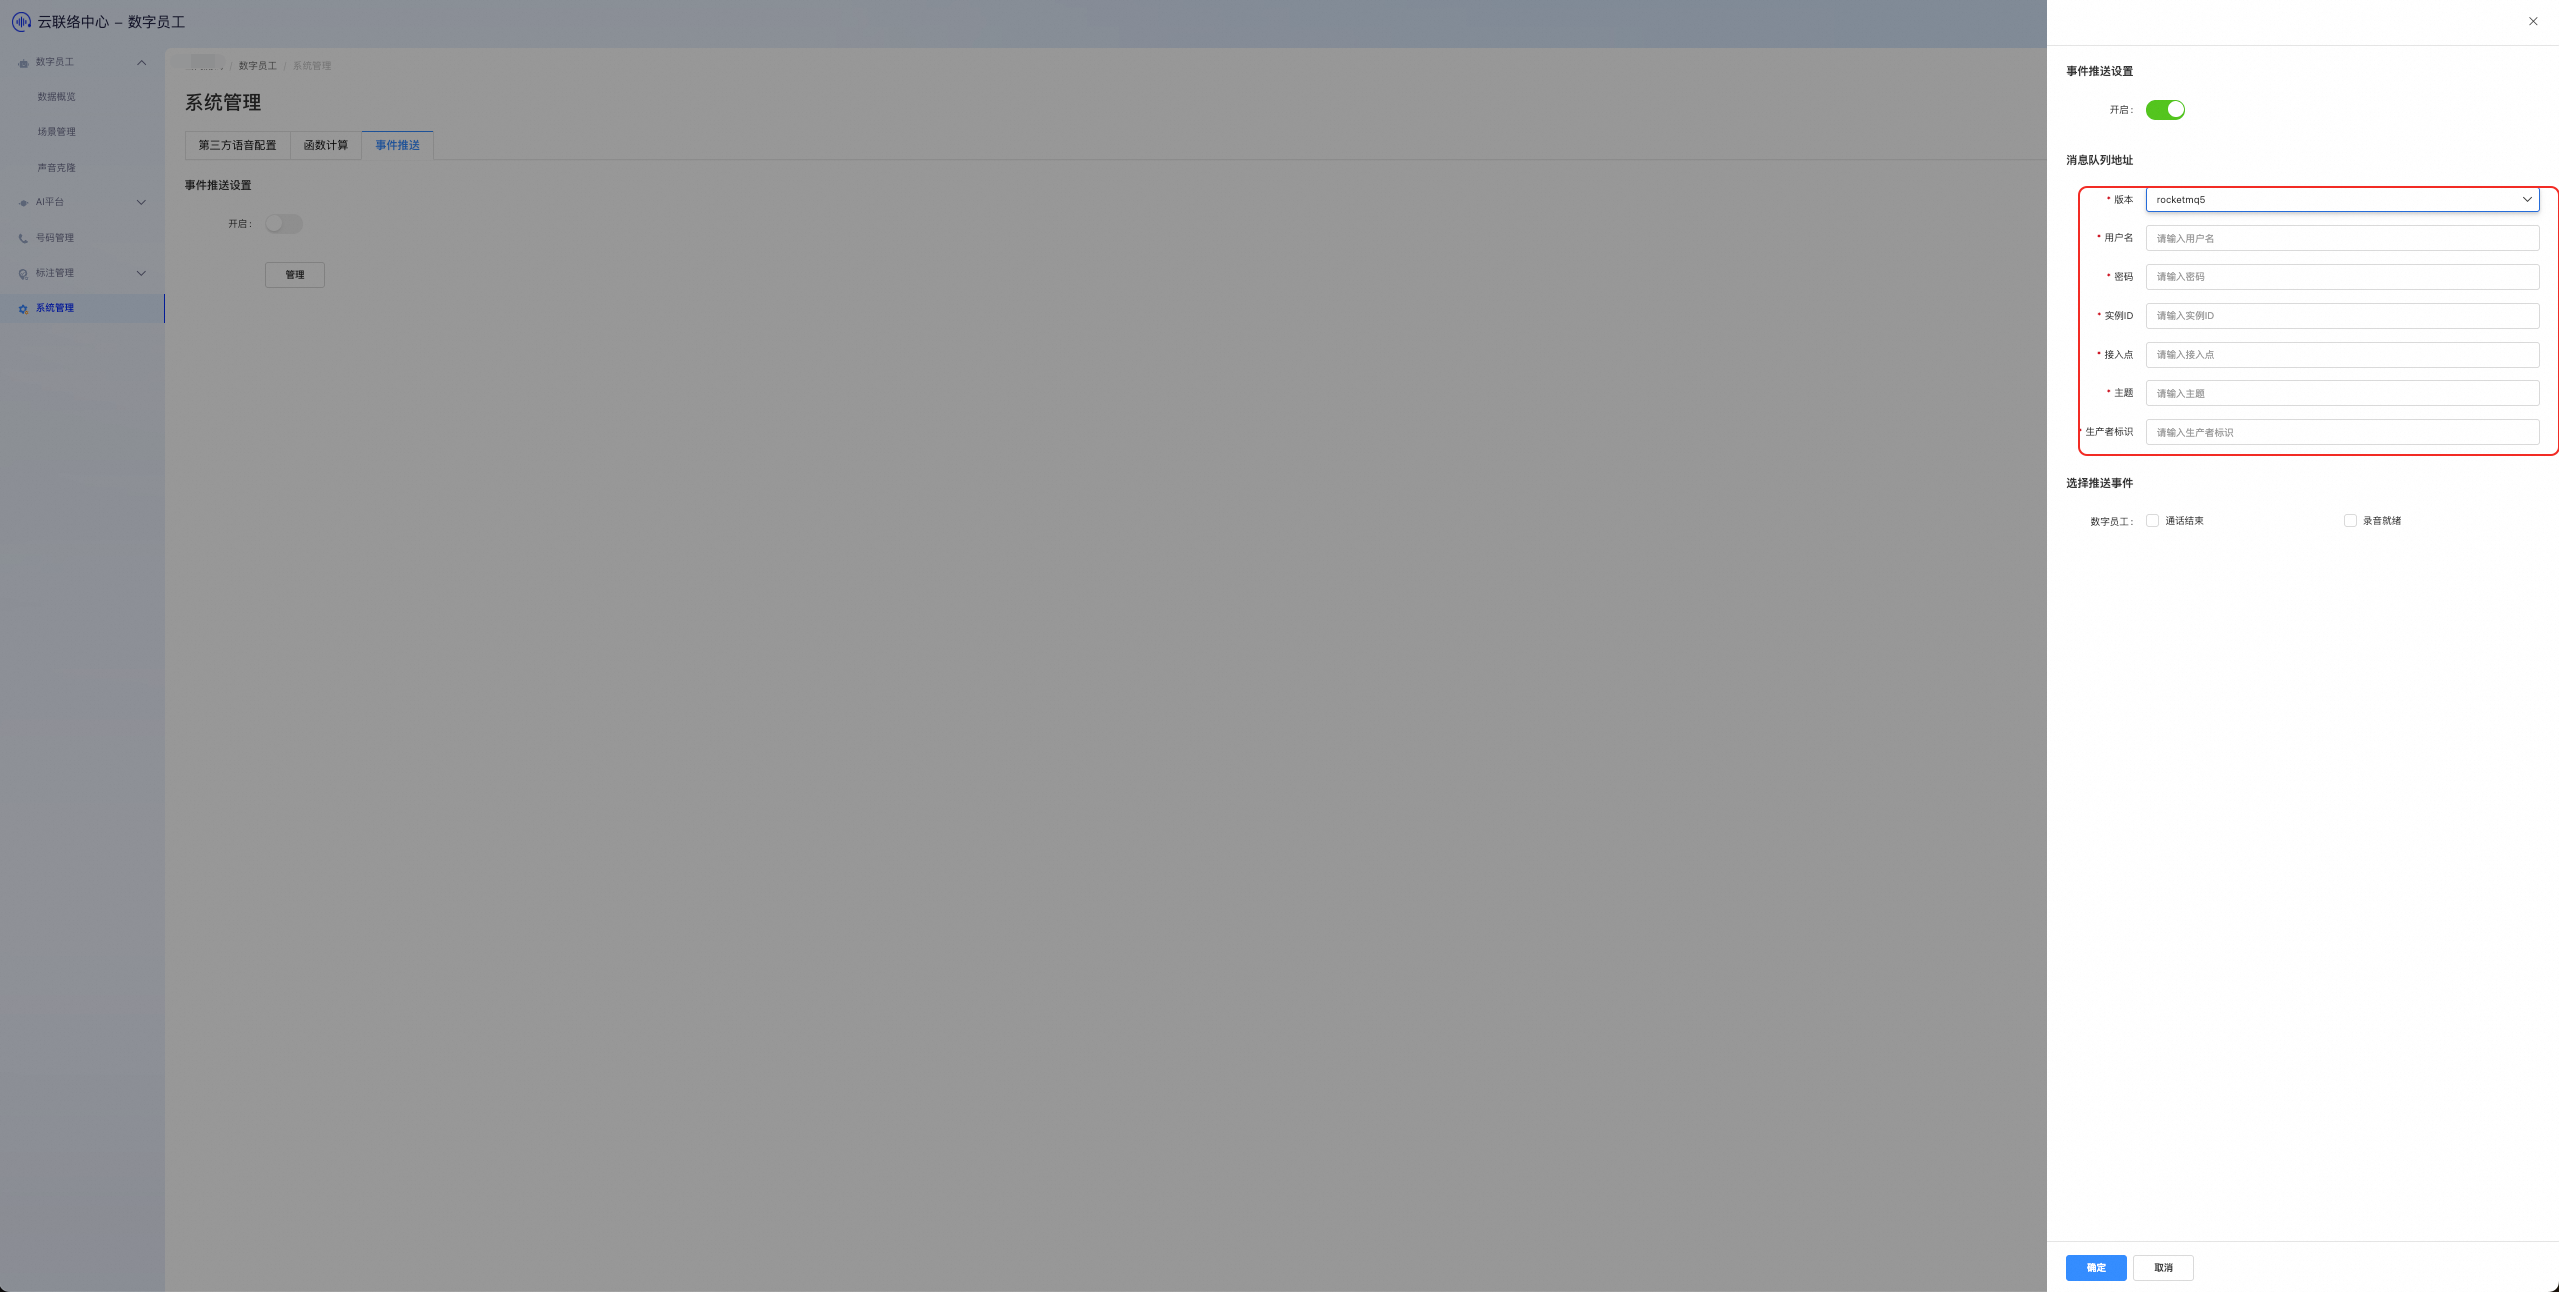
In the panel on the right, click Enable . Select the message queue version. Select the event types to push. Click OK .
If you select RocketMQ 4.0 , enter the instance information: endpoint, topic, and producer identity (Group ID).
If you select RocketMQ 5.0 , enter the information: username, password, instance ID, endpoint, topic, and producer identity.
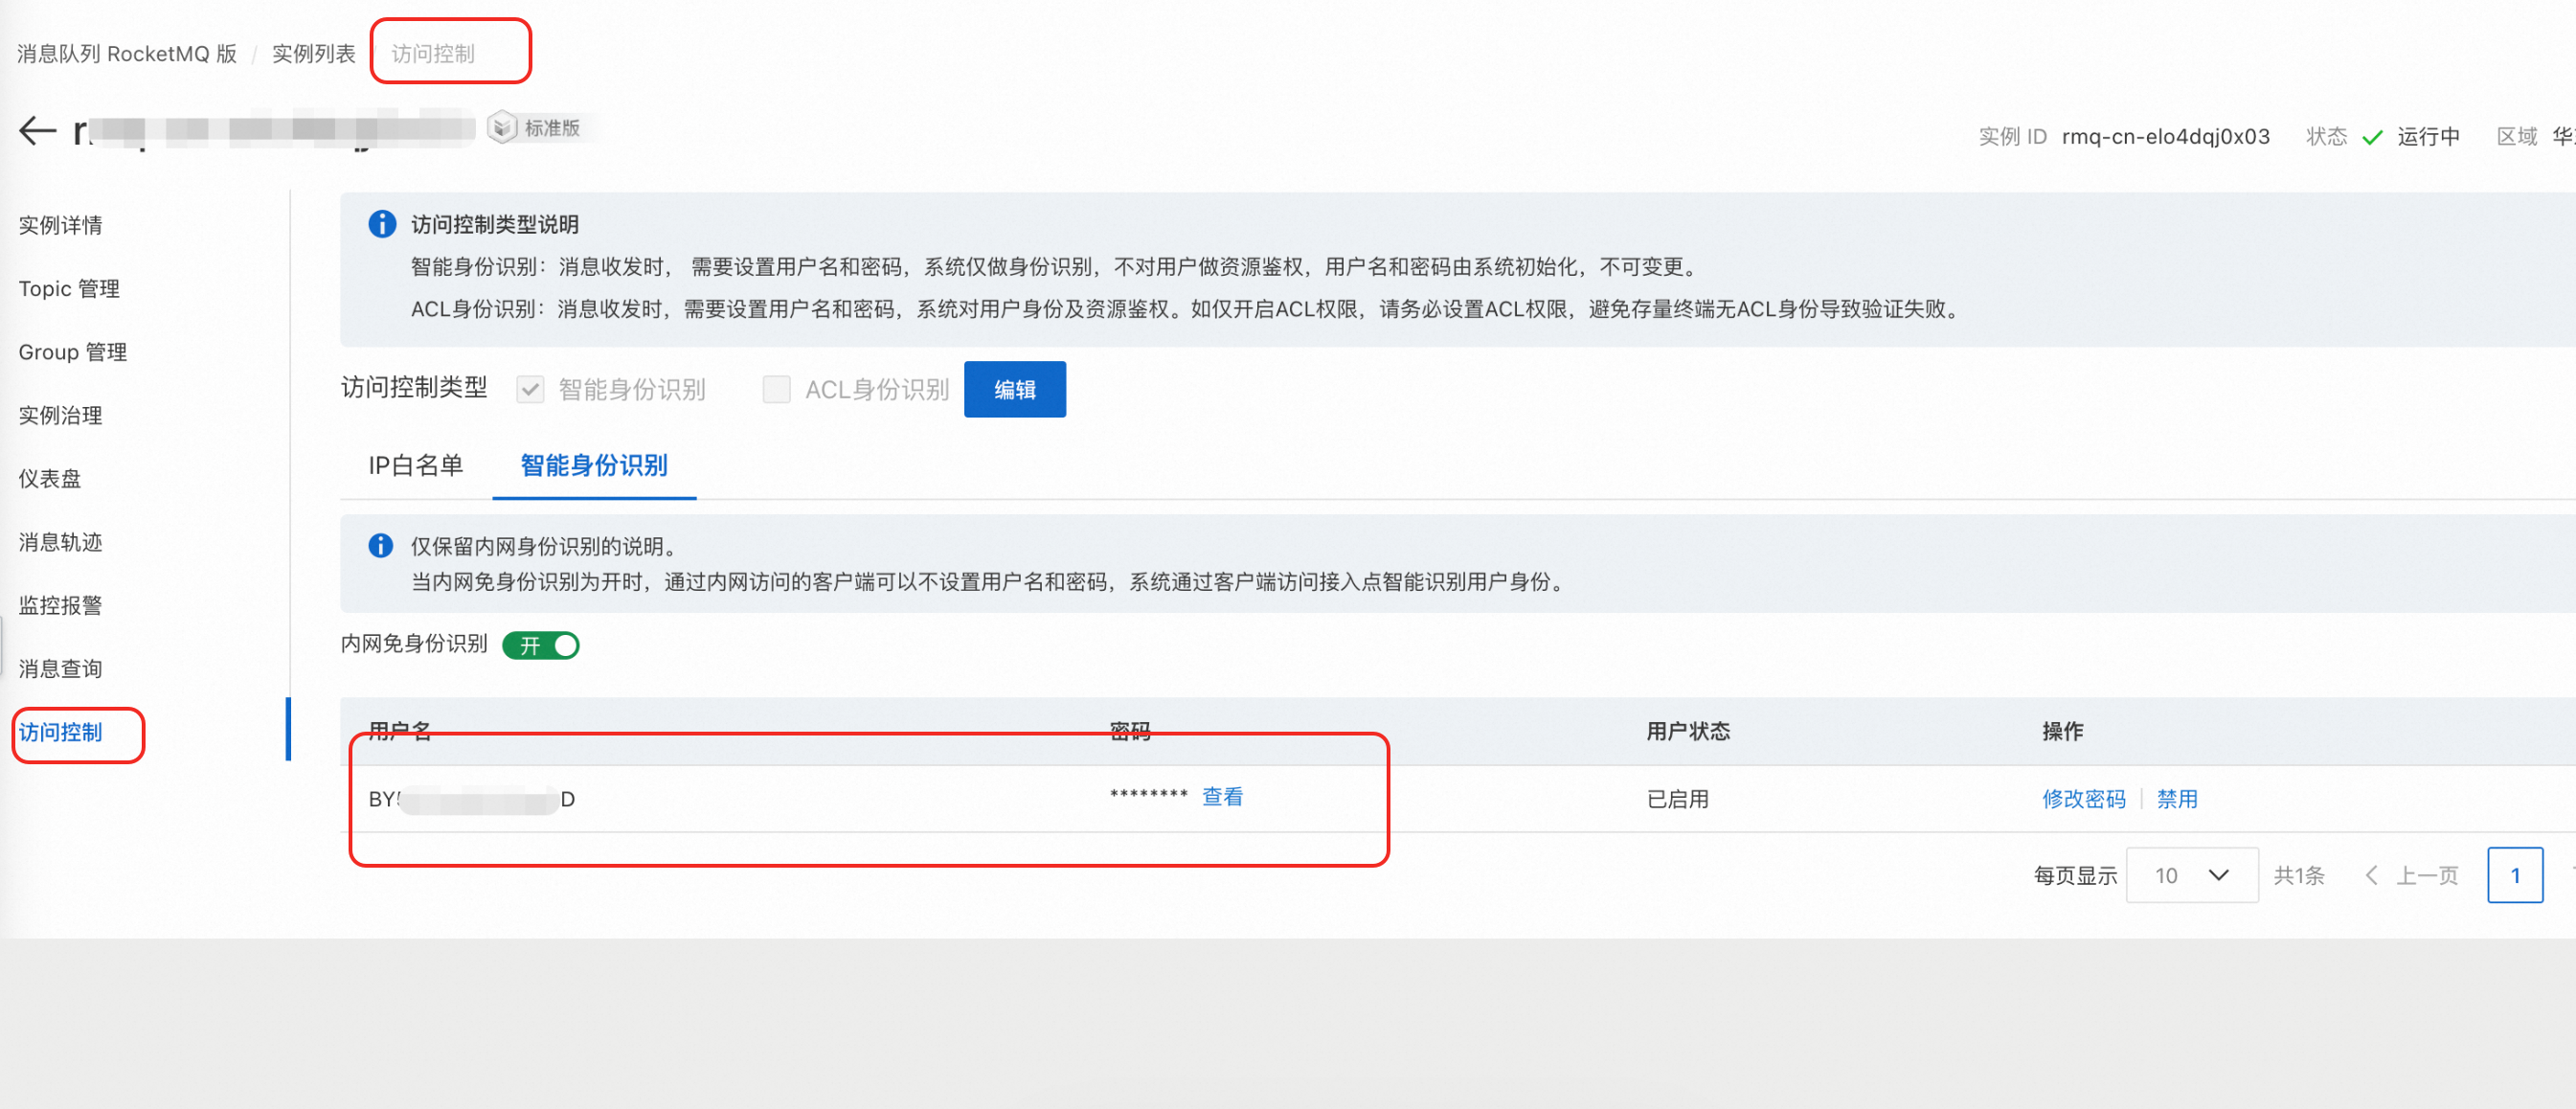
In the navigation pane on the left of the Message Queue instance list, click Access control . Then, click Intelligent Identity Recognition.
Username: Enter the username for your Message Queue service.
Password: Enter the password for your Message Queue service.
Instance ID: Enter the ID of your Message Queue for Apache RocketMQ 5.0 instance.
Topic: Enter the topic for your Message Queue service.
Producer identity: Enter the unique ID for your producer.
ImportantThe producer identity is the GroupID and must start with GID_, GID-, PID_, or PID- upon creation.
Otherwise, an error message appears.
Endpoint: Enter the access endpoint for your Message Queue service.
ImportantIf you change instance information in the Message Queue console—such as the endpoint, topic, or group—update the settings in the Digital Employee console.
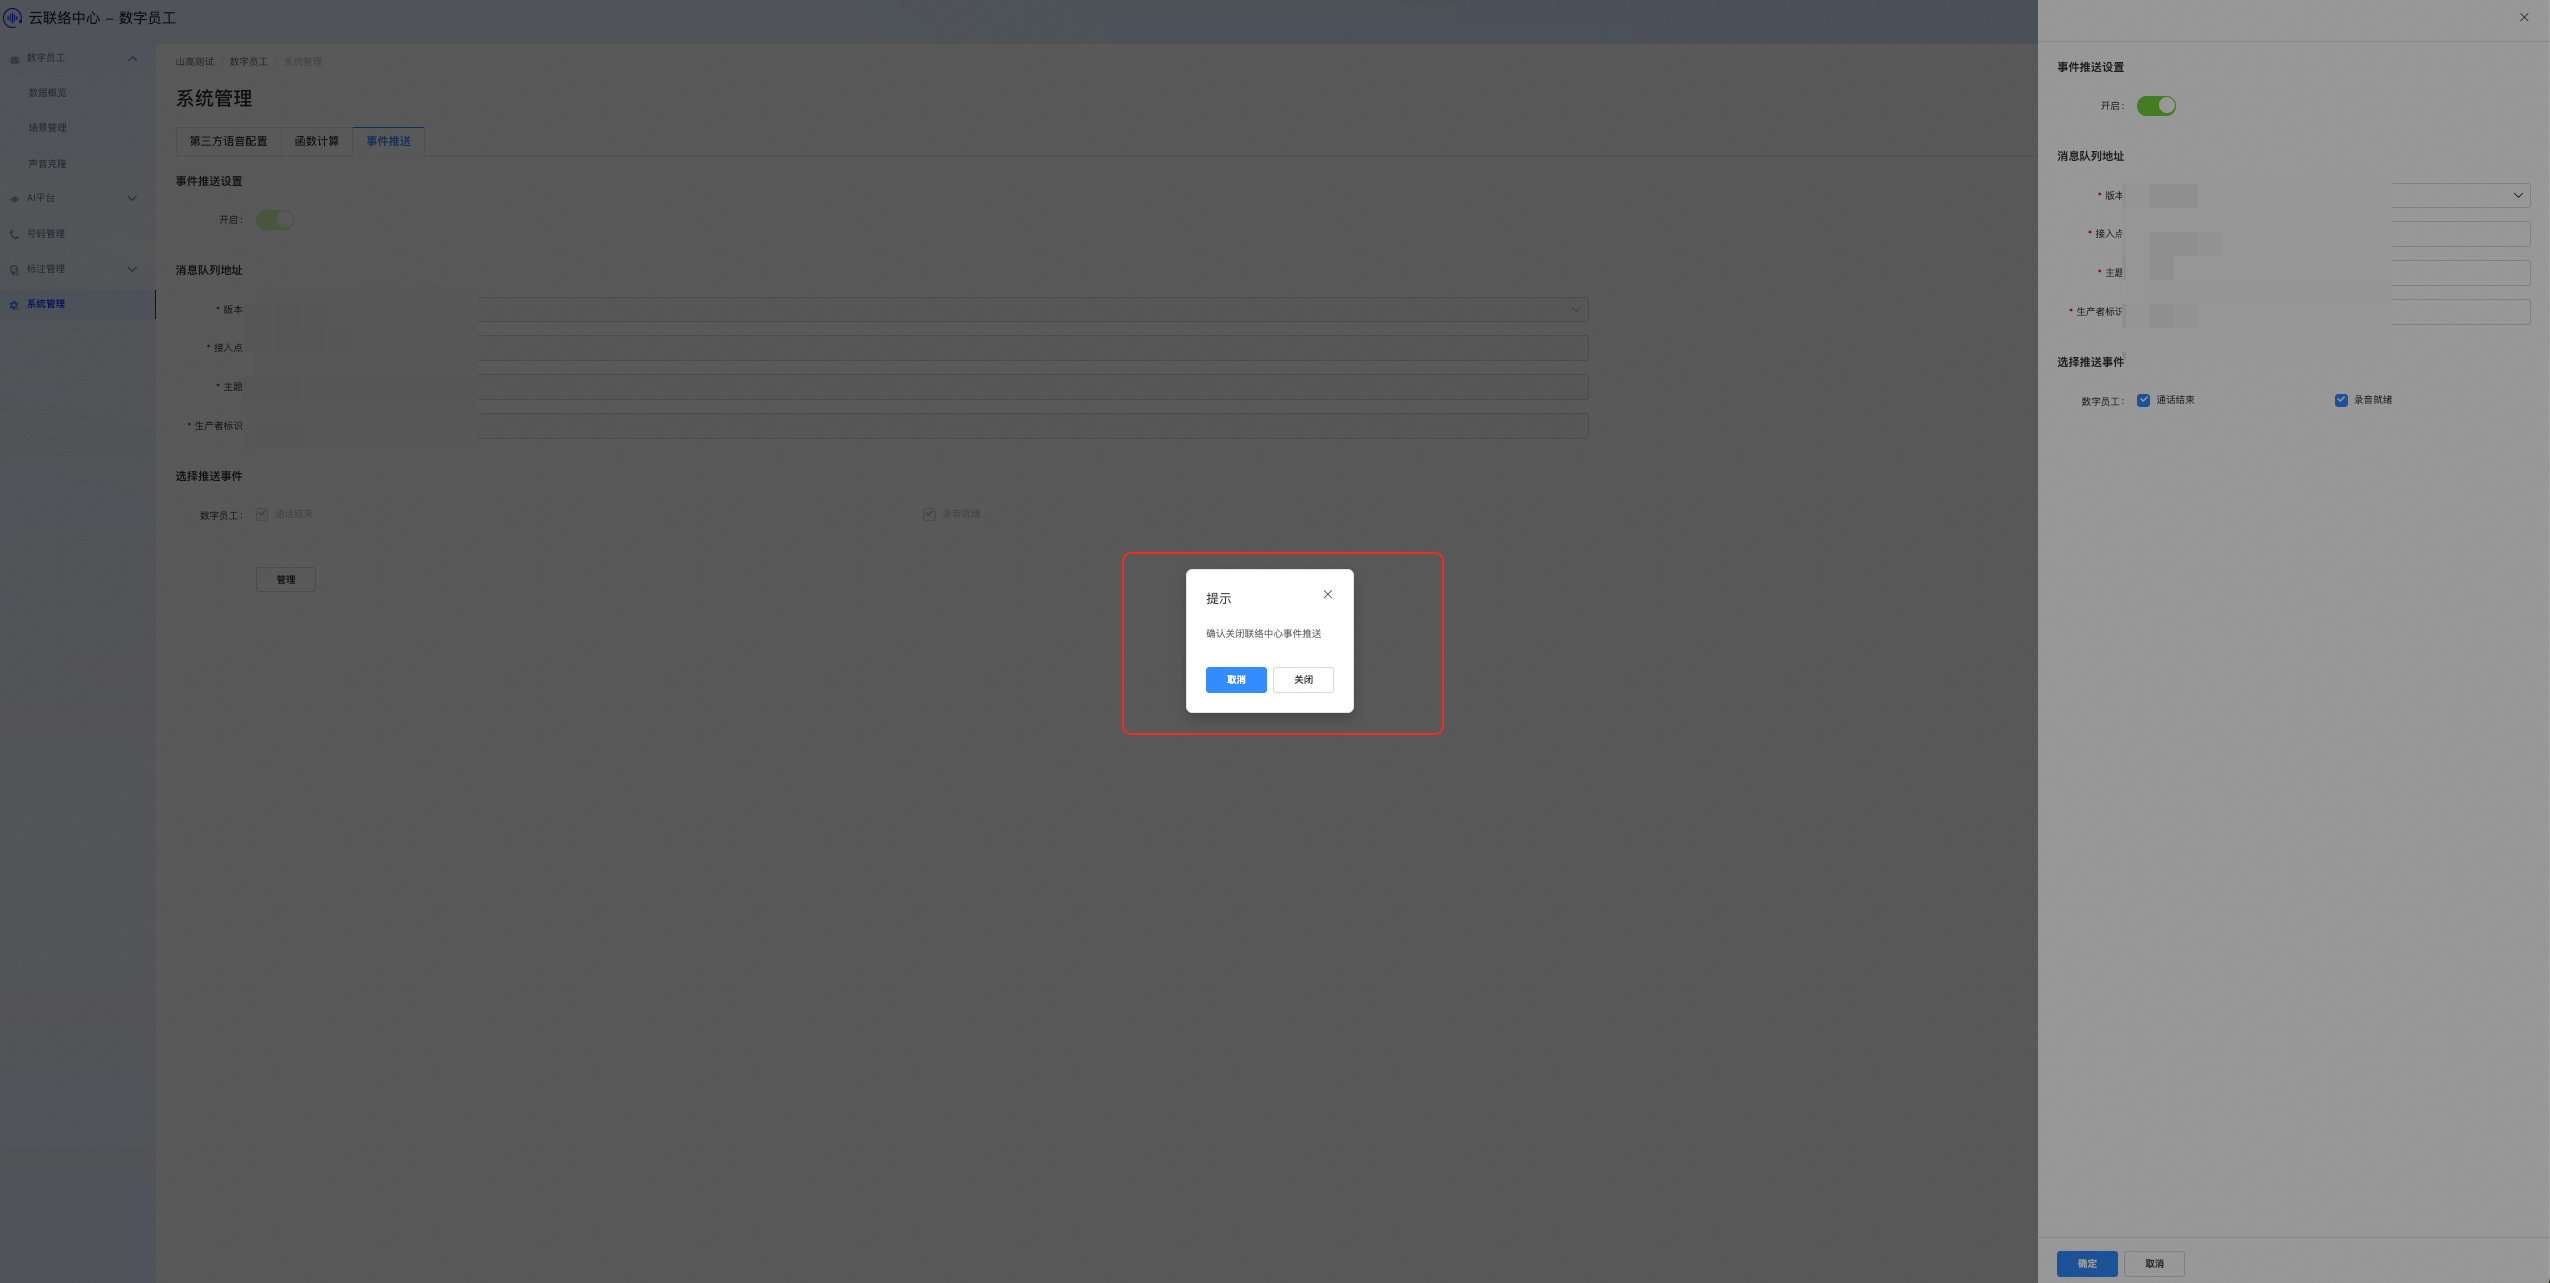
If you stop using a message queue instance, you must disable event push. In the Digital Employee console, go to the instance settings. Click the Disable Event Push button. In the confirmation dialog, click Disable.