Agent management involves setting up, configuring, and managing agents (customer service representatives). This topic describes the operations for managing agents.
Access the feature
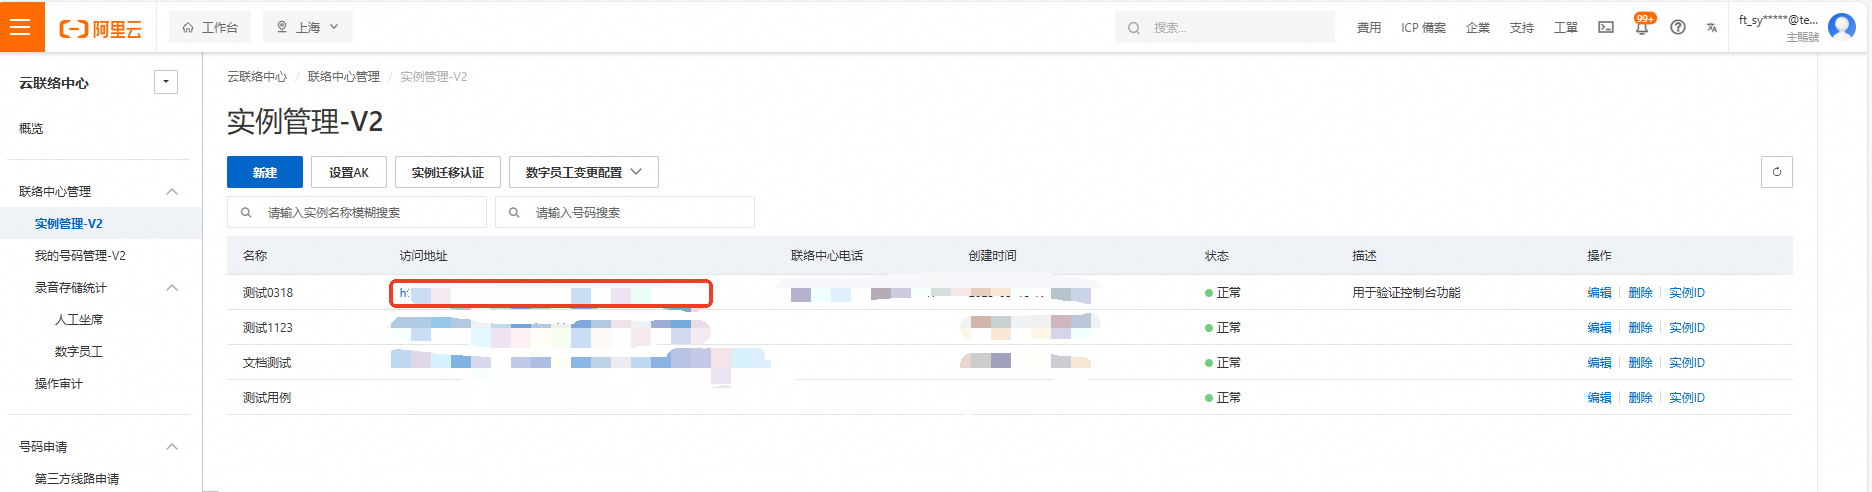
Log on to the Cloud Contact Center console. In the left navigation pane, choose Instance Management - V2. Click the endpoint of a specific instance to enter its console.
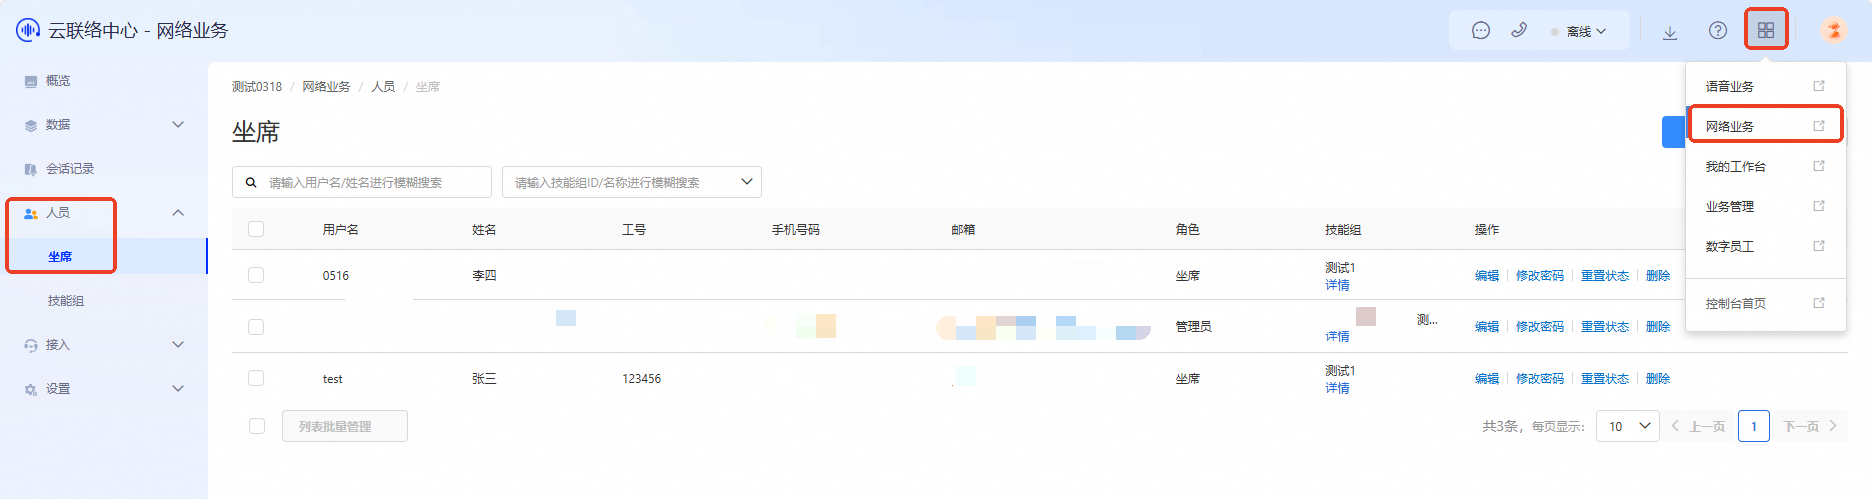
Click the menu button in the upper-right corner of the page and select Web Business to open the Web Business console. In the left navigation pane, choose Personnel > Agents.
Filter
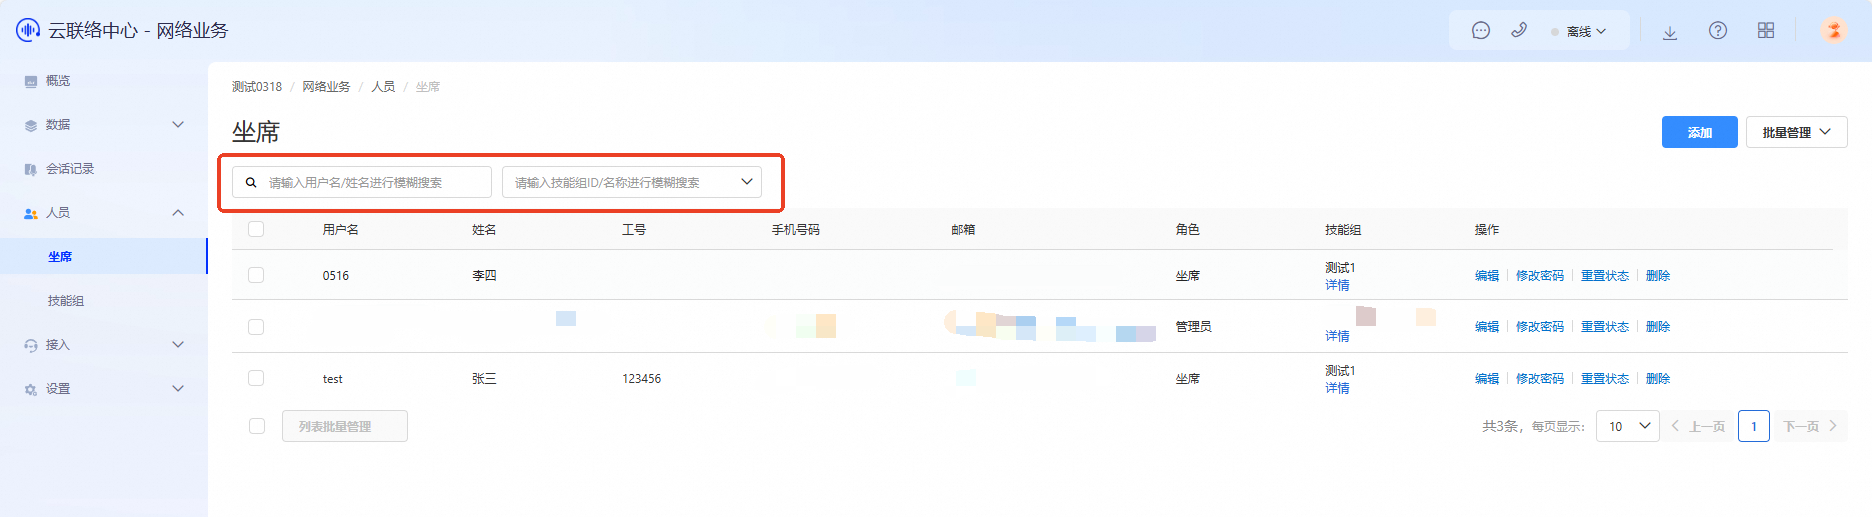
To filter agents, use the username or real name, or the skill group ID or name. Follow these steps:
Filter by username or real name: Enter the agent’s username or real name in the filter field. The system matches the input against the username or real name fields in agent records and displays matching results.
Filter by skill group ID or name: Select a specific skill group ID or name in the filter field. The system filters agent records associated with that skill group and displays matching results.
Add an agent
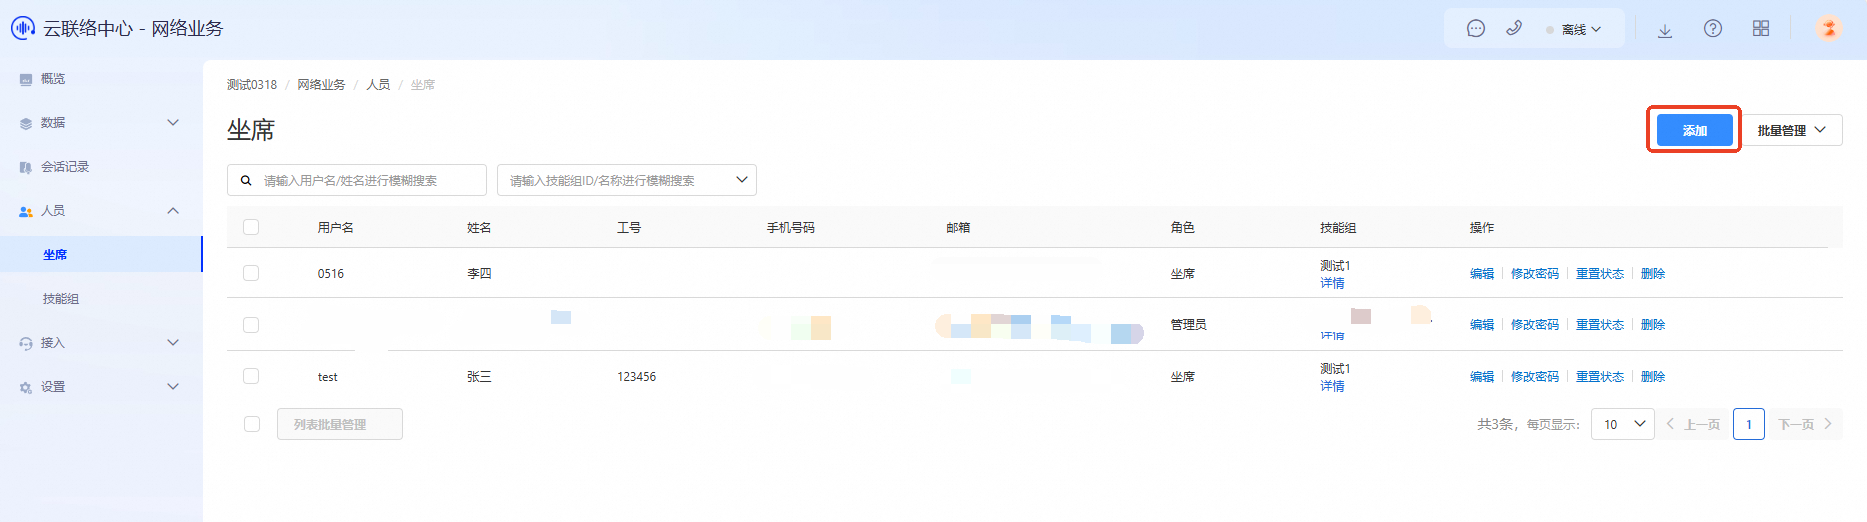
In the agent management interface, click Add to open the Create Agent dialog box. Fill in the following information:
Username: The username the agent uses to log on to the system.
Reset password: Set the agent’s initial password. The agent can change it during their first logon.
Real name: The agent’s full legal name.
Employee ID: A unique ID assigned to the agent within the organization.
Mobile phone number or landline: The agent’s contact phone number.
Email: The agent’s email address.
Role: Assign a role to the agent. Common roles include Administrator, Agent, and Skill Group Leader. Administrators have full permissions to manage the system and other users. Agents are standard customer service personnel. Skill Group Leaders manage specific skill groups.
After filling in the details, click OK.
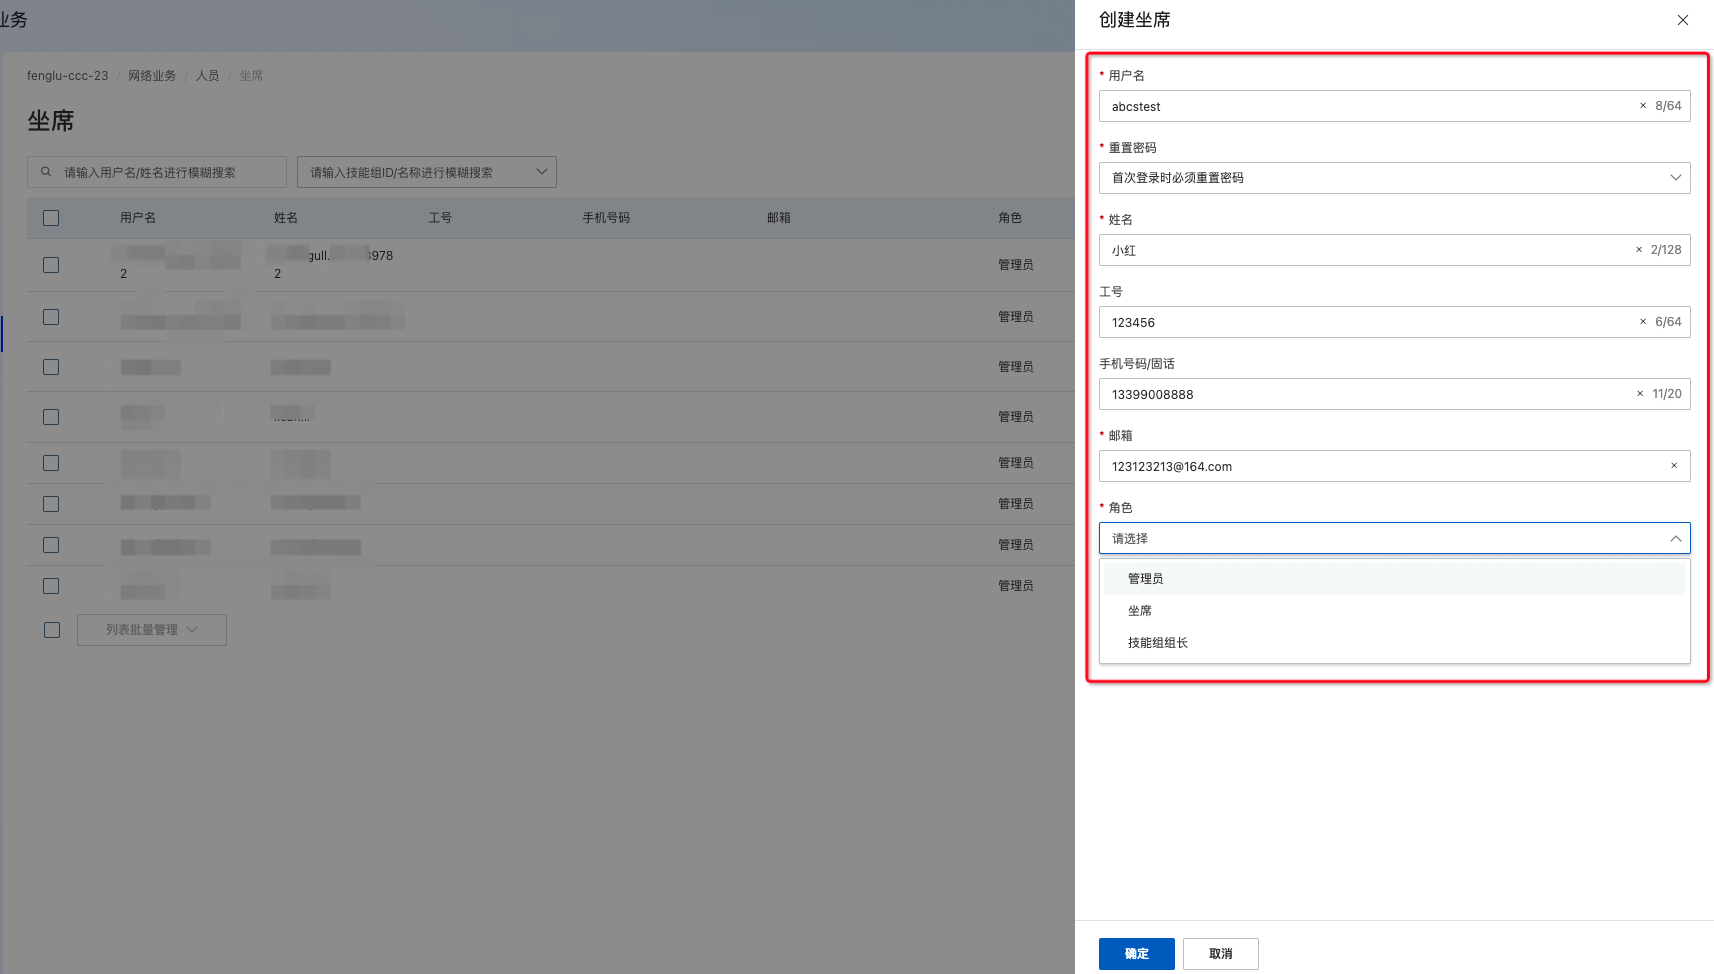
Fields marked with an asterisk (*) are required.
Batch management
Import RAM users in batch
Import other sub-accounts under your Alibaba Cloud account into the current Cloud Contact Center instance.
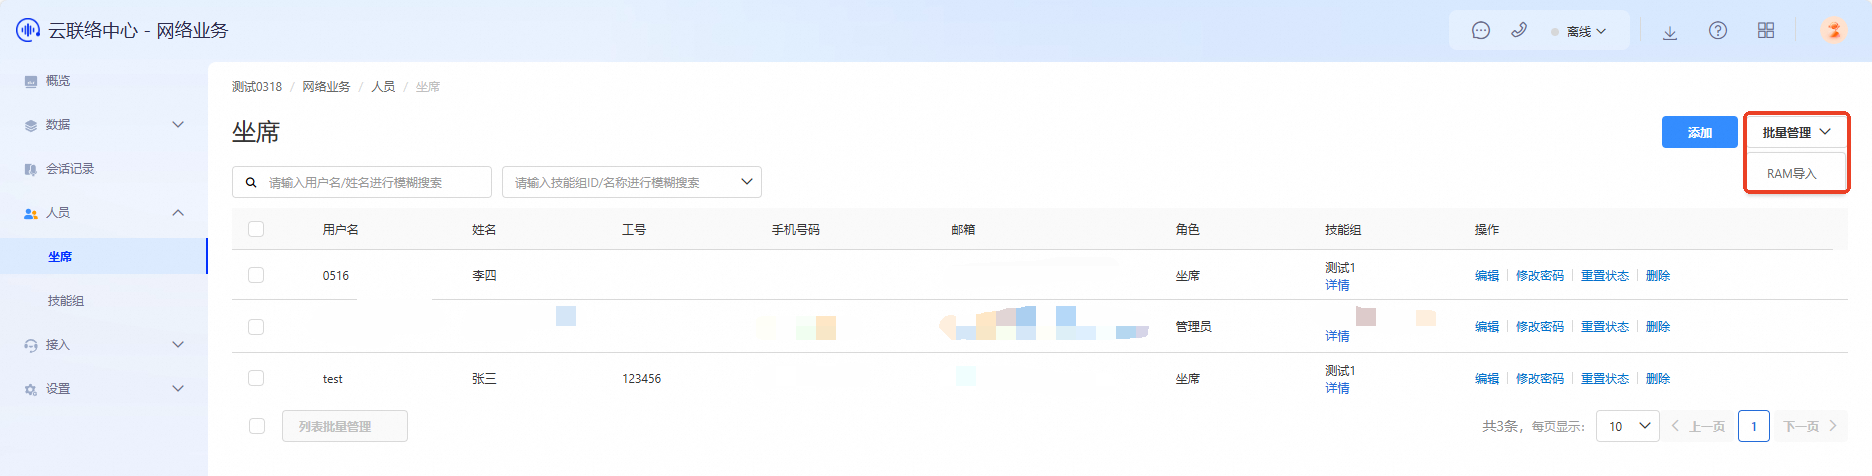
In the Agents interface, click Batch Management and select RAM Import.

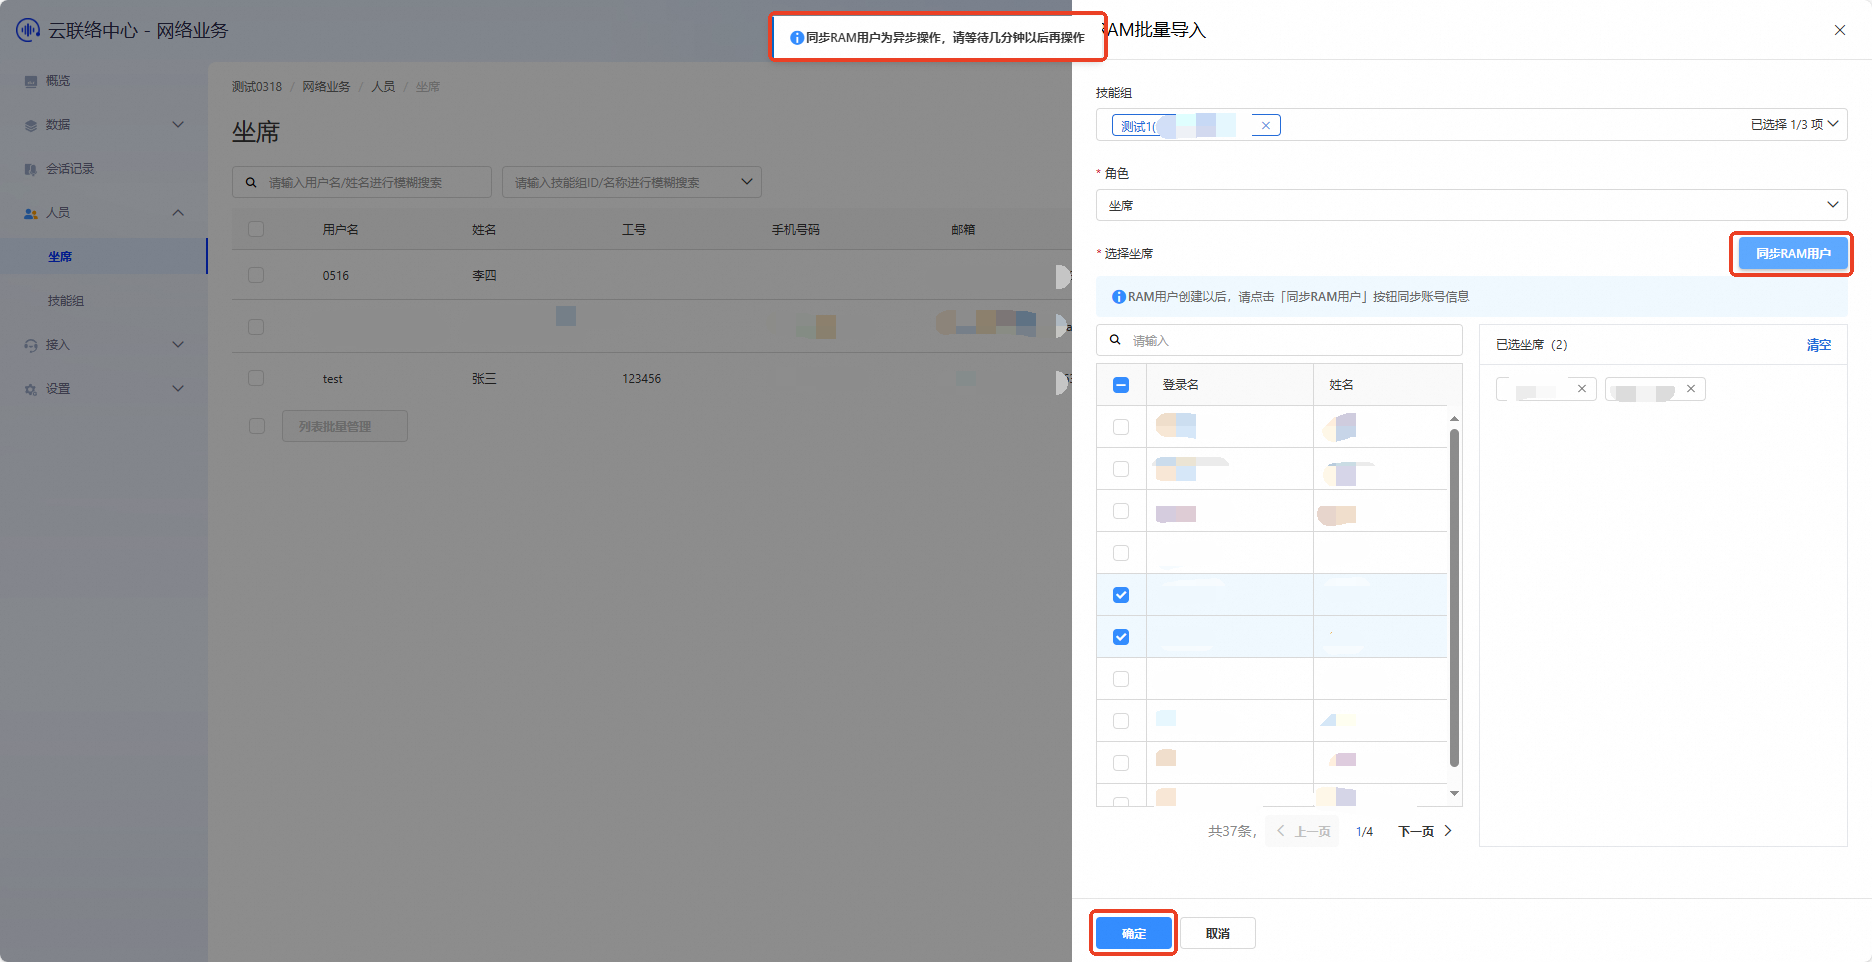
The panel on the right displays all users under your Alibaba Cloud account (excluding users already present in the current Cloud Contact Center instance).
Click Sync RAM Users to sync RAM users into the agent selection box.
ImportantIf you see the message “Syncing RAM users is an asynchronous operation. Wait a few minutes before trying again” after clicking Sync RAM Users, this is normal. Syncing RAM users may involve a delay.
Select the users you want to import, assign them to a skill group, and set their roles. Click OK to import the users into the current Cloud Contact Center instance.
Edit agent skill groups
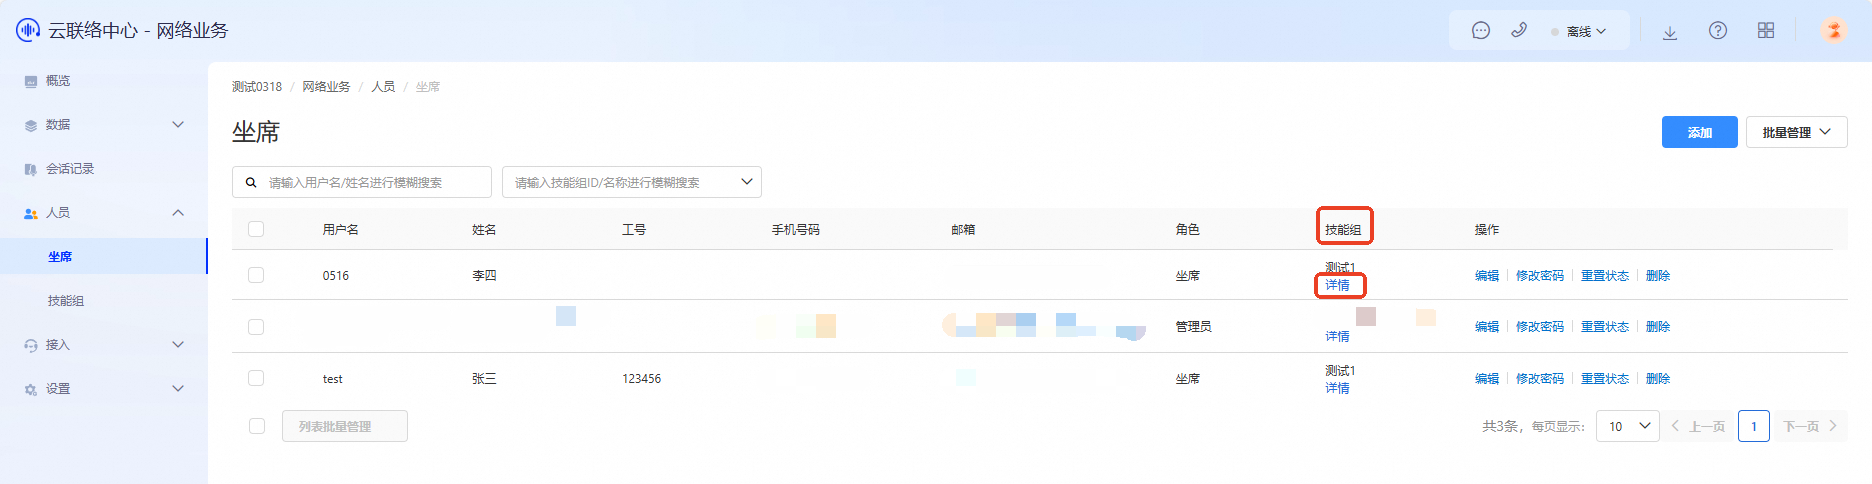
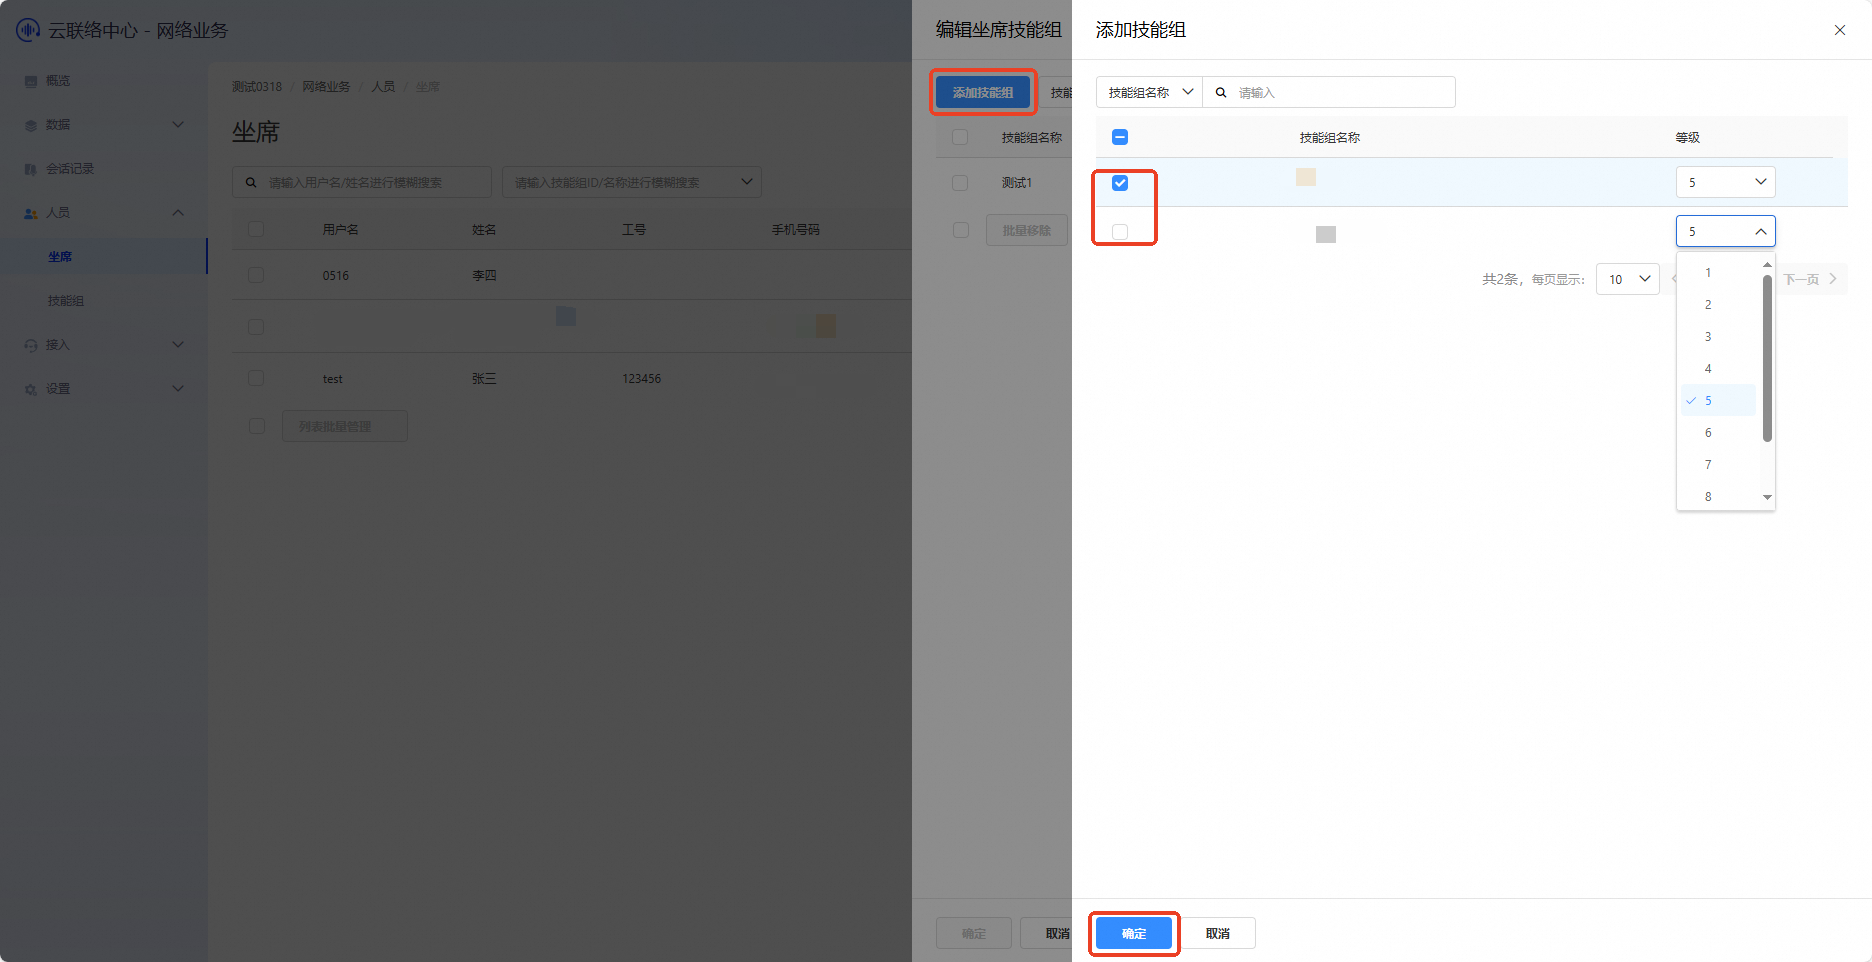
Click Details in the Skill Group column of the agent list to open the Edit Agent Skill Groups interface.
Click “Add Skill Group” to add the skill groups you need.
Set the skill group level based on your business needs. The skill group level is an identifier used to classify skill groups according to their responsibilities and permissions in your business operations.
Edit an agent
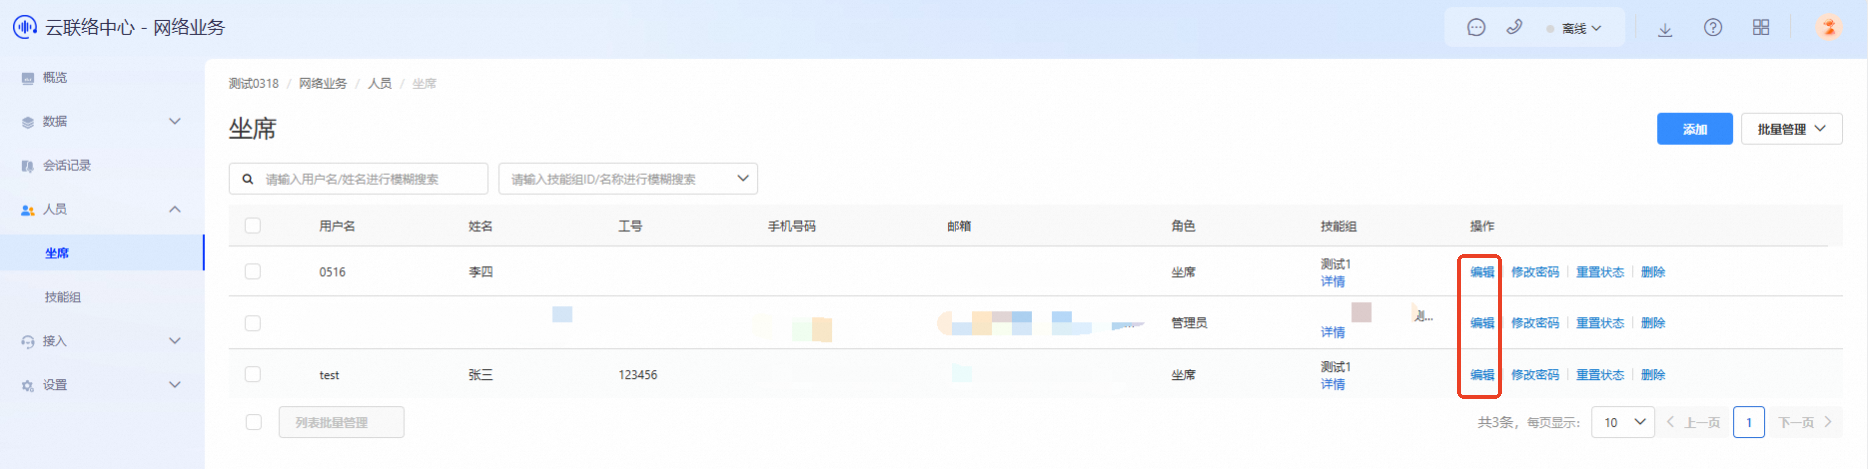
Click Edit in the Actions column of the agent list to open the agent editing interface. After making changes, click OK to save.
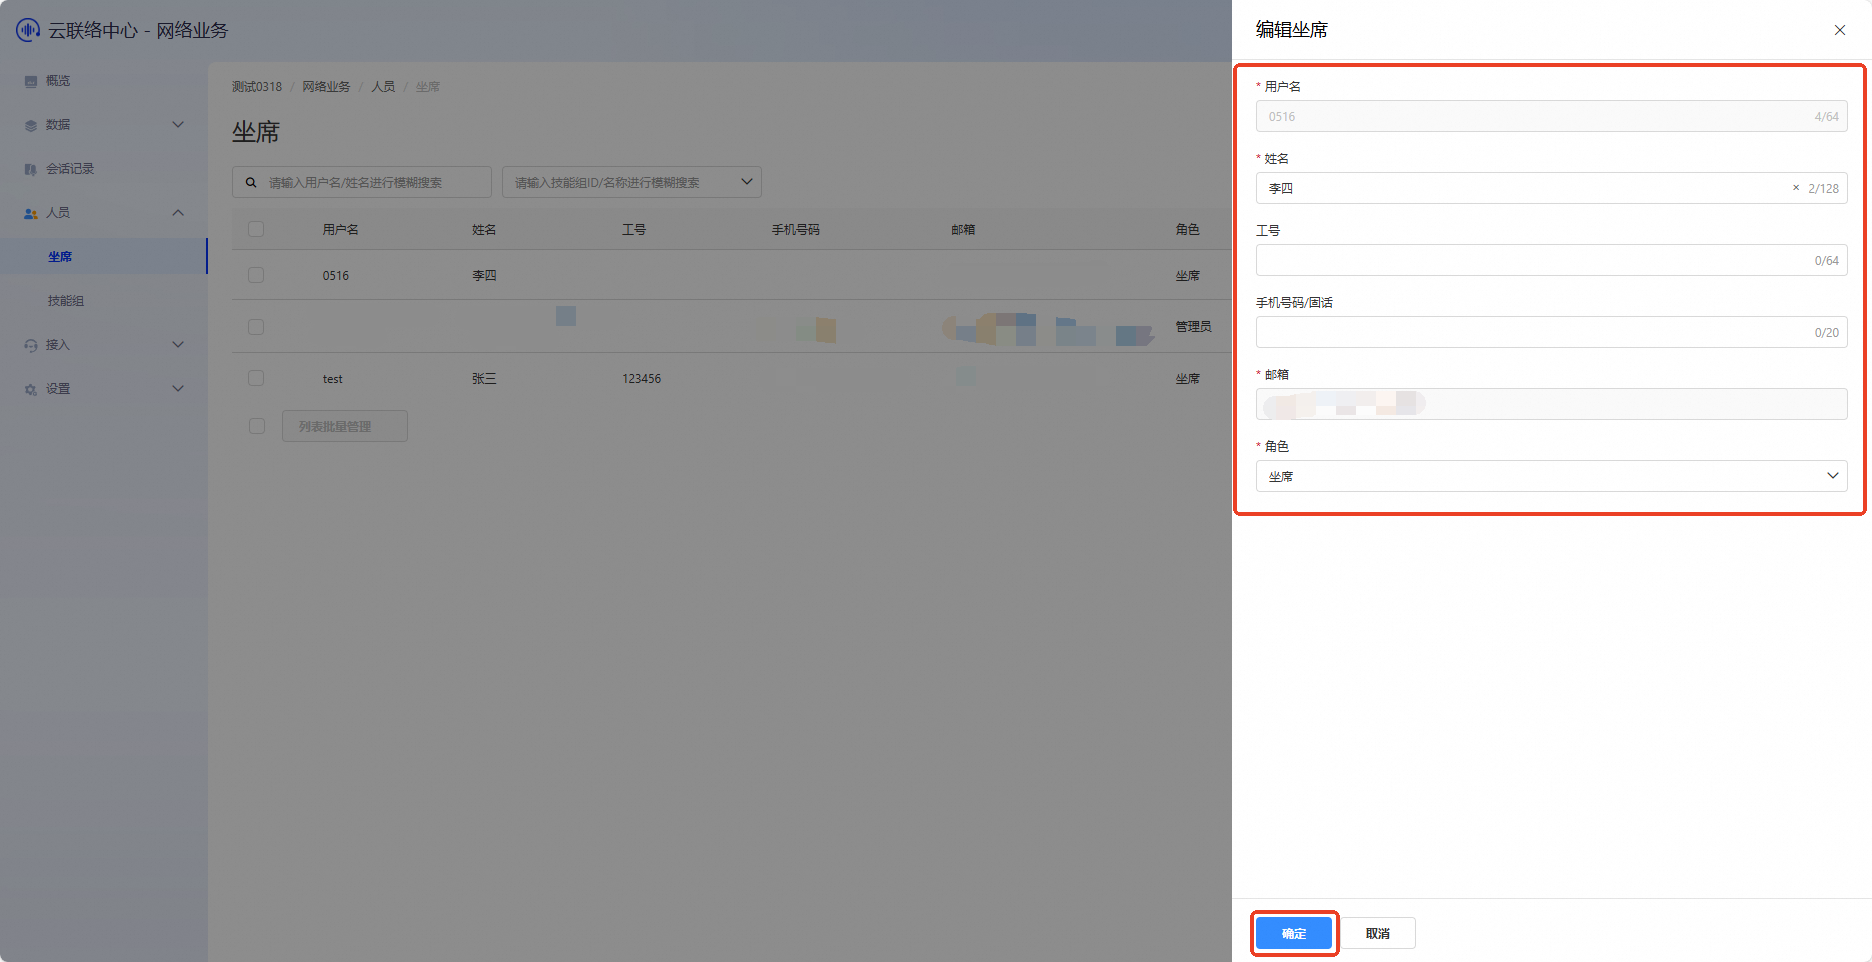
You can currently only edit the Employee ID, Mobile Phone Number or Landline, and Role.
Delete a skill group
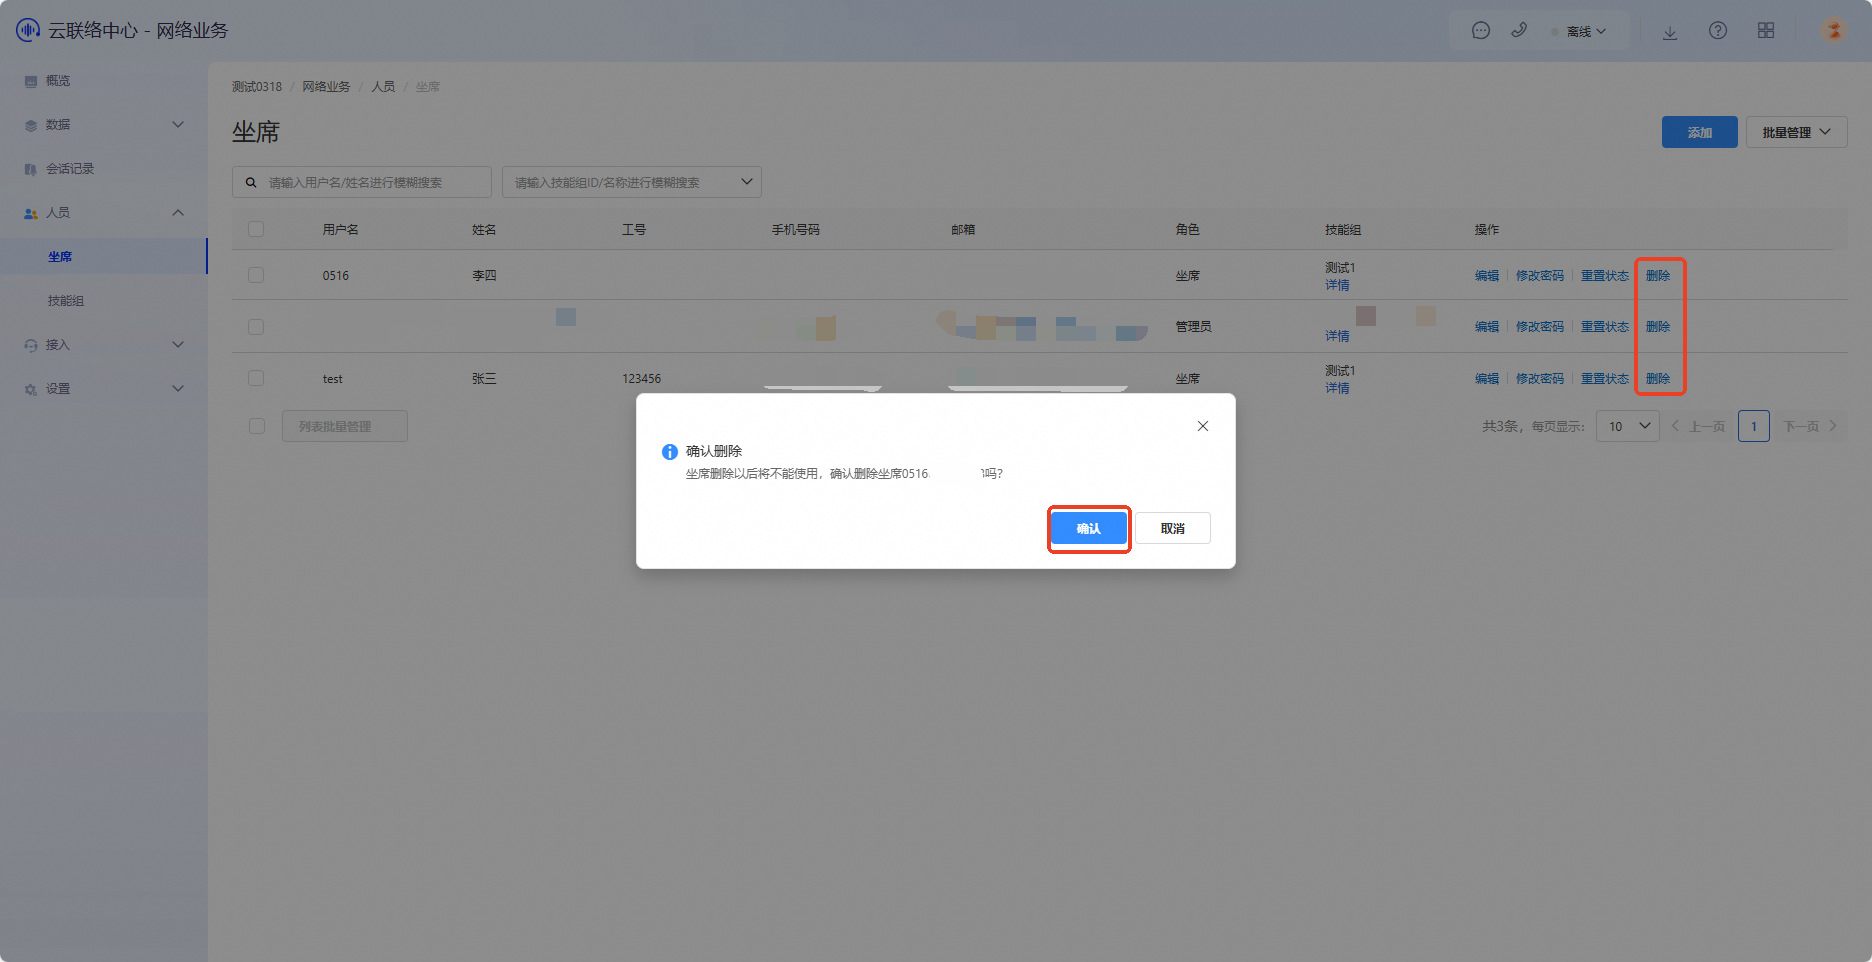
Click Delete in the Actions column of the agent list. In the confirmation window, click OK to delete the agent you no longer need.
Change password
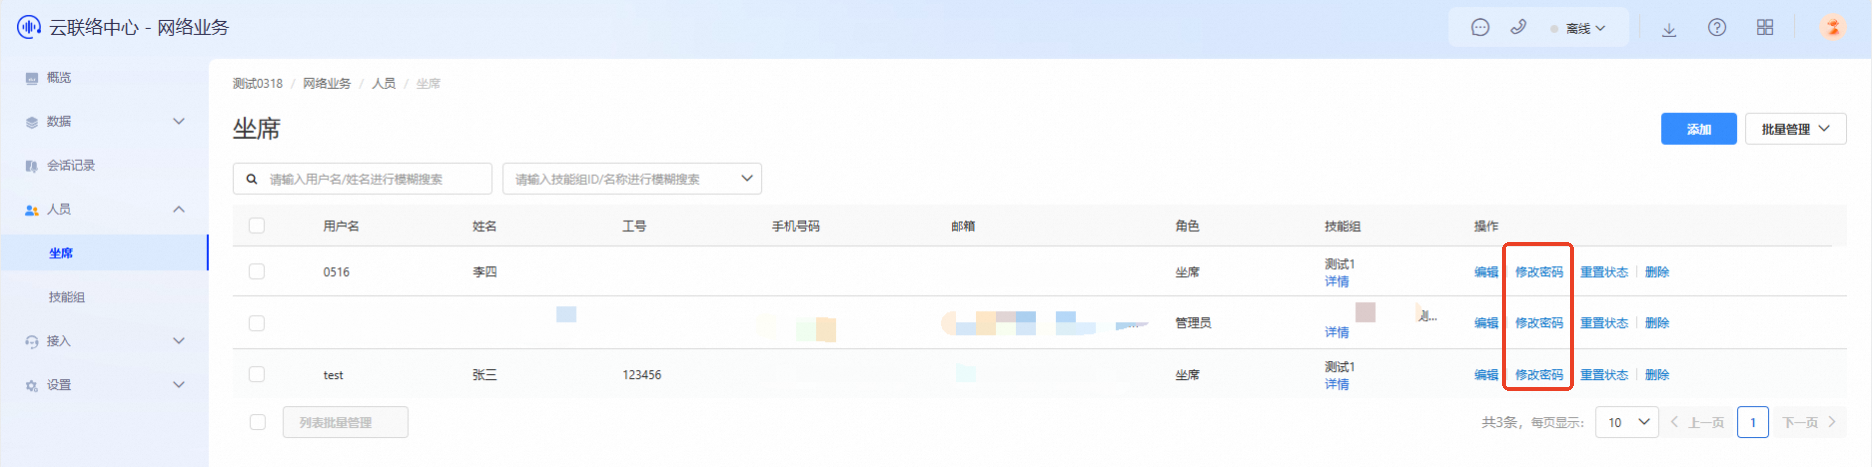
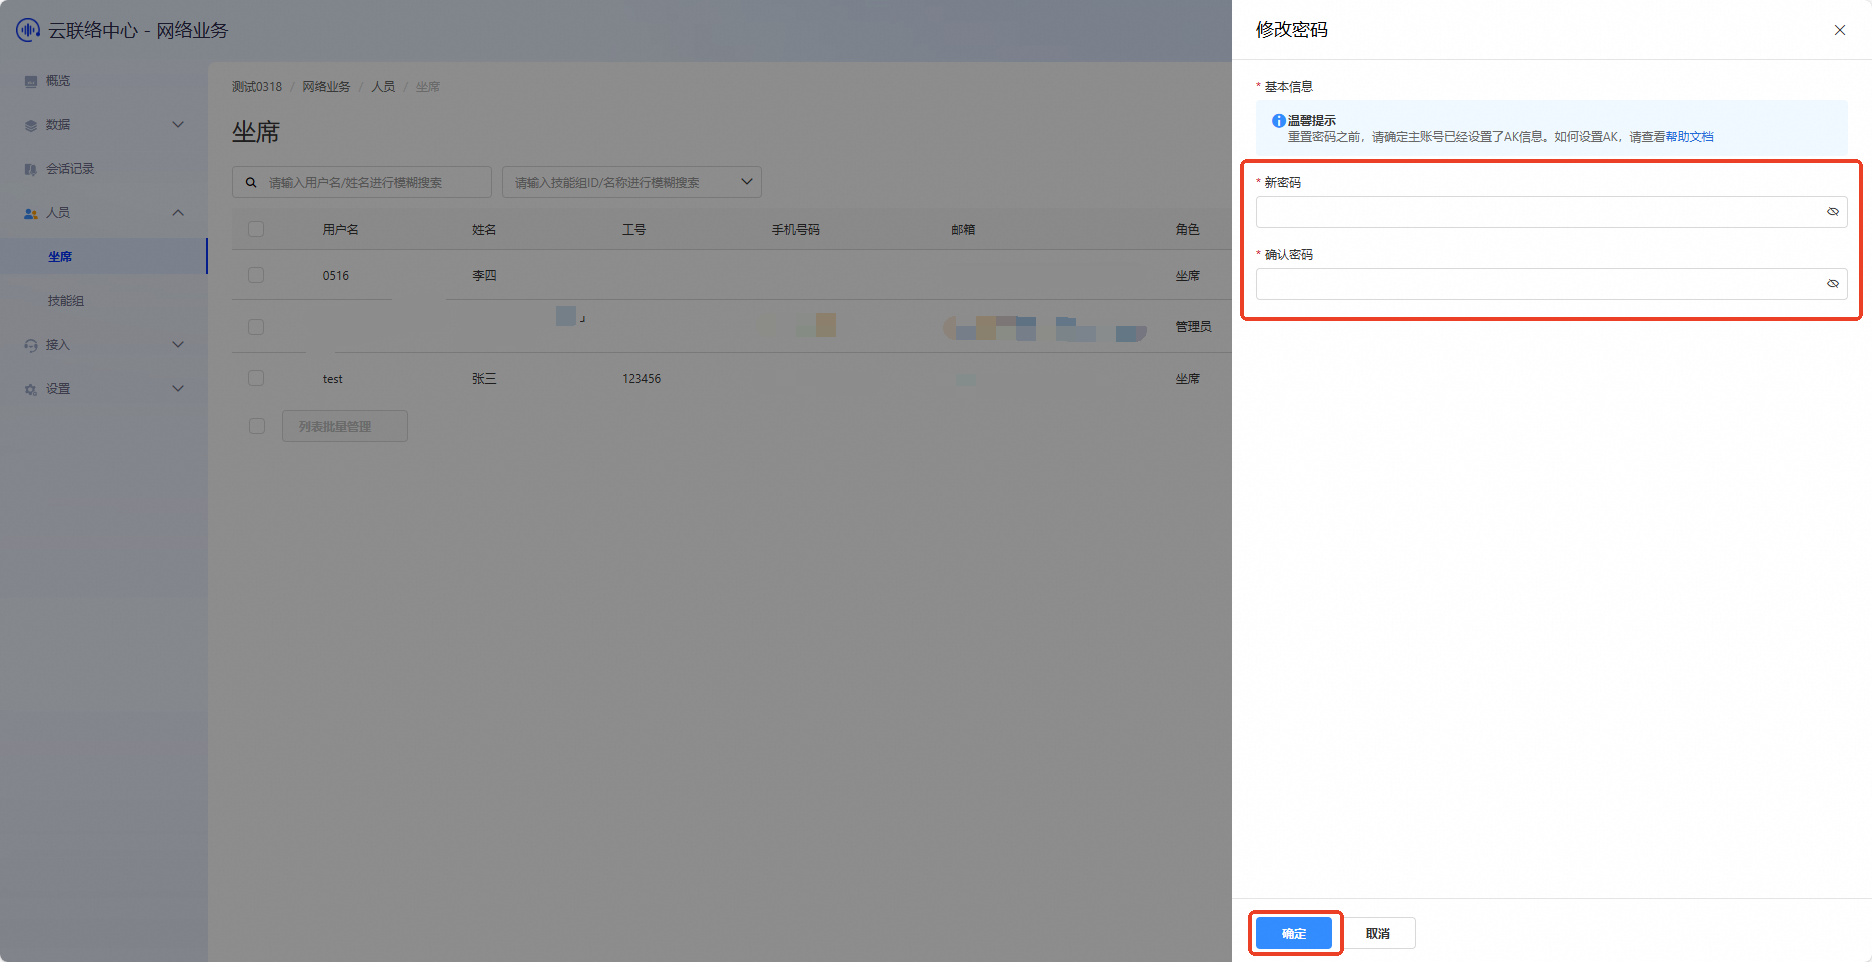
Click Change Password in the Actions column of the agent list to open the password change interface. Enter the new password and click OK to update the agent’s password.
Reset status
Click Reset Status in the Actions column of the agent list. In the confirmation window, click Confirm. The agent’s status will be forced offline.
