Deploy the Kubeflow Community Edition on ACK
This topic describes how to deploy the Kubeflow Community Edition in an ACK cluster. For distributed deep learning training, you can replace the default training operator images with images from Alibaba Cloud Container Registry (ACR) to ensure the rapid deployment and stable execution of PyTorchJob tasks.
Connect to the cluster
Install kubectl on your client machine based on your OS and cluster version.
-
Log on to the ACS console. In the left navigation pane, click Clusters.
-
On the Clusters page, click the name of the target cluster, or click Details in the Actions column.
-
On the Cluster Information page, click the Connection Information tab. Select a temporary or long-term kubeconfig. For a temporary kubeconfig, set the validity period.
-
Click the Internal Access or Public Access tab, then click Copy.
Verify the connection by running a
kubectlcommand. For example, to list all namespaces:kubectl get namespacesA successful connection will return a list of namespaces:
NAME              STATUS   AGE
default           Active   4h39m
kube-node-lease   Active   4h39m
kube-public       Active   4h39m
kube-system       Active   4h39m
Deploy the Kubeflow Community Edition
Run the following commands to deploy Kubeflow. Modify the parameters as needed before you run the commands.
# Install kustomize
curl -LO "https://github.com/kubernetes-sigs/kustomize/releases/download/kustomize%2Fv5.0.0/kustomize_v5.0.0_linux_amd64.tar.gz"
tar -xzvf kustomize_v5.0.0_linux_amd64.tar.gz
chmod 755 kustomize
mv kustomize /usr/bin/

# Deploy Kubeflow
git clone https://github.com/kubeflow/manifests.git && cd manifests && git checkout tags/v1.9.1-rc.2 -b v1.9.1-rc.2
# We recommend checking out this specific tag (v1.9.1-rc.2) to avoid potential image incompatibility issues.
kustomize build common/kubeflow-namespace/base | kubectl apply -f -
kustomize build apps/training-operator/upstream/overlays/kubeflow | kubectl apply -f -
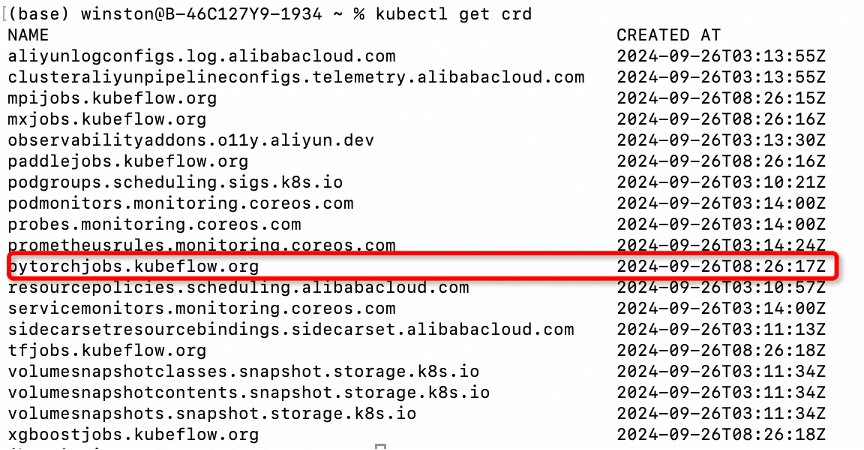
After successfully deploying Kubeflow, you can see its various distributed task CRDs when you create a workload of the custom resource type in the console. This topic focuses on the PyTorchJob CRD.
Due to network restrictions, some upstream Kubeflow images cannot be pulled. Therefore, you must patch the deployment after installation as follows:
Modify the image fields in the training-operator deployment:
# Replace the docker.io repository images in the training-operator with ACR images kubectl edit deployment training-operator -n kubeflow # Add the following parameter under - /manager in the spec.template.spec.containers[0].command field - -pytorch-init-container-image=cnp-image-center-registry.cn-wulanchabu.cr.aliyuncs.com/library/alpine:3.10 # Replace the value of the spec.template.spec.containers[0].image field with the following cnp-image-center-registry.cn-wulanchabu.cr.aliyuncs.com/kubeflow/training-operator:v1-4485b0aImportantUse spaces for indentation. Do not use the Tab key.
To save your changes and exit the editor, enter
:wqand press Enter. If the YAML is formatted incorrectly, the editor will not exit and will display an error message at the top.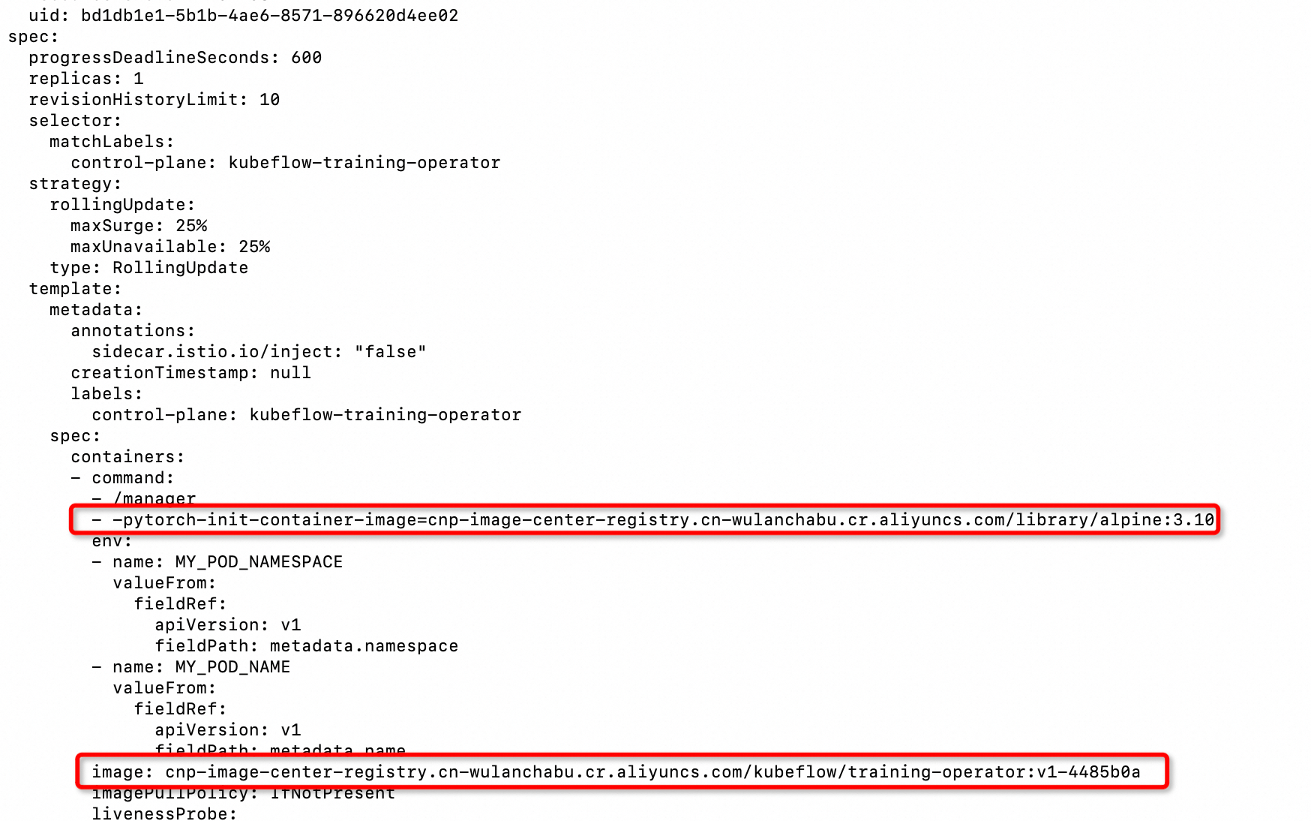
After you save the changes to the Operator YAML, check the status of the PyTorchJob CRD and the training-operator.
# Check the CRD
kubectl get crd
# Check if the training-operator is in the Running state
kubectl get pods -n kubeflow
The following figures show the result of a successful patch. Kubeflow is now ready to use.