After you attach a Lindorm instance to DataWorks, you can manage and view its metadata in Data Map. This topic describes how to view and manage data in Lindorm tables.
Prerequisites
You can set the Spark parameters on the computing resource attachment page to collect metadata from Lindorm. For more information, see Set Spark parameters for a Lindorm computing resource.
Go to Data Map
Log on to the DataWorks console. In the top navigation bar, select the desired region. In the left-side navigation pane, choose . On the page that appears, click Go to Data Map.
Collect metadata of Lindorm tables
In the left-side navigation pane of Data Map, click the  icon to open the data source collector management page. In the Data Source Perspective section, find the Lindorm collector and configure a metadata collection plan to collect metadata from Lindorm tables. For more information, see Metadata collection.
Lookup table
After the metadata collection plan for Lindorm runs successfully, you can follow these steps to view the collected metadata of the Lindorm tables.
Click the
 icon in the left-side menu bar to go to the search page.
-
In the Type directory tree on the left, select Table. Under Connection, find and click the Lindorm data source to open the Lindorm table list page.
NoteIf multiple data sources exist, the list may not be fully displayed. More appears to the right of DLF. Click More to find the Lindorm data source.
In the search box above the Lindorm table list, enter a keyword from the table name to find the table.
View table details
On the Lindorm table list page, click the Lindorm table that you want to view. The table details page appears.
|
Feature |
Description |
References |
Shortcut operations |
At the top of the page, you can Add to Album, View Added Albums, or Add to Favorites. |
|
|
Table Basic Information |
In the Table Basic Information section, you can view information such as the Database, Table Type, Owner, Created At, and whether the table is a Partitioned Table. |
|
Table Technical Information |
View information such as its storage Path, Input Format, and Output Format. |
|
|
Details |
View the Field Information and Lineage Field of the table. |
|
Lineage | View the data lineage between Lindorm tables. | |
Usage Notes |
You can Edit the usage notes or View Versions to understand the business context of the data over time. |
Manage table favorites
On the table details page, you can follow these steps to add a table to or remove a table from your favorites for centralized management and quick access.
-
Add to/Remove from favorites.
-
Add to My Favorites: Click the Add to Favorites button below the table name to add the table to My Favorites.
-
Remove from My Favorites: Click the Remove from Favorites button below the table name to remove the table from My Favorites.
-
View your favorite tables.
-
In the left-side navigation pane of Data Map, click the
 icon. In the directory tree, choose to open the My Favorites page. On this page, set Data Type to Lindorm to view your favorite Lindorm tables.
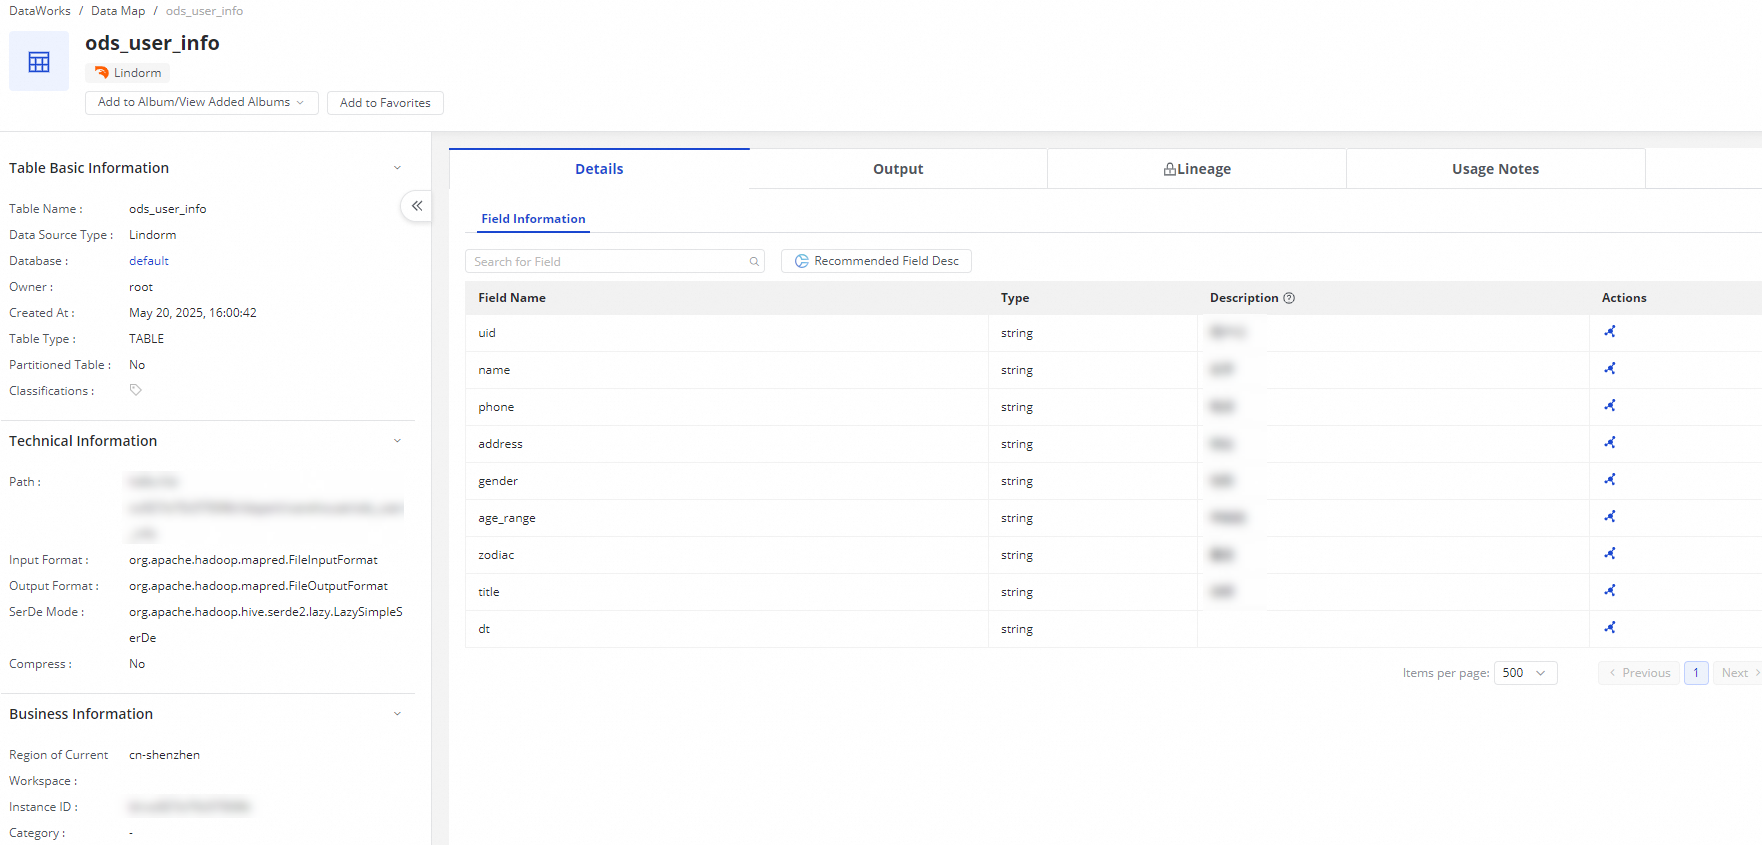
View basic information about a table
In the left part of the table details page, you can view the Table Basic Information, Technical Information, and Business Information to better understand the table.
-
Table Basic Information: includes information such as Table Name, Created At, and Partitioned Table.
-
Table Technical Information: includes information such as its storage Path, Input Format, and Output Format.
-
Business Information: includes information such as the Region of Current Workspace and the Instance.
View table details
On the table details page, click the Details tab.
View field information.
You can view the name and data type of each field in the table.
-
Search for fields.
If a table contains a large number of fields, you can enter the name of the desired field in the search box under Field Information to quickly locate the field.
-
Preview field descriptions.
Click Field Information under Recommended Field Desc. Copilot generates a description to help you understand the meaning and purpose of the field.
-
View field lineage.
Click the
 icon in the Actions column for a field to view its lineage.
View table lineage information
Data lineage shows the relationships between tables and fields. It is derived from the actual data flow, such as parsed scheduling jobs and data synchronization. On the lineage page, you can view the upstream and downstream nodes of a table or field. You can also view the source of the raw data and the destination database of the table data. As needed, you can also analyze the impact of lineage at different levels.
The data lineage feature is available only in DataWorks Standard Edition and later versions.
Table and field lineage is derived from the actual data flow, such as parsed scheduling jobs, to show the relationships between different tables and fields. This is a real-time statistical operation.
If Data Map cannot properly display the data lineage generated by running SQL statements in a Lindorm Spark SQL node, you can manually set the relevant DataWorks scheduling parameters in the code of the Lindorm Spark SQL job. For more information, see Attach a Lindorm computing resource. The following SQL statements can generate data lineage:
insert into /insert overwrite table
create as select from table
create table
create table like
Click the Lineage Information tab on the table details page. You can view Table Lineage and Field Lineage.
-
View Table Lineage
View basic information: Hover the mouse pointer over a table or node type to view details.
View the number of upstream and downstream nodes: In the table lineage graph, you can view the number of upstream and downstream nodes for the current table.
Expand or collapse nodes: As needed, you can click the
 or icon in the lineage graph to show or hide the corresponding upstream or downstream nodes.
-
View Field Lineage
-
Change Field: In the Change Field area, you can select a different field from the current table to view its lineage graph.
View basic information: Hover the mouse pointer over a field or node type to view details.
View the number of upstream and downstream nodes: In the field lineage graph, you can view the number of upstream and downstream nodes for the current field.
Expand or collapse nodes: You can click the
or icon in the lineage graph to show or hide the corresponding upstream or downstream nodes.
-
View usage notes for a table
Click the Instructions tab on the table details page. You can Edit the notes or View Versions to track the table's purpose and usage over time.
-
Edit usage notes for the table.
Click Edit. In the dialog box that appears, enter the usage notes for the current table and click Save.
-
View historical versions of the usage notes.
Click View Versions to see a history of all changes. From this history, you can click View in the Actions column for a specific version to see the usage notes from that time.