Lark channel
Dear Customer,
To enable you and your team to use the Alibaba Cloud Exclusive Service seamlessly in the Lark workbench, go to the Alibaba Cloud Value-added Service Console - My Support Plan, click Enable Multi-channel, add the Lark channel, and follow the configuration guide to complete the setup.
Note: Your Alibaba Cloud account must have an active Enterprise Support Plan. RAM users and RAM roles can also enable this service.
To enable the value-added service:
|
|

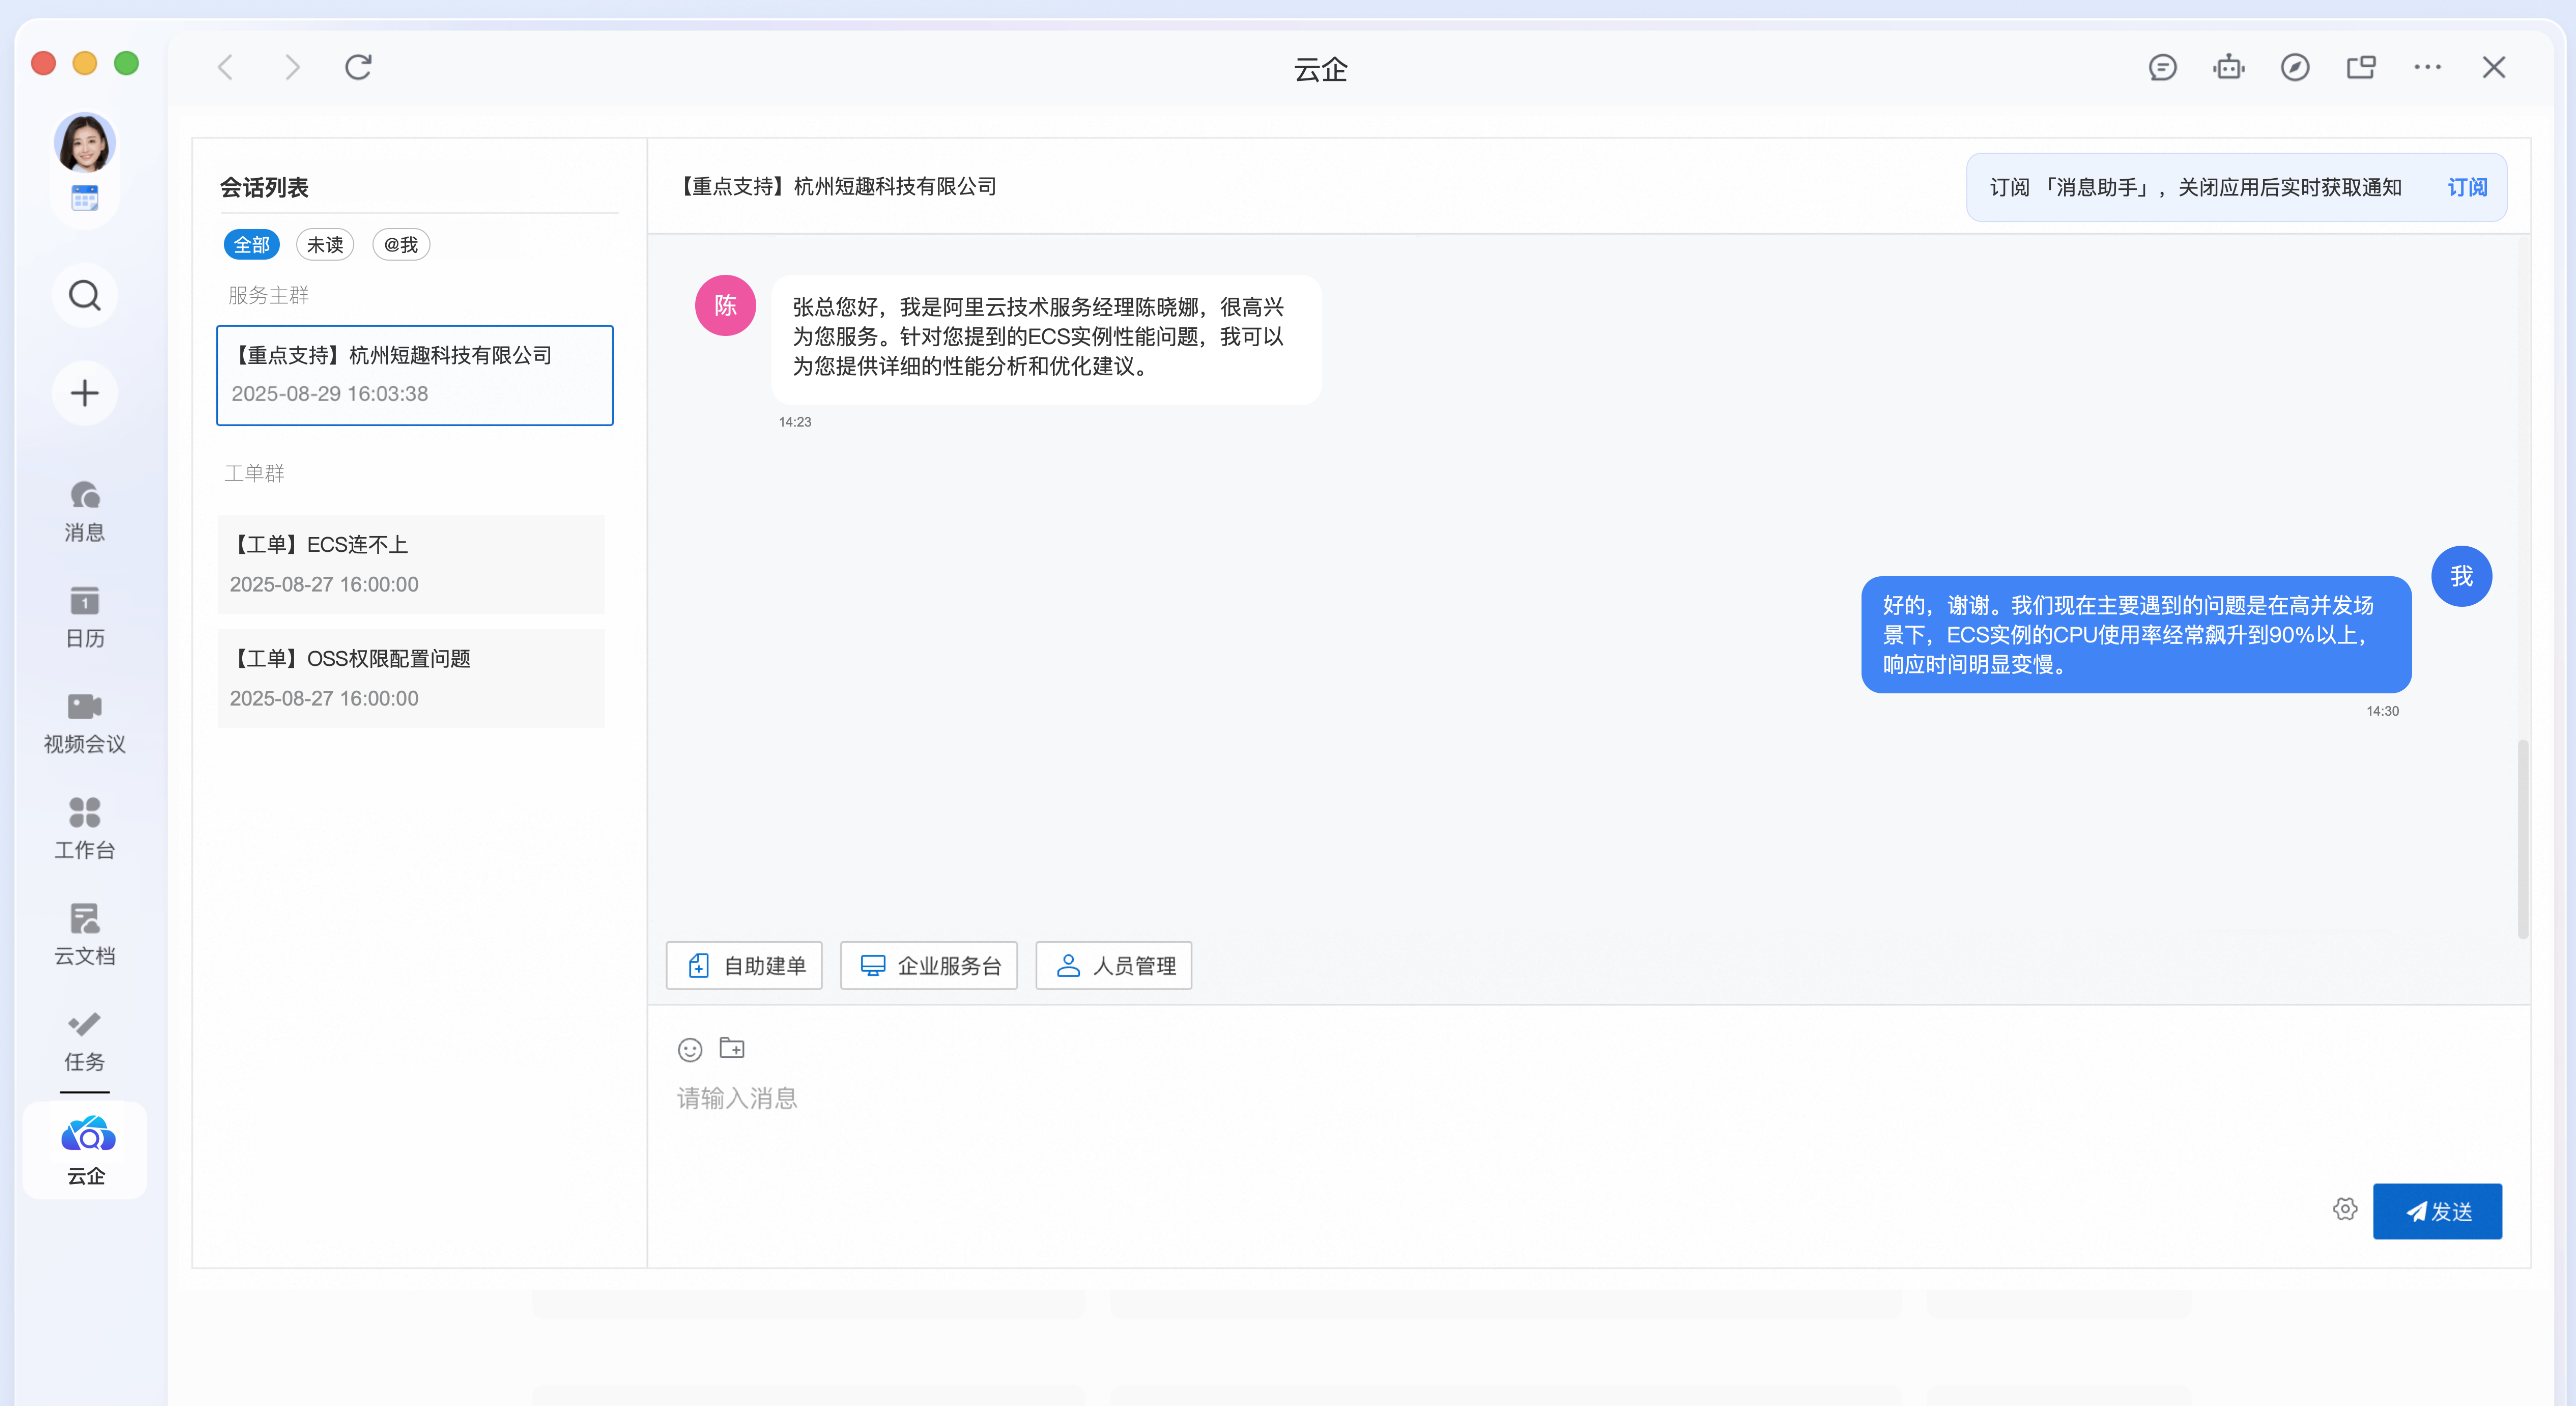
Example of the application in Lark |
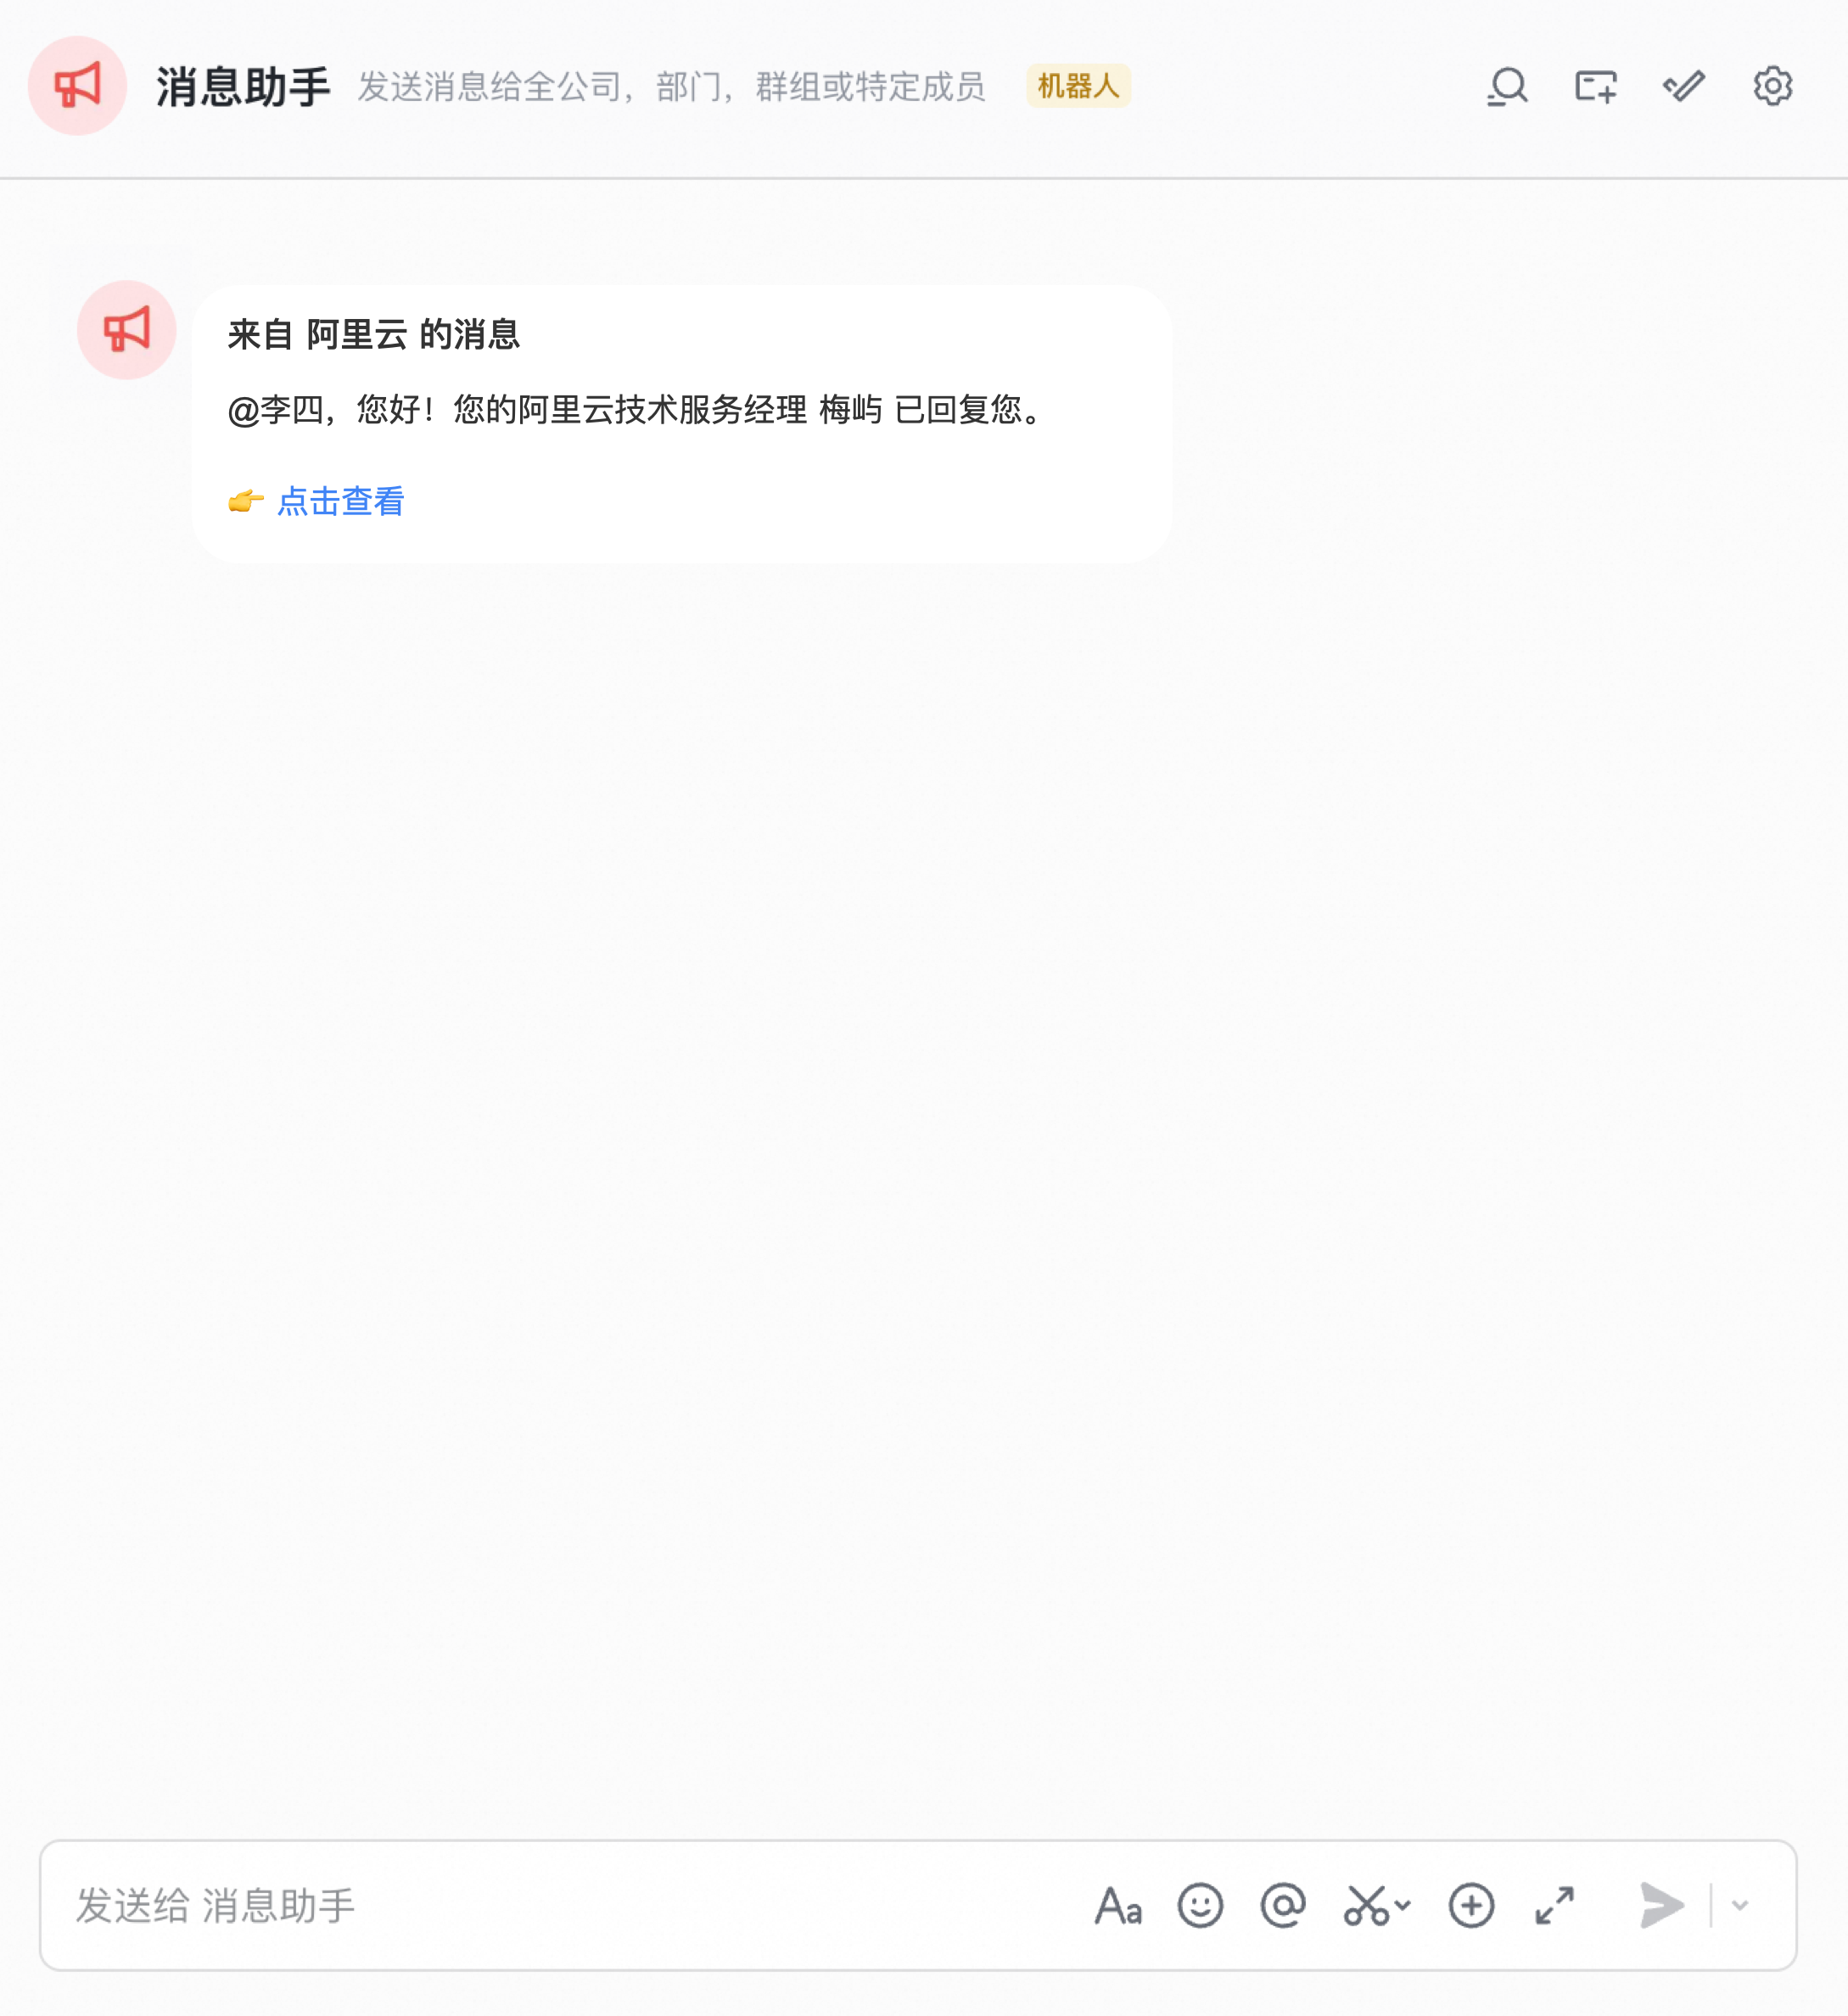
Example of a Lark Robot message notification |
|
|
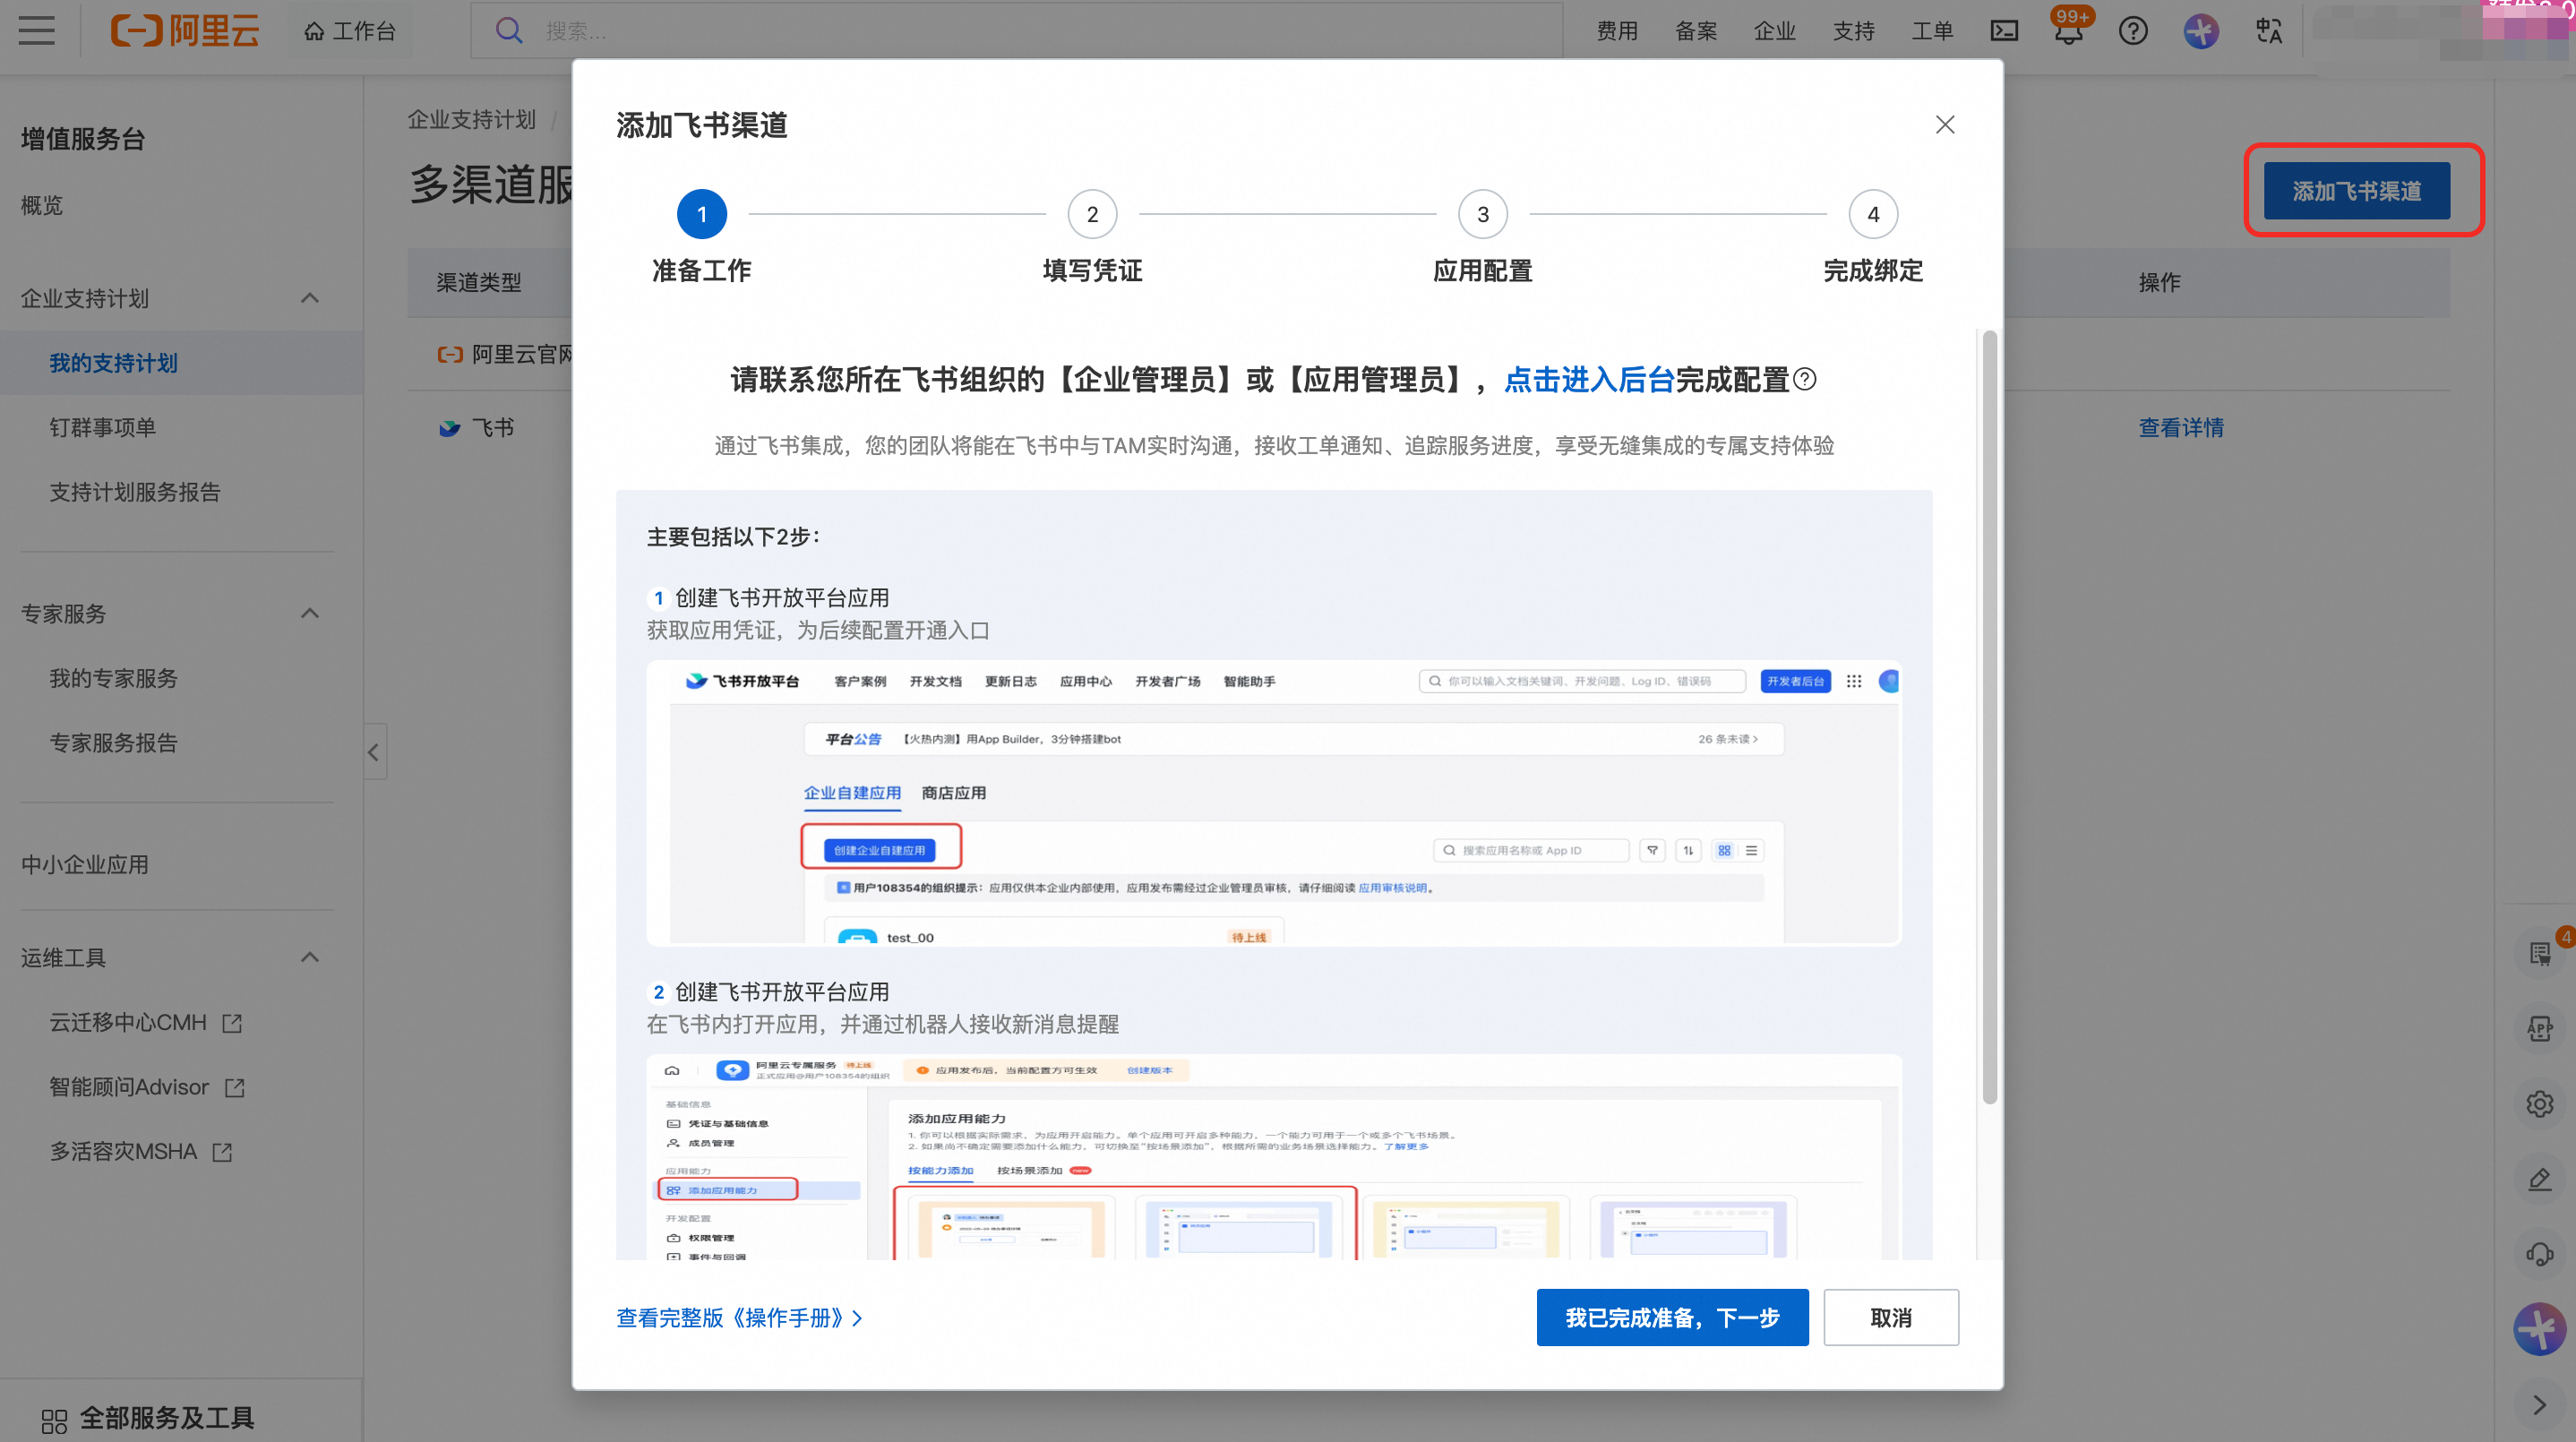
Part 1: Configuration steps (takes about 10 minutes)
Performed by: An enterprise administrator or application developer in your Lark organization's developer console.
Core objective: Create a custom enterprise application and grant the necessary permissions to establish a secure connection with our platform.
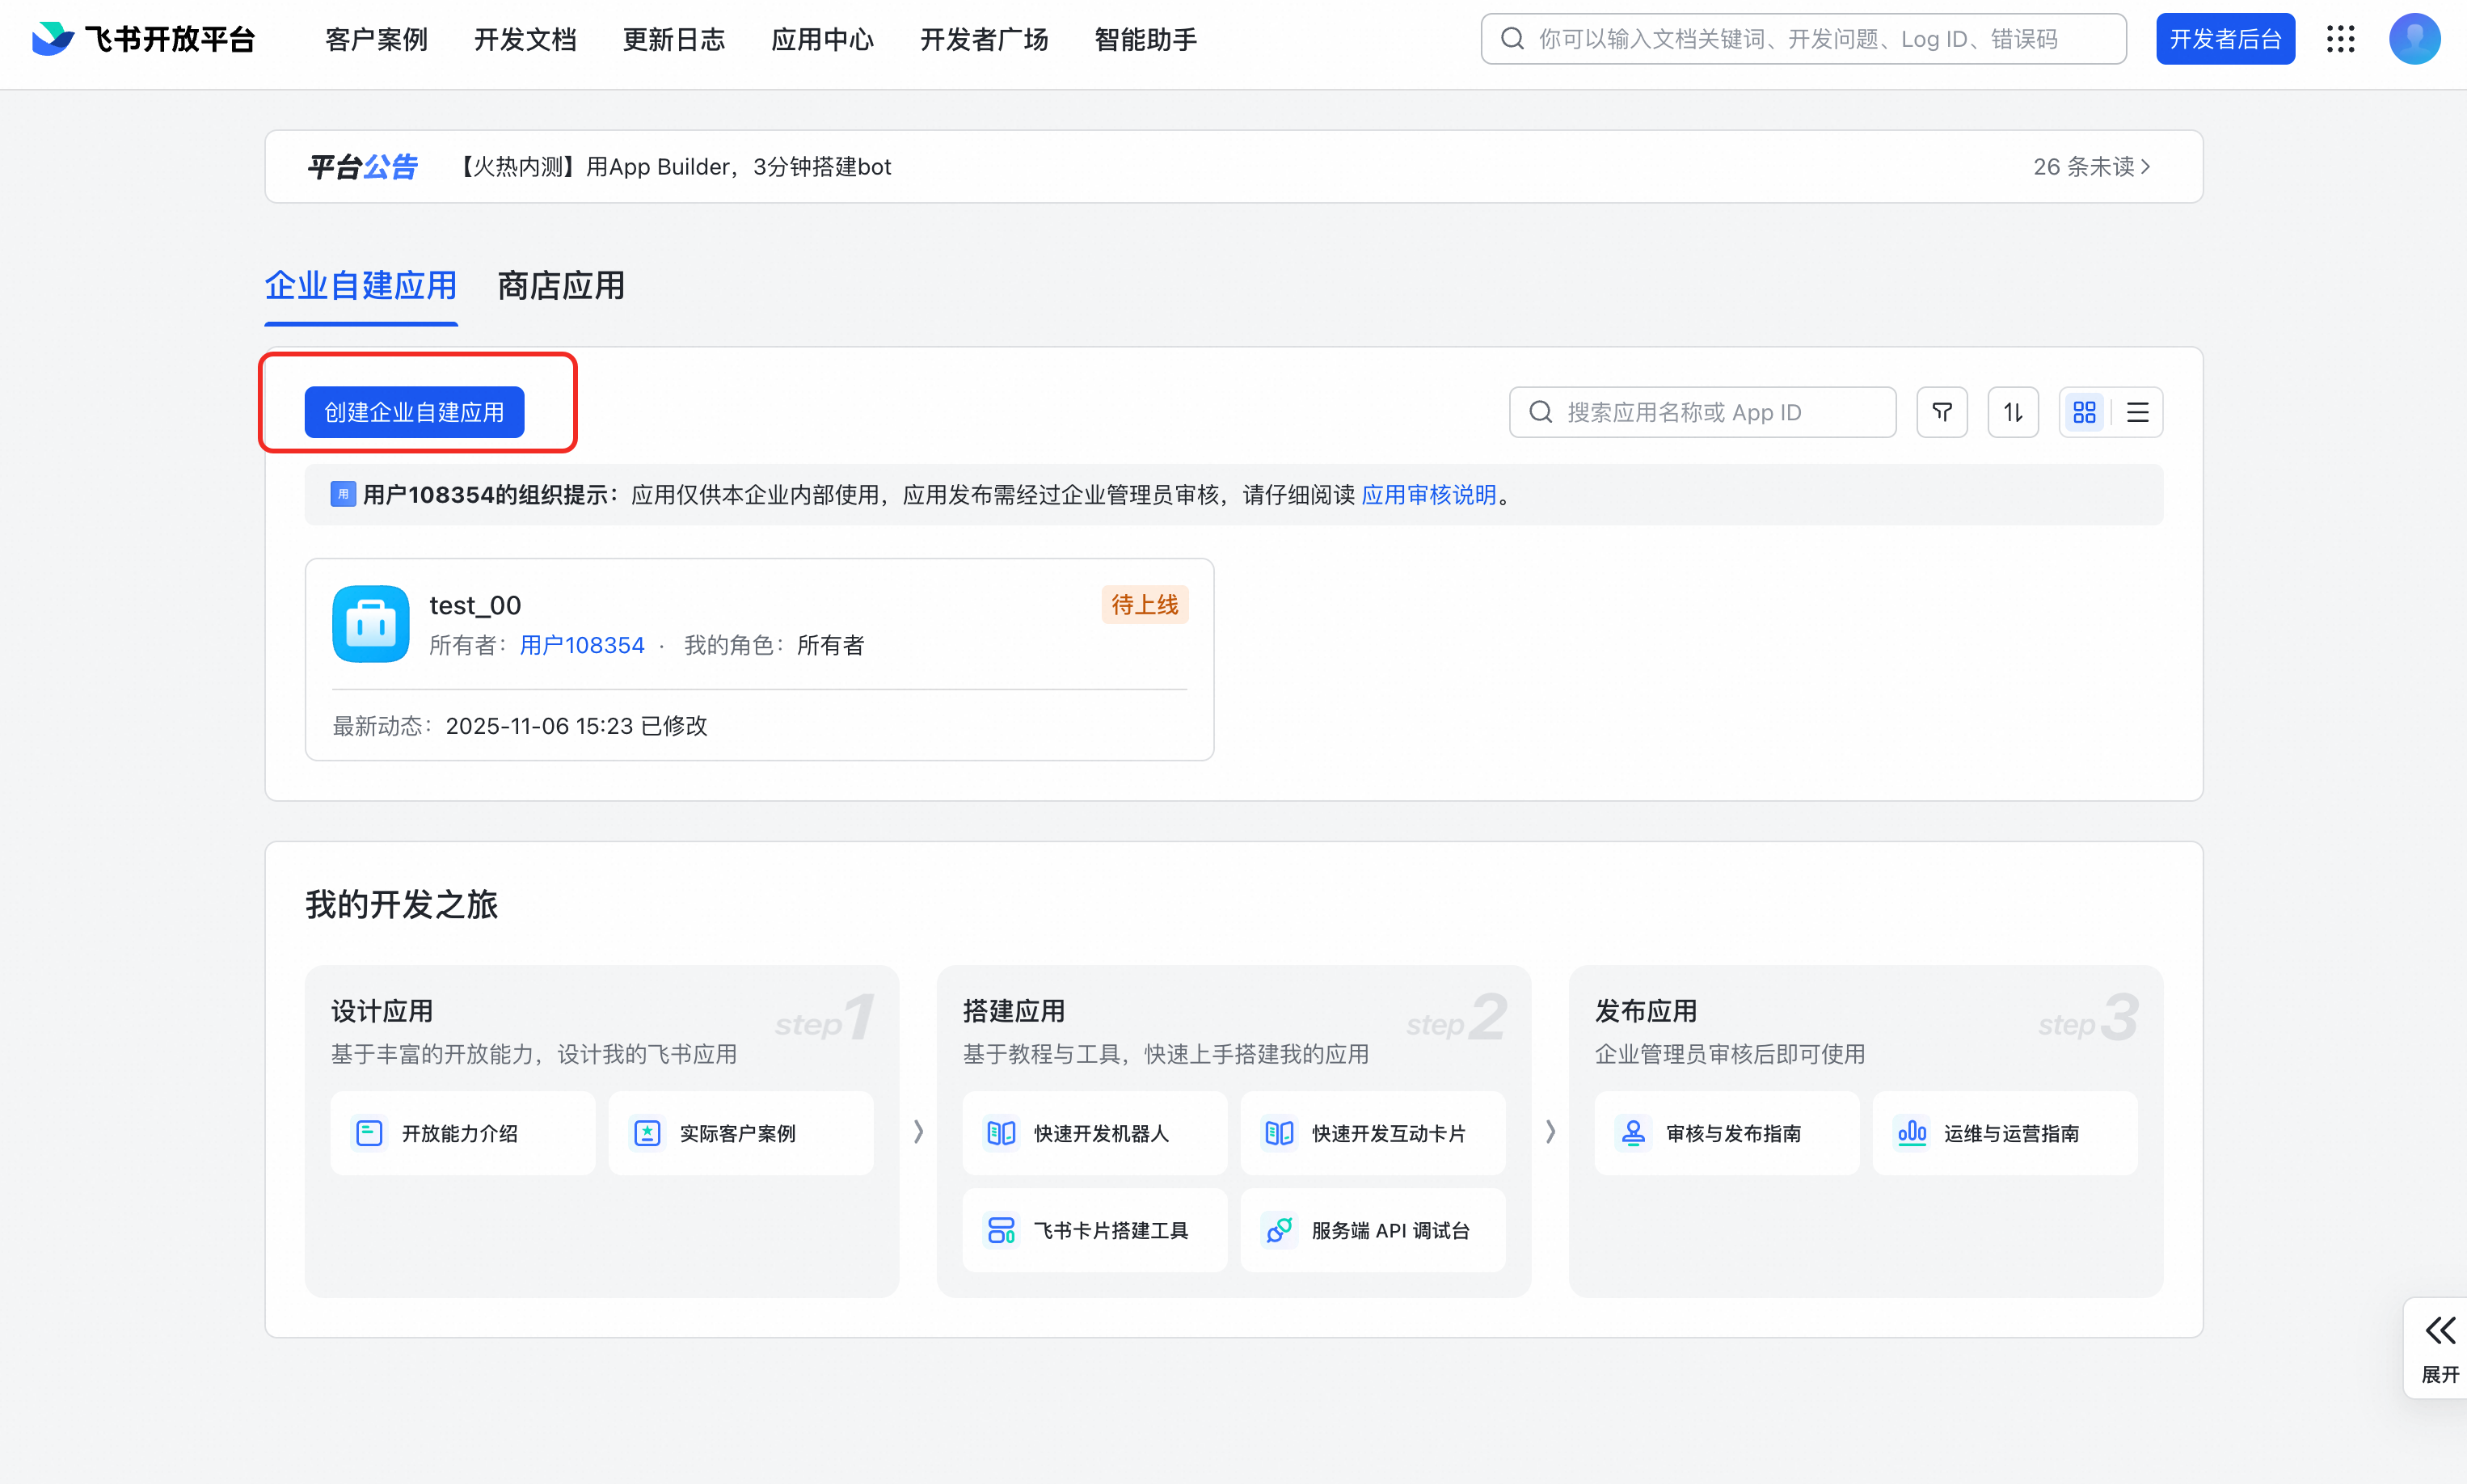
Step 1: Create a custom enterprise application
Log on to the Lark Open Platform - Developer Console as an enterprise administrator or application developer.
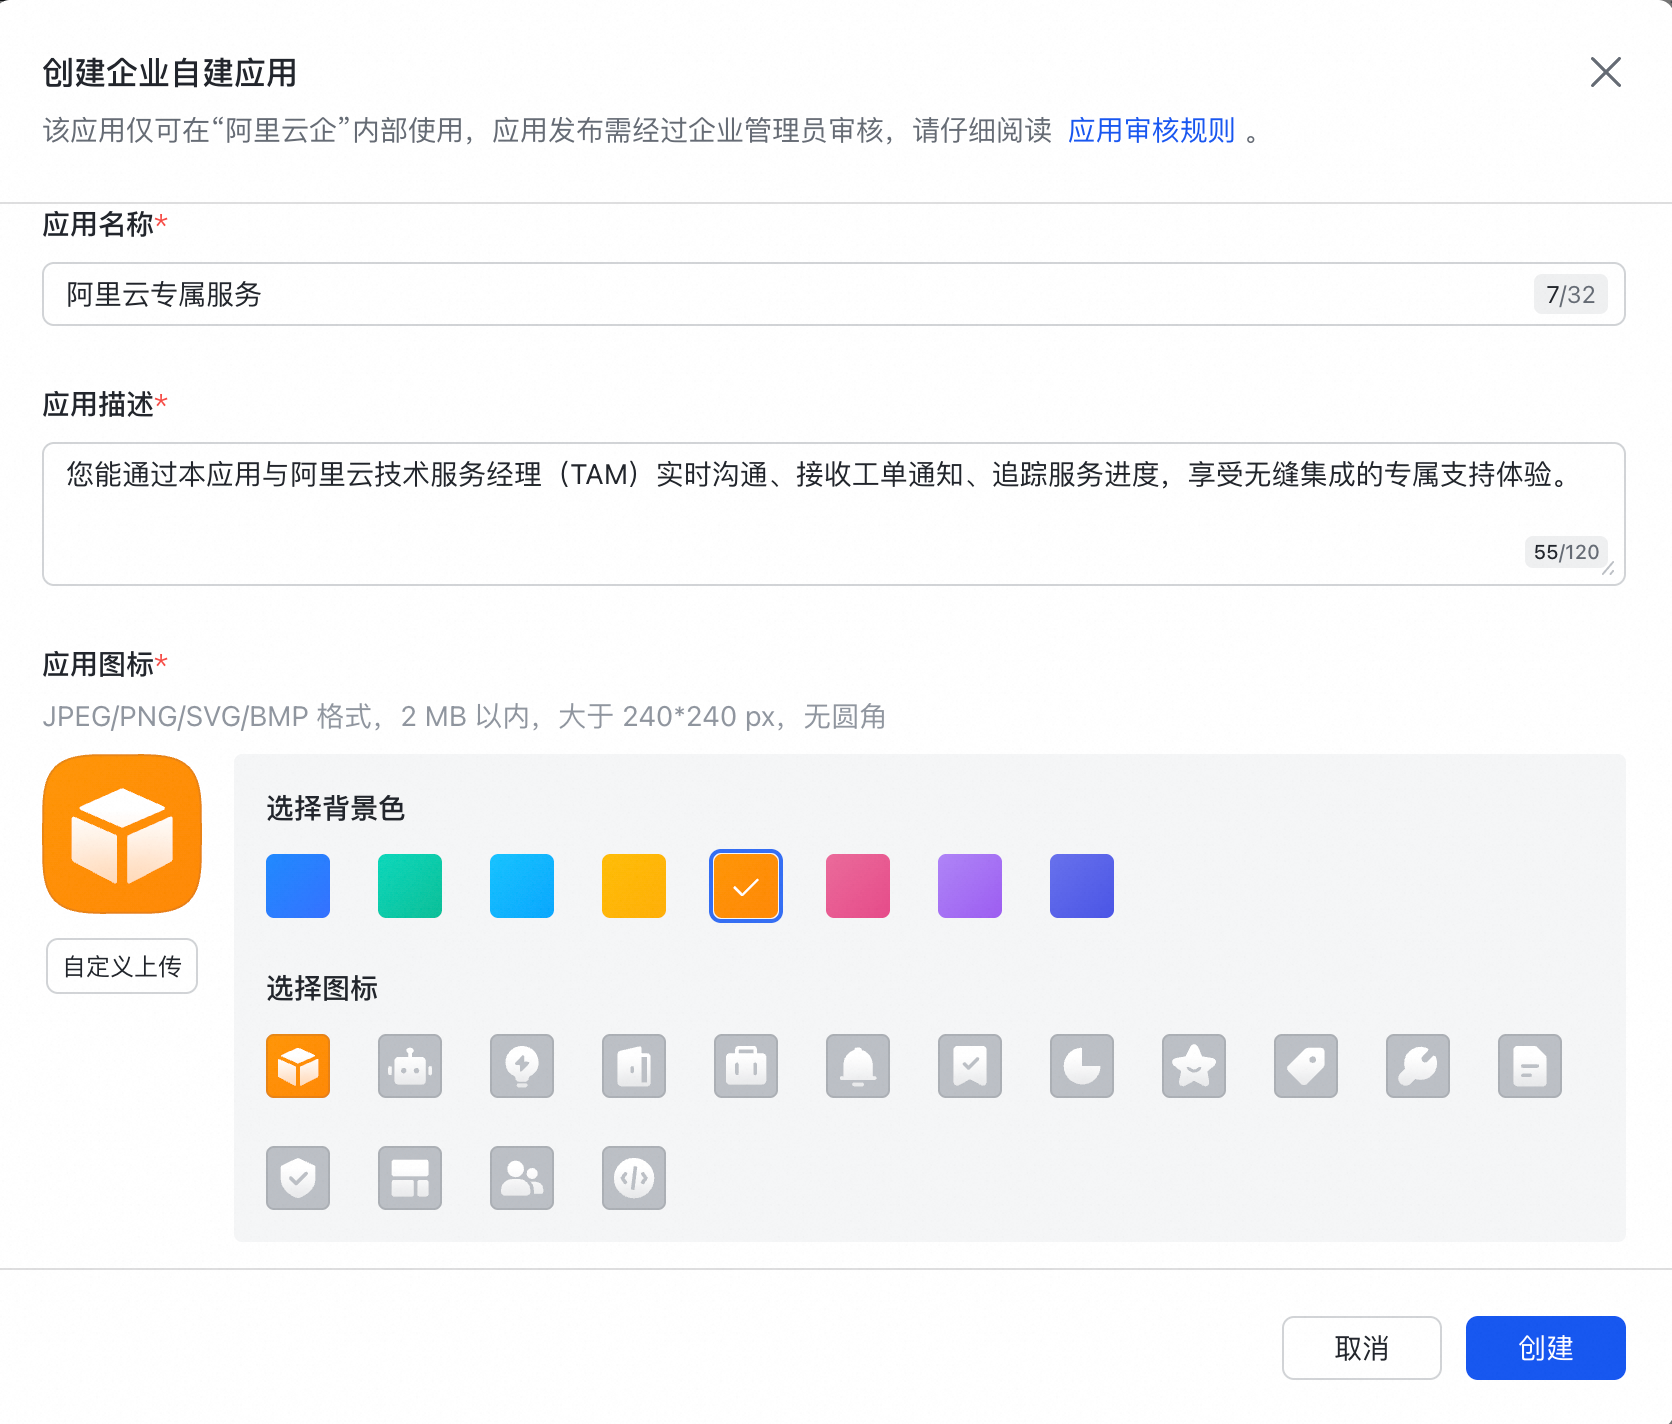
Create a new custom enterprise application. You can define a name and description for the application. We recommend including "Alibaba Cloud Exclusive Service" to help your organization members find and access it.
Step 2: Add application features
In the navigation pane on the left of the application console, find and click Add Features. On this page, you can add the following two core features to your application:
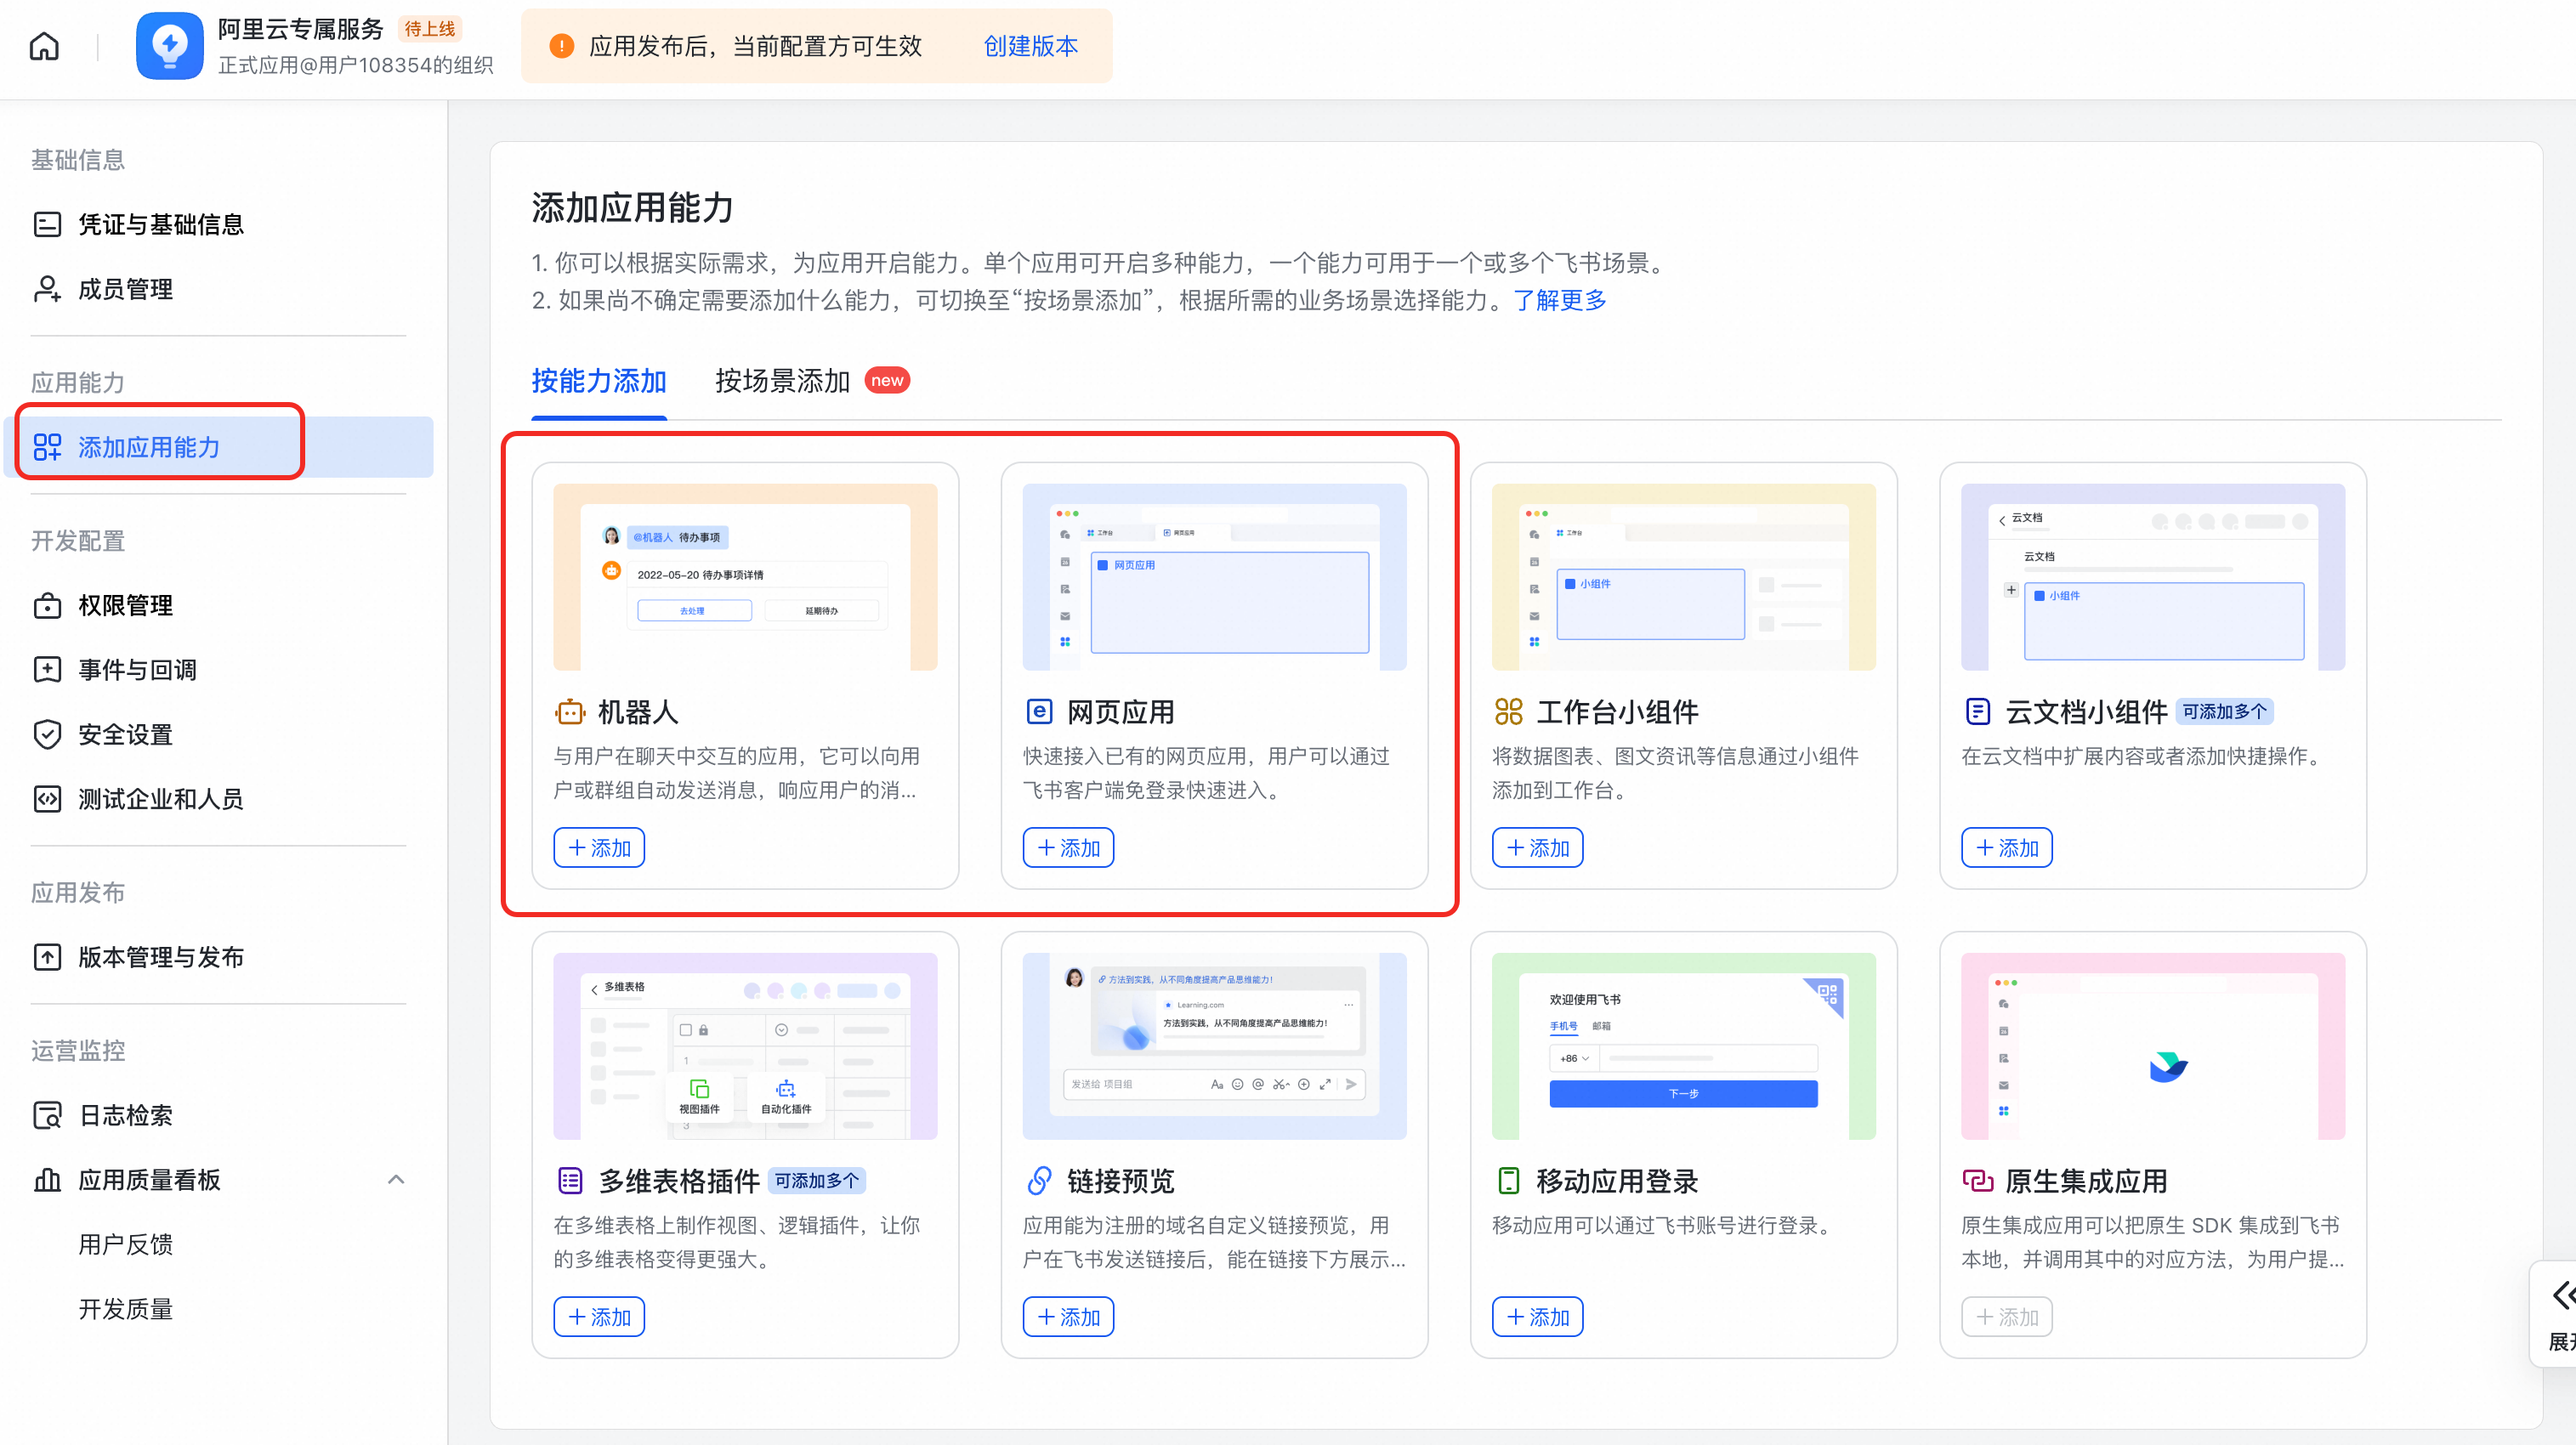
Web App
Purpose: Allows your team to open and use the Alibaba Cloud Exclusive Service application directly in Lark.
Action: Find the Web App card and click + Add. You can add the desktop homepage URL in Step 4.
Bot
Purpose: After you enable the bot, the Alibaba Cloud Exclusive Service application can send you new message notifications. This helps ensure that you do not miss important information.
Action: Find the Bot card and click + Add.
Step 3: Get and provide application credentials
To enable the Lark channel, you must provide your Organization Name, App ID, and App Secret.
Organization Name: In the upper-right corner of the Lark Open Platform, click your profile picture, and then click Personal Center. Your organization name is displayed below your name. The organization name is also shown in the upper-left corner of a new application page in the format "Official Application@(Organization Name)".
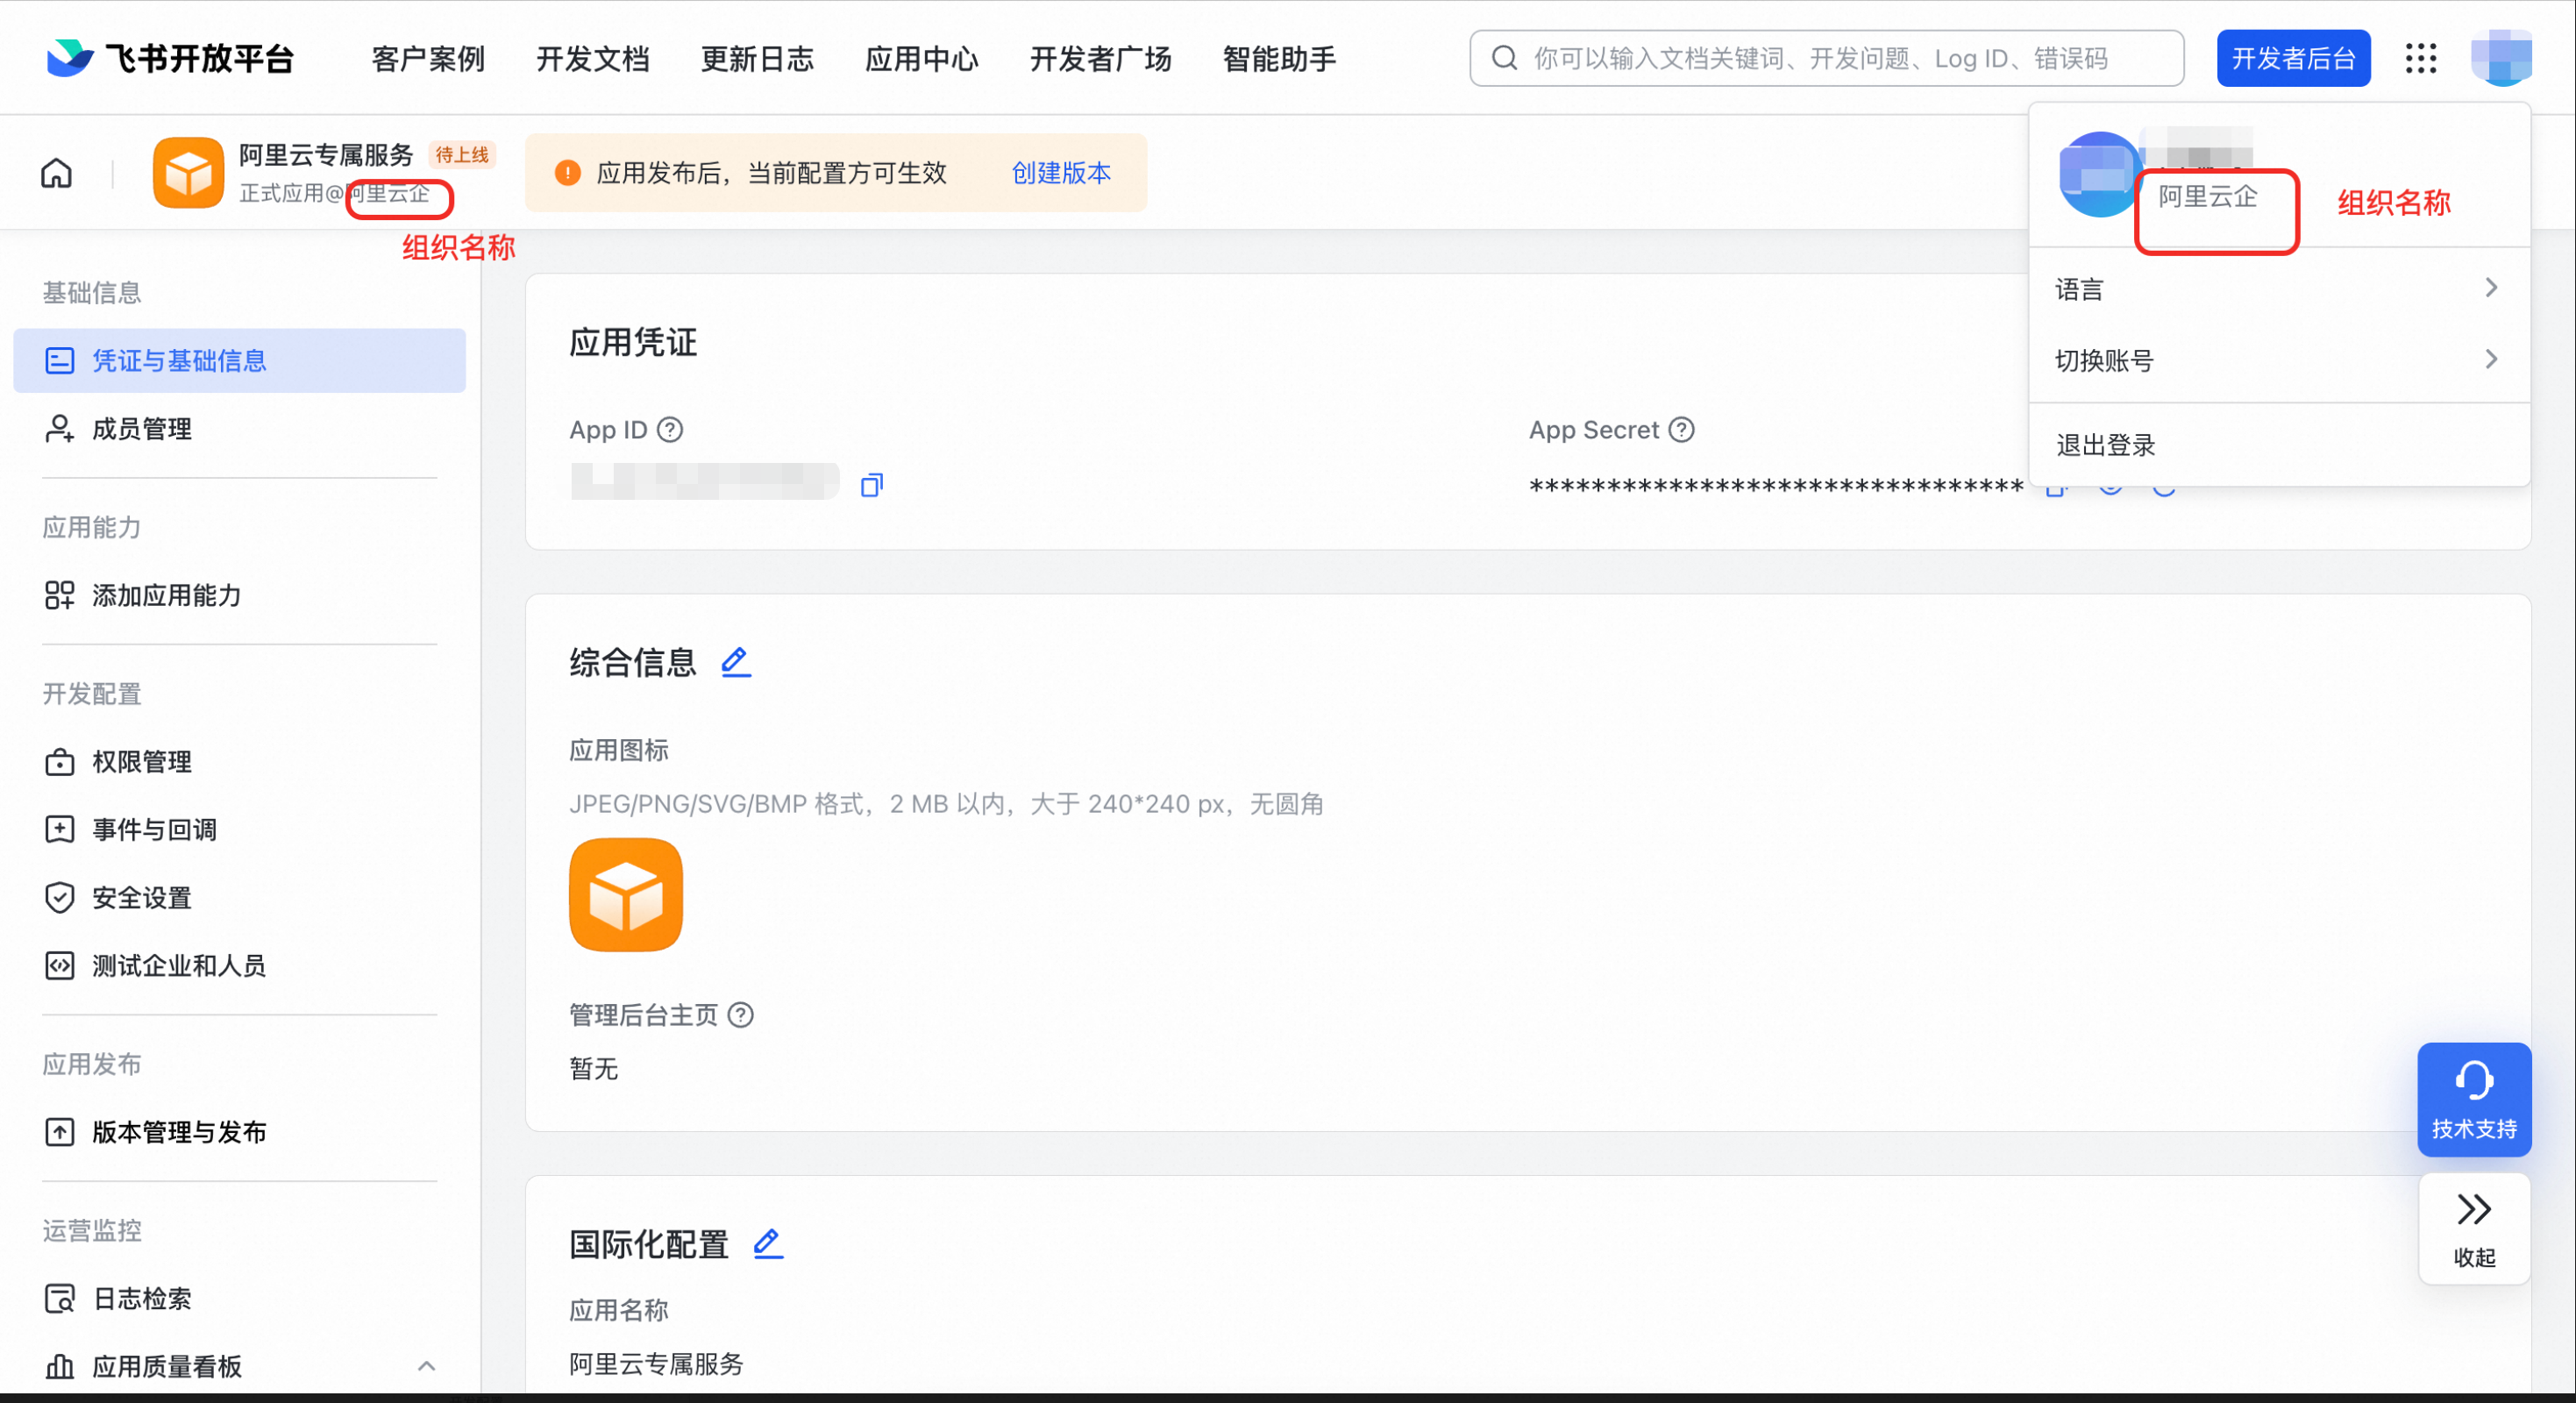
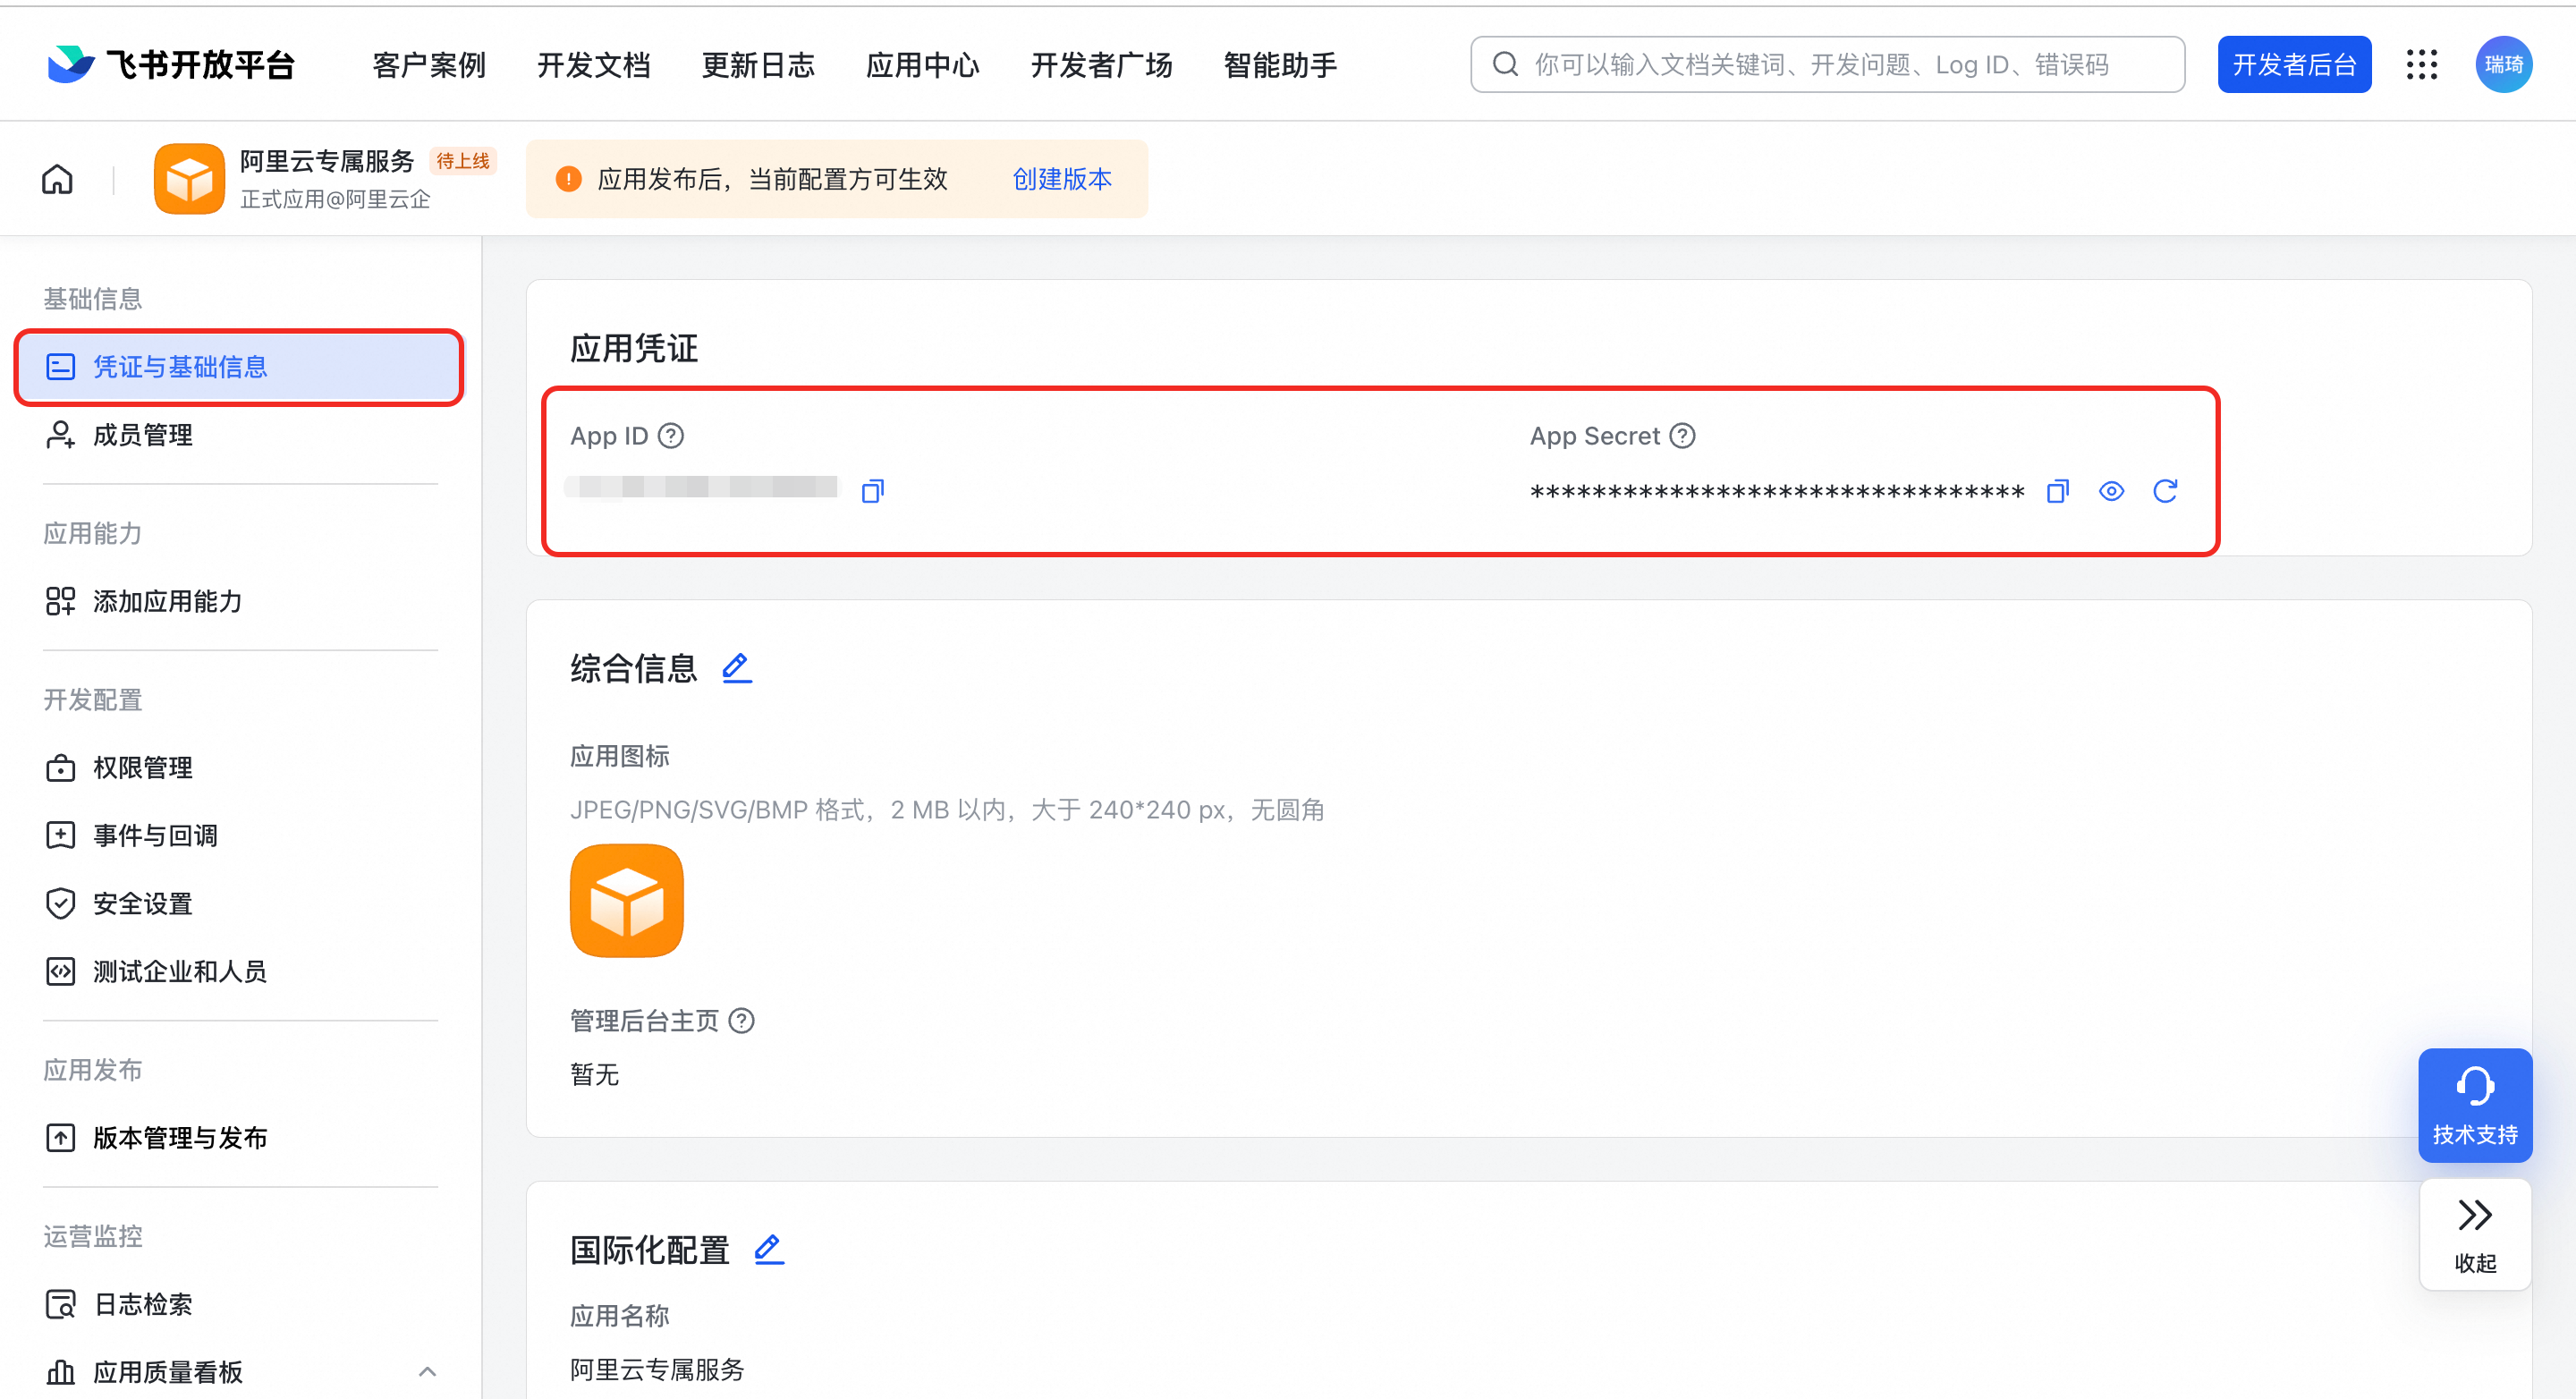
After the application is created, go to the Credentials & Basic Info tab on the application details page. Copy the App ID and App Secret.
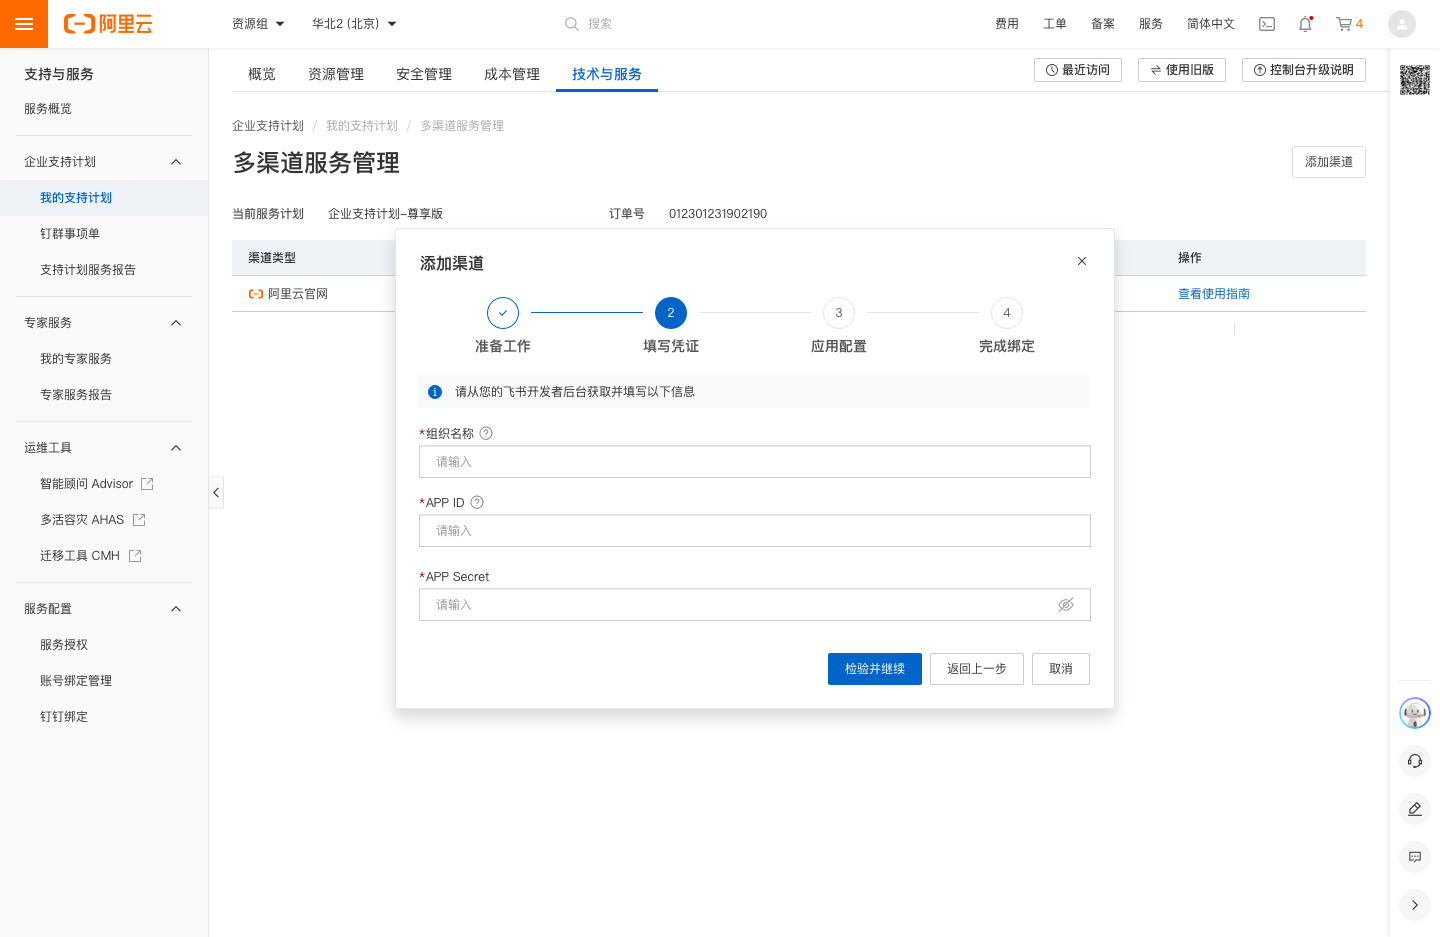
Paste the Organization Name, App ID, and App Secret into the credential fields for the Lark channel. You can find these fields on the Enable Multi-channel page in the Alibaba Cloud Value-added Service Console - My Support Plan.
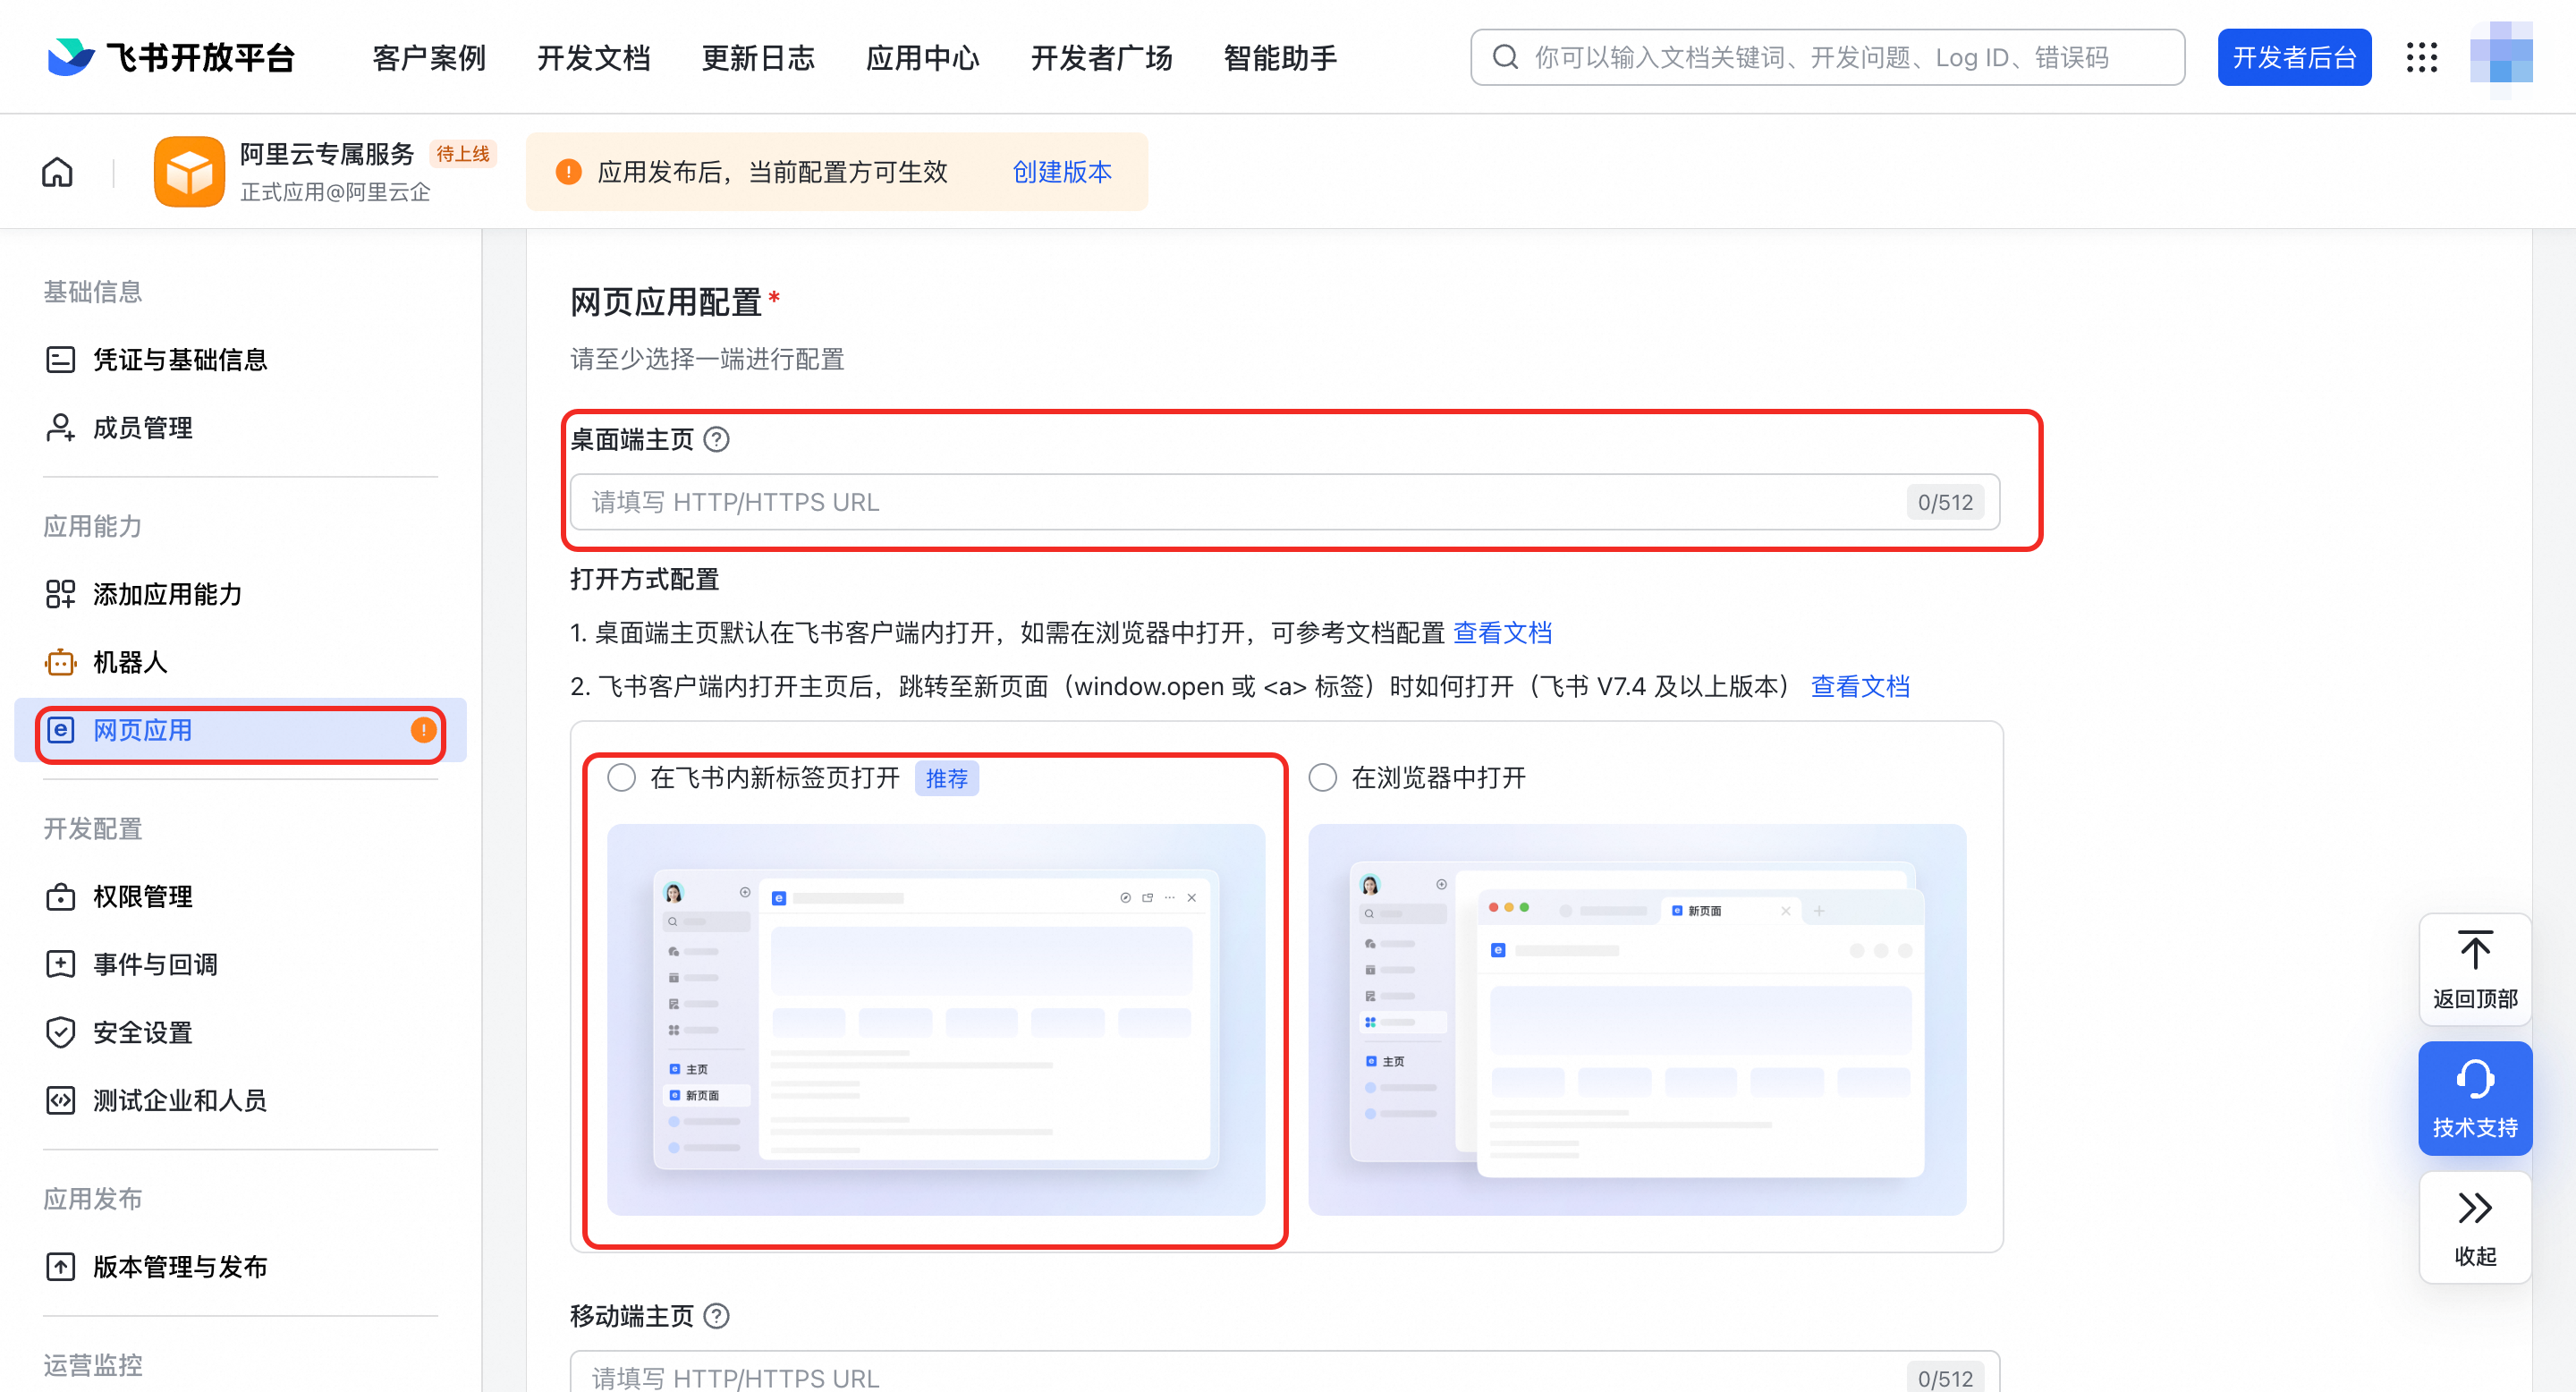
Step 4: Configure the web application URL
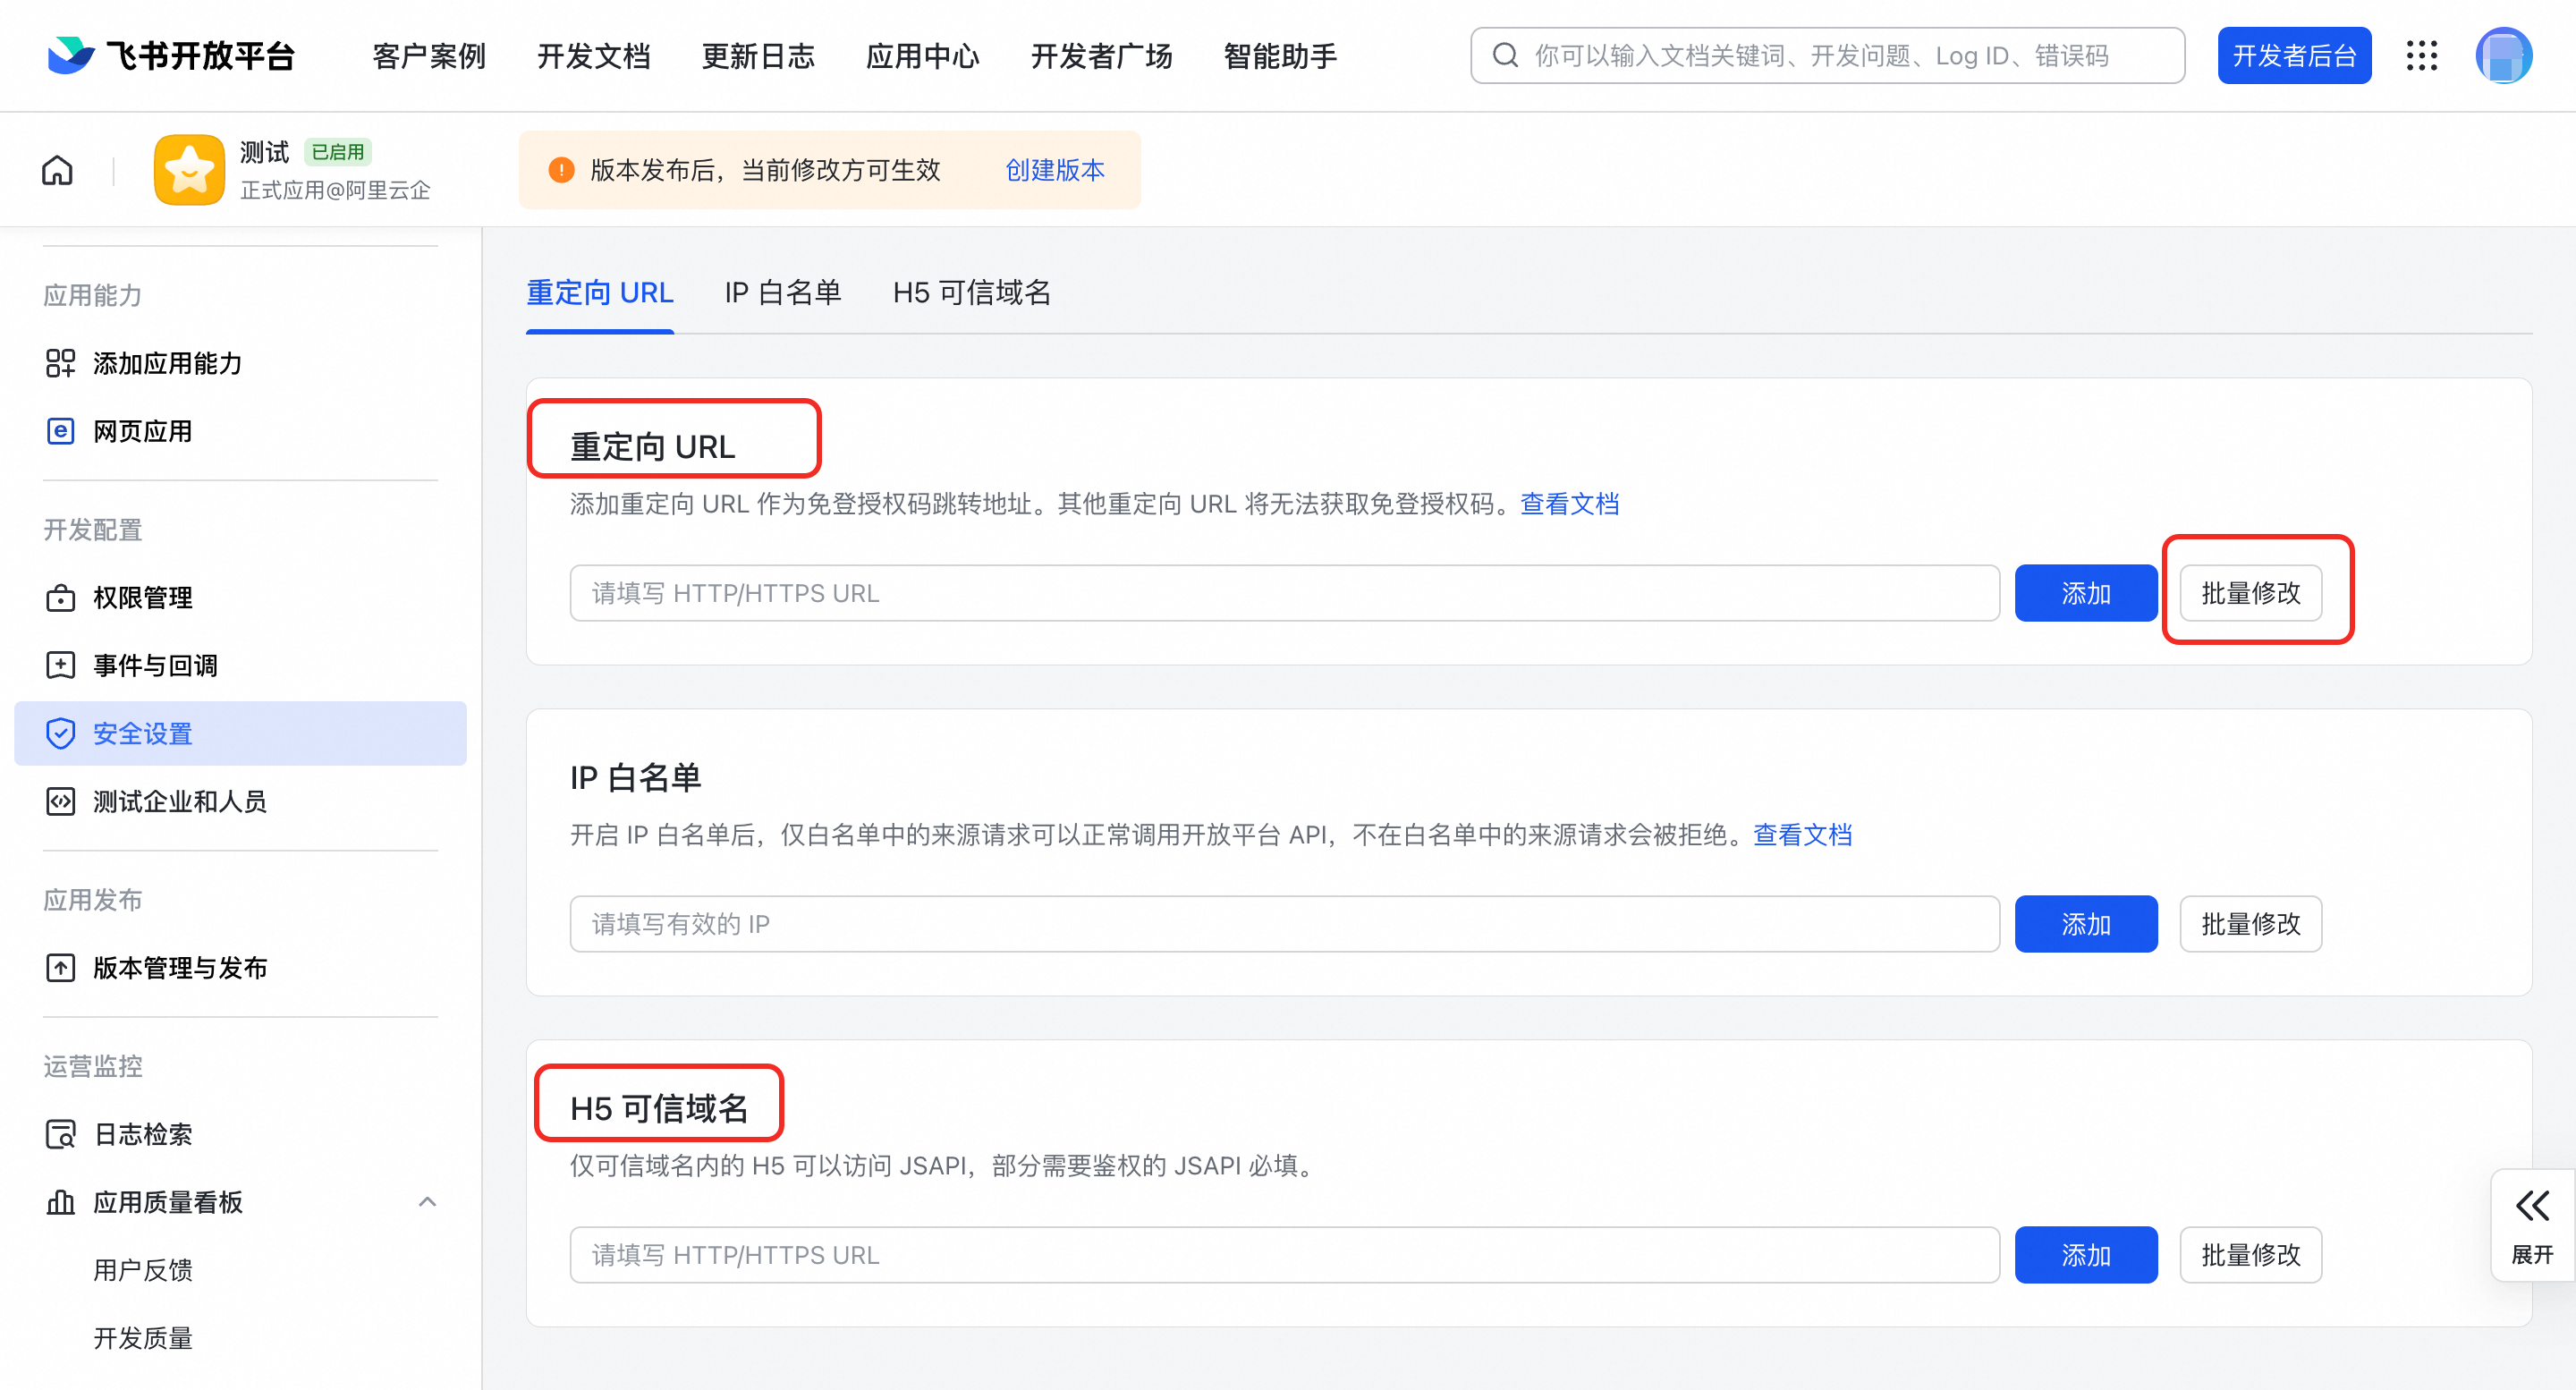
After you enter the App ID and App Secret on the Enable Multi-channel page, a Desktop Homepage URL is generated. Enter this URL on the web application's configuration page as shown in the following figure.
We recommend that you select "Open in a new tab within Lark".
The homepage URL format is shown below. Replace {appId} with your application's App ID:
https://ailink.gts.work/feishu/{appId}
Step 5: Grant application permissions
To ensure that the application functions correctly, such as sending message notifications and displaying information cards, you must grant the following permissions to the application.
Permission |
Description |
Official Lark permission documentation |
|
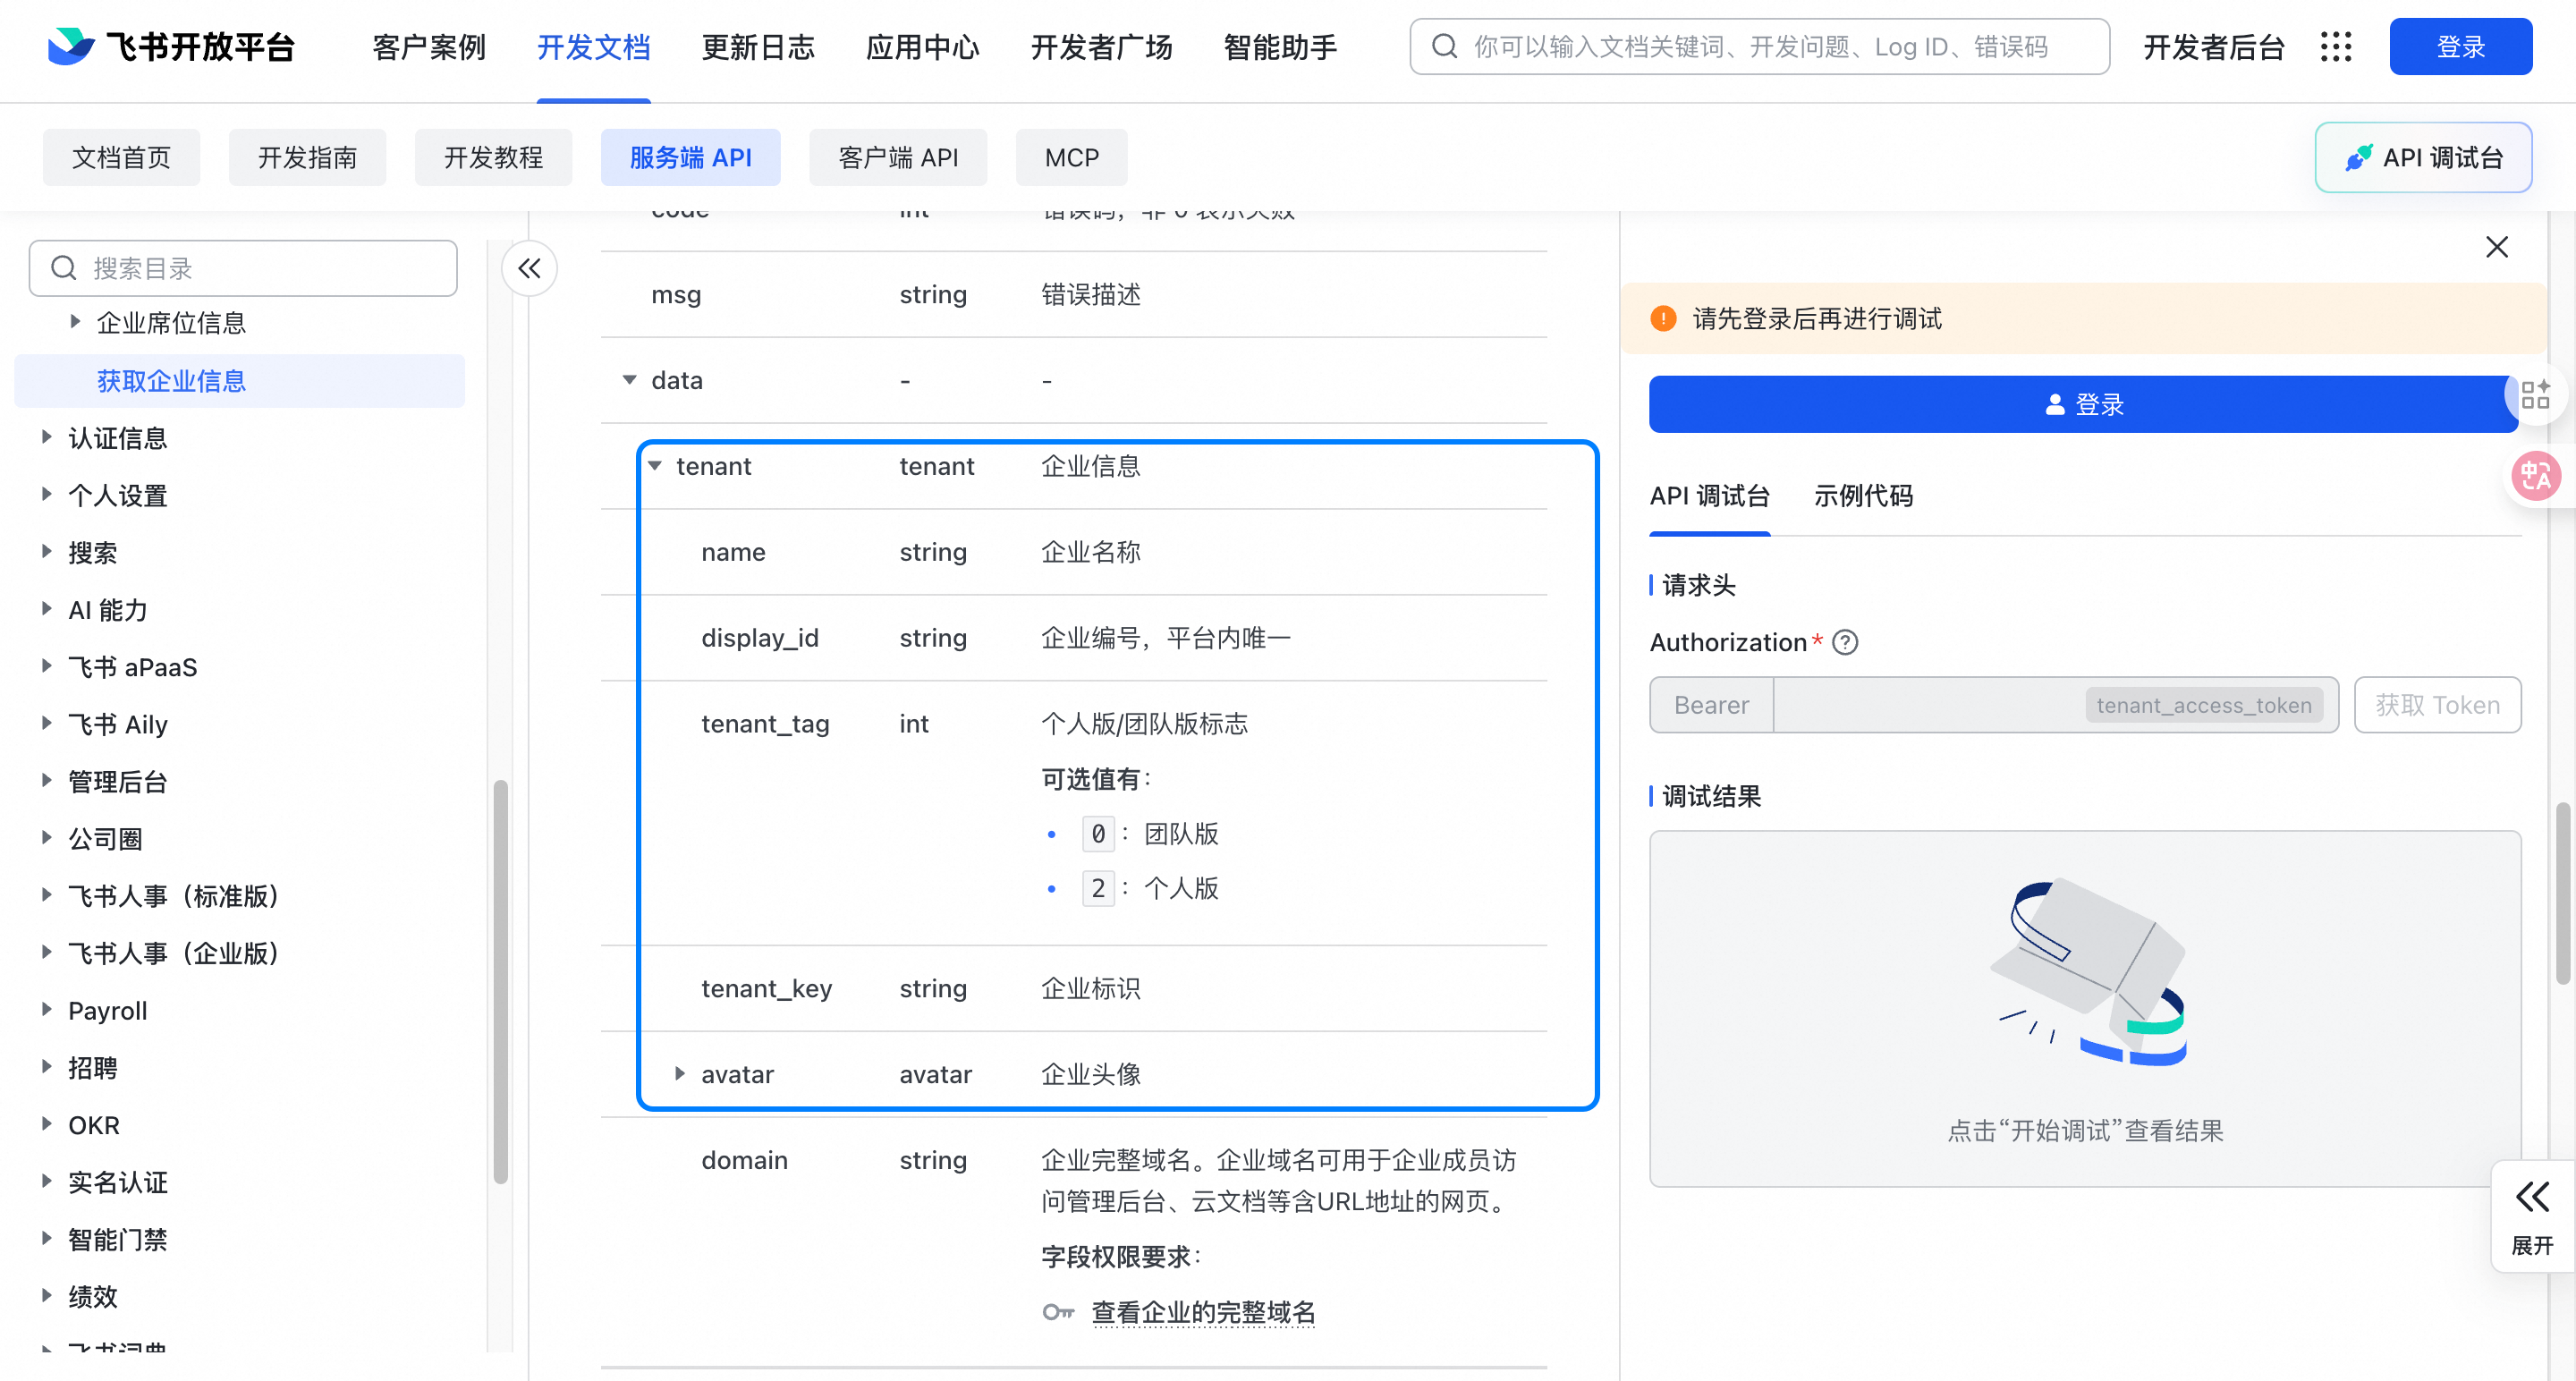
Gets basic information about your enterprise, including the following:
Main purpose: To correctly display your enterprise identity in the application. |
|
|
Gets application information. Main purpose: To get basic application information to verify that your application is configured correctly. |
|
|
Lets the application bot send messages to users. Main purpose: When you are mentioned with an |
|
|
Lets the application create and update message cards. Main purpose: To send you notifications as visually appealing and interactive cards for a better reading experience. |
5.1 Method 1: Batch import
Go to Lark Developer Console > Application Details > Permission Management and click Batch Import/Export.
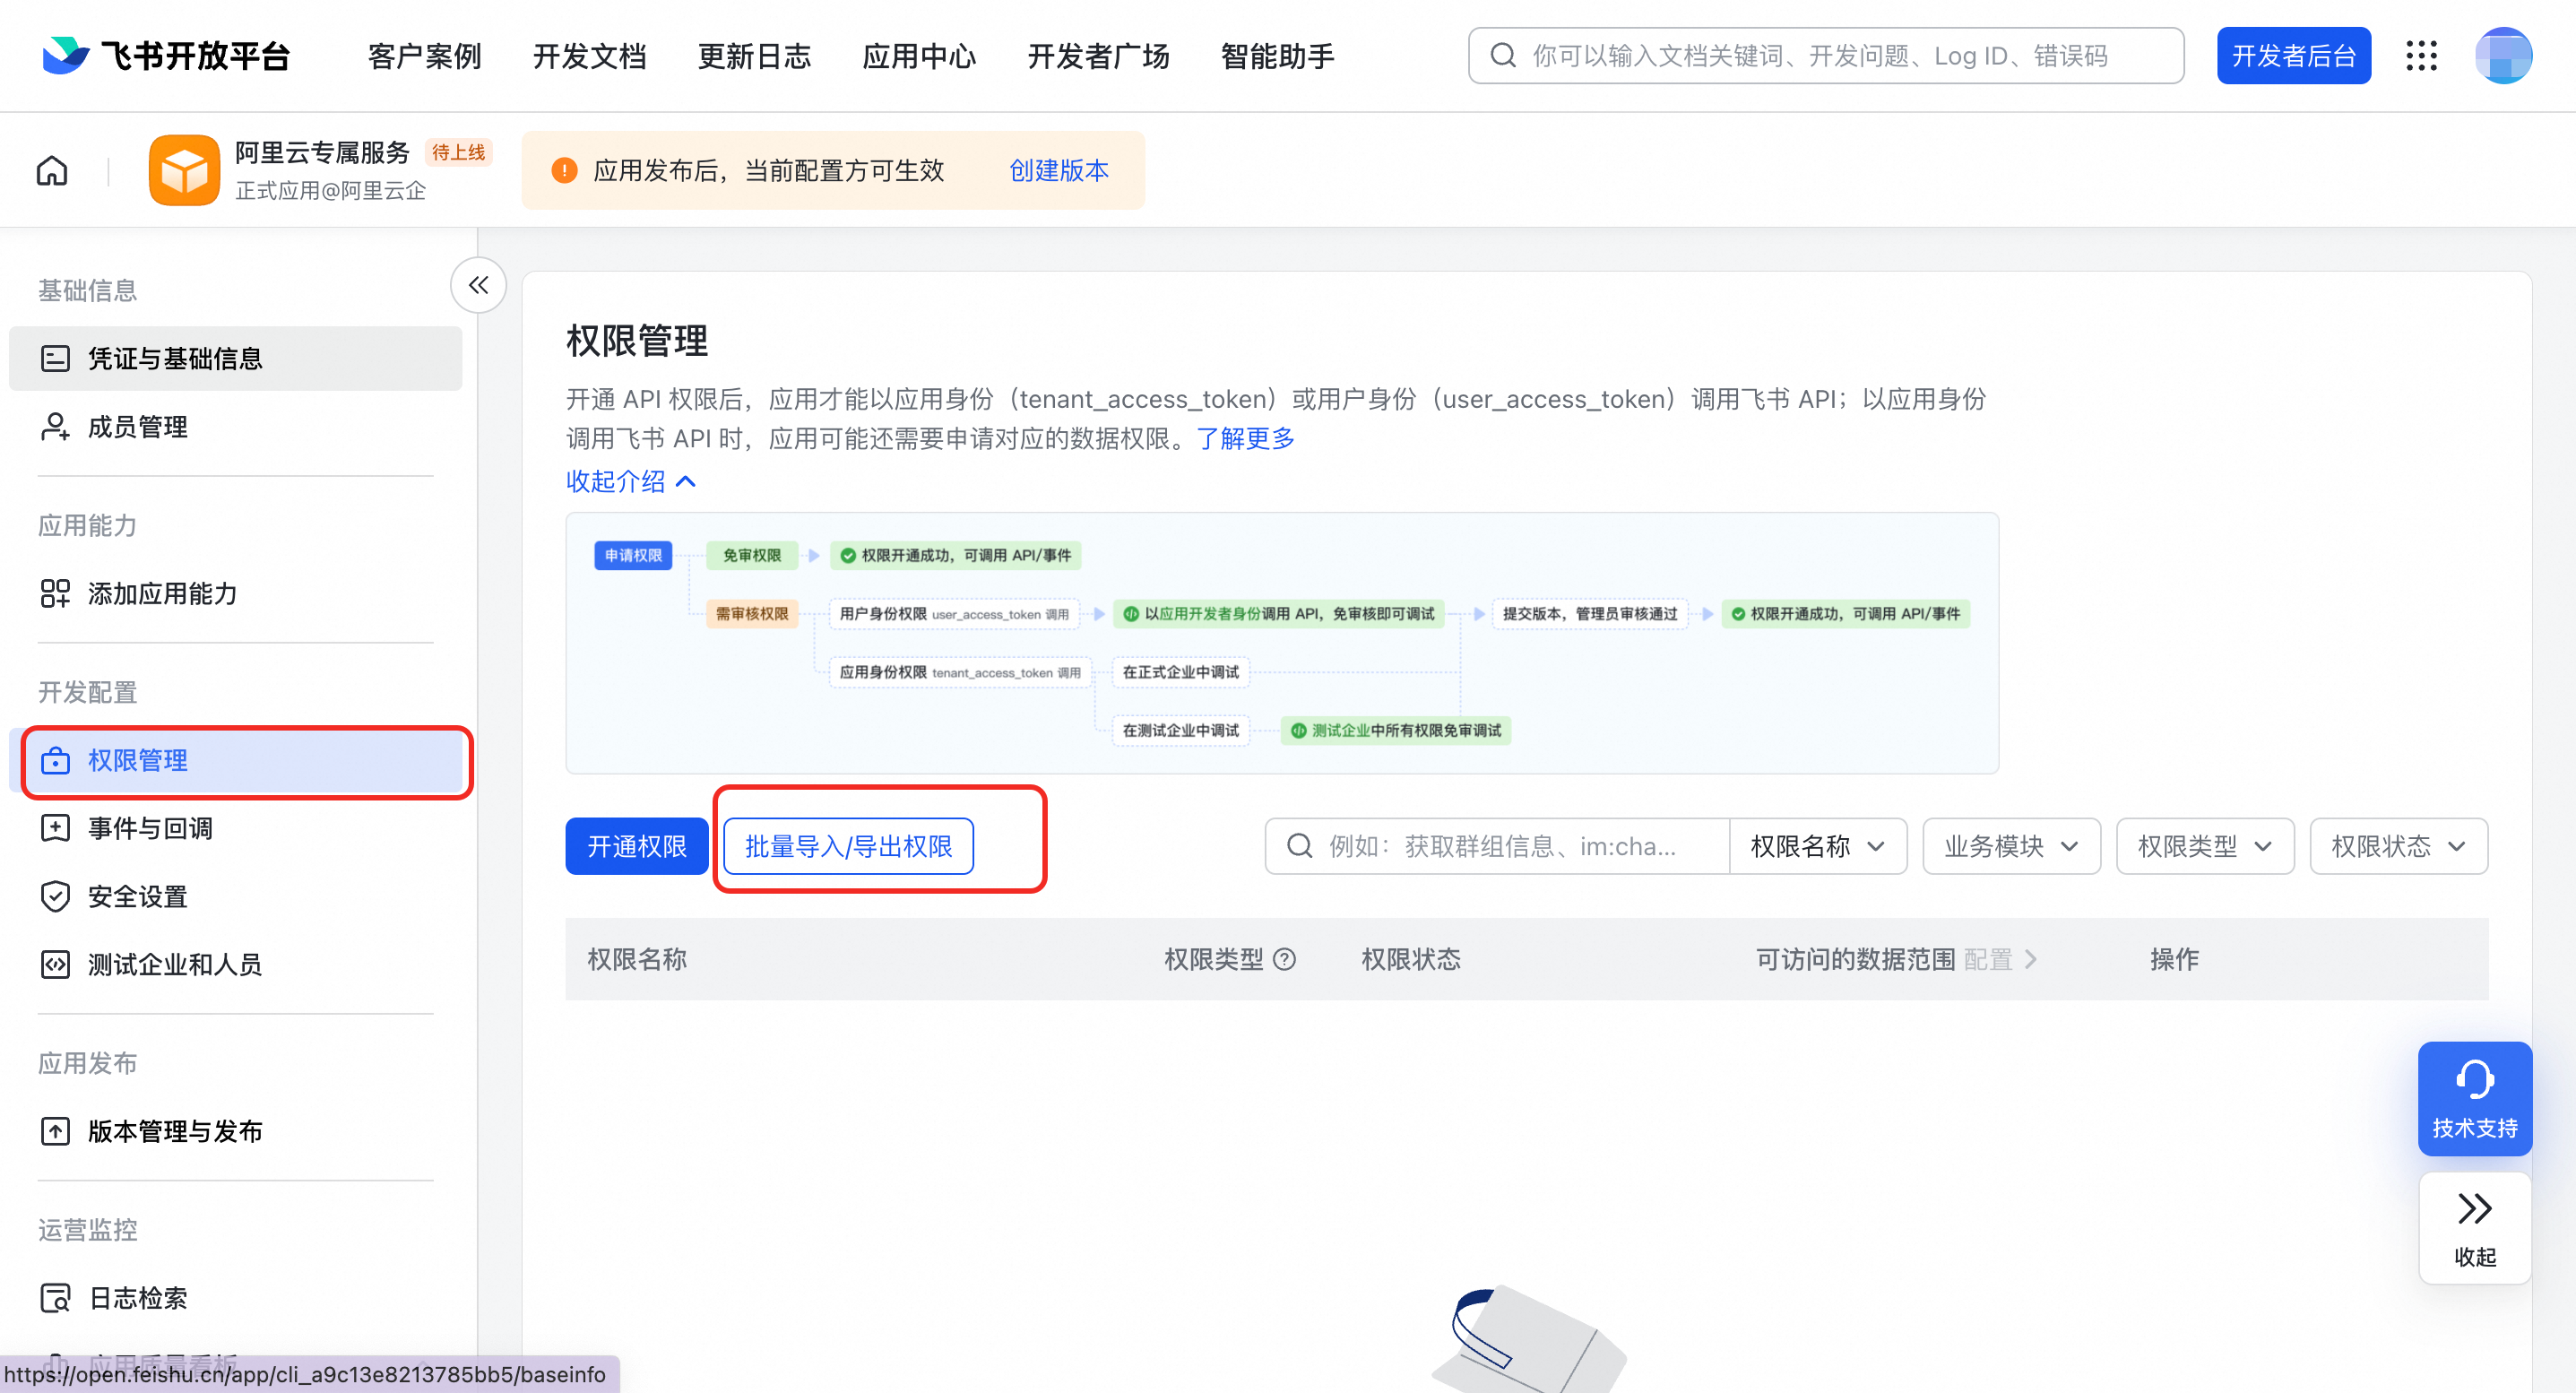
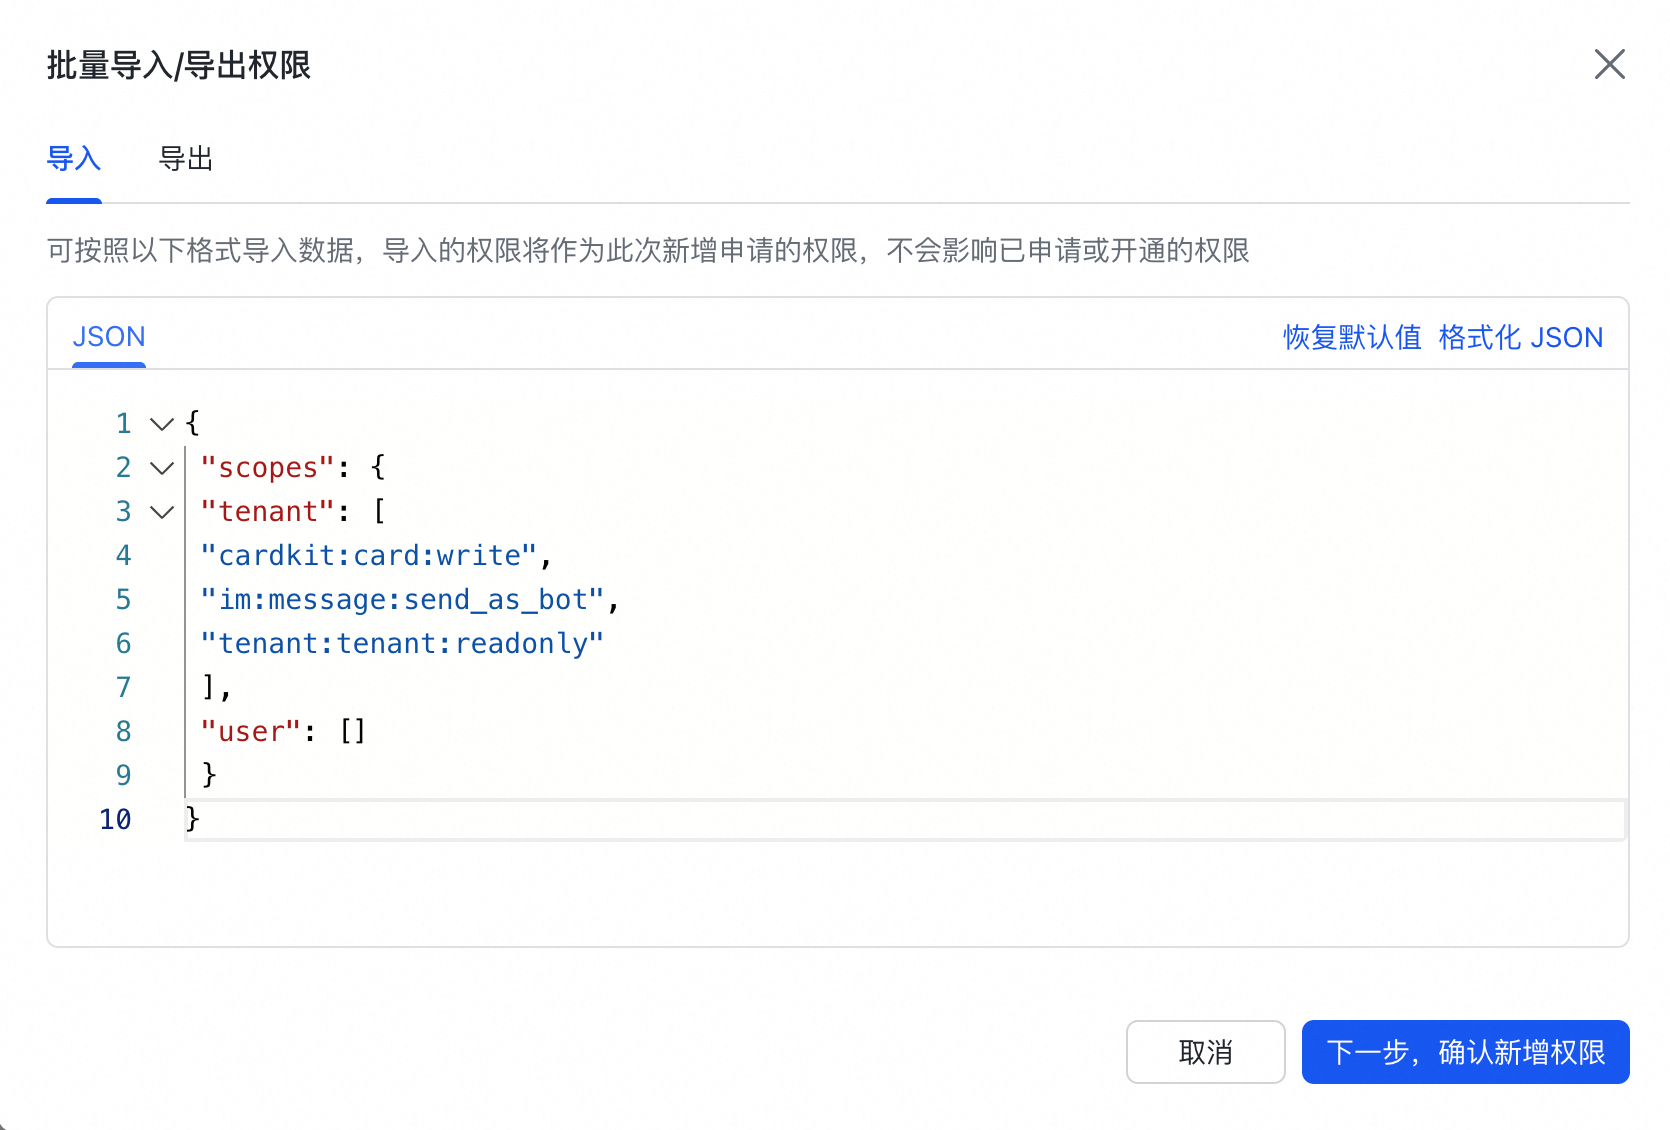
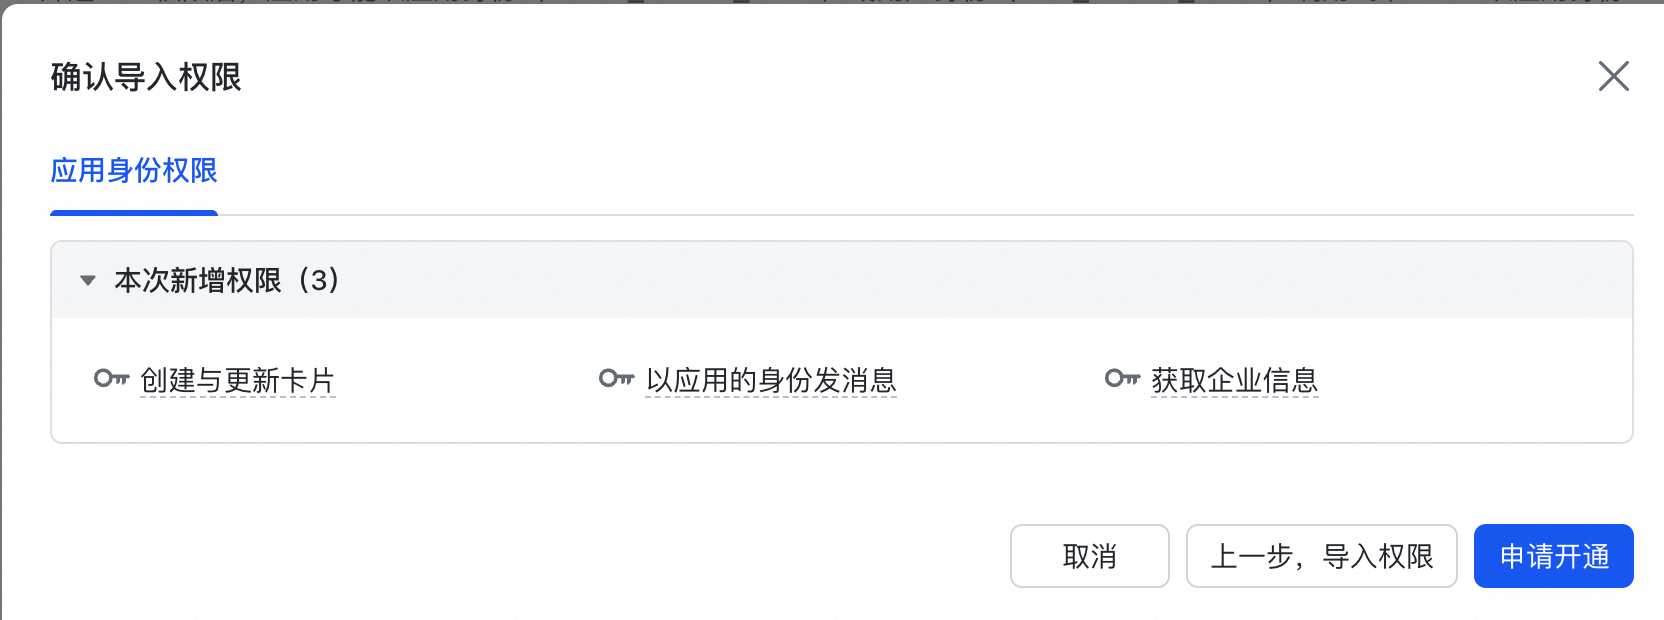
Copy the following JSON code into the import box and click Request to Enable.
{
 "scopes": {
 "tenant": [
 "application:application:self_manage",
 "cardkit:card:write",
 "im:message:send_as_bot",
 "tenant:tenant:readonly"
 ],
 "user": []
 }
}
|
|
5.2 Method 2: Manual addition
Quick add: On the Application Configuration page for the Lark channel, obtain the one-click add link. You can find this page in the Alibaba Cloud Value-added Service Console - My Support Plan under Enable Multi-channel. When you click the link, you are redirected to the Lark Developer Console, which lists the required permissions. Select all permissions and click Confirm to Grant Permissions to complete the process.
The quick add link format is shown below. Replace {appId} with your App ID.
https://open.feishu.cn/app/{appId}/auth?q=application:application:self_manage,tenant:tenant:readonly,im:message:send_as_bot,cardkit:card:write&op_from=openapi&token_type=tenantAdd one by one: You can also go to Lark Developer Console > Application Details > Permission Management and click Grant Permission. Search for and add the following permissions one by one.
Permission names:
application:application:self_manage
tenant:tenant:readonly
im:message:send_as_bot
cardkit:card:write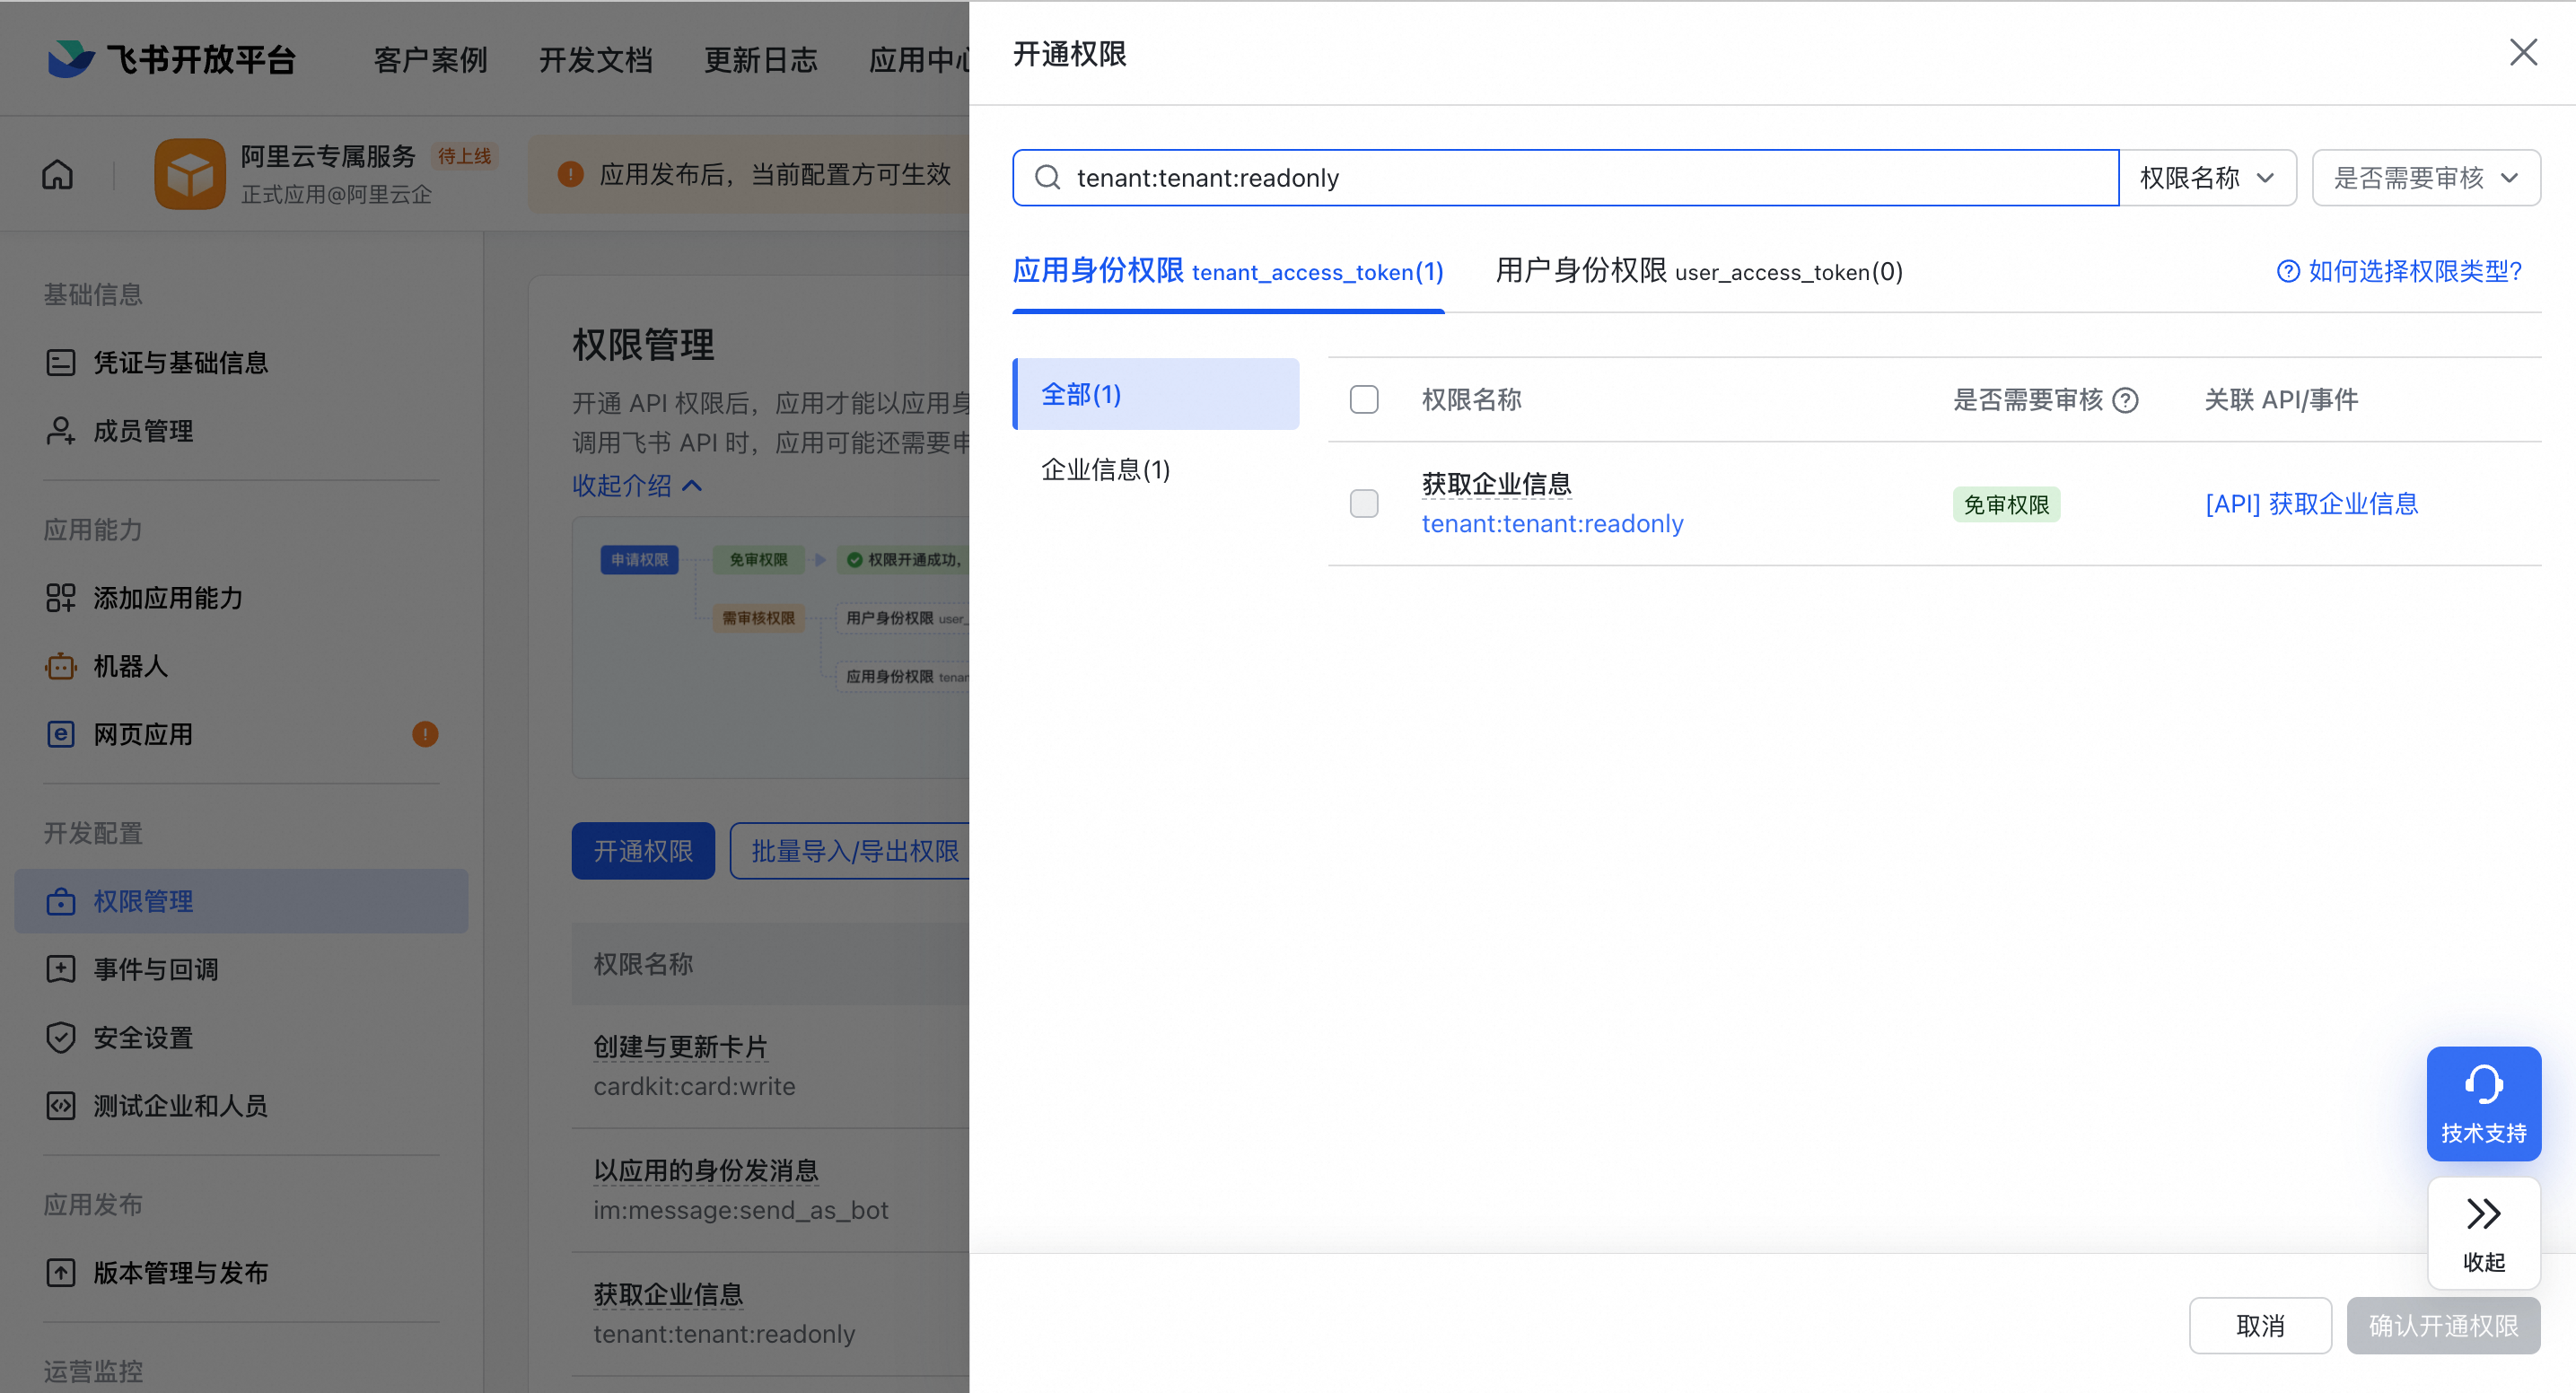
Step 6: Security settings
To ensure that the application runs correctly, you must complete the following security configurations in the Lark Developer Console.
6.1 Configure redirection URLs
Add the following addresses to Security Settings > Redirection URL. You can copy the required URLs directly from the Value-added Service Console and paste them into the Lark console for batch modification.
Note: Replace {appId} in the URLs with the actual App ID that you obtained in Step 1. You can find the App ID on the application details page in Lark.
https://ailink.gts.work/feishu/{appId}
https://ailink.gts.work/feishu/{appId}/workbench
https://ailink.gts.work/thirdparty/feishu/{appId}/login
https://ailink.gts.work/thirdparty/feishu/{appId}/oauth2/callback
https://ailink.gts.work/feishu/{appId}/person/inviteToGroup
6.2 Configure trusted H5 domain names
Add the following domain name to Security Settings > Trusted H5 Domain Names:
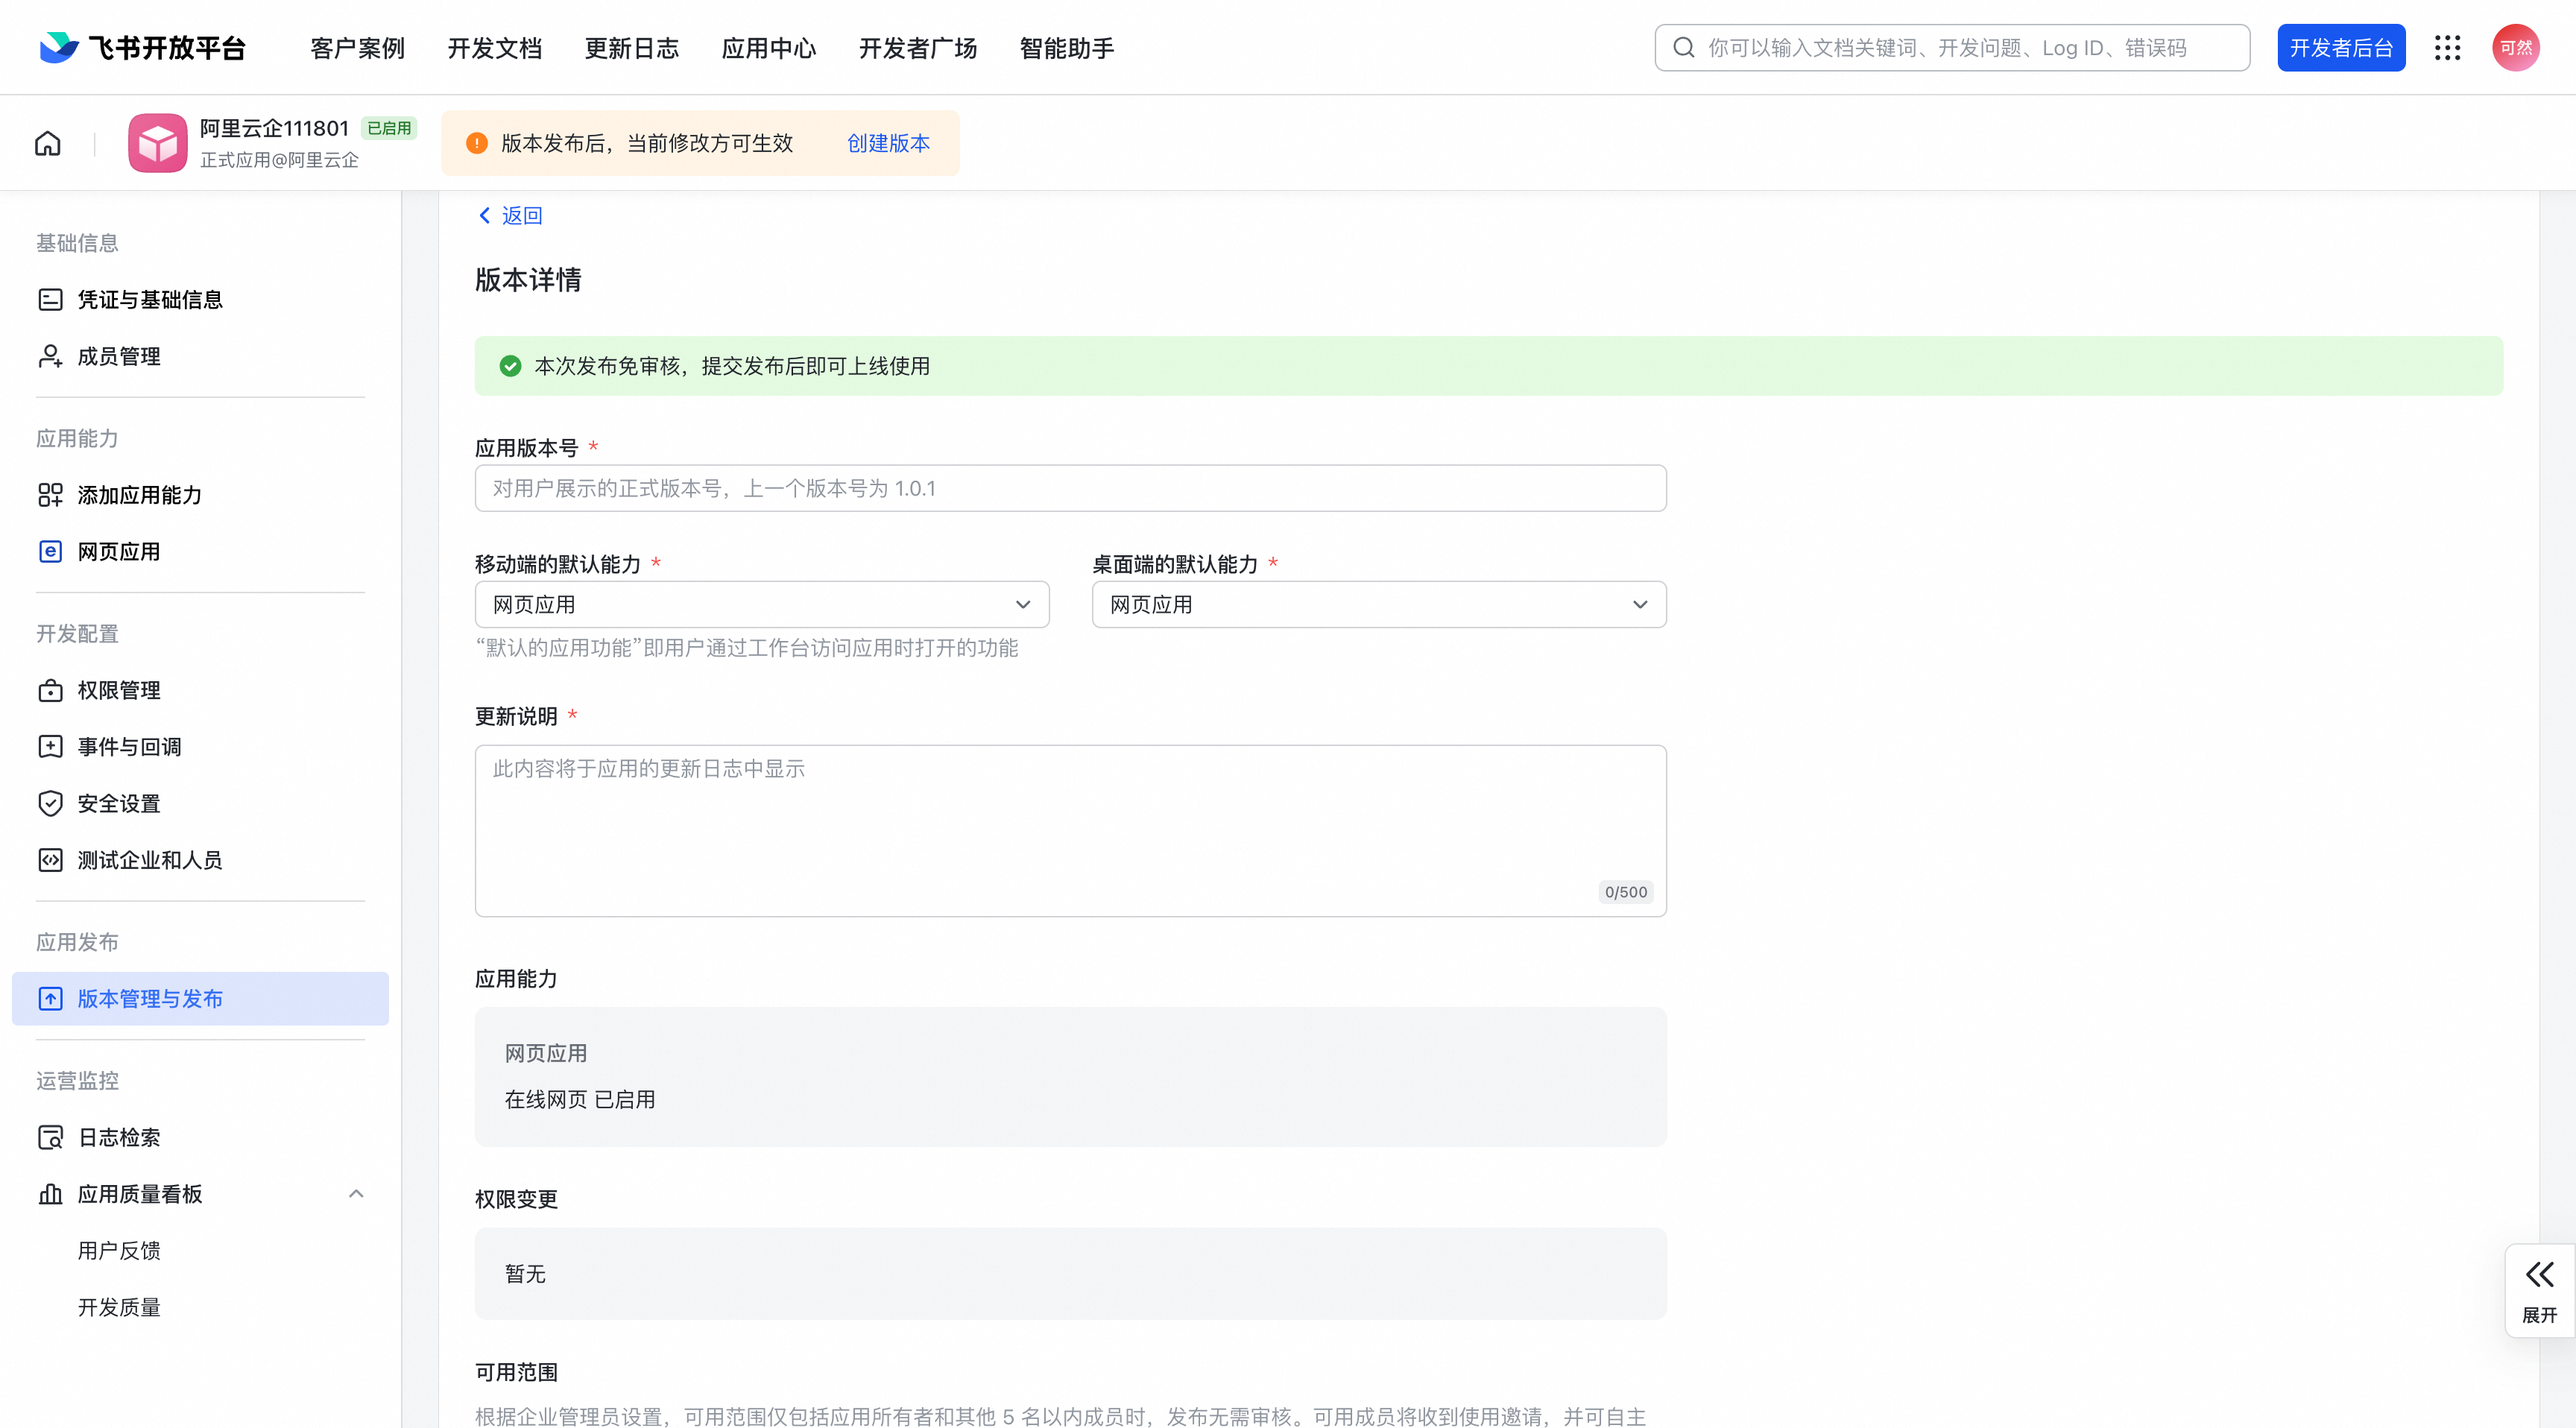
https://ailink.gts.workStep 7: Version management and publishing
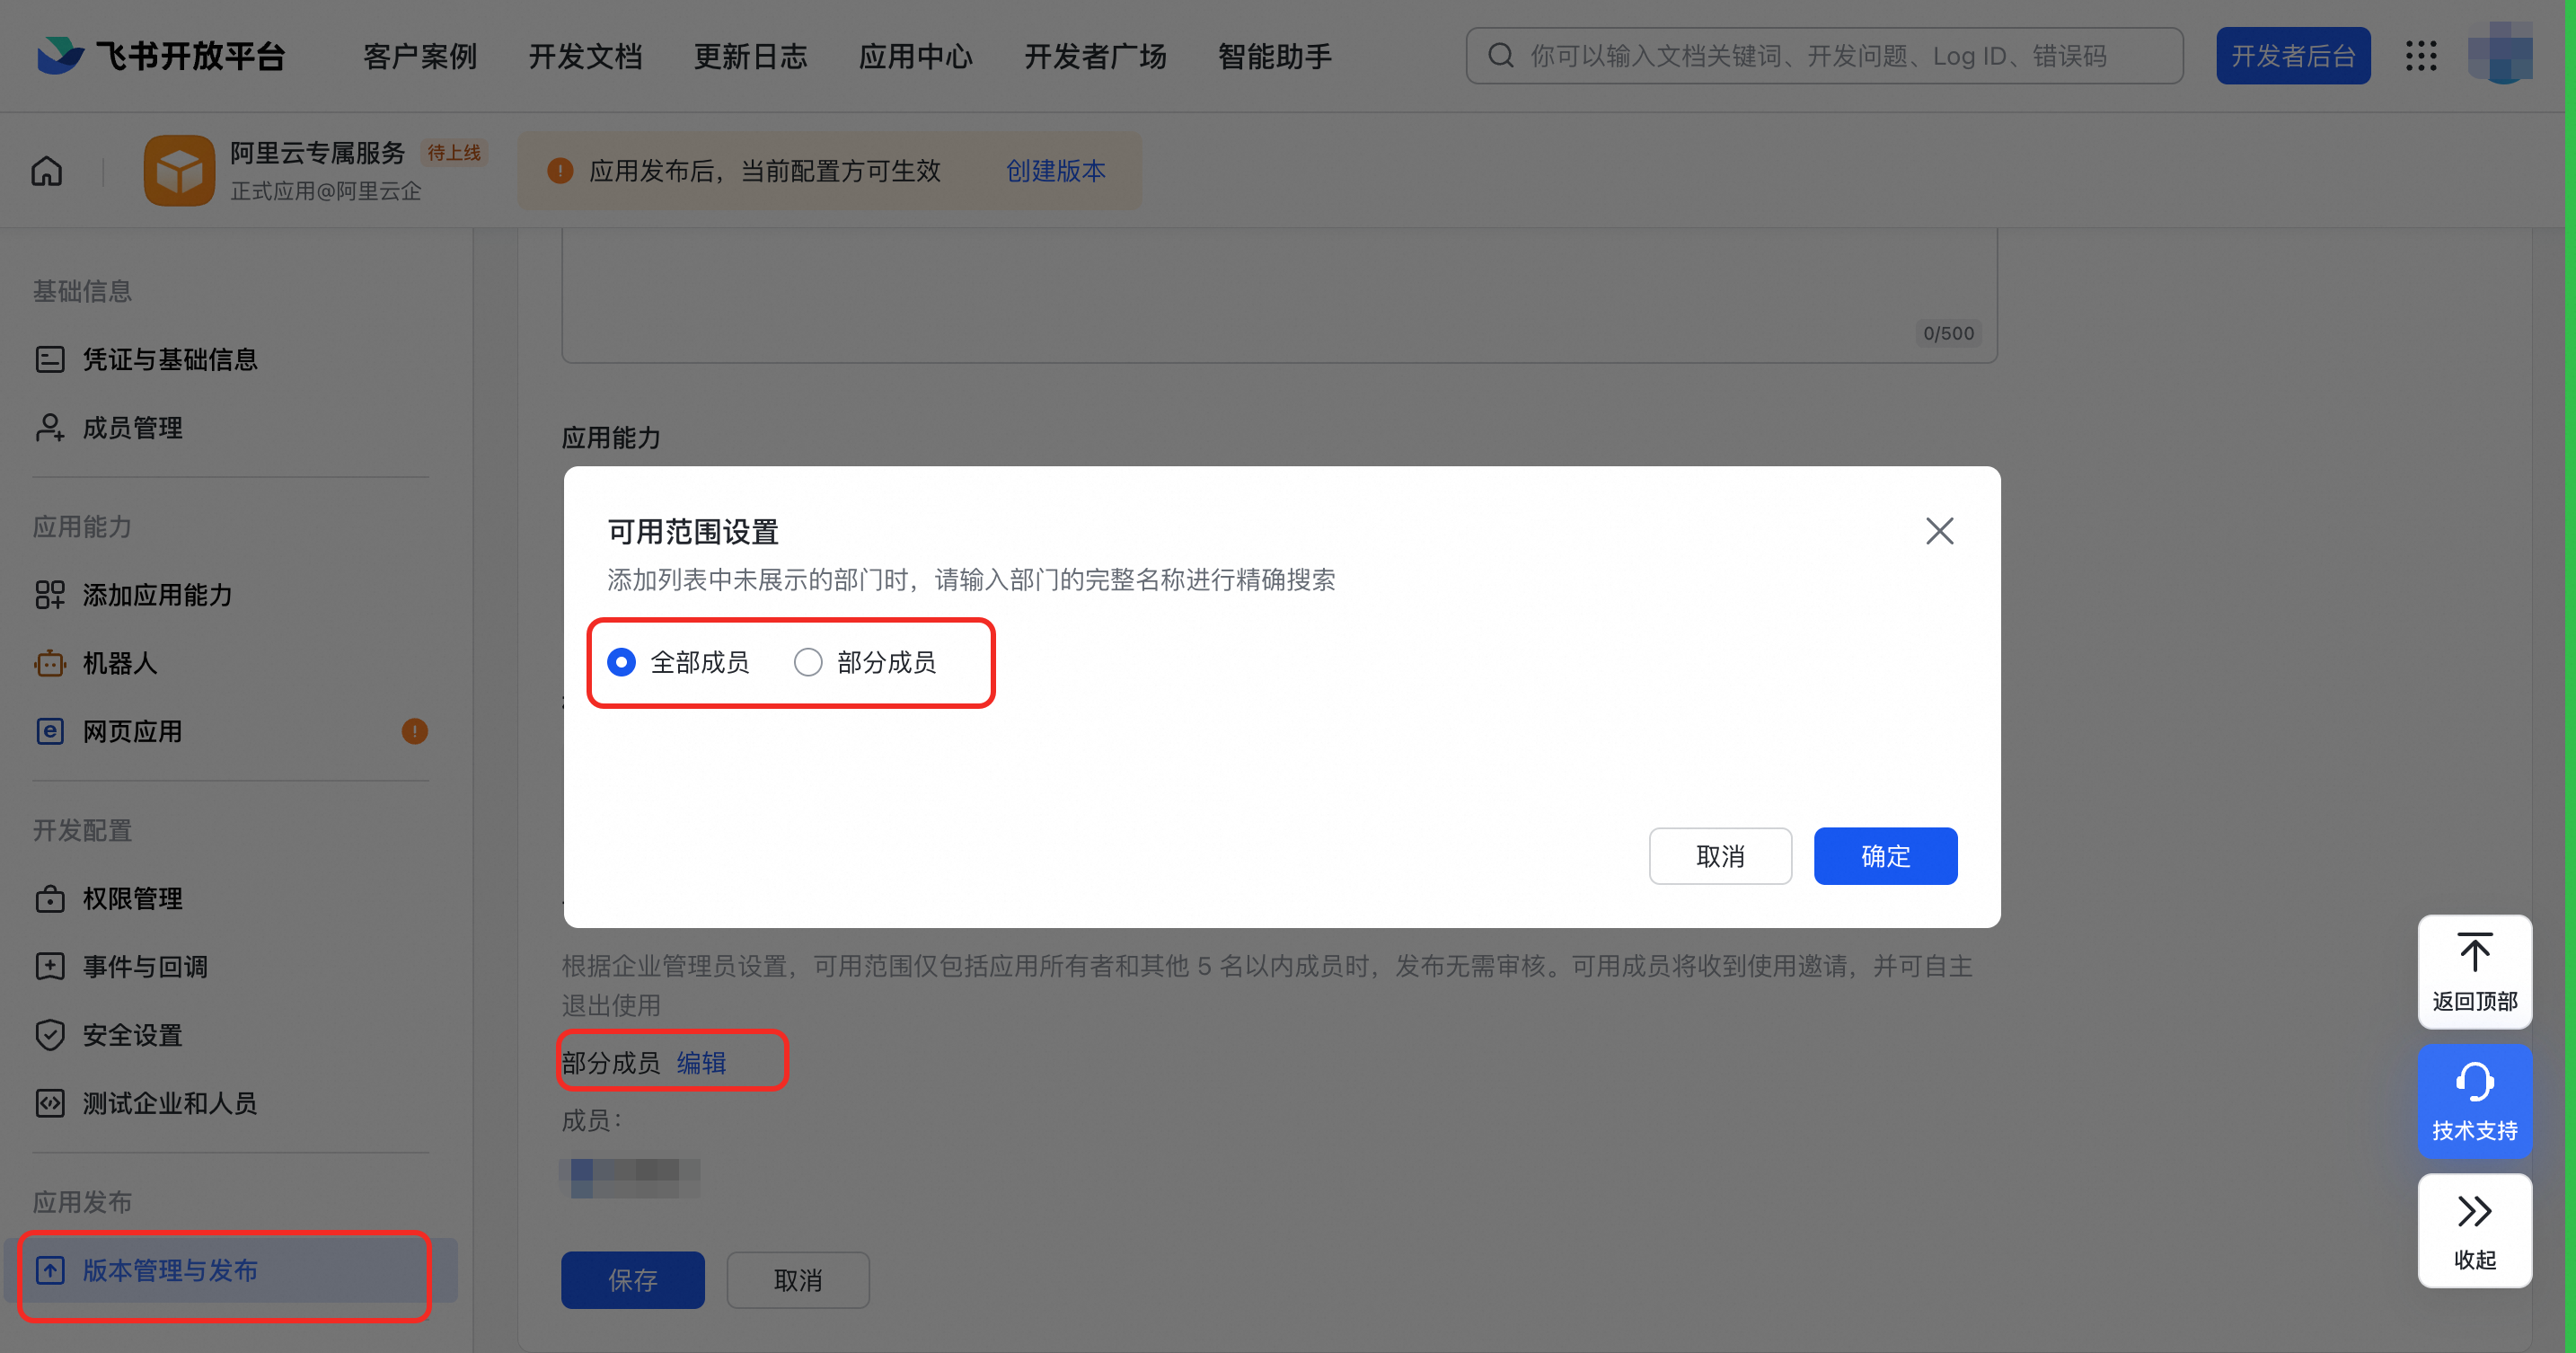
For the initial release and every subsequent change to the application, go to Version Management & Publishing. Enter the version number and update notes, and then save and publish the changes.
Note: You can set the Application Availability to all members of the organization or to specific members as needed.
Done! Contact your TAM to join the group
You have completed all the configuration steps. Contact your Technical Account Manager (TAM) to obtain a link to join the group. In the application, you can communicate with your TAM in real-time, receive ticket notifications, track service progress, and enjoy a seamlessly integrated exclusive support experience.
Special notes and FAQ
[Network Configuration] IP address whitelist (if applicable)
If your corporate network has a strict IP address or domain name whitelist, you must add our application URL to the whitelist. Otherwise, the application cannot be opened in Lark.
[Cost Information] Lark version and API call limits
If you use the Free Edition of Lark, the API call limit for custom enterprise applications is
10,000 calls/month.If you use a paid edition of Lark, this limit does not apply.
Note: Our application primarily uses API calls to send
@mention notifications through the bot. To prevent notification fatigue, each user receives a maximum of one notification every 10 minutes. You can estimate your usage based on your team's communication frequency. The limit of 10,000 calls/month applies to the total number of API calls. If you use the Free Edition, you must also consider other API calls. For more information about paid APIs, see https://open.feishu.cn/document/server-docs/api-call-guide/server-api-list?charge=all.
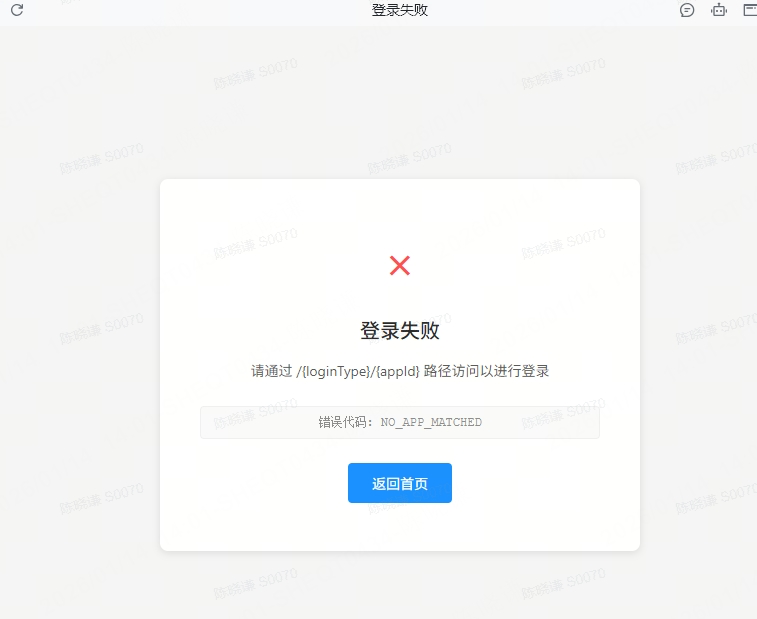
If you see this error when you open the Alibaba Cloud Enterprise Service application in Lark, it means the gateway configuration on the Alibaba Cloud side has not taken effect. Contact your TAM to activate the channel.

Part 2: Alibaba Cloud Exclusive Service application user guide
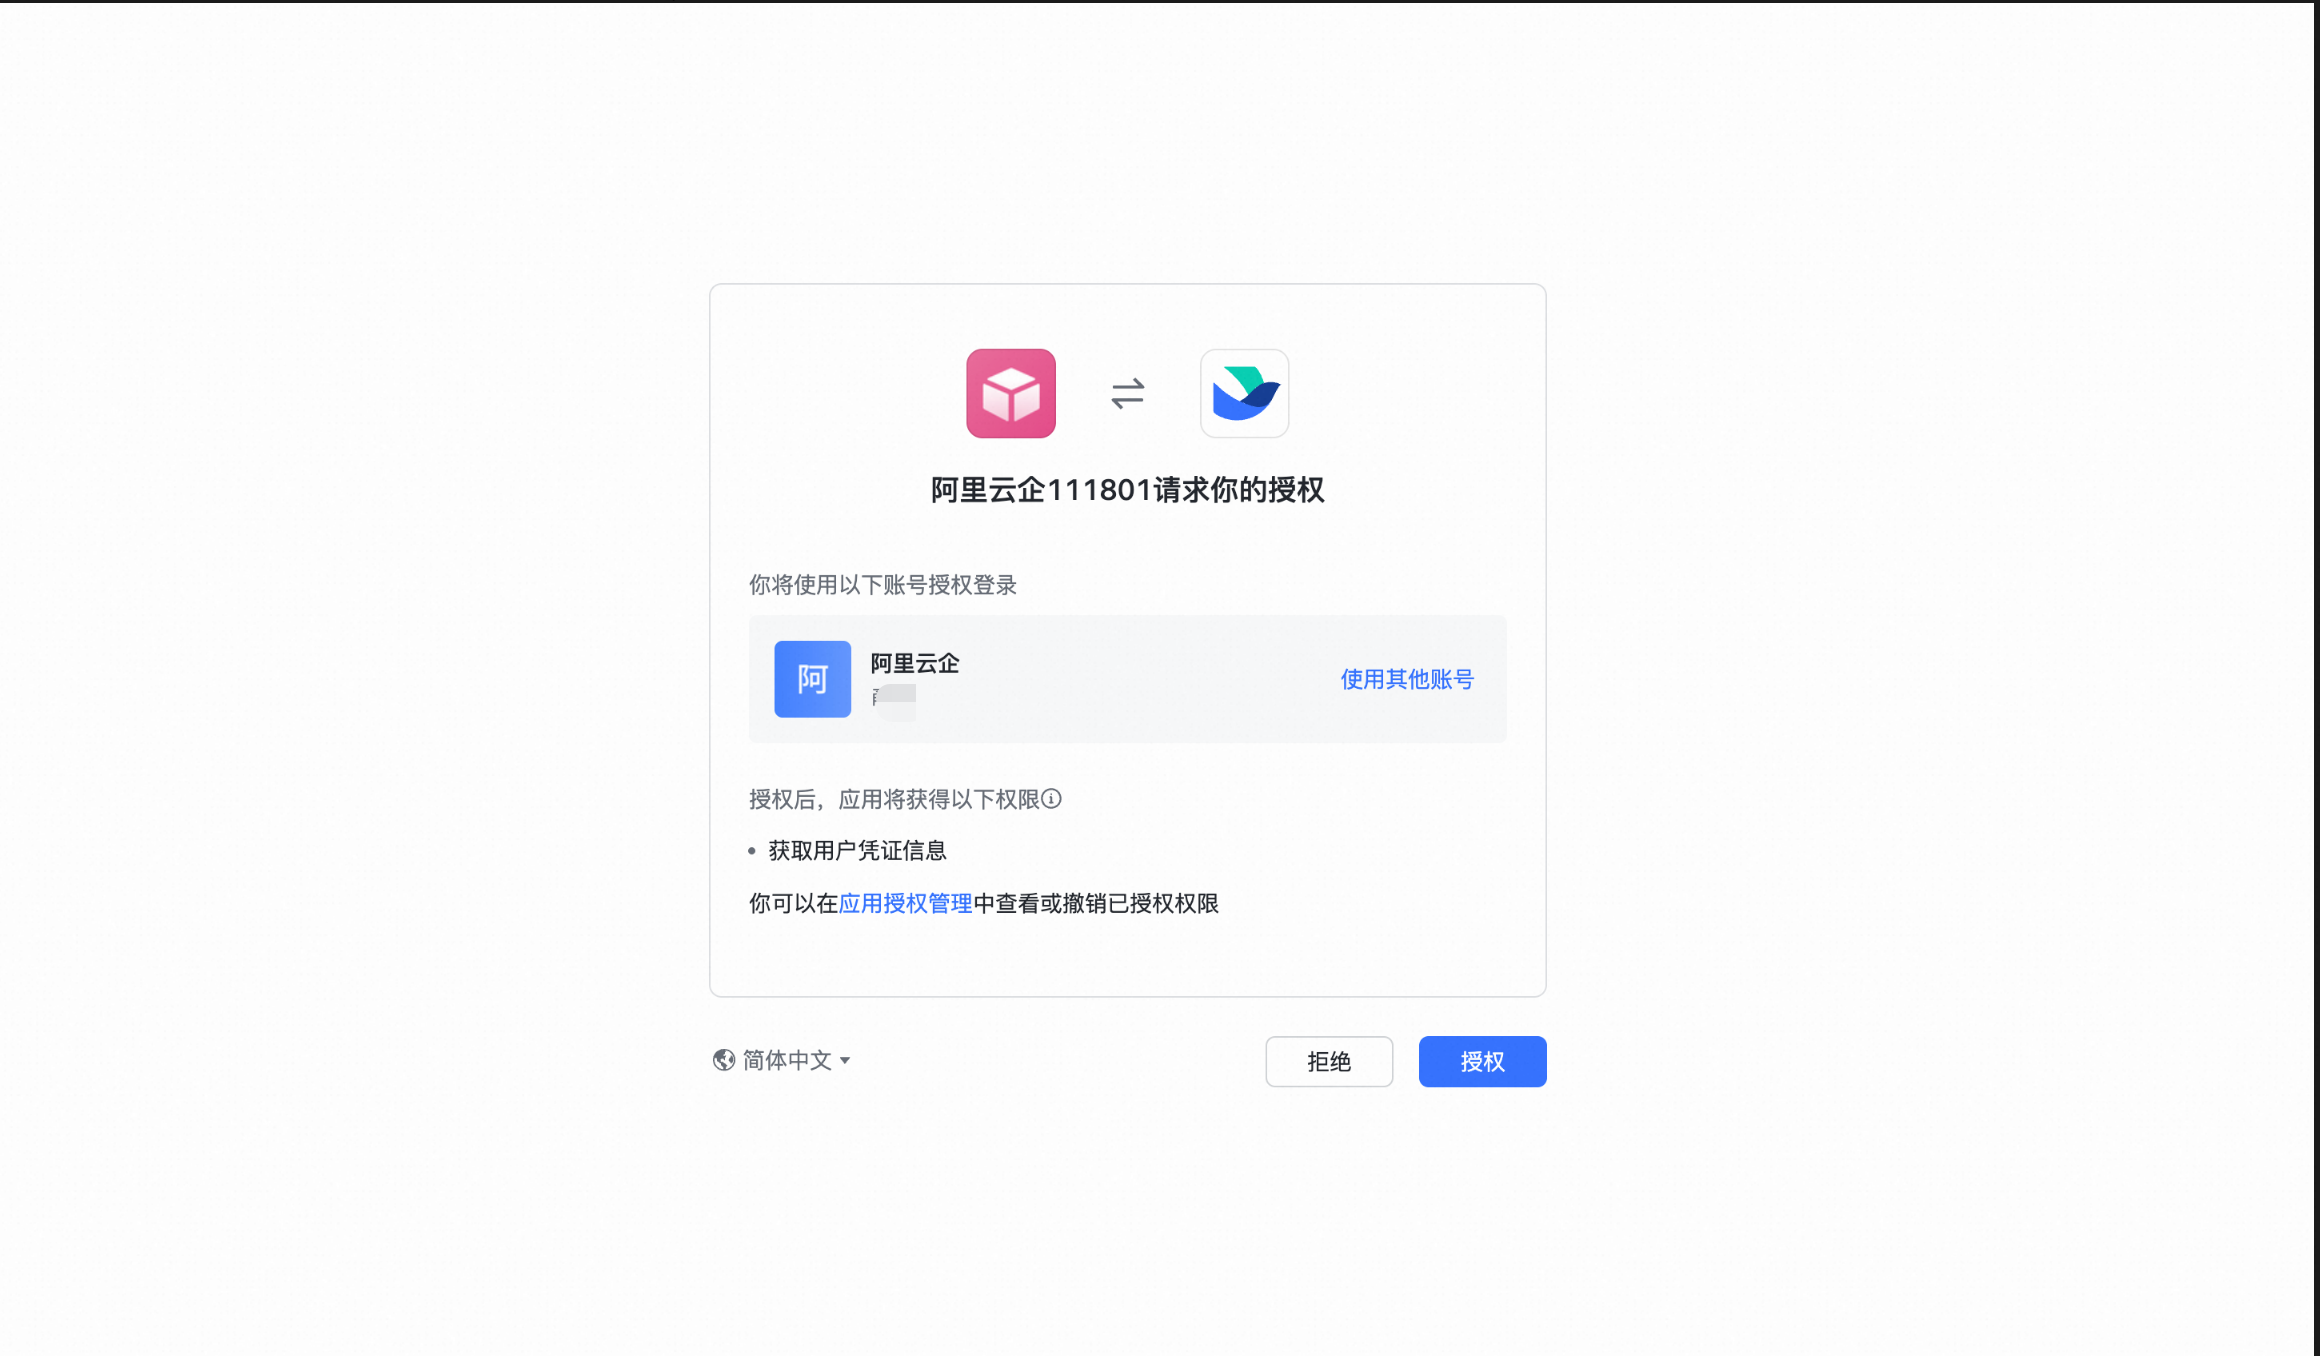
1. Log on and authorize
In Lark, click the application that you created in Part 1. Complete the authorization to log on. The authorization is used only for identity verification.
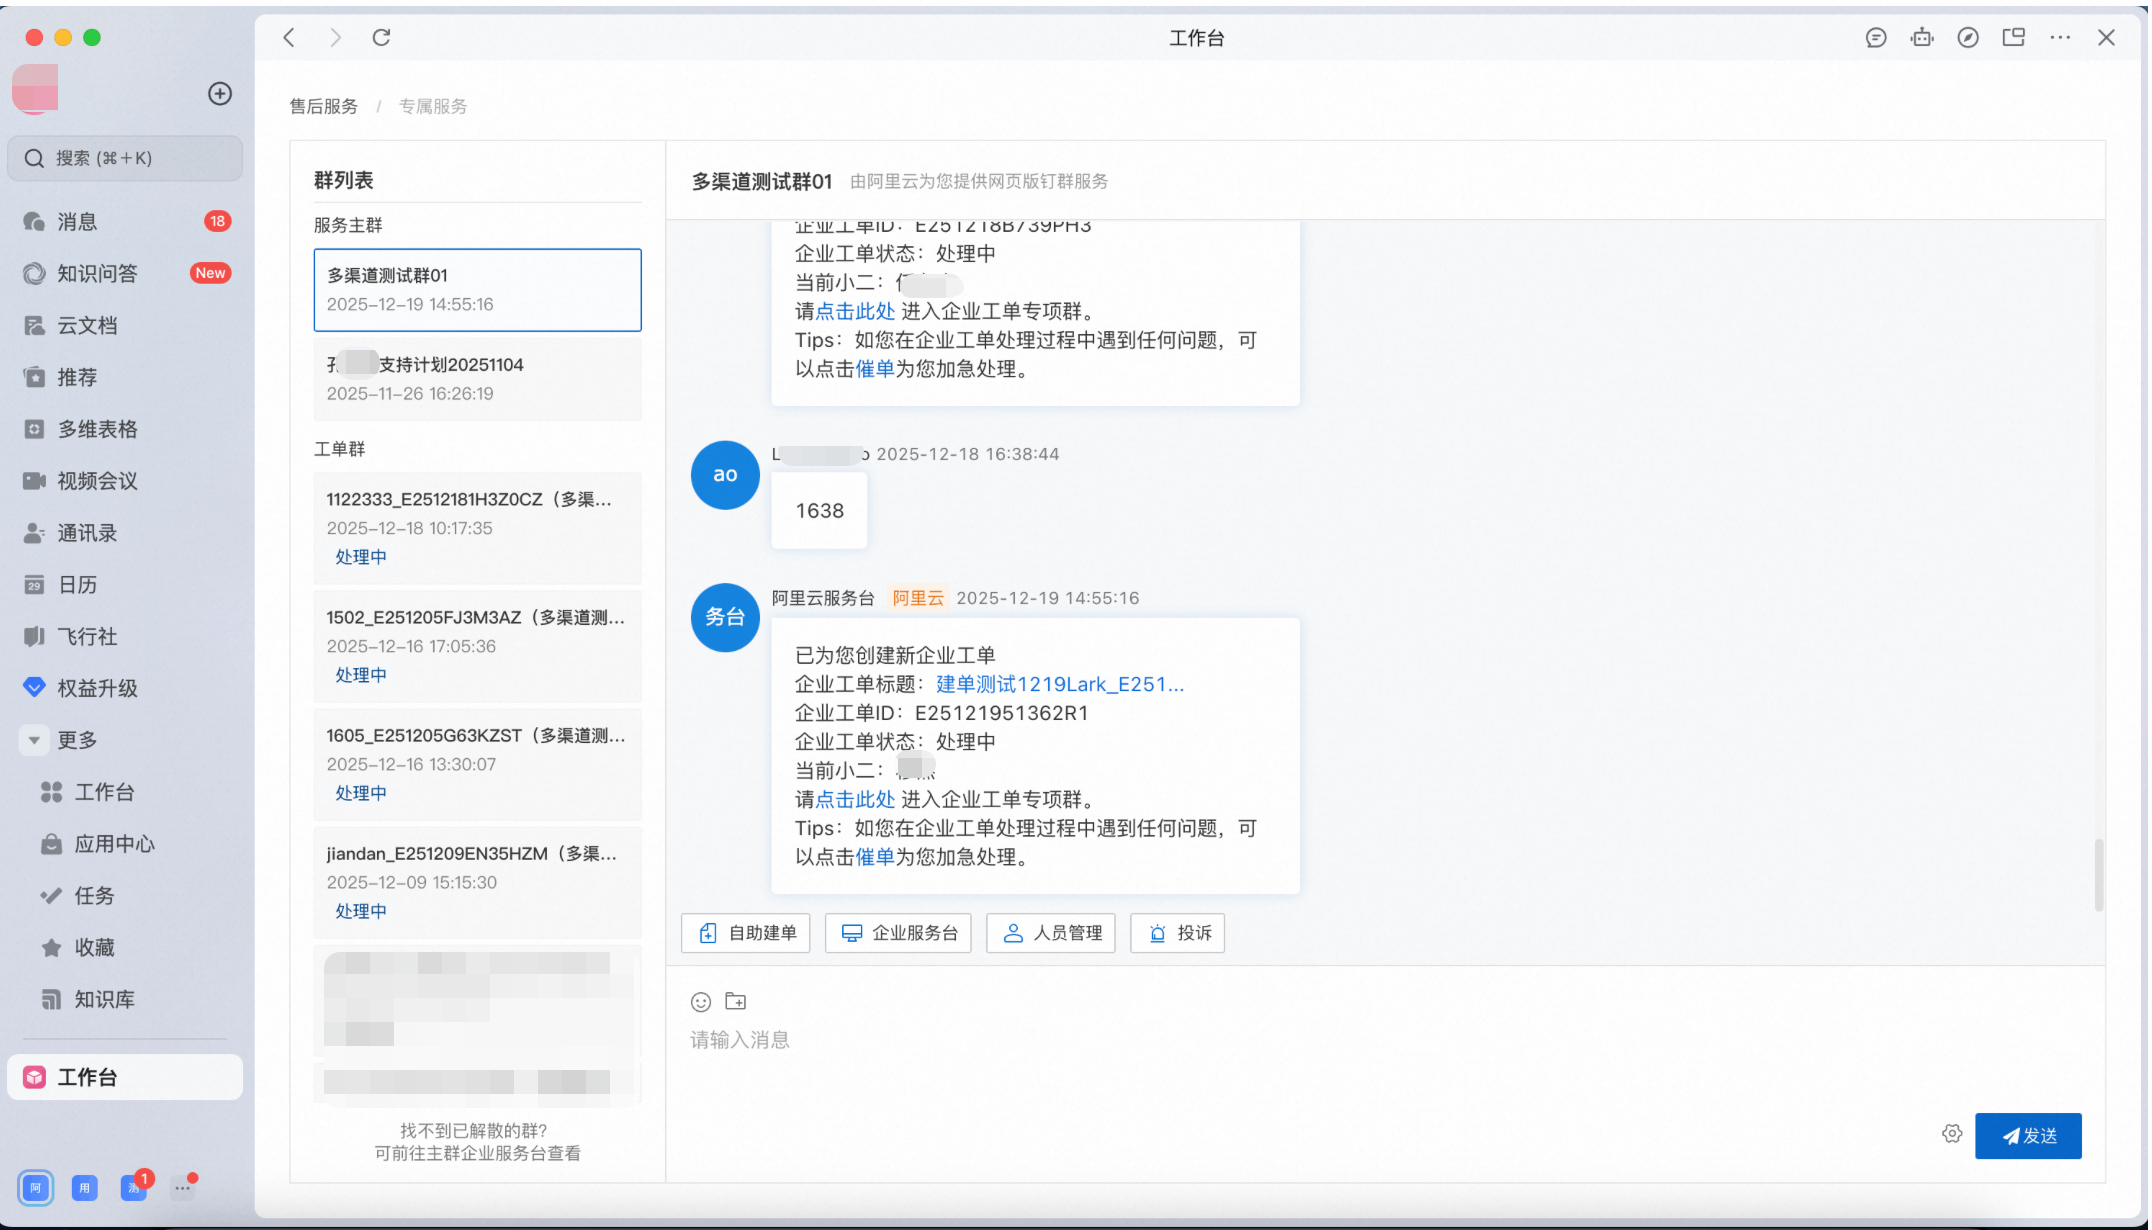
2. Main service group
After you enable the Lark channel service, the system automatically attaches the corresponding main service group for your Enterprise Support Plan. You can contact your TAM and other support staff directly in the group.
If the "Main Service Group" is not displayed on your interface and you see an error as shown in the figure below, contact your TAM to obtain a link to join the group.
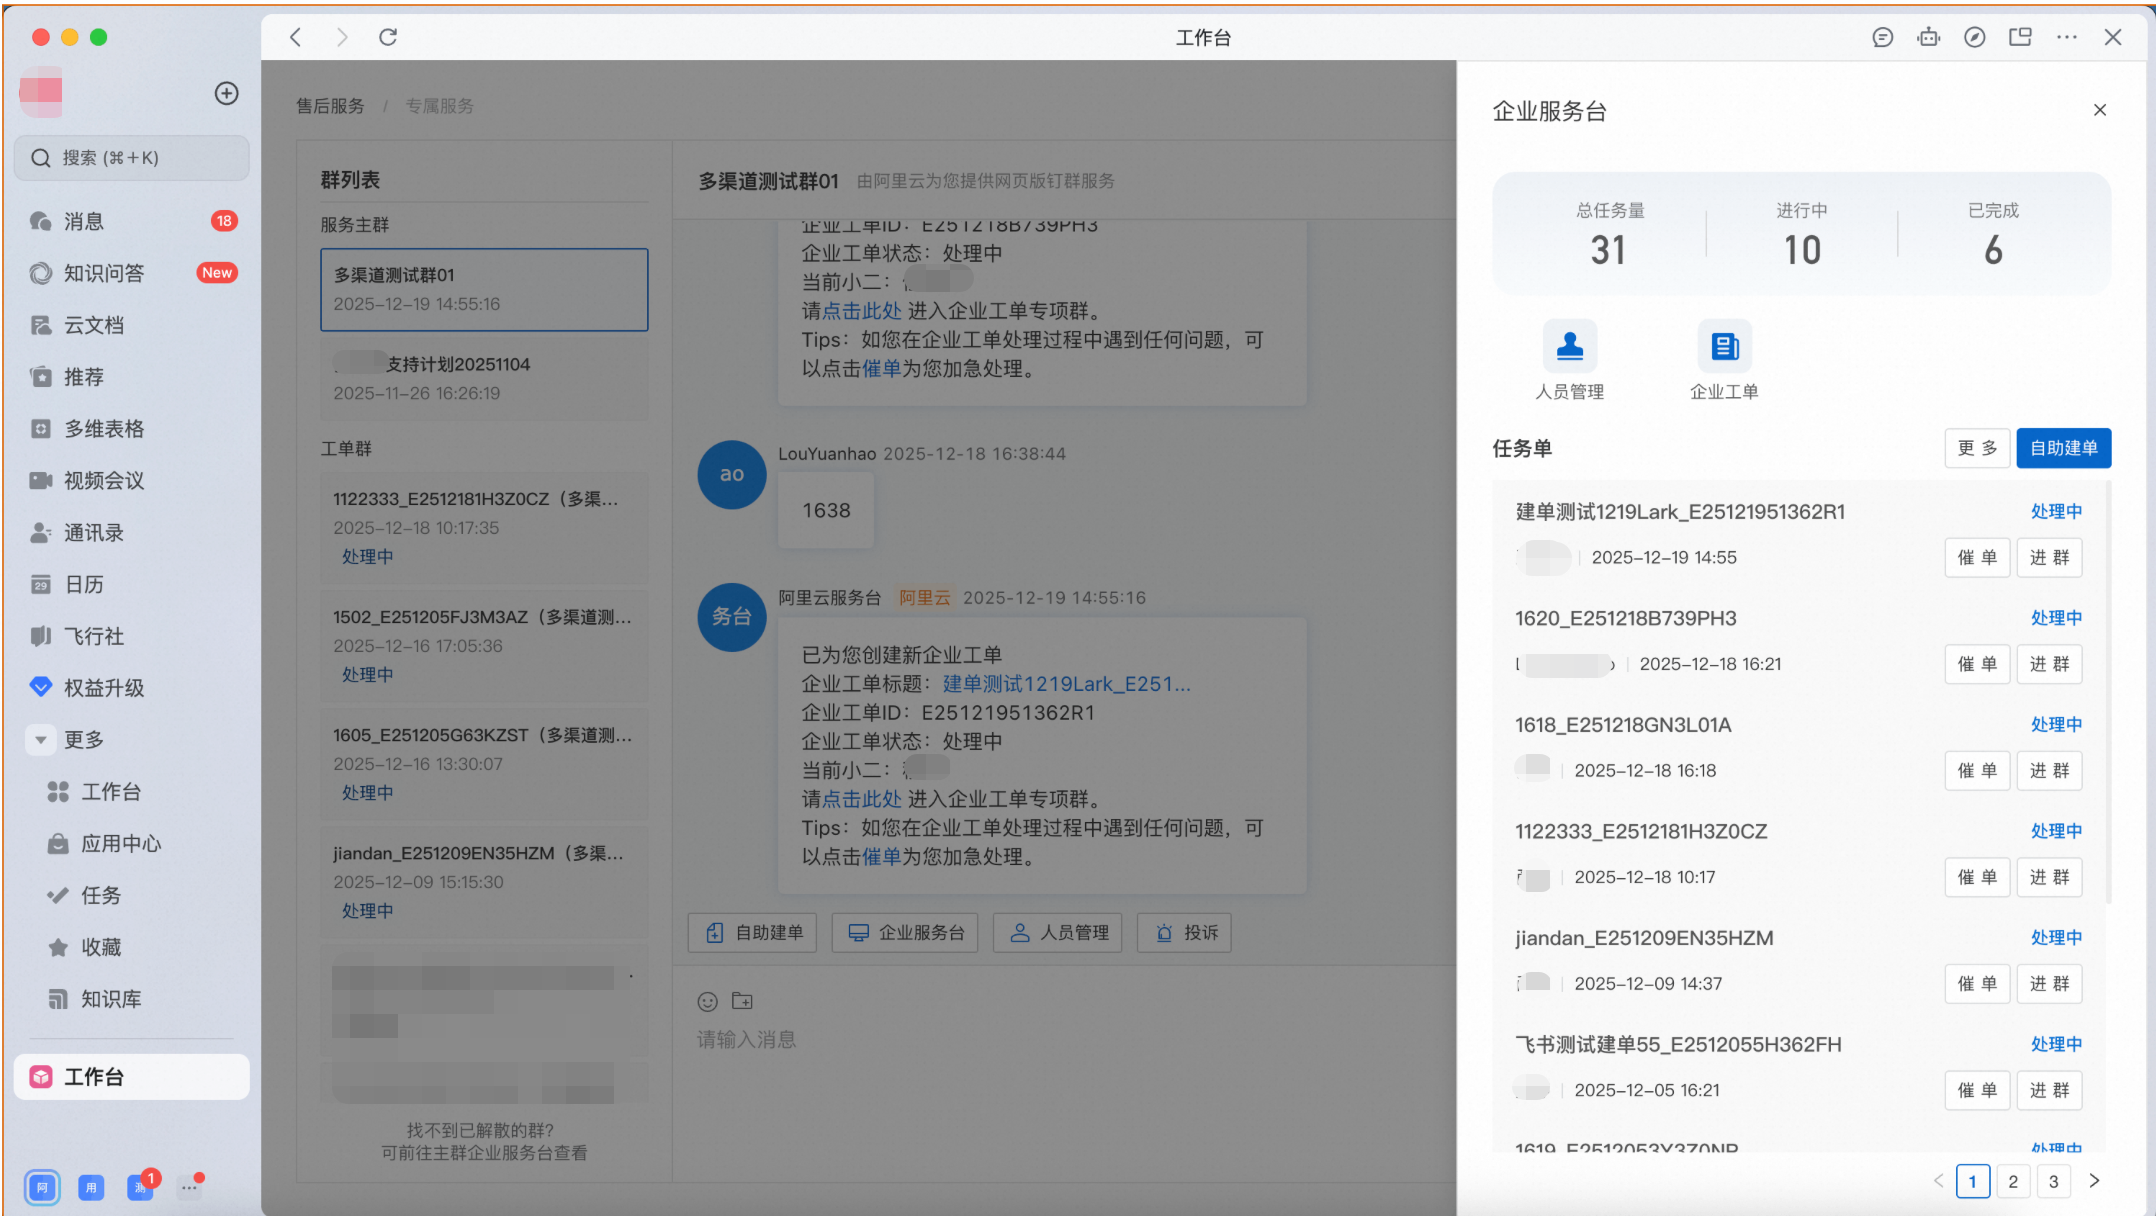
2.1 Enterprise Service Desk
In the main service group, click Enterprise Service Desk to view all associated tickets and participants in the group.
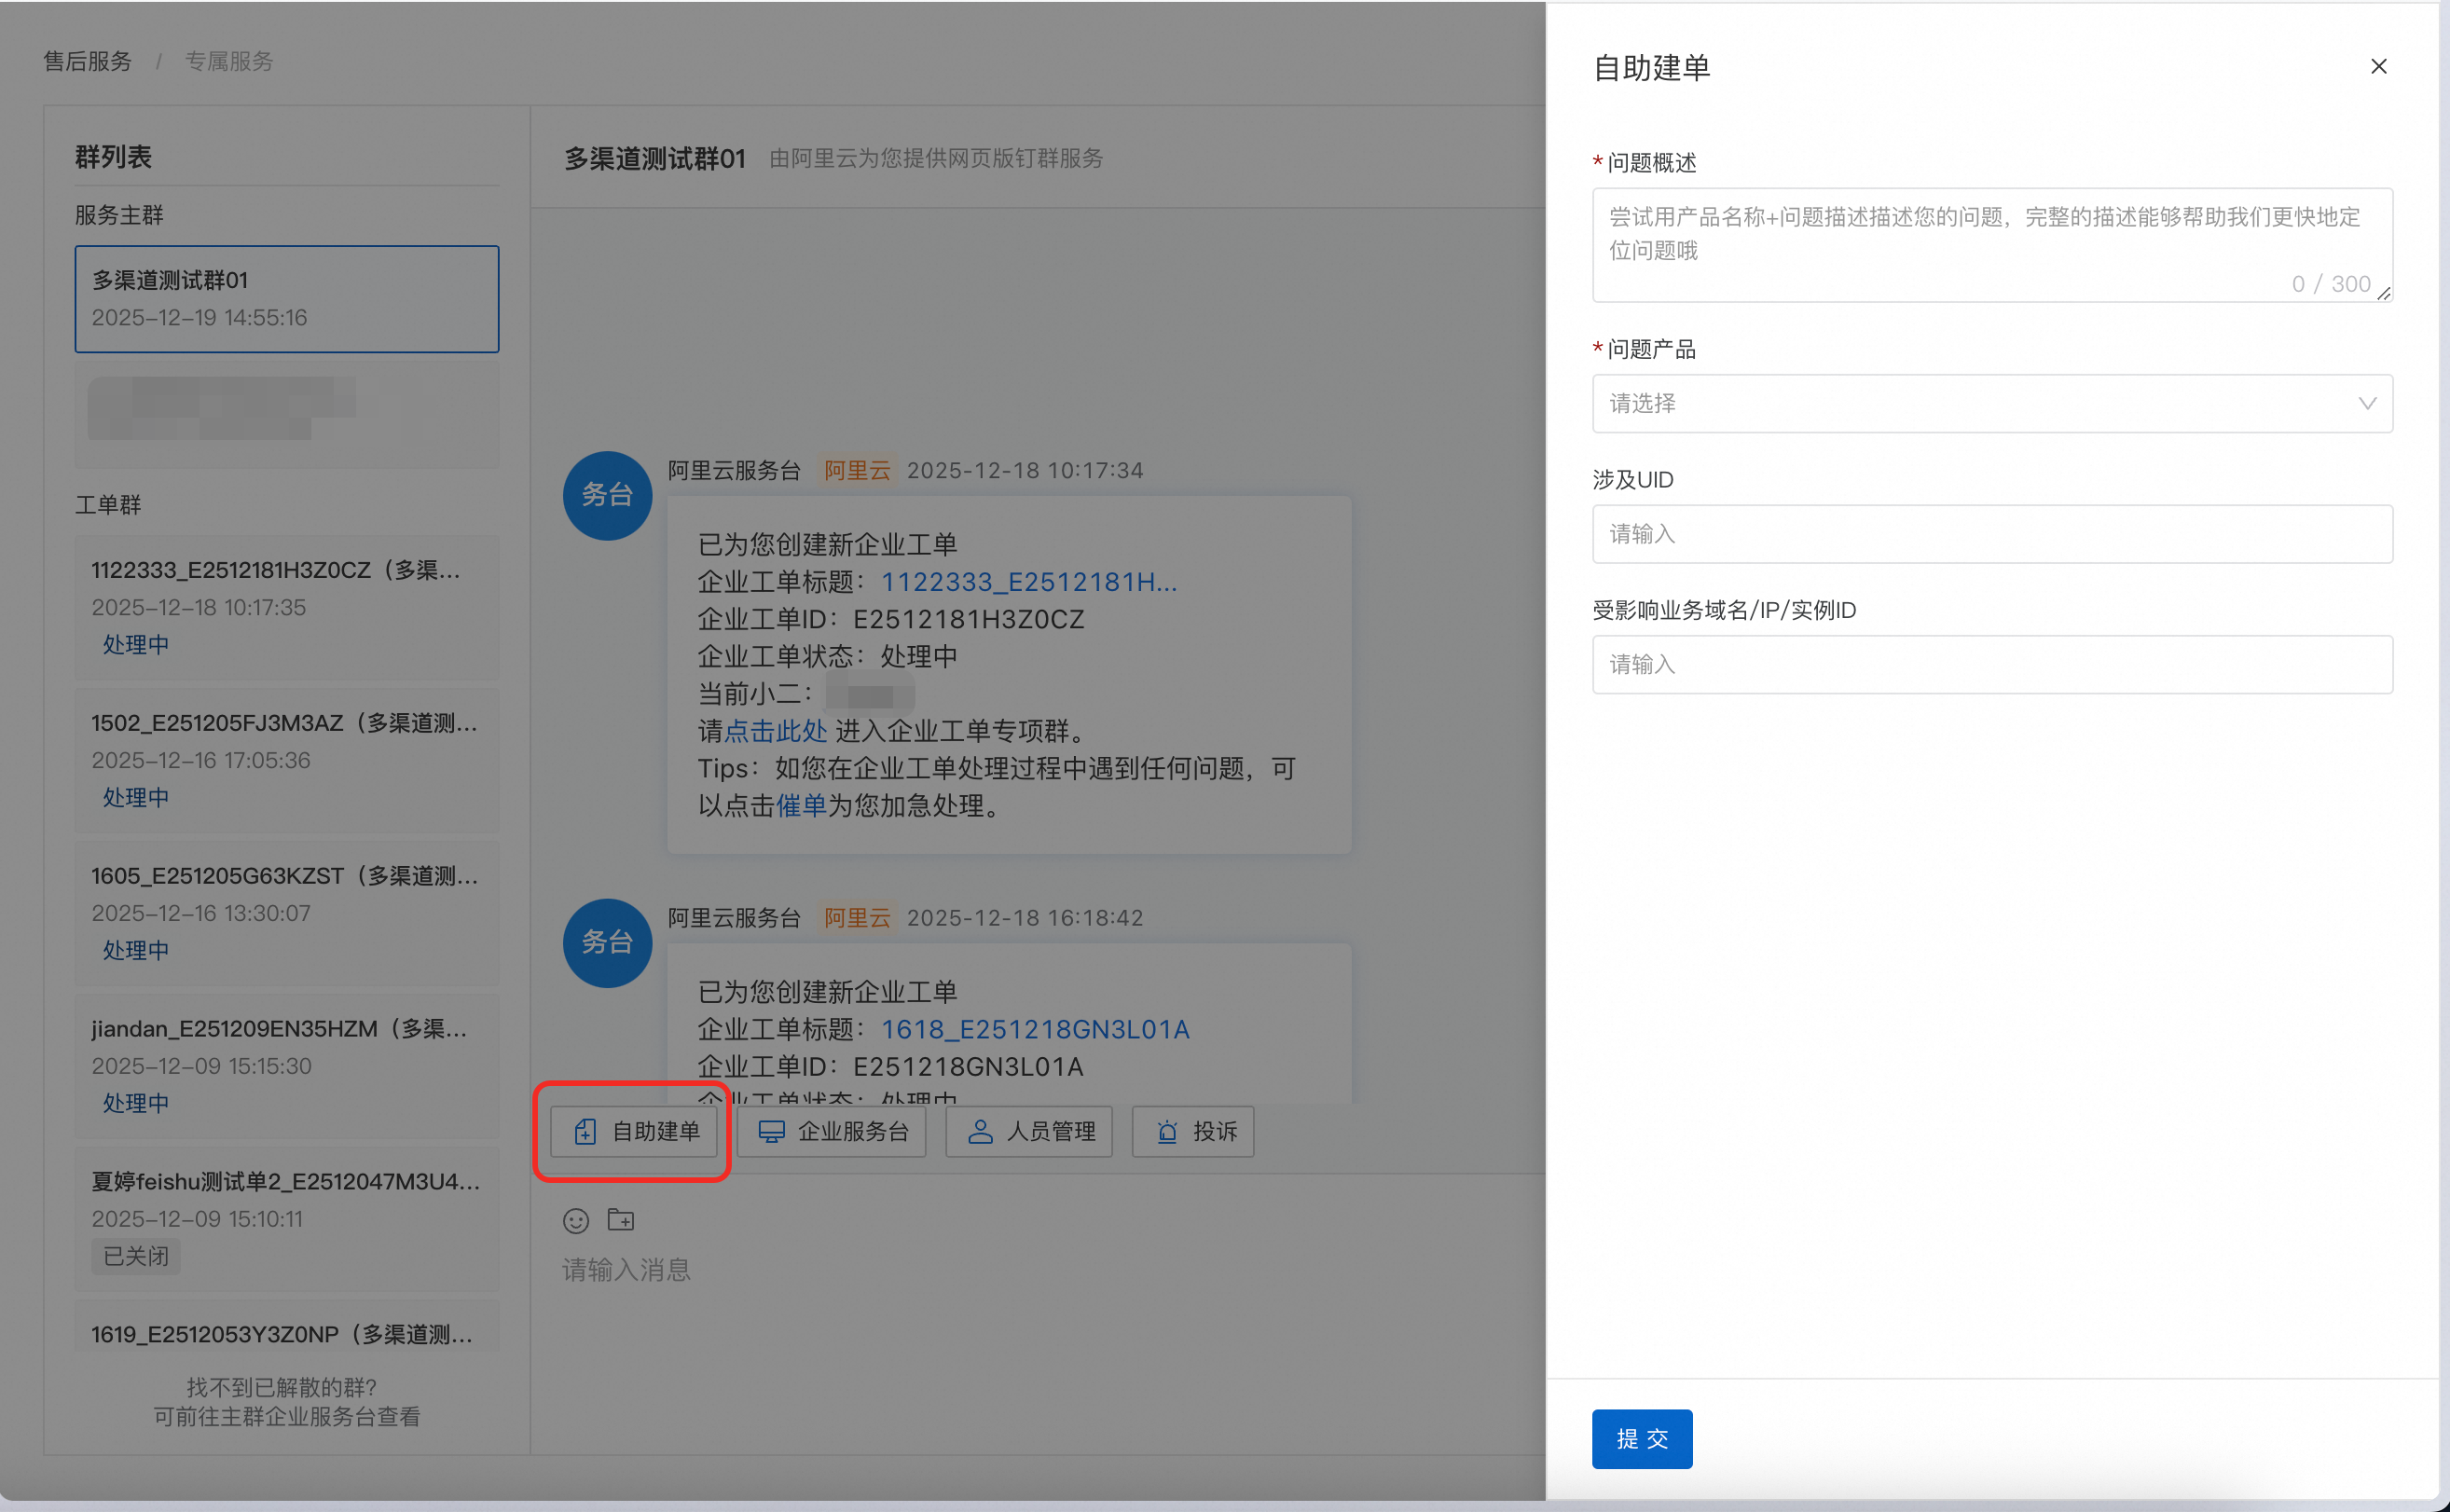
2.2 Create a ticket
In the main service group, click Create Ticket. The system automatically creates a dedicated ticket group and assigns a technical service engineer to handle your issue.
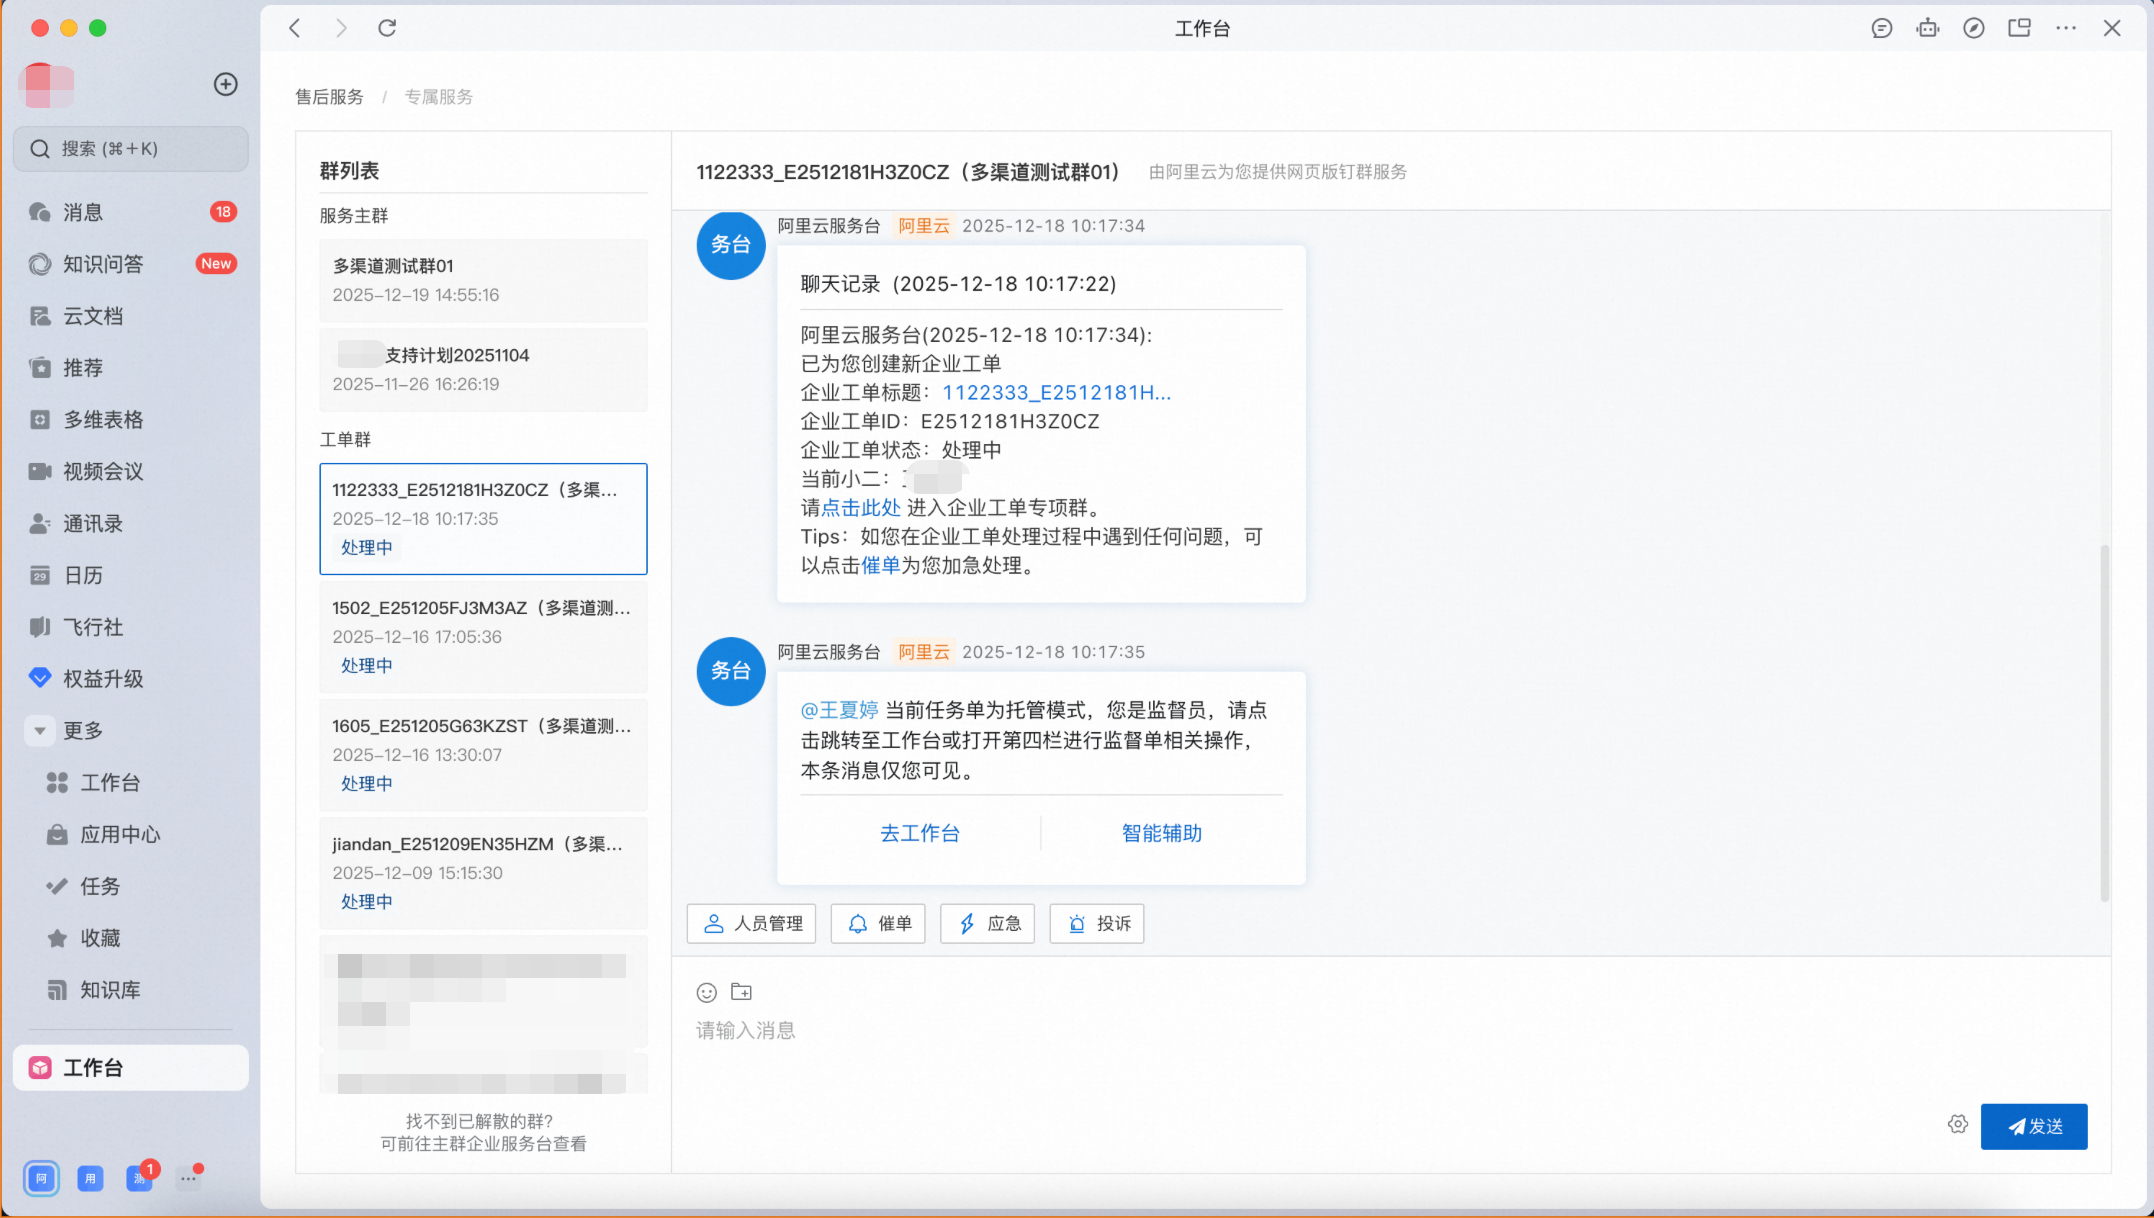
3. Ticket group
You can communicate with technical engineers about specific issues in the dedicated ticket group.
If the issue is urgent, click Escalate to speed up the process.
If a critical failure occurs, such as data loss, data corruption, or online service unavailability, click Emergency. We will initiate the emergency response mechanism and prioritize your issue.
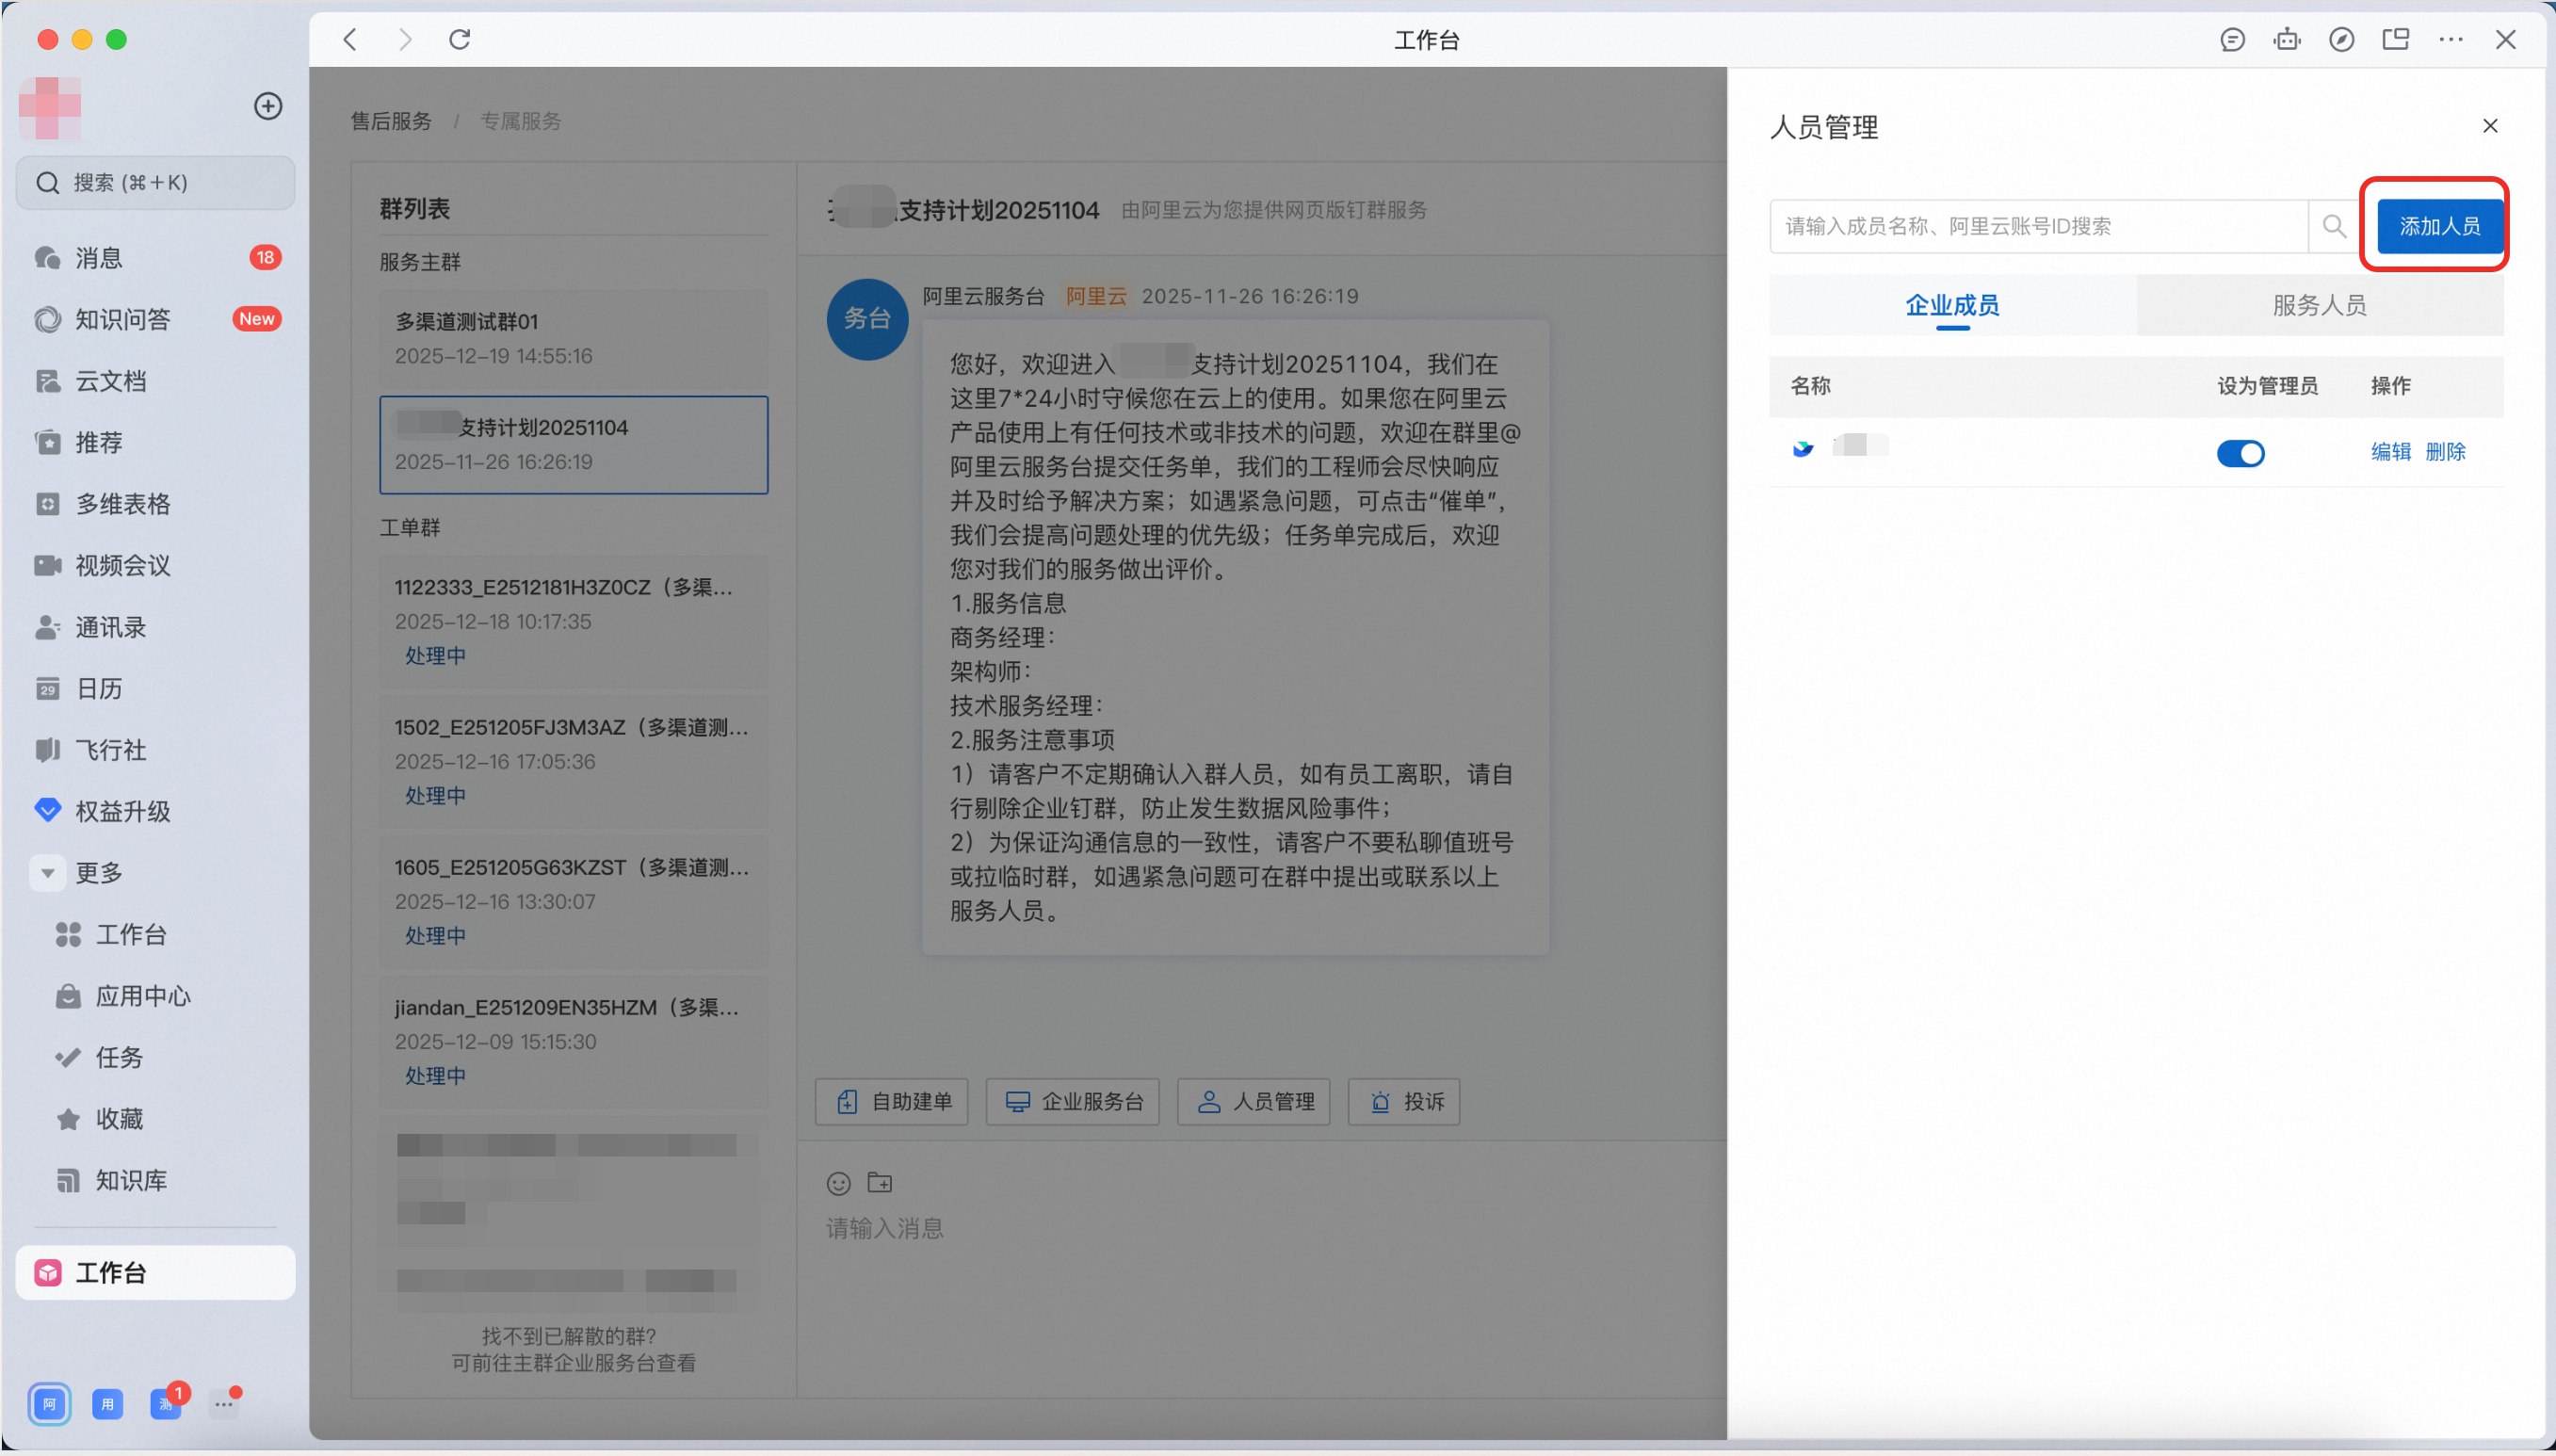
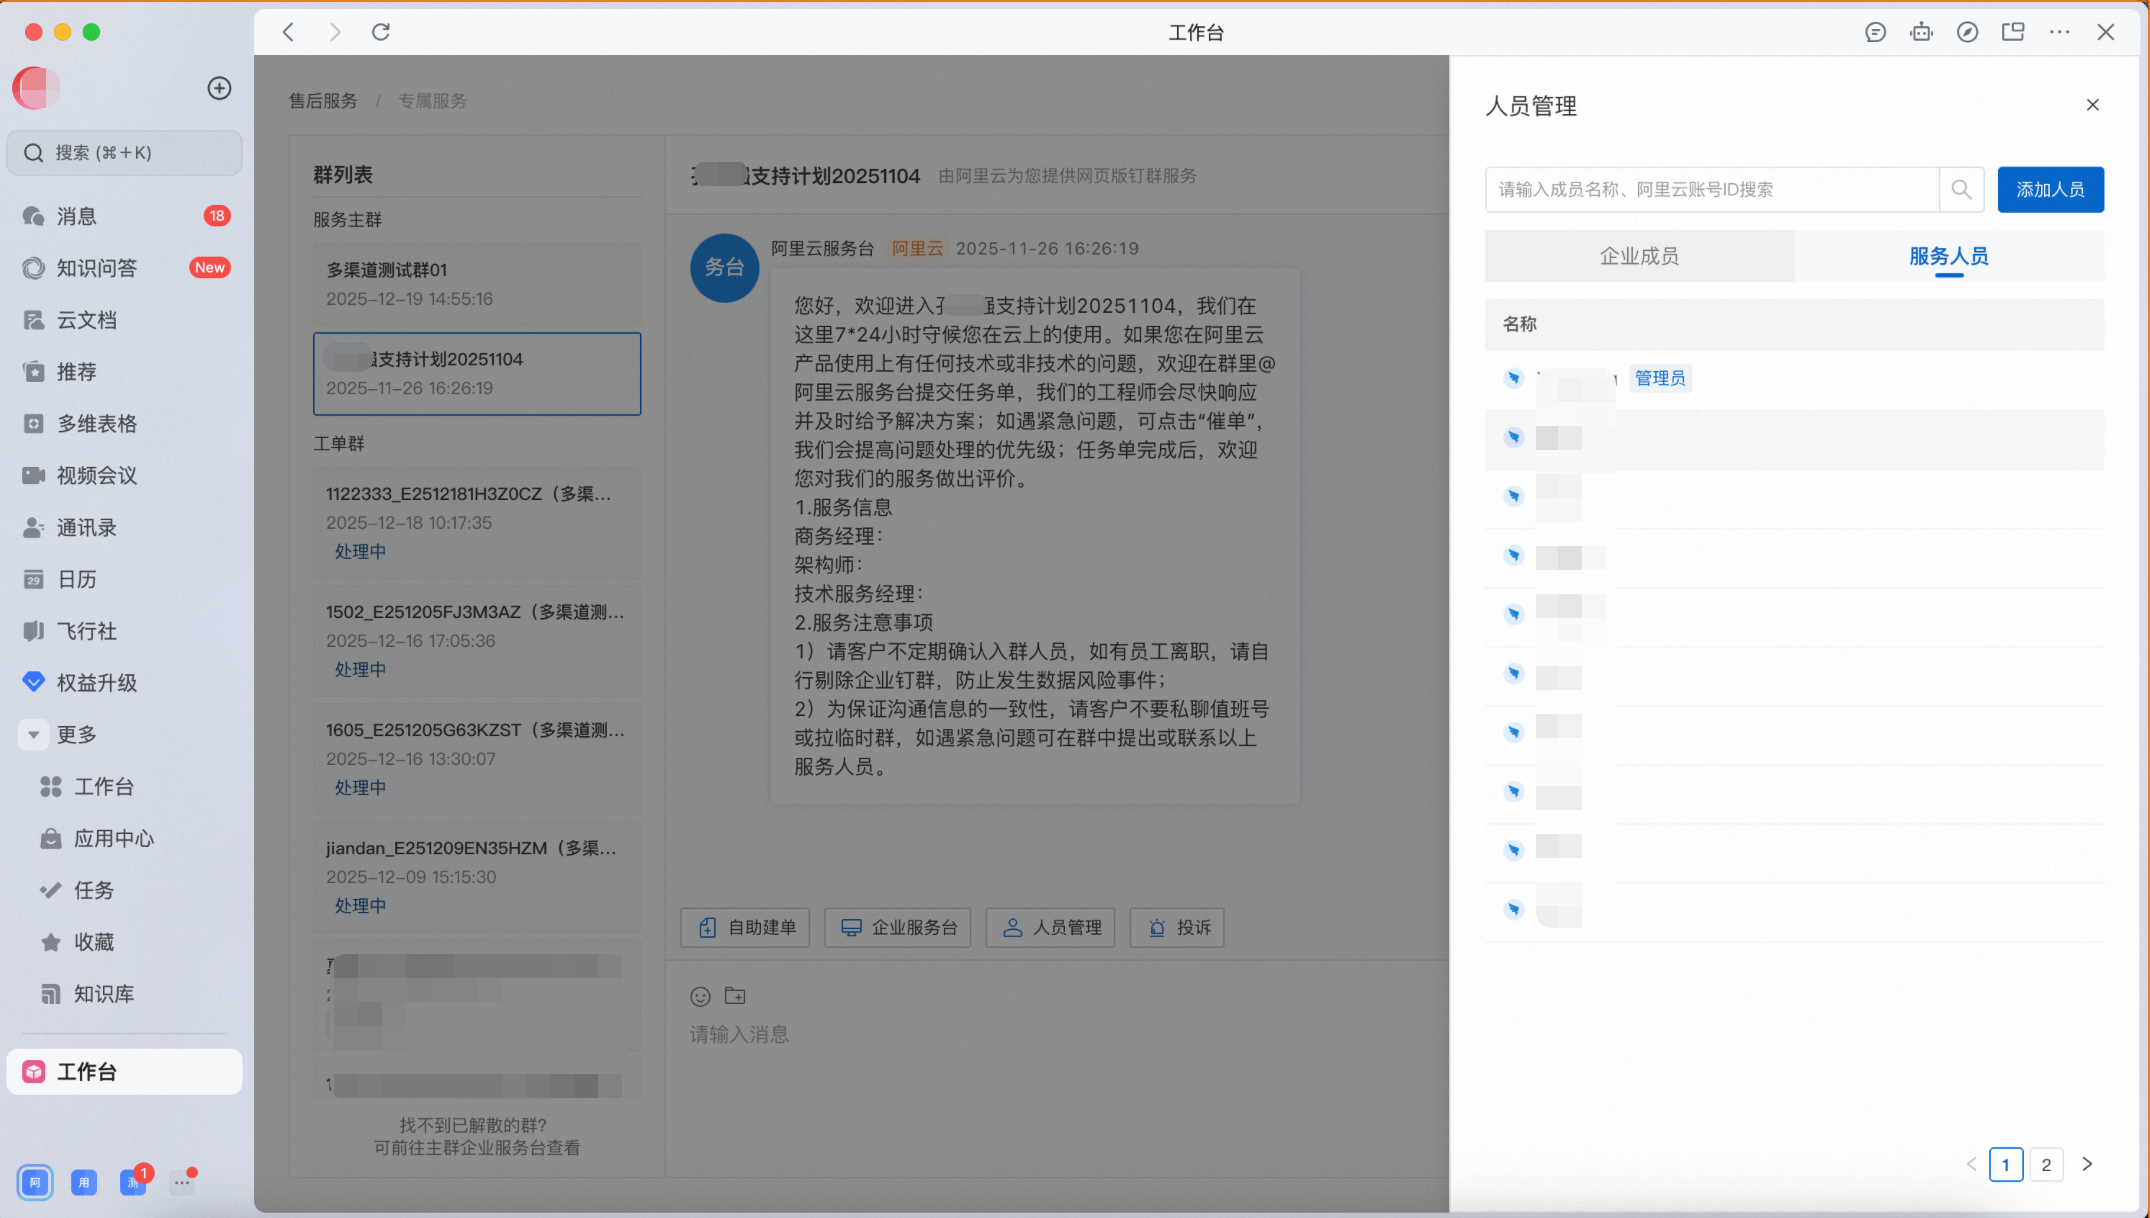
4. Member management
Both main service groups and ticket groups support the Member Management feature.
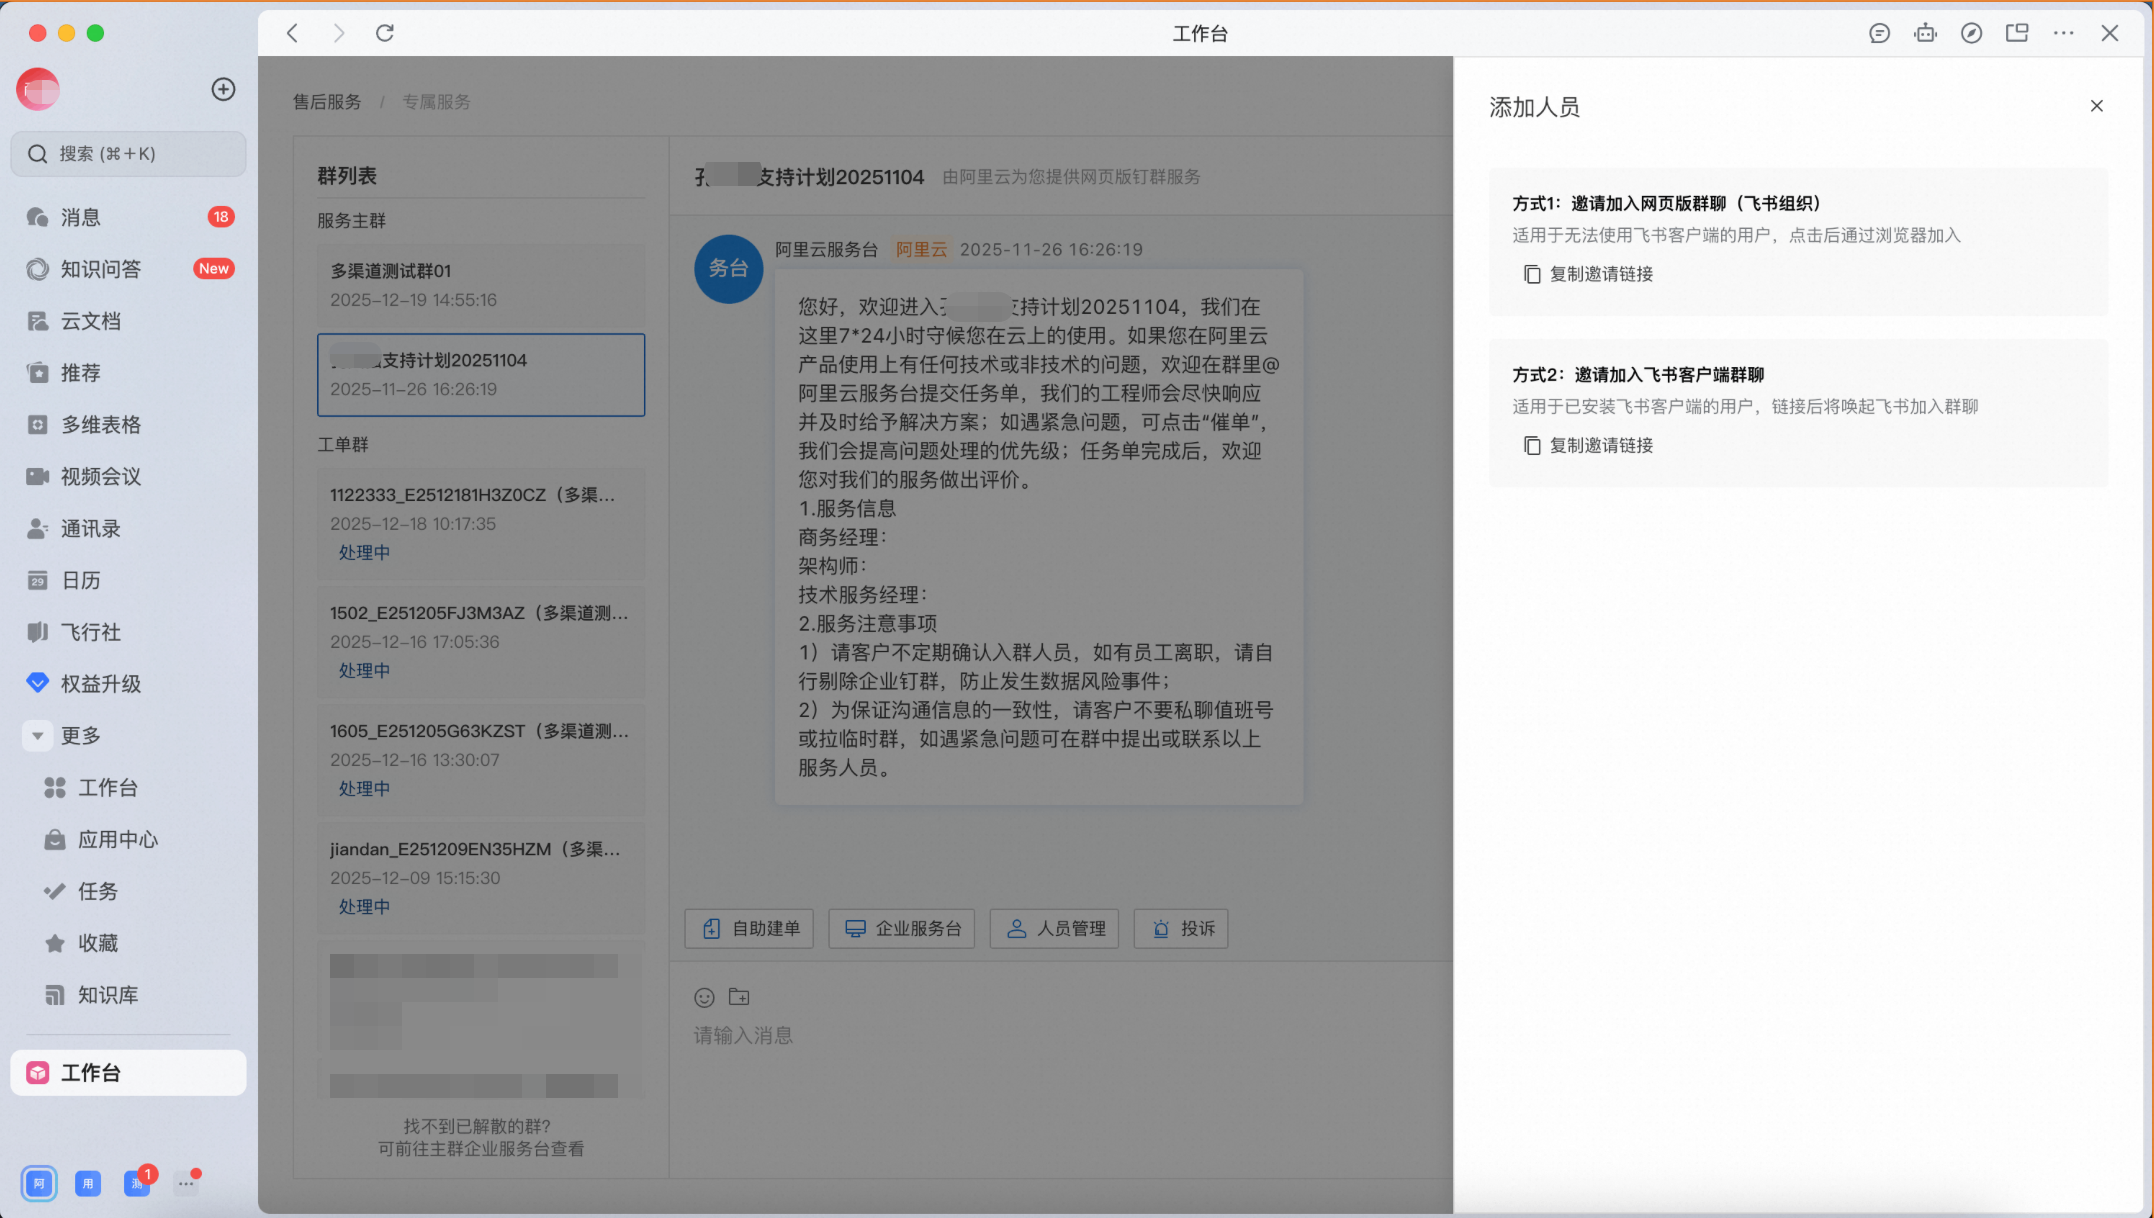
4.1 Add members
Click Add Members and copy the link from the drawer to invite colleagues to join. The link is valid for 24 hours.
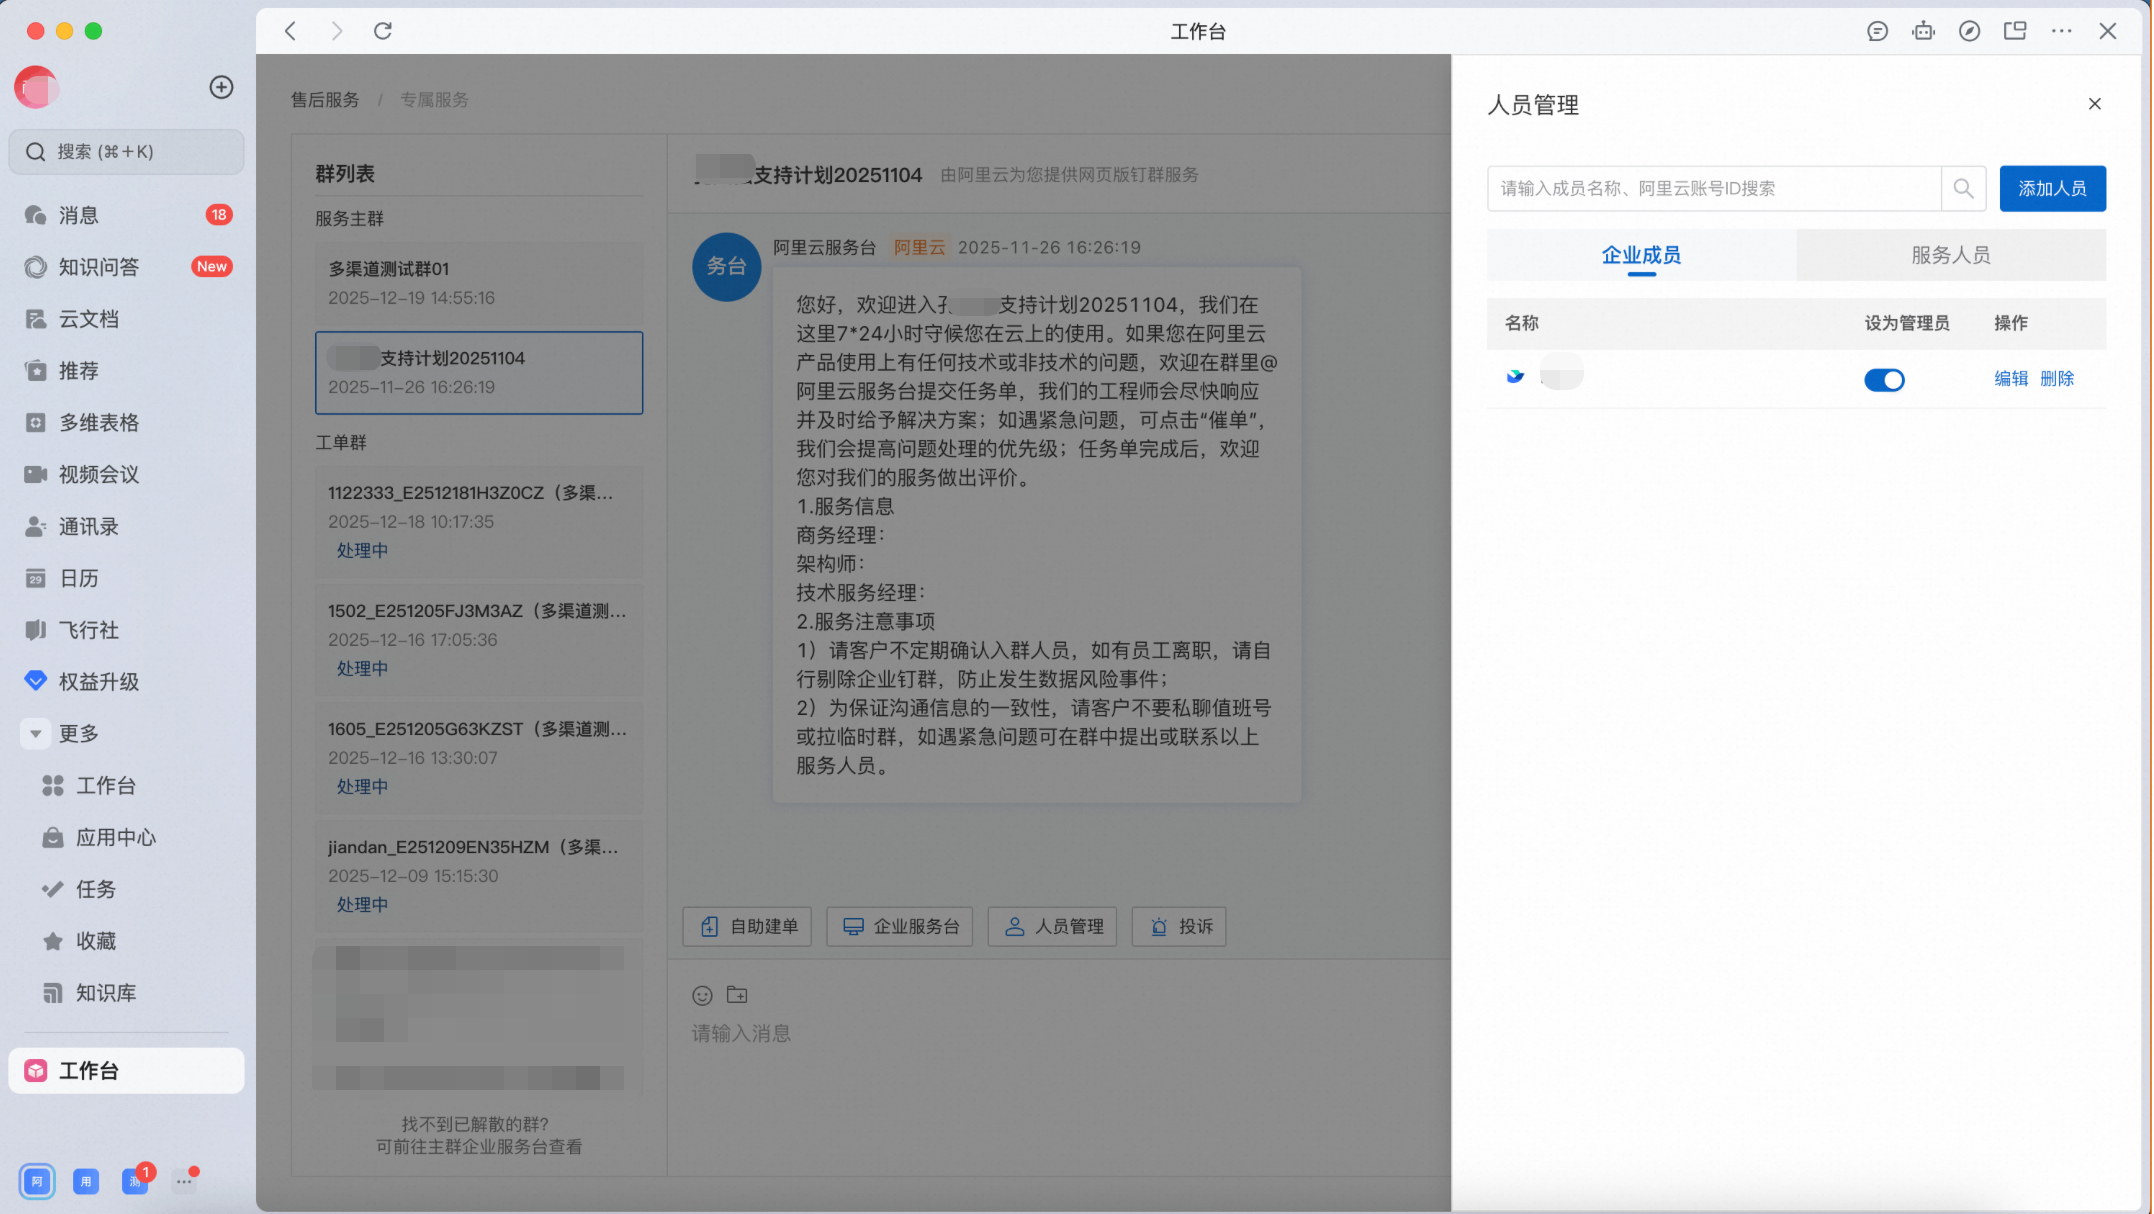
4.2 View the member list
In Member Management, you can view:
Your enterprise members (colleagues)
Alibaba Cloud service team members
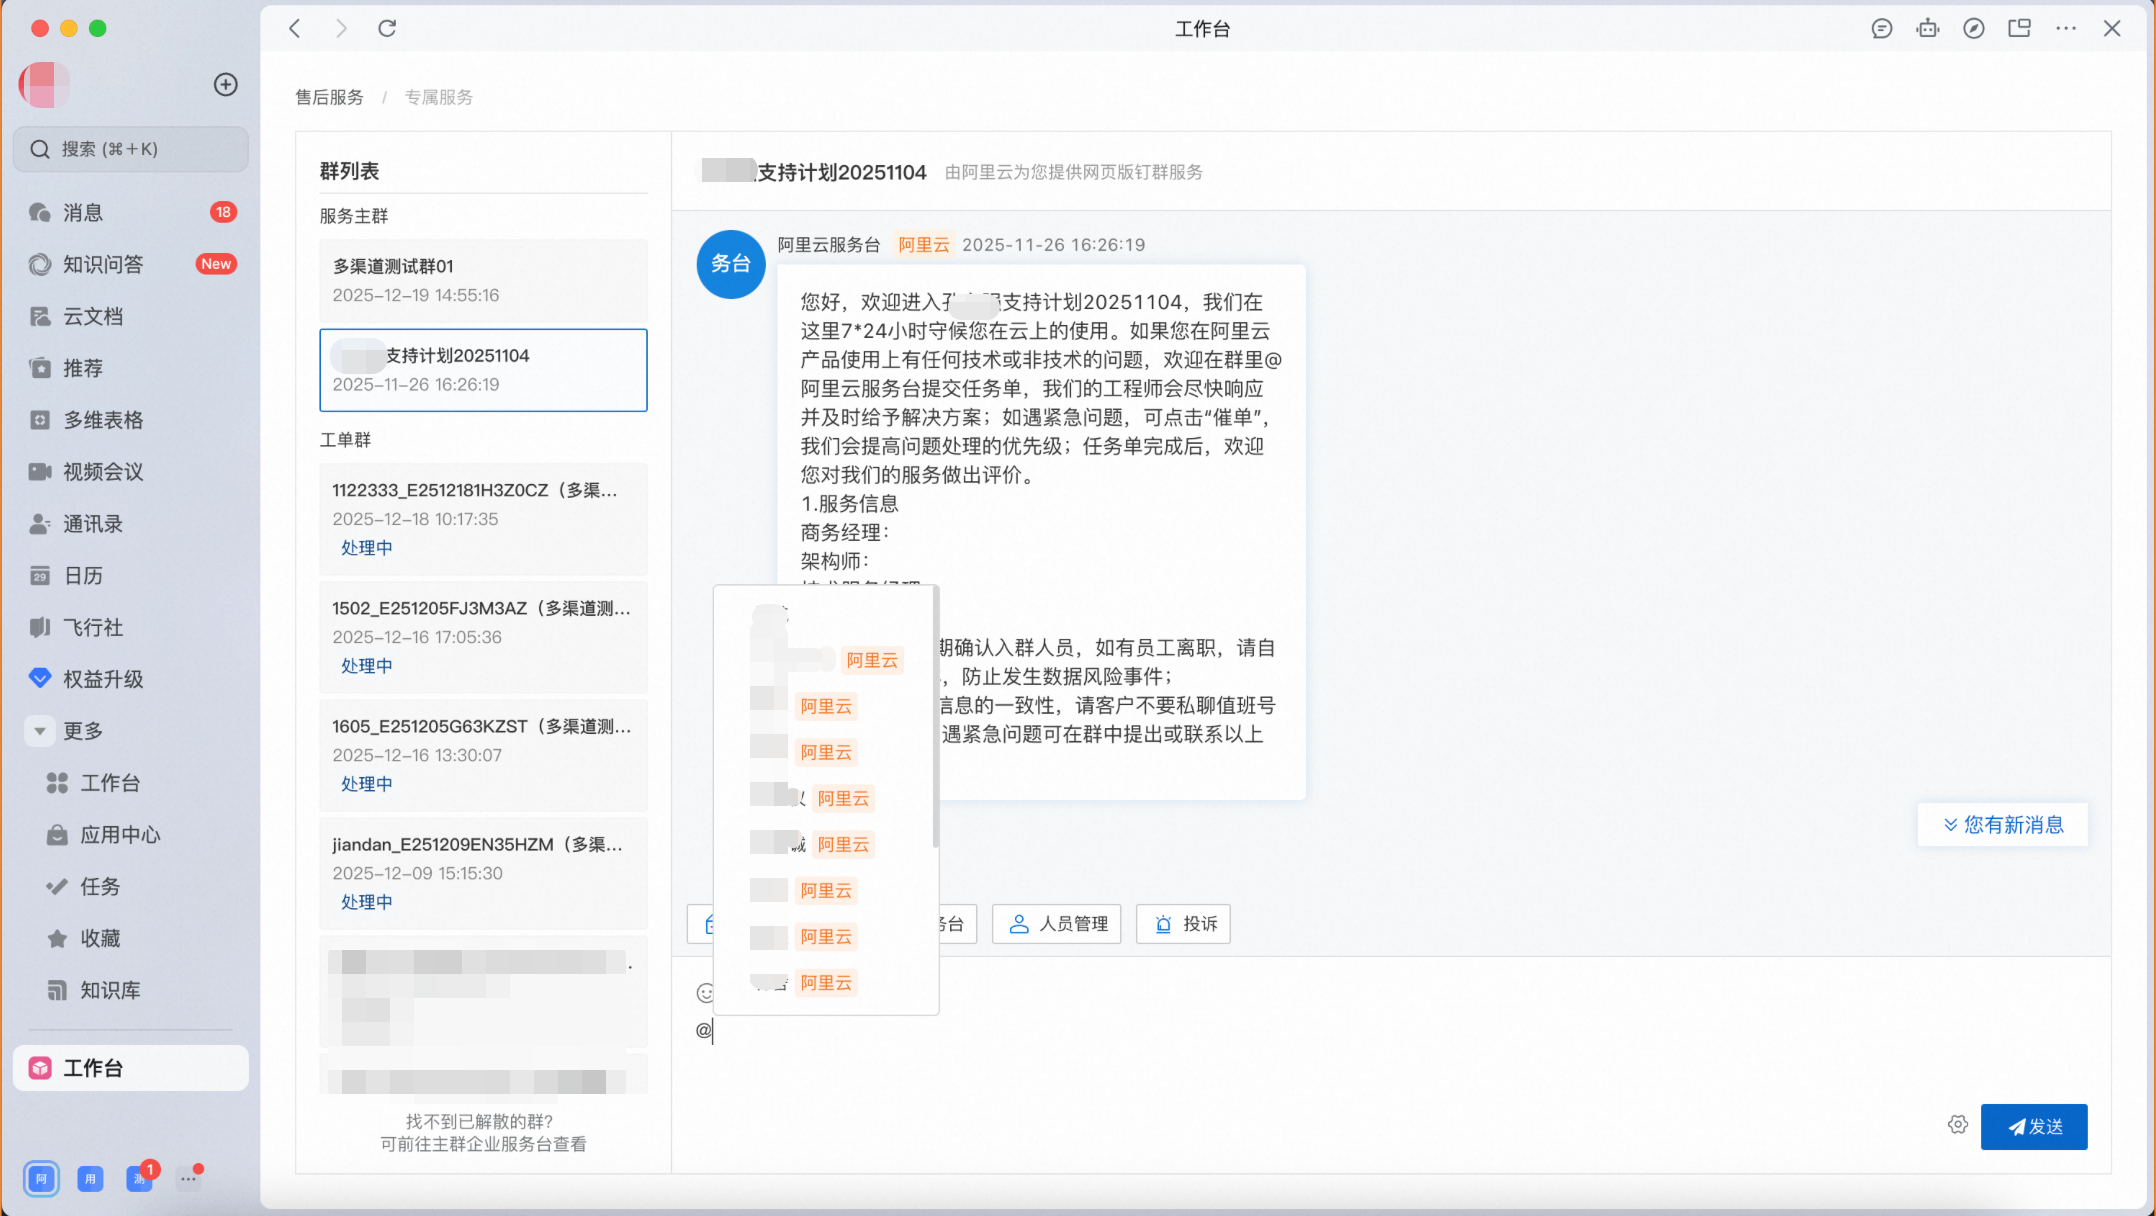
5. Group communication
In the group chat, you can directly @mention relevant Alibaba Cloud service staff or colleagues to collaborate efficiently and resolve issues.