Notification policies control how alert events from your EDAS applications reach your team. Each policy defines matching rules that filter events by source or field conditions, then delivers notifications to specified contacts through email, phone, DingTalk, text message, or WebHook. By routing alerts to the right people through the right channels, notification policies help your team respond to issues faster and reduce alert noise.
How it works
An alert rule triggers an alert event.
EDAS evaluates the event against each notification policy's matching rules.
If a match is found, EDAS groups the event based on the policy's event handling settings.
EDAS sends notifications to the configured contacts through the selected channels.
If two notification policies share the same matching rules but use different processing methods, the policy set to Do Not Generate Alerts (Drop Events) takes priority over the one set to Generate Alerts. No alert notifications are sent in this case.
Prerequisites
Before you begin, make sure that you have:
An EDAS application deployed on a Container Service or Serverless Kubernetes cluster
At least one contact created. For more information, see Create a contact.
Create a notification policy
-
Log on to the EDAS consoleEDAS console.
-
In the left-side navigation pane, click . In the top navigation bar, select a region. In the upper part of the page, select a namespace. Select Container Service or Serverless Kubernetes Cluster from the Cluster Type drop-down list. Then, find the application that you want to deploy and click the application name.
In the top navigation bar, select a region. In the upper part of the page, select a namespace.
From the Cluster Type drop-down list, select Container Service or Serverless Kubernetes Cluster. Find your application and click its name.
In the left-side navigation pane, choose .
Click Create Notification Policy in the upper-right corner.
Enter a name for the notification policy in the top field.
Define matching rules
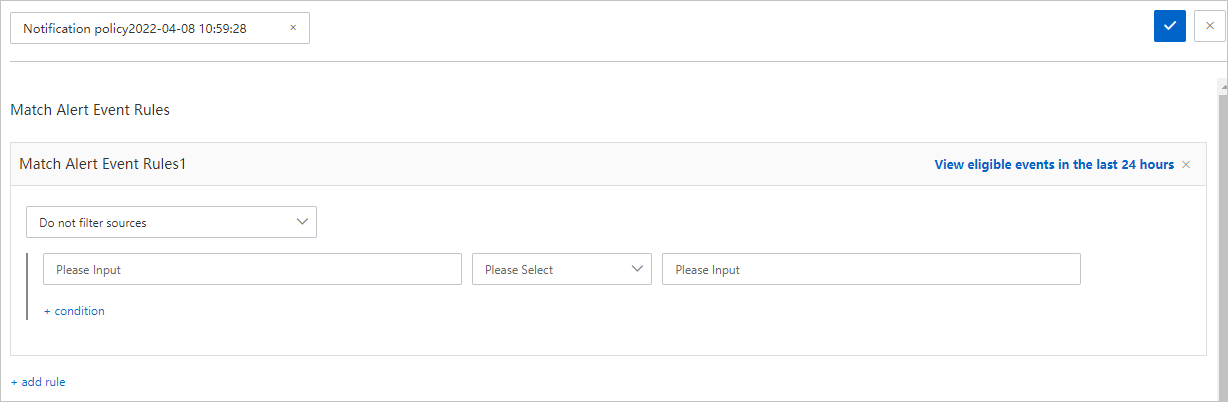
In the Match Alert Event Rules section, define which alert events trigger this policy.
Set the event source filter.
To restrict the policy to a specific alert source, select the source from the drop-down list. Only events from that source are processed.
To apply the policy to all alert events regardless of source, select Do not filter sources.
Add dispatch conditions.
Specify field-based conditions to further filter alert events. Select an existing field or define a custom field, then set the matching criteria.
Example:
alertnameis equal toPodRestart.The following default fields are available:
Field
Description
alertnameAlert name. Format:
<alert-name>_<cluster-name>_aliyun_arms_alert_levelAlert level
_aliyun_arms_alert_typeAlert type
_aliyun_arms_alert_rule_idAlert rule ID
_aliyun_arms_region_idRegion ID
_aliyun_arms_useridUser ID
_aliyun_arms_involvedObject_typeSubtype of the associated object, such as
ManagedKubernetesorServerlessKubernetes_aliyun_arms_involvedObject_kindType of the associated object, such as
apporcluster_aliyun_arms_involvedObject_idID of the associated object
_aliyun_arms_involvedObject_nameName of the associated object
In addition to default fields, these field types are supported:
Fields included in an alert rule expression
Fields created in Managed Service for Prometheus alert rules
Combine multiple conditions.
To require all conditions to be met (AND logic), click + condition to add conditions within the same rule.
To match any one of several conditions (OR logic), click + add rule to create a separate dispatch rule.
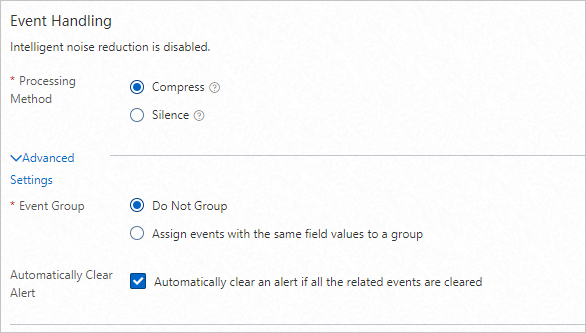
Configure event handling
In the Event Handling section, define how matched alert events are processed.
Parameter
Description
Processing Method
Generate Alerts: Alert notifications are created and sent to contacts. Do Not Generate Alerts (Drop Events): Alert events are silently dropped and no notifications are sent.
Event Group
Do not group: All alerts are sent in a single notification. Specifies that events with the same field content are assigned to a group: Select fields to group alert events. Events with matching field values are bundled into one notification.
Automatic Alert Recovery
When enabled, the alert status automatically changes to resolved after all related events are resolved. Contacts are notified of the status change.
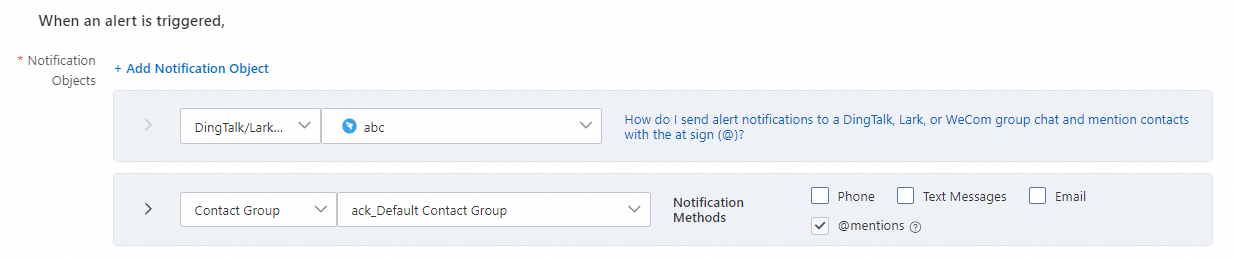
Set up notifications
In the When an alert is triggered section, configure how and when contacts are notified.
Parameter
Description
Contacts
Select one or more contacts, contact groups, or DingTalk groups to receive notifications. For more information, see Create a contact.
Notification Method
Choose one or more delivery channels: DingTalk, Email, Text messages, phone calls, or WebHook. To customize the notification content, click Notification template to configure templates for email, text message, or phone notifications.
NotePhone call notifications require a verified phone number. For more information, see Verify a mobile number.
Notification Period
The time range during which alert notifications are repeatedly sent.
Update Notification Method
Choose how to handle alerts that remain unresolved. Recurring Notifications: Specify the interval at which notifications are resent until the alert is resolved. Escalation Policy: Select an existing escalation policy or create one. For more information, see Create and manage an escalation policy. To view policy details, click Details.
Ticket System
The ticket system to which alert notifications are forwarded.
Save the policy
Click the save icon (
 ) in the upper-right corner to save the notification policy.
Manage notification policies
After creation, notification policies appear in the Notification Policies section. To manage a policy:
From the list: Click the More icon next to a policy and select Edit, Disable, Enable, Copy, or Delete.
From the detail view: Click a policy name to open it, then use the icons in the upper-right corner to modify, refresh, copy, or delete the policy.