When applications run on EDAS, you need alert notifications delivered to team chat channels so issues are surfaced immediately. Enterprise Distributed Application Service (EDAS) integrates with Application Real-Time Monitoring Service (ARMS) to send alert notifications through custom webhooks to platforms such as Lark, DingTalk, or WeChat.
This topic walks through the end-to-end setup using Lark as an example: get a webhook URL, create a webhook contact in the EDAS console, and link it to a notification policy.
Step 1: Get a webhook URL from Lark
Create a custom bot in a Lark group to generate the webhook URL that receives alert notifications.
Open Lark and sign in.
Click the + icon, then click New group to create a group for alert notifications.
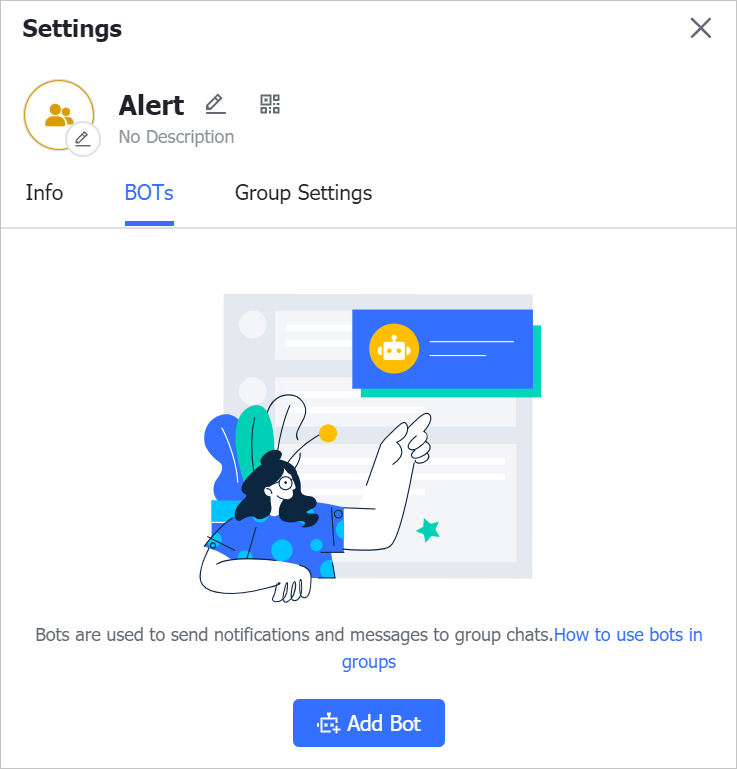
Click the Settings icon, then click the Bots tab.
On the Bots tab, click Add Bot.
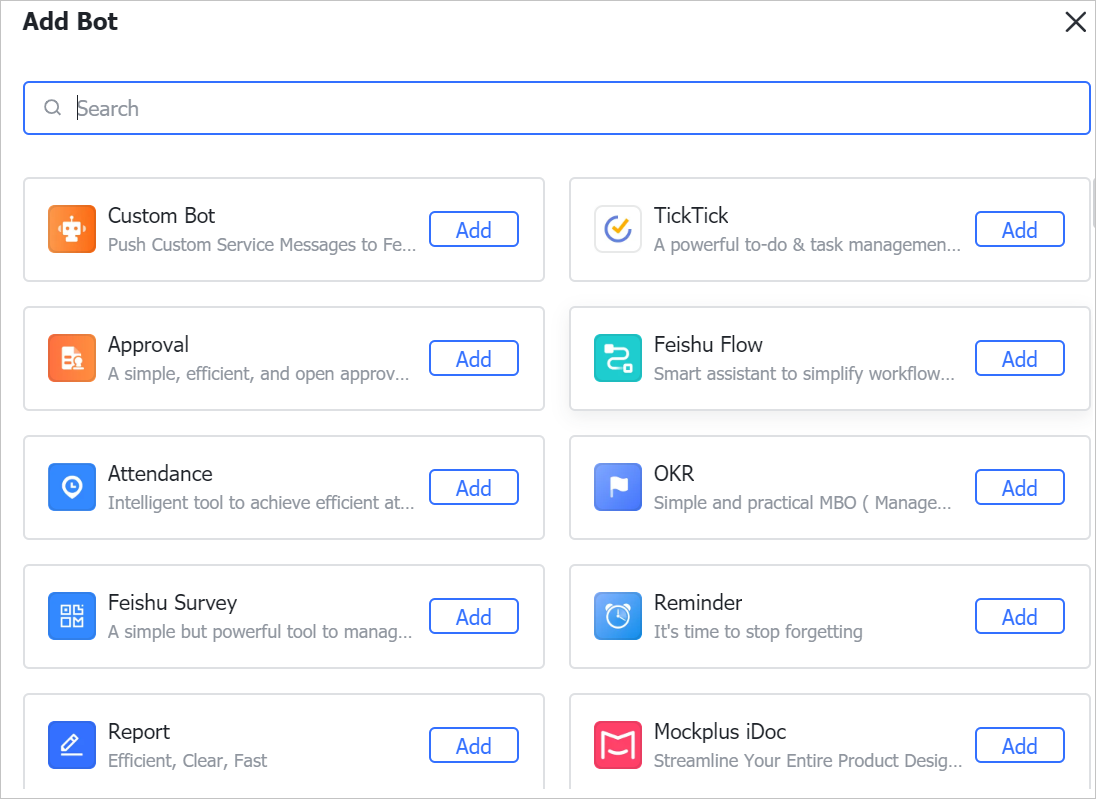
In the Add Bot dialog box, find the Custom Bot section and click Add.
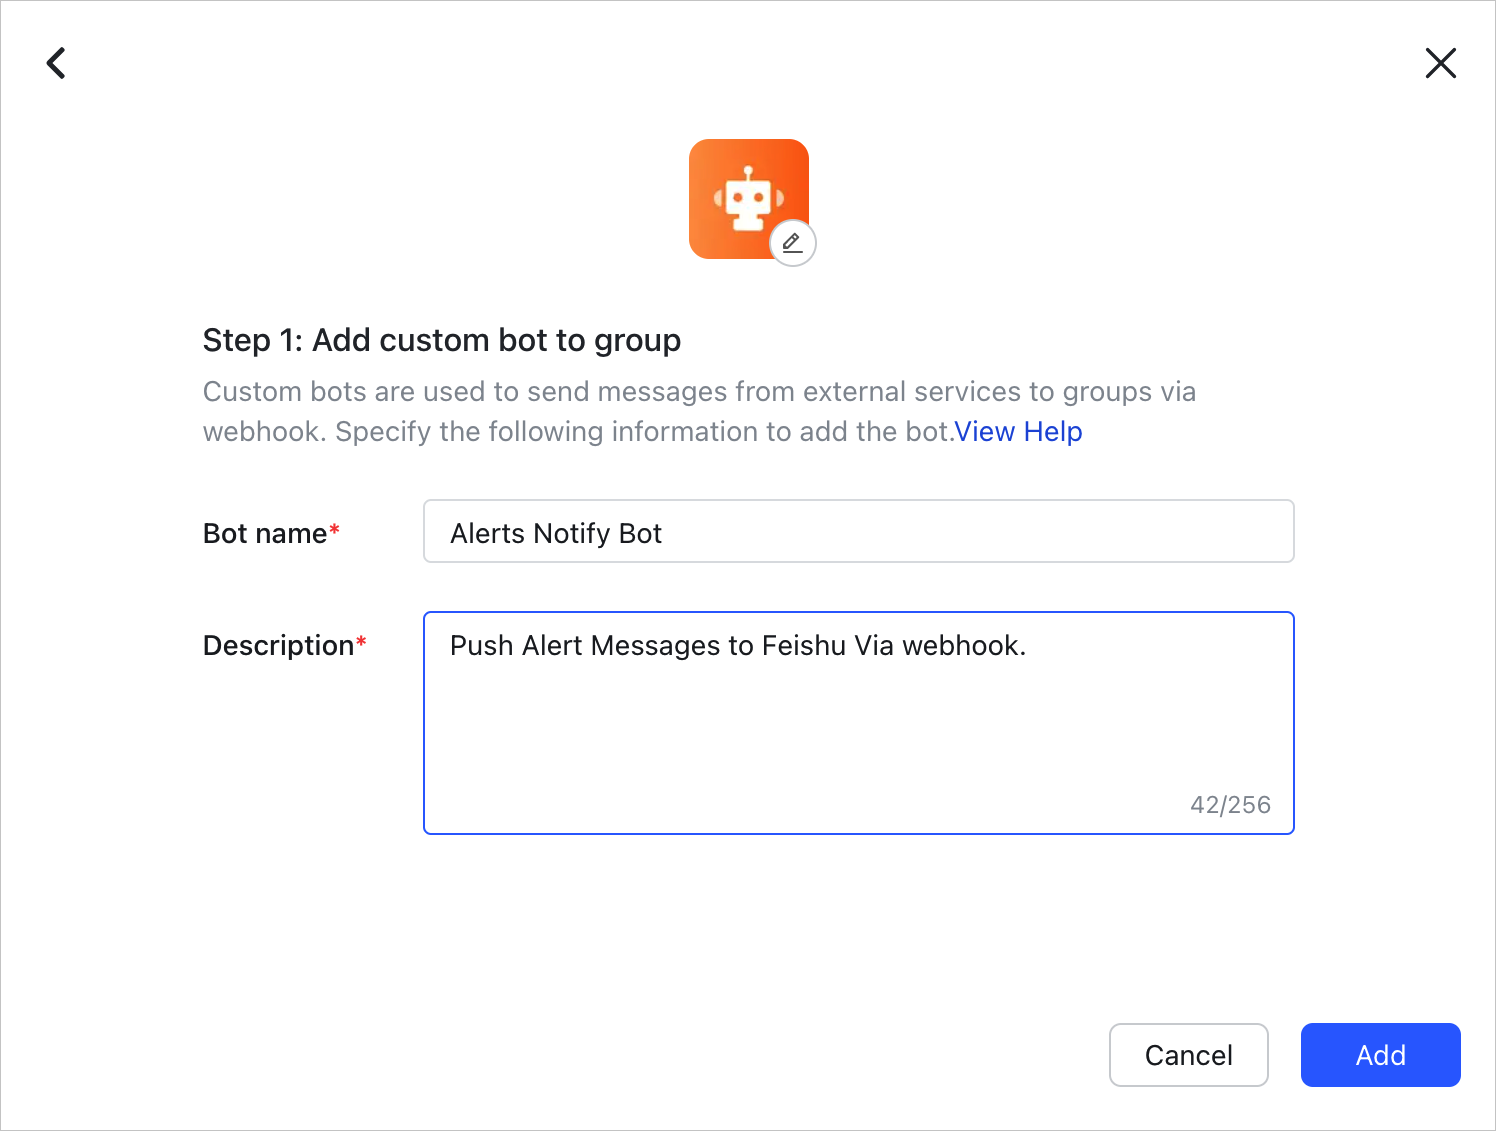
Enter a Bot name and Description, then click Add.
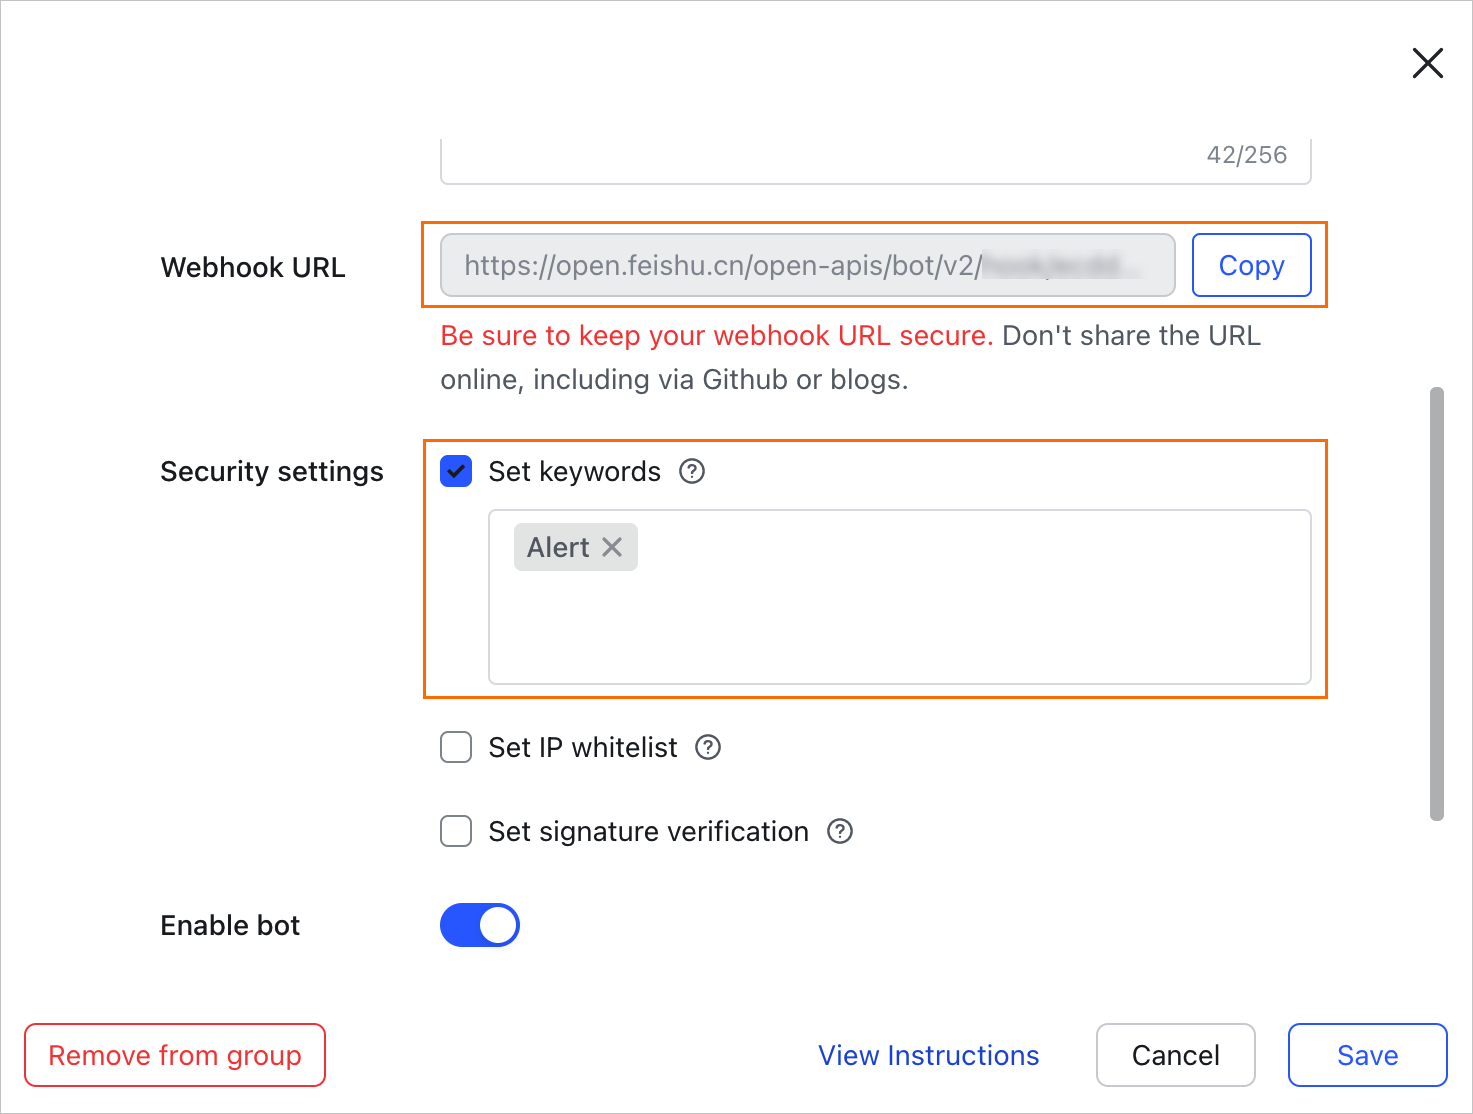
Click Copy next to Webhook URL to save the URL, then click Finish.
Step 2: Create a webhook contact in the EDAS console
Log in to the EDAS console.
In the left-side navigation pane, choose Application Management > Applications. In the top navigation bar, select a region and a namespace. Select Container Service or Serverless Kubernetes Cluster from the Cluster Type drop-down list, then click the name of your application.
In the left-side navigation pane, choose Alert Management > Contact.
On the Contact tab, click Create Webhook in the upper-right corner.
In the Create Webhook dialog box, configure the following parameters.
Parameter Required Description Webhook Name Yes A name for the webhook contact. Post or Get Yes The HTTP request method and endpoint URL. The URL supports up to 100 characters. For this example, select Post and paste the webhook URL from Step 1. Header or Param No Custom request headers or query parameters. Each value supports up to 200 characters, and you can add up to 6 headers and parameters combined. The default header is Content-Type: text/plain; charset=UTF-8. Click Create to add entries. For Lark, set the following headers:Arms-Content-Type: jsonandContent-Type: application/json.Notification Template No The message body sent when an alert fires. Appears only when Post is selected. You can use the $contentplaceholder to specify the notification content. Supports up to 500 characters. Uses Go-style template syntax. See Template variables and Template examples.Template to Clear Alerts No The message body sent when an alert resolves. Appears only when Post is selected. You can use the $contentplaceholder to specify the notification content. Supports up to 500 characters. Uses Go-style template syntax. See Template variables and Template examples.(Optional) Click Test to verify whether the configurations are valid.
Click Create.
Template variables
Both the Notification Template and Template to Clear Alerts fields accept Go-style template syntax. The following table lists the available variables.
| Variable | Type | Description |
|---|---|---|
{{ .commonLabels.alertname }} | string | Alert name. |
{{ .commonLabels.clustername }} | string | Cluster name. Available when the alert targets a cluster. |
{{ .commonLabels._aliyun_arms_involvedObject_kind }} | string | Object kind. Use with a conditional check (e.g., eq "app") to display application-specific fields. |
{{ .commonLabels._aliyun_arms_involvedObject_name }} | string | Application name. Available when _aliyun_arms_involvedObject_kind equals "app". |
{{ .dispatchRuleName }} | string | Notification policy name. |
{{ .startTime }} | string | Timestamp when the alert fired. |
{{ .endTime }} | string | Timestamp when the alert resolved. |
{{ for .alerts }} {{ .annotations.message }} {{ end }} | iteration | Iterates over all alerts and outputs each alert message. |
{{ .generatorURL }} | string | Link to the alert details page. |
Template examples
Generic template (alert fired)
{
  "Alert Name": "{{ .commonLabels.alertname }}{{if .commonLabels.clustername }}",
  "Cluster Name": "{{ .commonLabels.clustername }} {{ end }}{{if eq \"app\" .commonLabels._aliyun_arms_involvedObject_kind }}",
  "Application Name": "{{ .commonLabels._aliyun_arms_involvedObject_name }} {{ end }}",
  "Notification Policy": "{{ .dispatchRuleName }}",
  "Alert Triggered At": "{{ .startTime }}",
  "Alert Message": "{{ for .alerts }} {{ .annotations.message }} {{ end }}"
}
Generic template (alert resolved)
{
  "Alert Name": "{{ .commonLabels.alertname }}{{if .commonLabels.clustername }}",
  "Cluster Name": "{{ .commonLabels.clustername }} {{ end }}{{if eq \"app\" .commonLabels._aliyun_arms_involvedObject_kind }}",
  "Application Name": "{{ .commonLabels._aliyun_arms_involvedObject_name }} {{ end }}",
  "Notification Policy": "{{ .dispatchRuleName }}",
  "Alert Cleared At": "{{ .endTime }}",
  "Alert Content": "{{ for .alerts }} {{ .annotations.message }} {{ end }}"
}
Lark template (alert fired)
Lark bots require a msg_type field. Use this template to format alerts as plain-text messages in Lark:
{
  "msg_type": "text",
  "content": {
    "text": "Alert Name: {{ .commonLabels.alertname }} \n Alert Triggered At: {{ .startTime }} \n Alert Message: {{ for .alerts }} {{ .annotations.message }}  {{if .generatorURL }} Link to Details: {{.generatorURL}} {{ end }} \n {{ end }}"
  }
}
Lark template (alert resolved)
{
  "msg_type": "text",
  "content": {
    "text": "Alert Name: {{ .commonLabels.alertname }} \n Alert Cleared At: {{ .endTime }} \n Alert Message: {{ for .alerts }} {{ .annotations.message }}  {{if .generatorURL }} Link to Details: {{.generatorURL}} {{ end }} \n {{ end }}"
  }
}
Step 3: Link the webhook contact to a notification policy
Associate the webhook contact with a notification policy so that alerts are delivered through the webhook.
In the left-side navigation pane, choose Alert Management > Notification Policies.
Create or modify a notification policy.
On the Notification Objects tab, set Contacts to the webhook contact created in Step 2.
Set Notification Methods to Webhook.
For detailed instructions, see Create and manage a notification policy.
Limits
| Item | Limit |
|---|---|
| Webhook URL length | Up to 100 characters |
| Header or parameter value length | Up to 200 characters per entry |
| Total headers and parameters | Up to 6 |
| Notification template length | Up to 500 characters |
| Webhook response timeout | 5 seconds. If the endpoint does not respond within 5 seconds, the notification is treated as a delivery failure. |