This topic describes how to import a Tencent Cloud TKE cluster into EDAS and deploy an application to the cluster.
Prerequisites
Ensure that your Tencent Cloud TKE cluster is running and has public network access.
Register the TKE cluster with ACK
In the ACK console, create a registered cluster to register the target cluster with ACK. For more information, see Create an ACK One registered cluster. After the registration is successful, check the status of the cluster in the ACK console. If the cluster status is Running, the cluster is successfully registered.
Import the TKE cluster into EDAS
Step 1: Configure domain name resolution
You can configure Private DNS in Tencent Cloud to resolve the following domain names for public network access. For more information, see Create a Private Domain.
NoteWhen you import a cluster into EDAS, EDAS-related controllers are installed in the TKE cluster. The installation process requires downloading resources, such as images and Custom Resource Definition (CRD) resources. If the TKE cluster cannot access the EDAS control plane through a private network, you must configure Private DNS in Tencent Cloud to allow the cluster to download these resources over the public network.
After you create the private domain, add the following DNS records.
Internal same-region endpoint
Public endpoint
Remarks
arms-apm-cn-hangzhou.oss-cn-hangzhou-internal
arms-apm-cn-hangzhou.oss-cn-hangzhou.aliyuncs.com
Helm download address for installing ack-pilot.
edas-vpc.cn-hangzhou
edas.cn-hangzhou.aliyuncs.com
EDAS POP domain name.
aliregistry.oss-cn-hangzhou-internal
aliregistry.oss-cn-hangzhou.aliyuncs.com
Image download verification address.
registry-vpc.cn-hangzhou
registry.cn-hangzhou.aliyuncs.com
Image repository address.
edas-hz.oss-cn-hangzhou-internal
edas-hz.oss-cn-hangzhou.aliyuncs.com
Address for downloading cluster CRD information and other data.
You can use the
pingcommand to obtain the IP address of a public endpoint. Then, use Private DNS to create a record that resolves the corresponding internal same-region endpoint to this public IP address.ping edas.cn-hangzhou.aliyuncs.comAfter you add the DNS records, you can view the details on the DNS Records page.
NoteThe preceding example shows how to import a cluster into the China (Hangzhou) region. If you import a cluster into a different region, you must replace the region ID in the domain names accordingly. For a list of regions that EDAS supports, see Endpoints. To obtain the IP address for a domain name,
pingthe corresponding public endpoint.
Step 2: Import the cluster
Before you import the cluster, copy the KubeConfig file to your local machine and configure the required environment variables. This ensures that your local machine can connect to the cluster. For more information, see Obtain the KubeConfig file of a cluster and use kubectl to connect to the cluster.
Run the following command to download the Helm Chart package.
wget https://edas-hz.oss-cn-hangzhou.aliyuncs.com/helm/edas-helm-chart-1.0.0.tgzRun the following command to import the cluster into EDAS.
helm install edas-cluster edas-helm-chart-1.0.0.tgz --set accessKeyId=xxxx,accessKeySecret=xxxxx,clusterId=c87b5954acef****************accessKeyIdandaccessKeySecret: The AccessKey ID and AccessKey secret. The associated account must have permissions to import the cluster into EDAS and read the ACK cluster.clusterId: The ID of the registered cluster. You can obtain this ID from the ACK console.
The import process takes about two minutes. You can check the import result in one of the following two ways:
Run the following command to view the logs.
kubectl logs job/edas-helm-install-job -n kube-systemIn the EDAS console, go to the Resource Management > Container Service K8s Cluster page to view the import status and logs.
After the import is complete, run the following command. The output shows that two new namespaces are added to the cluster.
kubectl get namespaces
Deploy the application
Download the Helm Chart package for the test application.
wget https://edas-hz.oss-cn-hangzhou.aliyuncs.com/helm/edas-apps-chart-1.0.0.tgzRun the following command to create the application.
helm install edas-apps edas-apps-chart-1.0.0.tgzYou can view the created application in the EDAS console.
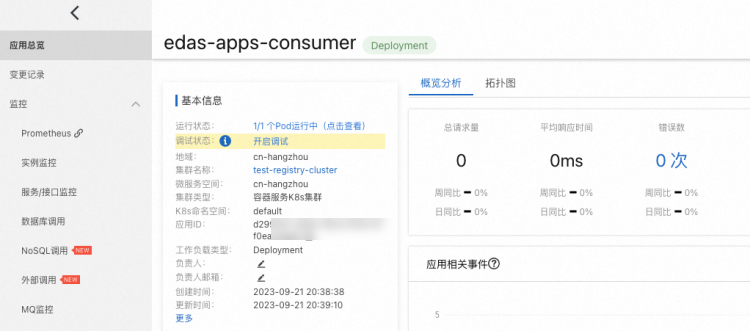
View application details
View application monitoring