WAF data analysis
The Security Analytics dashboard lets you explore traffic and security event data from the past 30 days. Filter aggregated metrics and inspect detailed log samples to identify emerging threats, investigate security incidents, and create targeted WAF rules directly from your analysis.
Analyzing data and logs
Data overview
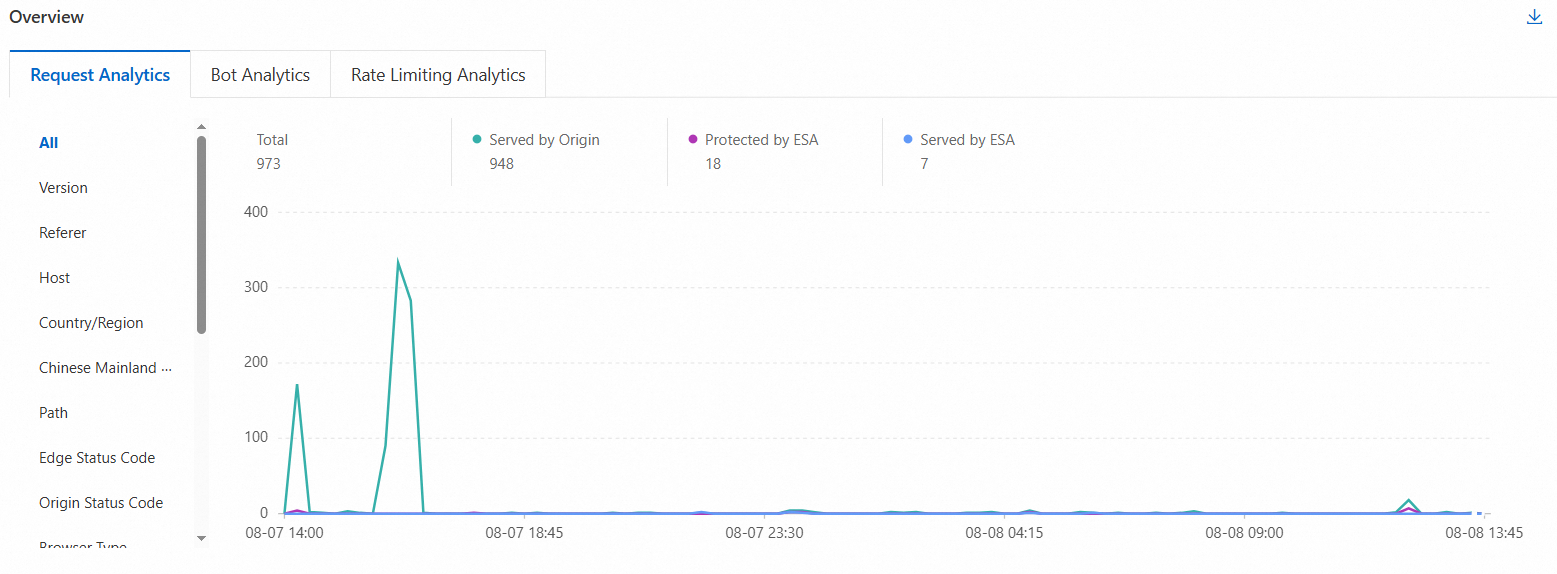
The Overview area visualizes traffic volume and rate limiting events for your selected time range. Use the time range selector and filters such as Source IP, Status Code, or Referer to analyze traffic patterns. These visualizations help you:
-
Spot anomalies
-
Understand traffic patterns
-
Make informed decisions about your security policies
-
In the ESA console, select Websites , and then click your target website.
-
Navigate to .
-
In the Overview area, switch between the Request Analytics or Rate Limiting Analytics tabs. Apply filters such as by Referer , Country/Region , or Host to drill down into specific patterns.
Inspecting sampled logs
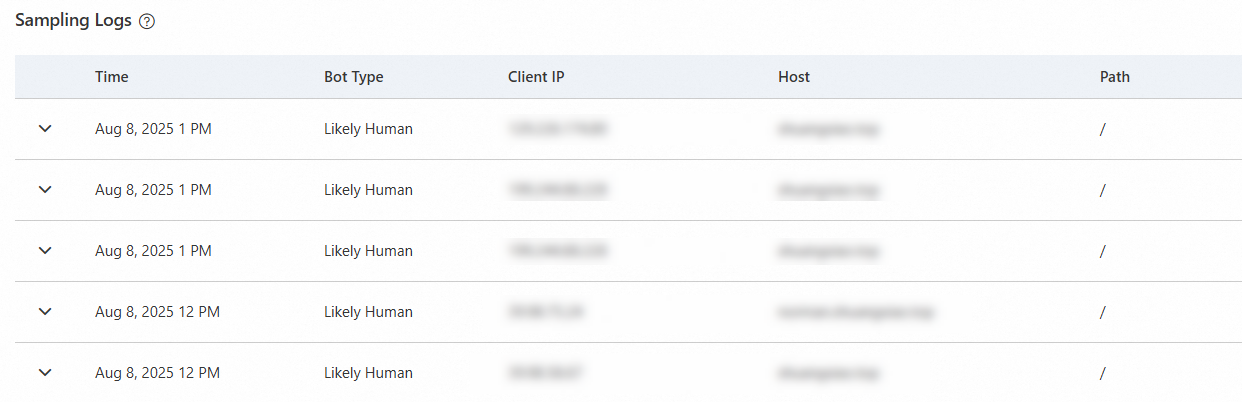
ESA automatically samples incoming HTTP and HTTPS traffic, providing detailed log entries. Each log includes basic request information, Edge Response data, Request Analytics, and Request Details. Use these logs to investigate security incidents and fine-tune mitigation rules.
-
In the ESA console, select Websites , and then click your target website.
-
Navigate to .
-
In the Sampling Logs section, click the Details icon
 to view log details.
-
Use the time range and filters to focus on logs from a specific period or matching certain criteria.
Responding to threats from the dashboard
When you detect suspicious activity, filter by dimensions such as IP address, URI, or User-Agent to isolate malicious requests. From the filtered results, create a WAF rule to block the threat.
Example scenario
You identify an IP address (192.0.XX.XX) sending over 200 requests per second to your login endpoint, which is a potential credential stuffing attack. Filter for this IP and create a rate limiting rule that throttles it to 10 requests per minute, or add it to a blacklist to block it entirely.
-
In the ESA console, select Websites , and then click your target website.
-
In the navigation pane on the left, choose .
-
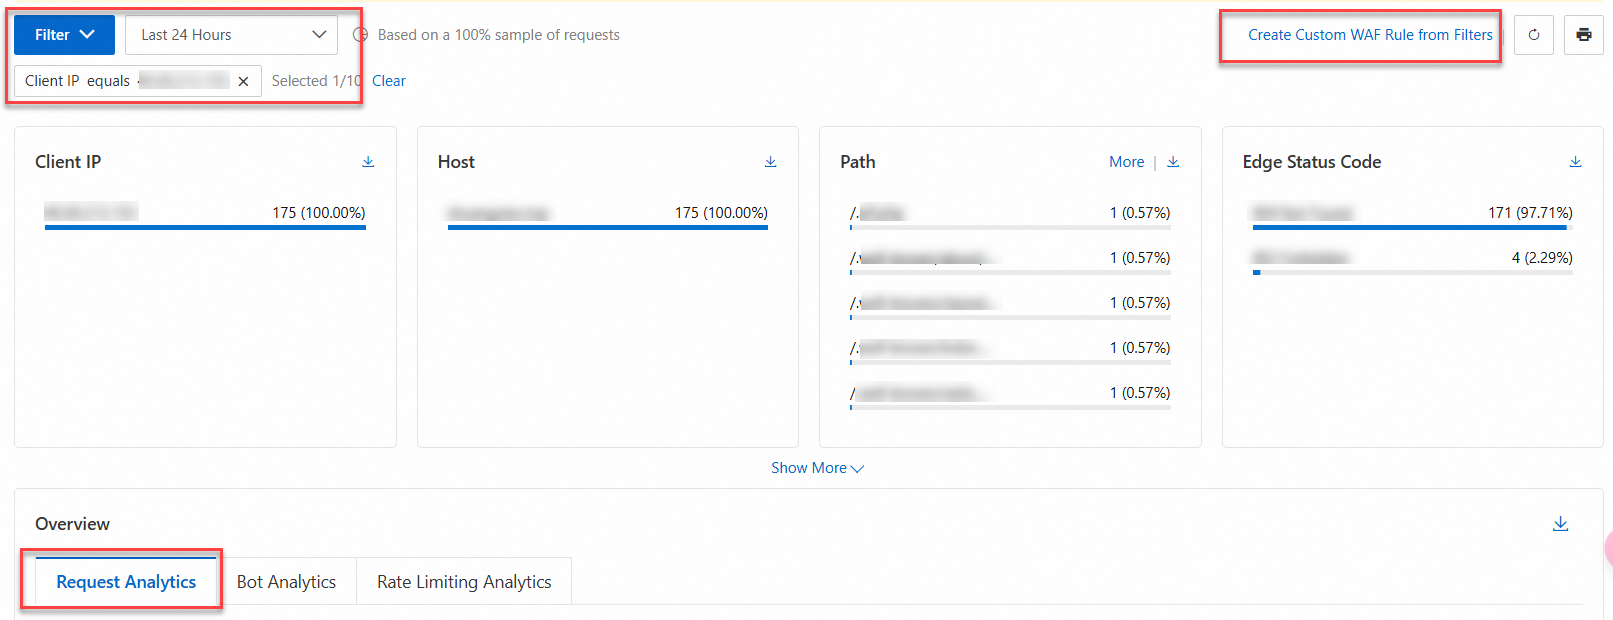
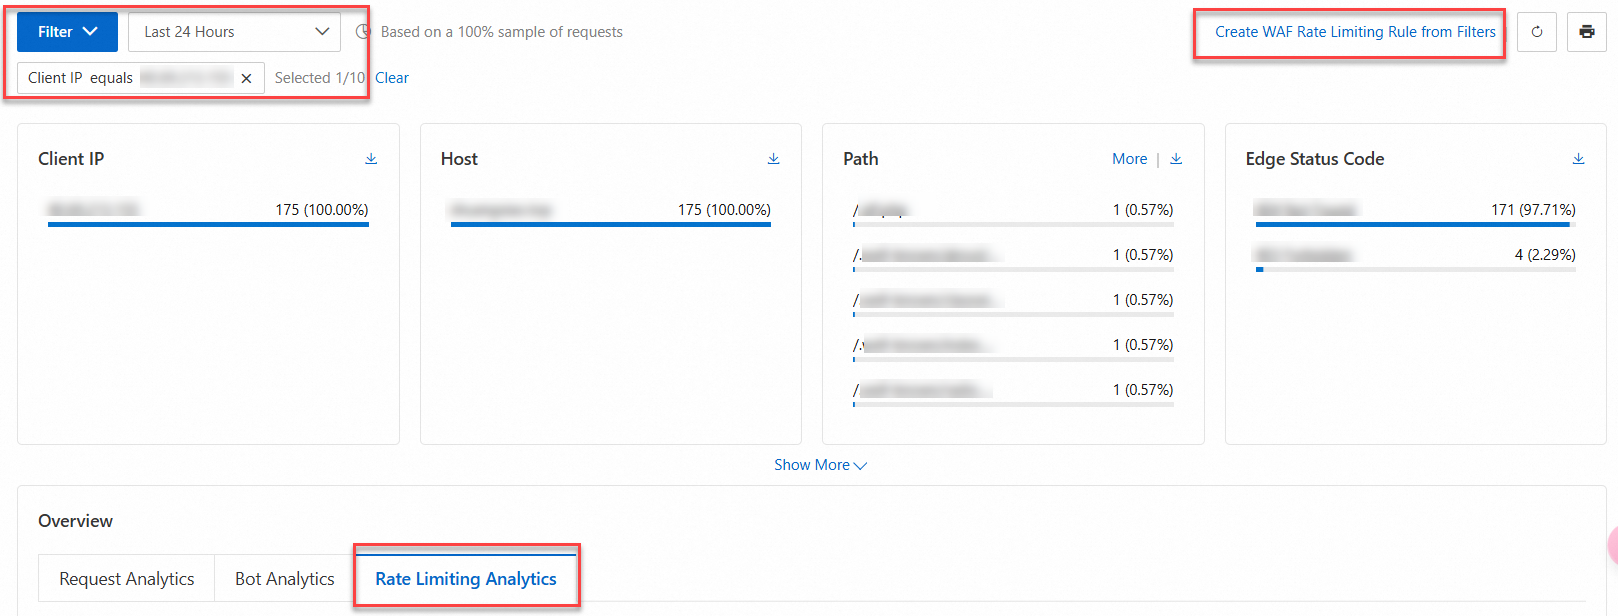
In the Filter, select the IP address
192.0.XX.XX. Then, create a blacklist rule or a rate limiting rule.-
Create a blacklist rule:
-
In the Overview area, select the Request Analytics tab, and then click Create Custom WAF Rule from Filters in the upper-right corner.
-
The Create Custom Rule page appears. Enter a Rule Name. In the If requests match... section, keep the default settings. In the Then execute... section, set the action to Block.
-
Click OK . The rule will immediately block all requests from the specified IP.
-
-
Create a rate limiting rule:
-
In the Overview area, select the Rate Limiting Analytics tab, and then click Create WAF Rate Limiting Rule from Filters in the upper-right corner.
-
The Create Rate Limiting Rule page appears. Enter a Rule Name. In the When the rate exceeds... section, set the rate to
10 requests/1 minute. In the Then execute... section, select Apply to Matched Requests and set the action to Block. -
Click OK . The rule will throttle excessive requests from the IP while allowing legitimate traffic.
-
-