This topic explains the Image Search workflow to help you get started quickly.
For more product details or technical support, click Online Consulting or contact us through our DingTalk group: 35035130.
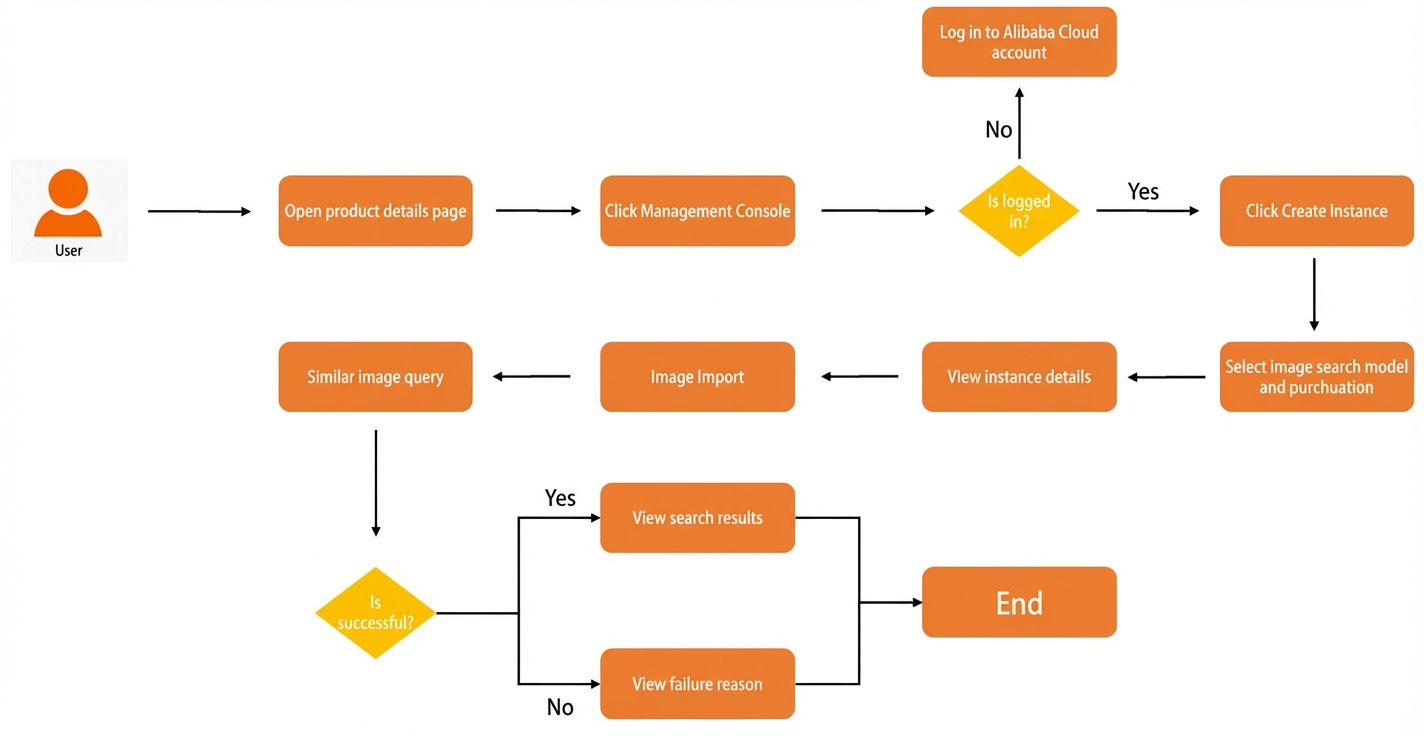
Flowchart
The following diagram shows the Image Search workflow.
Procedure
-
Log on to the Image Search console and go to the Overview page. This page displays the total number of instances and their running status for each service type, such as Product Image Search, Fabric Image Search, Trademark Image Search, Copyrighted Image Search, and Product Multimodal Search. The quick start guide is on the right.
-
Select a service type and create an instance. For more information, see Create an instance. On the Product Image Search page, click Create Instance in the upper-left corner.
-
Click an instance ID or a link in the Actions column to open the Instance Details page. The Overview tab is active by default, showing basic information about the instance such as its name, ID, region, status, and expiration time, as well as plan usage details like maximum capacity and the number of images used.
-
Click the Add Image tab to upload images and build an image gallery. For more information, see Add Image. Enter the product ID and image name, and then upload a product image. Turn on the main-body detection switch and select a detection method, such as automatic detection. If needed, you can also specify the image category, custom content, integer attribute, and string attribute. Click Confirm. In the response on the right, a
codeof0and amessageofsuccessconfirm that the image was added successfully. -
Click the Search by Image tab to find similar products or images. For more information, see Image query. In the Search Type field, select SearchByPic (to search for similar images by using a new image), and upload the image that you want to search. Turn on the main-body detection switch and set the detection method to automatic detection. Set parameters such as number of results and result start position, and then click Confirm. The raw response area on the right displays the search response in JSON format. The
auctionsarray contains matching records, including theproductIdandscorefields. Theheadsection returns information such asdocsFound(total number of hits),docsReturn(number of returned results), andsearchTime(search latency).