Text Document is a core component, and the most frequently used. It lets you create anything from simple letters to complex manuscripts, combining text, images, and tables. This topic covers the basic operations and frequently used features of Text Document.
Basic operations
Enter text
-
Create a new text document.
-
Position the cursor where you want to add text and start typing. The insertion point moves from left to right as you type.
Note-
If you type an incorrect character, press the Backspace key to delete it, and then type the correct text.
-
When you reach the end of a line, the text automatically wraps. Press Enter to start a new paragraph.
-
While typing, you can also insert items such as the current date, time, and special symbols.
-
Select text and objects
To edit text or an object, you must select it first. You can select text using the mouse, the keyboard, or a combination of both. However, objects can only be selected using the mouse or a combination of the mouse and keyboard.
-
Select text
-
Mouse actions
Depending on what you want to select, you can use one of the following mouse actions:
-
To select a sentence: Triple-click any word in it.
-
To select any block of text: Click at the beginning of the text and drag to the end of your selection.
-
To select all content in the document: Press the Ctrl+A keyboard shortcut.
-
-
Keyboard actions
You can also use keyboard shortcuts to select text. These shortcuts often involve the Ctrl, Shift, and arrow keys. The following table lists keyboard shortcuts for selecting text.
Key
Action
Shift+↑
Select one line up.
Shift+↓
Select one line down.
Shift+←
Select one character to the left.
Shift+→
Select one character to the right.
Ctrl+A
Select the entire document.
-
-
Deselect text
To deselect text, do one of the following:
-
Click anywhere in the document.
-
Press any arrow key.
-
-
Select an object
To edit or modify an object, you must first select it. The edit and selected states differ as follows:

-
Edit state: A blinking cursor appears, indicating where you can enter text.
-
Selected state: No cursor is visible, and sizing handles appear on the object.
You can select objects in the following ways:
-
To select a single object: Click the object.
-
To select multiple objects: Press and hold the Shift key while clicking each object.
-
-
Deselect an object
To deselect an object, use one of the following methods:
-
Press the Esc key.
-
Click outside the selected area.
-
To deselect one object from a multiple selection, hold Shift and click the object.
-
Copy, cut, and paste text or objects
After you select text or an object, you can perform actions such as Copy, Cut, and Paste.
-
Copy
Copying duplicates the selected content on the Clipboard, leaving the original unchanged. To copy content, use one of the following methods:
-
Press Ctrl+C.
-
Right-click the selection and choose Copy from the context menu.
-
-
Cut
Cutting removes the selected content from its original location and places it on the Clipboard. To cut content, use one of the following methods:
-
Press Ctrl+X.
-
Right-click the selection and choose Cut from the context menu.
-
-
Paste
Pasting inserts the content from the Clipboard at the current insertion point. You can only paste content if the Clipboard is not empty. To paste content, use one of the following methods:
-
Press Ctrl+V.
-
Right-click and choose Paste from the context menu.
-
In the copy success message, click Paste to Other Apps, as shown in the following figure.
 Important
Due to browser security restrictions, you must use this method to copy content with formatting or images to other applications.
-
-
Format Painter
The Format Painter lets you copy formatting (such as paragraph attributes, font, and color) from text or an object and apply it to another. To use the Format Painter, follow these steps:
-
Select the text or object with the formatting you want to copy.
-
On the Home tab, click the Format Painter icon. Your cursor changes to a paintbrush icon.
-
Use the paintbrush cursor to select the text or paragraph you want to apply the formatting to.
NoteTo keep the Format Painter active, double-click the Format Painter icon.
-
To move or copy text or objects, perform the following steps:
-
Select the text or object you want to move or copy.
-
Cut or copy the selection.
-
To move: Cut the selection.
-
To copy: Copy the selection.
-
-
Move the insertion point to the target location.
-
Paste the content from the Clipboard.
Delete text or objects
-
To delete selected content, use one of the following methods:
-
Press the Delete key.
-
Press the Backspace key.
-
Use the Cut command.
-
-
To delete content without first selecting it:
-
To delete the character to the left of the insertion point, press Backspace.
-
To delete the character to the right of the insertion point, press Delete.
-
Undo and redo
You can reverse or repeat recent actions with the Undo and Redo features.
-
Undo
To undo an action, use one of the following methods:
-
On the Home tab, click the
 icon.
icon. -
Press Ctrl+Z.
NoteTo undo multiple actions, repeat the Undo command.
-
-
Redo
After you undo an action, you can redo it. To redo an action, use one of the following methods:
-
On the Home tab, click the
 icon.
icon. -
Press Ctrl+Y.
-
Font settings
The application provides various fonts, font sizes, and character formatting options. To format text, select it and then apply the desired format. If no text is selected, the format applies to any new text you type.
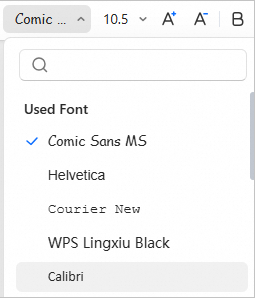
Set the font
You can set a font to suit your preferences or work requirements.
-
Select the text you want to change.
-
On the Home tab, click the font drop-down list and select a font, as shown in the following figure.
Set the font size
Follow these steps to set the font size:
-
Select the text you want to resize.
-
On the Home tab, click the font size drop-down list and select a size, as shown in the following figure.

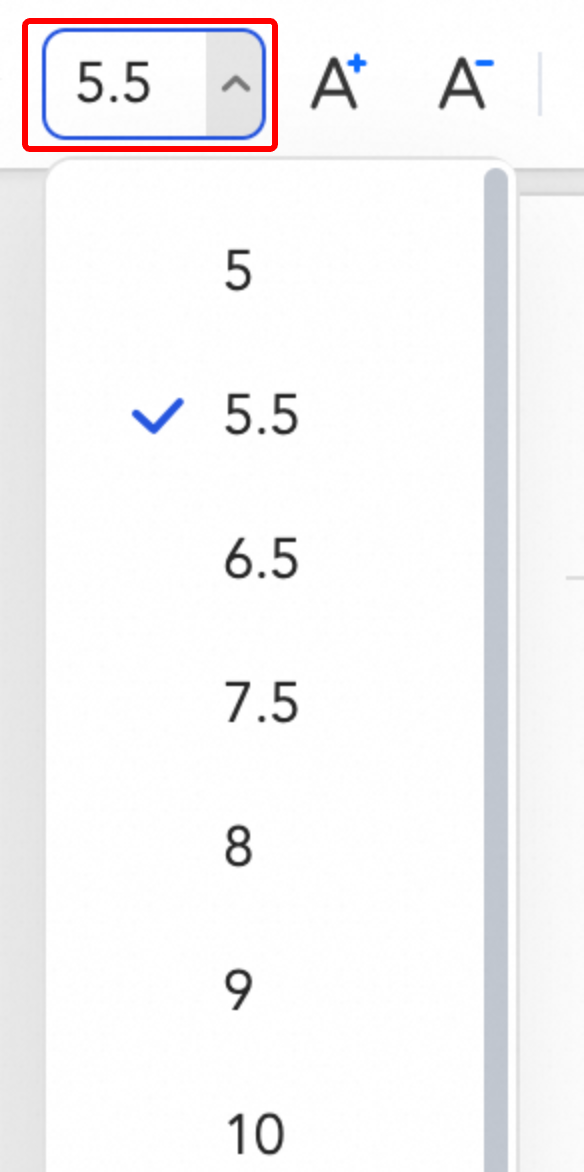
You can also click the  icon to increase the font size or the
  icon to decrease it.
Set the font style
Font style refers to the format of text characters. The Home tab contains several icons for setting the font style. The following table describes these icons and their functions.
|
Icon |
Function |
|
|
Toggles bold on the selected text. |
|
|
Toggles italic on the selected text. |
|
|
Toggles an underline on the selected text. |
|
|
Toggles strikethrough on the selected text. |
|
|
Click the arrow
|
|
|
Click the arrow |
 : Applies superscript to the selected text.
 : Applies subscript to the selected text.
Paragraph settings
Adding bullets, numbering, and checklists
Adding bullets, numbering, or checklists organizes your document and improves its readability. Automatic lists are more efficient than manual ones because they update automatically when items are added or removed.
-
Automatically create a list
To create a bullet, numbering, or checklist, follow these steps:
-
Add a bullet, numbering, or a check box.
-
On the Home tab, click the arrow next to the
icon and select a bullet style, as shown in the following figure. -
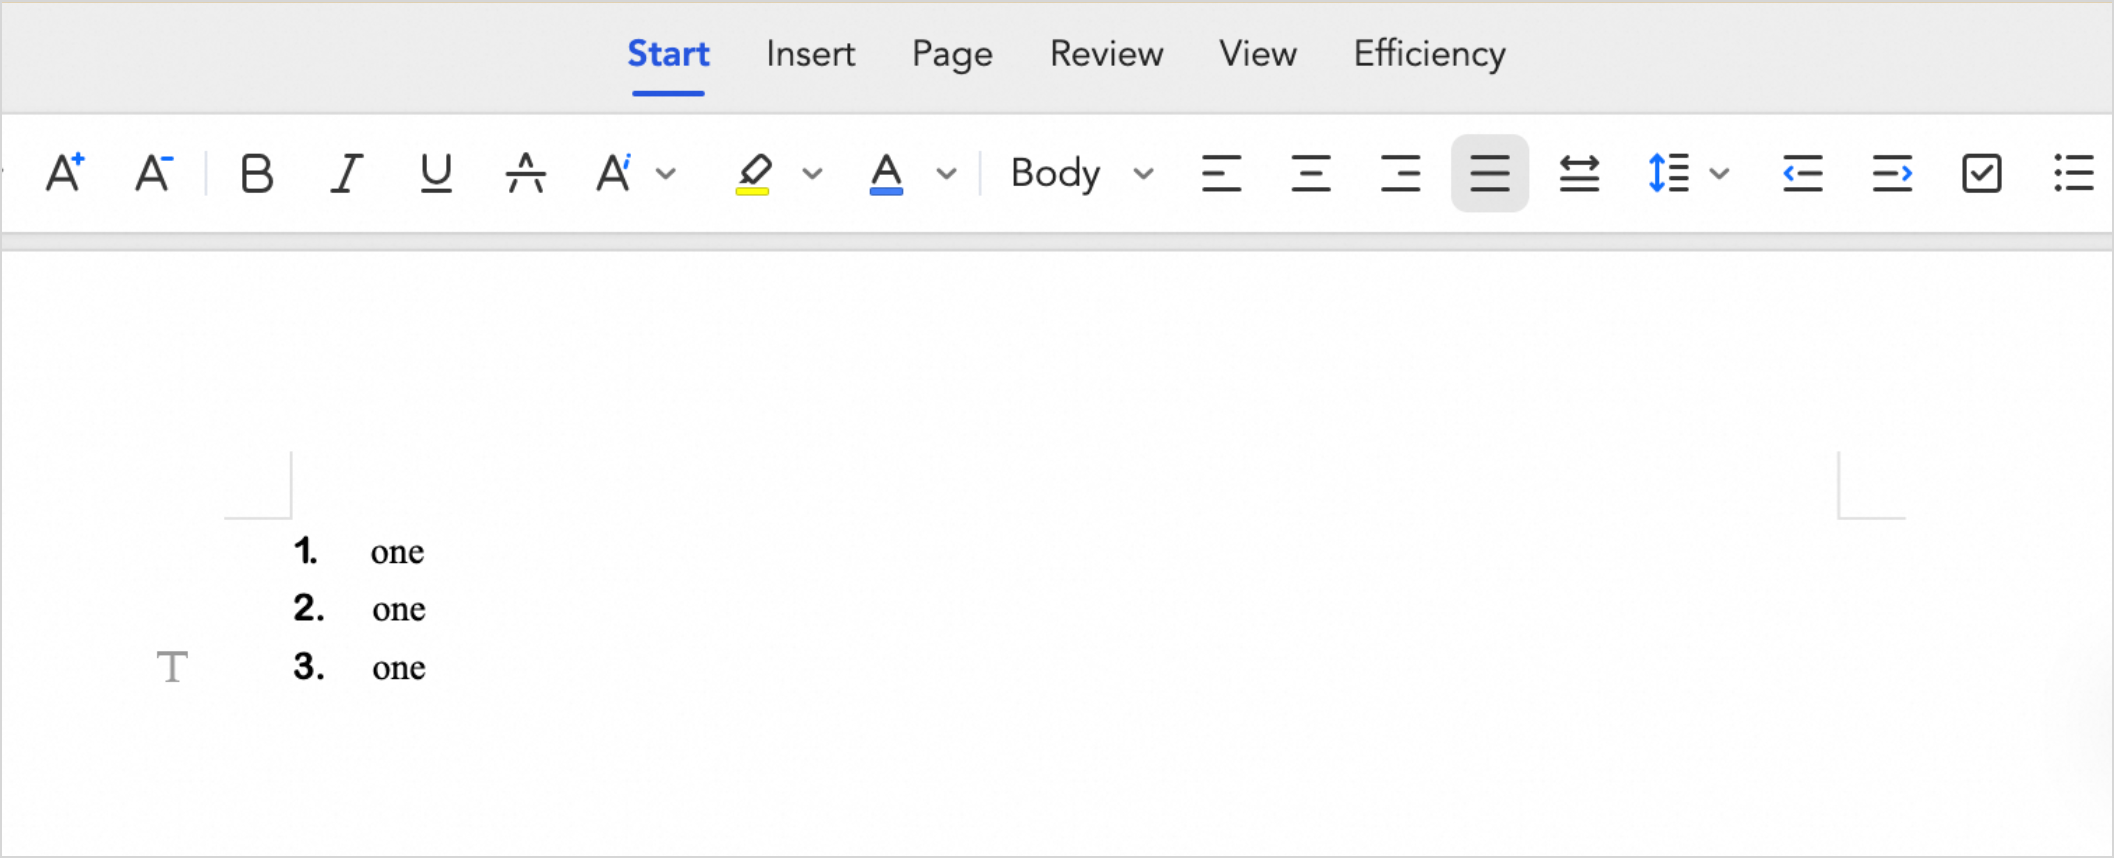
On the Home tab, click the arrow next to the
icon and select a numbering style, as shown in the following figure. -
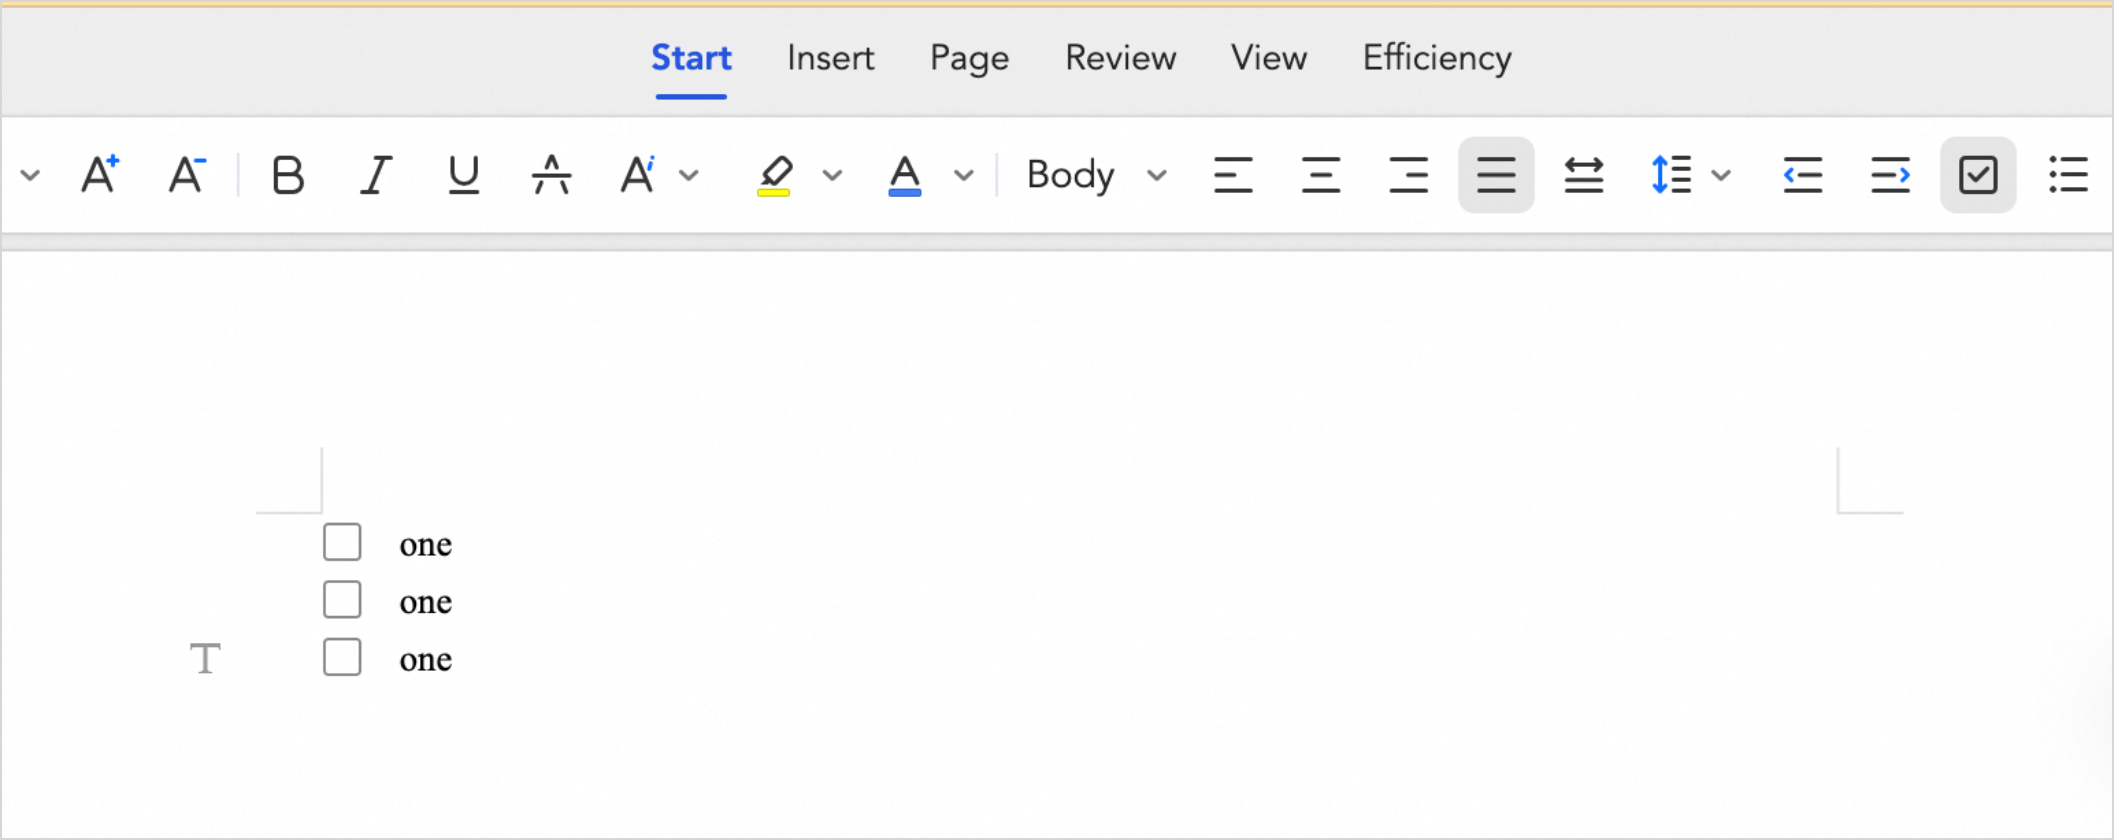
On the Home tab, click the
icon to add a check box.
-
-
Type your text after the inserted bullet, number, or check box.
NoteWrapped text aligns with the left margin. A hanging indent is not automatically applied.
-
Press Enter to add the next item to the list.
-
(Optional) To end the list, press Backspace to remove the last list item.
-
-
Apply list formatting to existing text
To apply list formatting to existing paragraphs, follow these steps:
-
Select the paragraphs you want to format as a list.
-
Apply a list style.
-
On the Home tab, click the arrow next to the
icon and select a bullet style, as shown in the following figure. -
On the Home tab, click the arrow next to the
icon and select a numbering style, as shown in the following figure. -
On the Home tab, click the
icon to add a check box, as shown in the following figure.
-
-
 icon and select a bullet style, as shown in the following figure.
 icon and select a numbering style, as shown in the following figure.
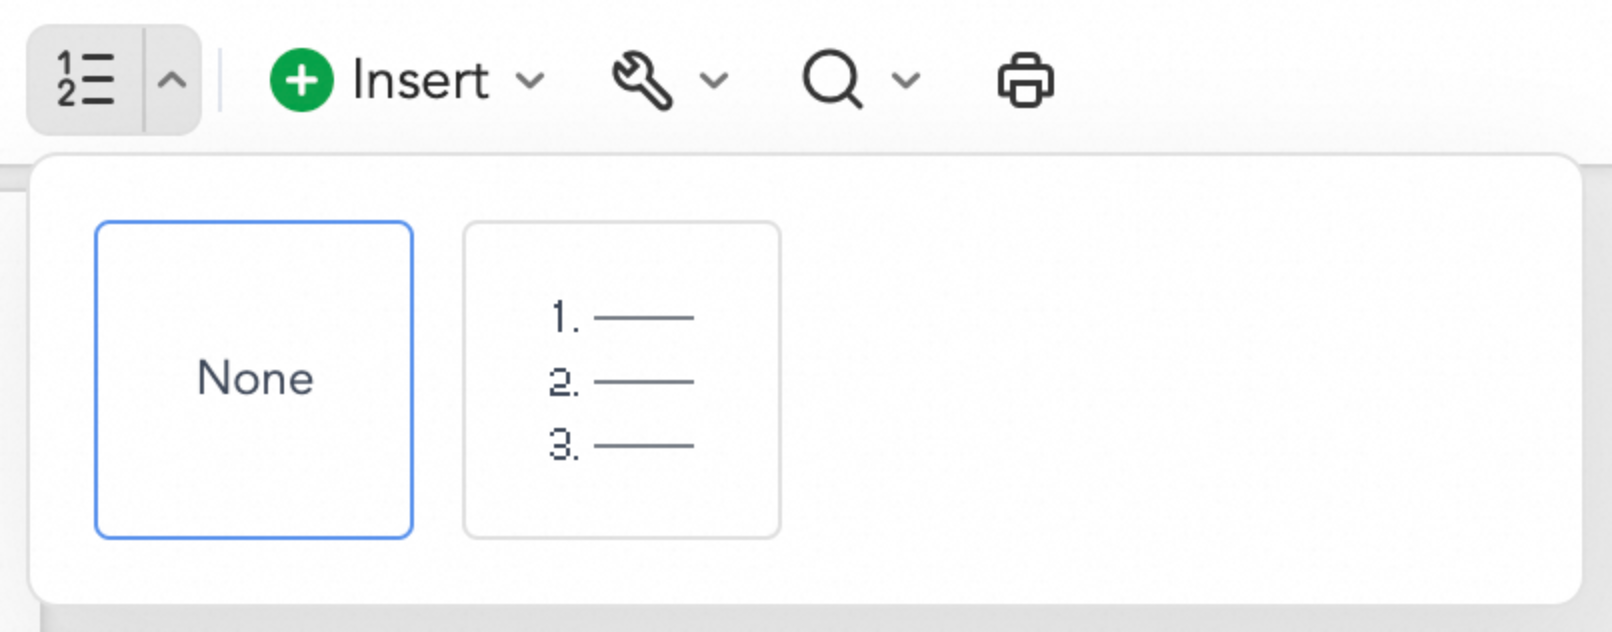

Setting paragraph indents
Paragraph indents control the space between a paragraph and the page margins. Indenting separates paragraphs, improving the document's structure and readability.
-
Types of indents
The four types of indents are:
-
left indent: Indents all lines of a paragraph from the left margin.
-
right indent: Indents all lines of a paragraph from the right margin.
NoteLeft and right indents can be used together to set off a block of text, a common format for quotations.
-
first-line indent: Indents only the first line of a paragraph. This is a common way to visually separate paragraphs.
-
hanging indent: Indents all lines of a paragraph except for the first line.
-
-
How to set indents
On the Home tab, click the
(Decrease Indent) or (Increase Indent) icon to adjust the paragraph indent.
Setting text alignment
-
Alignment options
The following table describes the five available alignment options.
Icon
Description
left alignment
center alignment
right alignment
justified
distributed
-
How to set alignment
Select the text you want to align, and then click the corresponding alignment icon.


Setting line spacing
Adjusting the line spacing can improve your document's visual appeal and readability.
To change the line spacing, click the ![]() icon and select an option from the drop-down list, as shown in the following figure.
icon and select an option from the drop-down list, as shown in the following figure.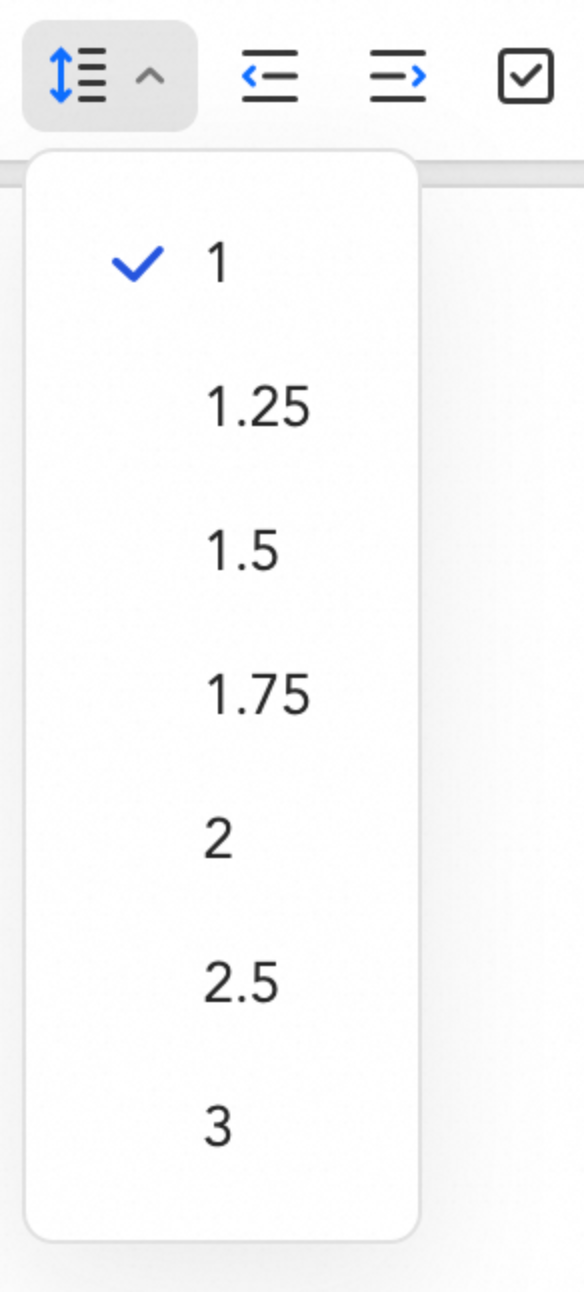
Using text tools
The text tools feature automates common formatting tasks to ensure your document is clean, compact, and follows standard writing conventions.
-
How to use text tools
On the Home tab, click the
icon and select a tool from the drop-down list. -
Text tool options
Hover over a tool's icon to see its function. The available tools are described below.
Icon
Action
Appends paragraphs that start flush left (for example, with no first-line indent or leading spaces) to the end of the preceding paragraph.
Removes leading spaces, blank paragraphs, and first-line indents of 2 characters.
Inserts a blank line between paragraphs. If a blank line already exists, no line is added.
Removes all empty paragraphs (blank lines).
Removes leading spaces from each paragraph.
Removes redundant spaces, such as double spaces, while preserving single spaces between words.
Removes all soft returns.
Replaces all soft returns with hard returns (paragraph breaks).
Applies a two-character first-line indent to unindented paragraphs.
Replaces all first-line indents with spaces.
Adds a blank paragraph that inherits formatting (such as a first-line indent) from the previous paragraph.
 icon and select a tool from the drop-down list.


Applying styles
A style is a reusable set of formatting options. Styles let you apply multiple formats to text and paragraphs at once, improving your efficiency.
On the Home tab, click the  icon and select a style from the drop-down list.
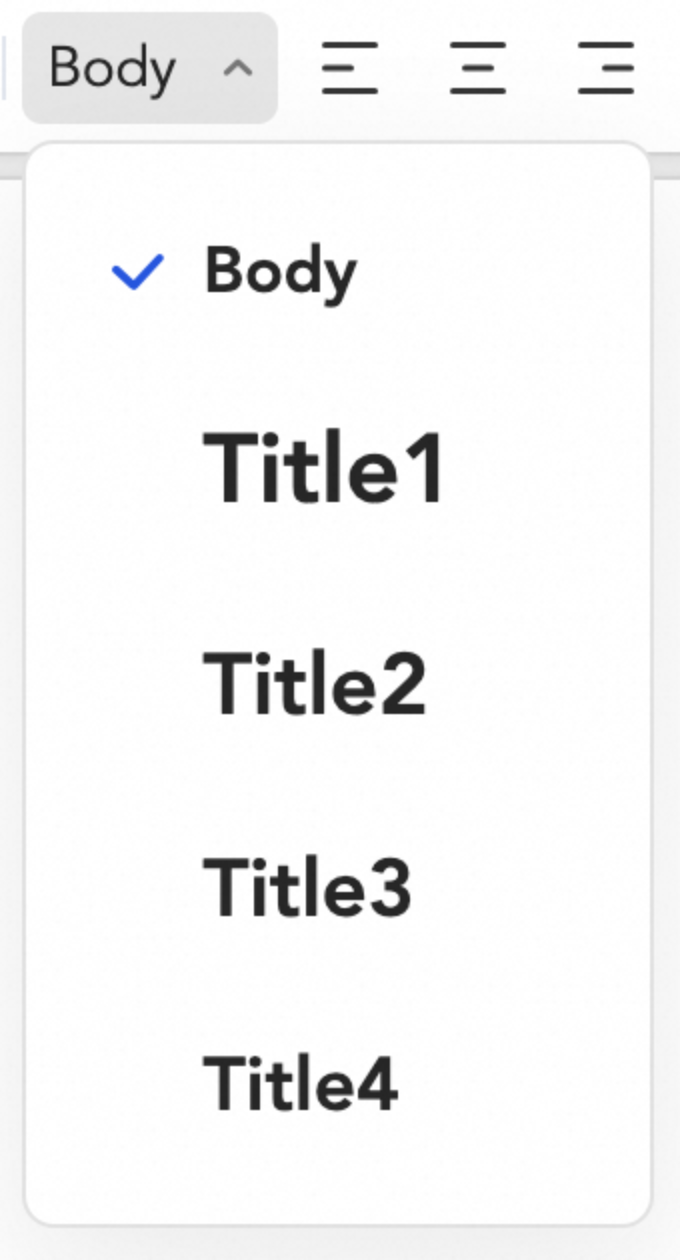
Find and replace
The find and replace feature helps you quickly find specific text and replace it with new content.
Find
The find feature helps you quickly find specific text or formatting. You can search for characters, symbols, and sentences, as well as specific fonts, font sizes, and special characters.
To find text, follow these steps:
-
On the Home tab, click the
icon and select find from the drop-down list. -
In the text box, enter the content you want to find.
NoteClick the
icon to show more search options, including match case, use wildcards, match whole word, and ignore half/full width forms. -
Press Enter to start the search.
Note-
If no matches are found, the message We couldn't find what you were looking for appears below the text box.
-
Click the
icon or icon next to the text box to find the previous or next match.
-
-
Click the
icon to exit the find tool and return to the document.
 icon and select find from the drop-down list.
 icon to show more search options, including match case, use wildcards, match whole word, and ignore half/full width forms.
 icon or
  icon next to the text box to find the previous or next match.
 icon to exit the find tool and return to the document.
Replace
The replace feature lets you replace specific content in your document.
To replace text, follow these steps:
-
On the Home tab, click the
icon and select replace from the drop-down list. -
In the find what text box, enter the content you want to search for.
NoteClick the
icon to show more search options, including match case, use wildcards, and ignore half/full width forms. -
In the replace with text box, enter the new content.
NoteTo delete the found content, leave the replace with text box empty and perform a replacement.
-
Press Enter to find the first match. The matched content is highlighted in the document. You can then choose one of the following actions:
-
To replace the current match: Click replace. The content is replaced, and the search moves to the next match.
-
To replace all matches in the document: Click replace all. A notification appears confirming that all replacements are complete.
-
To skip the current match: Click the
icon to find the next match without making a replacement.
NoteTo undo a replacement, click the
icon in the ribbon. -
-
Click the
icon to exit the replace tool and return to the document.
Insert and edit tables
Tables help you organize and summarize related data. There are several ways to create a table: you can draw one by dragging with your mouse or use commands to create a table of a specific size.
Insert a table using the grid
To quickly insert a simple table, follow these steps:
-
Place the cursor where you want to insert the table.
-
Choose one of the following methods to insert a table:
-
On the Home tab, click the
icon and select table from the drop-down list. -
On the Insert tab, click the
icon.
-
-
Move the pointer over the grid to select the number of rows and columns. The dimensions are displayed above the grid as you select, as shown below.
-
After selecting the rows and columns, click in the grid to insert the table.
 icon and select table from the drop-down list.
 icon.
icon.
Select cells, rows, and columns
A cell is the basic unit for storing data or text. You can select one or more cells, rows, or columns. Selected items are highlighted.
-
Select cells
You can select a single cell or multiple adjacent cells.
-
To select a single cell: When the pointer changes to an upward-right arrow, click to select the cell.
-
To select adjacent cells: Click and hold the left mouse button, then drag over the cells you want to select.
The selected cells are highlighted, as shown below.
-
-
Select rows and columns
You can select a single row, a single column, or multiple adjacent rows or columns.
-
To select a single row: When the pointer changes to a right-pointing arrow, click to select the row, as shown below.
-
To select a single column: When the pointer changes to a downward-pointing arrow, click to select the column, as shown below.
-
To select multiple adjacent rows or columns: Click and hold the left mouse button, then drag over the rows or columns you want to select.
-
-
Select the entire table
There are three ways to select the entire table:
-
Using the Select All tag: Place the cursor anywhere in the table, and the Select All tag will appear in the upper-left corner. Click the tag to select the entire table, as shown below.
-
Using a keyboard shortcut: Place the cursor anywhere in the table and press Ctrl+A.
-
Using the sizing handle: Place the cursor anywhere in the table, and the sizing handle will appear in the lower-right corner. Click the sizing handle to select the entire table, as shown below.
The selected table is highlighted, as shown below.
-


To deselect the items, click anywhere outside the table.
Enter content in a table
To enter content in a table, follow these steps:
-
Place the cursor in the cell where you want to enter text.
-
Enter your content.
Note-
If the entered text exceeds the cell width, it automatically wraps to the next line, increasing the row height.
-
To start a new paragraph within a cell, press Enter. The row height will also increase.
-
To move between cells, click a different cell or use the arrow keys.
-
Format table content
Formatting table content includes setting the font, font style, font size, color, and alignment of text in the cells.
-
Format text in cells
To format the text in cells, follow these steps:
-
Select the cells containing the text you want to format.
-
On the Home tab, use the formatting icons to change the font, font style, font size, and color.
-
-
Set text alignment
To align text in a table, follow these steps:
-
Select the cells containing the text you want to align.
-
On the Home tab, click the desired alignment icons.
-
Move and resize a table
New tables are created at a default size. You can move or resize the table while editing the document.
To resize a table, follow these steps:
-
Place the cursor anywhere in the table, and the sizing handle will appear in the lower-right corner, as shown below.
-
Hover over the sizing handle until the pointer changes to a double-headed diagonal arrow, then click and drag the handle.
-
While dragging, a dotted outline indicates the new table size, and the pointer changes to a four-headed arrow, as shown below.
-
Release the mouse button when the table reaches the desired size.


Insert or delete rows and columns
-
Insert rows or columns
To insert rows or columns, follow these steps:
-
Select a location for the new rows or columns. The number of rows (or columns) you select determines how many are inserted.
-
Choose one of the following methods to insert the rows or columns:
-
Method 1:
-
Place the cursor in a cell where you want to insert a row or column.
-
Right-click and choose an insertion option.
-
Click Insert Above, Insert Below, Insert Left, or Insert Right.
-
-
Method 2: Hover the pointer between two rows (or columns). When the plus (+) icon appears, click it to insert one new row (or column), as shown below.
-
-
-
Delete rows or columns
To delete rows or columns, follow these steps:
-
Place the cursor in any cell within the row or column you want to delete.
-
Choose one of the following methods to delete the rows or columns:
-
Method 1:
-
Right-click and choose a deletion option.
-
Click Delete Row, Delete Column, or Delete Table.
-
-
Method 2: Select a row or column. When the minus (-) icon appears, click it to delete the selection, as shown below.
-
-


Adjust row height and column width
-
Adjust row height
To adjust the row height, follow these steps:
-
Hover over the bottom border of the row you want to resize until the pointer changes to a vertical double-headed arrow.
-
Click and hold the left mouse button, then drag the border up or down. A dotted line indicates the new row height as you drag, as shown below.
-
Release the mouse button when the row is at the desired height.
-
-
Adjust column width
To adjust the column width, follow these steps:
-
Hover over the side border of the column you want to resize until the pointer changes to a horizontal double-headed arrow.
-
Click and hold the left mouse button, then drag the border left or right. A dotted line indicates the new column width as you drag, as shown below.
-
Release the mouse button when the column is at the desired width.
-


Insert and edit pictures
You can insert pictures into a document to illustrate content and improve readability.
Insert a picture
To insert a picture, follow these steps:
-
Place the cursor where you want to insert the picture.
-
Do one of the following:
-
On the Home tab, click the
icon, and then select Pictures from the drop-down list. -
On the Insert tab, click the
icon.
-
-
In the Open dialog box, navigate to and select your picture file.
-
Click Open to insert the picture.
 icon.
icon.Resize a picture
Cropping adjusts the visible area of a picture, while resizing changes its overall dimensions.
To resize a picture, follow these steps:
-
Click the picture you want to resize. Eight sizing handles appear on its corners and sides.
-
Do one of the following to resize the picture:
-
To resize the picture horizontally or vertically, hover over a middle sizing handle until the mouse pointer changes to a horizontal or vertical double arrow.
-
To resize the picture diagonally, hover over a corner sizing handle until the mouse pointer changes to a diagonal double arrow.
-
-
Click and drag the handle. A dotted box indicates the new size.
-
Release the left mouse button when the dotted box reaches the desired size.
Wrap text
The wrap text feature lets you control how text flows around a picture to improve the layout.
To wrap text around a picture, follow these steps:
-
Select the picture. The
icon appears in the upper-right corner of the picture. -
Click the
icon and select a wrap text option.
 icon appears in the upper-right corner of the picture.
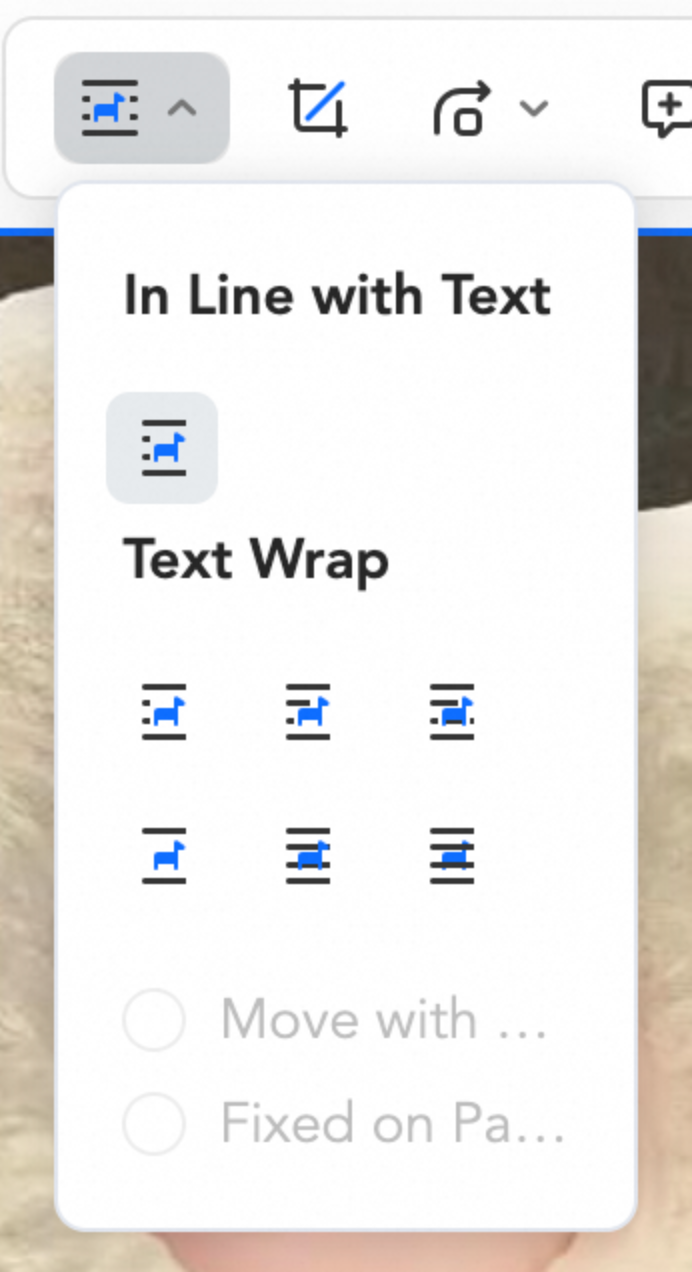
Hyperlinks
Create a hyperlink
You can hyperlink selected text to a web page.
To create a hyperlink, follow these steps:
-
Select the text to hyperlink.
-
Use one of the following methods to insert a hyperlink:
-
Right-click the selected text and select Insert Hyperlink from the context menu.
-
On the Home tab, click the
icon and select Link from the drop-down list. -
On the Insert tab, click the
icon.
-
-
In the Link dialog box, set the following parameters:
-
Text: The display text for the hyperlink.
-
Link: The destination URL.
-
-
Click OK.
 icon.
icon.Follow a hyperlink
Hold down Ctrl and click the hyperlink.
Edit a hyperlink
To edit or remove a hyperlink, right-click the hyperlink and select Edit Hyperlink or Remove Hyperlink from the context menu.
Insert a date
You can insert a date in various formats.
To insert a date, follow these steps:
-
Place the insertion point where you want to insert a date.
-
Use one of the following methods:
-
On the Home tab, click the
icon and select Date from the drop-down list. -
On the Insert tab, click the
icon.
-
-
Select a date format.
-
In the date settings dialog box, specify the date and time.
-
Confirm the date and time, and then click anywhere in the document to insert them.
 icon.
icon.Insert symbol
The Insert Symbol feature lets you add symbols to your text document that are not on your keyboard, including Greek letters, mathematical symbols, and graphical symbols.
To insert a symbol, follow these steps:
-
Place the cursor where you want to insert the symbol.
-
Do one of the following:
-
On the Home tab, click the
icon and select Symbol from the drop-down list. -
On the Insert tab, click the
icon.
-
-
Click the desired symbol.
 icon.
icon.Insert a watermark
You can insert a watermark, which is a faded image or text that appears behind the content of your document.
To insert a watermark, follow these steps:
-
To open the watermark options, do one of the following:
-
On the Home tab, click the
icon and select Watermark from the drop-down list. -
On the Insert tab, click the
icon.
-
-
(Optional) In the Custom Watermark section, click Add. In the Custom Watermark dialog box, configure the watermark settings.
-
(Optional) Select a pre-configured watermark.
NoteHover over a pre-configured watermark and click the
icon that appears in the upper-right corner. You can then choose to apply the watermark to the entire document or current section, or choose Edit Watermark. -
(Optional) To remove the watermark, click Delete Watermark.
 icon.
icon.

 icon that appears in the upper-right corner. You can then choose to apply the watermark to the entire document or current section, or choose Edit Watermark.
Horizontal line
Use a horizontal line to separate content or add visual appeal to your document.
To insert a horizontal line, follow these steps:
-
Place the cursor where you want to insert the horizontal line.
-
Do one of the following:
-
On the Home tab, click the
icon and select Horizontal Line from the drop-down list. -
On the Insert tab, click the
icon.
-
-
Click the desired horizontal line style.
 icon.
icon.To change the line color, click Horizontal Line Color at the end of the list and select a color from the color palette.
Inserting breaks
Page break
Page breaks control a document's pagination. A page break marks the point where one page ends and the next one begins. The application automatically inserts a page break when content fills a page.
To manually insert a page break, follow these steps:
-
Place the cursor where you want to insert a page break.
-
Use one of the following methods to insert a page break:
-
On the Home tab, click the
icon, then select from the drop-down list. -
On the Insert tab, click the
icon, then select Page Break from the drop-down list.
-
 icon, then select Page Break from the drop-down list.
Column break
To insert a column break, follow these steps:
-
Place the cursor where you want to insert a column break.
-
Use one of the following methods to insert a column break:
-
On the Home tab, click the
icon, then select from the drop-down list. -
On the Insert tab, click the
icon, then select Column Break from the drop-down list.
-
Line break
To insert a line break, follow these steps:
-
Place the cursor where you want to insert a line break.
-
Use one of the following methods to insert a line break:
-
On the Home tab, click the
icon, then select from the drop-down list. -
On the Insert tab, click the
icon, then select Line Break from the drop-down list.
-
Section break
By default, a document is a single section. You can divide it into multiple sections to apply different formatting to each, such as unique page numbering, headers, footers, and margins.
To insert a section break, follow these steps:
-
Place the cursor where you want to insert a section break.
-
Use one of the following methods to insert a section break:
-
On the Home tab, click the
icon, then select the type of section break you want from the drop-down list. -
On the Insert tab, click the
icon, then select the type of section break you want from the drop-down list.
The following table describes the different types of section breaks.
Section break
Description
Starts the new section on the next page.
Starts the new section on the same page.
Starts the new section on the next even-numbered page.
Starts the new section on the next odd-numbered page.
-


Header and footer
A header is the text that appears at the top of a page, outside the body text. Headers are often used in books, manuals, and other long documents to display information such as chapter titles.
To add the same header and footer to every page, follow these steps:
-
On the Page Layout tab, click the
icon to enter the header and footer editing area. -
In the header area, enter text or insert a shape. You can format this content using the same commands and controls you use for the body text.
-
Move the insertion point to the footer area and enter the footer text.
-
On the Page Layout tab, click the
icon to return to body text editing mode.
 icon to enter the header and footer editing area.
 icon to return to body text editing mode.
Page layout
Page zoom
Zoom in for a close-up view of your document, or zoom out to see more of the page.
To select a specific zoom level, click the  icon in the lower-right corner of the page. In the Display Percentage list, select a percentage.
To quickly set the zoom to page width, click the  icon in the lower-right corner of the page.
Page margins
To change the margins in your document:
-
On the Page Layout tab, click the
icon. -
Choose one of the following methods:
-
Select a predefined margin setting.
-
Select Custom Margins, then enter values in the Top, Bottom, Left, and Right text boxes.
-
 icon.
icon.Page orientation
On the Page Layout tab, click the  icon and select Portrait (the default) or Landscape.
Review
Word count
The lower-left corner of the page shows the document's page number, page count, section, line, column, and word count.
Comments
Use comments to add notes, make suggestions, or track issues.
-
Add a comment
To add a comment, follow these steps:
-
Select the text you want to comment on.
-
Click the
icon to the right of the text, or press Ctrl+Alt+M to open the comment box. -
Type your comment. To start a new line, press Alt+Enter.
-
Press Enter to post the comment.
-
-
Delete a comment
To delete a comment, follow these steps:
-
Select the comment you want to delete.
-
Click the
icon in the upper-right corner of the comment box and select Delete. -
In the confirmation dialog box, click Delete.
-
 icon to the right of the text, or press Ctrl+Alt+M to open the comment box.
 icon in the upper-right corner of the comment box and select Delete.
Highlight collaborator changes
Collaborator edits are highlighted in different colors.
To turn on highlighting, on the Review tab, click the  icon.
icon.
Call online collaborator
You can call a collaborator to start an instant meeting within the document. The collaborator receives a notification that takes them directly to your cursor's location.
To call an online collaborator, follow these steps:
-
Place your cursor where you want the collaborator to focus.
-
Right-click and select Call Online Collaborator from the context menu.
-
The collaborator receives a notification in the upper-right corner of their document. Clicking the notification brings them to your location.
Document outline
The Document outline displays the heading structure of your document. Click a heading in the Navigation pane to expand or collapse its subheadings, or to jump to the corresponding content.
After you set headings in your document, click the  icon on the Page Layout tab. The Navigation pane appears on the left and displays the document's heading outline, as shown below.
To hide the Navigation pane, click the  icon again.
Text Document lets you print online files using your browser. This feature is not supported on mobile browsers or in mini-program clients.
To print a document, follow these steps:
-
On the Home tab, click the
icon to open the Print Settings dialog box. -
Select a print range.
-
Print All Pages: Prints the entire document.
-
Print Current Page: Prints the page containing your cursor.
-
Print Selection: Prints the selected content.
-
Custom Print: Prints specific pages or a page range that you enter in the text box.
-
-
Click Next to open your browser's print dialog box.
NoteIf your browser does not support printing, you can download the document as a PDF file and then print it.
 icon to open the Print Settings dialog box.
Export as image
This feature lets you export the document as an image.
To export the document as an image:
-
On the Efficiency tab, click the
icon to open the Export as Image panel. -
Select an export method and export format.
-
Click Export to download the image.
 icon to open the Export as Image panel.
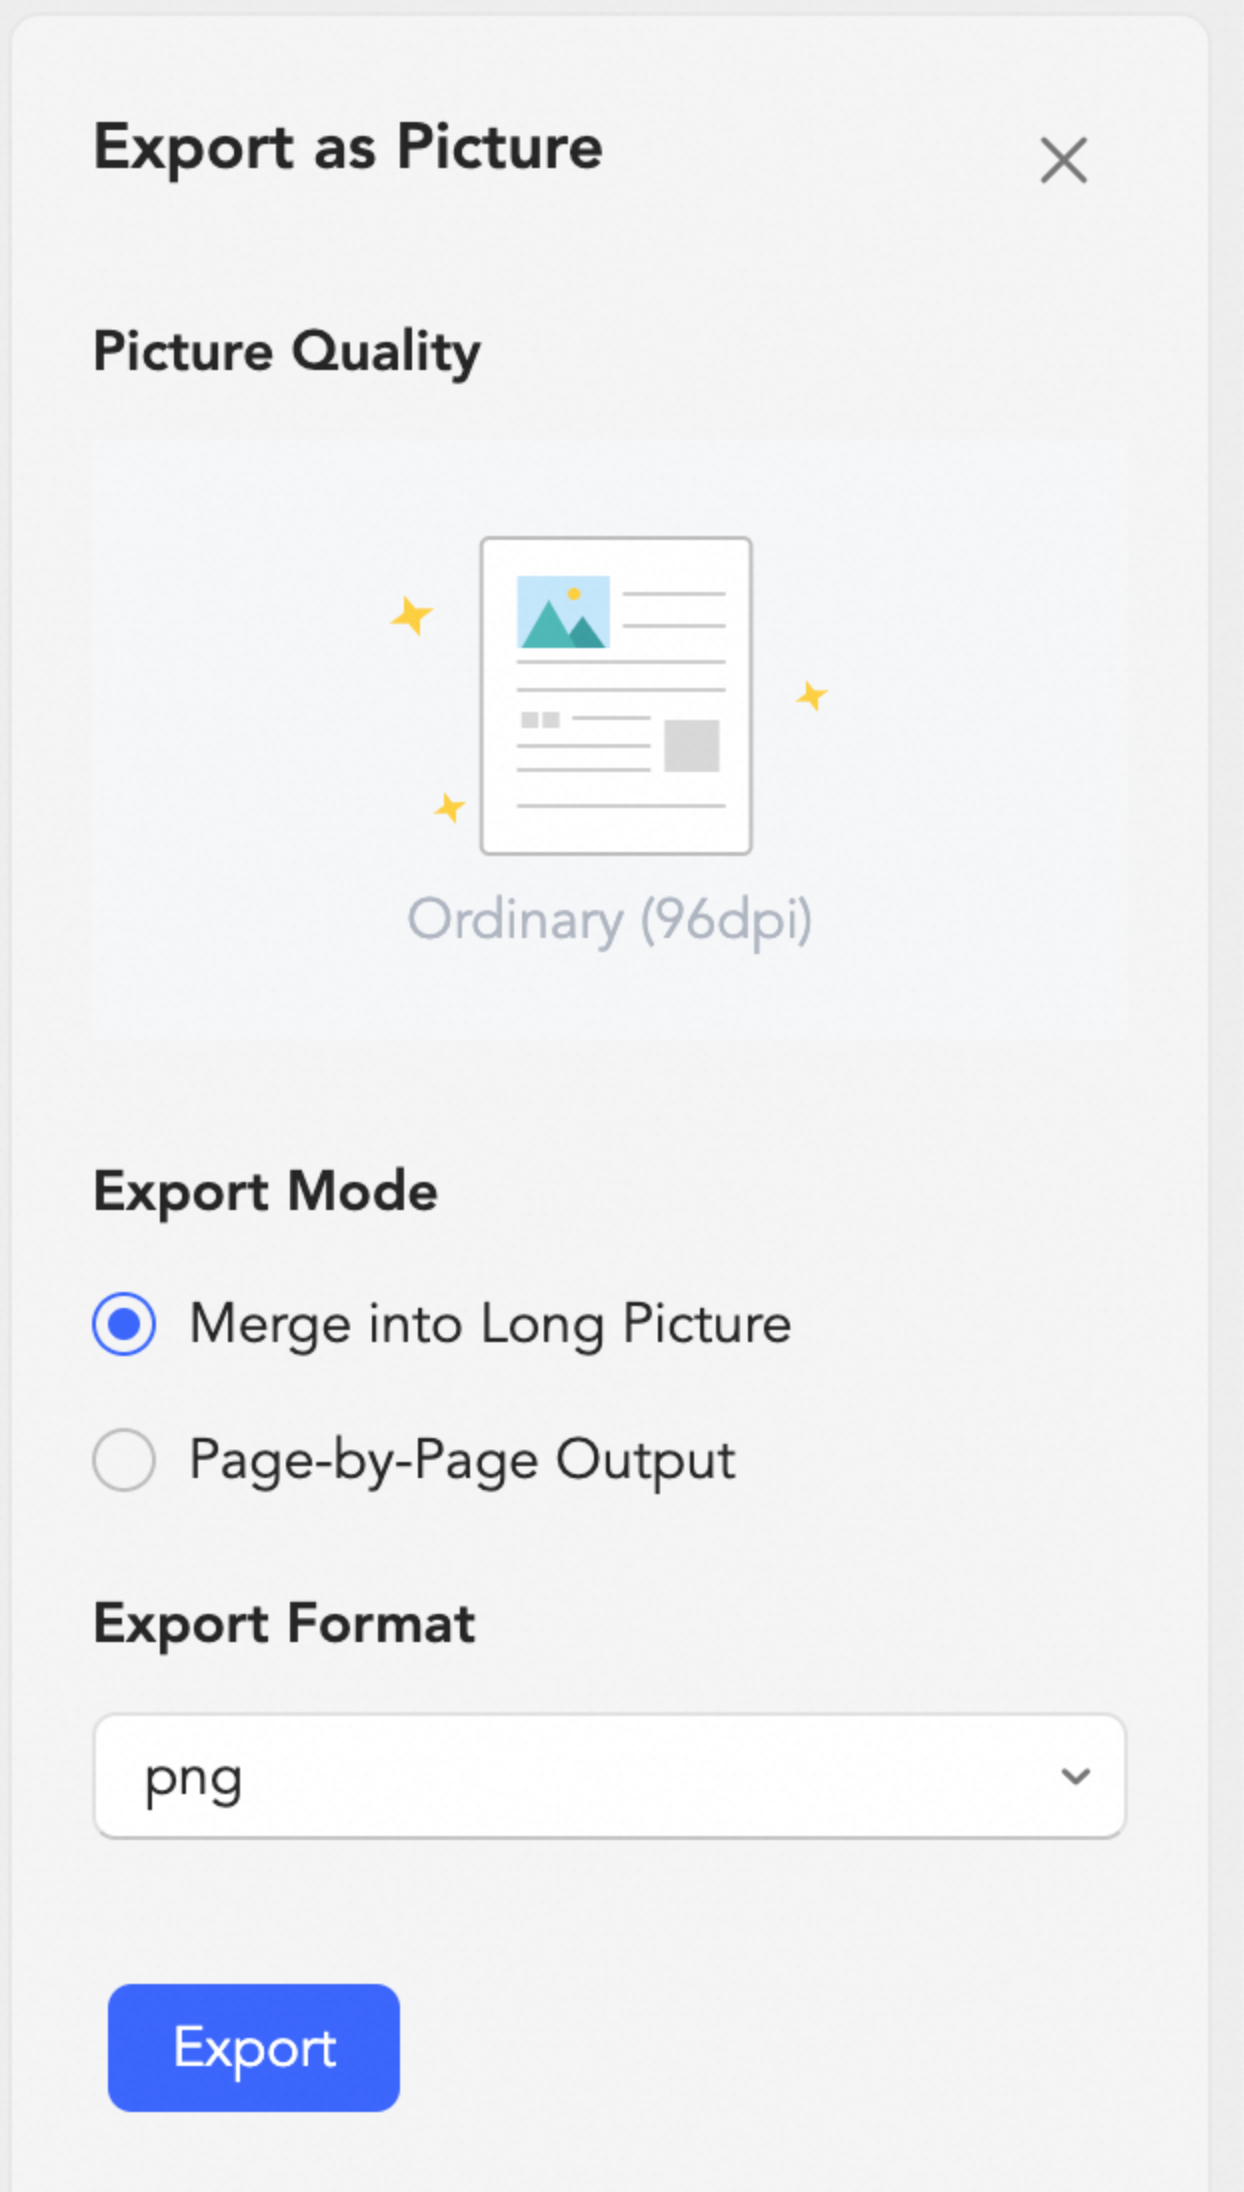
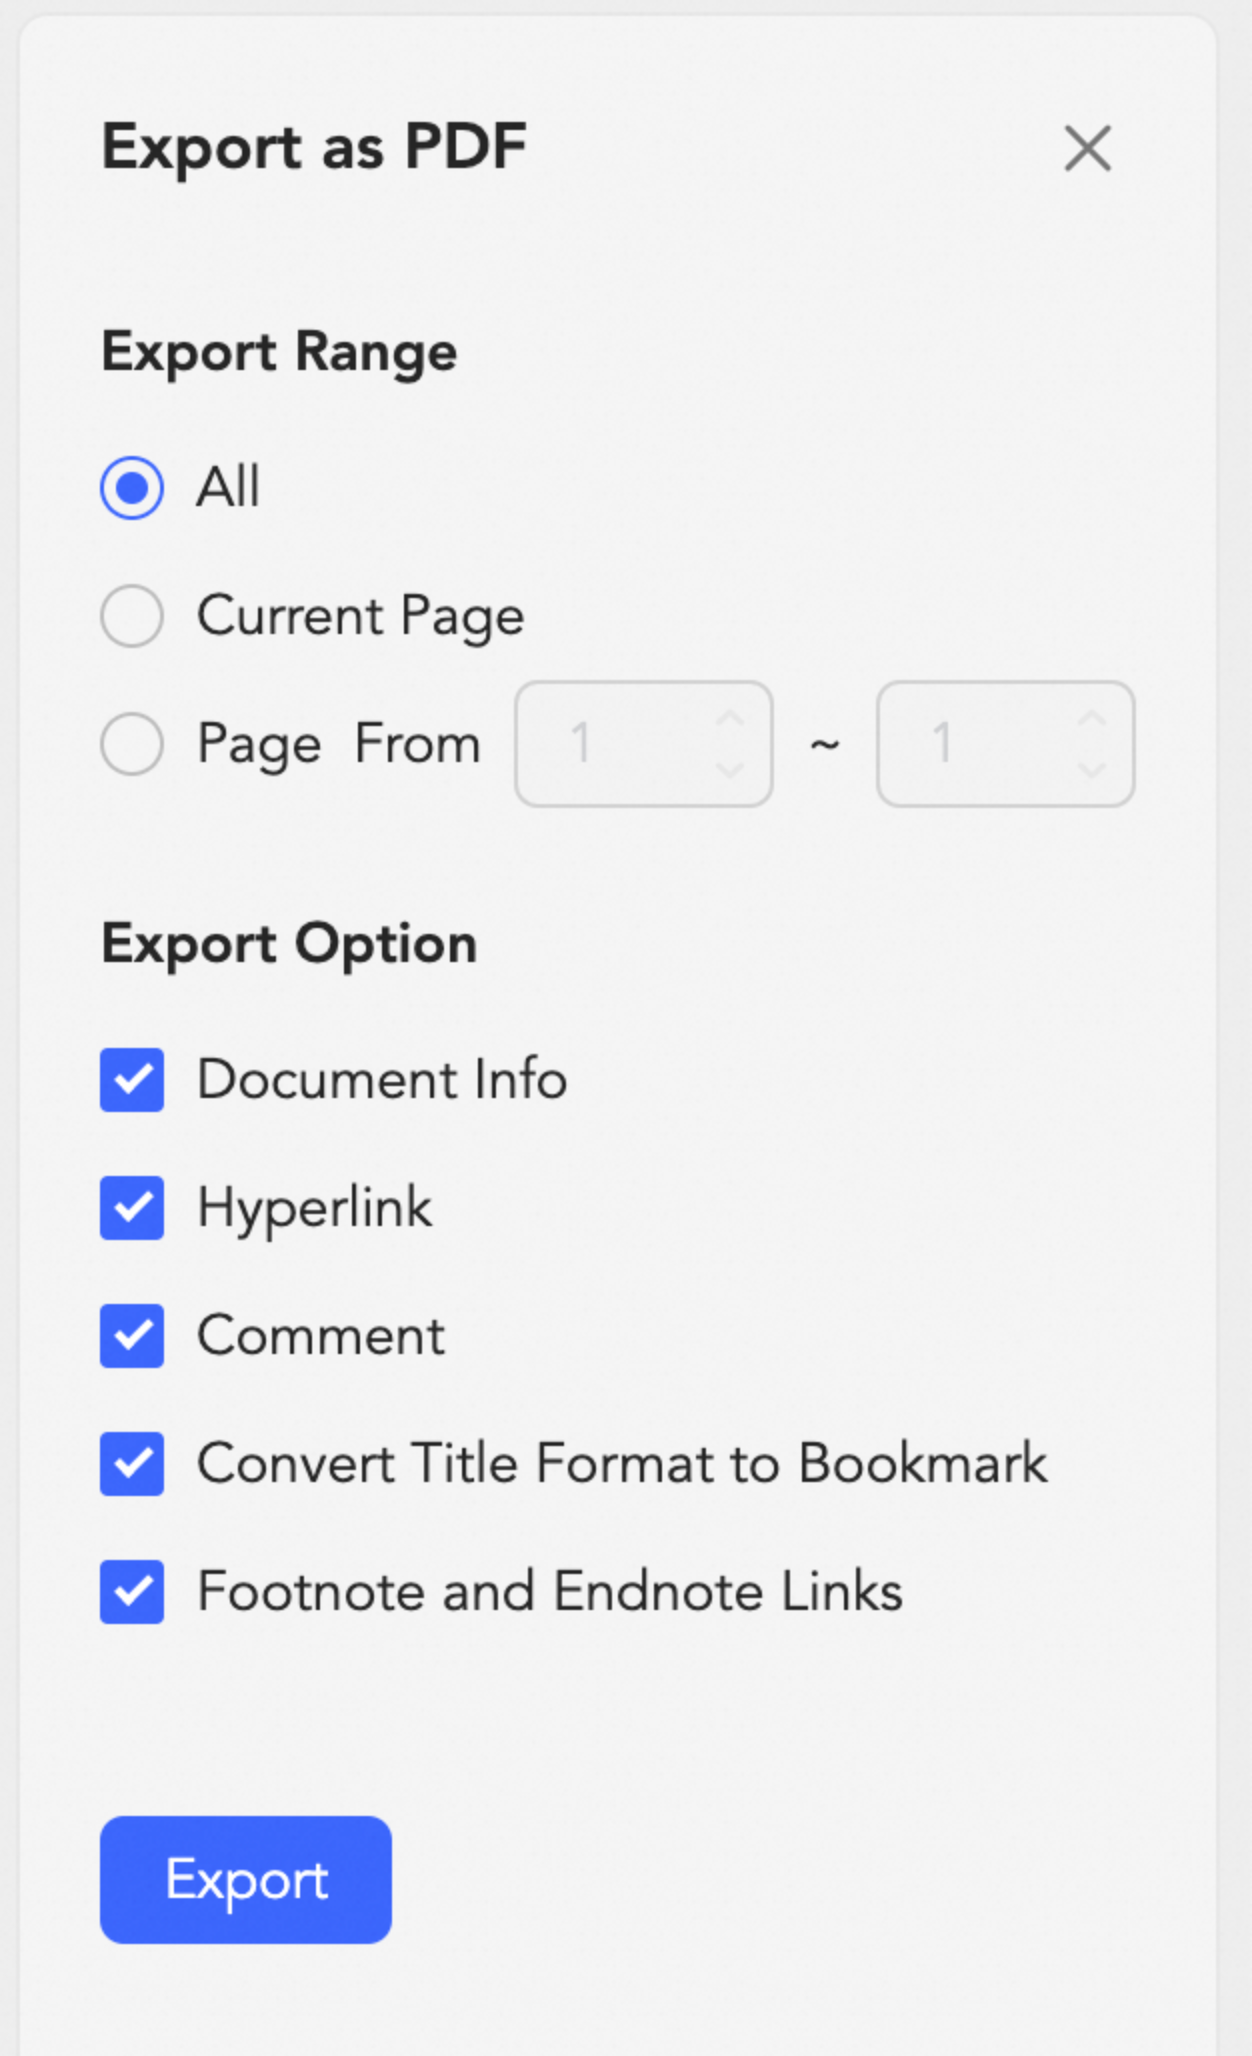
Export as PDF
You can export a text document as a PDF.
To export the document as a PDF, follow these steps:
-
On the Efficiency tab, click the
icon. The Export as PDF panel appears. -
Select the export range and export options.
-
Click Export to download the PDF.
 icon. The Export as PDF panel appears.