Presentation Document is a core component of our document suite. It provides a rich set of features to help you create and deliver professional presentations for lectures, business reports, and more. This guide covers the basic operations and common features of Presentation Document.
Basic operations
A presentation consists of various objects. Presentation Document provides a wide range of object types, including text boxes, images, shapes, tables, formulas, and QR codes, for creating beautiful and effective presentations.
Insert a slide
A presentation consists of slides. Before organizing your content, first add slides to your presentation.
- Click the
 icon above the slide thumbnails on the left. In the layout gallery that appears, click a layout to create a new slide.
 - Select a slide thumbnail on the left and press Enter to quickly insert a slide.
Insert a text box
 icon to add a horizontal text box to the slide. icon to select either Horizontal Text Box or Vertical Text Box.
Insert an image
On the Insert tab, click the to insert one or more images into your slide.
Insert a shape
On the Insert tab, click the  icon and select a shape to insert.
Insert a table
 icon. In the grid that appears, drag to select the number of rows and columns you want, then click to insert the table, as shown in the following figure.
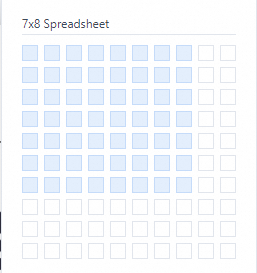
Insert a formula
 icon. In the LaTeX Formula dialog box, edit the formula and click OK to insert it, as shown in the following figure.
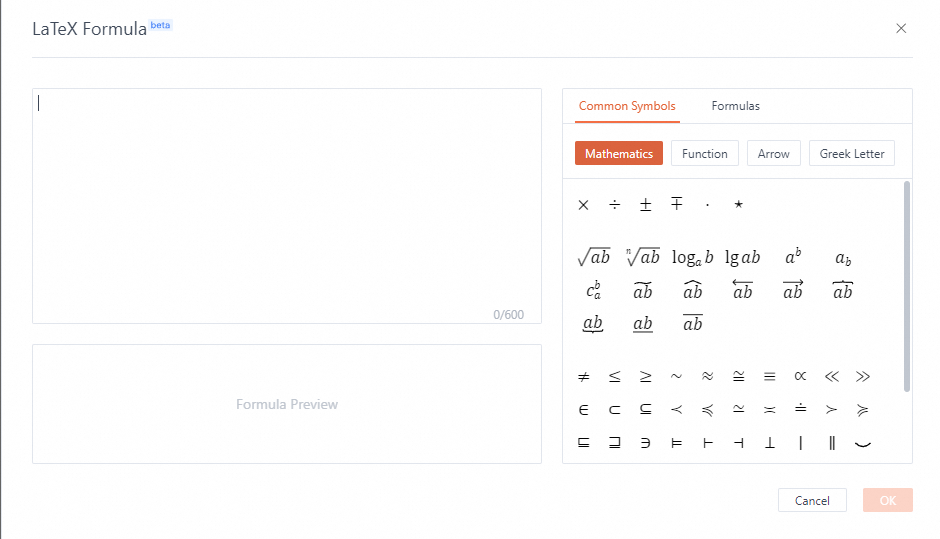
Insert a QR code
 icon. In the Insert QR code dialog box, enter text or business card information and click OK to insert the auto-generated QR code, as shown in the following figure.
Insert a link
- Select the object you want to link.
- Do one of the following to insert a link:
- On the Insert tab, click the
 icon.
icon. - Right-click the object and select Insert link from the context menu.
- On the Insert tab, click the
- In the Link to dialog box, configure the following parameters, as shown in the following figure.
- Display text: The text to display for the link.
- Link type: Options include Web page, Slide, and Email.
- Link to: If the Link type is Web page or Email, enter the URL or email address. If the Link type is Slide, select the target slide from the drop-down list.
- Click OK. The link is successfully inserted when the link text turns blue and becomes clickable.
 icon.
icon.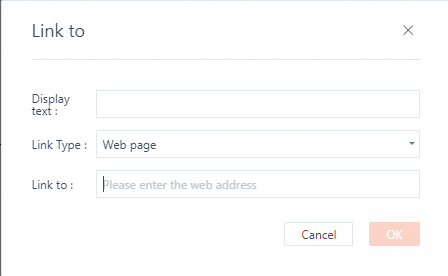
Set object properties
Set properties from the toolbar
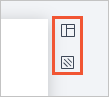
- Slide toolbarThe slide property toolbar appears in the upper-right corner of the slide. It includes slide layout and background settings, as shown in the following figure.
- : Slide layout. Create or change slide layouts and add preset placeholders. These layouts provide preset designs for blank slides, helping you build and format slides faster.
- : Slide background. You can set a color or an image as the slide background. The background appears behind all other objects, making it a critical part of your slide's design.
- Object toolbarThe object toolbar is divided into unique properties, text properties, border properties, fill properties, and common properties.
- Unique properties: Properties specific to the selected object. For example, line shapes have properties such as Front arrow and End arrow.
- Text properties: If the selected object supports text input, you can adjust properties such as font, font size, and color.
- Border properties: If the selected object has a border, you can change its color, weight, and style.
- Fill properties: If the selected object can be filled, you can set its fill color or icon.
- Common properties: Properties available for most objects, such as adjusting the layer order, rotating the object, adding comments, and accessing more formatting options.
- Toolbar for text boxes, shapes, placeholders, and WordArtThis toolbar lets you set the font, font size, text properties (including bold, italic, underline, strikethrough, and highlight), font color, horizontal and vertical alignment, lists (including Bulleted list and Numbered list), border (including No border, Border color, Line weight, and Line type), fill, layer order, rotation, comments, and more formats, as shown in the following figure.
- Toolbar for line shapesThis toolbar lets you set Front arrow, Swap, End arrow, border, layer order, comments, and more formats, as shown in the following figure.
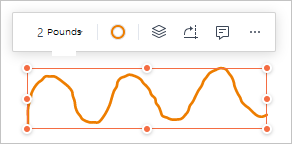
- Toolbar for inkThis toolbar lets you set line weight, line color, layer order, rotation, comments, and more formats, as shown in the following figure.
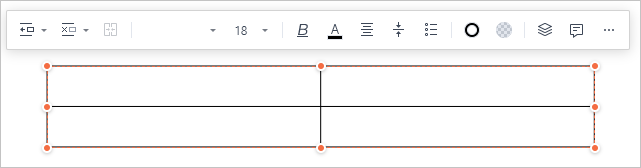
- Toolbar for tablesThis toolbar lets you insert or delete rows and columns, merge cells, and set the font, font size, text properties (including bold, italic, underline, strikethrough, and highlight), font color, horizontal and vertical alignment, lists (including Bulleted list and Numbered list), border (including Border color, Line weight, and Line type), fill, layer order, comments, and more formats, as shown in the following figure.
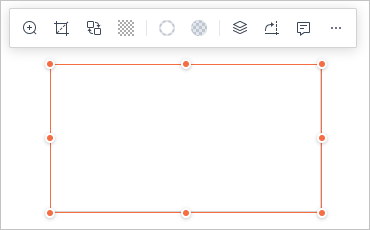
- Toolbar for imagesThis toolbar lets you View original image, perform an image crop, Replace the image, set transparency, and format the border (including No border, Border color, Line weight, and Line type), fill, layer order, rotation, comments, and more formats, as shown in the following figure.
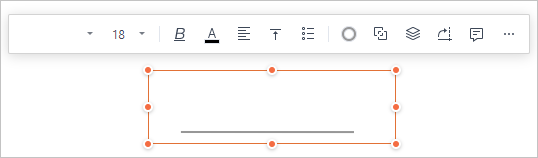
- Toolbar for grouped objectsYou can set properties for all child objects within a group. After selecting multiple objects, options such as Group and Alignment appear. Click the icon to group the selected objects, as shown in the following figures.
- Before grouping
- After grouping
- Before grouping
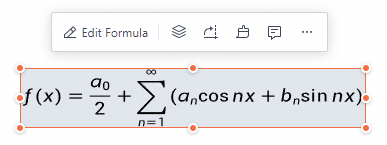
- Toolbar for LaTeX formulasThis toolbar lets you Edit formula, adjust the layer order, rotate the object, add comments, and access more formats, as shown in the following figure.
- Toolbar for other objects (formulas, attachments, icons, etc.)
This toolbar lets you adjust the layer order, add comments, and access more formats.
- Toolbar for text boxes, shapes, placeholders, and WordArt
 : Slide layout. Create or change slide layouts and add preset placeholders. These layouts provide preset designs for blank slides, helping you build and format slides faster.
 : Slide background. You can set a color or an image as the slide background. The background appears behind all other objects, making it a critical part of your slide's design.

 icon to group the selected objects, as shown in the following figures.
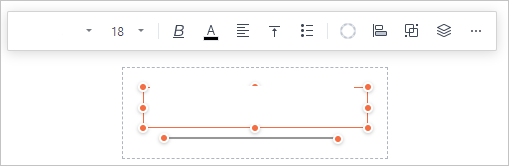
Set properties in the format panel
If the toolbar does not provide the settings you need, you can use the format panel on the right side of the slide for more options. The format panel aggregates all available properties for the selected object, including text and object properties.
- Click the icon in the object's toolbar.
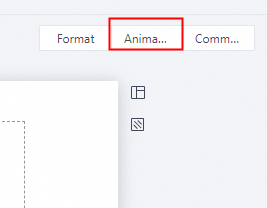
- Click Format in the upper-right corner of the slide, as shown in the following figure.
 icon in the object's toolbar.
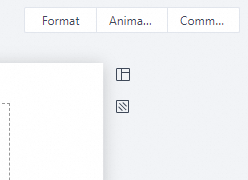
Animate objects
You can add animations to objects like text and images to make your presentation more engaging and professional. After adding an animation, you can fine-tune its timing, speed, and direction to control how it starts, how long it lasts, and more.
Set object animations
- Animation effectsAnimations are categorized into three types:
- Entrance: Makes the object appear on the slide.
- Emphasis: Draws attention to an object already on the slide.
- Exit: Makes the object leave the slide.
- Add an animationTo add an animation to an object, follow these steps:
- In Normal view, select the slide containing the object you want to animate.
- Select the text or object, then click Animation in the upper-right corner of the slide, as shown in the following figure.
- In the Animation panel, on the Object Animation tab, click the icon and choose an animation type, as shown in the following figure.
- Entrance animation: Animates the object as it enters the slide.
- Exit animation: Animates the object as it leaves the slide.
- Emphasis animation: Animates an object that is already on the slide.
- Select the desired animation effect from the list.
Note- Animations in the list play in order from top to bottom.
- To preview a single animation effect, click the preview icon in the Animation panel.
- To preview all animations on the slide, click the play icon in the upper-right corner of the slide.
- Change animation propertiesTo change the properties of an animation, follow these steps:
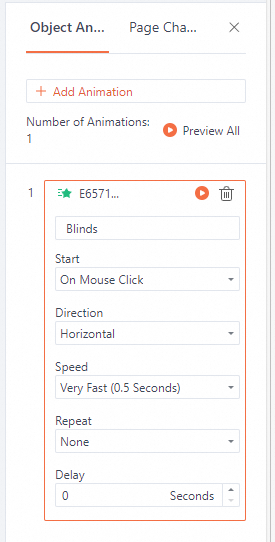
- In the Animation panel, on the Object Animation tab, click an animation to expand its settings menu, as shown in the following figure.
- Configure the animation properties:
- Start: Sets the trigger for the animation. Options include:
- On Mouse Click: The animation starts when you click the object.
- With Previous: The animation starts at the same time as the previous animation.
- After Previous: The animation starts after the previous animation ends.
- Direction: Sets the direction of the animation, such as Horizontal or Vertical.Note This option is not available for all animations.
- Speed: Sets the duration of the animation. Options include Very Fast (0.5s), Fast (1s), Medium (2s), Slow (3s), and Very Slow (5s).
- Repeat: Sets the number of times the animation repeats. Options include None, 2, 3, 4, 5, and 10.
- Delay: Sets the amount of time to wait before the animation starts.
- Start: Sets the trigger for the animation. Options include:
- In the Animation panel, on the Object Animation tab, click an animation to expand its settings menu, as shown in the following figure.
- Change the animation orderTo reorder animations, follow these steps:
- In the Animation panel, select the Object Animation tab.
- Drag an animation to its new position in the list to change the playback order.
- Remove an animationTo remove an animation, follow these steps:
- In the Animation panel, select the Object Animation tab.
- Hover over the animation you want to remove.
- Click the delete icon, as shown in the following figure.
 icon and choose an animation type, as shown in the following figure.
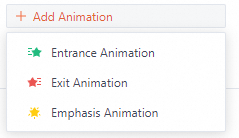

Set slide transitions
- Set a slide transitionYou can apply a different transition to each slide. To set a transition for a single slide, follow these steps:
- Click Animation in the upper-right corner of the slide.
- In the Animation panel, select the Slide Transition tab.
- Select the slide to which you want to add a transition.
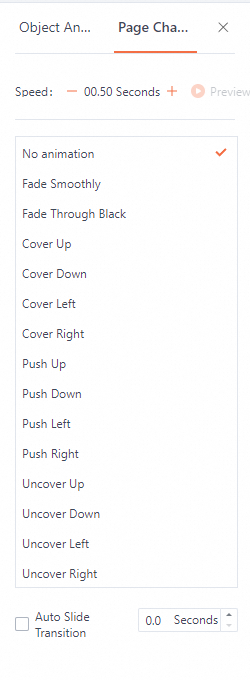
- In the Slide Transition panel on the right, choose a transition effect and configure its properties, such as speed and auto-advance timing, as shown in the following figure.
- Apply a transition to multiple slidesTo apply the same transition to multiple slides, follow these steps:
- Click Animation in the upper-right corner of the slide.
- In the Animation panel, select the Slide Transition tab.
- Press and hold Shift or Ctrl, then click the slides to which you want to apply the transition.
- In the Slide Transition panel on the right, choose and configure a transition effect.Note The selected transition is applied to all selected slides.
- Apply a transition to all slidesTo apply the same transition to all slides in your presentation, follow these steps:
- Click Animation in the upper-right corner of the slide.
- In the Animation panel, select the Slide Transition tab.
- Select any slide in your presentation.
- In the Slide Transition panel on the right, choose and configure a transition effect.
- Click Apply to All Slides.
- Preview a slide transitionAfter applying a slide transition, click the preview icon on the Slide Transition tab to see the effect directly in the editor without starting the slideshow, as shown in the following figure.
Note
- To preview transitions in slideshow mode, click the play icon in the upper-right corner of the slide.
- To remove a transition, select No Animation on the Slide Transition tab.

Review
Comments
- Open the Comments panel by doing one of the following:
- On the Review tab, click the icon.
- Click Comments in the upper-right corner of the slide, as shown in the following figure.
- On the Review tab, click the
- Go to the slide, or select the object on the slide where you want to add a comment.
- Click the comment text box in the lower-right corner and enter your comment, as shown in the following figure.
- Click Send to add the comment.
- (Optional) To edit a comment:
- Click the icon in the upper-right corner of the comment and select Edit.
- Modify the text in the comment box.
- Click OK.
- Click the
- (Optional) To delete a comment:
- Click the icon in the upper-right corner of the comment and select Delete.
- In the Delete this comment? confirmation dialog box, click Delete again.
- Click the
- (Optional) To reply to a comment:
- Click the comment you want to reply to, which displays a reply text box, as shown in the following figure.
- Enter your reply and click Reply.
- Click the comment you want to reply to, which displays a reply text box, as shown in the following figure.
 icon.
icon.

 icon in the upper-right corner of the comment and select Edit.
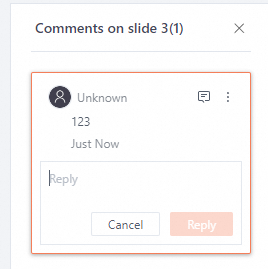
Brush
- On the Review tab, click the icon and select Open Brush.
- Click the or icons on the sides of the slide to navigate to the desired slide.
- The toolbar at the top of the slide provides three brush types. Click to select a brush, as shown in the following figure.
- Click the small circle below the selected brush to set its thickness and color.
- After selecting the brush type, color, and thickness, your cursor changes to a brush. Press and hold the left mouse button to draw ink.
- (Optional) To remove ink, do one of the following:
- Select from the toolbar. Your cursor changes to an eraser. Drag it over the ink to remove it.
- Select to remove all ink from the current slide.
- Select to remove all ink from the entire presentation.
- Click Done to exit brush mode and return to editing mode.
 icon and select Open Brush.
 or
or  icons on the sides of the slide to navigate to the desired slide.
Edit the slide master
With the slide master feature, you can make a change once, such as inserting content or setting a style, and have it apply to all slides that use that master or layout.
- On the View tab, click the icon.
- In the thumbnail pane on the left, select the slide master or layout you want to edit.
- Above the slide, you can see which slides are currently using the selected master or layout.
- Insert content or set a background on the master or layout. The changes are automatically applied to all slides that use it.
- Click the icon to exit slide master editing mode.Note You can also click the icon in the lower-right corner to quickly enter or exit slide master editing mode.
 icon.
icon. icon to exit slide master editing mode.
 icon in the lower-right corner to quickly enter or exit slide master editing mode.
Version history and collaboration record
You can use version history to view and restore previous versions of your presentation, and use the collaboration record to track changes made by collaborators.
Version history
- In the upper-right corner, click the icon and select Version history.
- In the Version history panel, you can see all historical versions.
- Click the icon next to a version to view its content.
- Click Restore this version in the upper-right corner of a version to restore the presentation to that state.
 icon and select Version history.
 icon next to a version to view its content.
Collaboration record
- In the upper-right corner, click the icon and select Collaboration record.
- In the Collaboration record panel, scroll to view all records.
- Click the icon to view the detailed operations for a record.
- In the details dialog box, click the icon to revert the presentation to the state before that action occurred.
 icon to view the detailed operations for a record.
 icon to revert the presentation to the state before that action occurred.
Play the presentation
Playback modes
You can start your slideshow in three ways: from the beginning, from the current slide, or on autoplay.
- Playback options
- To start from the first slide, go to the Play tab and click the icon.
- To start from the current slide, go to the Play tab and click the icon.
- To use autoplay, go to the Play tab and click the icon. You can set the duration for each slide (0.1, 1, 3, 5, 10, 30, or 60 seconds), choose whether to loop the presentation, and decide whether to use preset slide transition timings, as shown in the following figure.
- To start from the first slide, go to the Play tab and click the
- Navigate during a slideshow
- To advance to the next slide, click the mouse or press Space, N, Down Arrow (↓), Right Arrow (→), or Page Down.
- To return to the previous slide, press P, Up Arrow (↑), Left Arrow (←), or Page Up.
- To go to the first slide, press Home.
- To go to the last slide, press End.
- To exit the slideshow, press Esc.
 icon.
icon. icon.
icon. icon. You can set the duration for each slide (0.1, 1, 3, 5, 10, 30, or 60 seconds), choose whether to loop the presentation, and decide whether to use preset slide transition timings, as shown in the following figure.
Presenter tools
Use the presenter tools available during playback to deliver your presentation more effectively and control its pace.
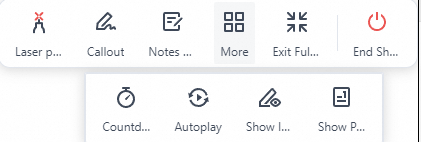
- Laser Pointer
Click Laser Pointer. Your cursor turns into a red dot. Press and hold the left mouse button while moving the mouse to draw attention to areas on the slide.
- Brush
Click Brush, select a Watercolor Brush, Highlighter, or Smart Pen, then set the brush thickness and color. Press and hold the left mouse button to draw ink on the slide.
- Presenter View
Click Presenter View to open a private view with the following controls:
- Click the thumbnails at the bottom to switch slides.
- Click the or icons in the upper-right corner to adjust the font size of your notes.
- Click the text box in the Speaker notes area to edit your notes.
- Click Audience View on the left to open a new window for your audience. You can drag this window to a secondary display. The audience view follows your navigation, allowing you to see your notes while the audience only sees the slides.
- Countdown
To use the countdown timer, follow these steps:
- Select .
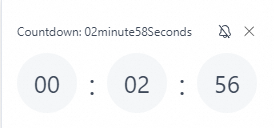
- Click the time area to enter a duration. Select Ring at the end if you want an audible alert when the timer finishes, as shown in the following figure.
- Click Start countdown.
- (Optional) While the countdown is running, you can click the icon to disable the sound, or click the icon to stop the timer, as shown in the following figure.
- Autoplay
Select to set the duration for each slide, enable looping, and specify whether to use preset slide transition timings.
- Show Page Number
To use the page number navigation, follow these steps:
- Select .
- The current page number appears in the lower-right corner of the slide.
- Click the page number to open the Go to Slide dialog box.
- In the dialog box, click a slide to jump directly to it.
 or
or  icons in the upper-right corner to adjust the font size of your notes.
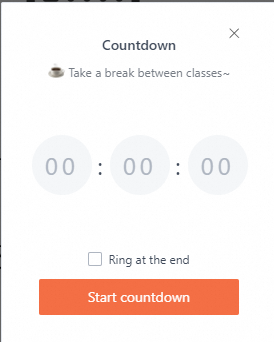
 icon to disable the sound, or click the
  icon to stop the timer, as shown in the following figure.