LinkedMall Open Platform
This topic describes the main features of the LinkedMall Open Platform.
Access the Open Platform
After you onboard as a distributor and activate your distributor store, go to the LinkedMall Distributor Console. In the lower-left corner, click  to access the platform.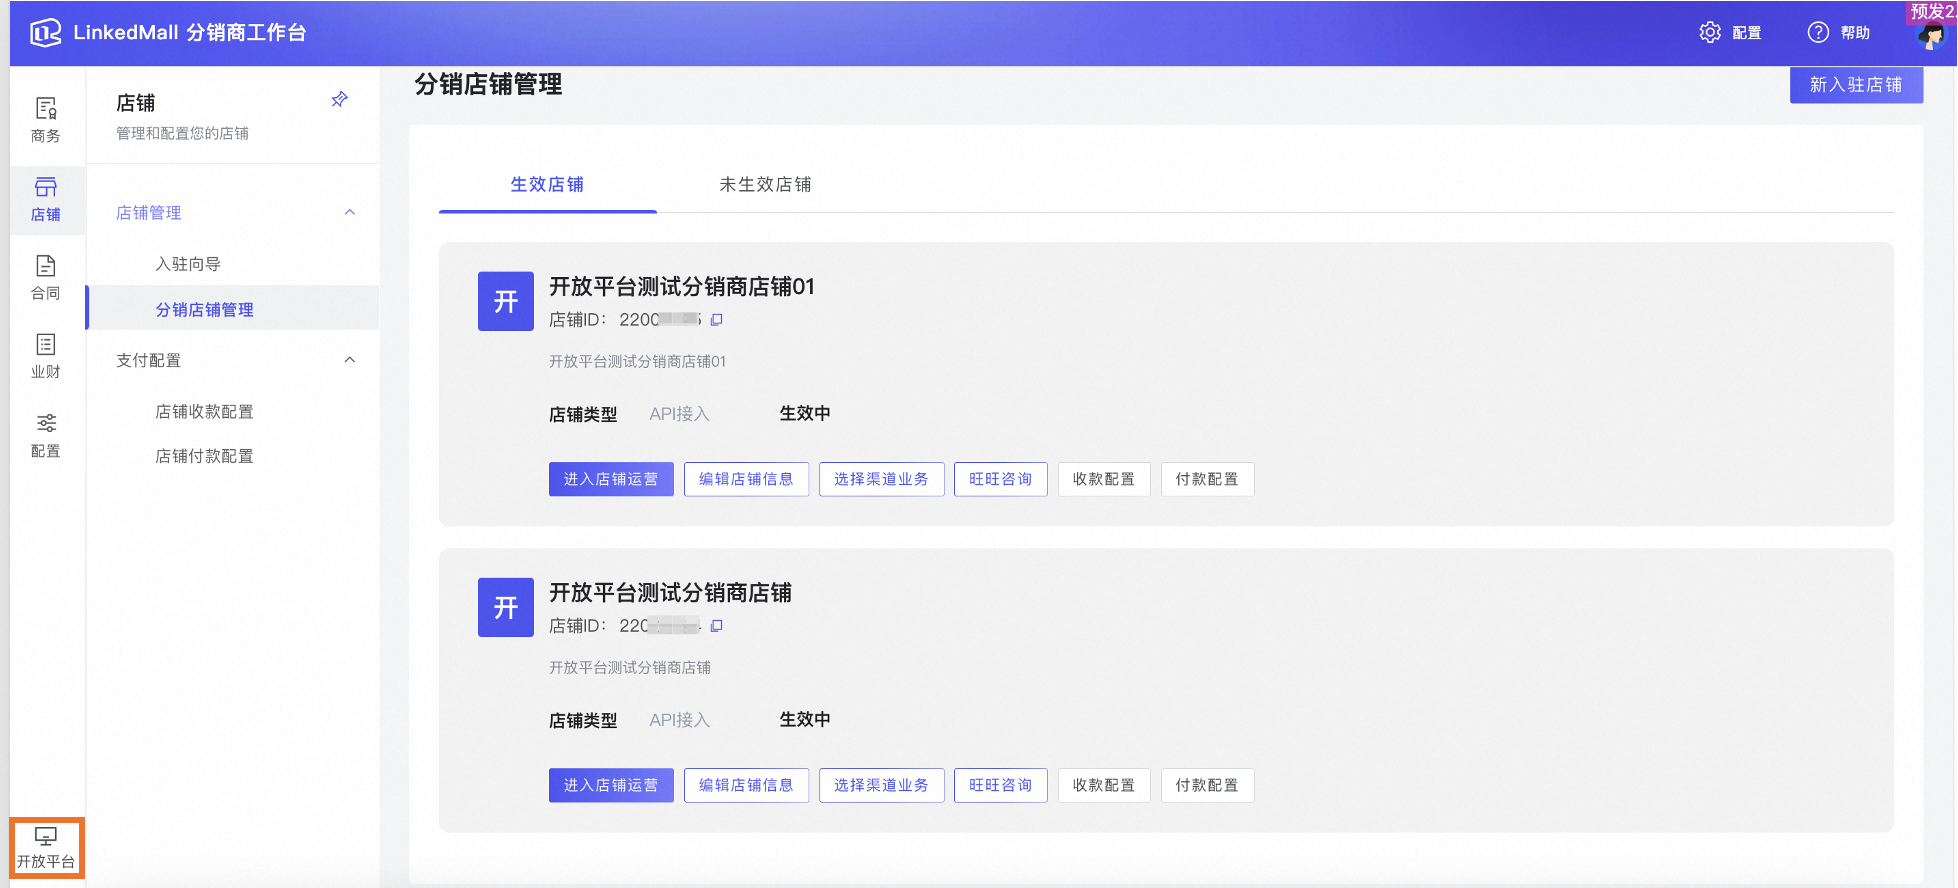
LinkedMall Open Platform features
The LinkedMall Open Platform provides Operations and Maintenance (O&M) capabilities for Kafka. You can perform basic Kafka O&M tasks using features such as monitoring and alerting.
Monitoring
Overview
In the navigation pane on the left, choose to open the Monitoring Overview page.
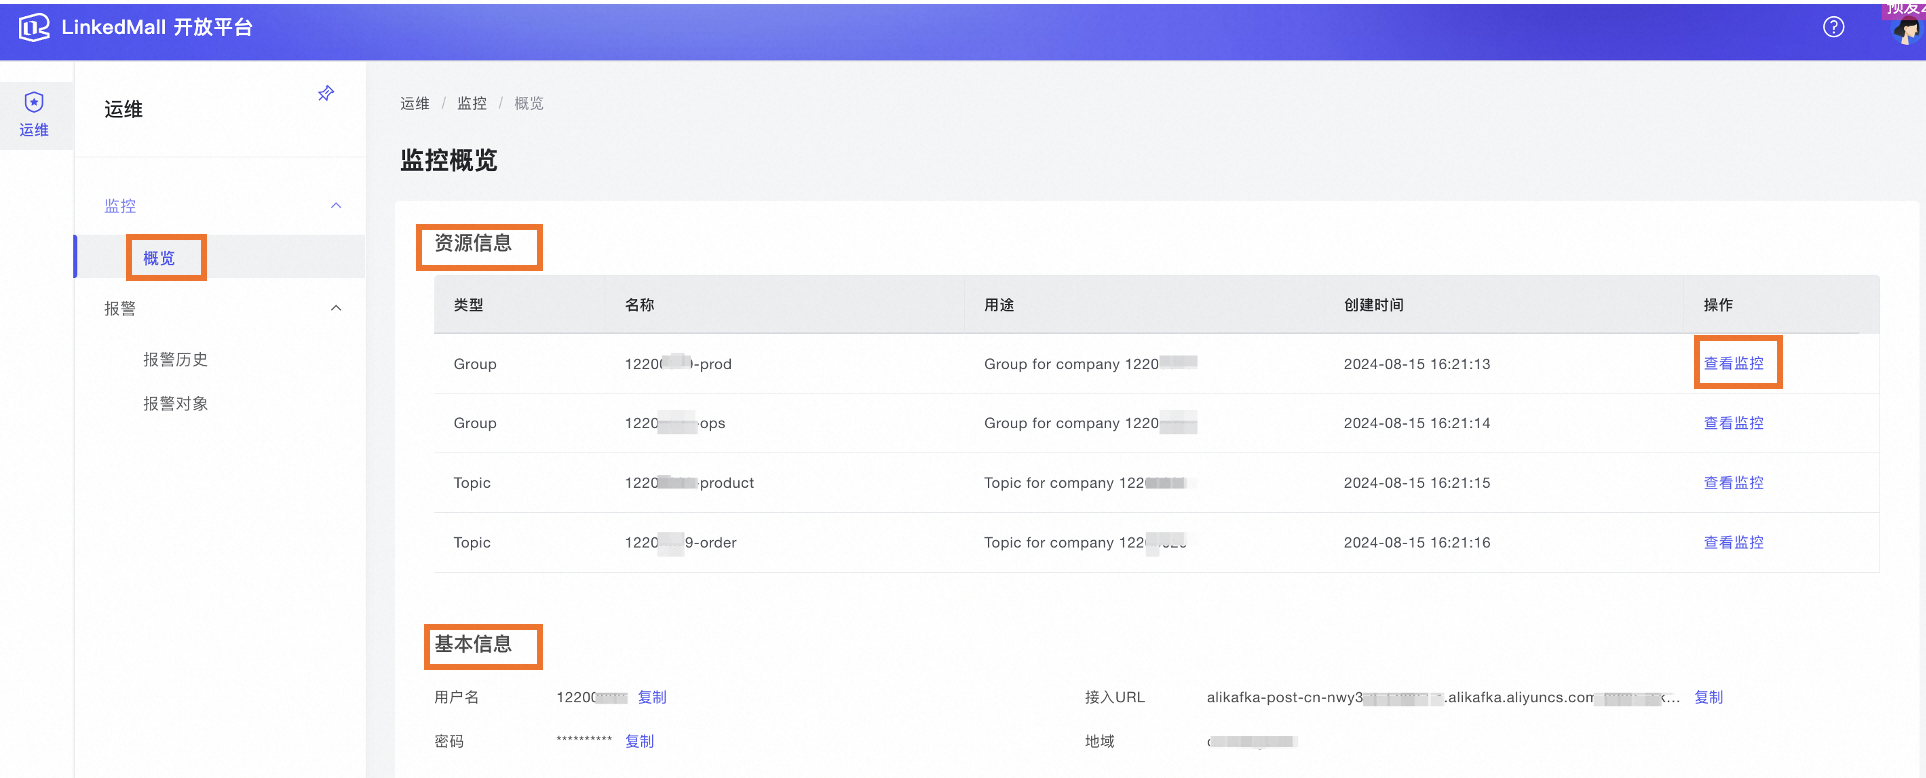
Resource information
This section displays the Kafka resources for your account. It includes two groups and two topics:
Group names follow the naming convention Your-Enterprise-ID-prod and Your-Enterprise-ID-ops. The prod group is for production use. The ops group is for scenarios such as testing, O&M, and troubleshooting. Both groups contain the same messages. Click View Monitoring to open the Group Details page.
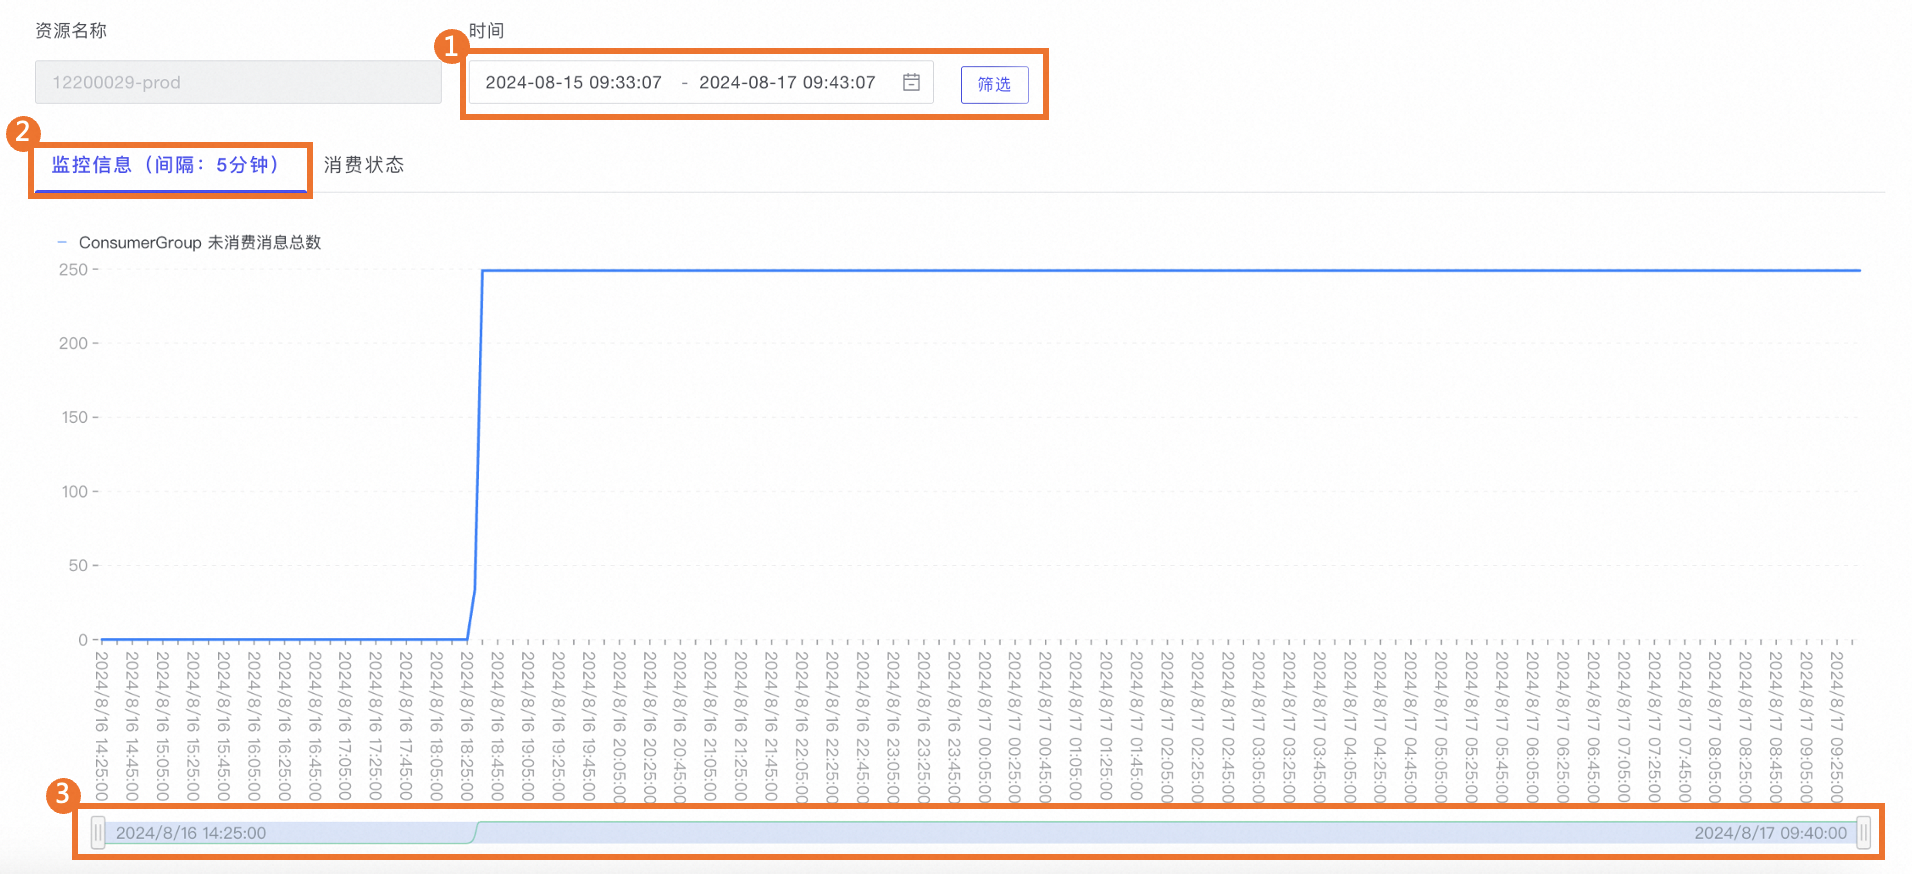
Monitoring information
No.
Description
1
Filter by time range.
2
Select the Monitoring Information tab to view the graph of the total number of unconsumed messages.
3
Drag the horizontal scroll bar to change the displayed time period.
Consumption status
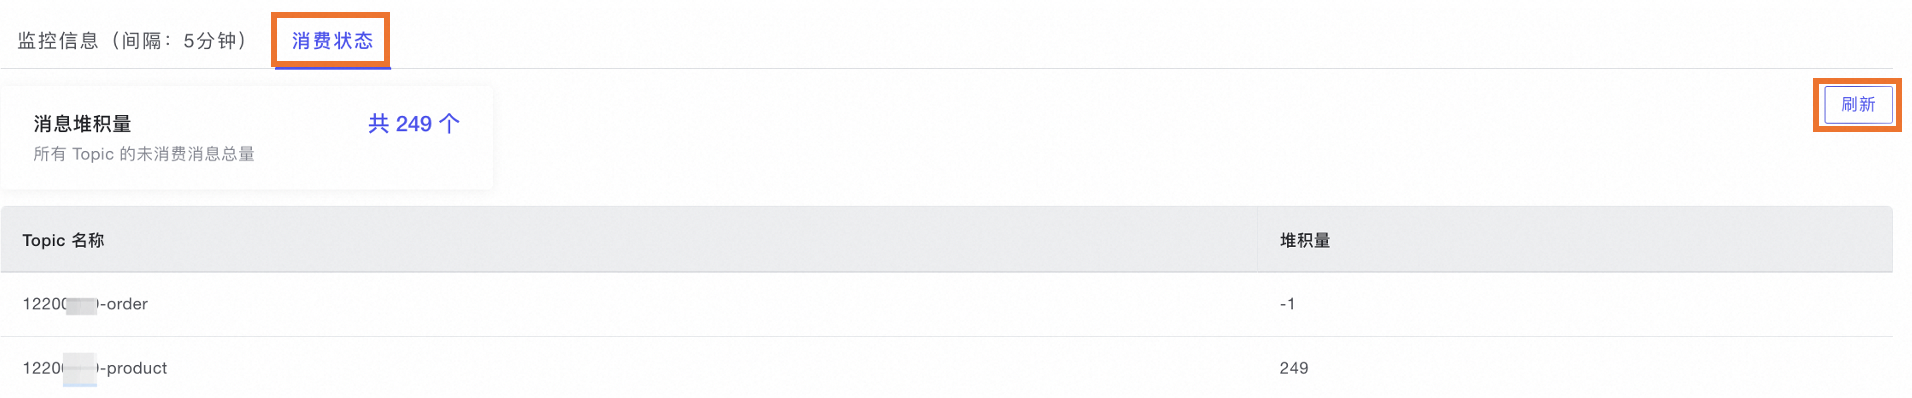
Select the Consumption Status tab to view the current message accumulation for the group. Click Refresh to update the data in real time.
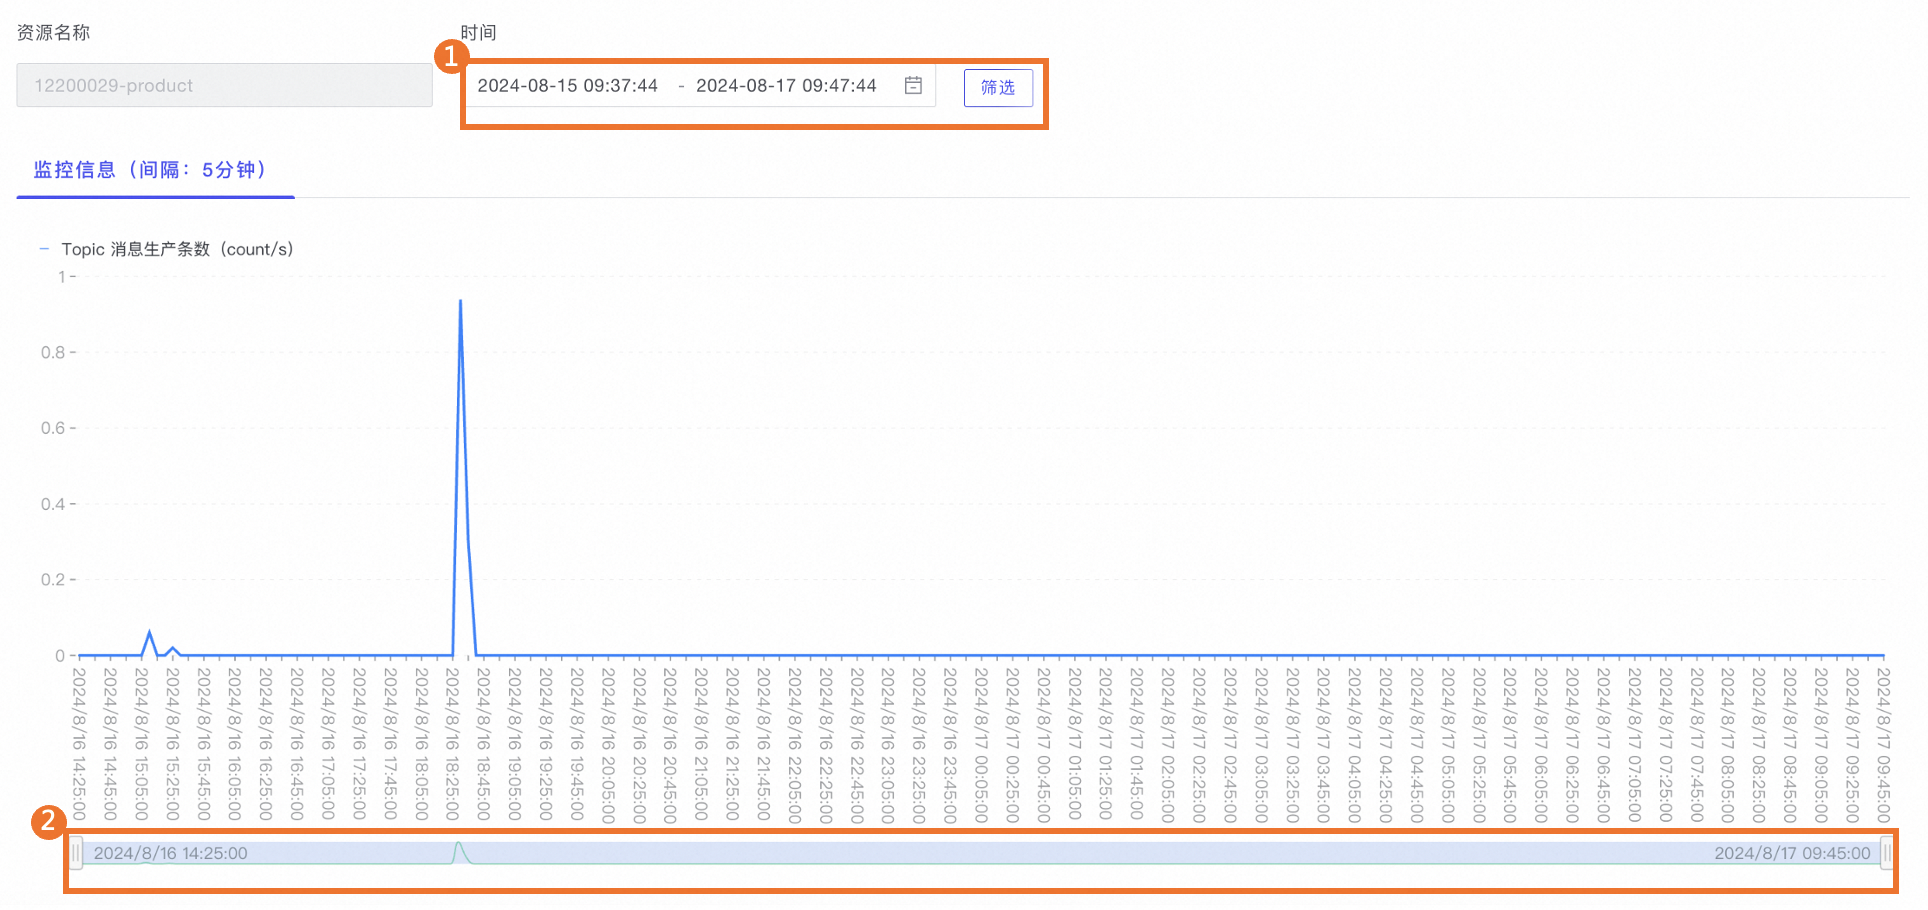
Topic names follow the naming convention Your-Enterprise-ID-product and Your-Enterprise-ID-order. These are the topics for product messages and order messages, respectively. Click View Monitoring to open the Topic Details page.

No.
Description
1
Filter by time range.
2
Drag the horizontal scroll bar to change the displayed time period.
Basic information
The information in the Basic Information section, such as Username, Access URL (supports public network access), and Password, is used for your Kafka configuration. For more information, see Configuration preparation.
Alerting
You can configure alert objects and edit alert rules to set up alerts for message accumulation.
Alert rules take effect only after you configure alert objects.
Alert objects
In the navigation pane on the left, choose to open the Alert Objects page.
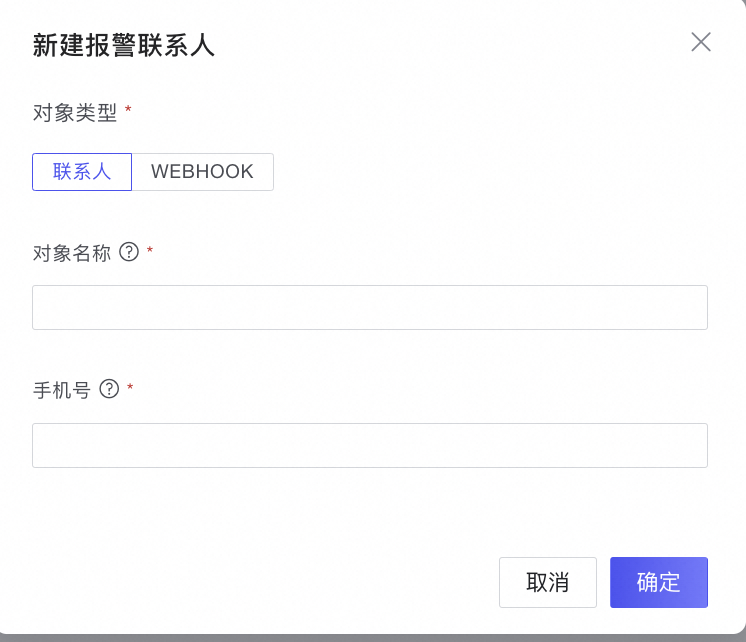
Add an alert object: Click Add Alert Object. In the New Alert Contact dialog box that appears, select and configure an Alert Object Type.
Contact
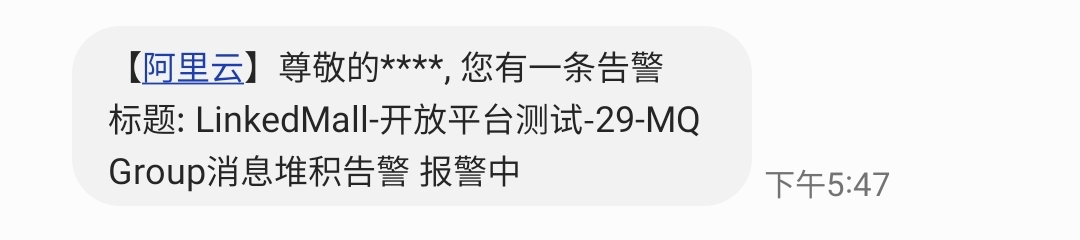
With the contact alert method, when an alert is triggered, the system sends an alert message and places a call to the specified mobile number.
Select Contact as the alert object type. Enter an Object Name and a Mobile Number. The mobile number must be valid and able to receive text messages.
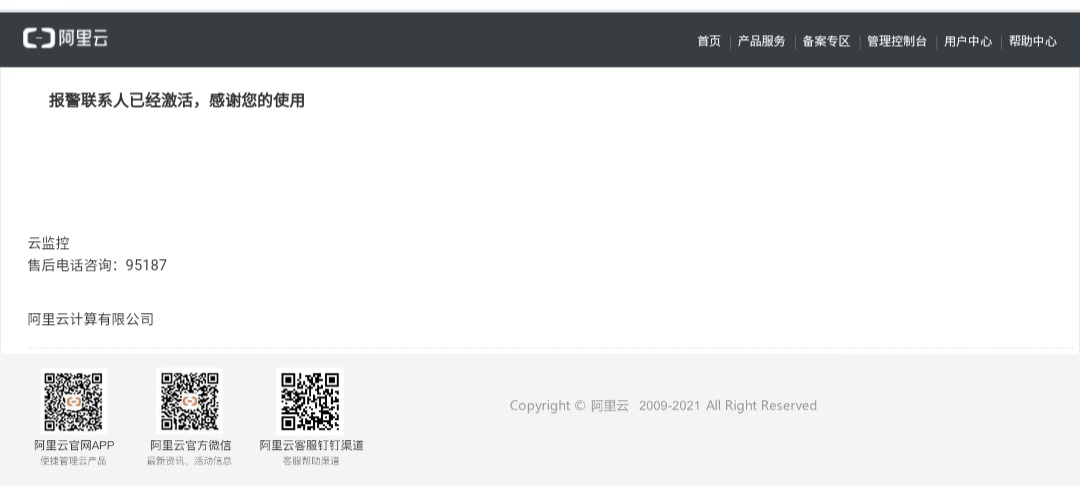
After you click Confirm, the system sends a text message with an activation link to the mobile number. The contact can click the link in the message to activate the alert contact.
NoteIf the contact does not receive the text message, you can resend the activation code while the status is Pending Activation.
The status after activation is shown in the following figure.
Edit: Edit the current contact's information. If you change the mobile number, you must reactivate the alert contact.
Delete: Delete the current contact.
Webhook
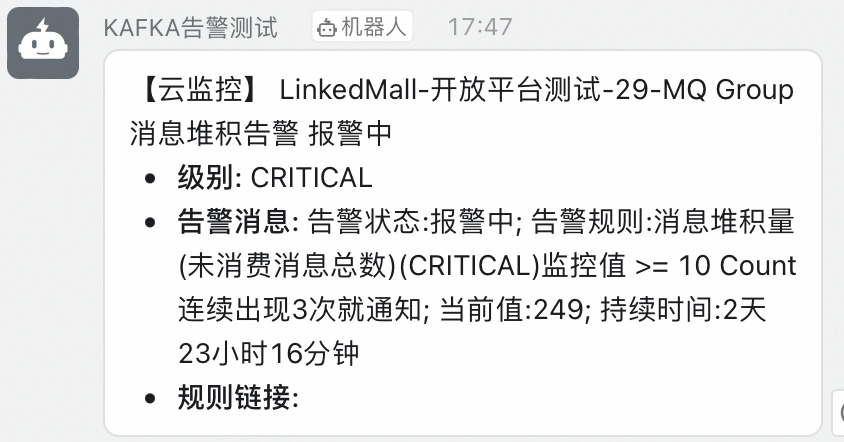
With the webhook alert method, when an alert is triggered, the system sends an alert message through the configured robot in a DingTalk group.
Select Webhook as the alert object type. Enter an Object Name and the Webhook URL.
NoteHow do I obtain the webhook URL?
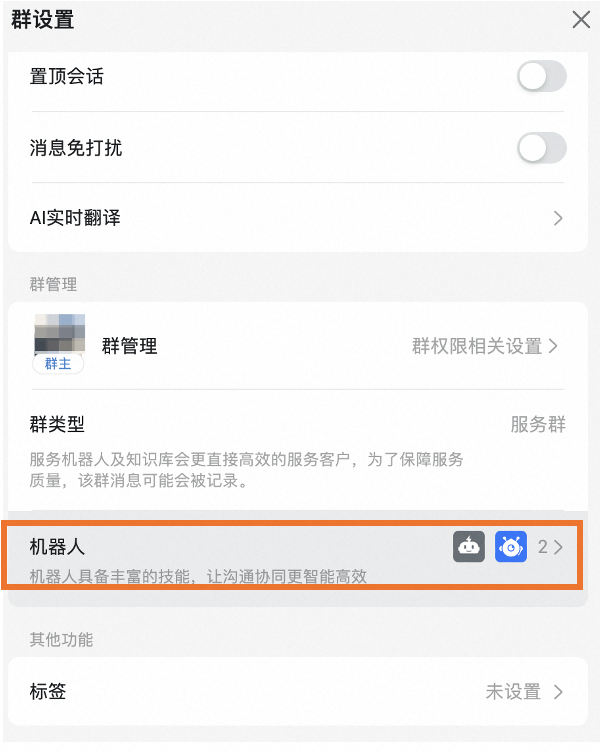
In the DingTalk group where you want to receive alerts, go to Group Settings and click Robot.
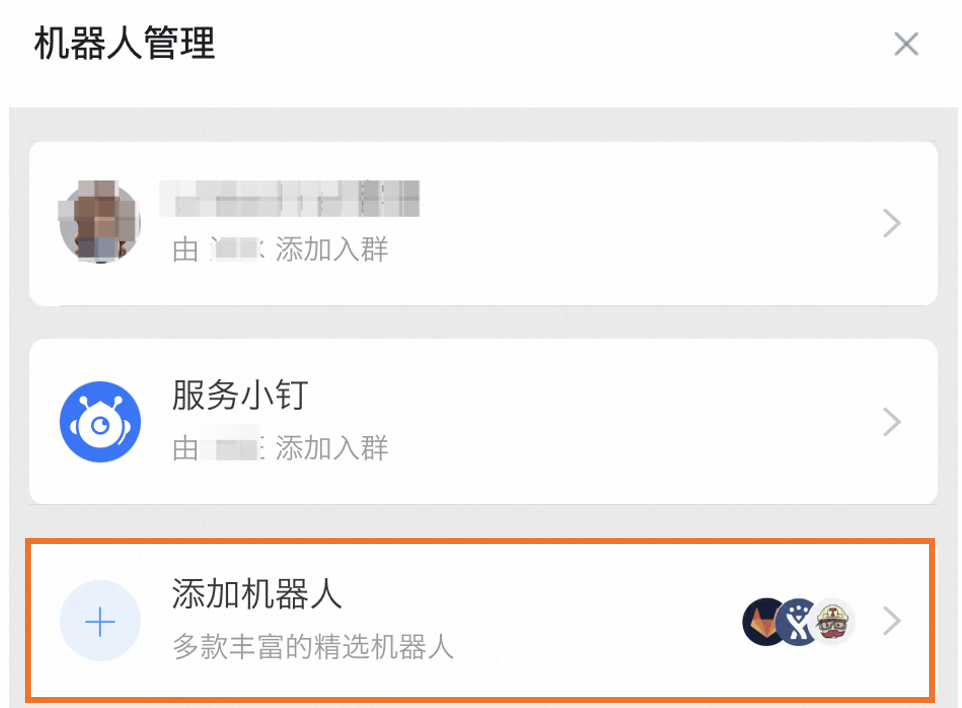
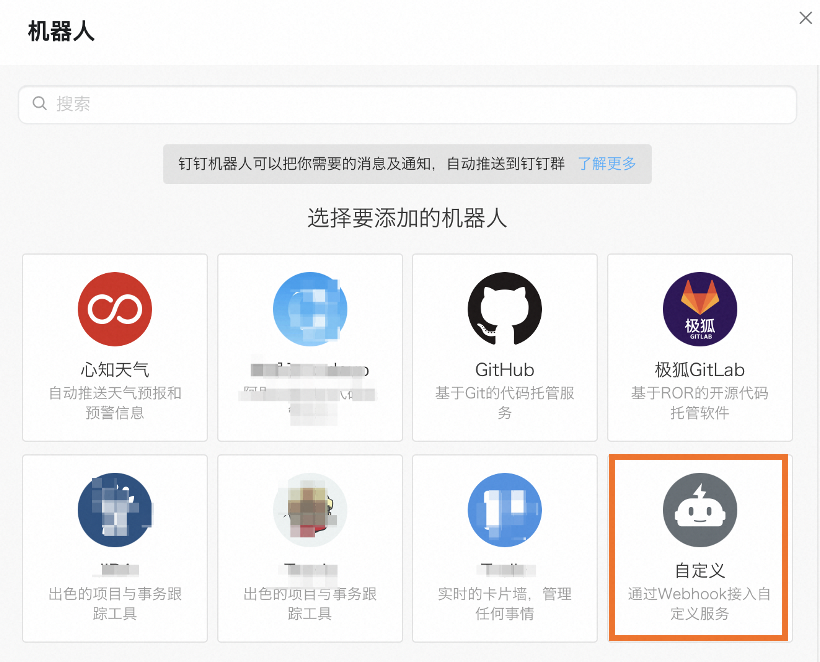
In the robot management section, click Add Robot.
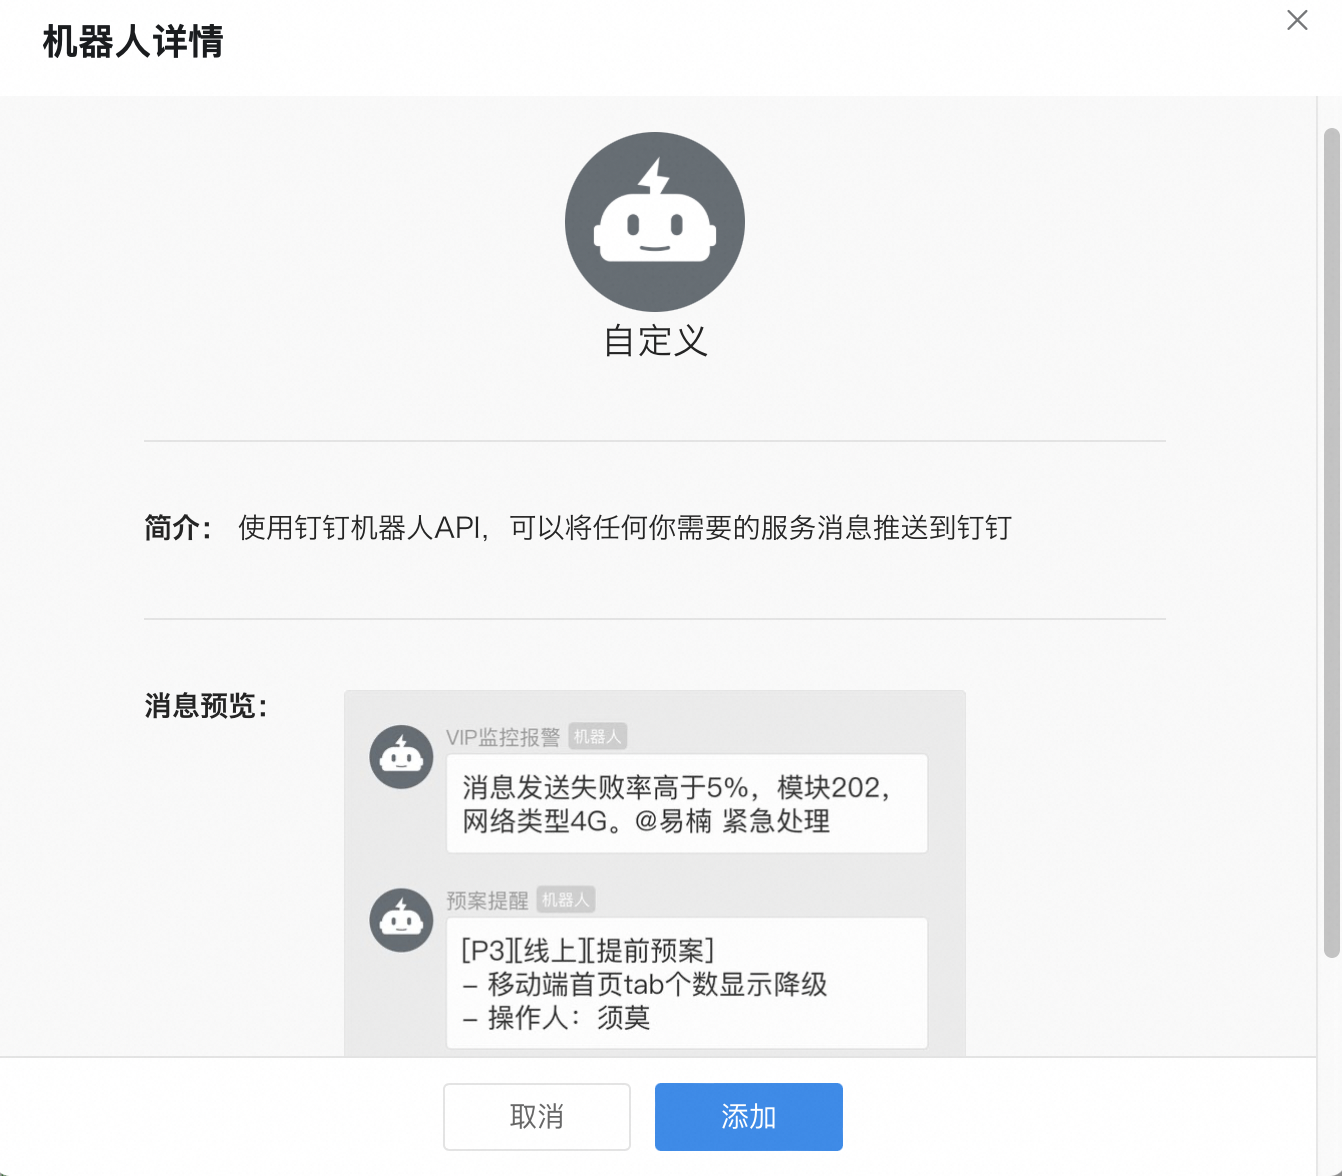
For Robot Type, select Custom.
Click Add.
Configure the robot by entering a name. In the Security Settings section, select the Custom Keywords checkbox and enter Alert. Keep the default settings for the other configurations.
Copy the webhook URL and click Done.
When you are finished, click OK. The result is shown in the following figure.
Edit: Edit the information of the current alert object.
Delete: Delete the current alert object.

Alert history
In the navigation pane on the left, choose to open the Alert History page.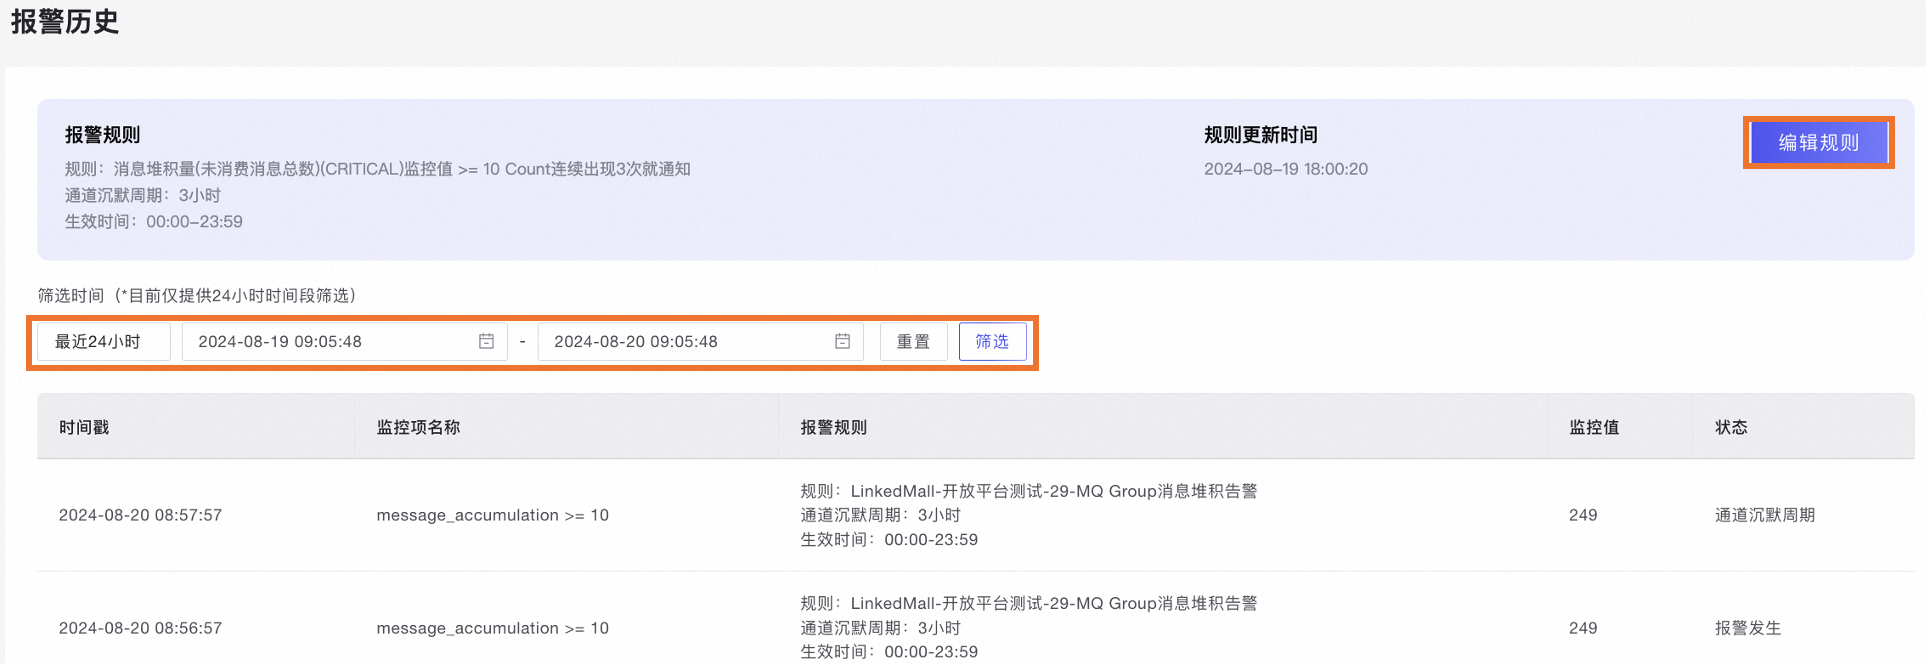
Edit alert rules
Click Edit Rule. In the dialog box that appears, edit the alert rule.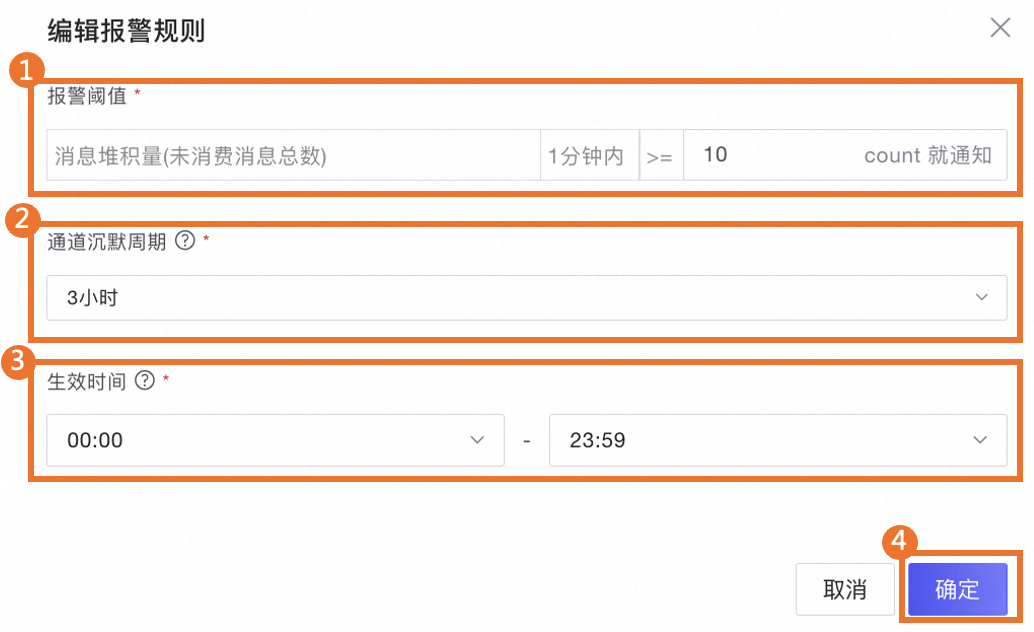
No. |
Description |
1 |
Set the Alert Threshold. For example, if you set it to 10, the threshold is reached when the message accumulation exceeds 10 messages for three consecutive times.
Note
Alerts for message accumulation apply only to the production group (the group with the prod suffix). |
2 |
Set the Channel Silence Period. For example, if you set it to 3 hours, an alert is sent every 3 hours after the threshold is reached. No repeated alerts are sent during the silence period. |
3 |
Set the Effective Time. For example, if you set it to 9:00-17:59, alerts are triggered only between 9:00 AM and 5:59 PM. No alerts are triggered outside this period. Note that the effective time cannot span across midnight, such as 22:00-7:59. |
4 |
Click OK. |
View alert history
You can set a time range to filter and view the alert history for a specific period.
Timestamp: The time when the alert occurred.
Metric Name: The name of the alert metric (message accumulation).
Alert Rule: Specifies the alert rules configured by the distributor.
Monitored Value: The total number of accumulated messages when the alert occurred.
Status:
Channel Silence Period: The alert threshold was reached, but no alert message was sent to the alert object because the alert was within the silence period.
Alert Triggered: The alert threshold was reached, and an alert message was sent to the alert object.
Alert Recovered: An alert recovers when the message accumulation drops below the alert threshold, and a recovery message is sent to the alert object (DingTalk group).