You can use OOS (CloudOps Orchestration Service) to manage software in batches. In addition to installing software through Alibaba Cloud agents or package management tools, OOS also allows you to install custom extensions. A custom extension can be a standard software package, such as an RPM, DEB, or MSI file. This feature lets you efficiently manage software across different platforms and architectures. This topic describes how to create and manage custom extensions in batches.
Prerequisites
-
You need an ECS instance deployed in a VPC.
For more information, see Create an instance by using the wizard. You can install or uninstall custom extensions only on instances in a VPC. Make sure that the network type of your ECS instance is VPC.
-
Log on to the ECS console.
-
In the left-side navigation pane, choose .
-
Find the target ECS instance and check the Network Type column to confirm that the instance is in a VPC.

-
-
You need a RAM role attached to your ECS instance.
For more information, see Step 1: Create a RAM role. When you create the role, take note of the following parameter settings:
-
Create a custom permission policy.
For more information, see Create a custom permission policy. The RAM role must include the permissions in the following policy:
-
Create a RAM role.
For more information, see Create a normal service role. Take note of the following parameter settings:
-
For Alibaba Cloud Service, select Alibaba Cloud Service.
-
For Role Type, select Normal Service Role.
-
For Elastic Compute Service, select Elastic Compute Service.
-
-
Grant permissions to the RAM role.
When you grant a permission to a RAM role, for Permission Policy, select the custom policy that you created in 2.a Create a custom permission policy. For more information, see Manage the permissions of a RAM role.
-
Attach the RAM role to the ECS instance.
For the RAM Role parameter, select the role that you created and configured in the previous steps. For more information, see Step 1: Create a RAM role.
-
-
You need an OSS bucket to store your custom extensions.
For more information, see Create buckets. When you select a Region, you must choose Region-specific and select the same region where you use OOS.
Create a custom extension
-
Go to the OOS console, choose Server Management > Extensions in the left-side navigation pane, and then click the Custom Extensions tab.
-
Click Create Custom Extension. In the Basic Information section, configure the parameters, and then click Next Step.
Custom extensions are visible only to you. You can use your account to install or uninstall them. The following table describes the key parameters.
Parameter
Description
Extension Type
The category of the extension. You can select Driver, Performance Acceleration, Agent, or Application based on your business needs.
Version Description
The first version that you create is automatically labeled V1. After the extension is created, you can view the version number and details on its details page.
NoteTo modify the extension, you must use the update feature. When you update an extension, the system automatically creates a new version, such as V2.
Supported Scope
Defines the conditions for using the extension, including the supported instance families, image types, and operating system platforms or versions. After you set this scope, users can select only applicable extensions when installing extensions from the ECS buy page or the ECS instance details page.
Command Parameter
Specifies the input parameters for the extension commands. You can add multiple parameters. The parameter type can be string, numeric, or Boolean. You can define the parameter name, default value, and description. After you set the installation command parameters, users must provide values for these parameters when installing the extension from the ECS buy page or the ECS instance details page.
-
In the Extension Configuration step, configure the parameters.
NoteYou can add multiple extension configurations. When you later install the extension, the system finds the configuration that matches the operating system and architecture of the ECS instance. The system then downloads the corresponding software package and runs the specified installation or uninstallation script to complete the process.
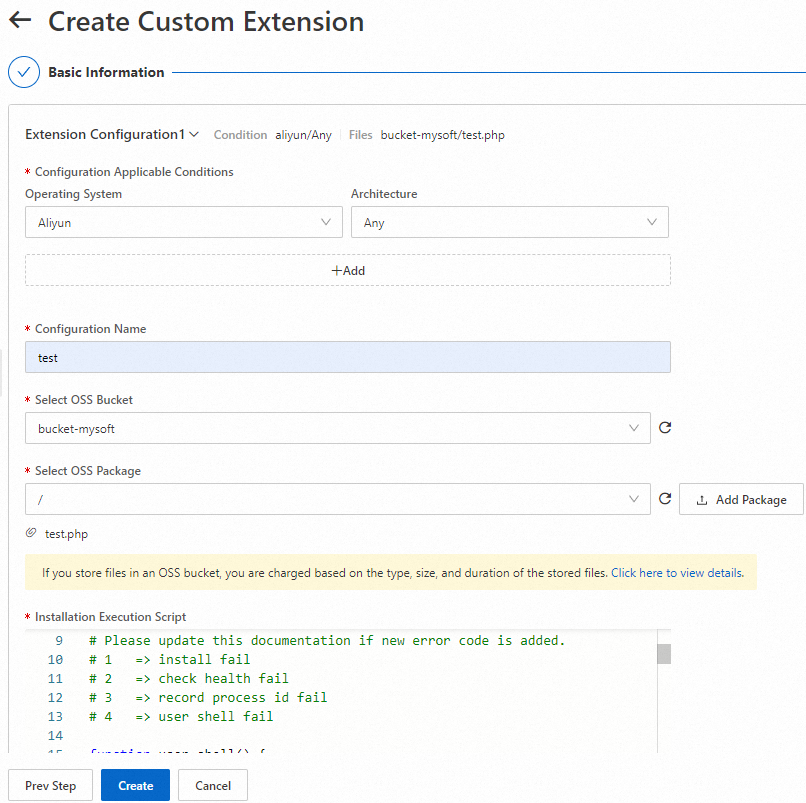
The following code provides examples of an Installation Execution Script and an Uninstallation Execution Script:
-
-
Click Create.
After the extension is created, you can view it on the Custom Extensions tab.

Install a custom extension
-
Go to the OOS console, choose Automated Tasks > Common O&M Tasks > Batch Software Management in the left-side navigation pane, and then click Create.
-
On the Create Batch Software Management Task page, configure the parameters and click Create.
-
For Operation, select Install.
-
For Extension Name, select Custom Extensions, and then select the custom extension that you want to install.
-
For Select Instances, select Manually Select Instances. In the instance list, select the ECS instances where you want to install the custom extension. Ensure that the instances are deployed in a VPC.
-
-
In the Parameter Confirmation dialog box, verify the parameters and click OK to create the execution.
After the execution is created, you can go to the Task Execution Management page to view the custom extension's installation status in the task list.

Uninstall a custom extension
-
Go to the OOS console, choose Automated Tasks > Common O&M Tasks > Batch Software Management in the left-side navigation pane, and then click Create.
-
On the Create Batch Software Management Task page, configure the parameters and click Create.
-
For Operation, select Uninstall.
-
For Extension Name, select Custom Extensions, and then select the custom extension that you want to uninstall.
-
For Select Instances, select Manually Select Instances and select the ECS instances from which you want to uninstall the custom extension.
-
-
In the Parameter Confirmation dialog box, verify the parameters and click OK to create the execution.
After the execution is created, you can go to the Task Execution Management page to check the task list and confirm that the custom extension is uninstalled.