This topic describes how to add a table when you use an API as a data source.
Add a table
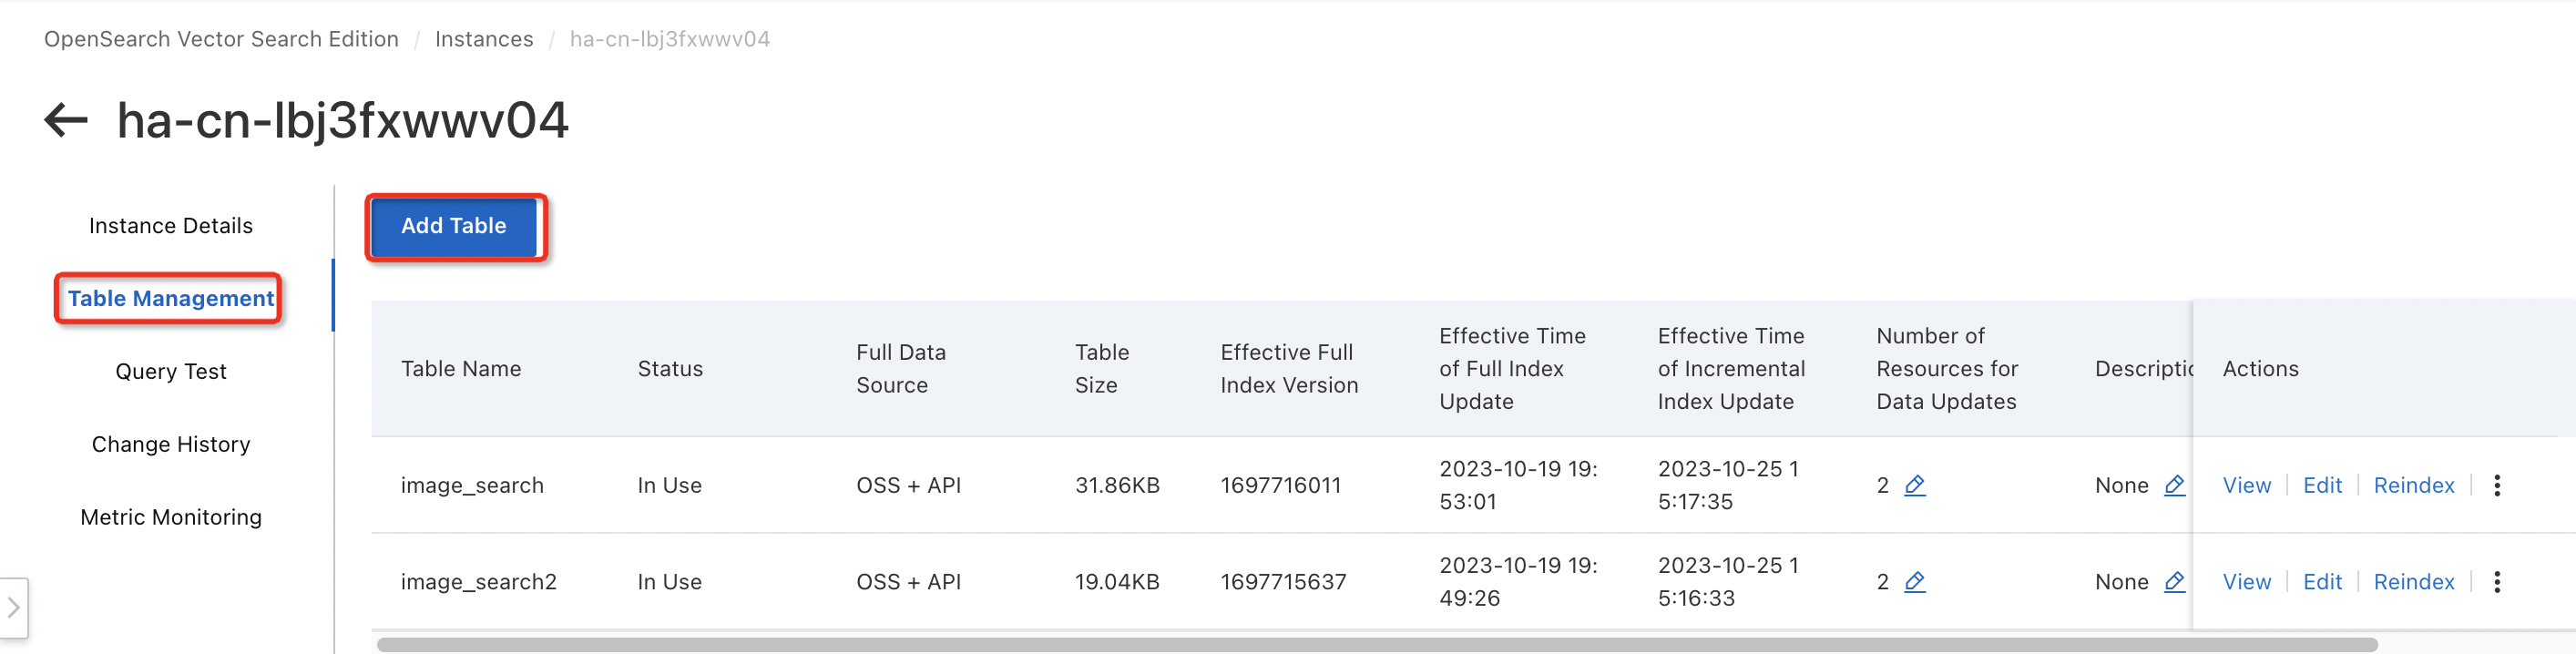
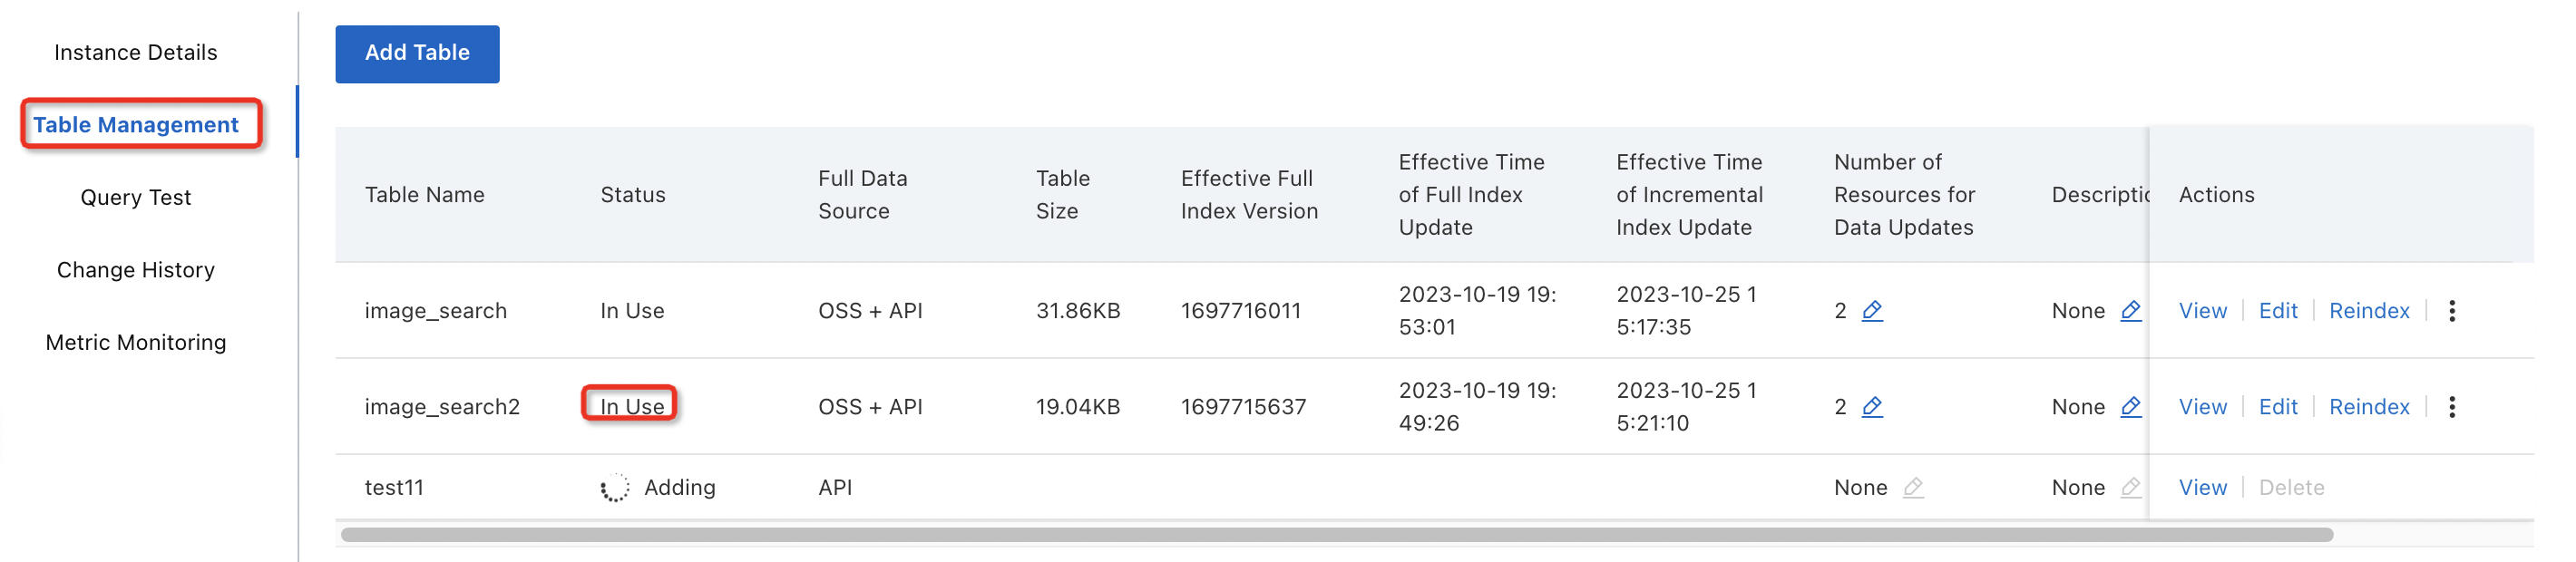
On the Instance Details > Table Management page, click Add Table.
Enter the basic information for the table and click Next.
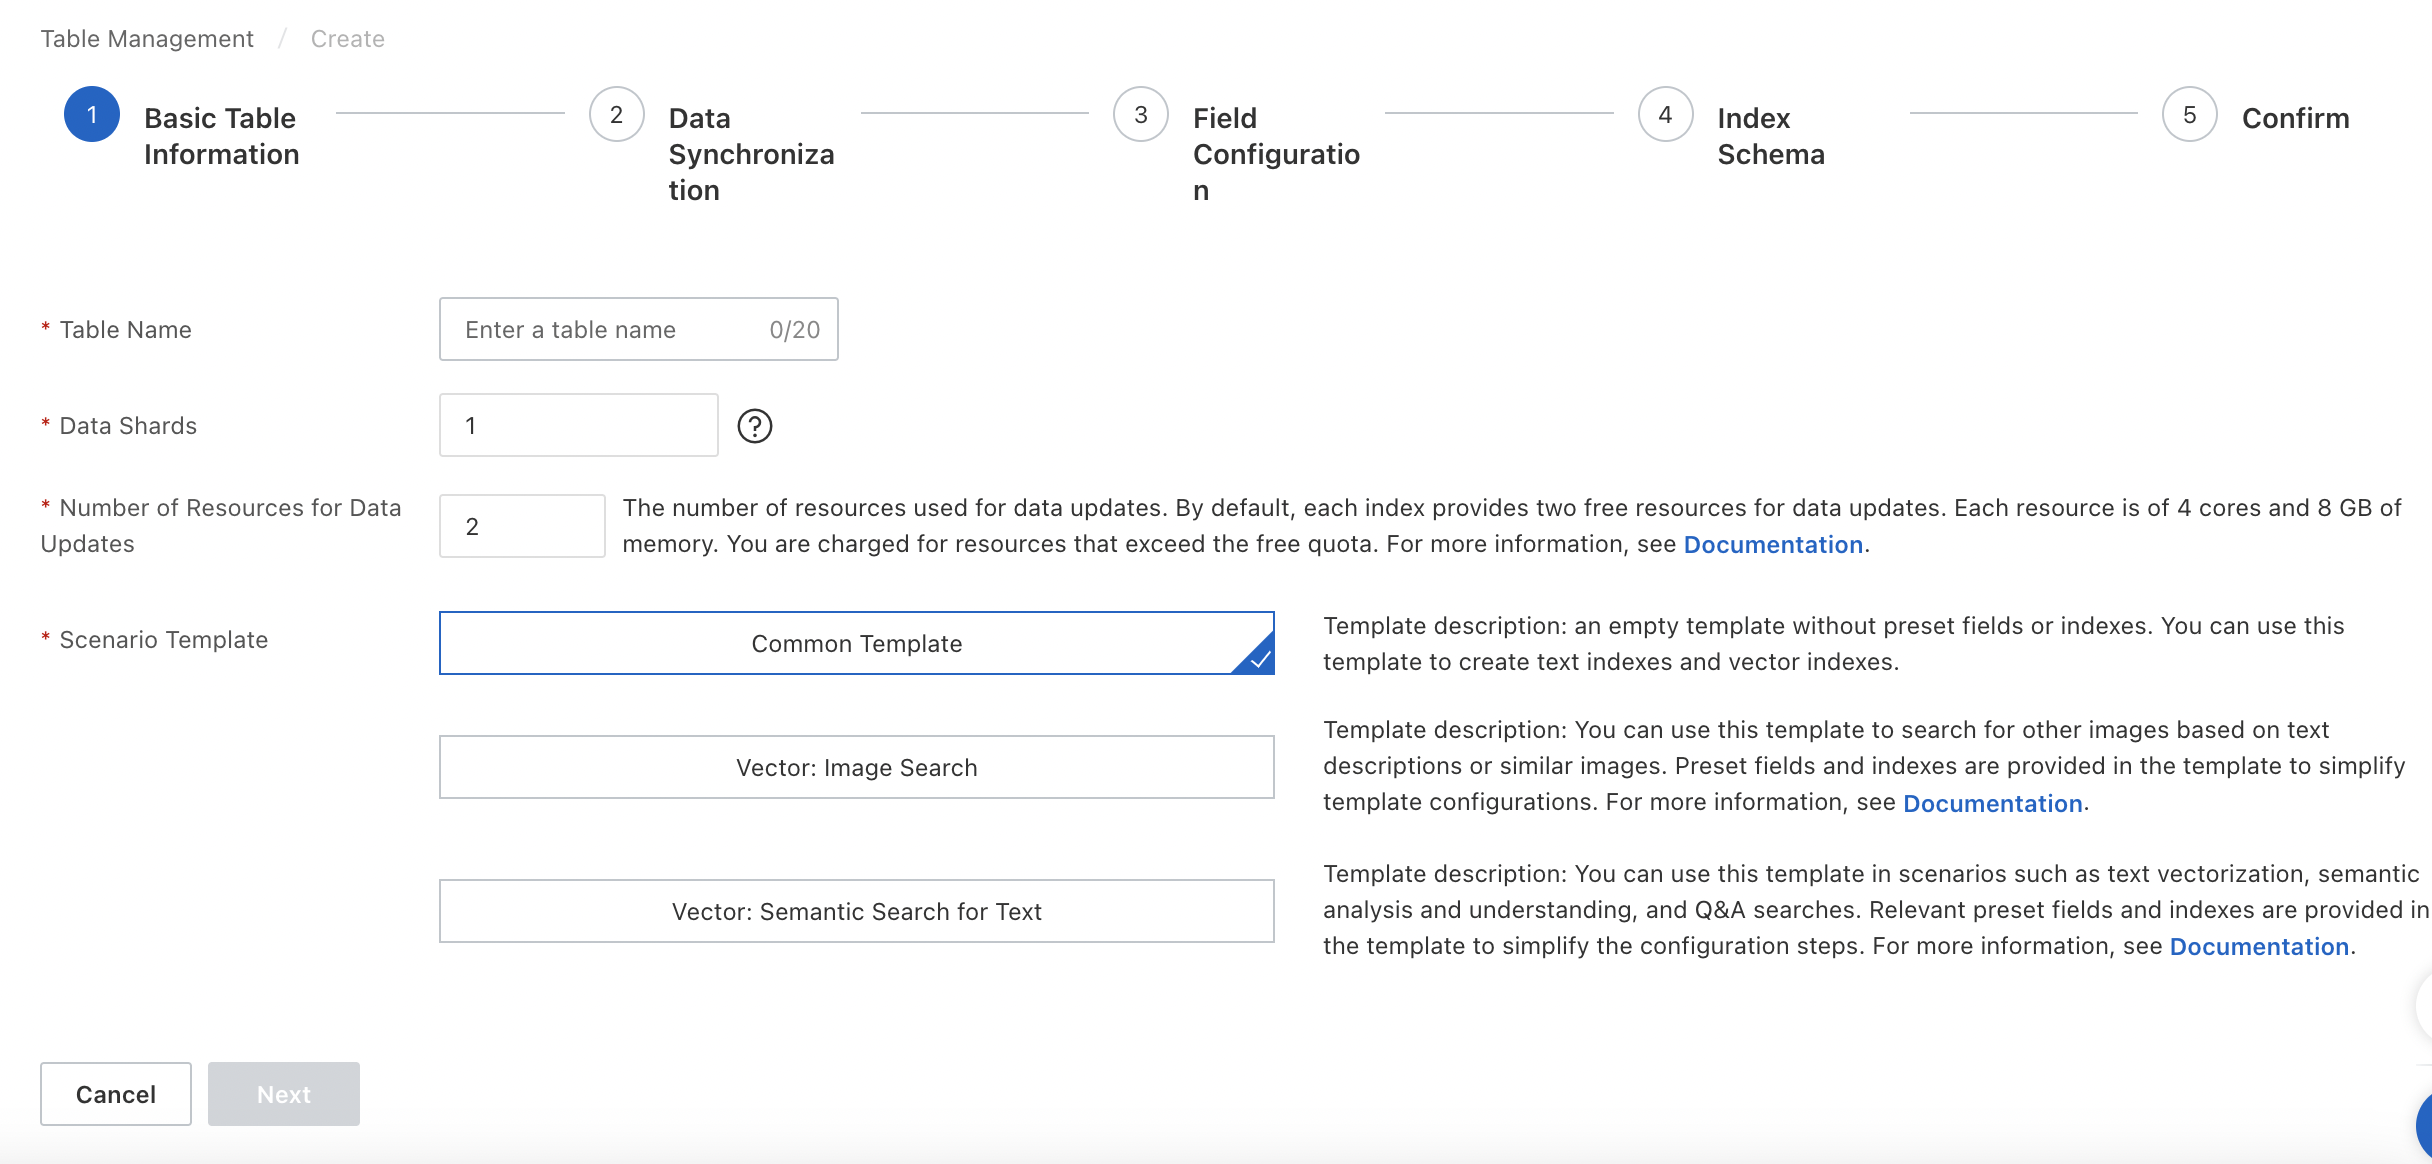
Configuration description:
Table Name: Enter a custom name.
Number of Shards: Enter a positive integer up to 256. This setting improves the speed of full builds and the performance of individual queries. For some existing instances, all index tables must have the same number of shards. Alternatively, one index table can have a single shard while all other index tables have the same number of shards.
Data update resources: The number of resources used for data updates. By default, each index includes two 4-core 8 GB update resources free of charge. You are charged for resources that exceed the free quota. For more information, see Vector Search Edition Billing Overview or .
Scenario Template: Vector Search Edition provides three built-in templates: General, Vector - Image Search, and Vector - Text Semantics.
Configure the data source for data synchronization and click Next.
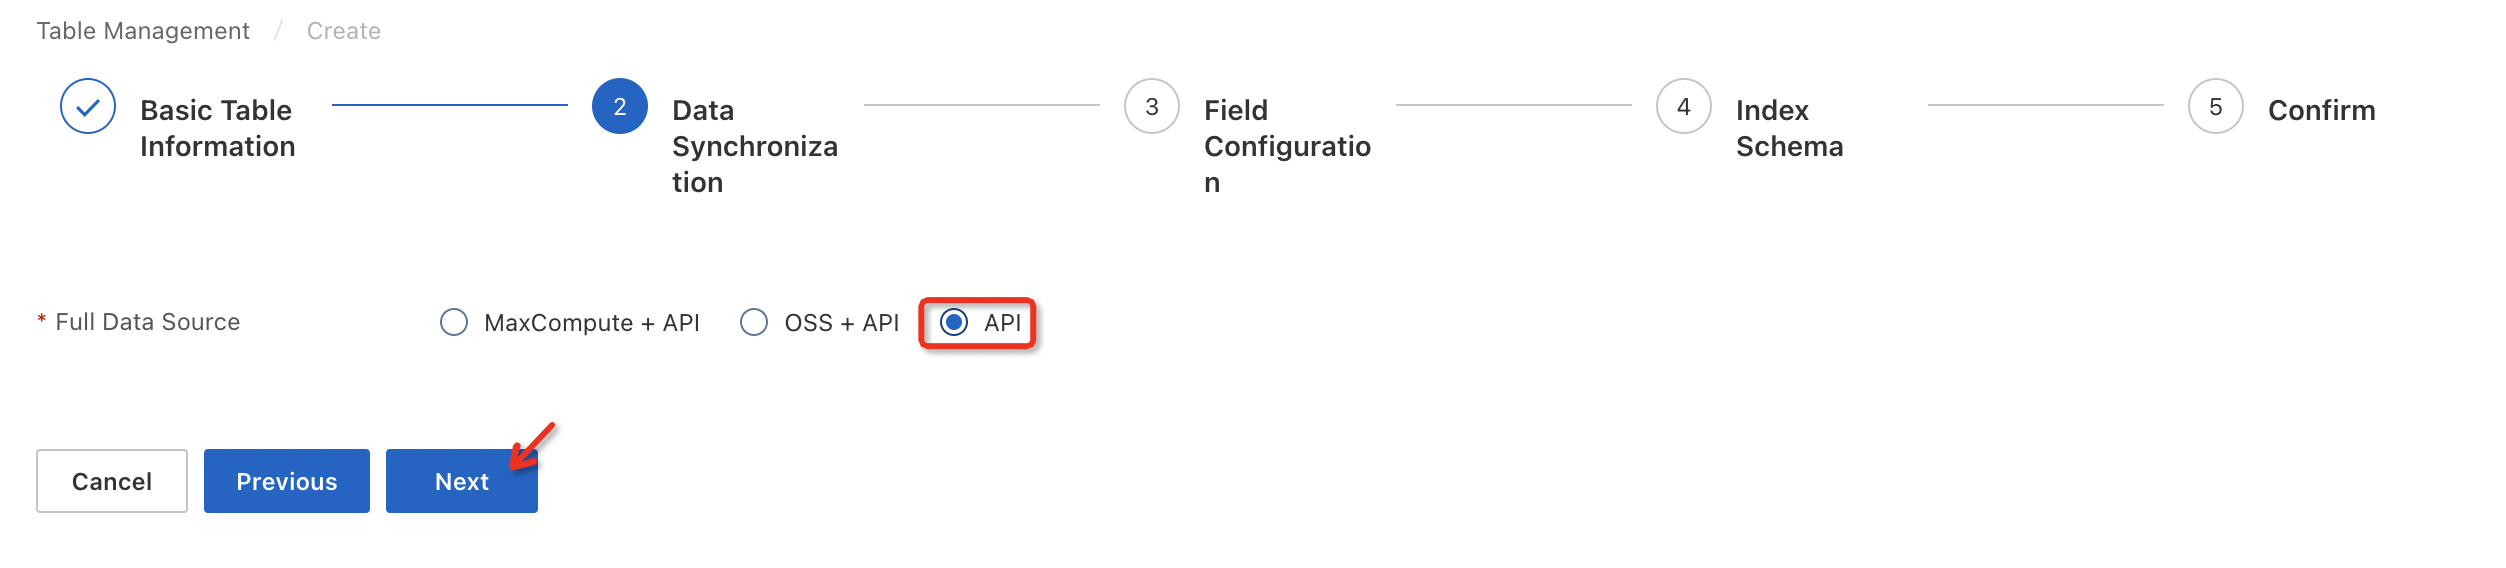
Parameter description:
Data Source Type: Select API. This indicates that data is pushed to the instance using an API.
Configure the fields and click Next.
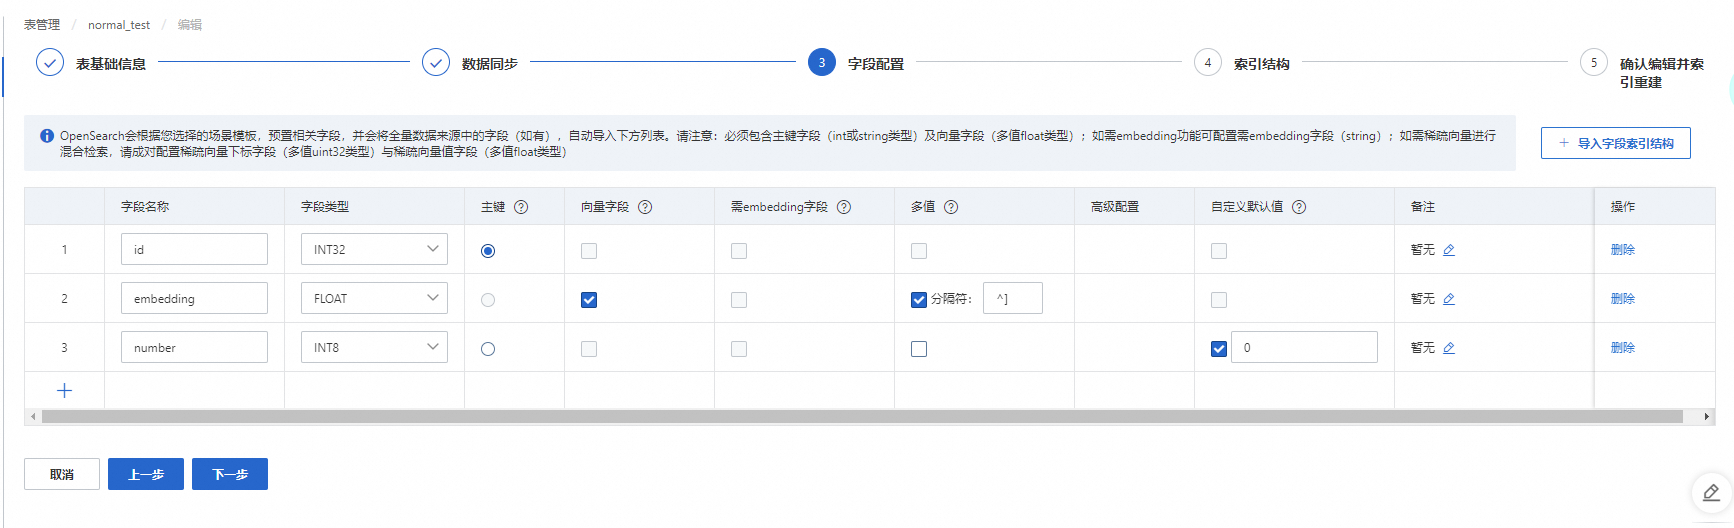
The primary key field and the vector field are required. The primary key field must be of the int or string type, and you must select the Primary Key option for it. The vector field must be of the float type, and you must select the Vector Field option for it.
By default, the vector field is a multi-value float type. The default multi-value separator is the ha3 separator `^]` (UTF-8 encoded as `\x1D`), which is used to split the values. You can also specify a custom multi-value separator.
If a field is missing or empty in the data, the system automatically populates it with a default value. The default value is 0 for numeric types and an empty string for the STRING type. You can also specify a custom default value.
Configure the index schema and click Next.
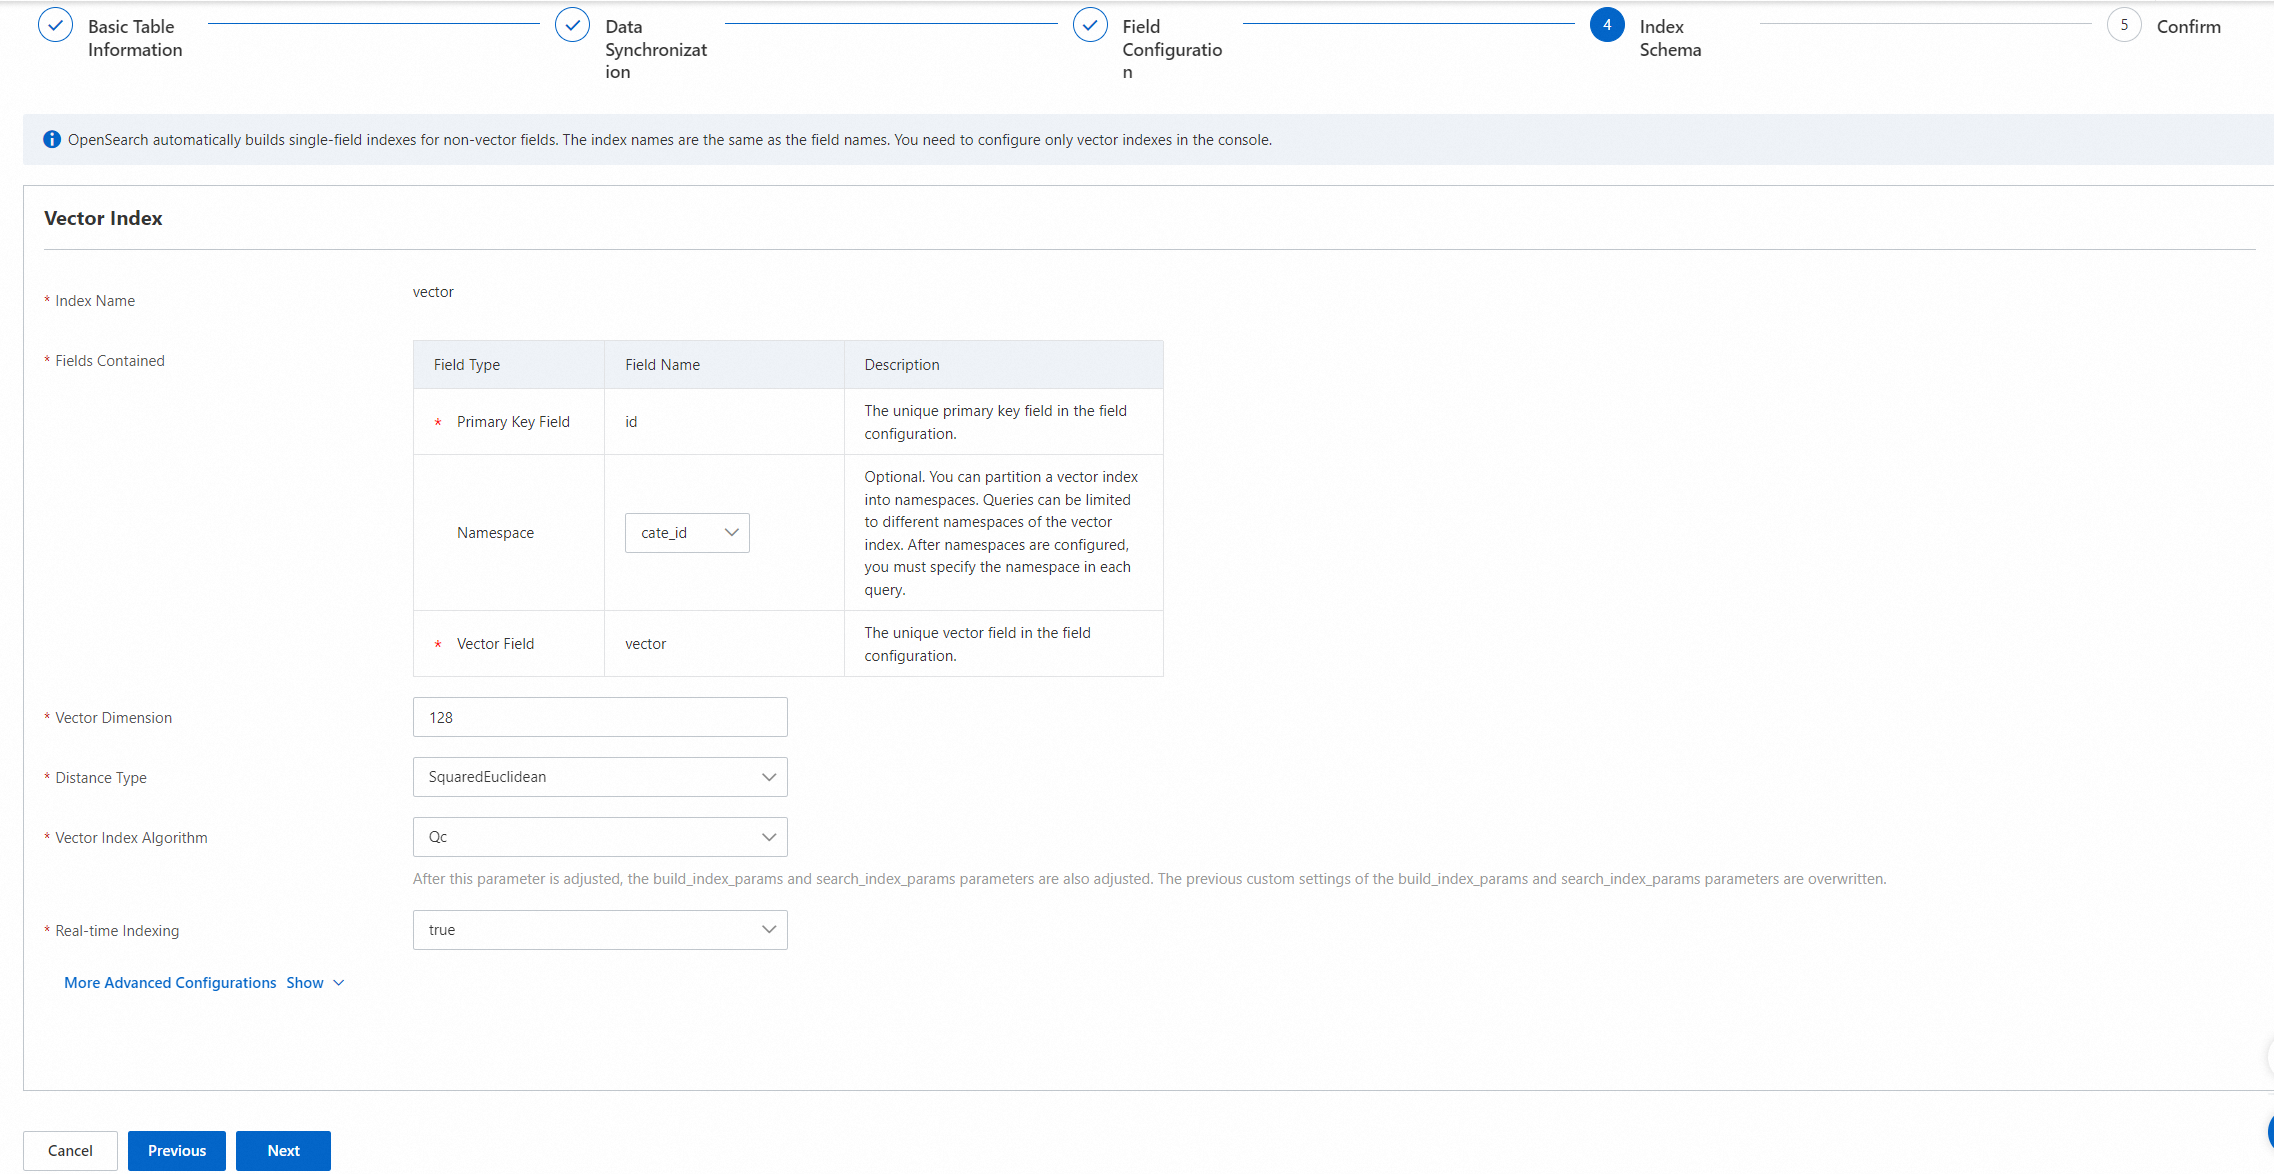
This section is for configuring the vector index:
The primary key field and vector field are required. The namespace field is optional and can be left empty.
You can select only from these three fixed fields. You cannot add new fields.
Vector Dimensions: Select the number of dimensions based on the vectors that are generated by your model.
Distance Metric: Select the distance metric based on the vectors that are generated by your model. The system supports two distance metric types: SquareEuclidean and InnerProduct.
Vector Index Algorithm: Select the algorithm based on the vectors that are generated by your model. The system supports the following vector index algorithms: Quantized Clustering, linear, and HNSW (Hierarchical Navigable Small World).
Real-time Index: Specifies whether to build a real-time vector index for incremental data from the API. The default value is true.
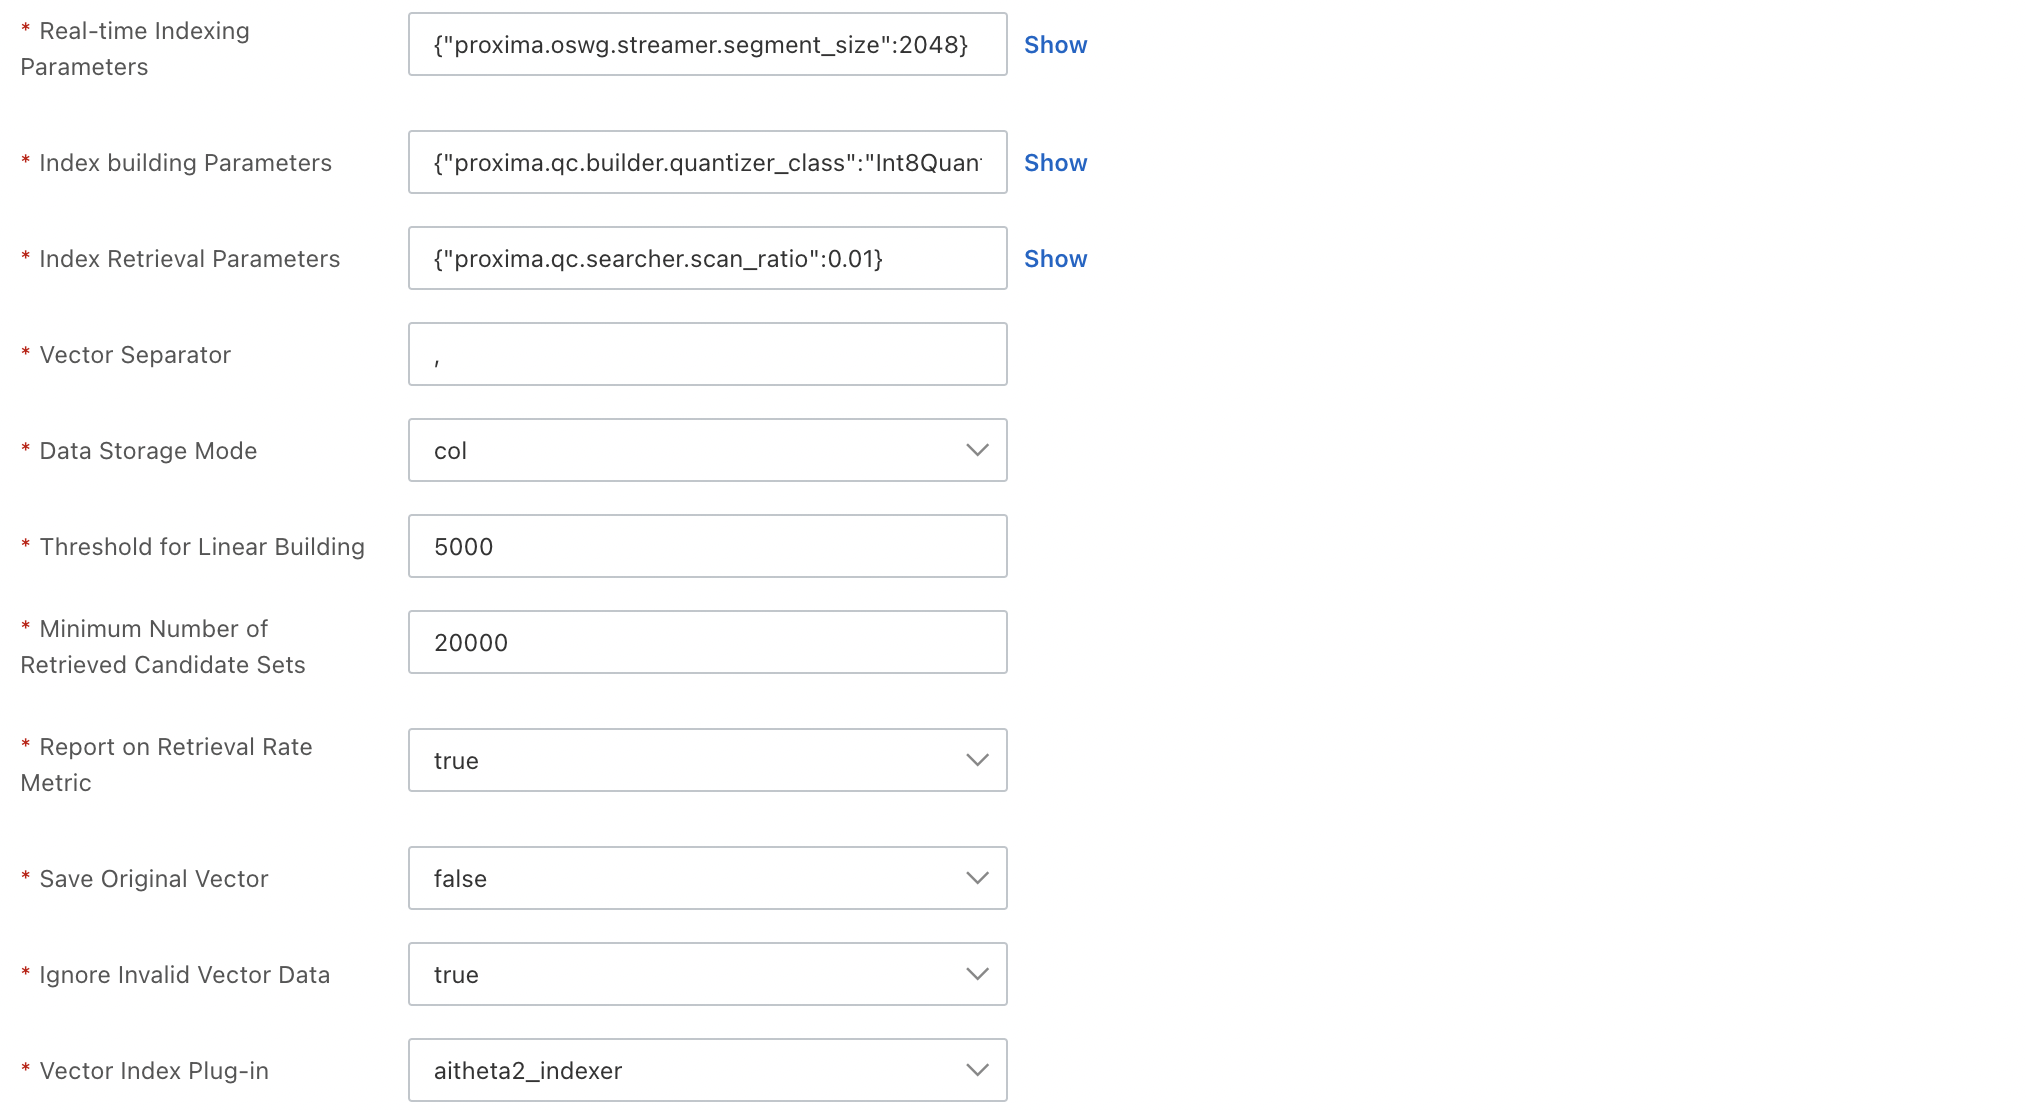
For other advanced configurations, expand the section. For parameter descriptions, see General configurations for vector indexes.
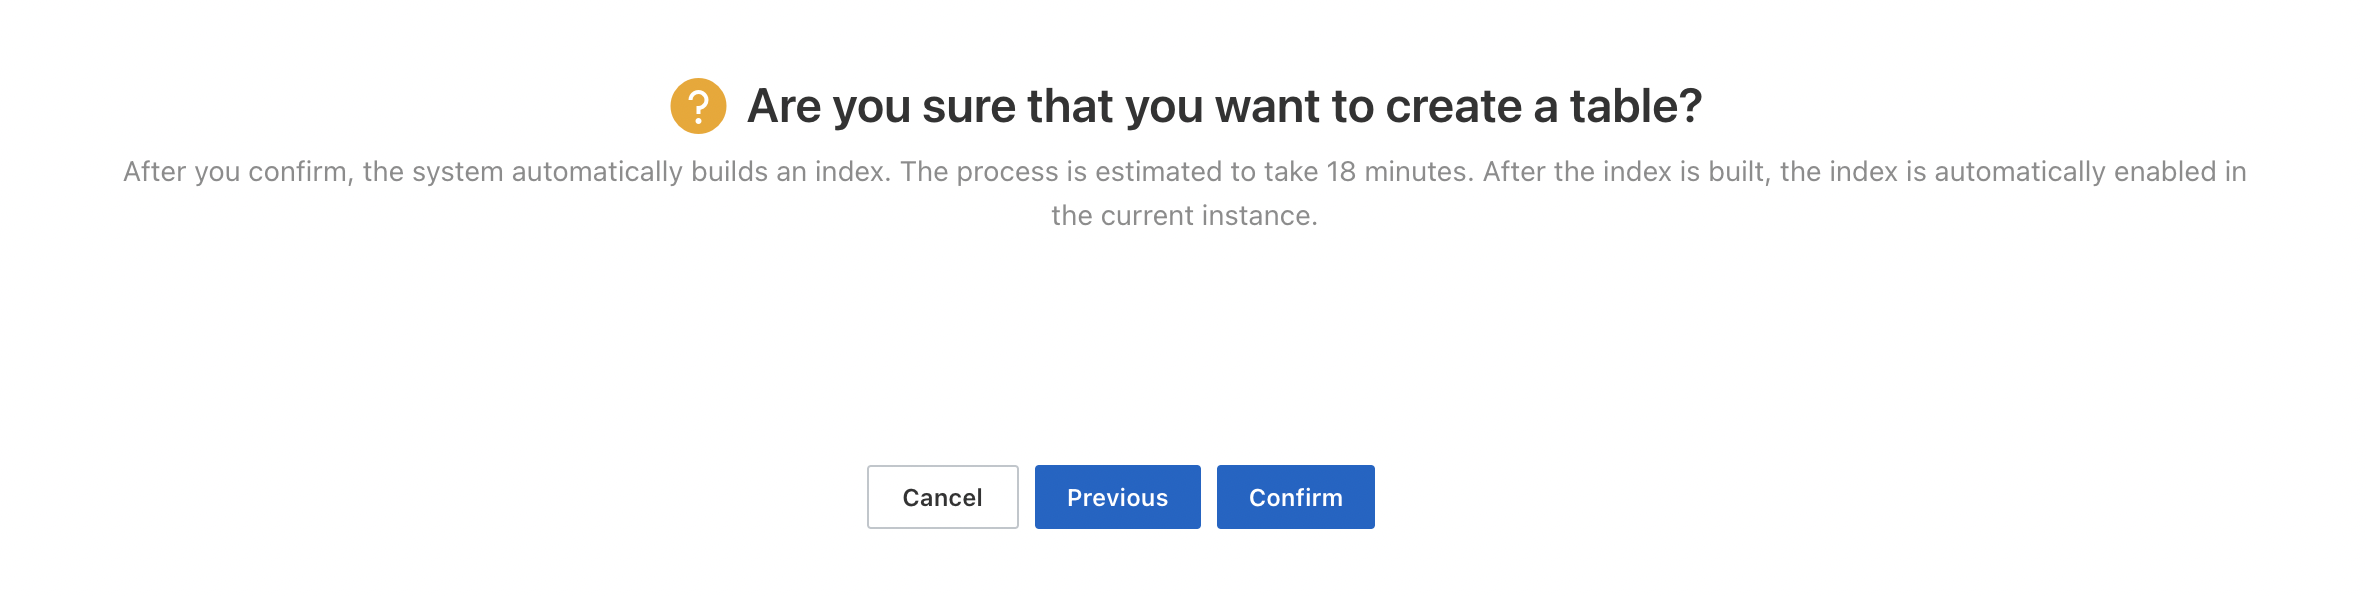
Confirm the configuration. After you click Confirm, the system automatically creates the table based on your specifications.
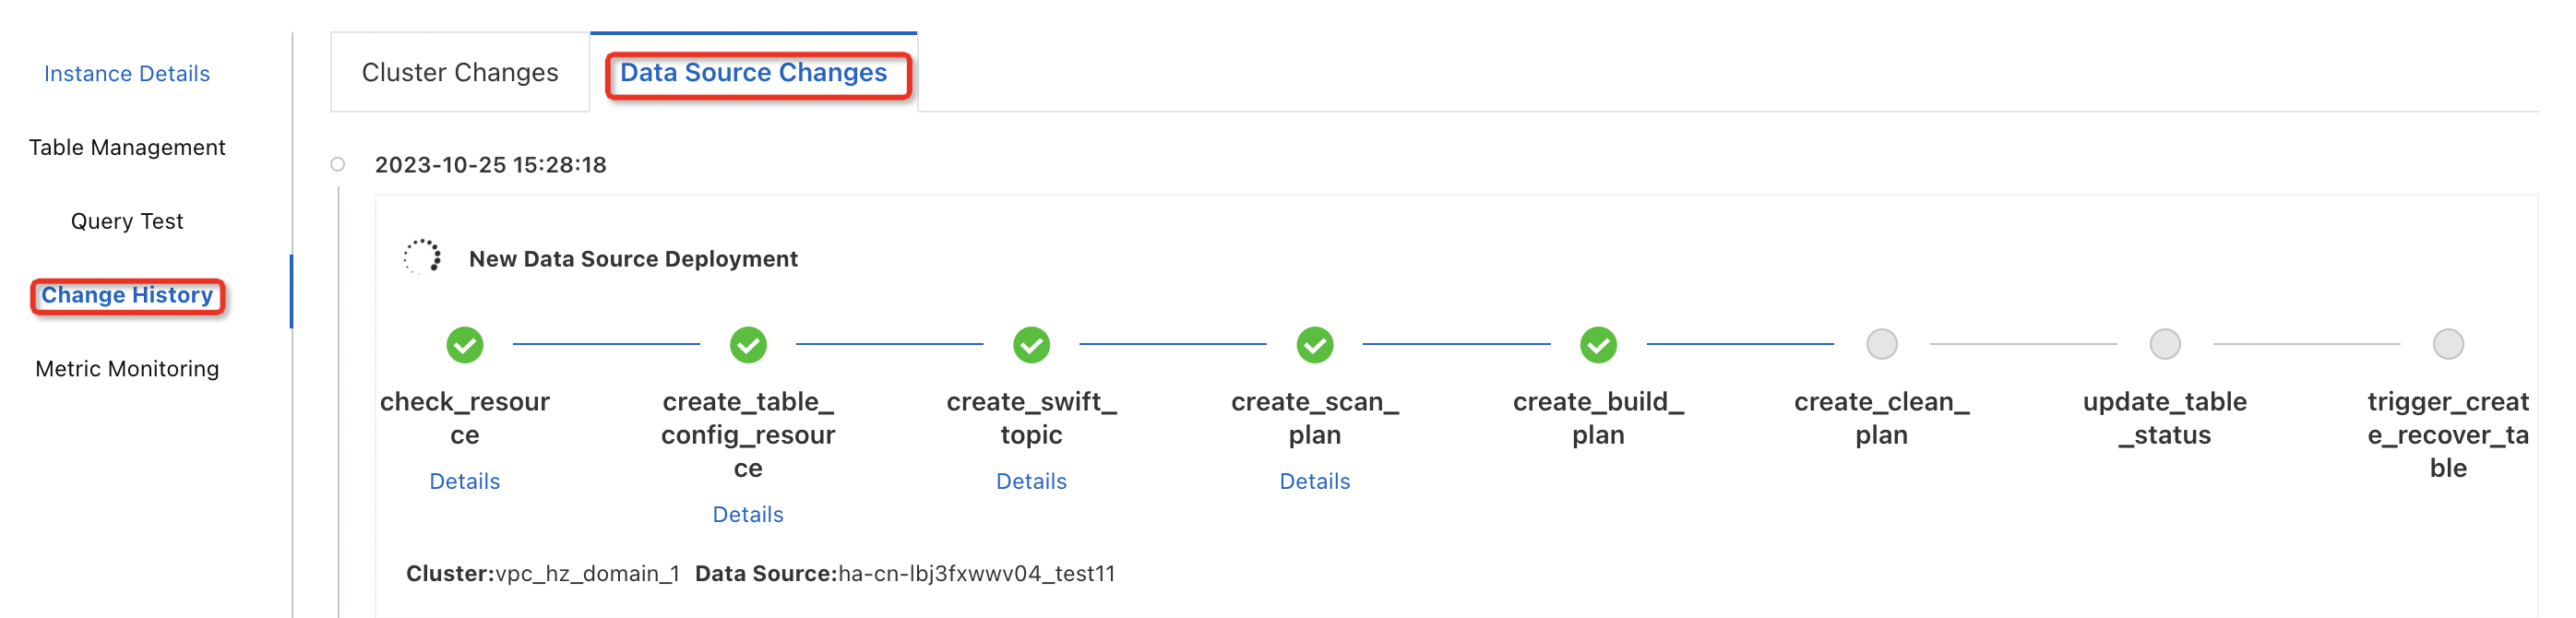
You can view the creation progress in the change history.
When the table status changes to In Use, you can test queries on the Query Test page.
Notes
When you perform a full build for an API data source, all previously pushed data is cleared. The system then starts synchronizing real-time data from the specified timestamp. Therefore, exercise caution when you perform a full build for an API data source.