Category management lets you classify dashboards, workbooks, BI portals, visualization screens, and data forms within your organization. The categorized directories are displayed in the Data section of DingTalk or WeCom applications and in the business navigation on the PC homepage.
Feature Entry
After you log on to the Quick BI console, you can configure data in Category Management.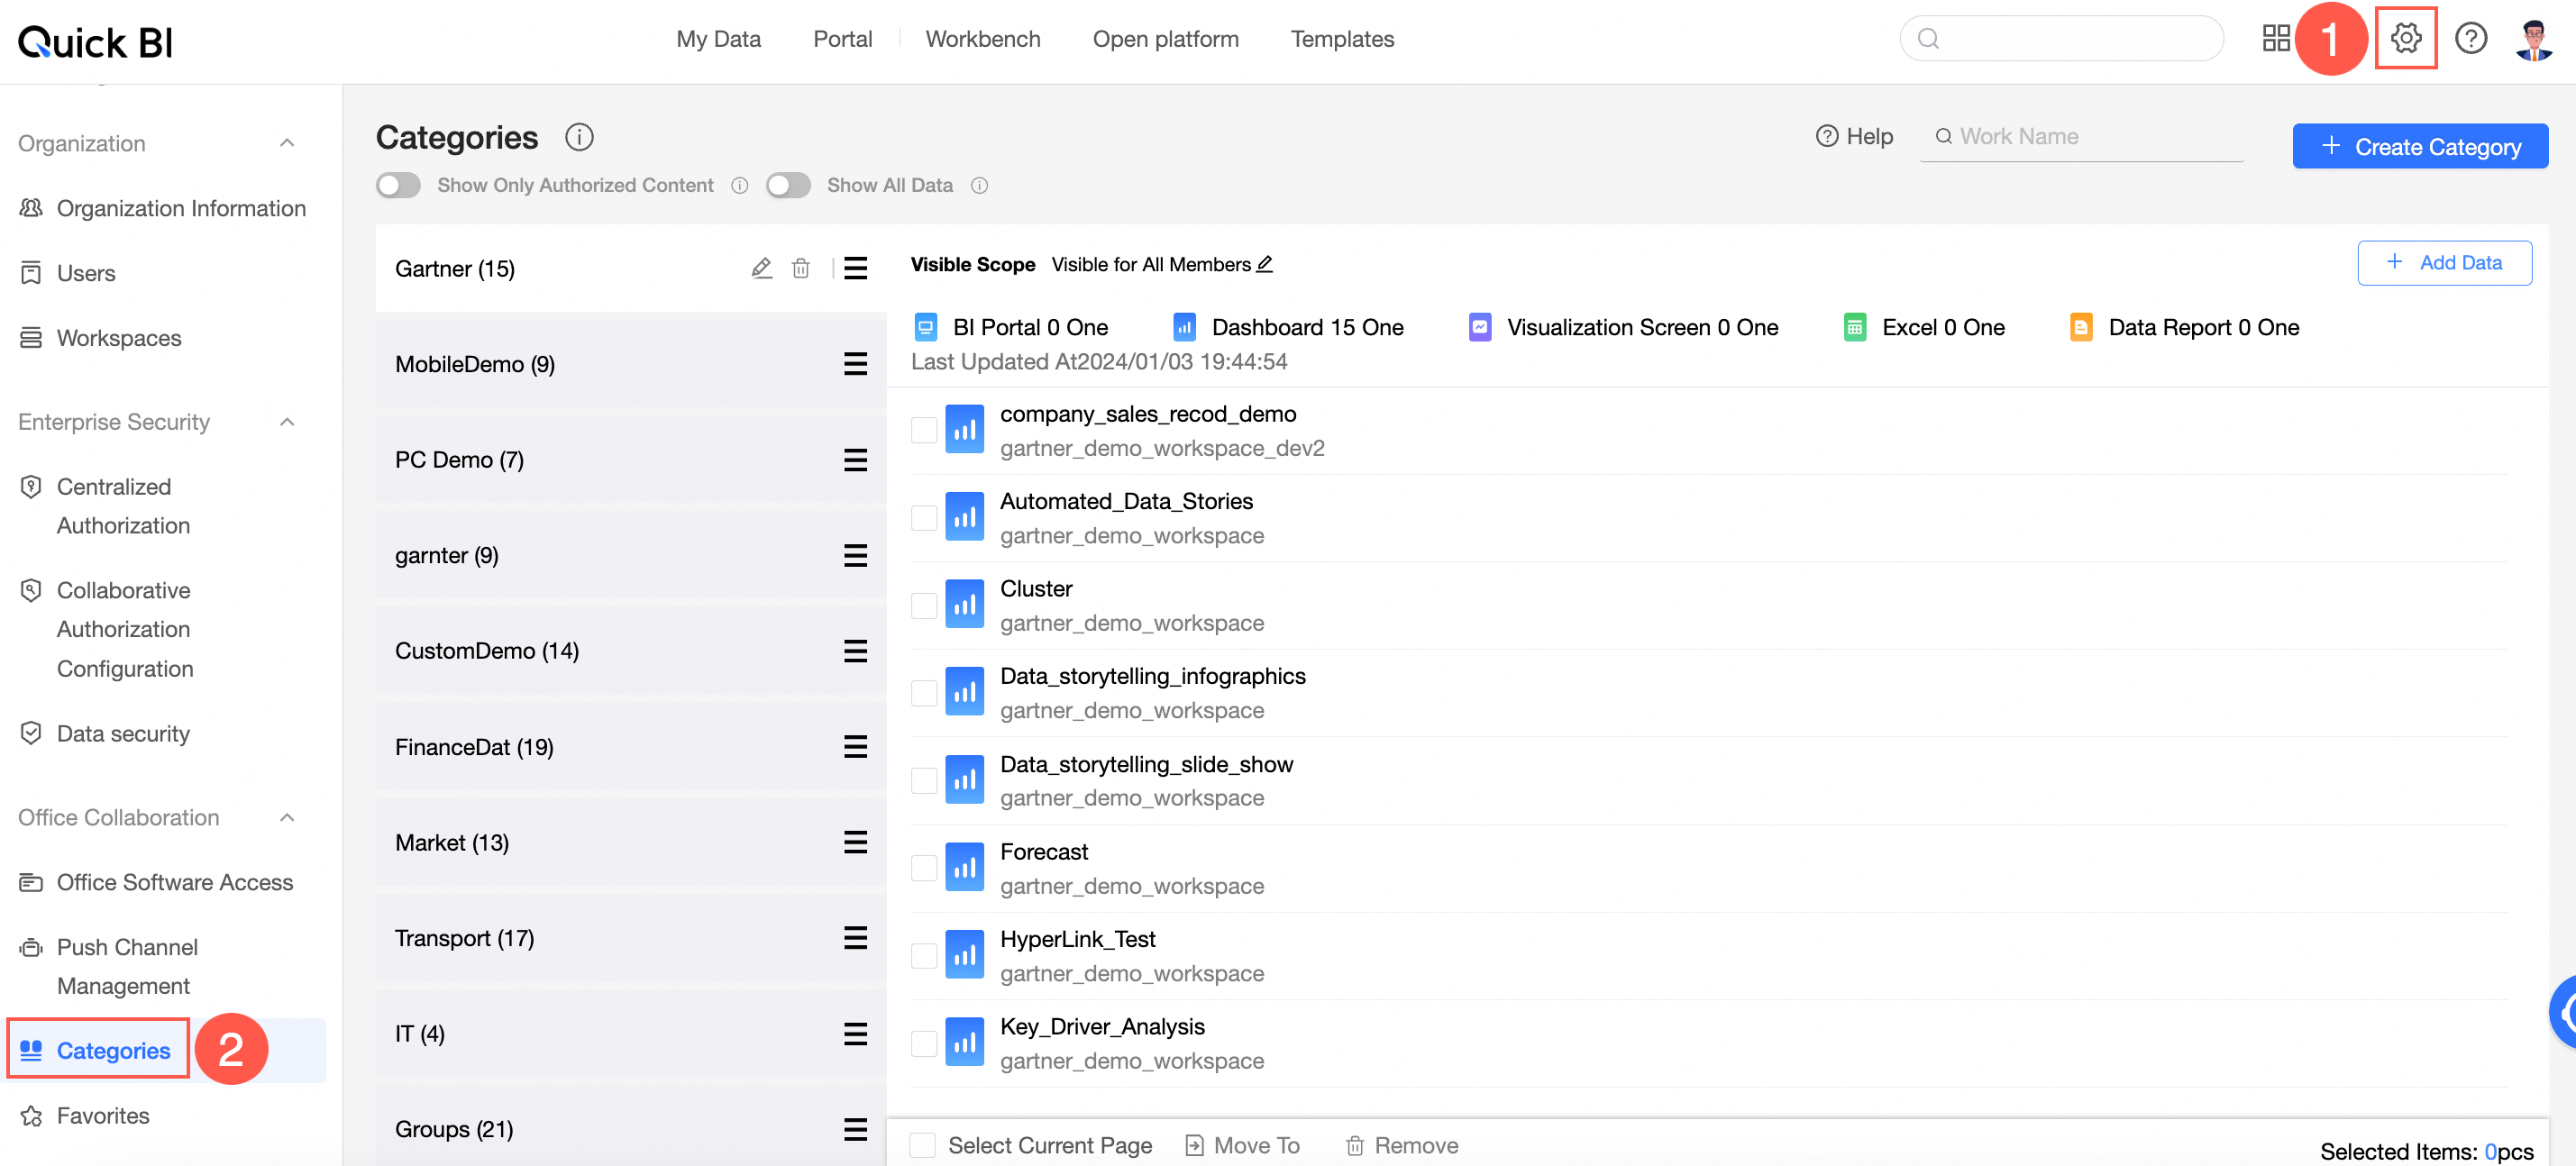
Create a Category
-
On the Category Management page, click Create Category in the upper-right corner.
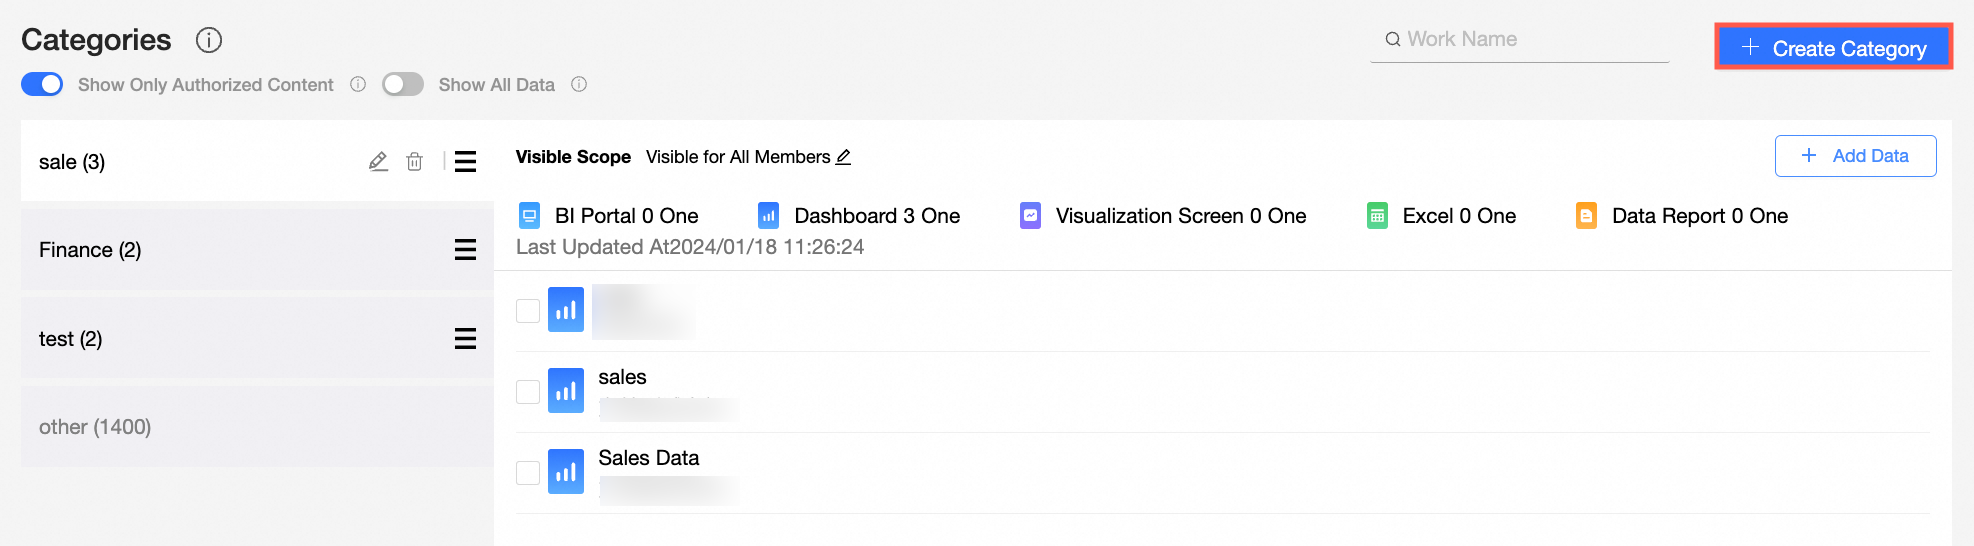
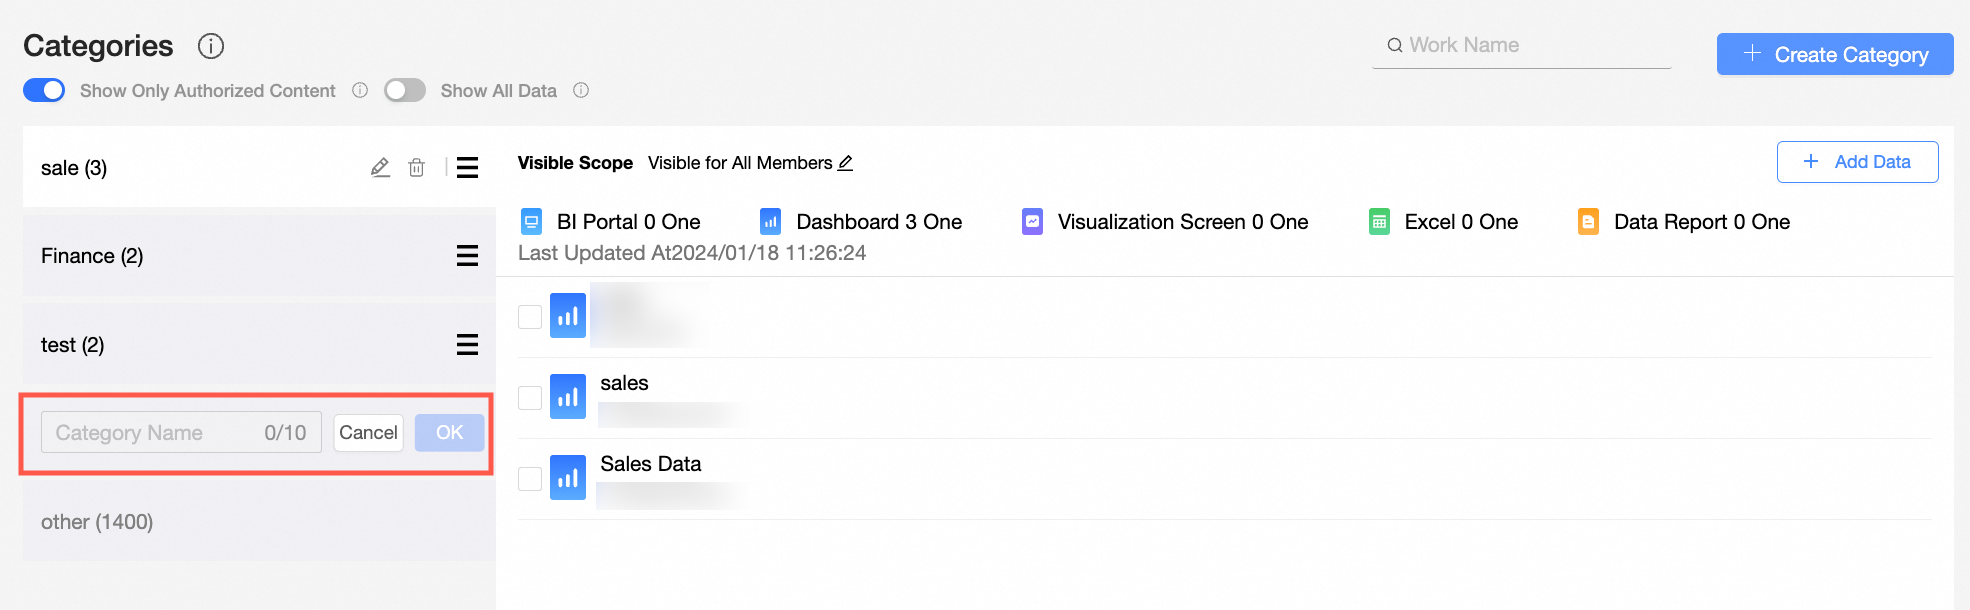
A new category item appears in the category list.
-
Enter a category name and click OK to complete the creation.
NoteThe naming convention for categories is as follows:
-
The title can contain only letters, digits, underscores (_), or hyphens (-).
-
The name must be globally unique.
-
The length cannot exceed 6 characters.
-
Edit Objects and Visibility Scope in a Category
-
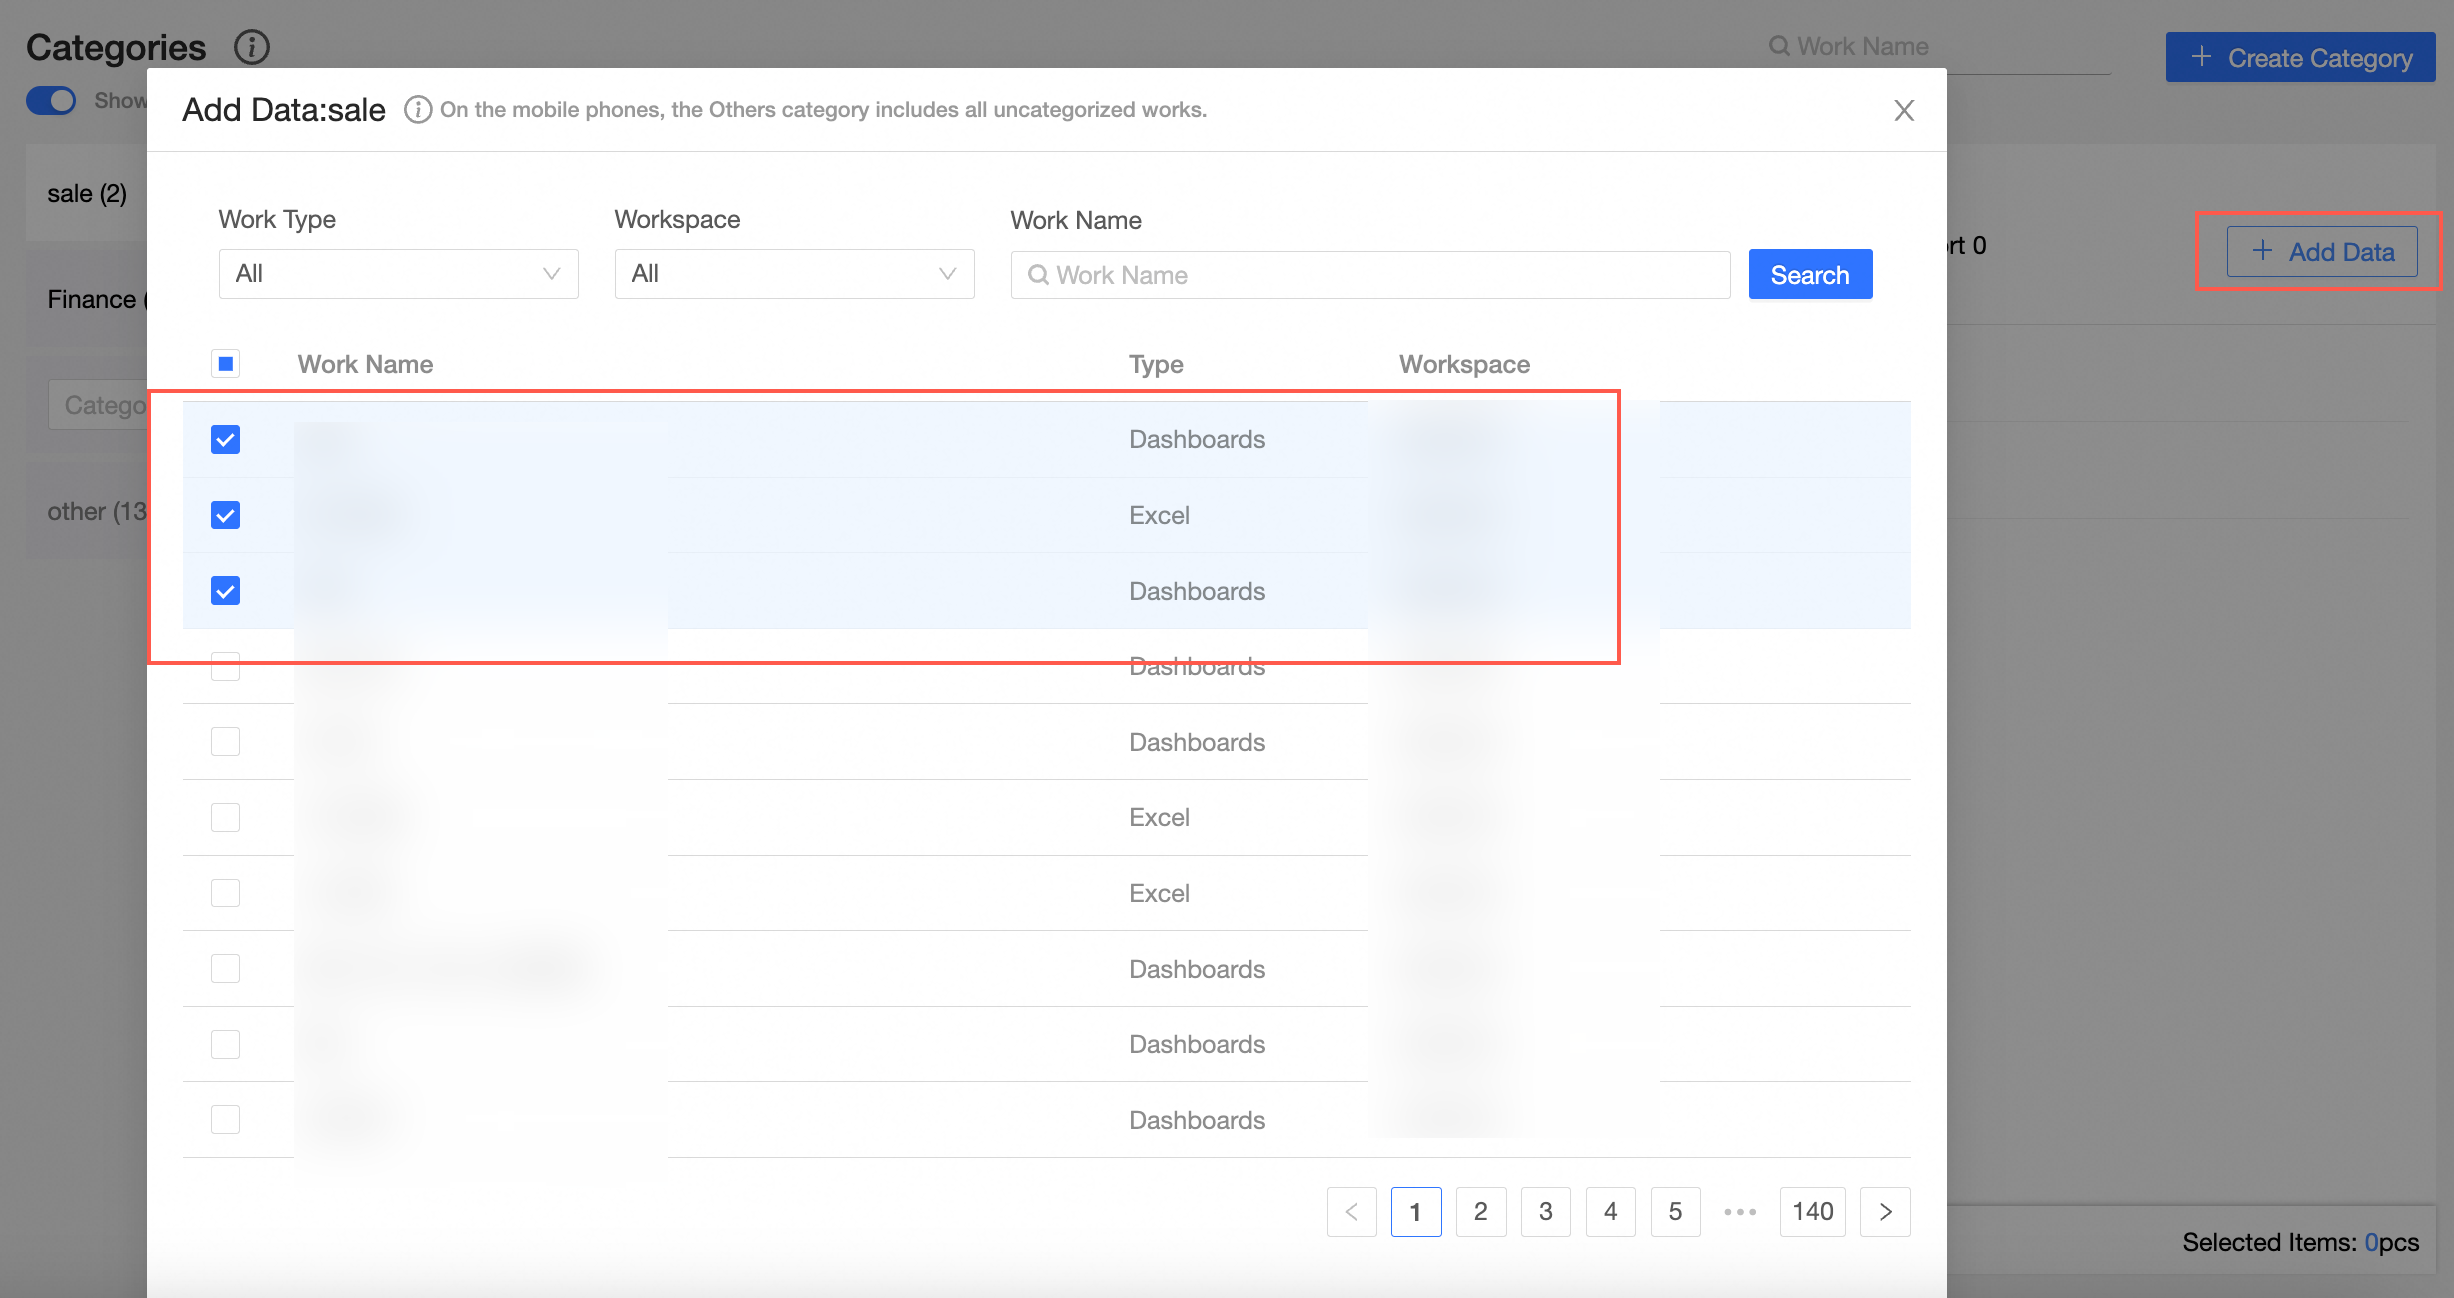
Add data to a new category
-
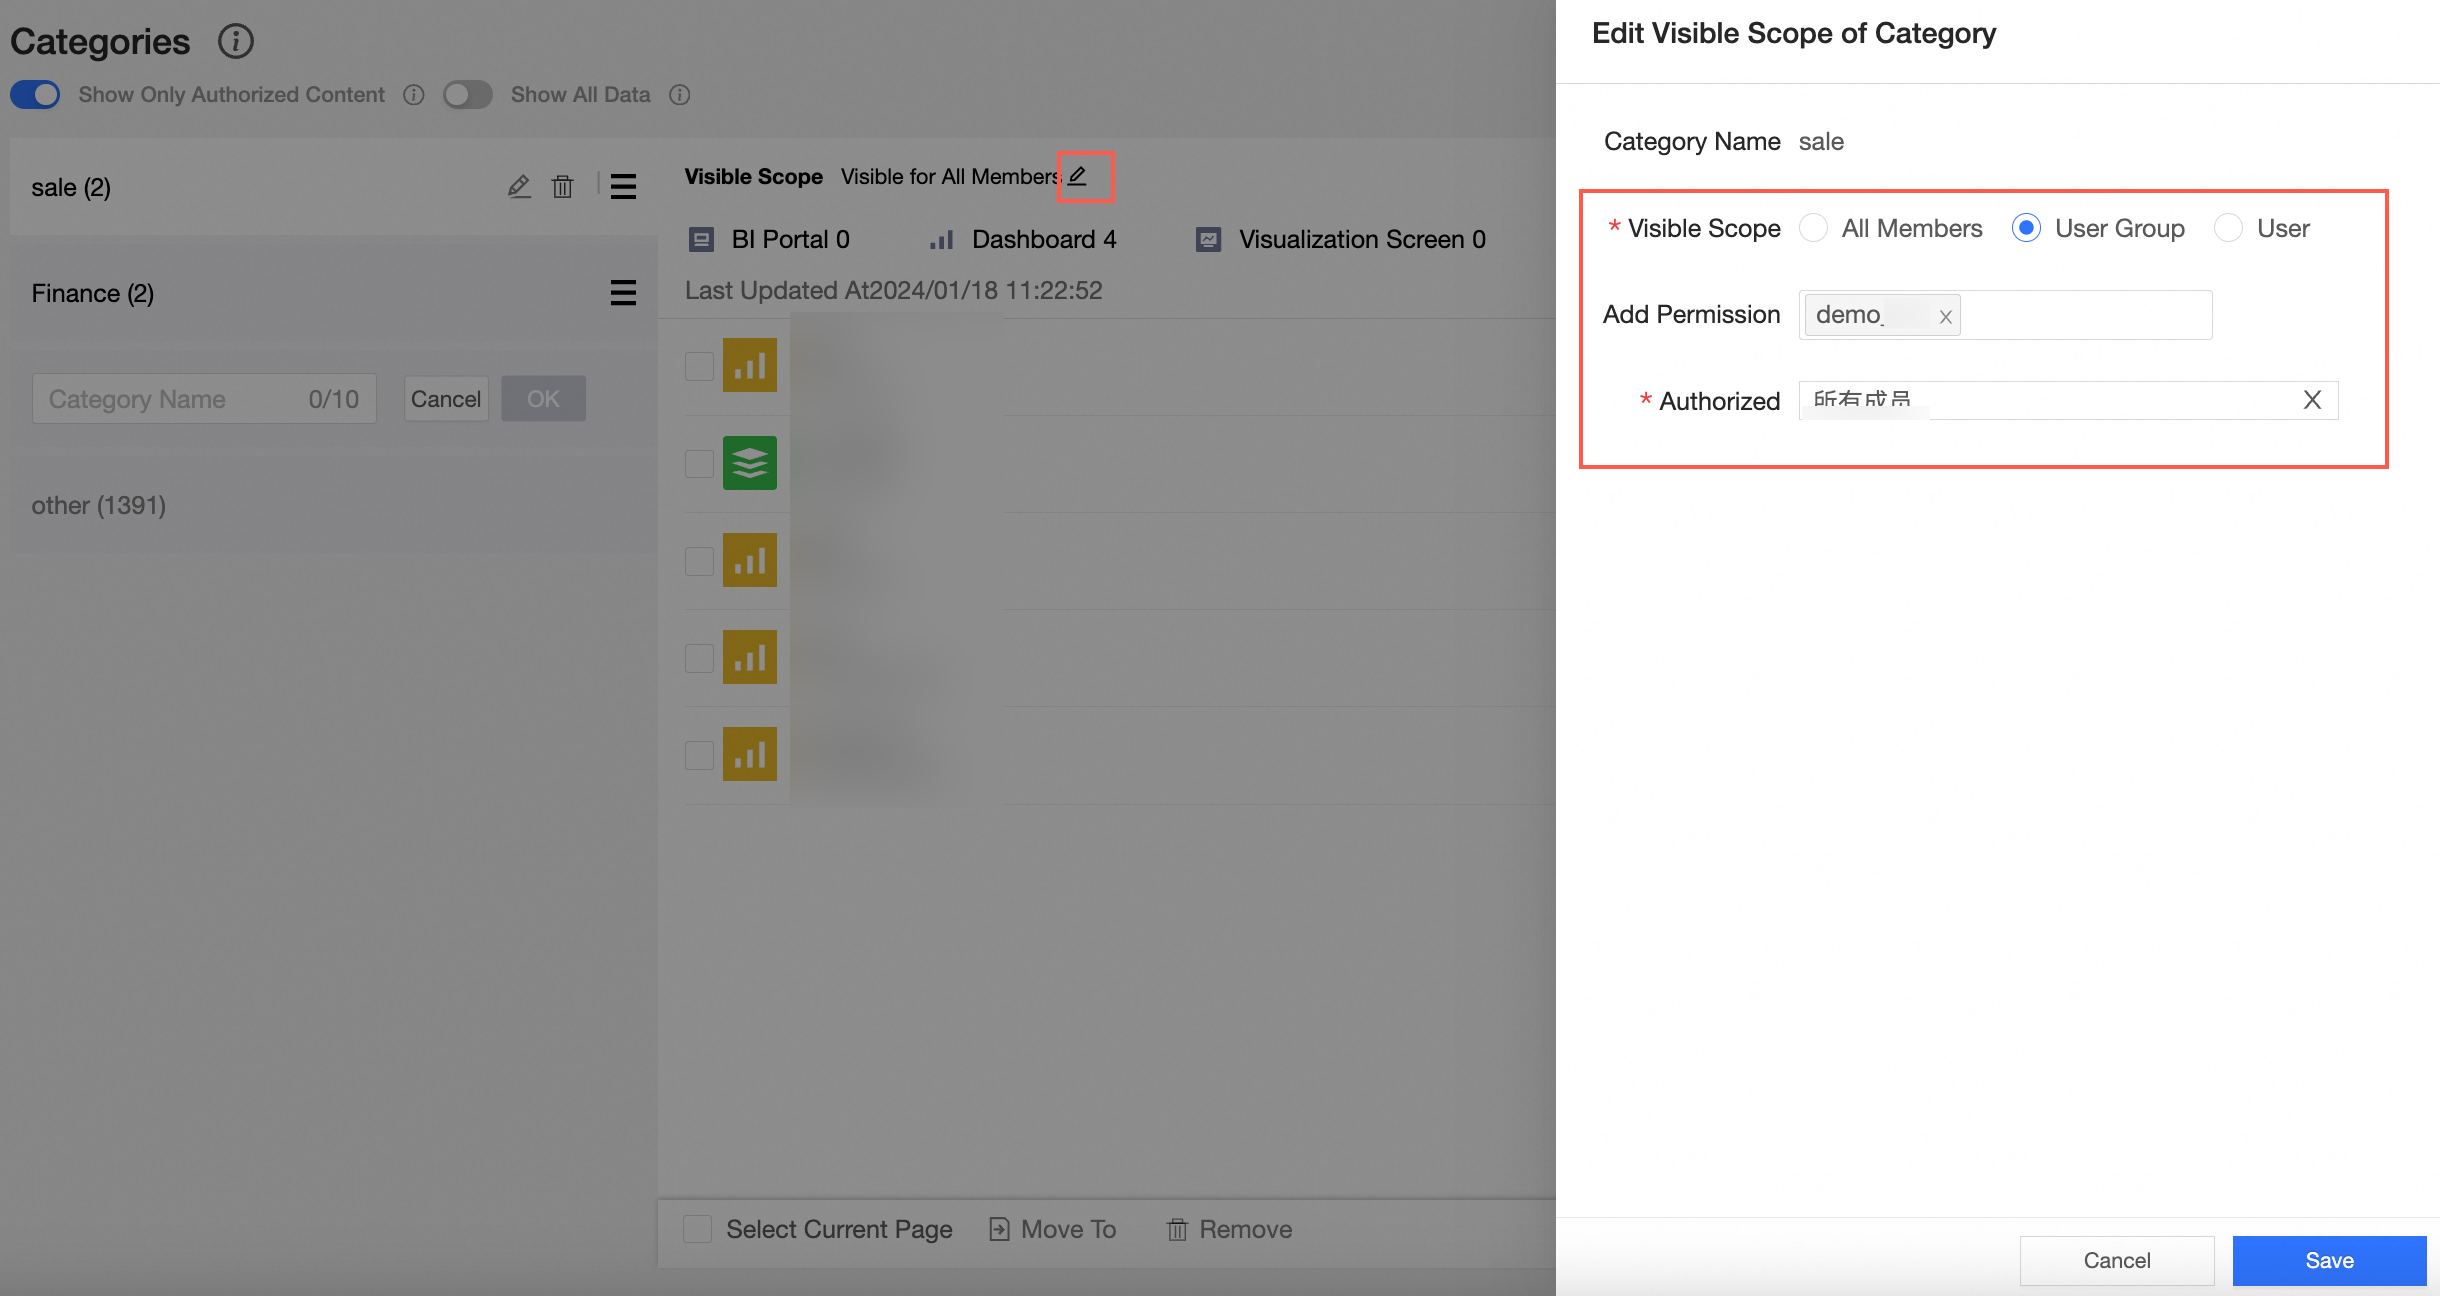
Grant access permissions to a category
-
When your category is visible to all members, set Visible Scope to All Members.
-
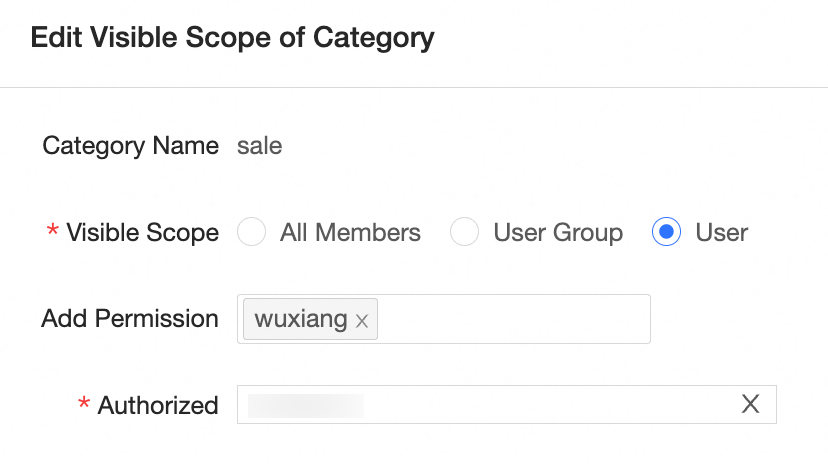
To make a category visible only to specific members, set Visible Scope and Add Permission. Only authorized members can view the category. Authorized users or user groups are listed in the Authorized section.

-
When you set Visible Scope to User Group and set Add Permission to User Group A, User Group A appears in the Authorized section. This indicates that members of User Group A can view this category.
-
When you set Visible Scope to User and set Add Permission to Ms. Wang, Ms. Wang appears in the Authorized section. This indicates that Ms. Wang can view this category.
-
To remove visibility permissions for a member, click the
icon to the right of the target member in the Authorized section.
-
-
-
Move data to a target category
 icon to the right of the target member in the Authorized section.
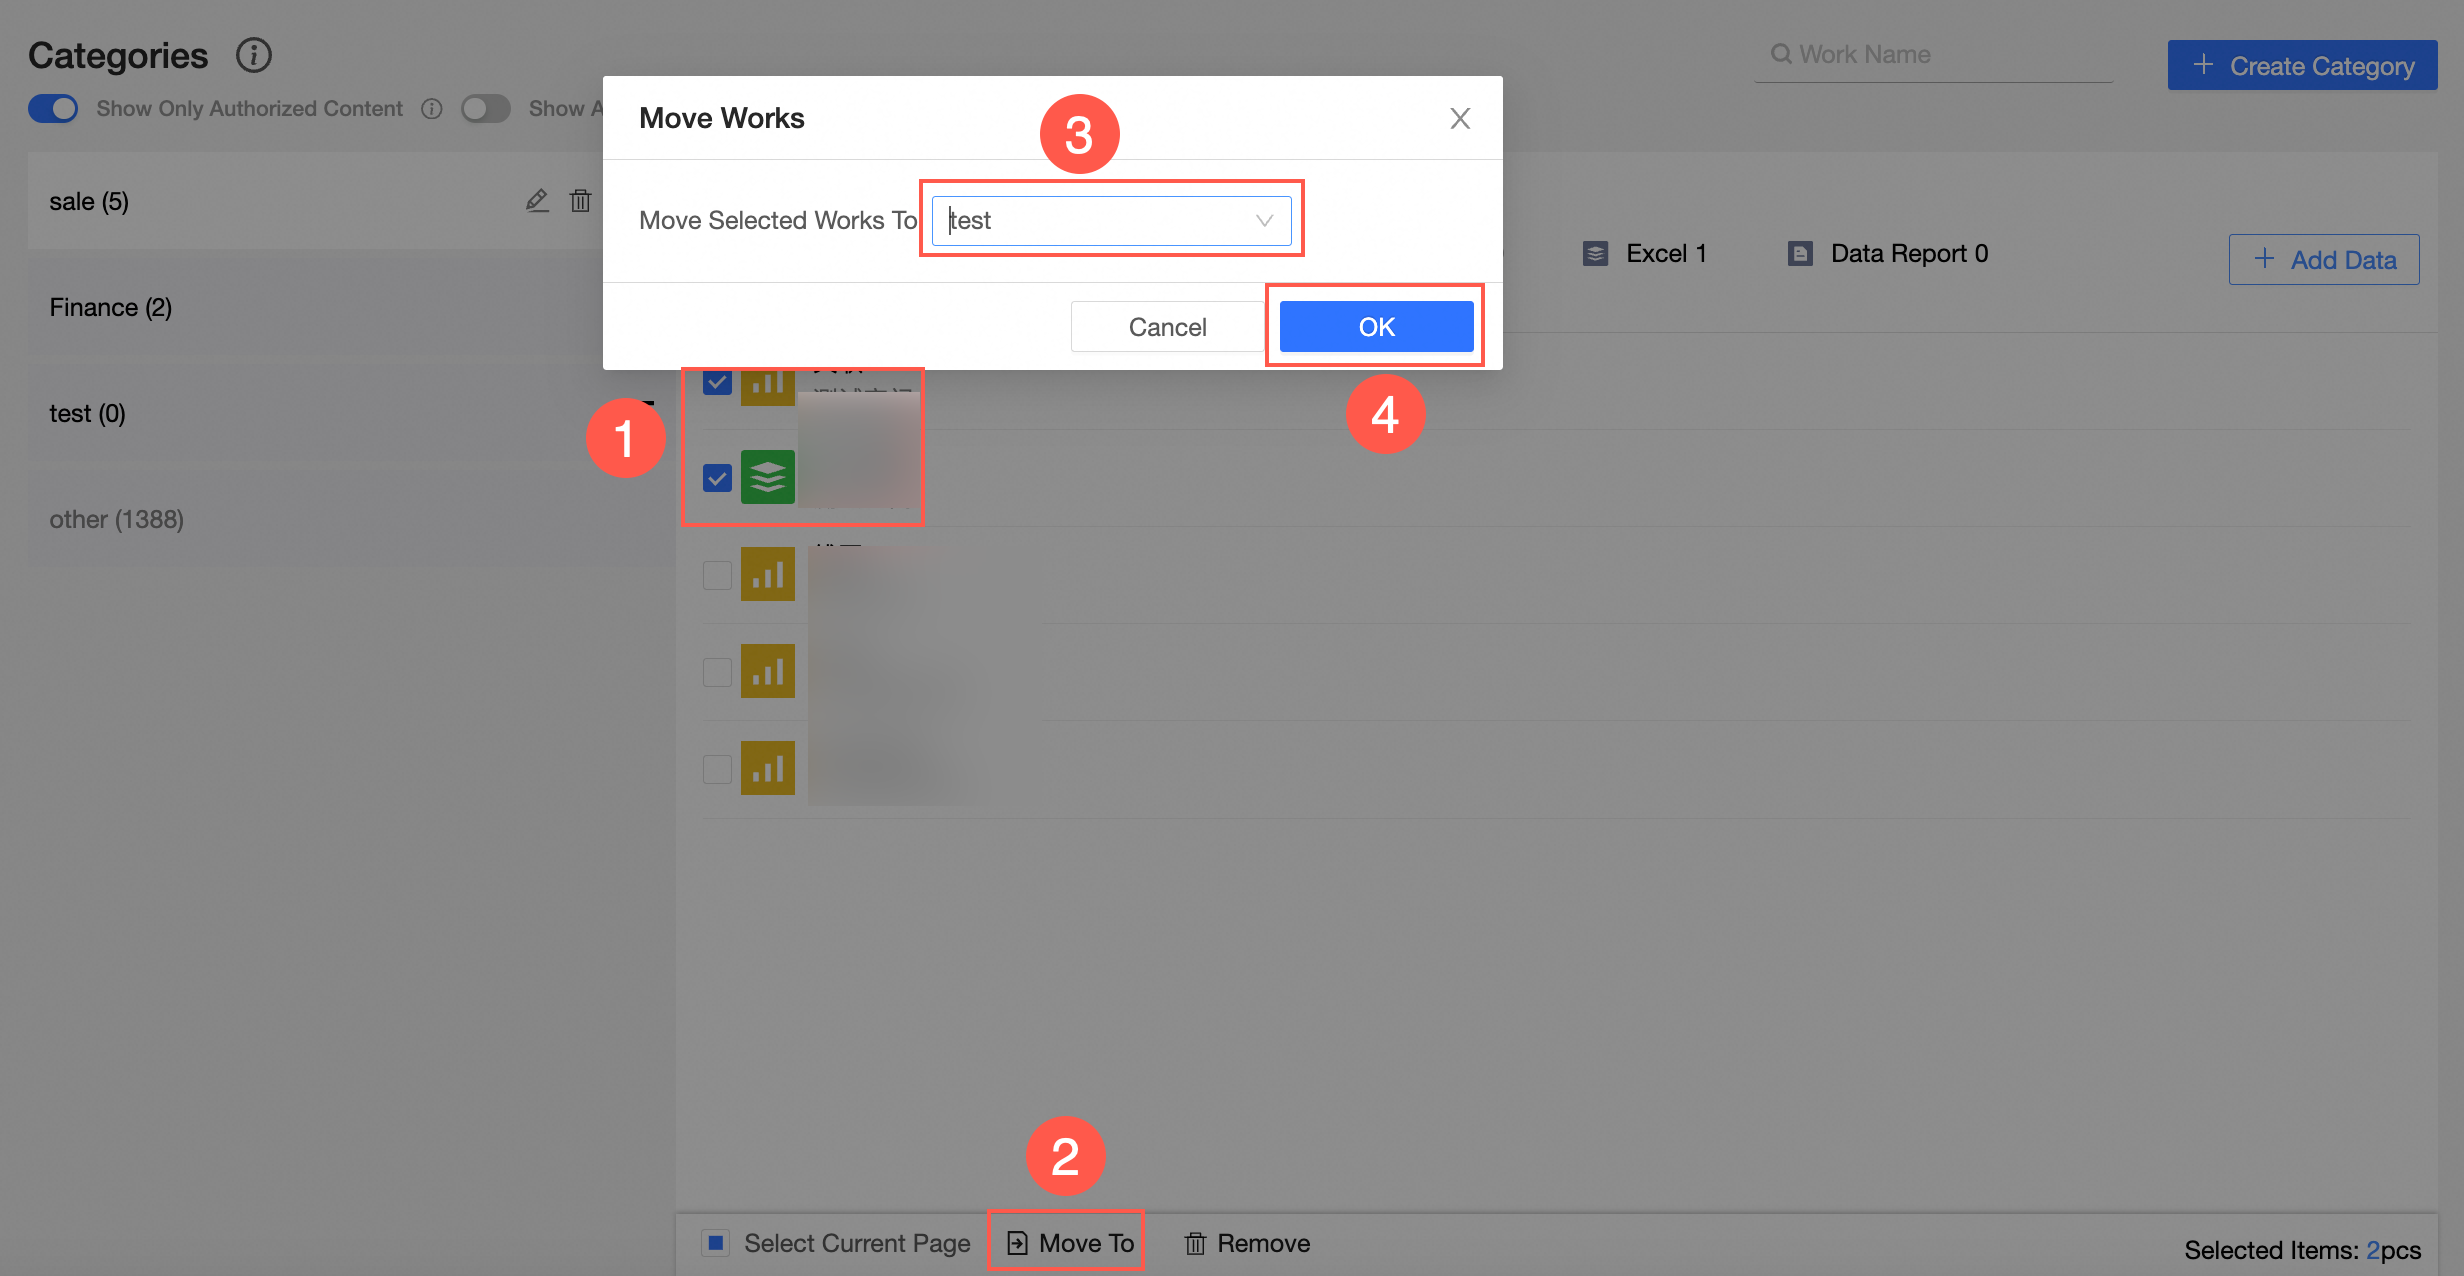
Manage Categories
You can perform the following operations on existing categories.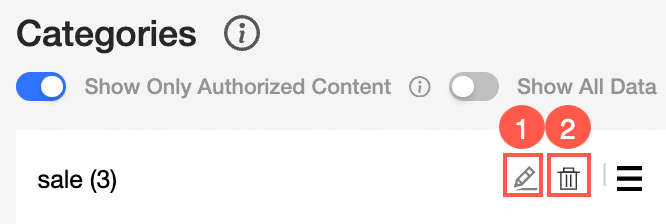
-
Modify a category name: Hover over the right side of the target category and click ① in the preceding figure.
-
Delete a category: Hover over the right side of the target category and click ② in the preceding figure.
The content of the deleted category is moved to Other and is not visible to mobile users.
-
Adjust the order of categories: Select the target category, hold down the left mouse button, drag it to the target position, and release.
Limits
-
Only the Advanced and Enterprise Standard editions support the category management feature.
-
Only organization administrators can create and manage categories.
Notes
-
After you delete a target category, the data in that category is automatically migrated to the Other category.
-
Data in Other is not visible on mobile devices. To display this data, move it to a category by using Move To.
-
After you enable Show All Content, uncategorized data can also be displayed in the DingTalk mini-application.
-
Workbooks displayed in the DingTalk mini-application may not render well if the table is too wide or the cell content is excessive. We recommend that you avoid displaying workbooks in categories.