Table filling
Complex form filling includes cell filling, table filling, and dataset filling. Create and manage fill-in tables to configure data entry controls across multiple columns.
Example
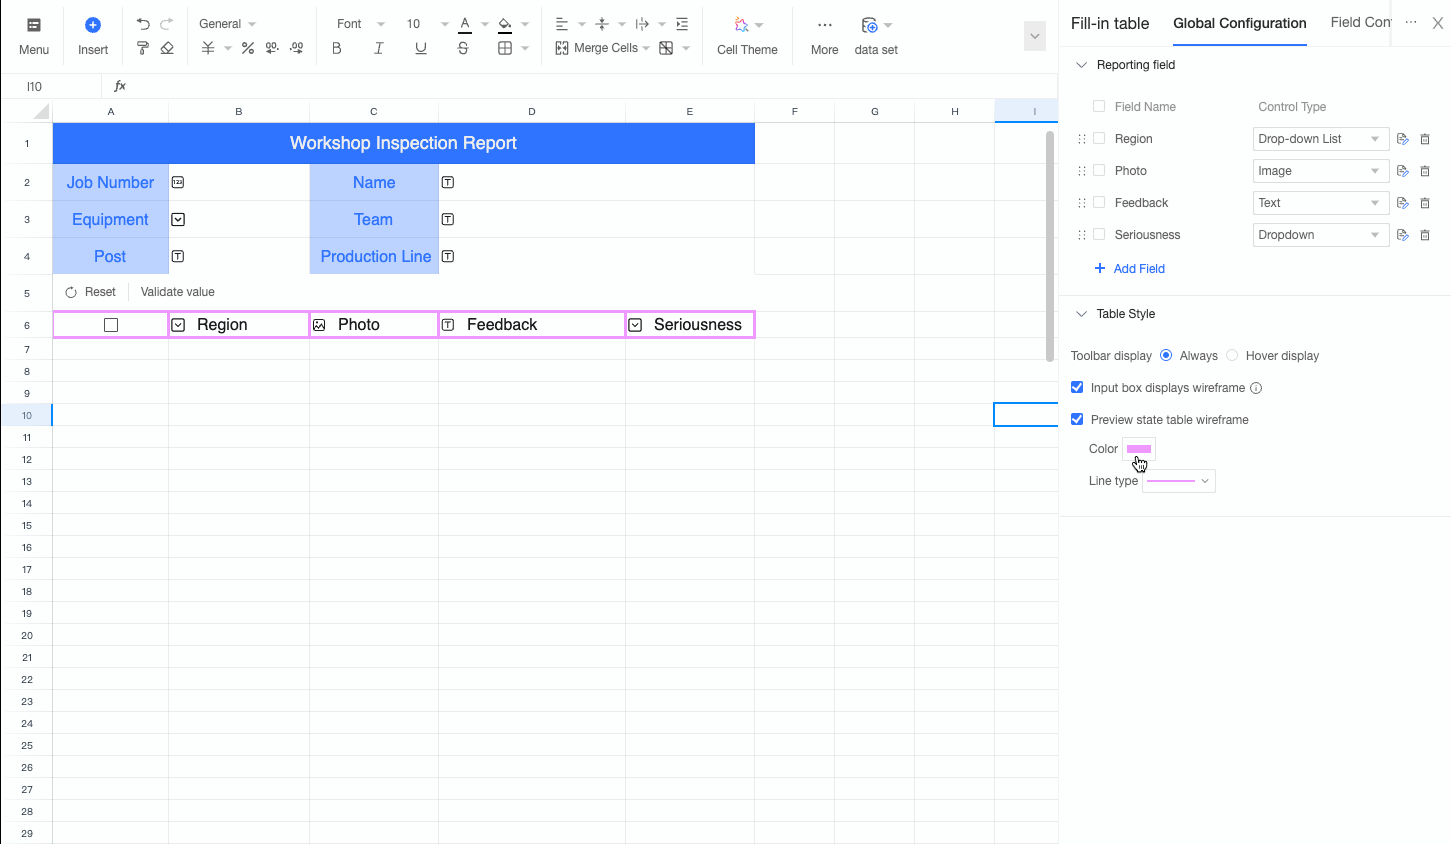
The following workshop inspection report uses table filling to configure fields such as Area, Inspection Photo, Problem Feedback, and Severity.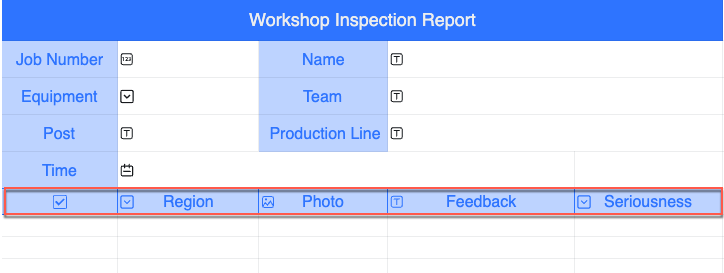
Fill-in table
A fill-in table is a horizontally expandable table that lets you quickly configure filling controls for all cells in a column. The following examples use a workshop inspection report.
Create fill-in table
-
Methods
-
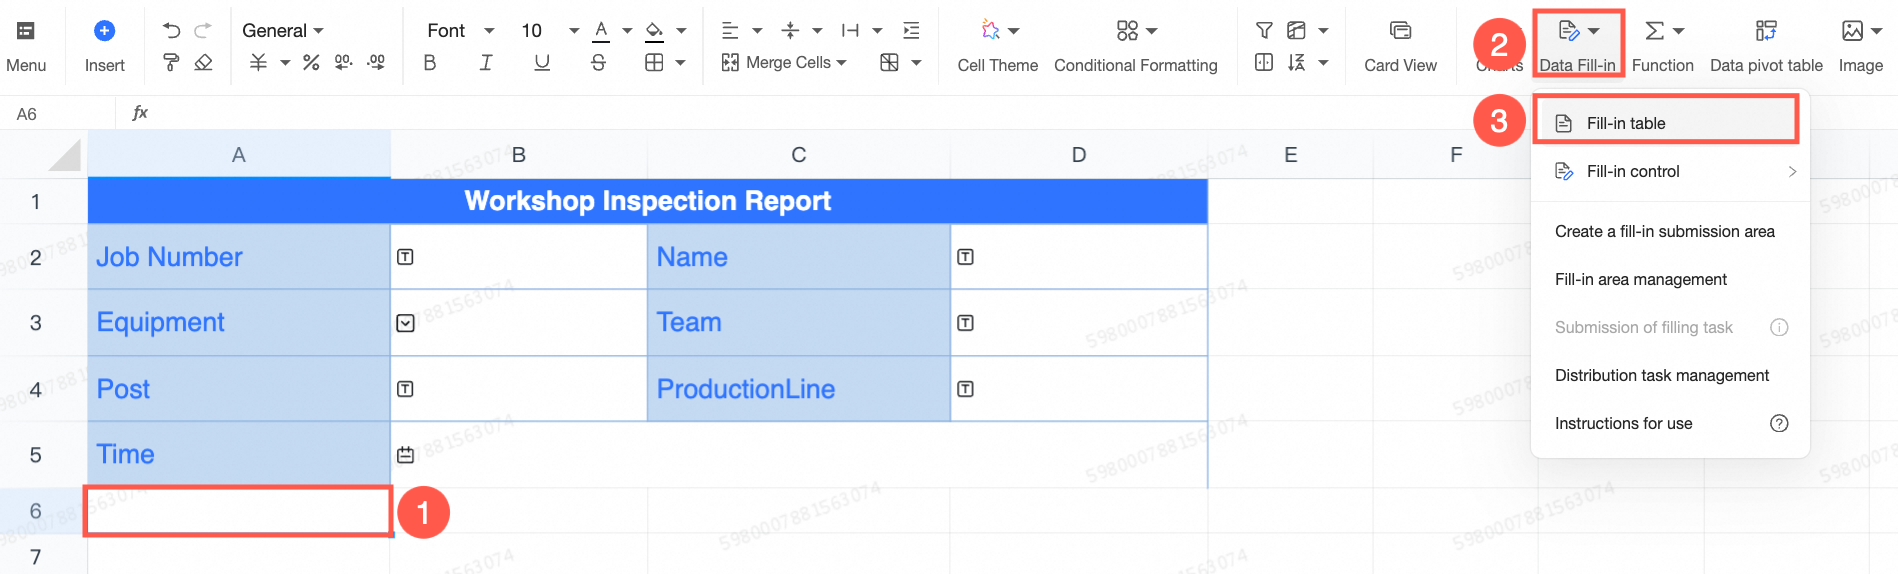
Method 1: Select the cell where you want to insert the fill-in table. In the upper-right corner of the toolbar, click Data entry and select Fill-in table. The configuration panel opens on the right, where you can configure the table's parameters.
-
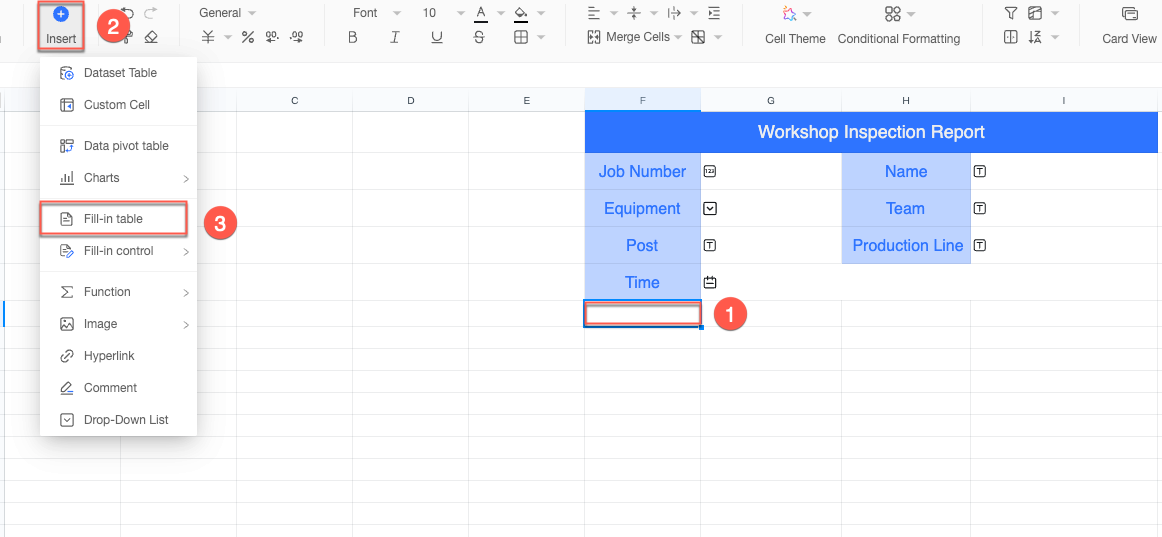
Method 2: Select the cell where you want to insert the fill-in table. In the upper-left corner of the menu bar, click Insert and select Fill-in report. The configuration panel opens on the right, where you can configure the report's parameters.
-
-
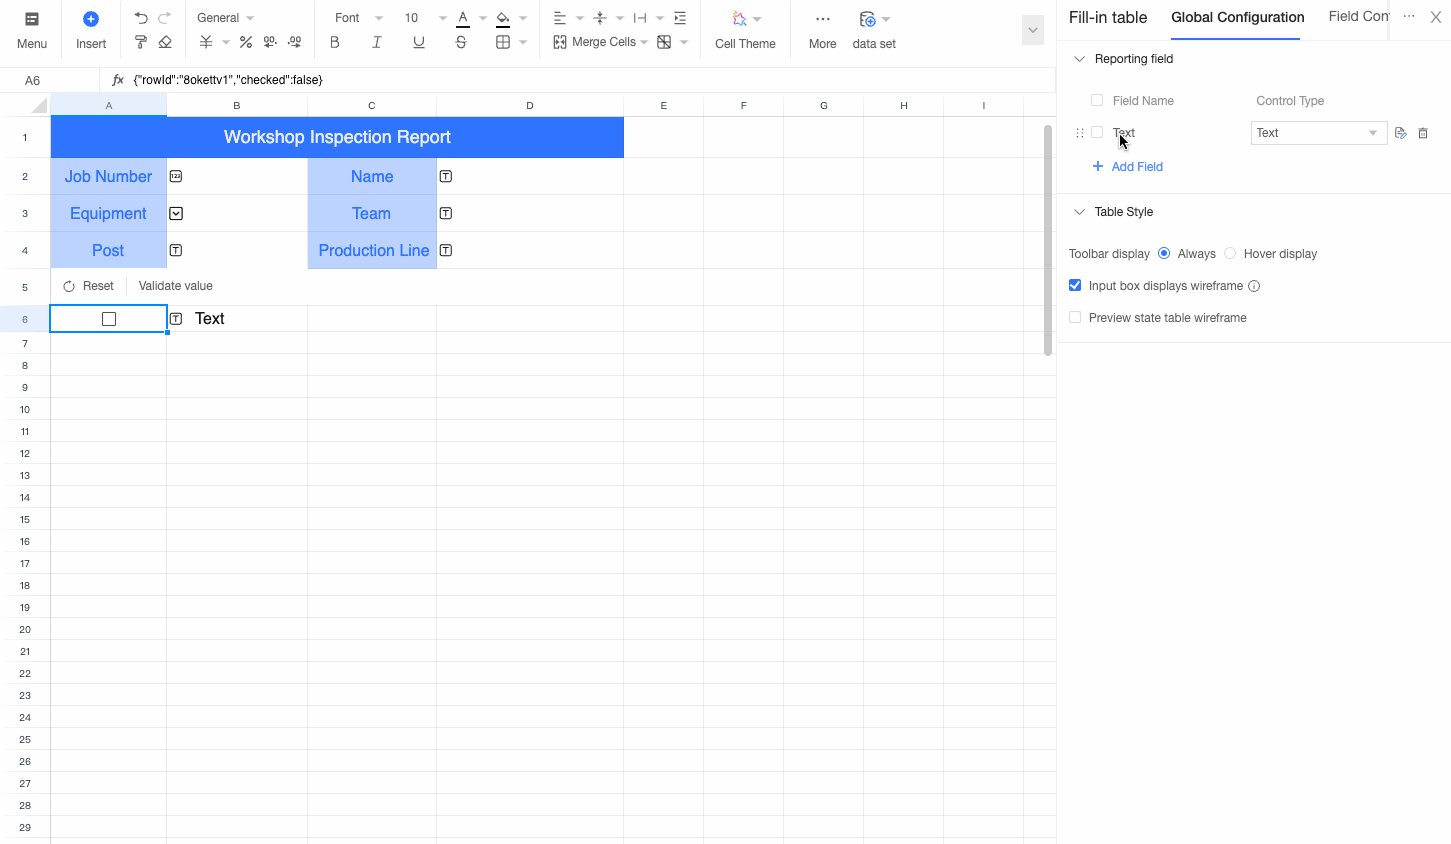
After you create the fill-in table, its configuration panel opens automatically.

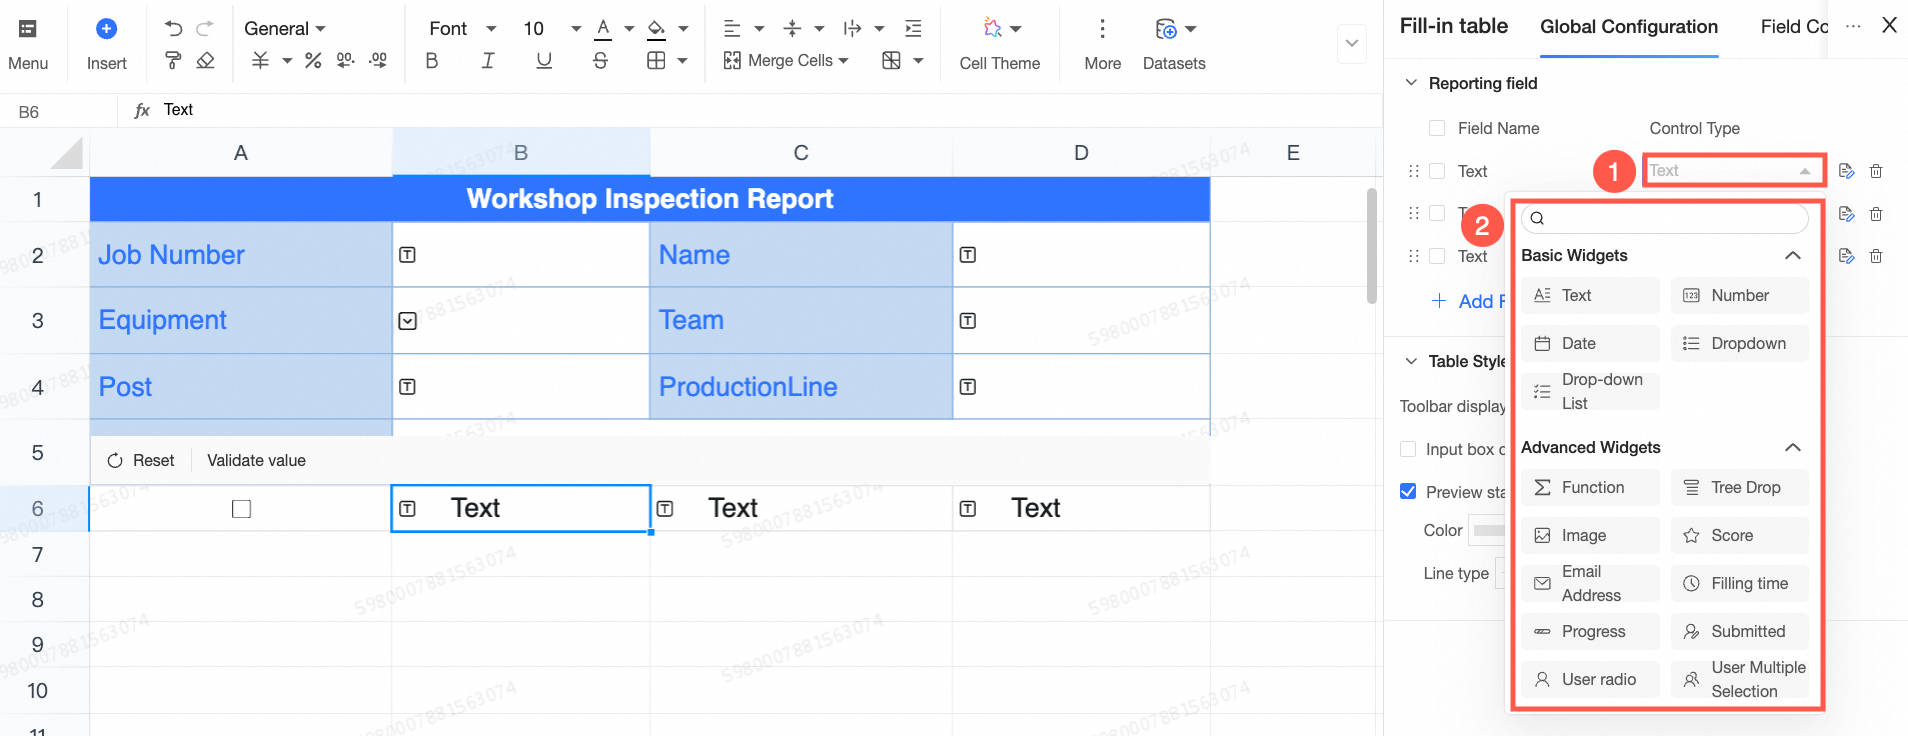
Global configuration
-
Fields
-
Click Add field to add a new column to the right of the fill-in table.
-
You can modify the control type. For table filling, the available control types include Function in addition to the standard cell controls.
-
Click the
 icon to open the field configuration page for that field. Click the
  icon to delete the field.
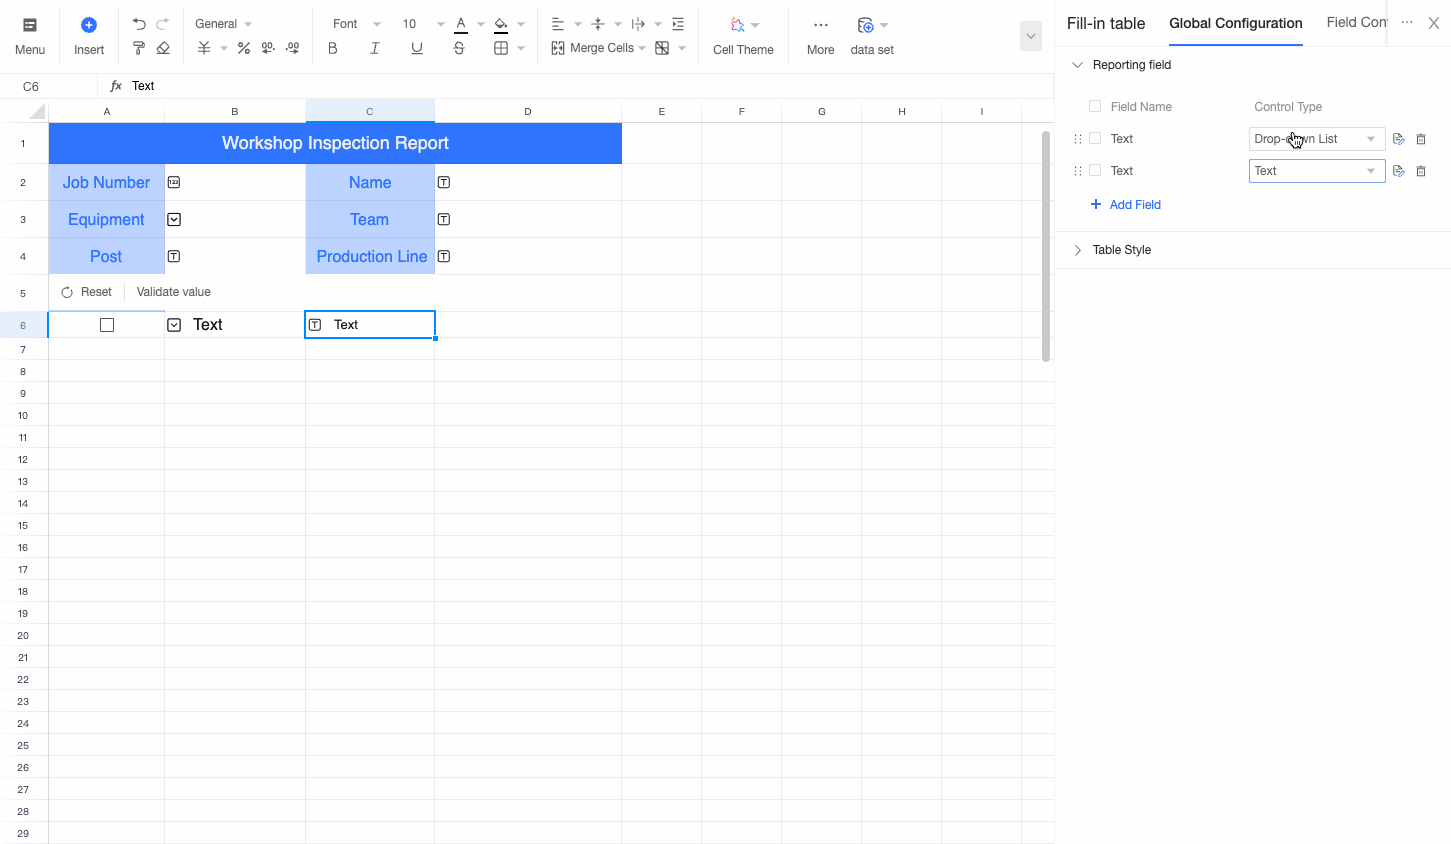
-
-
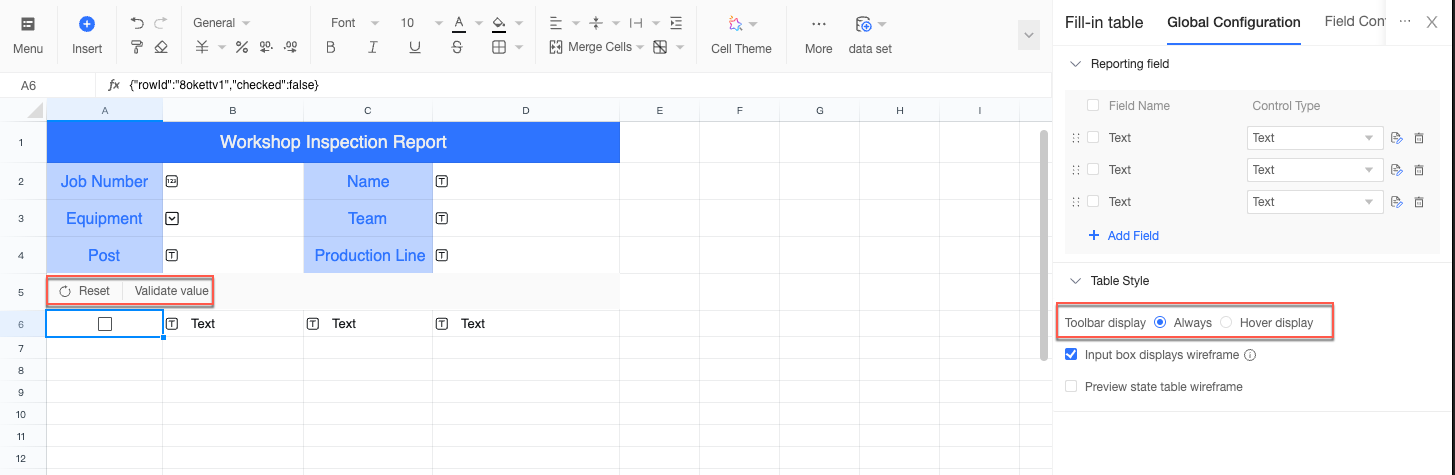
Table style
-
Set the toolbar display to Always show or Show on hover. The toolbar provides Add row, Reset (clears all data), Delete row, and Validate value actions.
-
Configuration UI
-
Result
 Note
NoteThe add row and delete row actions are available only after you set up a data submission area. You can add rows only if the write mode includes Add, and you can delete rows only if the write mode includes Delete. For more information, see Set data submission area.
-
-
Select Show border for input box to display borders around cells during data entry.
-
Select Preview table border to customize the border's Color and Line style.
-
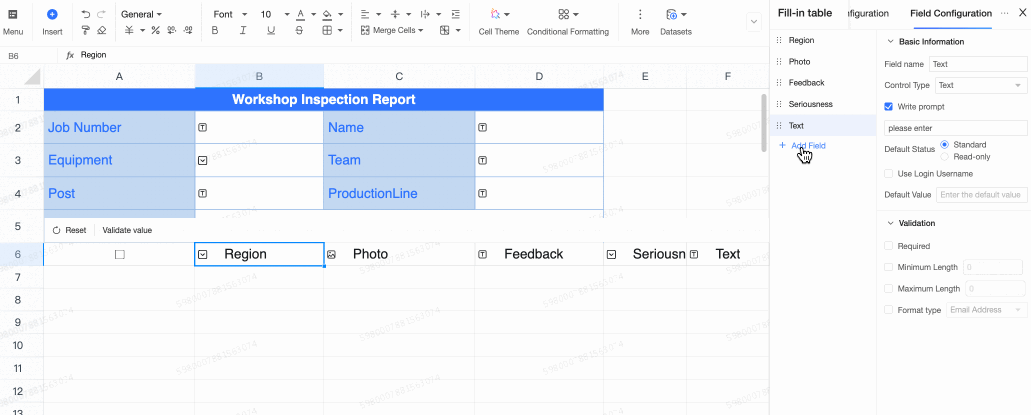
Field configuration
-
In the global configuration panel, click the edit
icon for a specific field to open that field's configuration panel. You can also switch directly between the Global and Field tabs.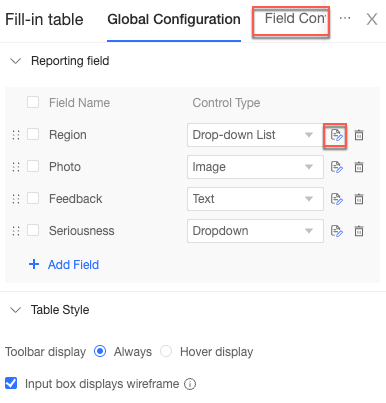
-
In the left-side menu of the field configuration page, you can add, delete, or drag fields to reorder them.
-
Modify the field name and control type as needed.
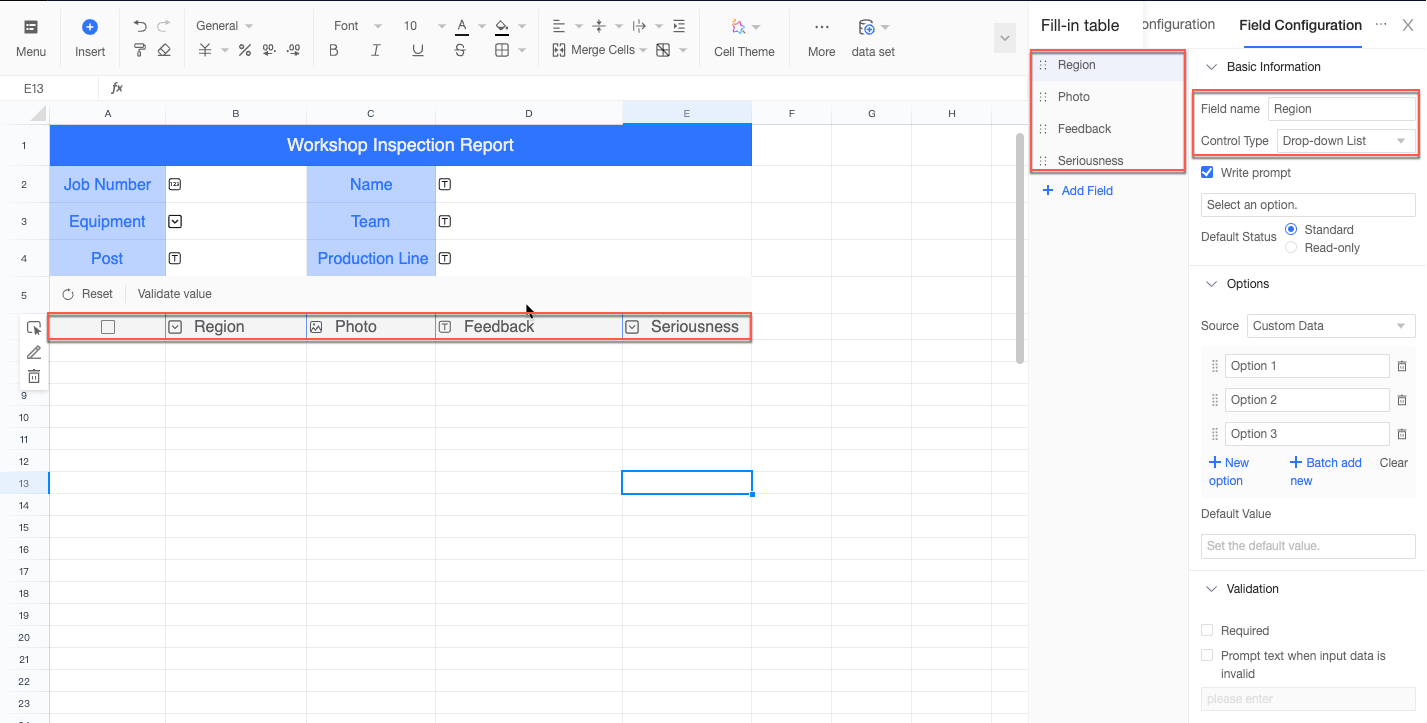 Configure the parameters for the field. A control's configuration options in a fill-in table are almost identical to those for a single cell control. For more information, see Filling controls.
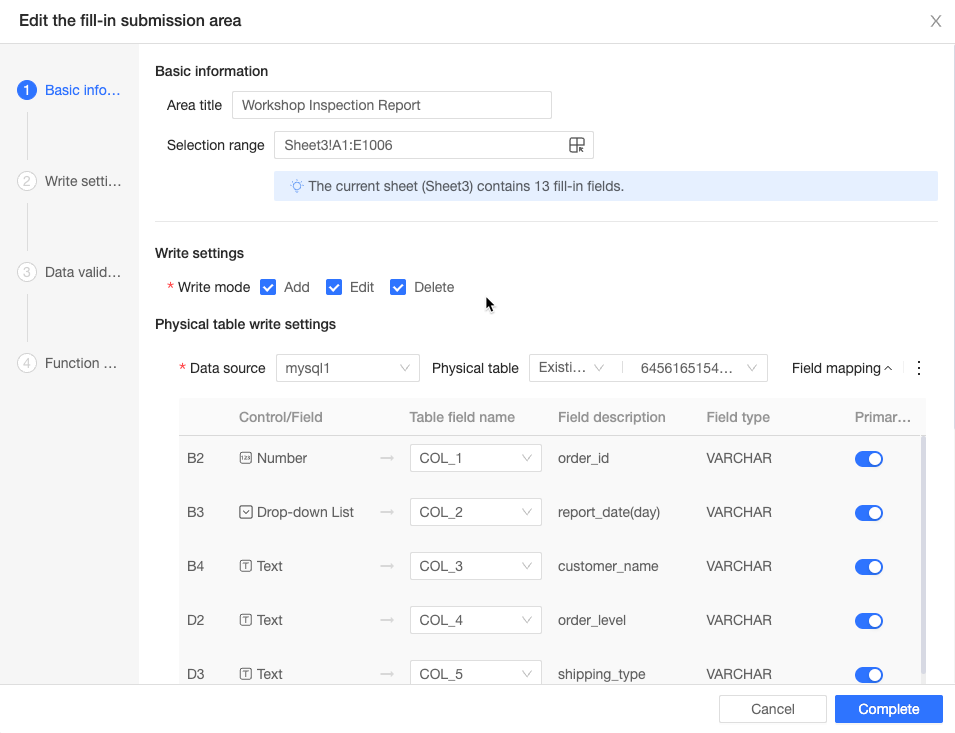
Next steps
-
After you create the fill-in table, configure a data submission area to map the entered data to the underlying data source. For more information, see Set data submission area.