Getting started with HTTP APIs
This topic describes how to create, publish, and call an HTTP API service to help you quickly get started with API Gateway.
Procedure
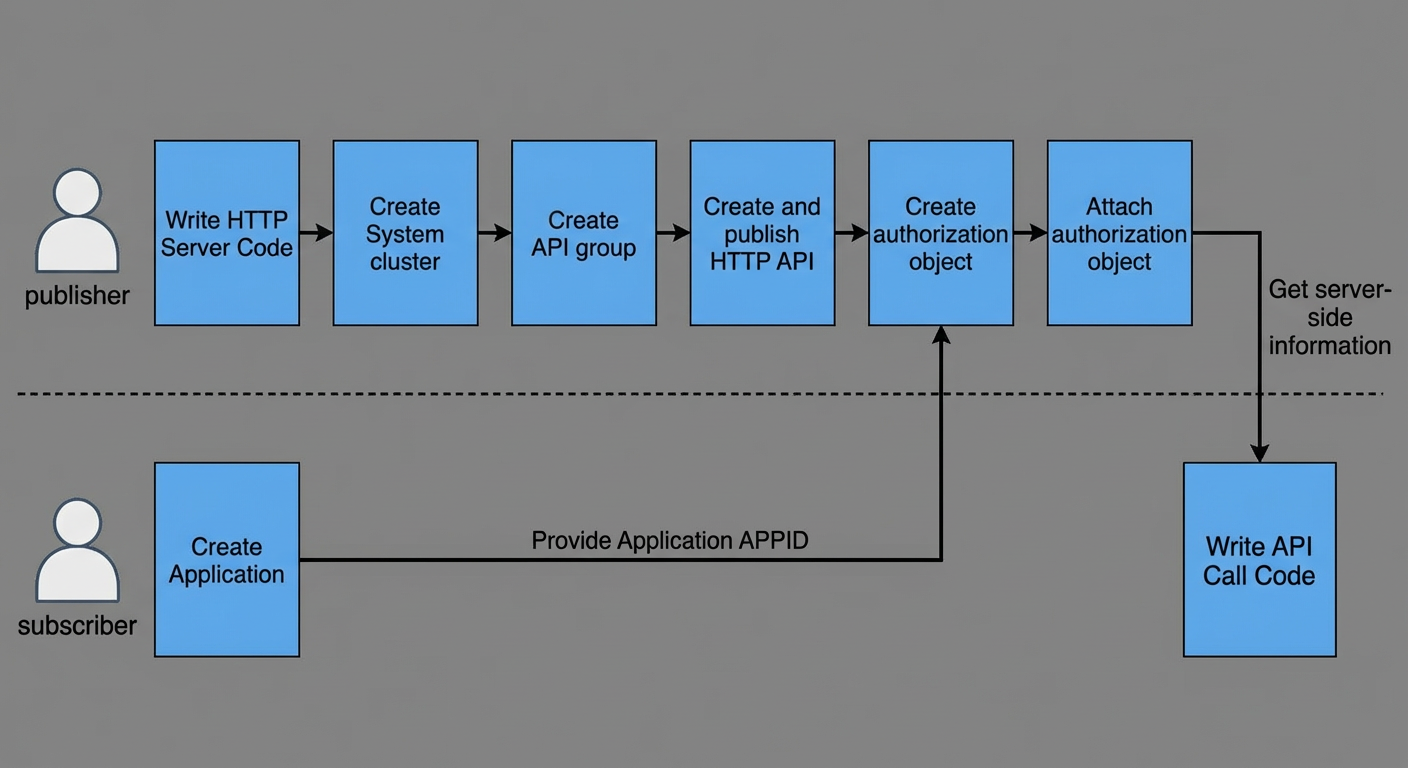
For more information about the role of API Gateway and the complete workflow, see Quick Start overview.
Sample project
To quickly develop and test the API Gateway HTTP API service, you can download the sample project for this topic.
Step 1: Write an HTTP server
You can write a simple Spring Boot server to quickly test how to publish and call an API Gateway HTTP API service.
If you do not use the backend cluster authentication feature, API Gateway has no specific requirements for the HTTP server. However, if you require mutual authentication between the gateway and the server, you must integrate the gateway software development kit (SDK). Currently, only a Java SDK is provided. For more information, see Develop an HTTP API service.
@RestController
public class StartController {

    @RequestMapping("/hello/world")
    public String hello() {
        System.out.println("hello");
        Map<String, String> m = new HashMap<>();
        m.put("hello", "world");

        return JSON.toJSONString(m);
    }
}
After you write the code, deploy the service on a server that is accessible to API Gateway, and then start the server.
Step 2: Create a system cluster
Log on to the Scalable Open Financial Architecture console.
In the navigation pane on the left, choose API Gateway > API Publishing > System Clusters.
On the System Clusters page, click Create System Cluster.
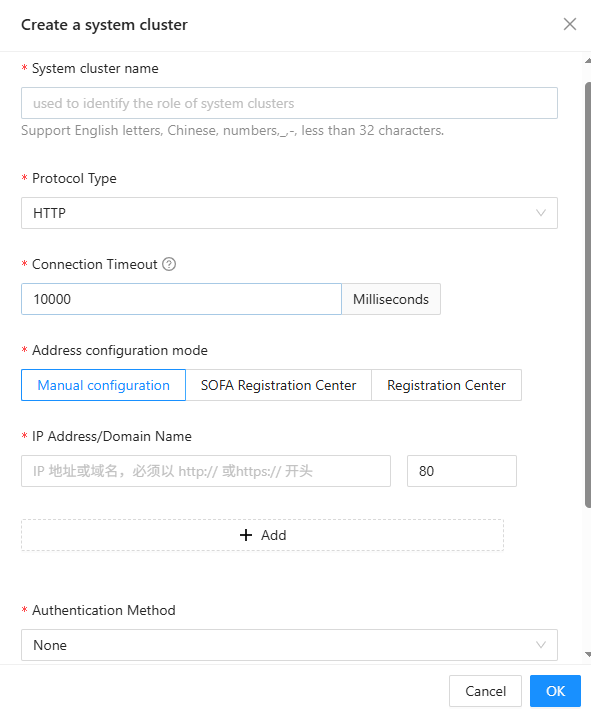
In the pop-up window, configure the following parameters:
System Cluster Name: Required. Specifies a name to identify the system cluster. In this example, enter
helloserver.Protocol Type: For this example, select
HTTP.Address Configuration Method: Select Manual Configuration. This lets you manually configure the IP address or domain name of the system cluster.
IP Address/Domain Name: The format is
Address:Port. In this example, set the IP address tohttp://127.0.0.1and the port number to8080.IP address or domain name:
The IP address format is (1-255).(0-255).(0-255).(0-255).
A domain name can contain letters, digits, or hyphens (-), with a maximum length of 200 characters.
The domain name must start with
http://orhttps://.
Port: The default port for HTTP is 80, and the default port for SOFARPC is 12200. The port number ranges from 1 to 65535.
Authentication Method: Specifies whether the gateway signs requests sent to the backend system cluster. In this example, select
Noneto disable authentication.NoteTo use authentication, you must integrate the gateway SDK when you write the backend system and develop the local API service in Step 1. For more information, see Write an HTTP API.
Description: Describes the purpose of the system cluster. The description can be up to 64 characters long and can be left empty.
Click OK.
Step 3: Create an API group
In the navigation pane on the left, choose API Publishing > API Groups.
In the upper-right corner of the API group list, click Create Group.
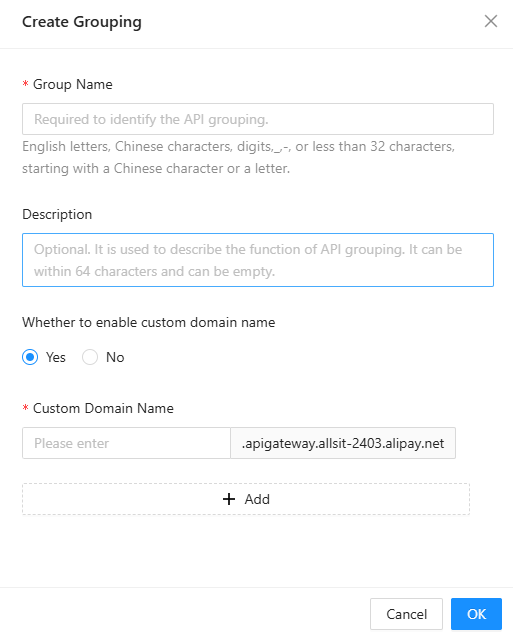
In the pop-up window, enter the API group information:
Group Name: Required. Specifies a name to identify the API group. The name can contain English letters, Chinese characters, digits, underscores (_), and hyphens (-), and must be no more than 32 characters long. In this example, enter
hello.Description: Optional. Describes the purpose of the API group. The description can be up to 64 characters long and can be left empty.
Click OK.
Step 4: Create and publish an HTTP API
In the navigation pane on the left, choose API Publishing > API Management. In the upper-right corner of the page, click Create API.
On the new page, select HTTP API as the type and click Create.
In the Define API step, configure the following parameters:
API Group: Required. Select the API group that you created in Step 3.
API Name: Required. Specifies a name to identify the API. The name can contain English letters, Chinese characters, digits, underscores (_), and hyphens (-), and must be no more than 32 characters long. In this example, enter
hello.NoteAPI names must be unique within the same API group.
Description: Optional. Describes the purpose of the API. The description can be up to 64 characters long.
API Authorization Application Type: Required. Specifies the type of application that can subscribe to and call this API. For this example, select Application.
Request Path: Required. The URL path used by an application to access the resource. In this example, enter
/hello/world.Path Matching Rule: Select Exact Match. This rule requires that the request path must be an exact match. For more information, see Path matching rules.
Method: Required. Indicates the operation to be performed on the given HTTP resource. This example uses
GET.Request Parameters: The parameters that an API subscriber includes when sending a request to the gateway. For more information, see API property description > Request parameters.
Response Parameters: The return value type and error codes that the gateway sends in a response to the subscriber. For more information, see API property description > Response parameters.
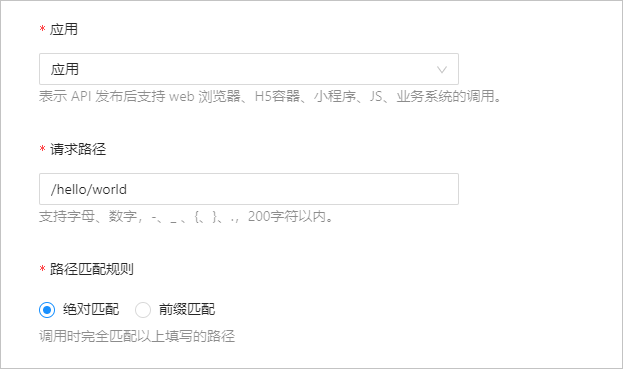
Click Next. On the backend configuration page, select a Backend Configuration Type and configure the backend service. In this example, select System Cluster and configure the cluster details.
Protocol Type: Required. The communication protocol used by the backend service to which the gateway forwards requests. For this example, select
HTTP.Request Path: The resource URL of the backend service. In this example, enter
/hello/world.Timeout: Required. The API request timeout period in milliseconds (ms). Keep the default value of 3000 ms.
Routing Policy: Required. The routing policy used by the gateway when it receives a request. In this example, select Route by Request Path, which means direct forwarding.
System Cluster: Required. Select the system cluster that you created in Step 2, which is
helloserver.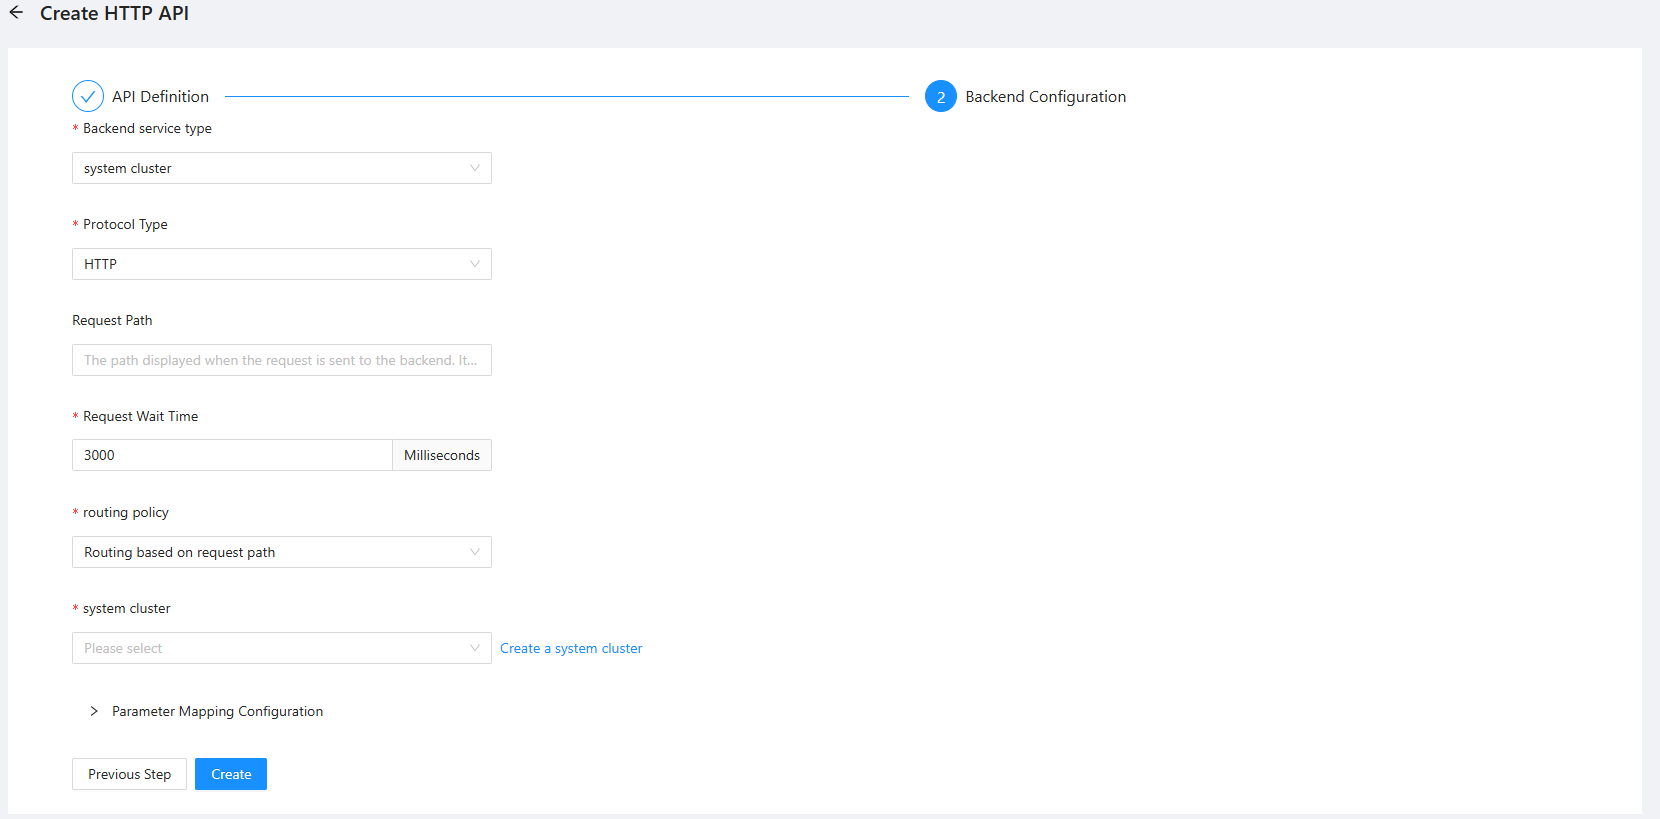
Click Create.
After the API is created, click Publish Now.
Step 5: Create an application
In the navigation pane on the left, choose API Subscription > Application Management. In the upper-right corner of the page, click Create Application.
In the Create Application window, set Application Type to Application.
Enter an Application Name to identify the application. In this example, enter
hello.
Click OK.
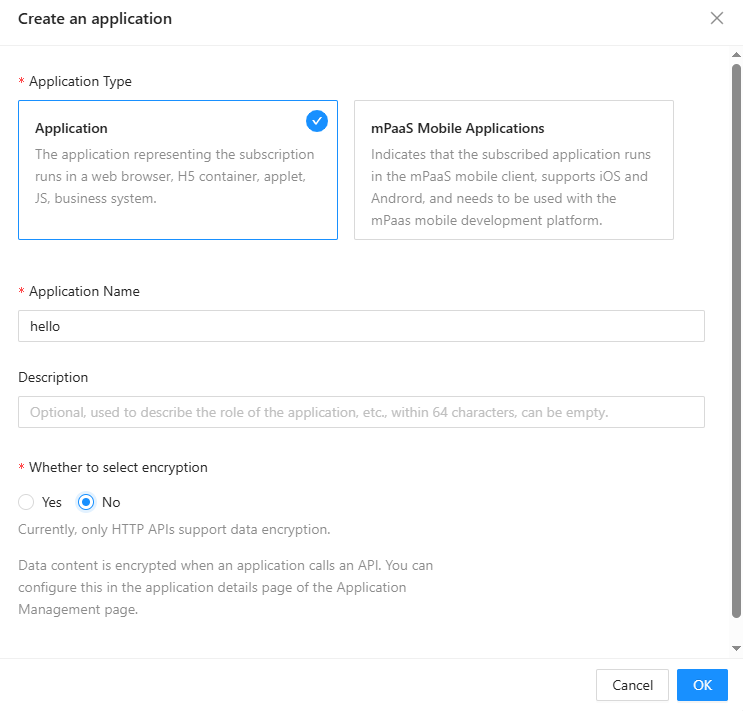
After the application is created, the subscriber can retrieve the AppID of the application from the application details page. The subscriber then provides this AppID to the API publisher to request authorization to access the API.
Step 6: Create an authorization object
In the navigation pane on the left, choose API Publishing > Authorization Management. In the upper-right corner of the page, click Create Authorization Object.
In the Create Authorization Object window, configure the authorization information for the subscribing application.
Application Source: Required. Select Internal System. This grants authorization for application subscriptions in the current environment of the current tenant.
Application Name: Enter the name of the application that you created in Step 5, such as
hello. The system automatically retrieves its AppID and type.Company/Department: Identifies the company or department to which the application belongs. This can be left empty.
Description: Enter notes about the authorization object. This can be left empty.
Click OK.
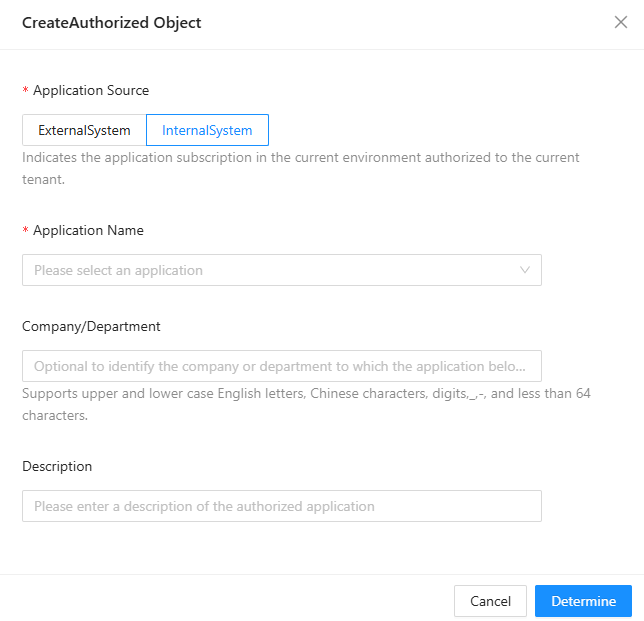
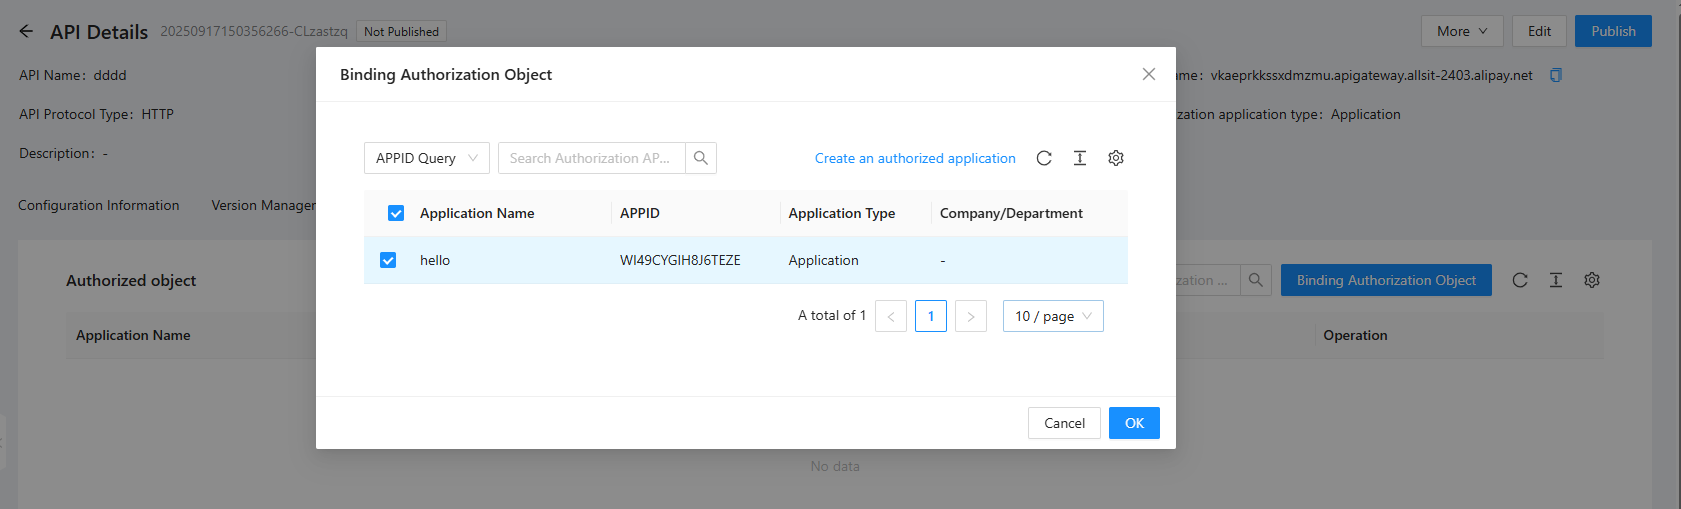
Step 7: Attach an authorization object
On the API Management page, find the API that you want to authorize and navigate to its details page.
On the Authorization Objects tab, click Attach Authorization Object.
In the Add Authorization Object window, find the authorization object that you created in Step 6.
Select the application and click OK to authorize the API.
Step 8: Write the API call code
Obtain the following service configuration information:
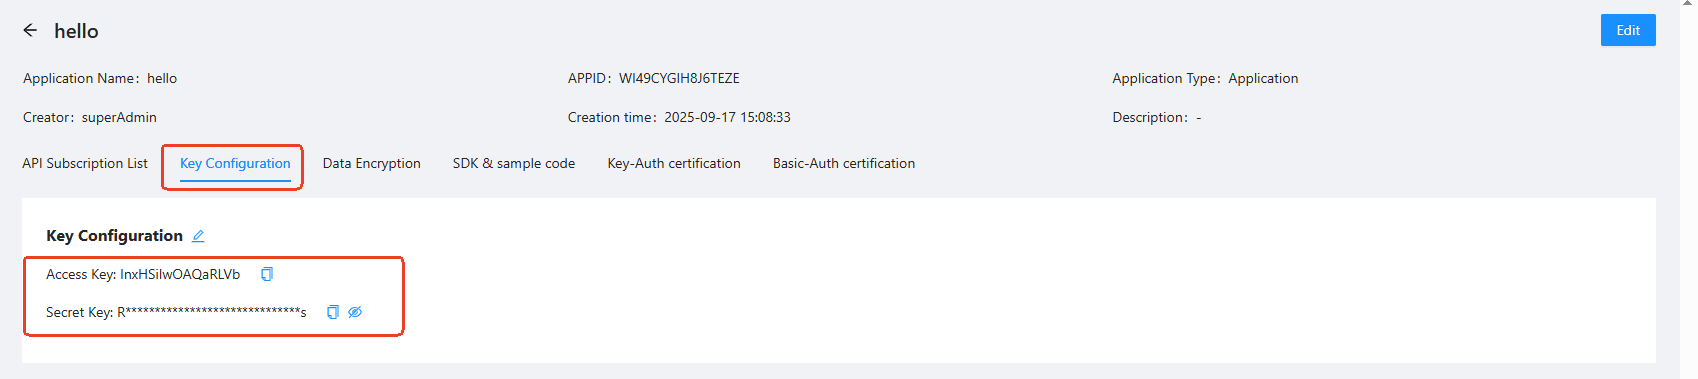
On the application details page of the subscriber, obtain the application's AccessKey and SecretKey.
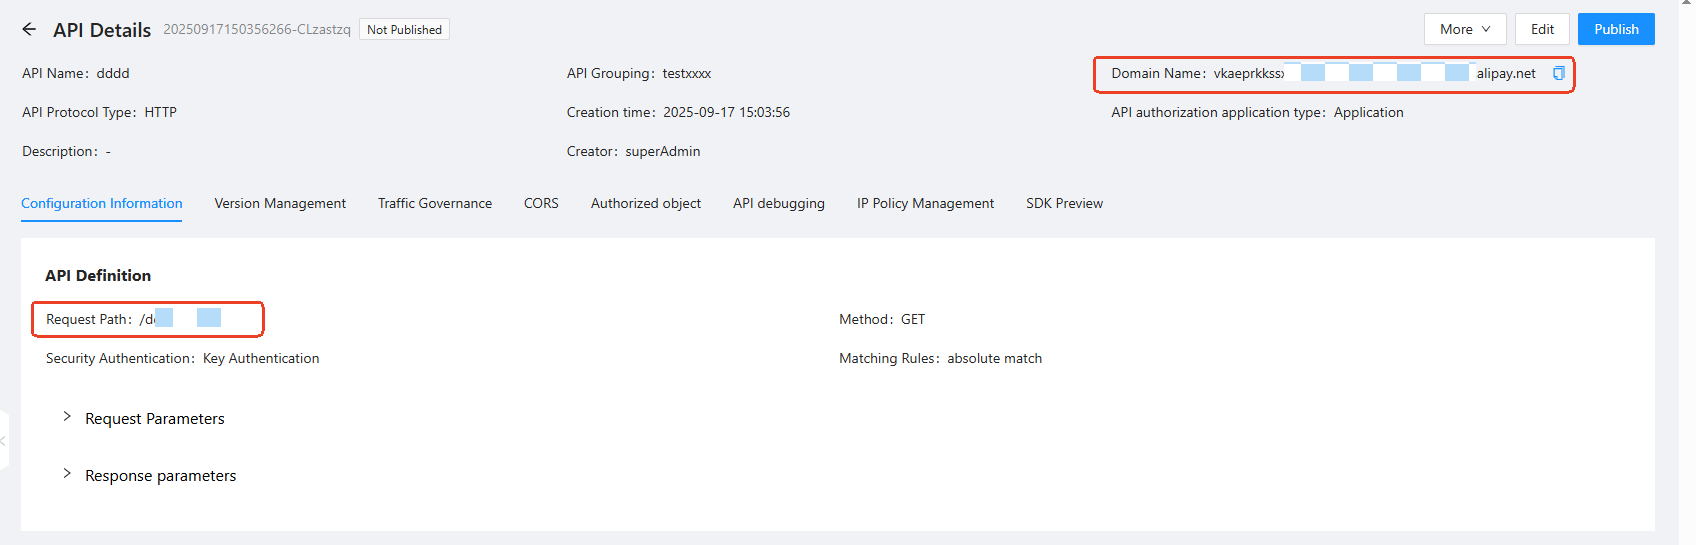
On the API details page, obtain the API's domain name (host), request path (path), and method.
Write the call code. The following Java code is an example:
NoteIf key-based authentication is enabled for the API, configure the corresponding AccessKey and SecretKey in the project. You can use startup parameters and environment variables for this configuration.
# The AccessKey and SecretKey for the client request are the application's key information
gateway.accessKey=<testAccessKey ID>
gateway.secretKey=<testSecretKey ID>
apigateway.url=<yourGatewayURL>
@Value("${gateway.accessKey}") private String accessKey; @Value("${gateway.secretKey}") private String secretKey; @Value("${apigateway.url}") private String gatewayurl; @Before public void initClient() { // Initialize the request client ApiSecretKey apiSecretKey = new ApiSecretKey(gateway.accessKey, gateway.secretKey); List<ApiSecretKey> secretKeys = new ArrayList<>(); secretKeys.add(apiSecretKey); apiClient = new DefaultApiClient(gatewayUrl, secretKeys); } @Test public void testNoSignHttp() { ParamGetRequest request = new ParamGetRequest(); request.setPath("hello"); // Specifies whether to perform signature verification on the response request.setClientCheckSign(false); ApiResponse response = apiClient.execute(request); System.out.println(JSON.toJSONString(response)); }After you make the call, the following result is returned:
{"body":"{\"hello\":\"world\"}"}
Notes
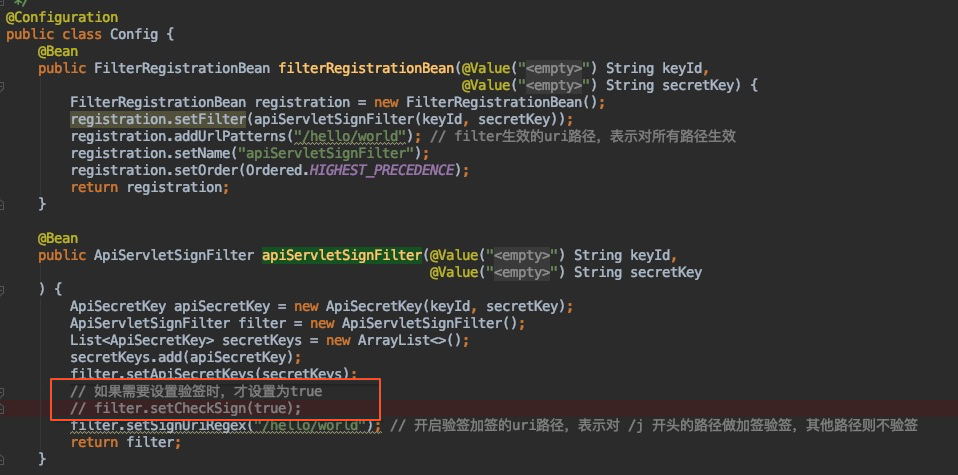
If you use the sample project from this document, you must comment out filter.setCheckSign(true); in the com.alipay.gateway.quickstart.Config#apiServletSignFilter method. This disables signature verification for requests. If you do not comment out this line, a "Failed to get signature key" error is reported.