Create and execute your first Terraform template
Create and manage your first cloud resource—a Virtual Private Cloud (VPC)—by using a Quick Start template in the Automation Service Desk console.
Core Concepts
Before you begin, understand the following core concepts:
|
Concept |
Description |
Relationship |
|
Template |
Defines what to create, which is a set of Terraform code. |
A template can create multiple tasks. |
|
Task |
Defines how to execute, including the template, variable values, and execution mode. |
A task can execute multiple times. Each execution generates a job. |
|
Job |
A specific execution record, such as Plan, Apply, or Destroy. |
A job is a single run instance of a task. |
Operation Flow
Follow these steps to create a VPC. The process covers obtaining a template, creating resources, and cleaning up the environment:
-
Create a template: Create an execution template based on the official Quick Start Terraform module.
-
Create a task: Create a task based on the template and initiate a job to preview the resources to be created.
-
Execute the task: After confirming the preview content is correct, execute the job to create VPC resources and verify the result in the console.
-
Destroy resources: Clean up the resources created in the preceding process.
By default, an AccessKey (AK) is used for authentication. This method is only for quick personal testing. In production environments or team collaboration scenarios, use a more secure RAM role for authentication to avoid security risks.
Procedure
Step 1: Create a Template
A template manages Terraform code in Automation Service Desk. It follows the official Terraform Module specification and defines cloud products and their dependencies for deployment.
Create a template based on the official Terraform Quick Start module to define a VPC.
-
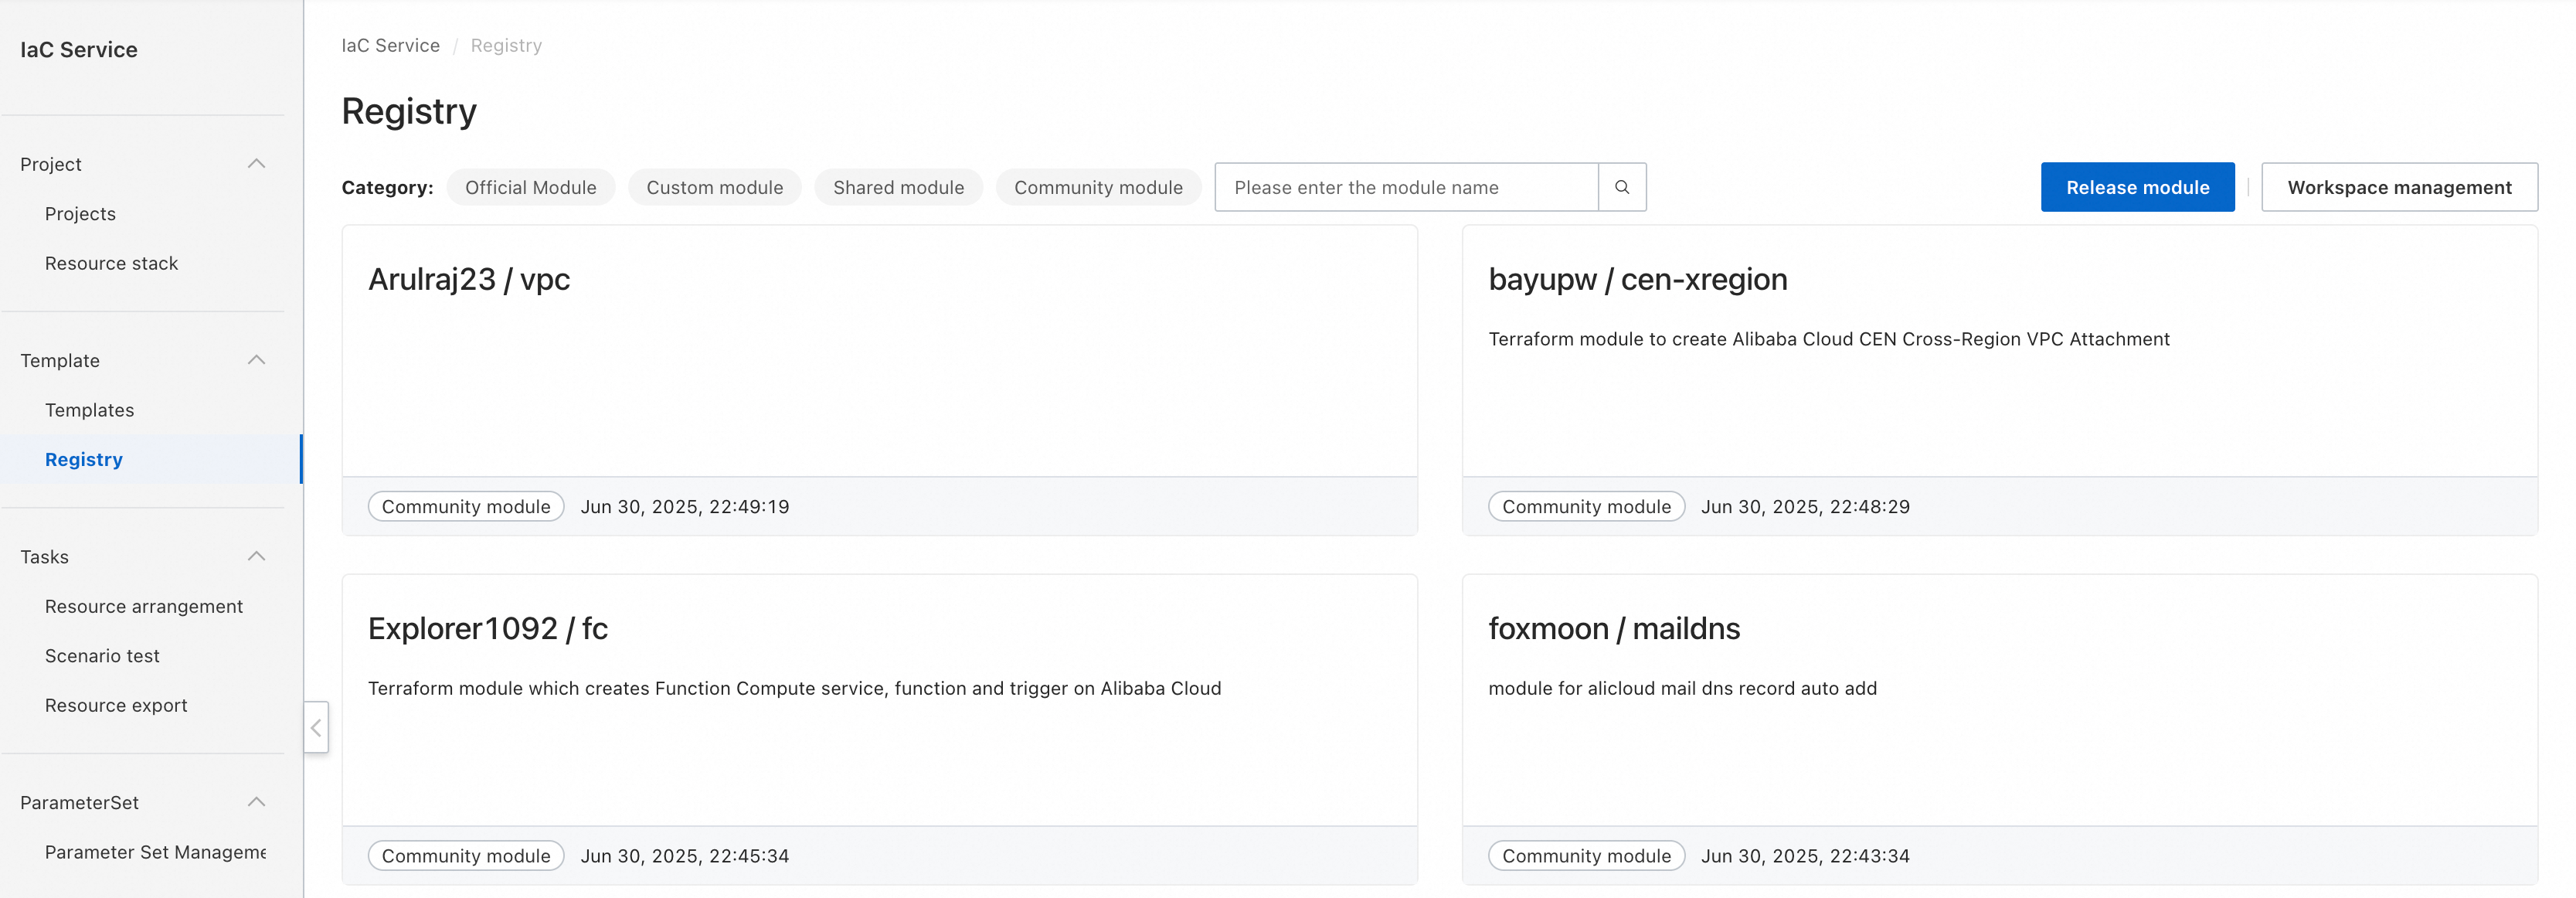
Log on to the IaC Service. Then, go to Templates > Registry.
-
Set the module Category to Official Module. Search for
vpc. Then, select and enter thealibaba / vpcmodule.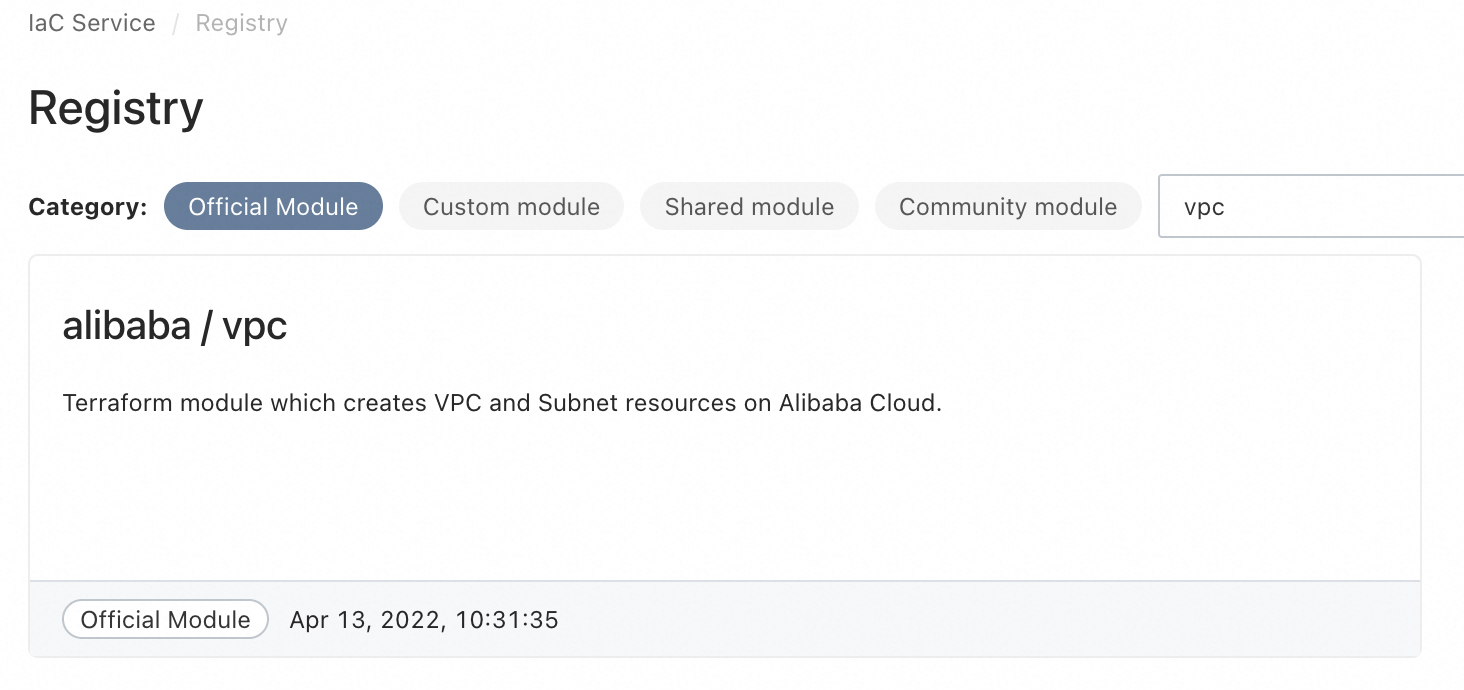
-
On the Module management tab, view the Terraform code, input and output parameters, and cloud resources involved in the
alibaba / vpcmodule. Click Create Template in the upper-right corner of the page to create a template using this module.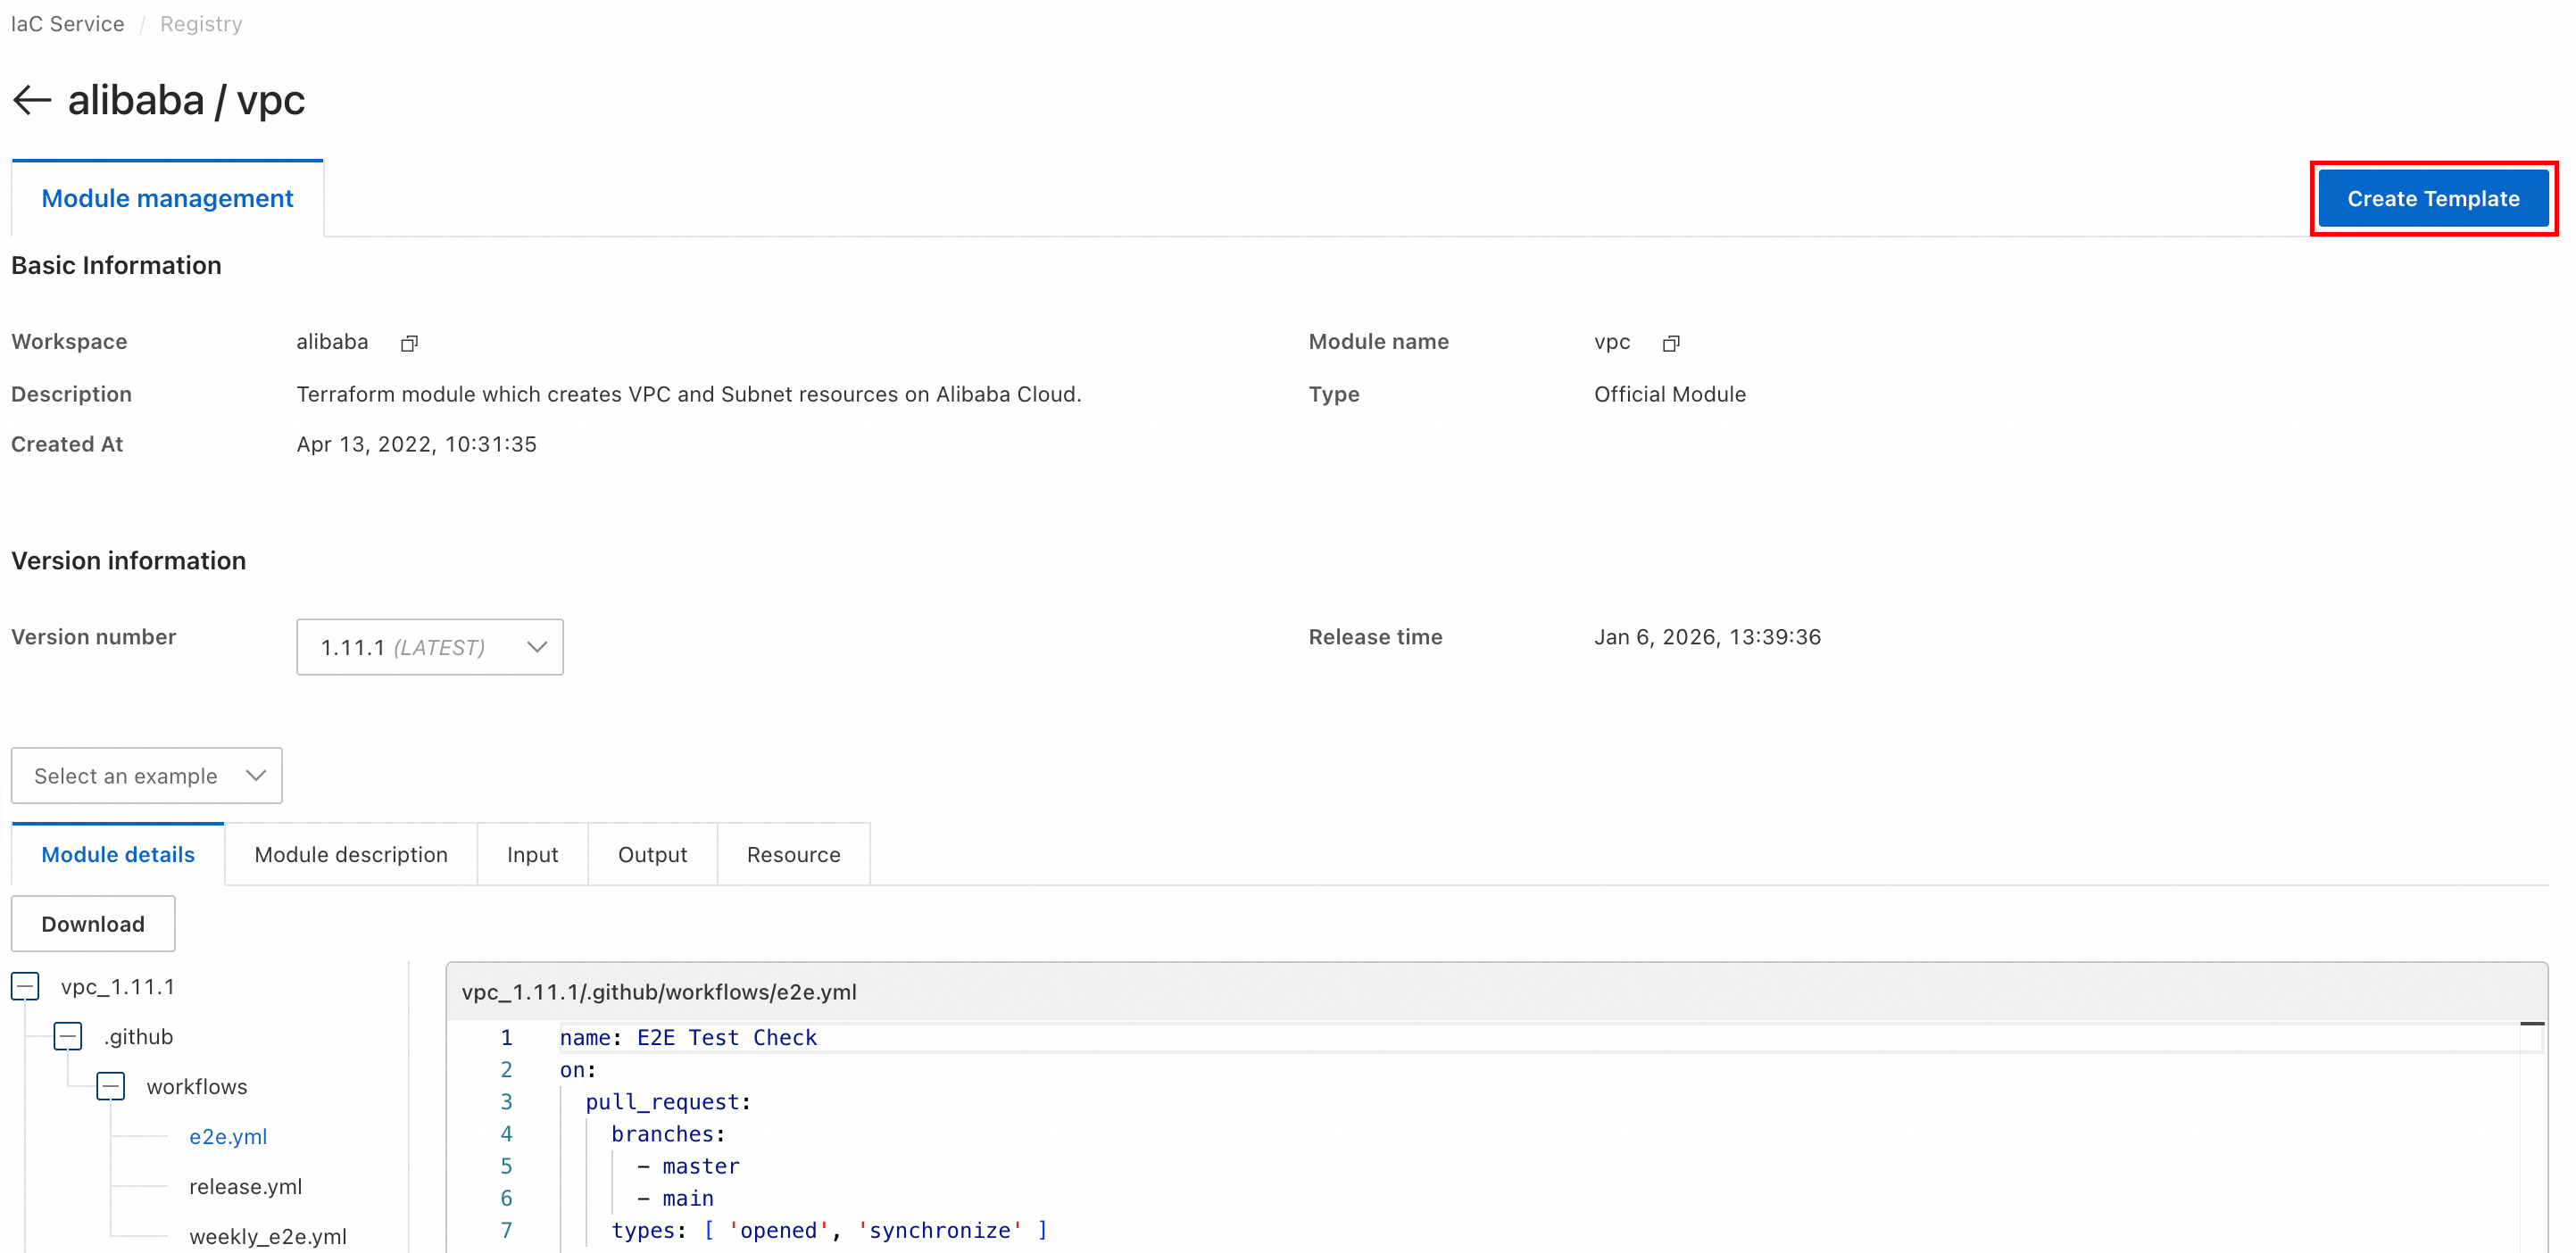
-
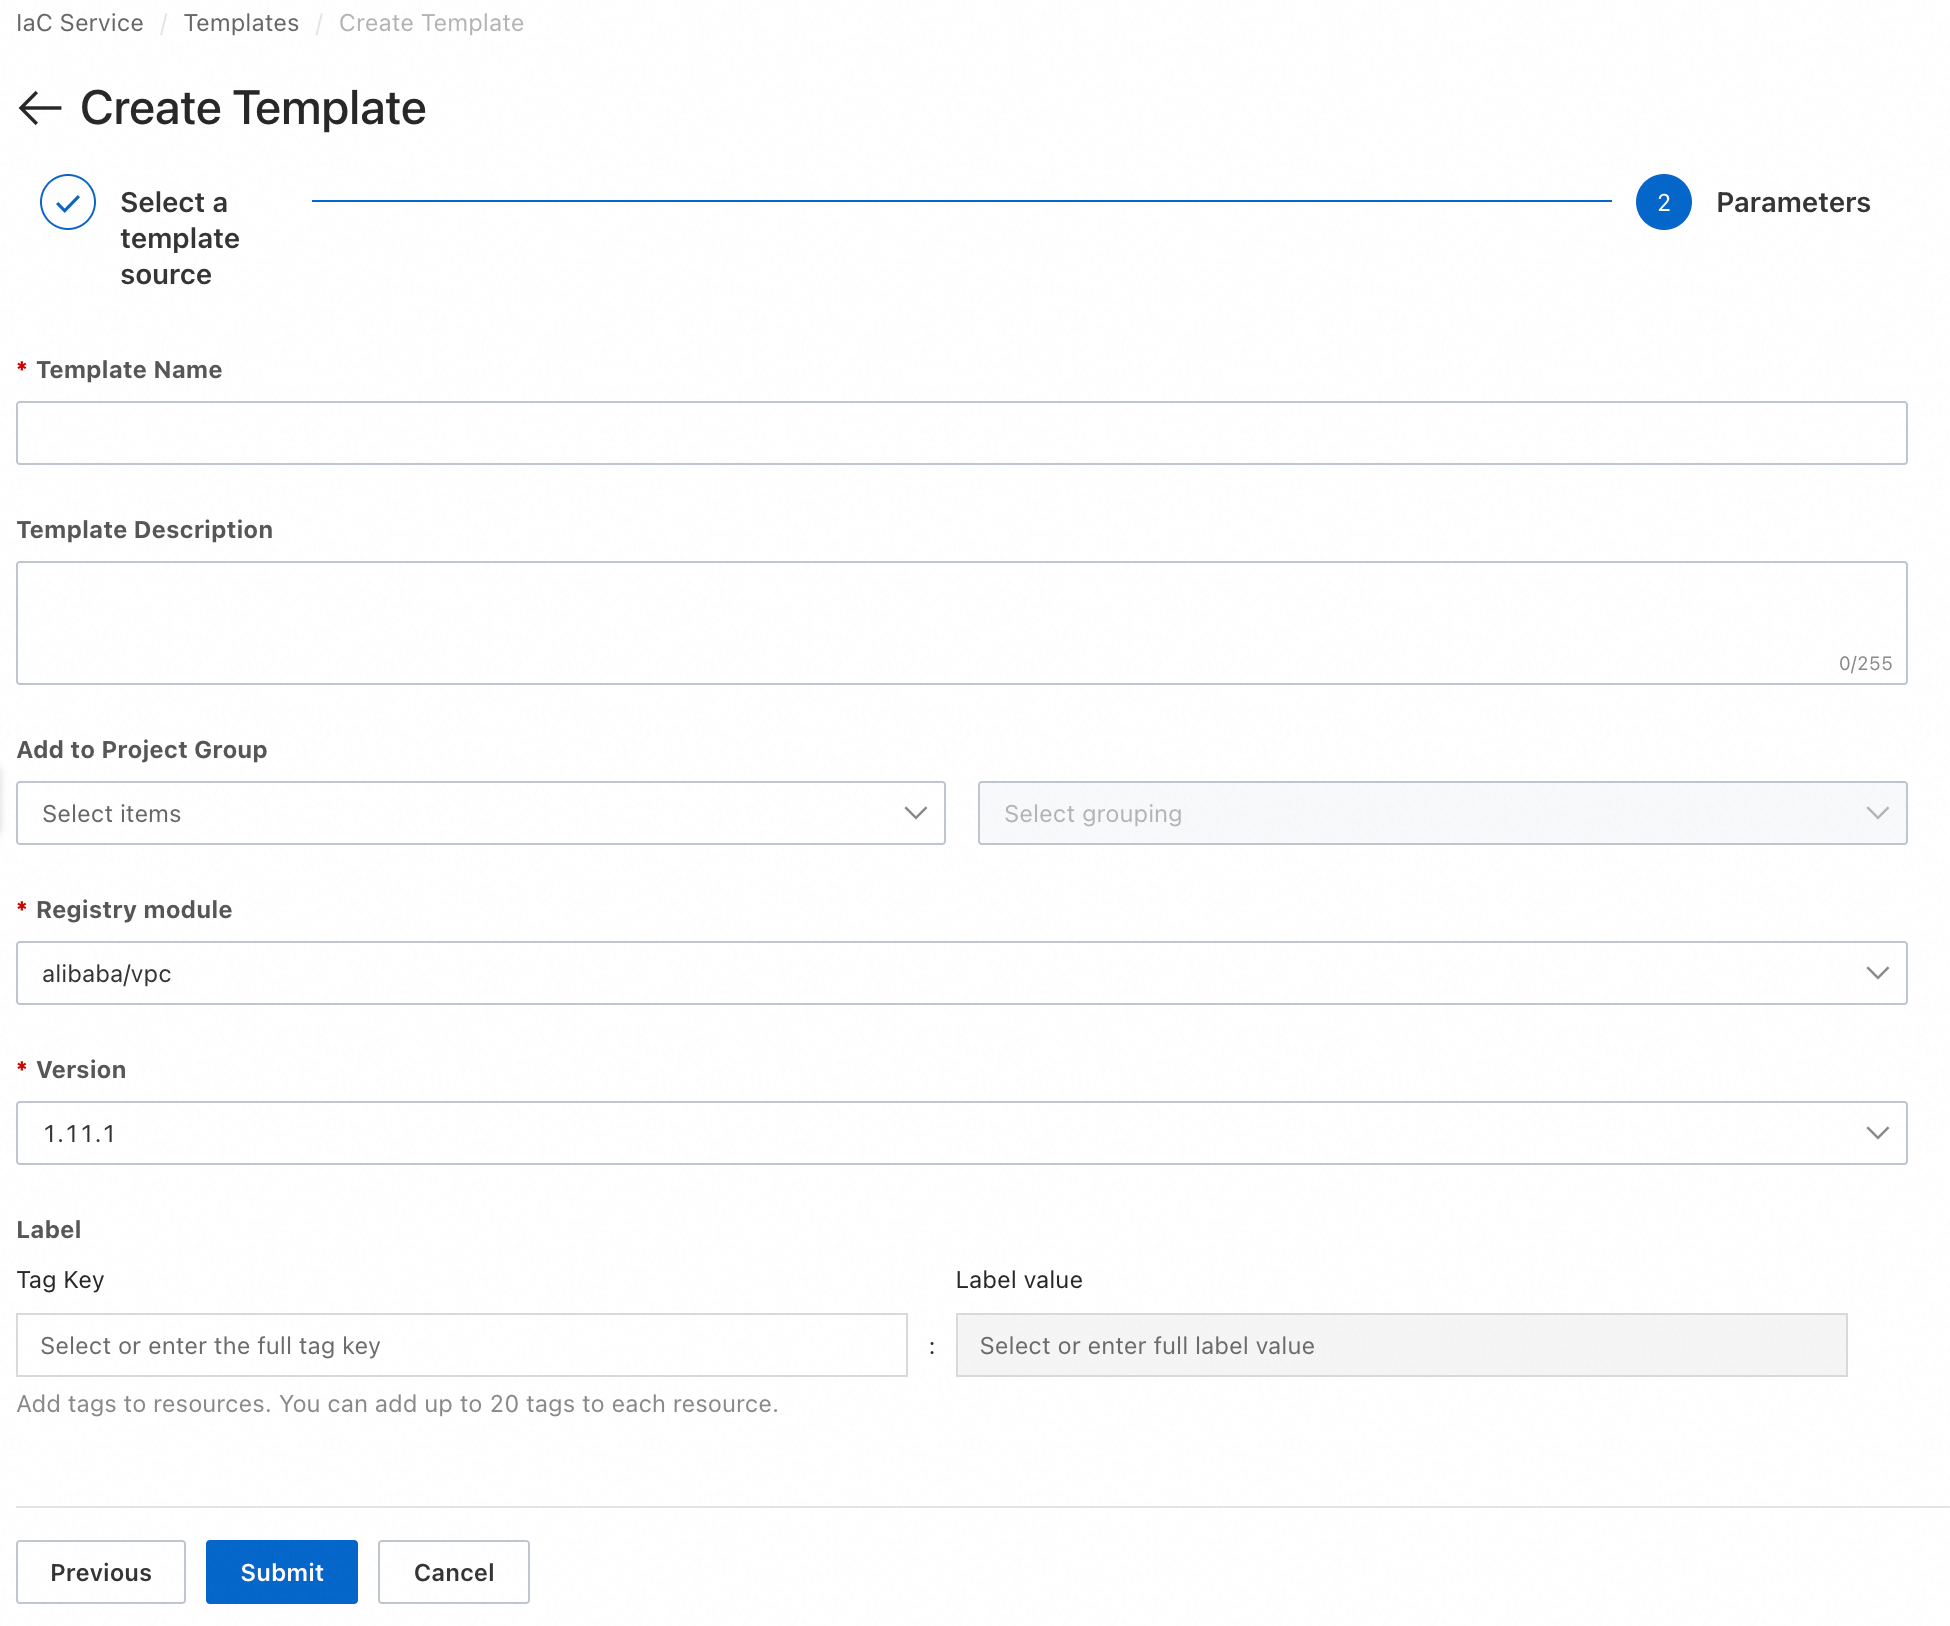
Set the following parameters. Then, click Submit.
-
Template Name: Set the template name. Use a semantic name, such as "OrganizationName-ScenarioName-XXTemplate-OrdinalNumber".
-
Template Description (Optional): The description of the template.
-
Add to Project Group (Optional): Select a project group to manage multiple templates.
-
Registry Module: This field is automatically filled based on the selected module.
-
Version: This field is automatically filled based on the selected module.
-
Tags (Optional): Add tags to cloud resources for filtering resources, cost allocation, and other purposes.
-
-
After creating the template, the page automatically redirects to the Templates page. On this page, modify the template code, name, description, source path, and tags.
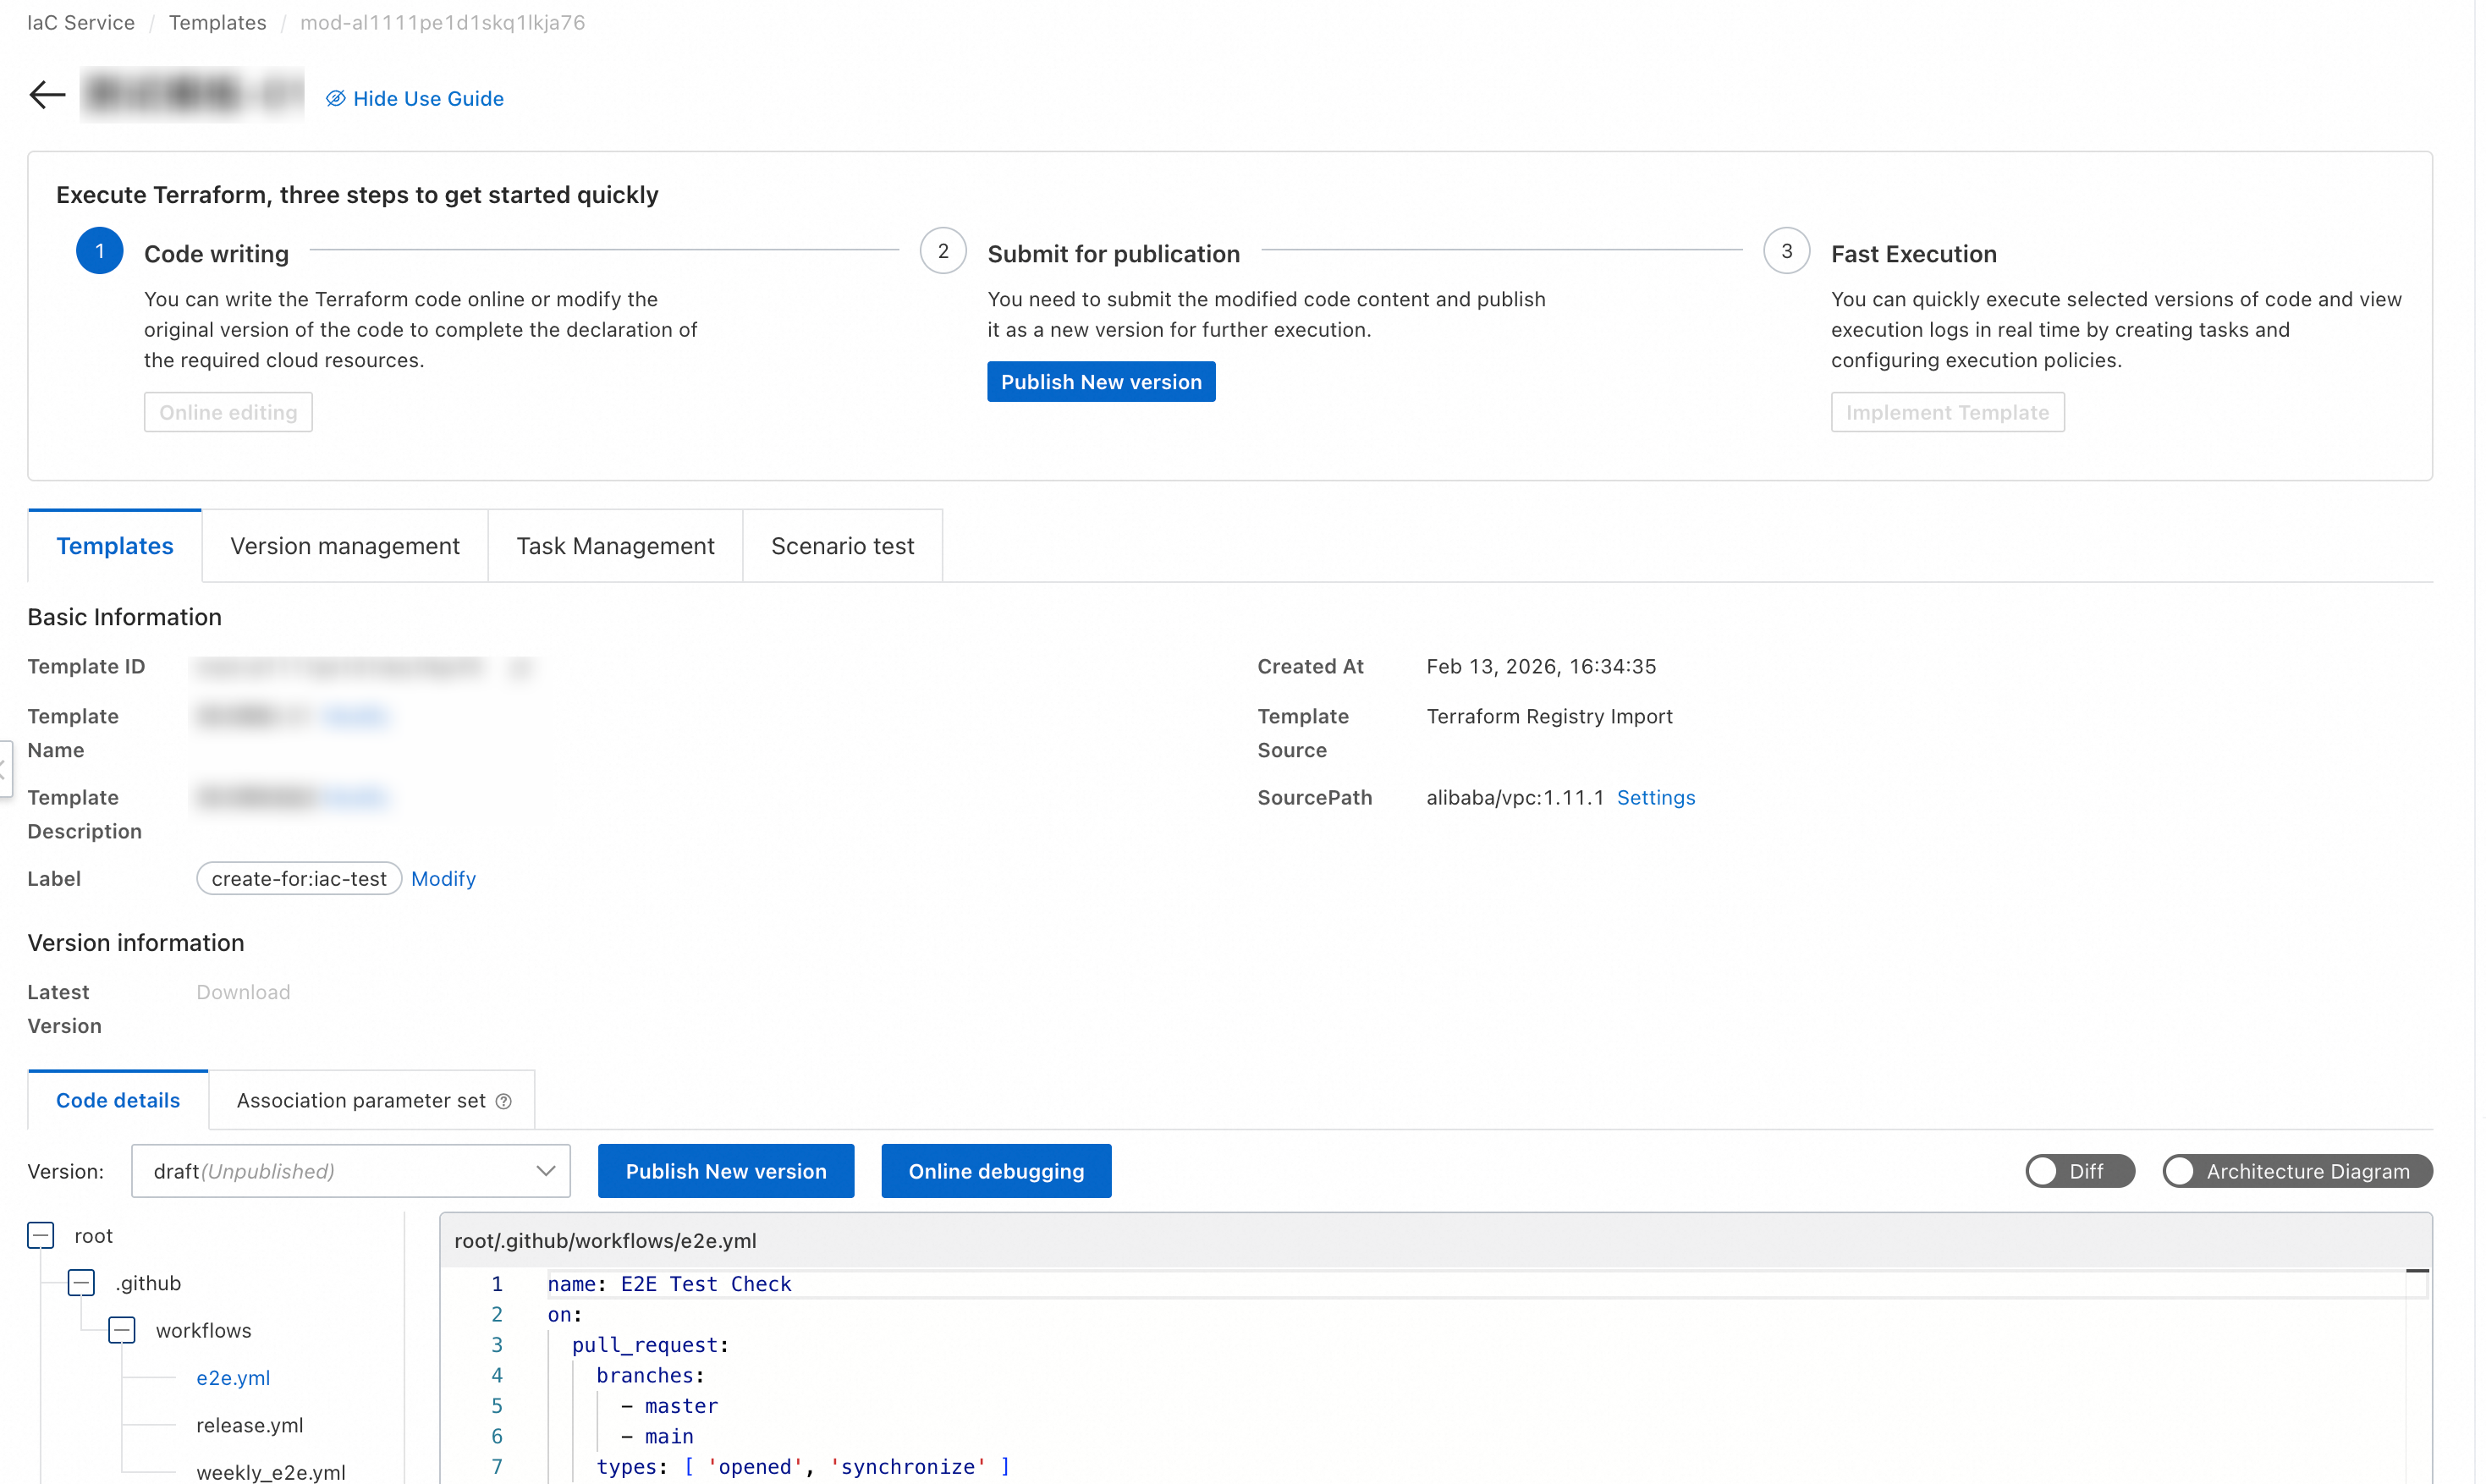
-
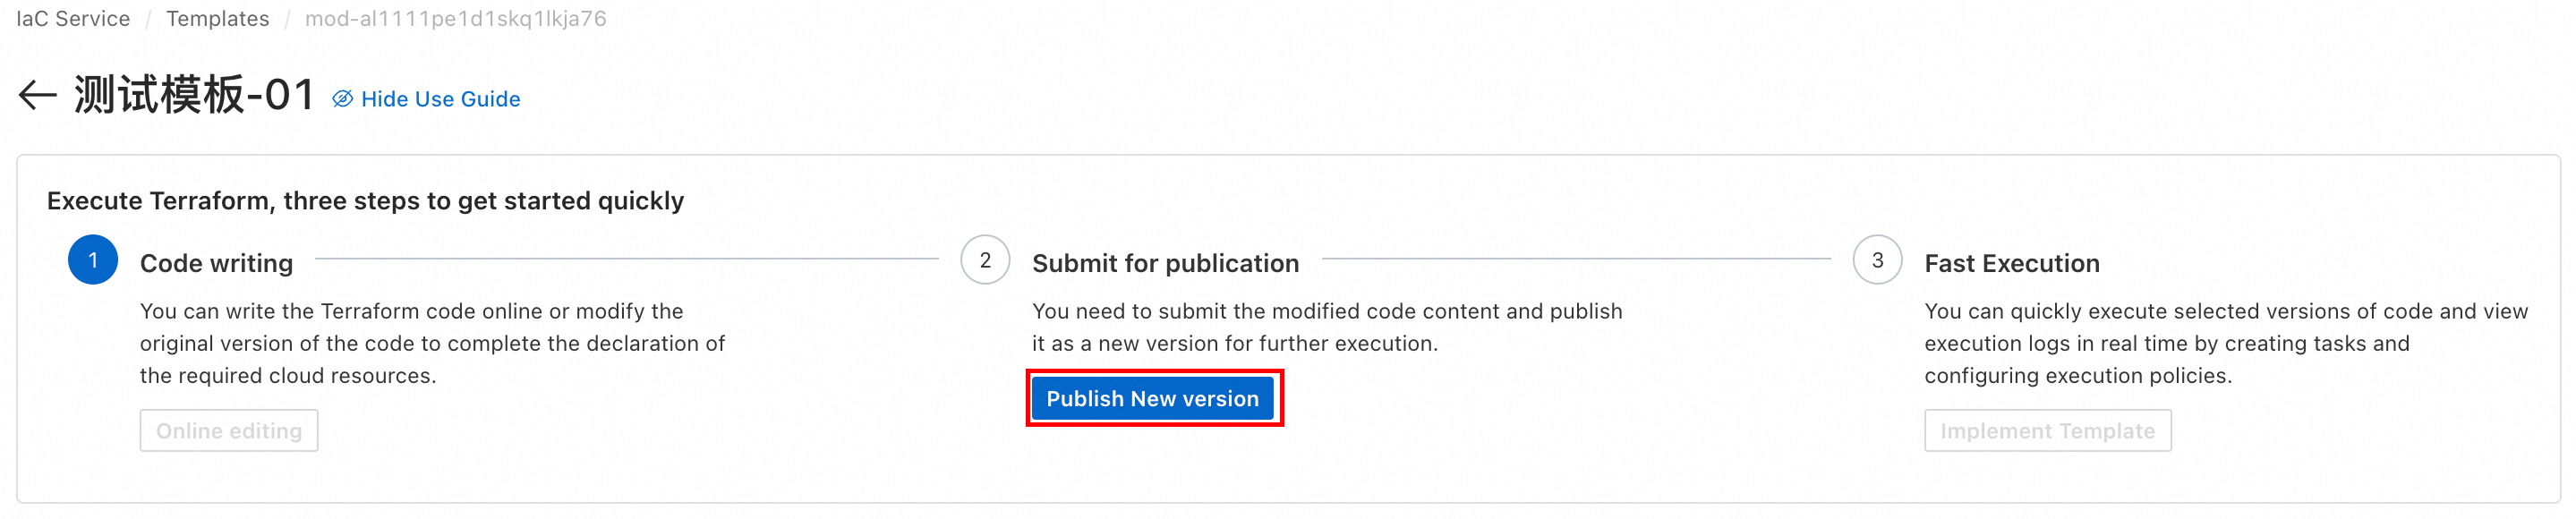
The template is in draft status after creation. Commit the code and publish it as a new version before you can execute it. Each publication generates a new version.

-
On the Templates page, view the created templates.
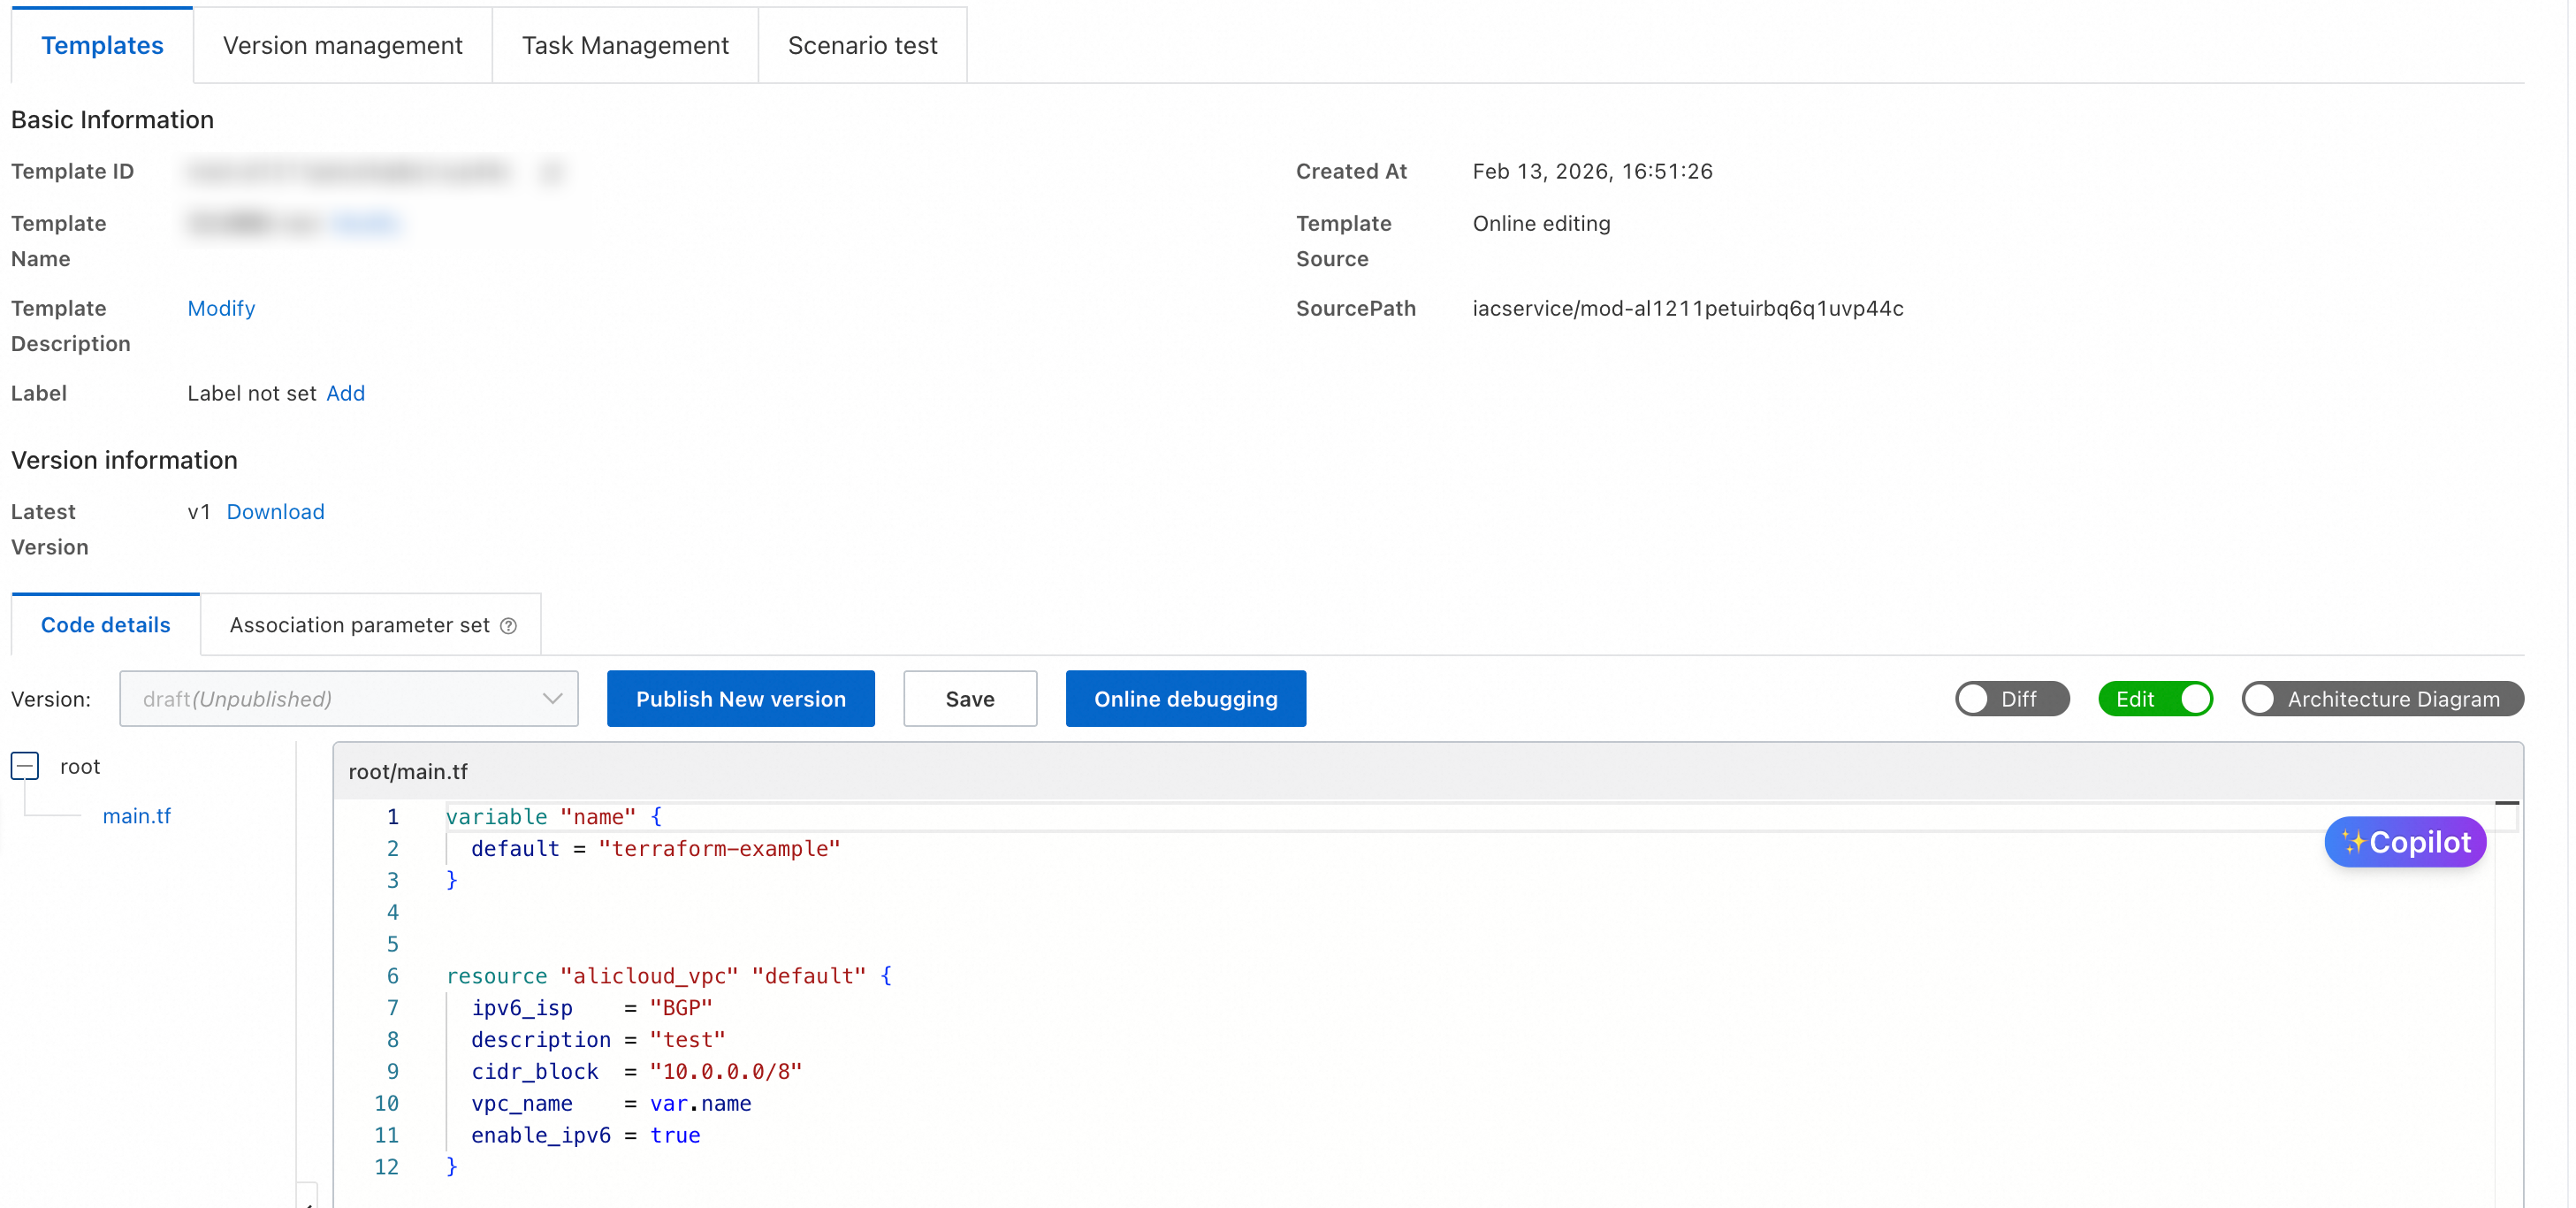
Alternatively, create a blank template using Create Template. Select Online Edit, enter the following code, and click Submit:
variable "name" {
  default = "terraform-example"
}


resource "alicloud_vpc" "default" {
  ipv6_isp    = "BGP"
  description = "test"
  cidr_block  = "10.0.0.0/8"
  vpc_name    = var.name
  enable_ipv6 = true
}
Then, on the template details page, click Publish New Version.
Step 2: Create a Task
A task is the core execution unit of Automation Service Desk. It corresponds to a published template version and an independent state file, and manages IaC deployments.
Create a task based on the template from Step 1.
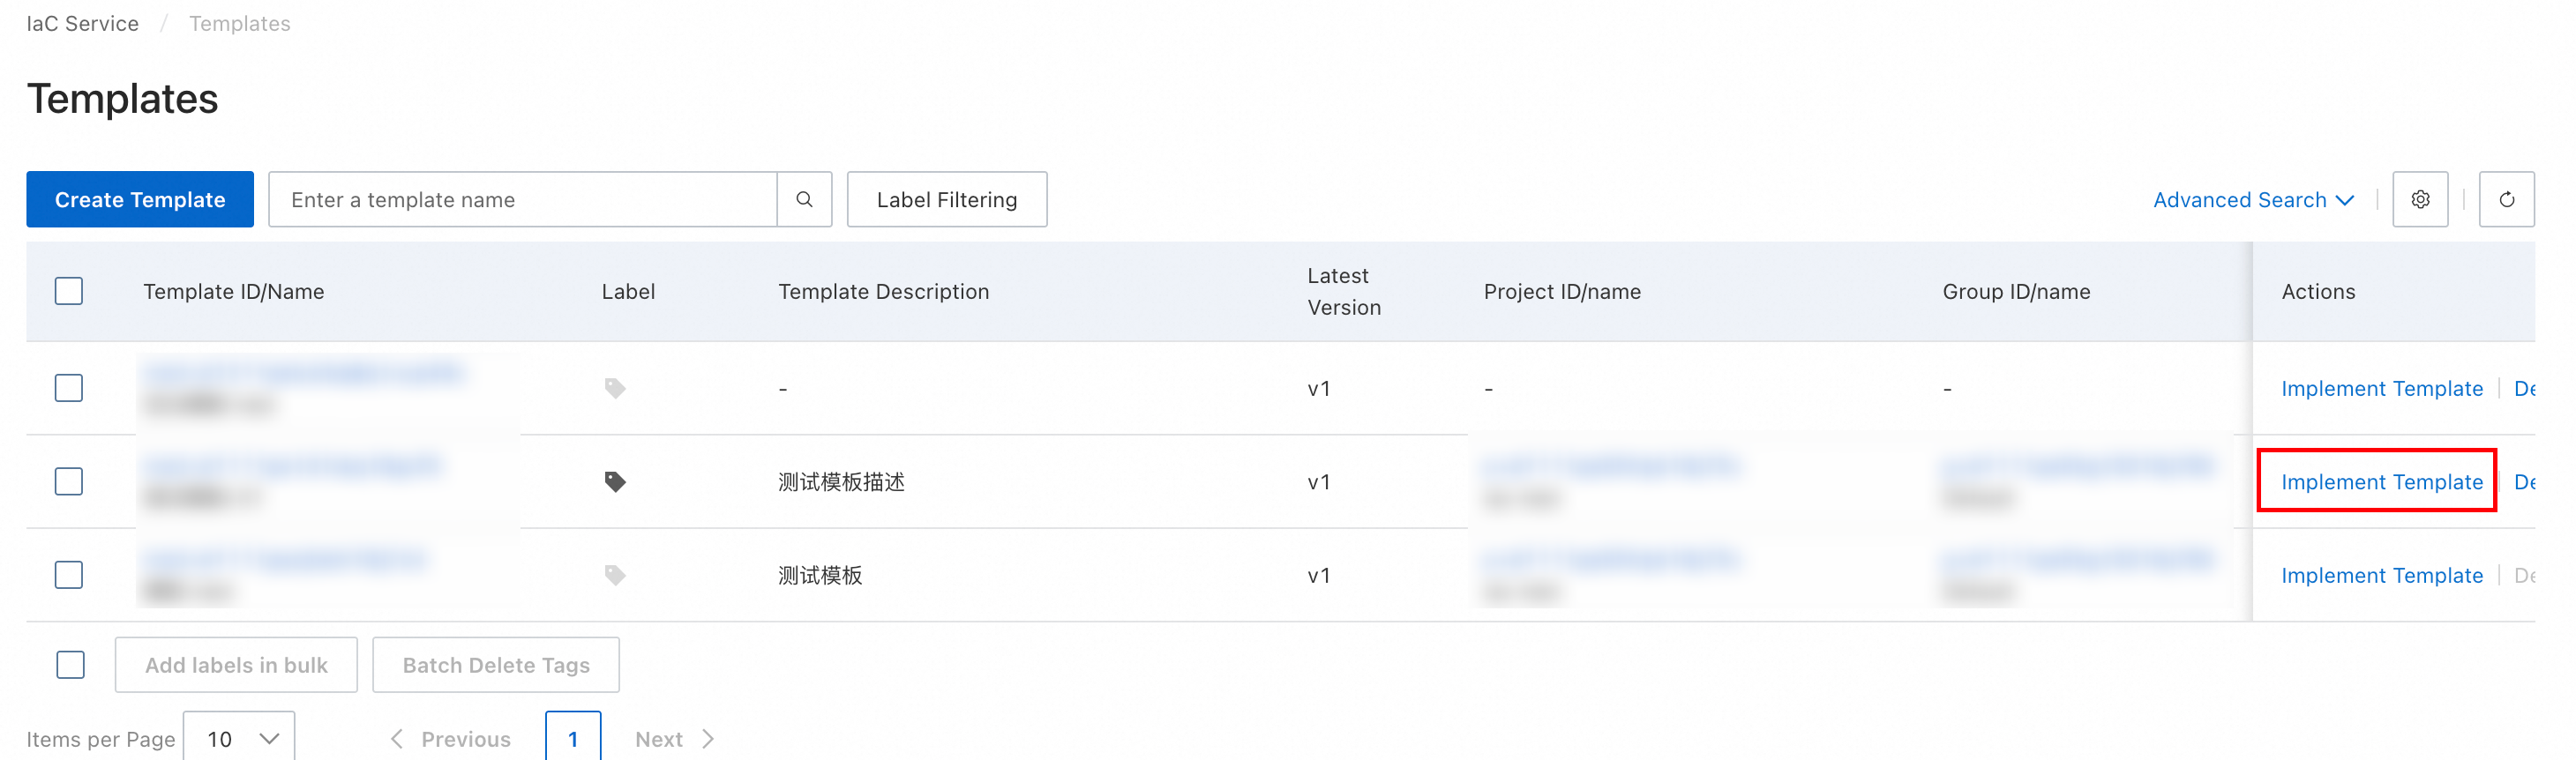
-
On the Templates page, find the target template. Then, click Implement Template.
-
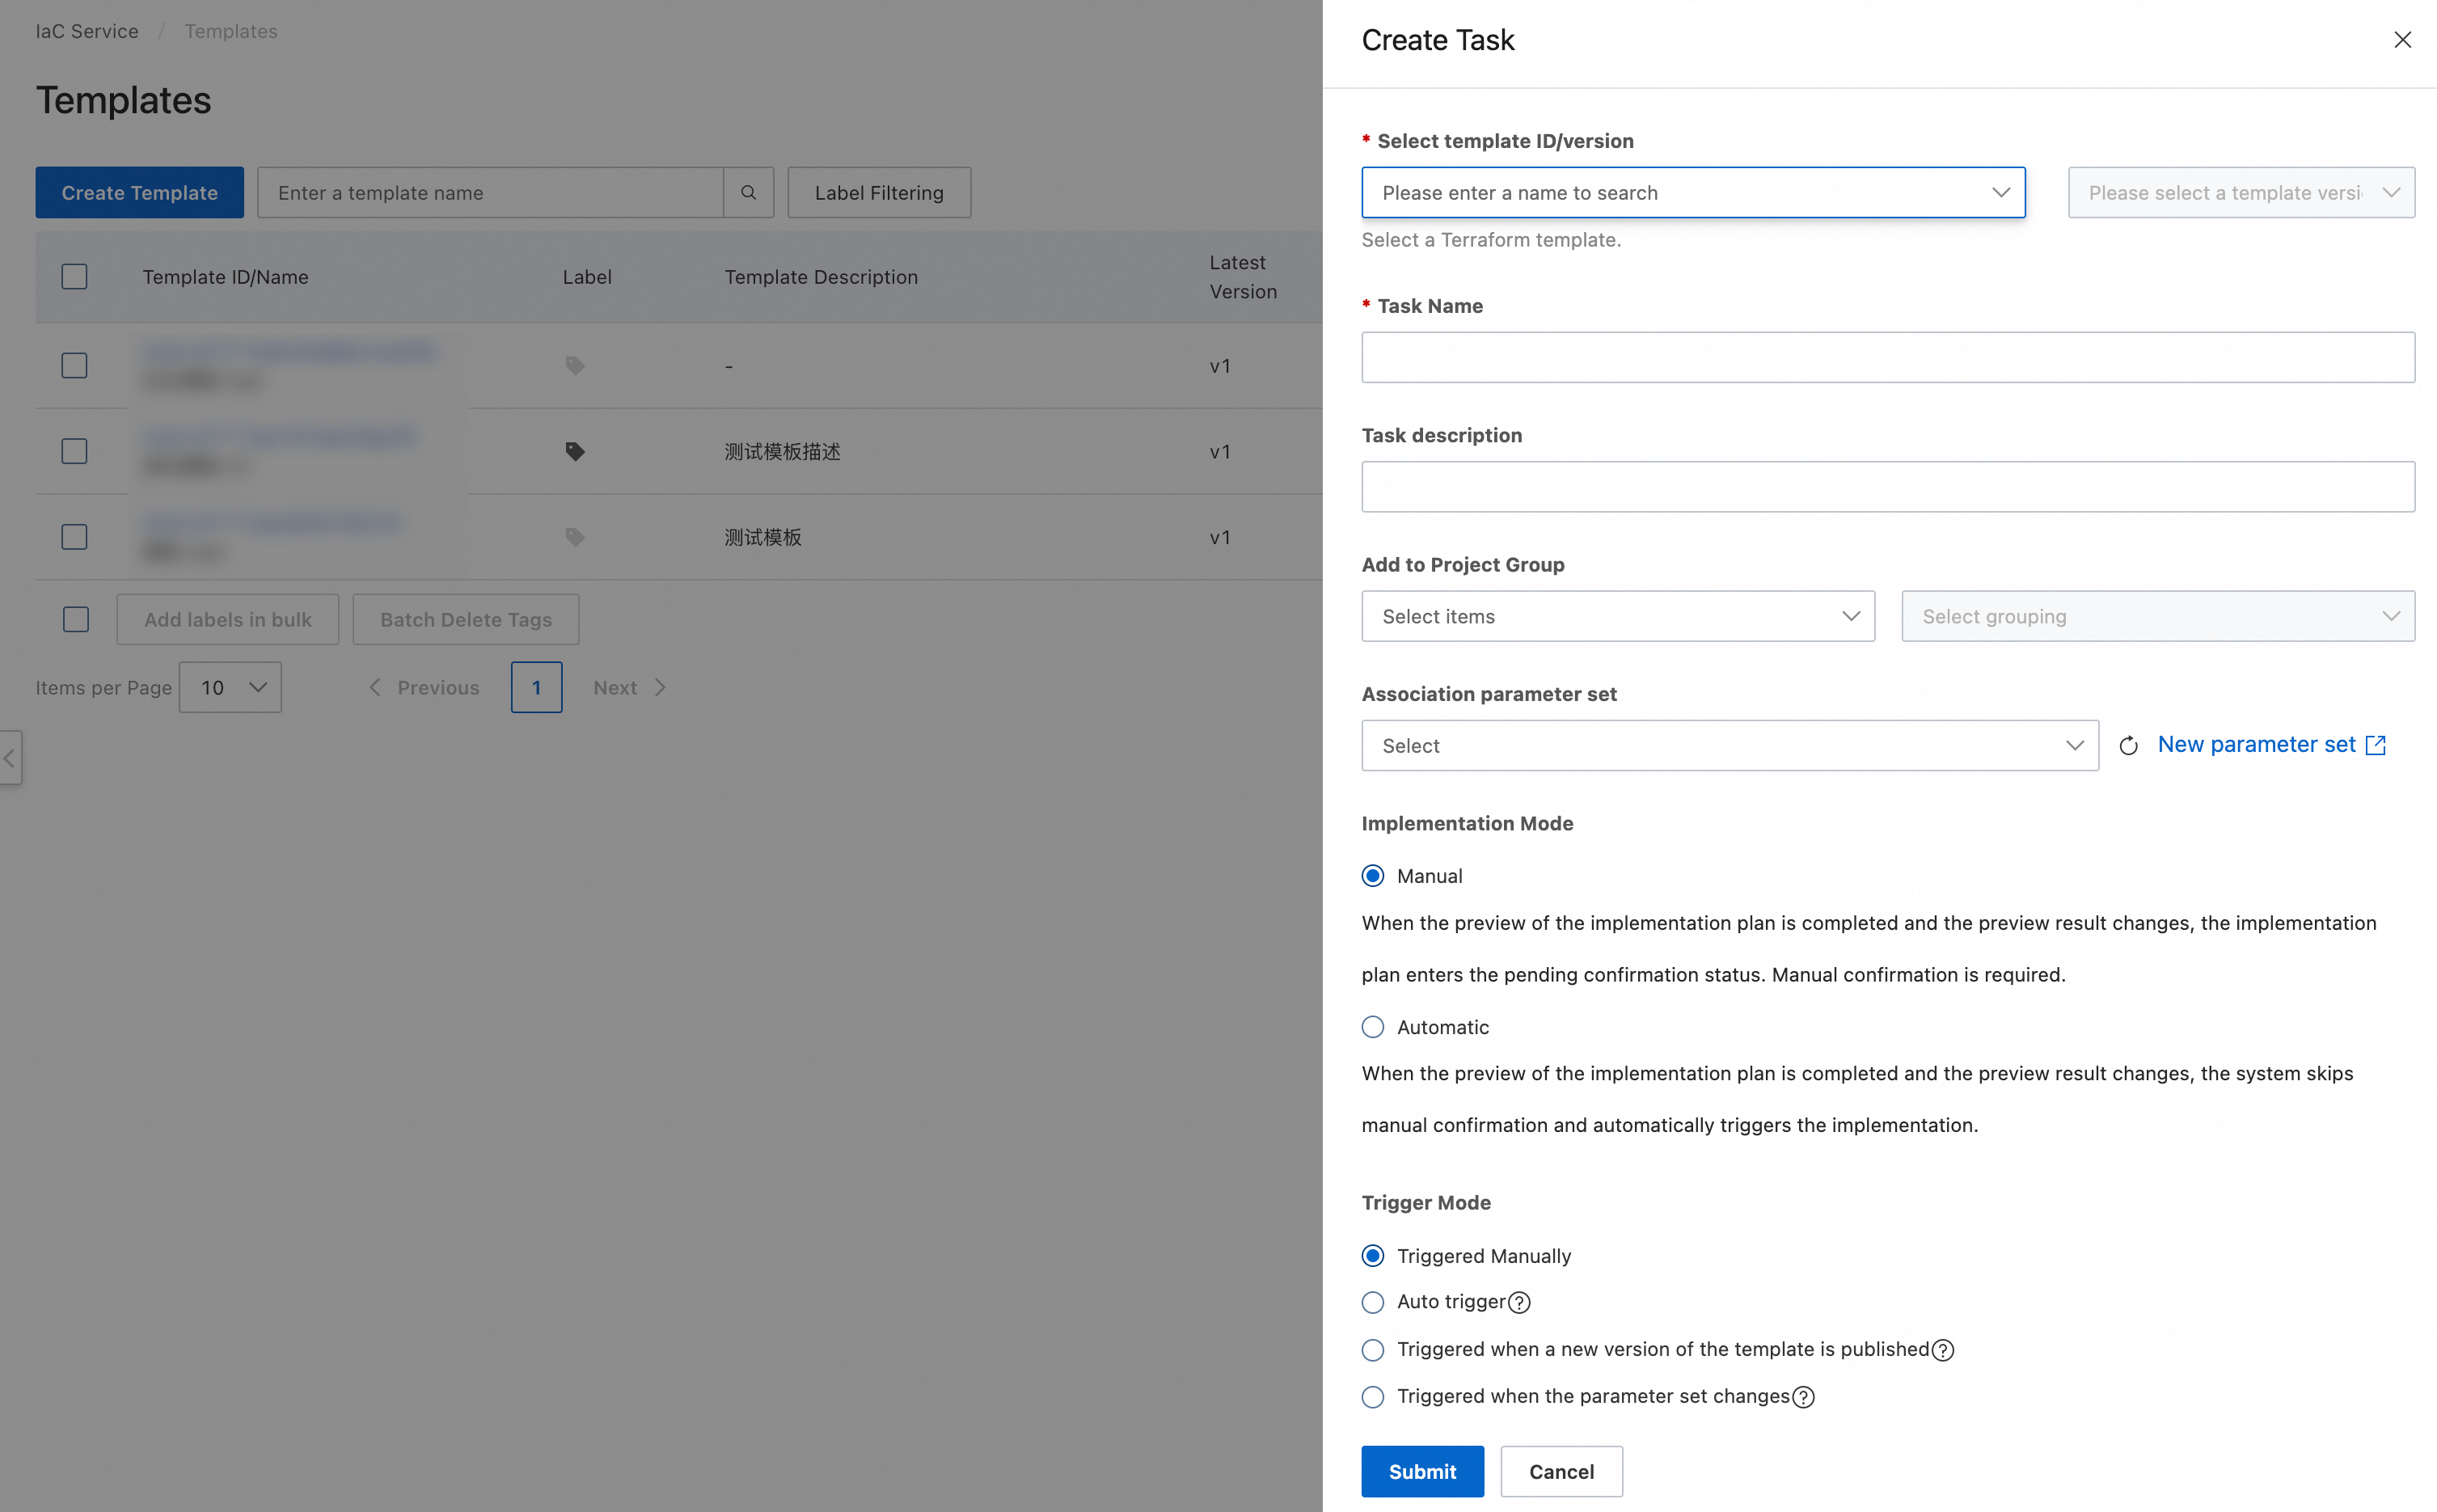
Fill in the following configurations. Then, click Submit:
-
Select template ID/version: Select the published template and its version.
-
Task Name: Enter a task name. Requirements: 2 to 128 characters in length. It can contain uppercase and lowercase letters, digits, Chinese characters, hyphens (-), underscores (_), and periods (.). It cannot start or end with a special character.
-
Task description (Optional): The description of the task.
-
Add to Project Group (Optional): Select a project group to manage and batch execute tasks by project. A task can only belong to one project.
-
Association parameter set (Optional): Associate a parameter set to automatically fill variables when executing the task.
-
Implementation Mode: Select the execution plan mode. Set it to manual or automatic execution.
-
Trigger Mode: Select the trigger mode for the task. The default is manual trigger. For automatic triggers, configure RAM role information.
-
RAM Role (Optional): Grant a RAM role to the task. This role executes the task in automatic trigger or offline scenarios.
-
Resource protection strategy (Optional): Set a security policy to prevent accidental deletion or modification of important resources.
-
Delete protection: Prohibits execution when the execution plan includes a destroy operation.
-
Change protection: Prohibits execution when the execution plan includes an update in-place operation for resource attributes.
-
Deleted reconstruction protection: Prohibits execution when the execution plan includes a force replacement operation for resources.
-
-
Terraform Version (Optional): Select the Terraform version. The task executes using the specified version.
-
Label (Optional): Add tags to the resources created by the task. Each resource can have up to 20 tags.
-
-
After creating the task, the page automatically redirects to the Resource arrangement page. Edit the task here.
-
On the Resource arrangement page, view the created tasks.
Step 3: Execute the Task
-
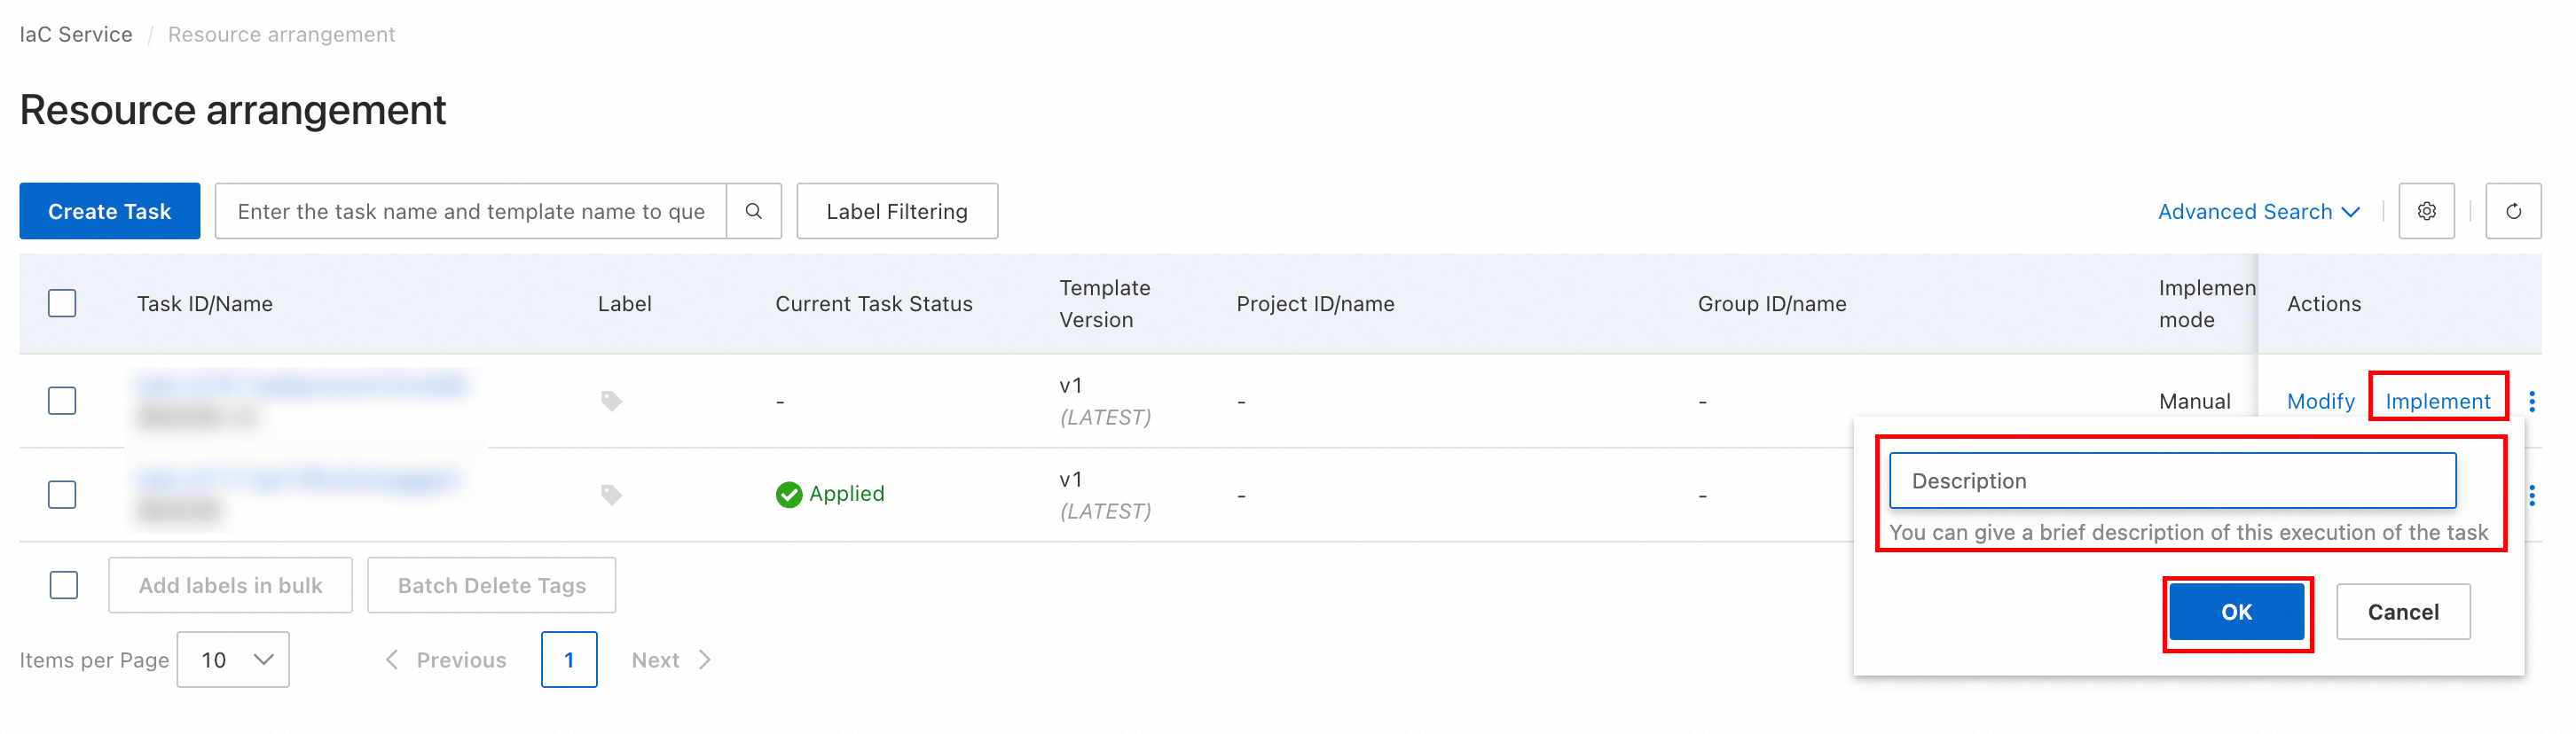
On the Resource arrangement page, find the target task. Then, click Implement.
-
In the dialog box that appears, enter a description for this execution. Then, click OK.
-
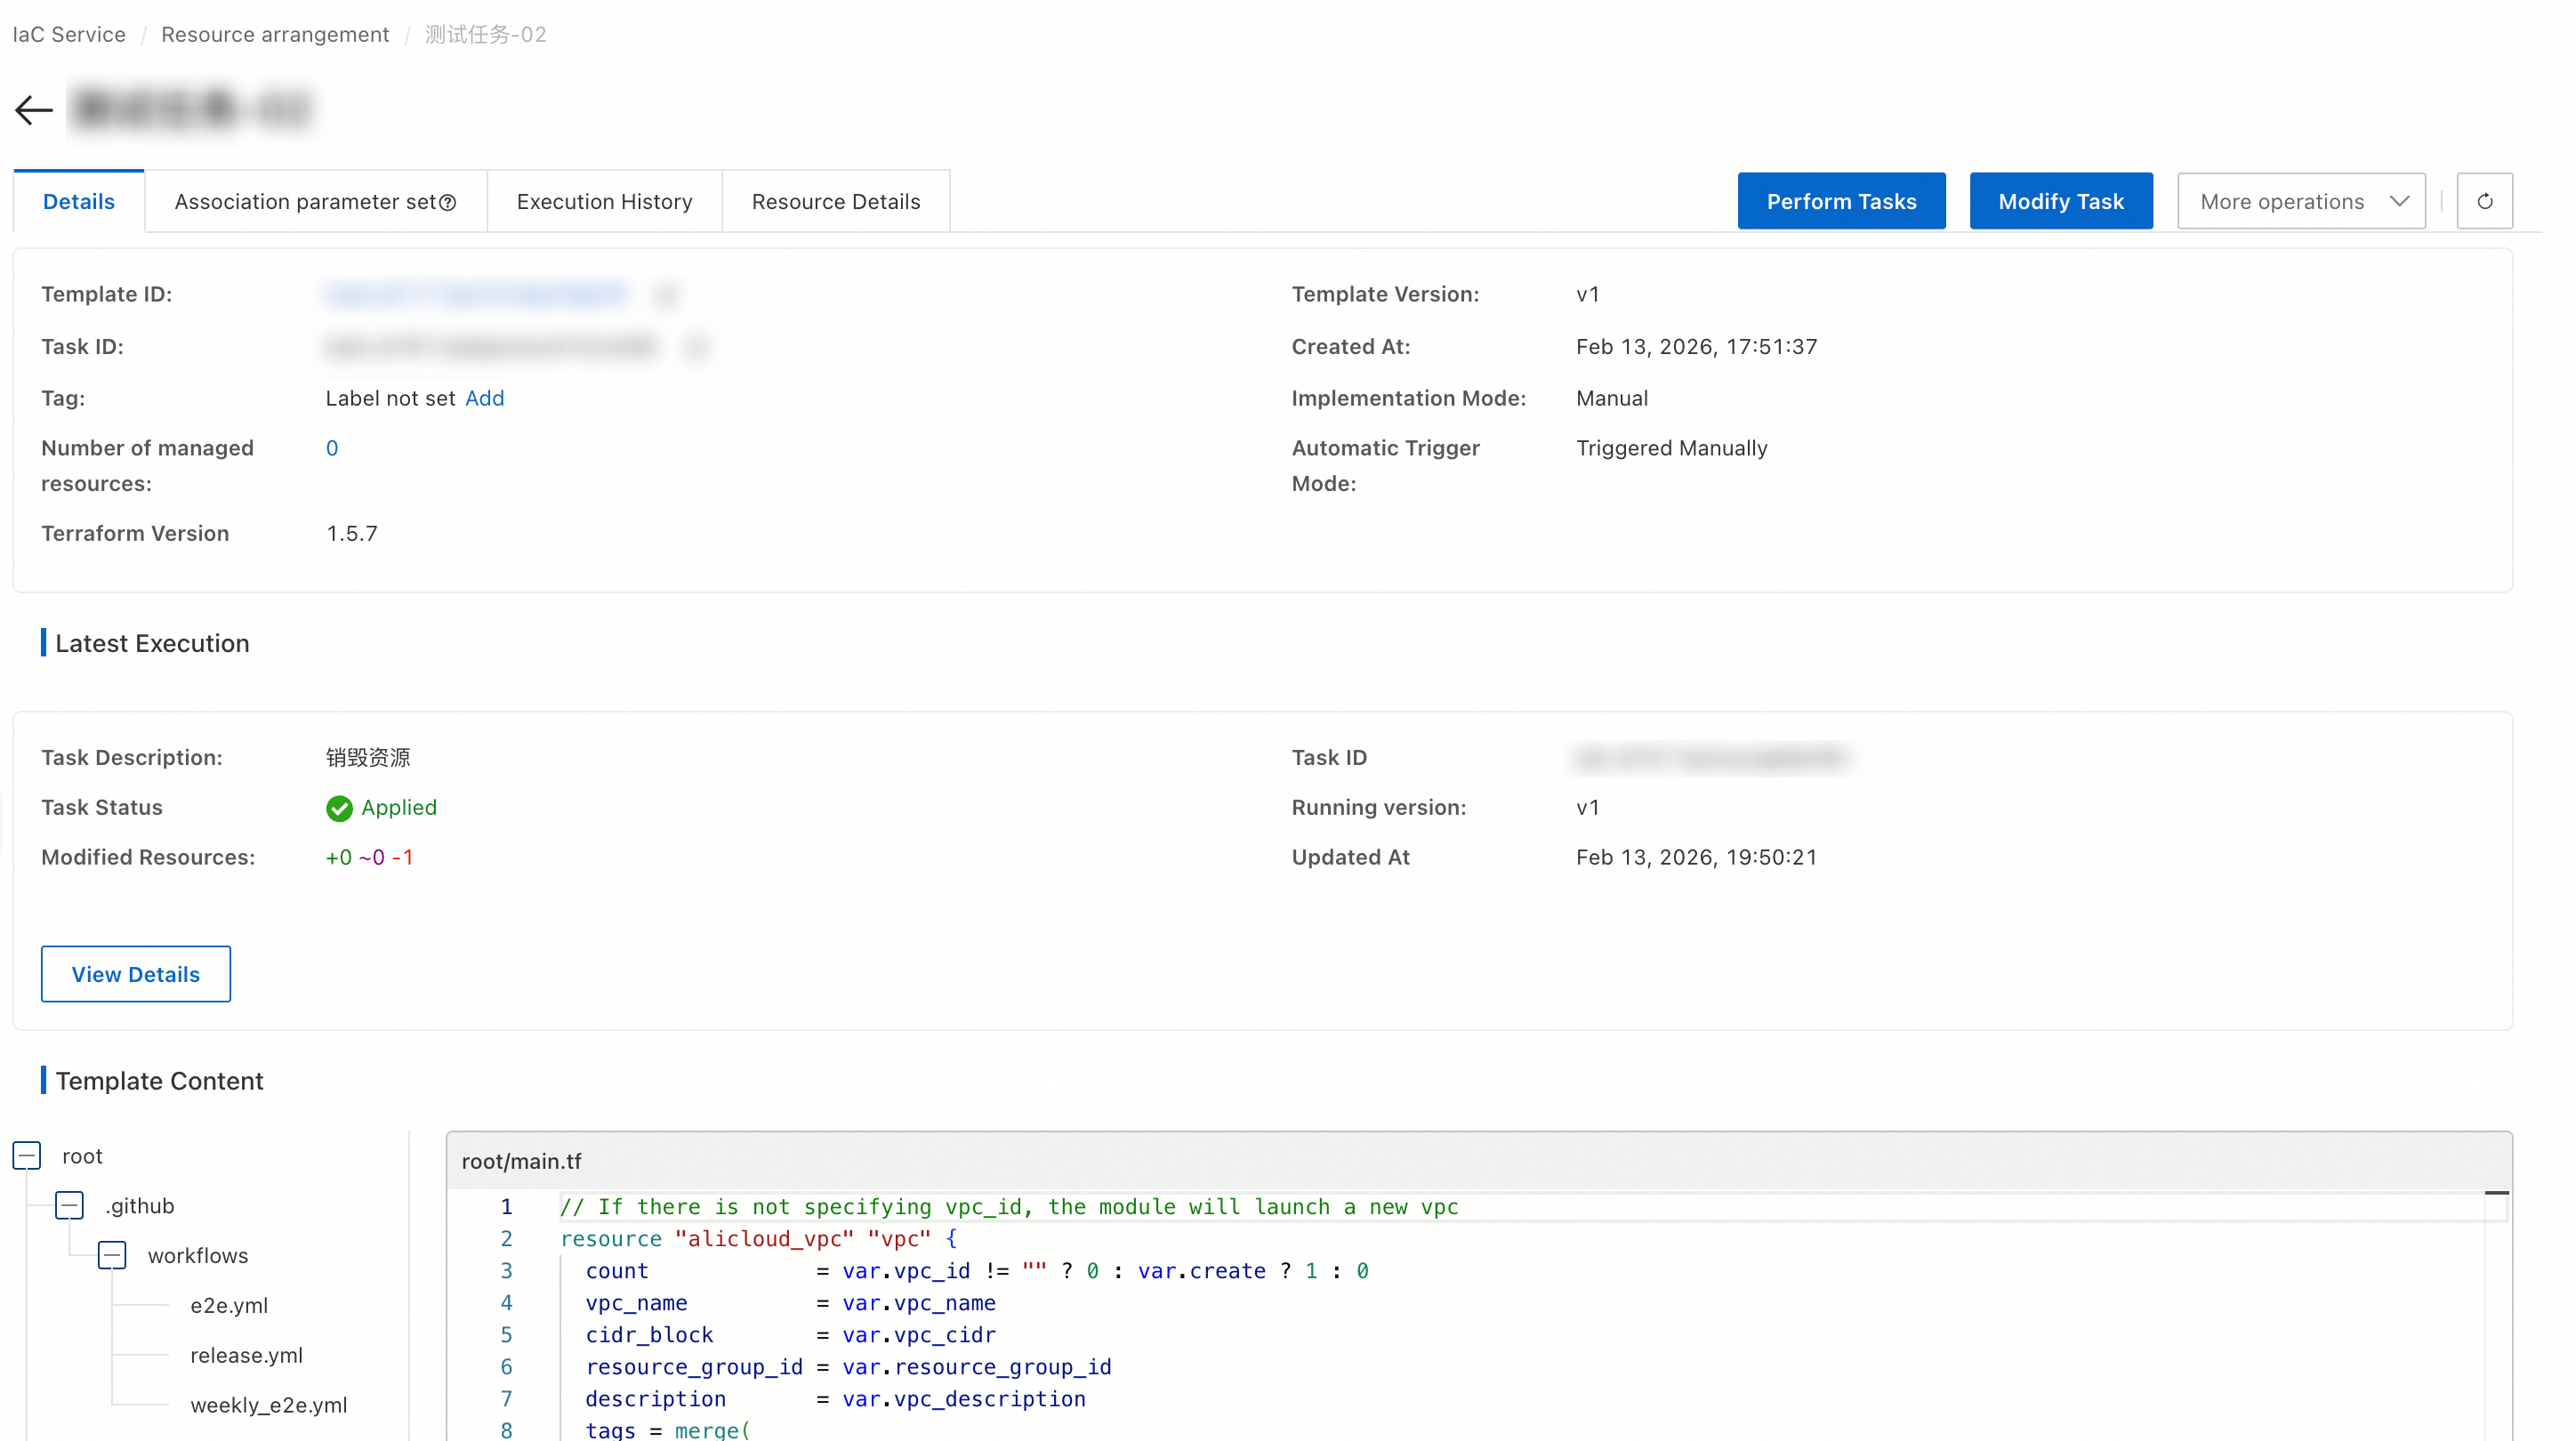
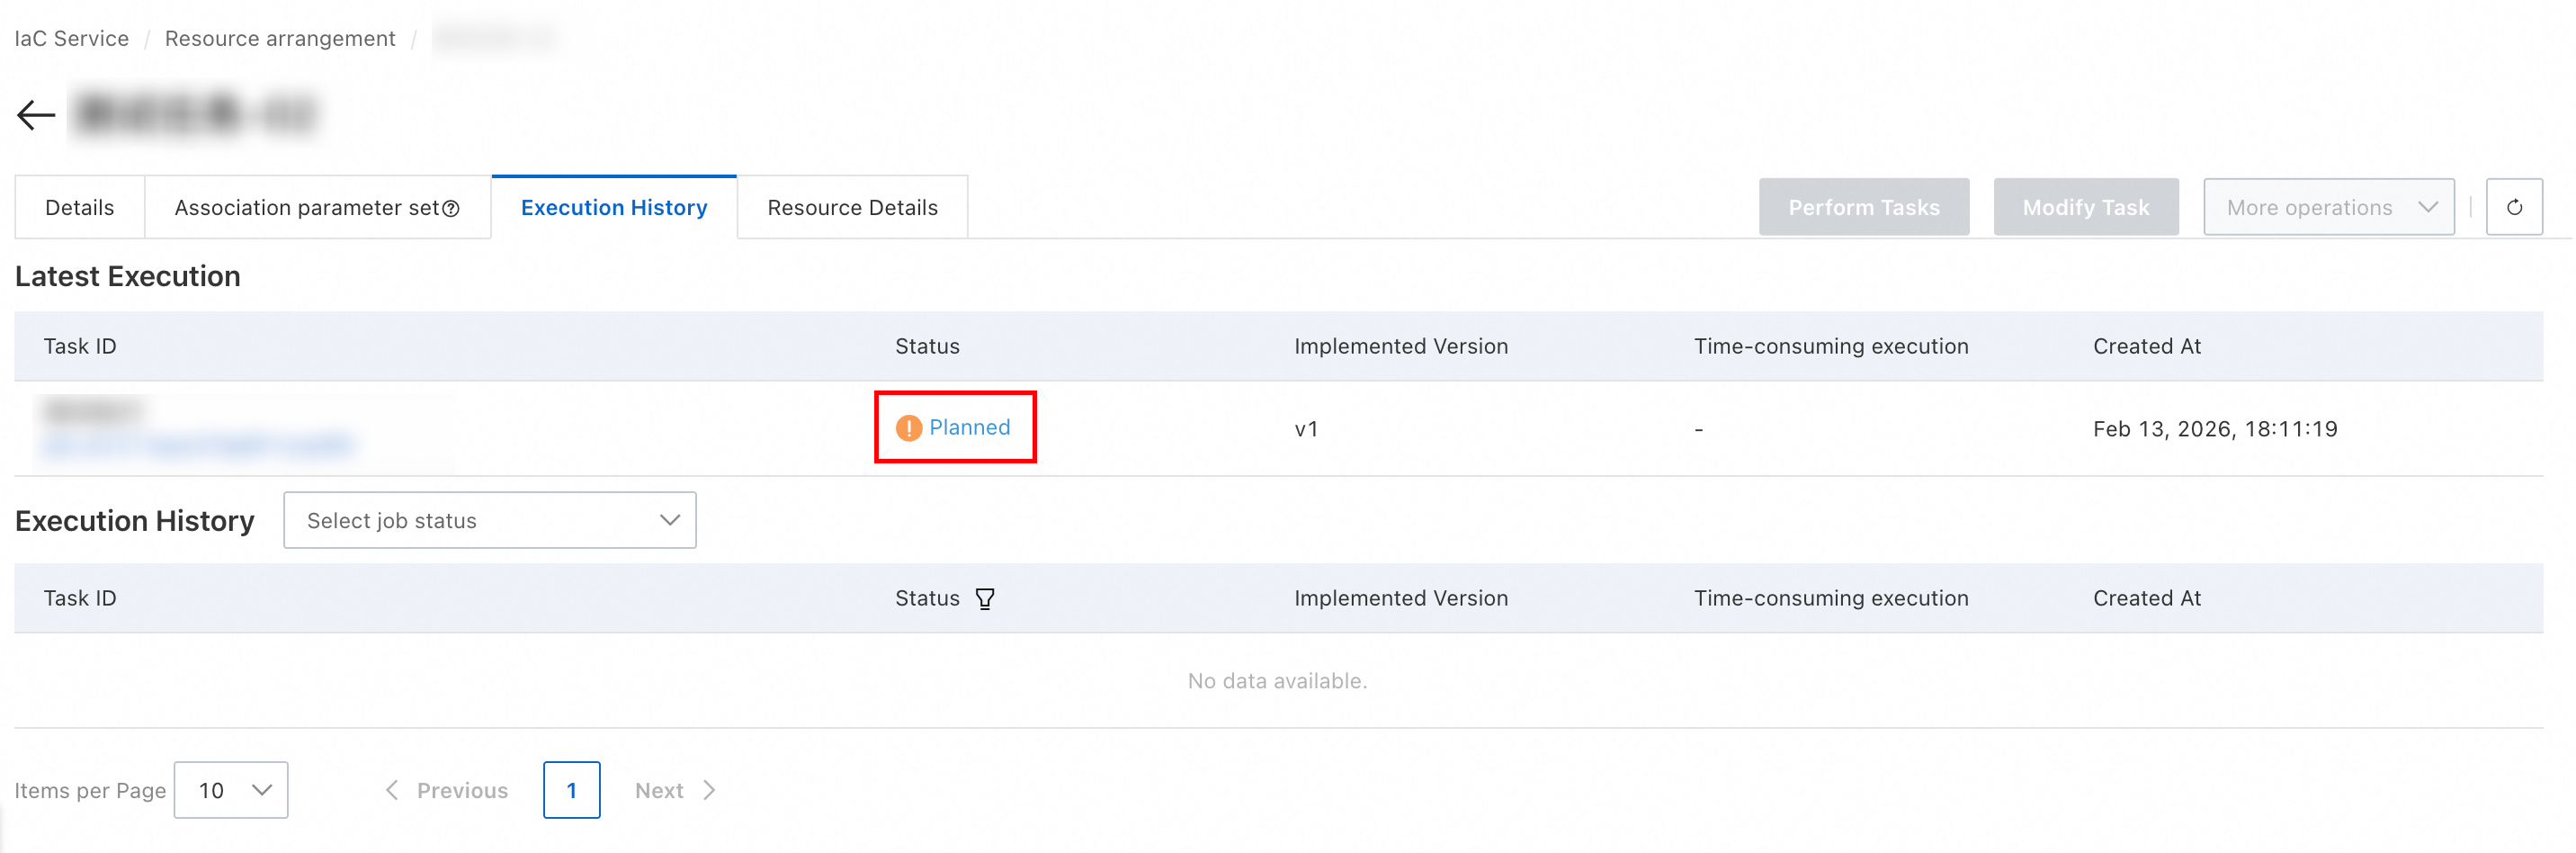
Each task execution generates a job. On the Execution History tab, view the job list.
-
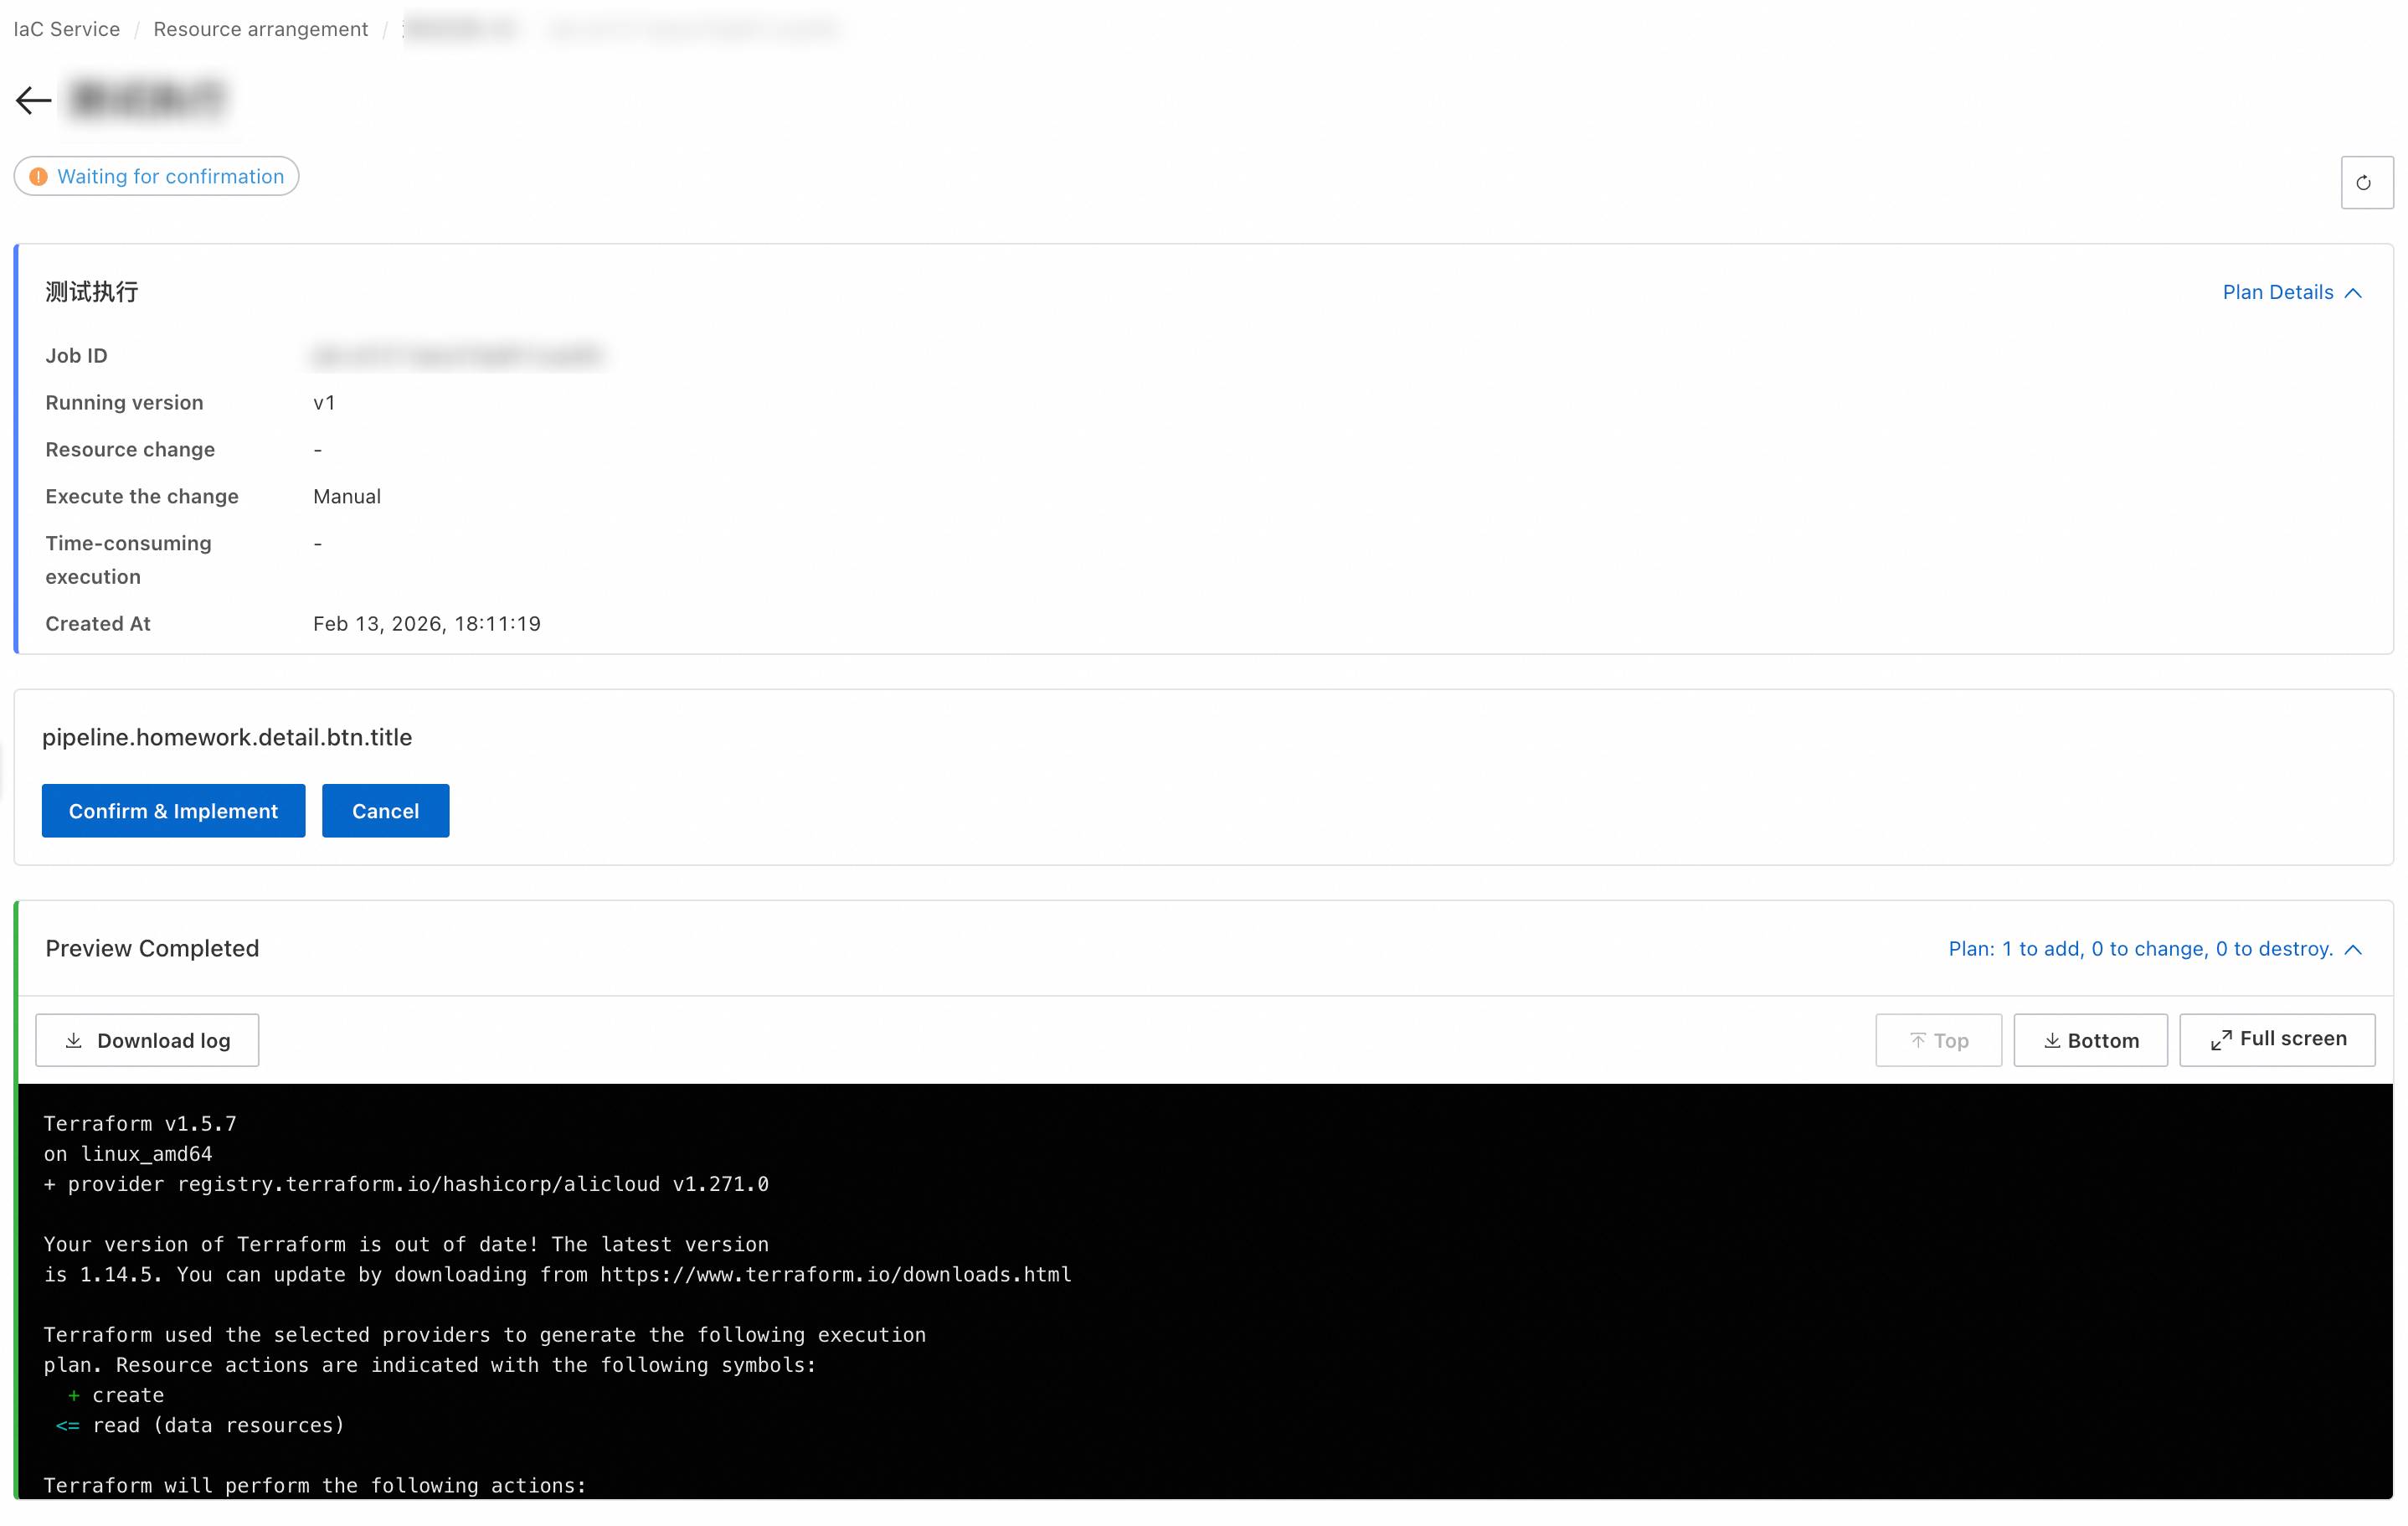
Click the job ID to view execution details. If the Plan result is as expected, click Confirm & Implement.
-
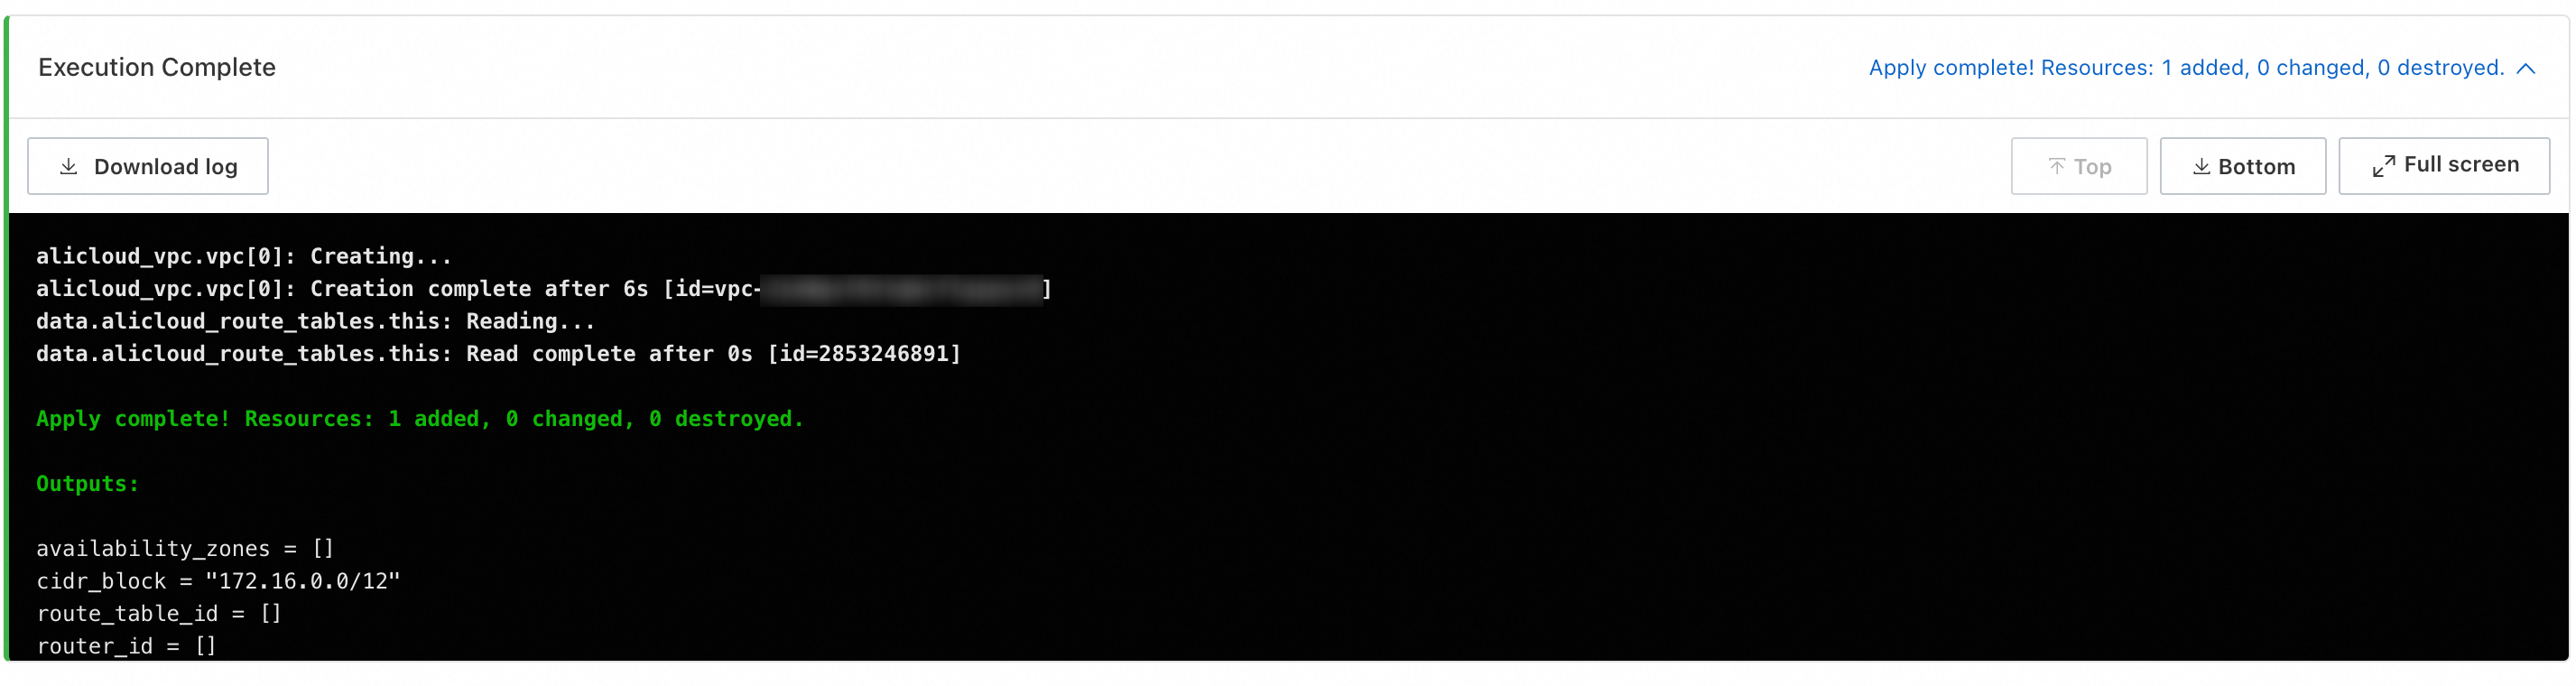
Wait for the execution to complete. The page displays "Execution successful," indicating that resource creation is complete.
-
Go to the VPC console to view the created VPC. If you cannot find it, confirm that the correct region is selected.

Step 4: Destroy Resources
Delete the VPC resources created in this tutorial to avoid unnecessary charges.
-
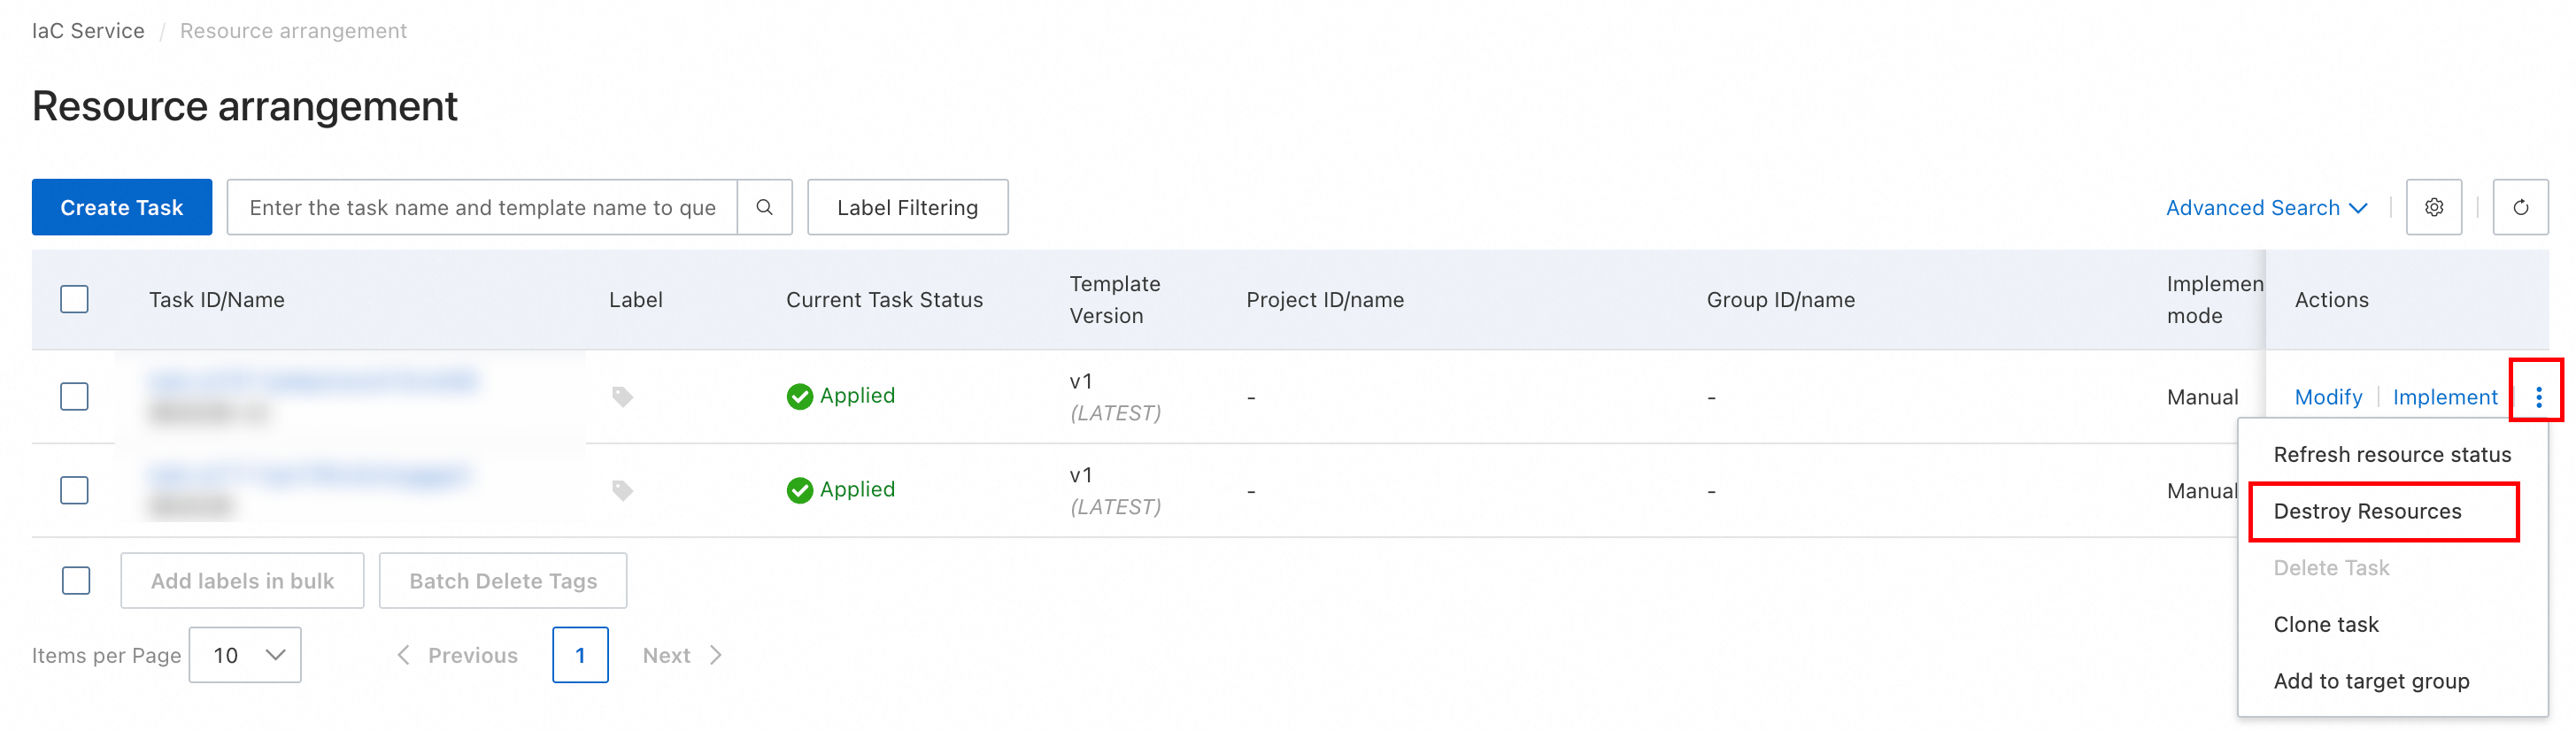
On the Resource arrangement page, find the target task. Click the
icon. Then, select Destroy Resources. -
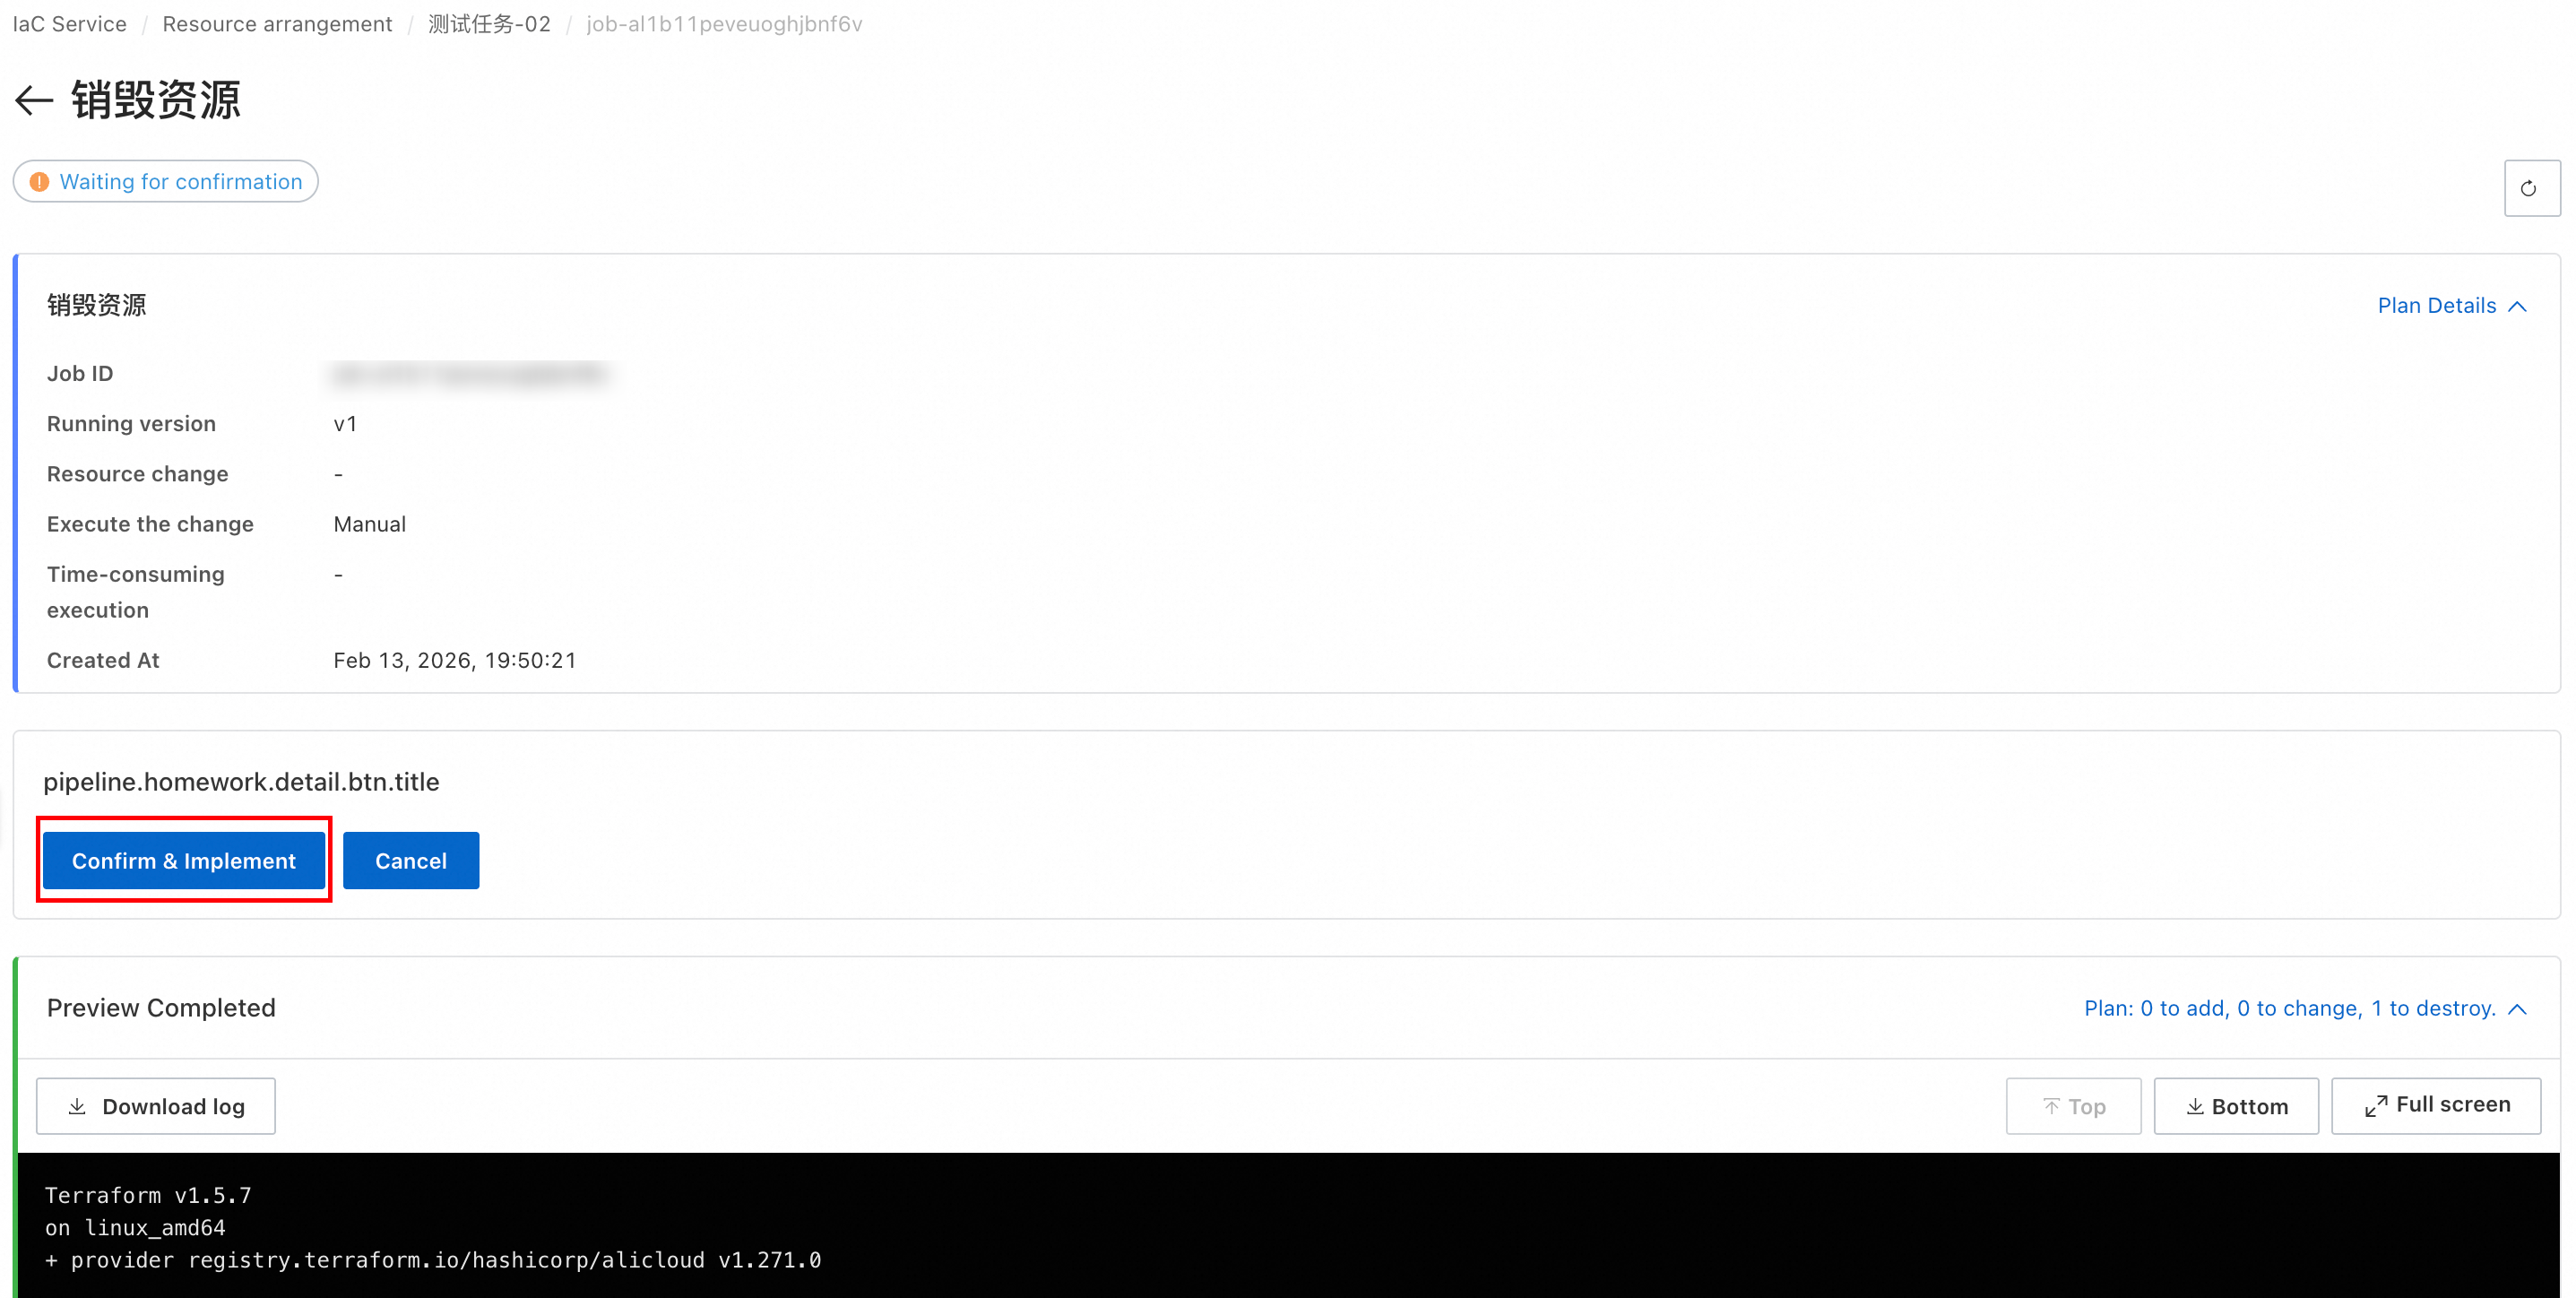
In the task's Execution History, view the job for this Destroy Resources operation. If the Plan result is as expected, click Confirm & Implement.
-
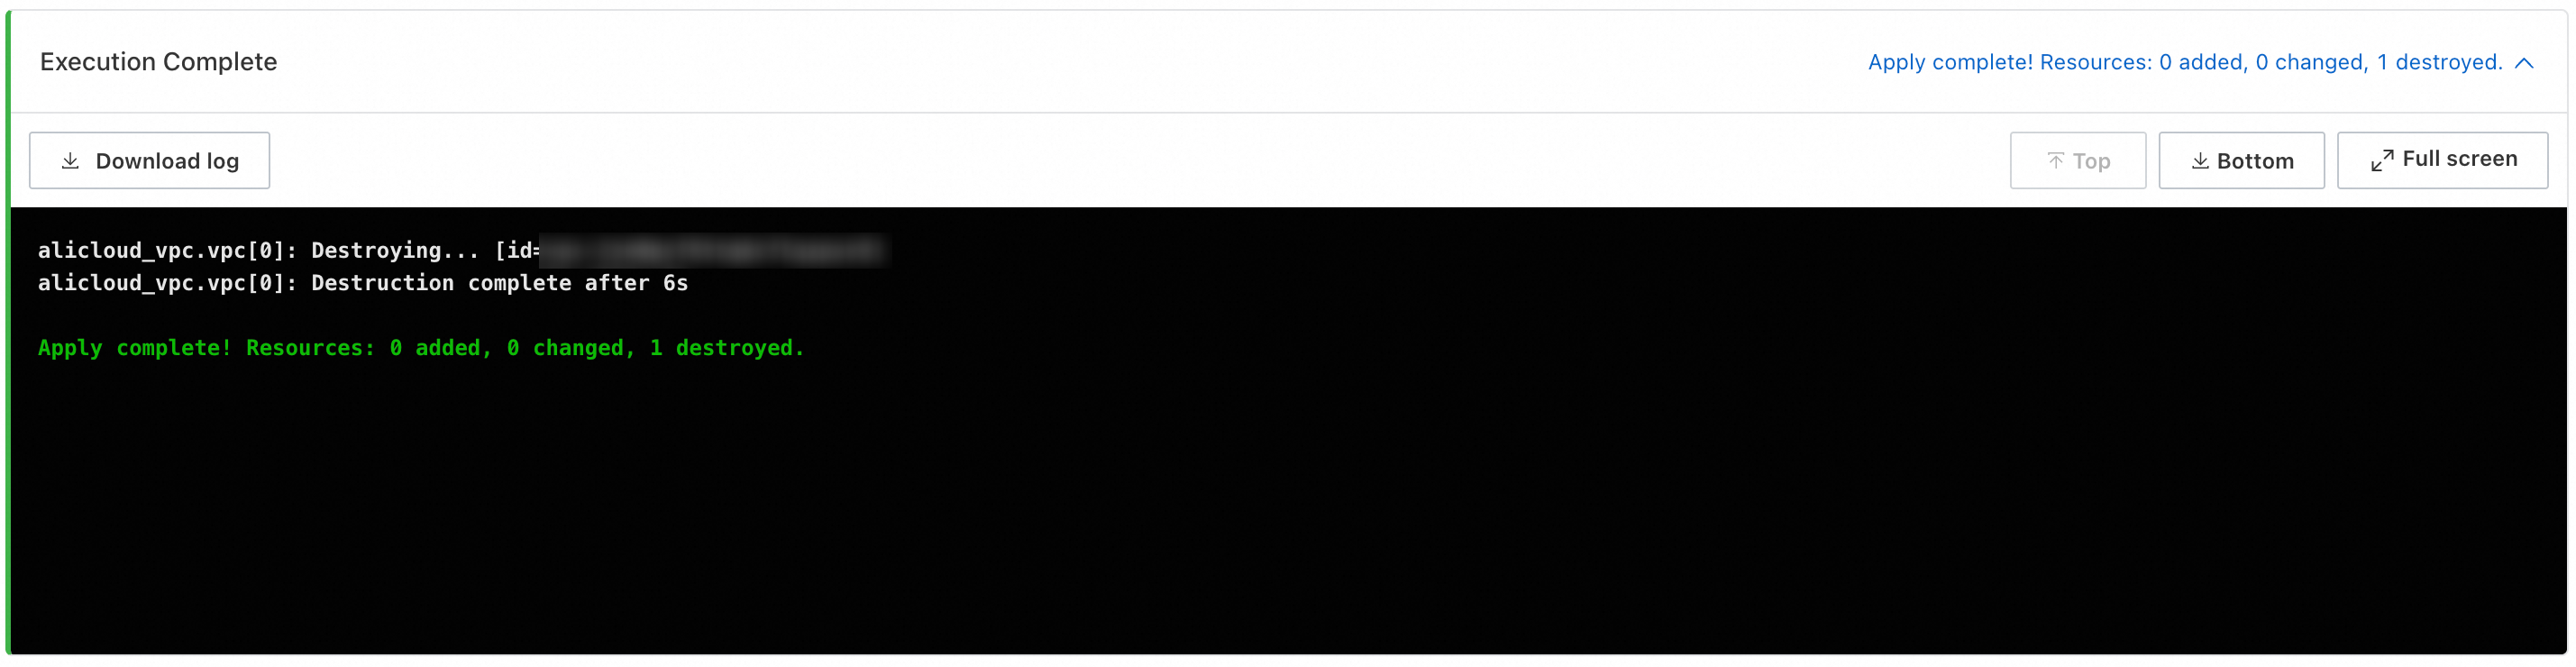
Wait for the execution to complete. The page displays "Execution successful," indicating that resource destruction is complete.
FAQ
Are Resources Immediately Deleted After Destruction?
Yes. After a destroy job executes successfully, the resources defined in the template are immediately deleted. Confirm that the resources are no longer needed before you proceed, because destruction is irreversible.
How Do I Troubleshoot Execution Failures?
View the execution logs on the job details page. Common failure causes include insufficient permissions, invalid resource parameters, or unsupported resource specifications in the target region.
What if the Plan Result is Not as Expected?
Click Cancel Execution on the job details page to terminate the current job. Then, modify the template code or task parameters and reinitiate the job. A preview does not create or modify any actual resources, so you can safely cancel it.