Issuing corporate-titled invoices from a personal account
If you have a personal account with real-name verification and need to issue an invoice with a corporate title, refer to the following methods.
Individual accounts cannot directly apply for corporate invoice titles. To issue an invoice with a corporate title, you must first upgrade your account to enterprise verification. If you are unable to complete the verification at this time, you can submit supporting documents for a special review. We recommend completing enterprise verification as soon as possible to access all features.
Method 1: Change real-name verification to enterprise
You can change your account's real-name verification from individual to enterprise. For details, see Change from Individual to Enterprise Verification. After the change, go to the invoice information (title) page and select Update to Latest Real-name Information to apply for invoices with the new title.
This change is irreversible. Once an account is changed to enterprise verification, it cannot be reverted to individual verification.
Method 2: Submit an application
If you cannot change your account's real-name verification, follow the steps below to submit an application. Provide the supporting documents as instructed. After approval, you can issue invoices with a title type of "Organization" or "Enterprise".
Submitting the application invalidates your existing title. Before you apply, issue any remaining invoices with your current title, as you will no longer have access to it.
When you apply, ensure that your account has no active corporate titles and no pending title applications.
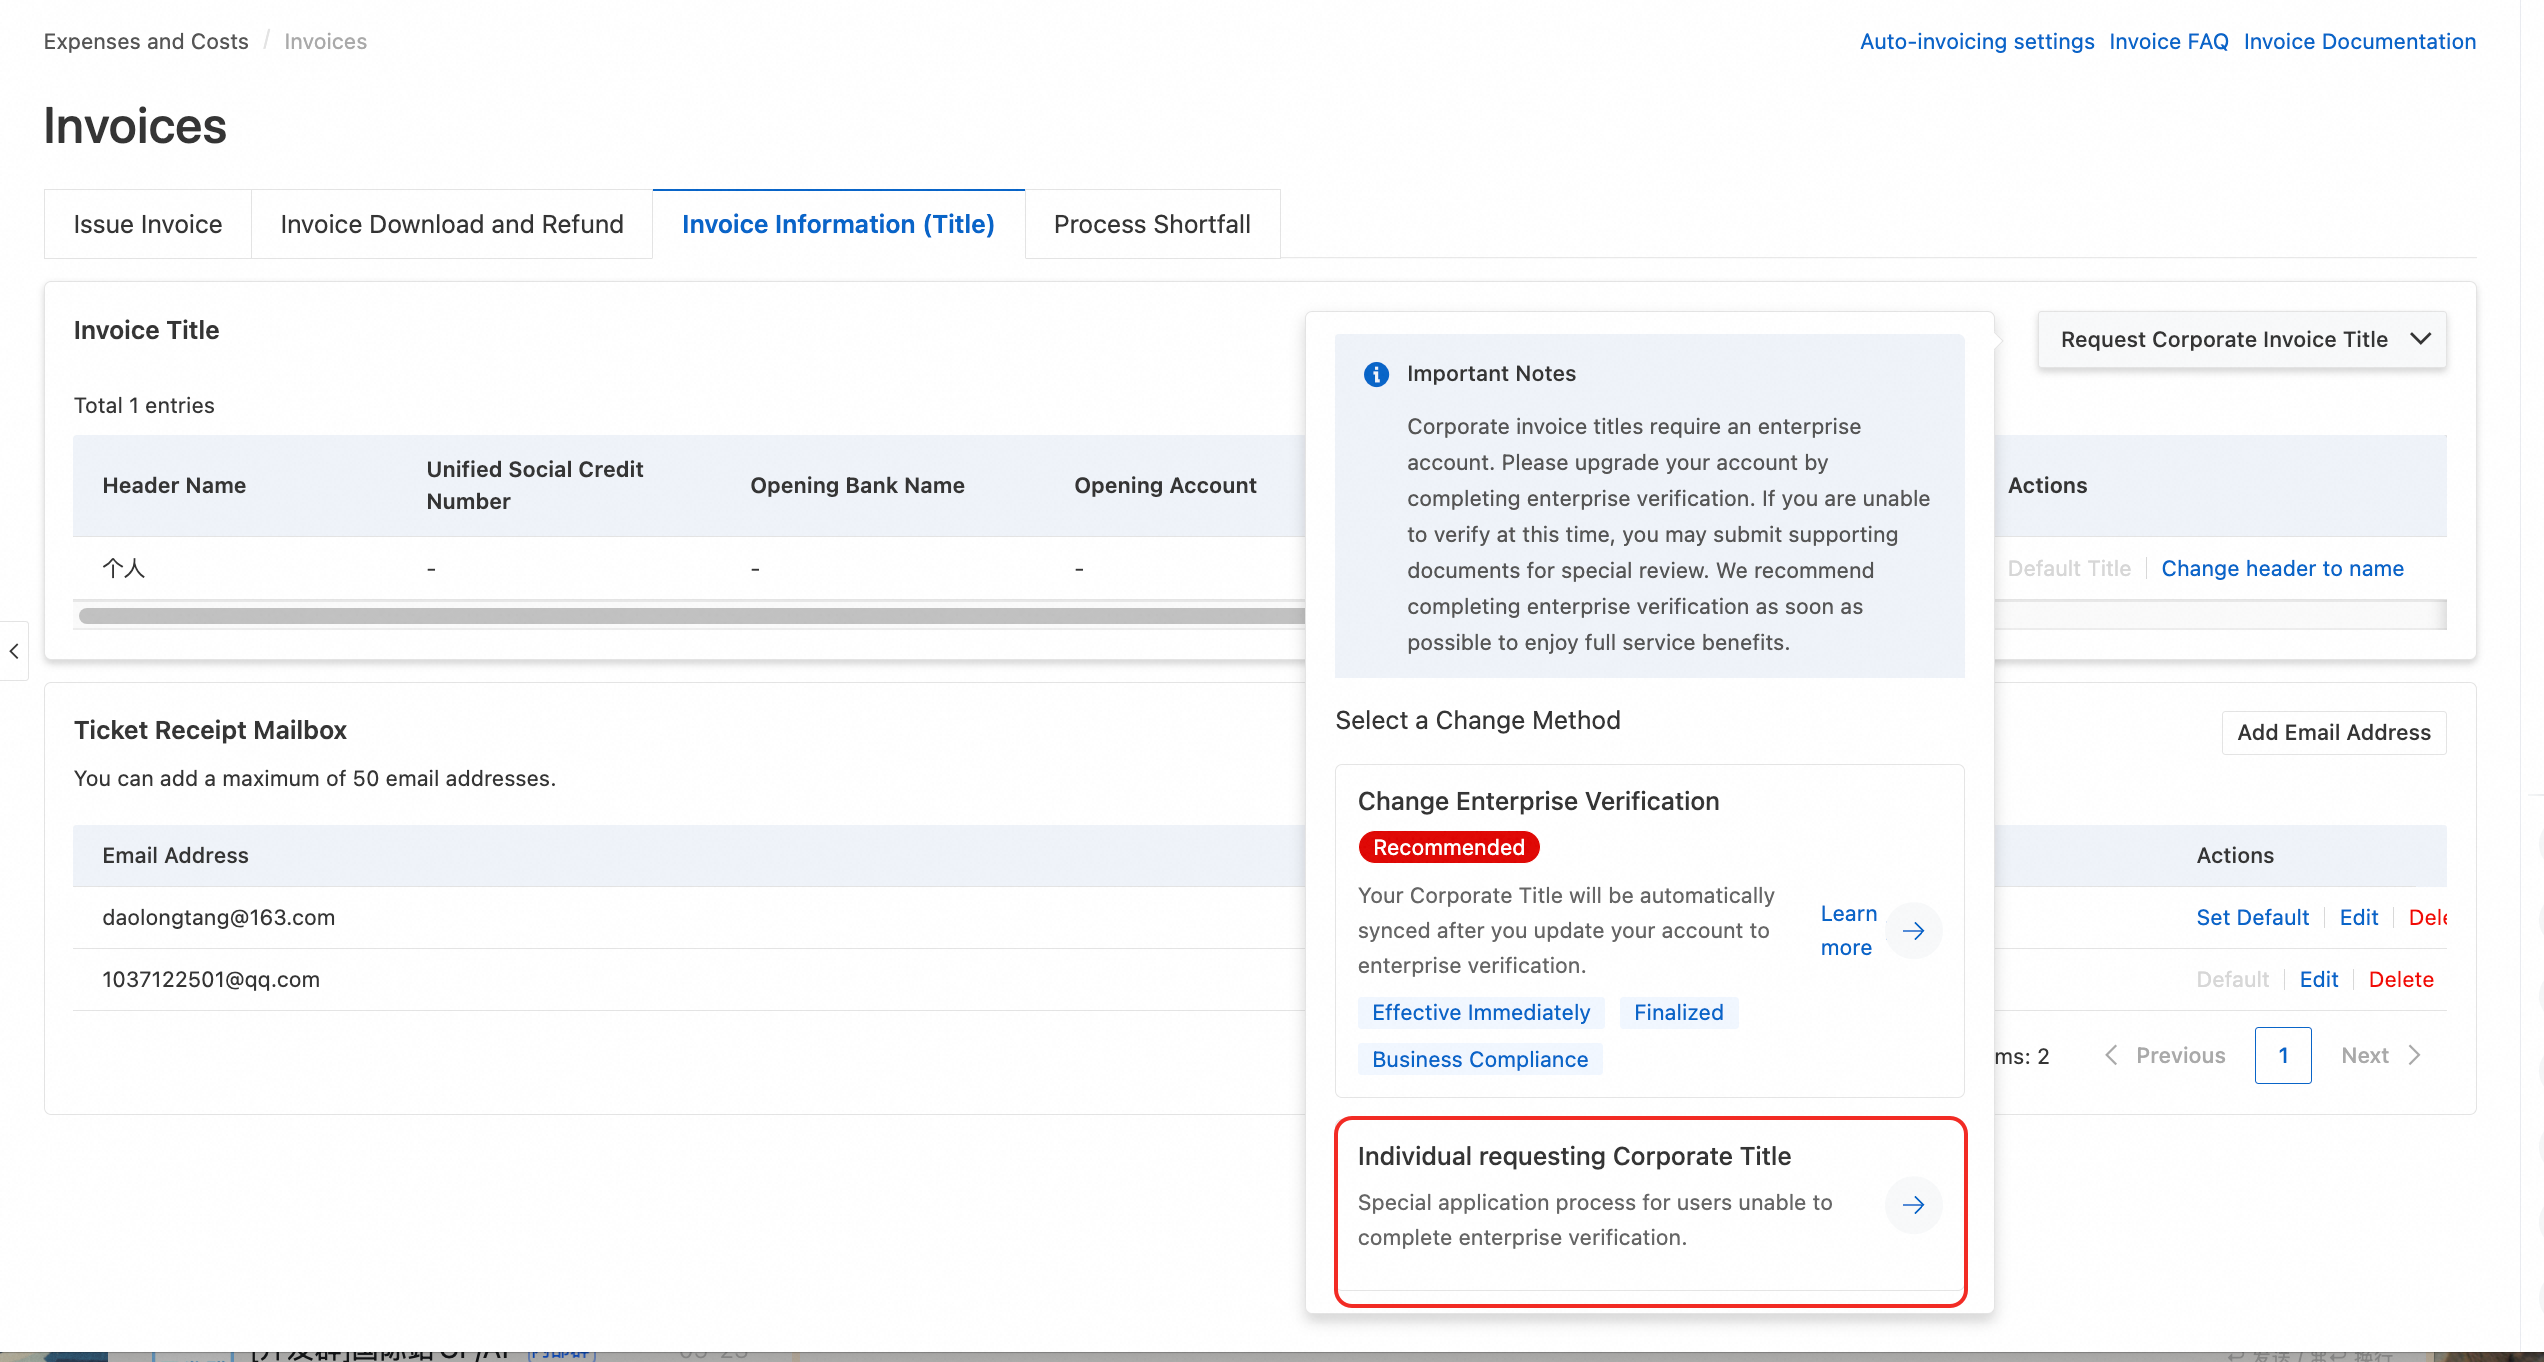
Sign in to the Expenses and Costs console. In the left-side navigation pane, click Invoices to open the Invoices page.
Go to the Invoice Information (Title) page. To the right of Invoice Title, click the drop-down arrow next to apply for corporate title and select Individual Application for Enterprise Title.
In the application form, select your applicant type: student, teacher, or corporate employee.
Follow the on-screen prompts to complete the application and submit it for review.
After you submit your application, Alibaba Cloud will complete the review within 3 to 5 business days and notify you of the result by SMS. You can also Check Review Progress or Withdraw Application on the Invoice Title page. If you need to expedite the process, you can click Expedite on the Check Review Progress page to notify the review team to accelerate the approval.
NoteTo check the approval status, use the new version of the Costs console. You can request an expedited review 24 hours after submitting the application.
If your application is approved, the new title is automatically added to your invoice title information. You can view and manage it on the invoice information (title) page.
If your application is denied, you can click View Reason. Based on the reason provided, correct your application and resubmit it. Alternatively, you can Delete the application.
Sample supporting documents
When you apply, submit the required supporting documents as instructed. Refer to the samples below.
Type | Sample |
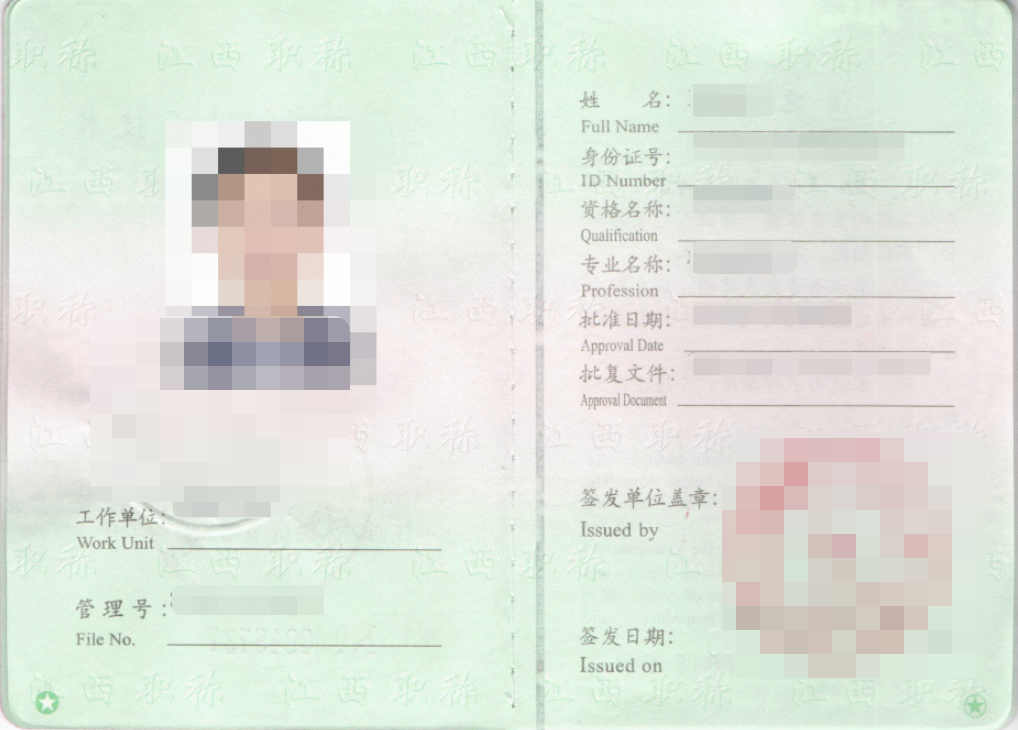
Faculty ID card |
|
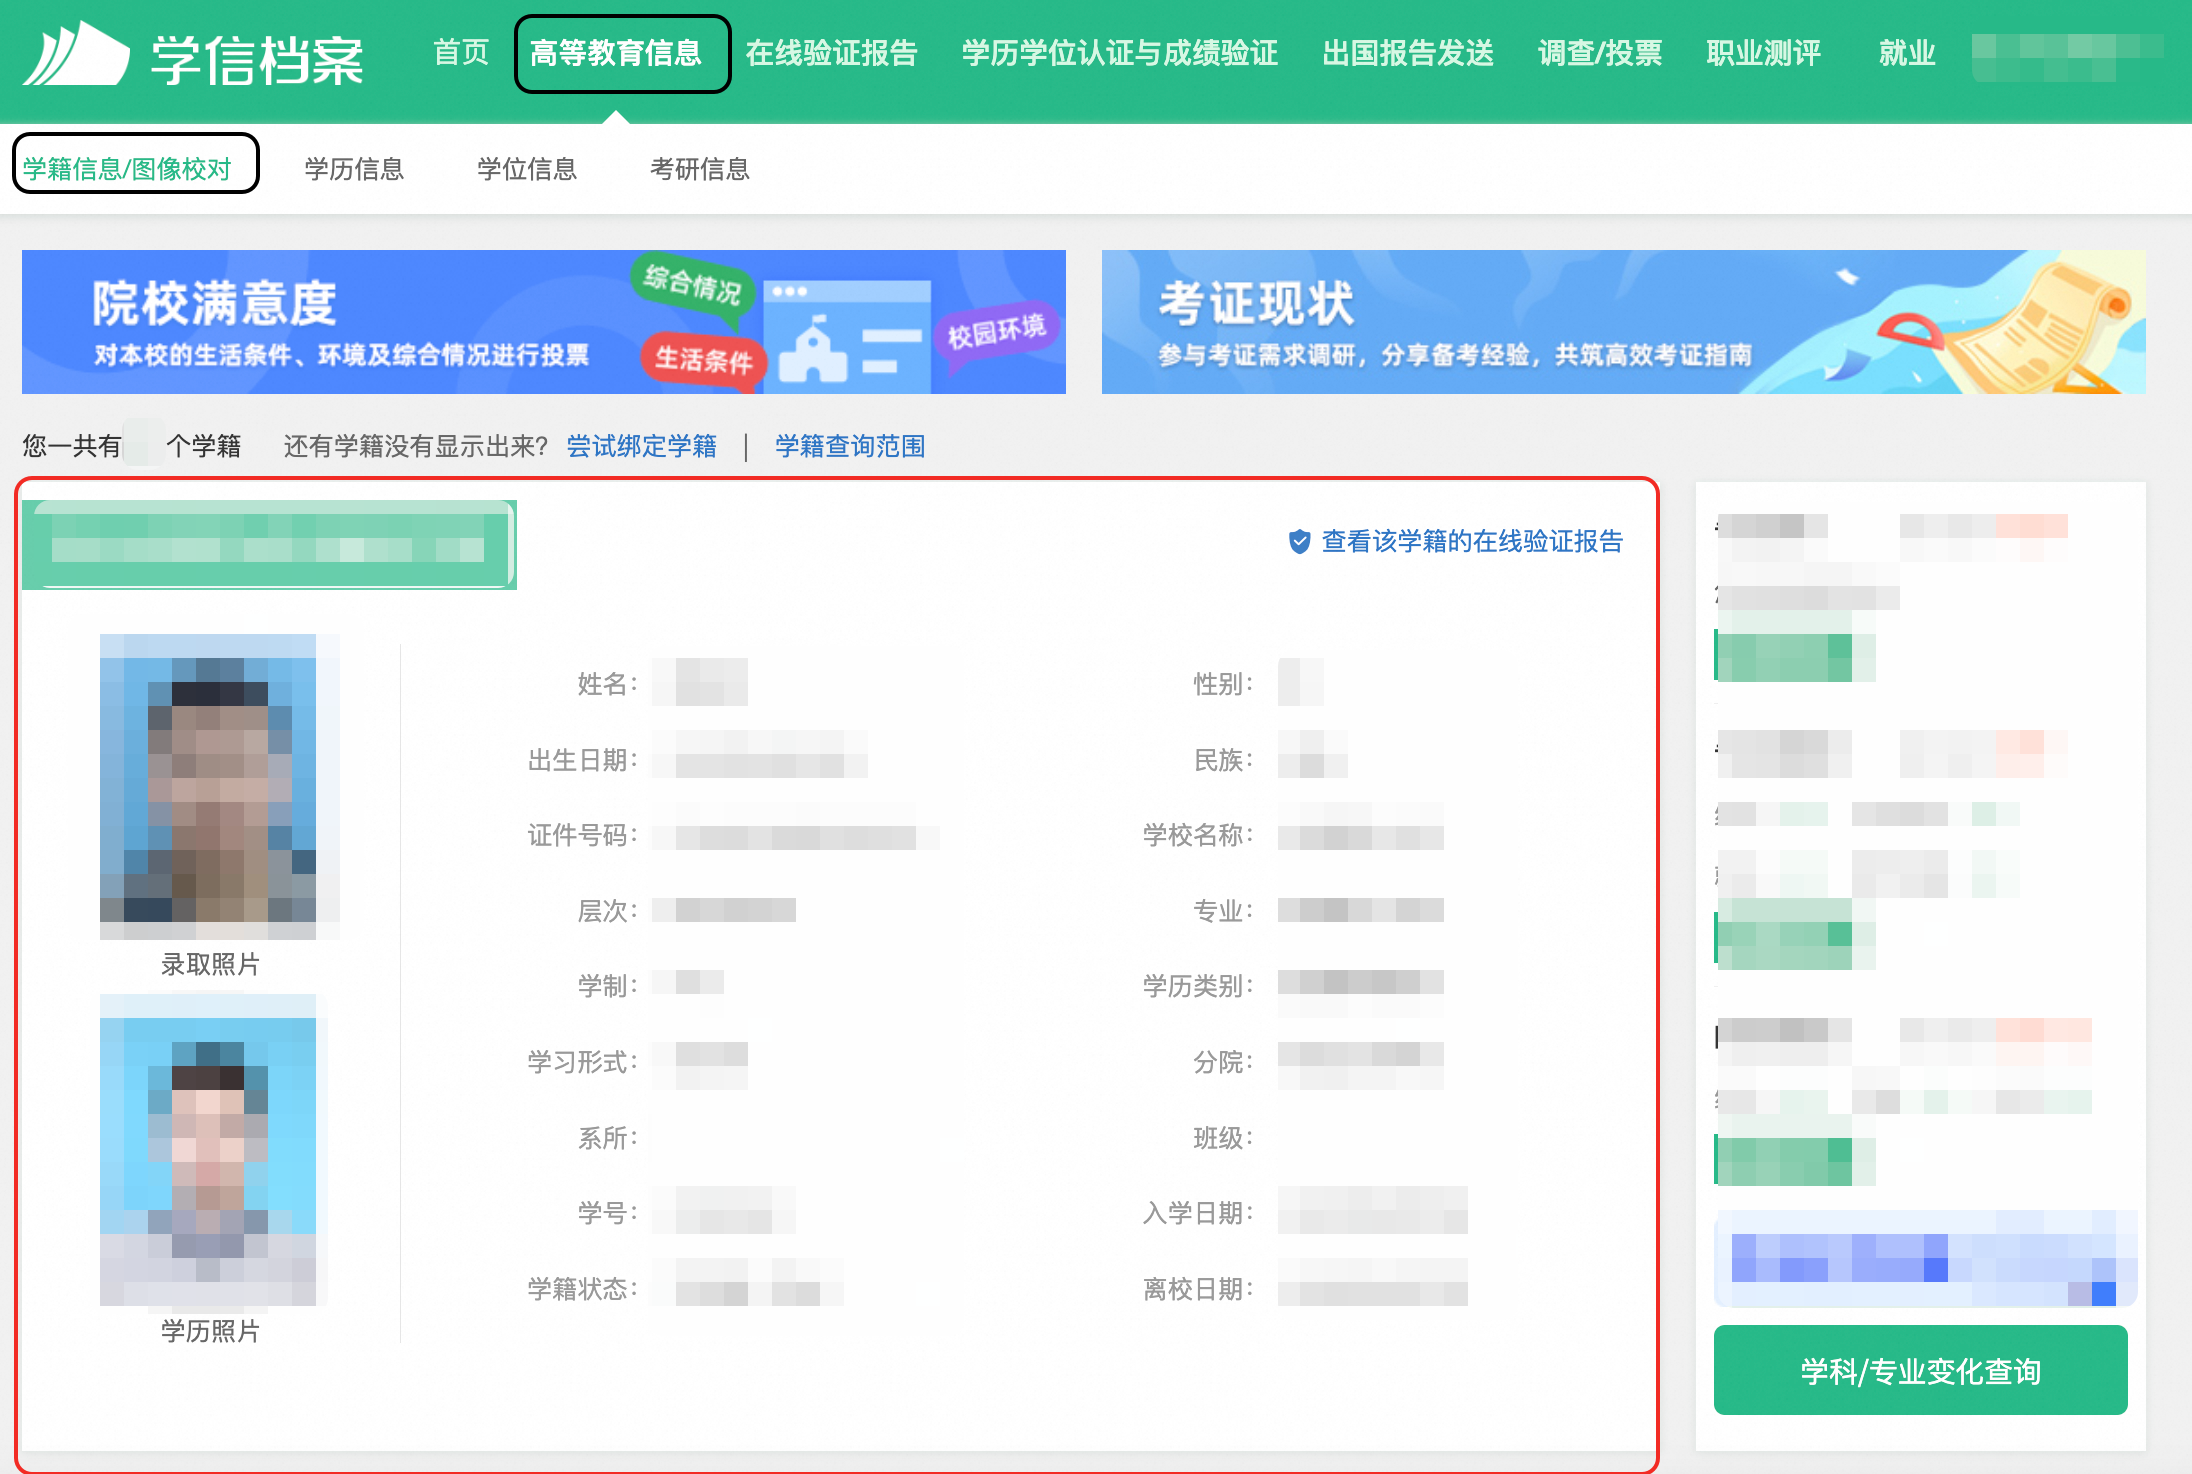
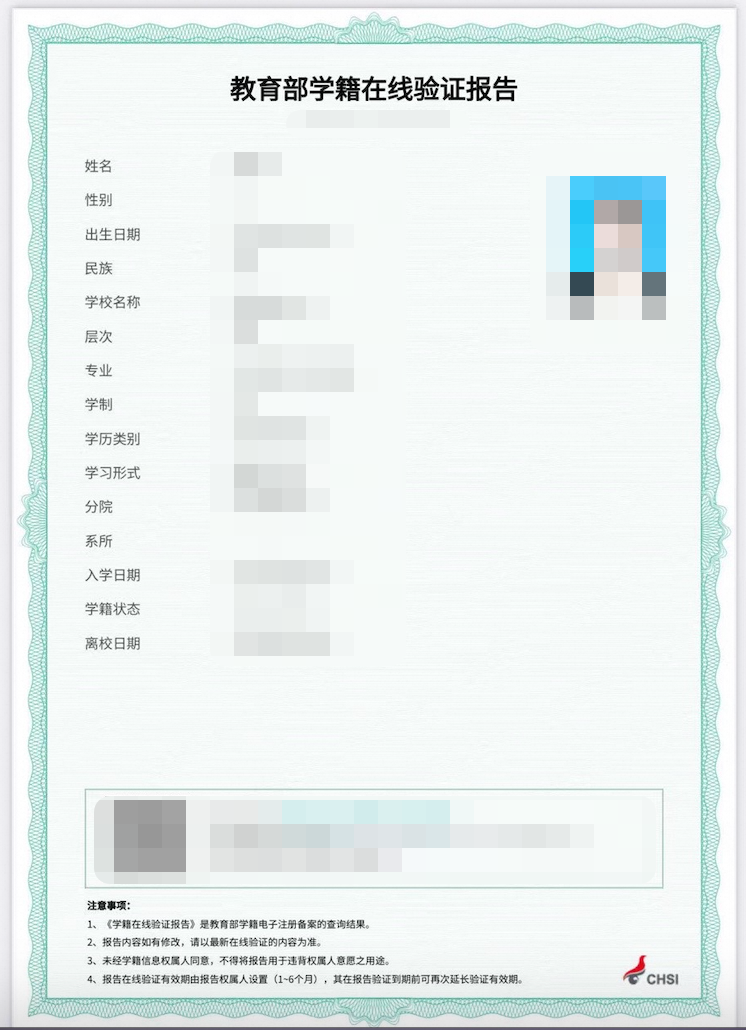
Student: CHESICC Screenshot and Online Student Status Report
|
|
| |
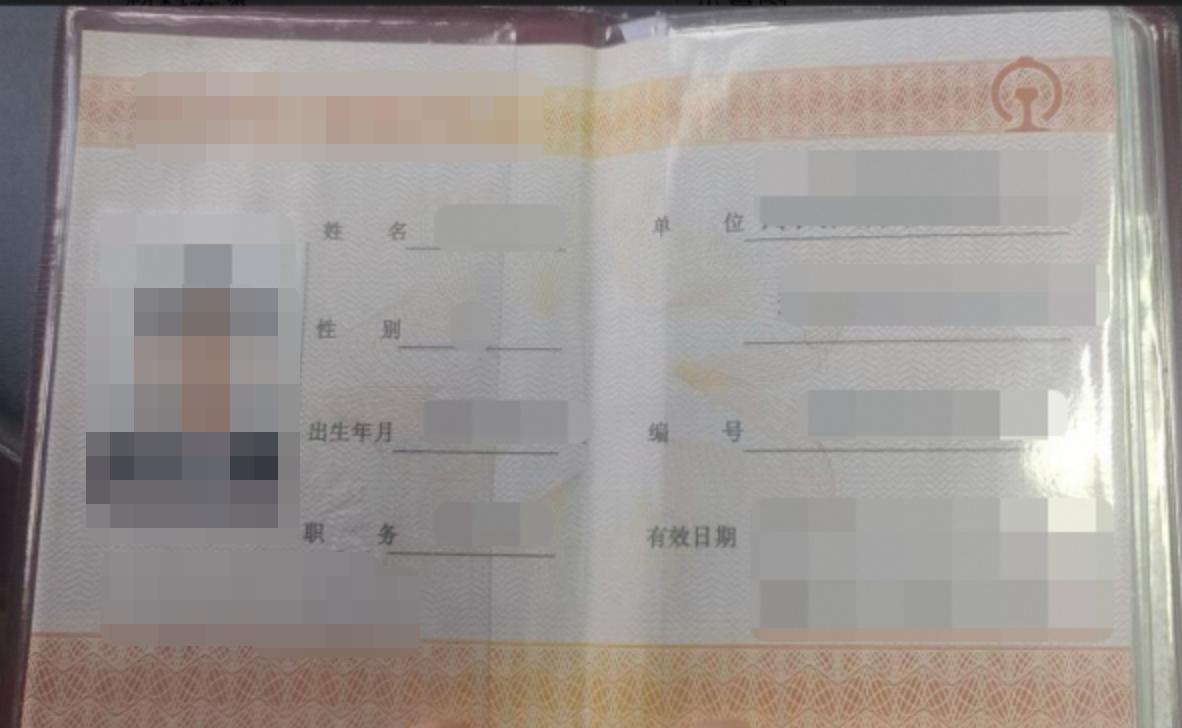
Employee ID card |
|
Certificate of employment |
|
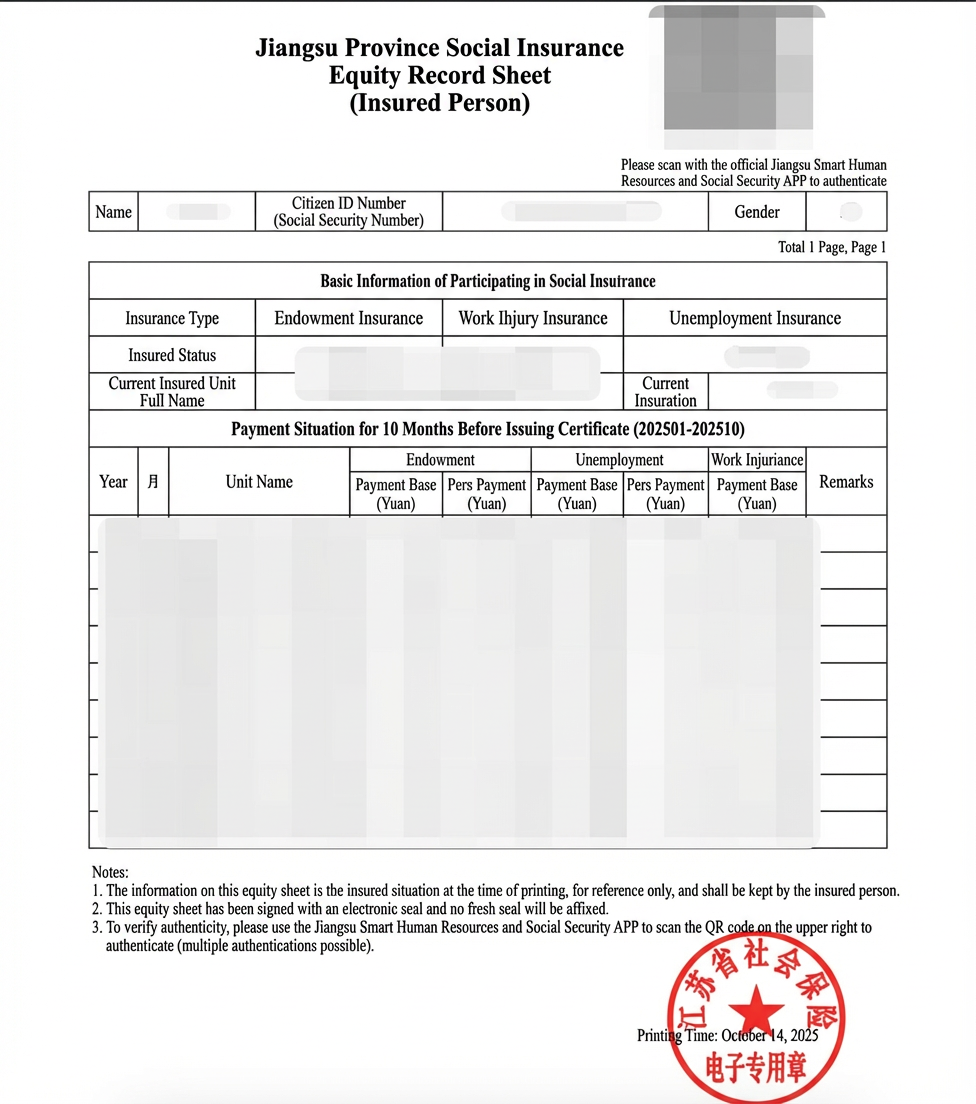
Social security records |
|
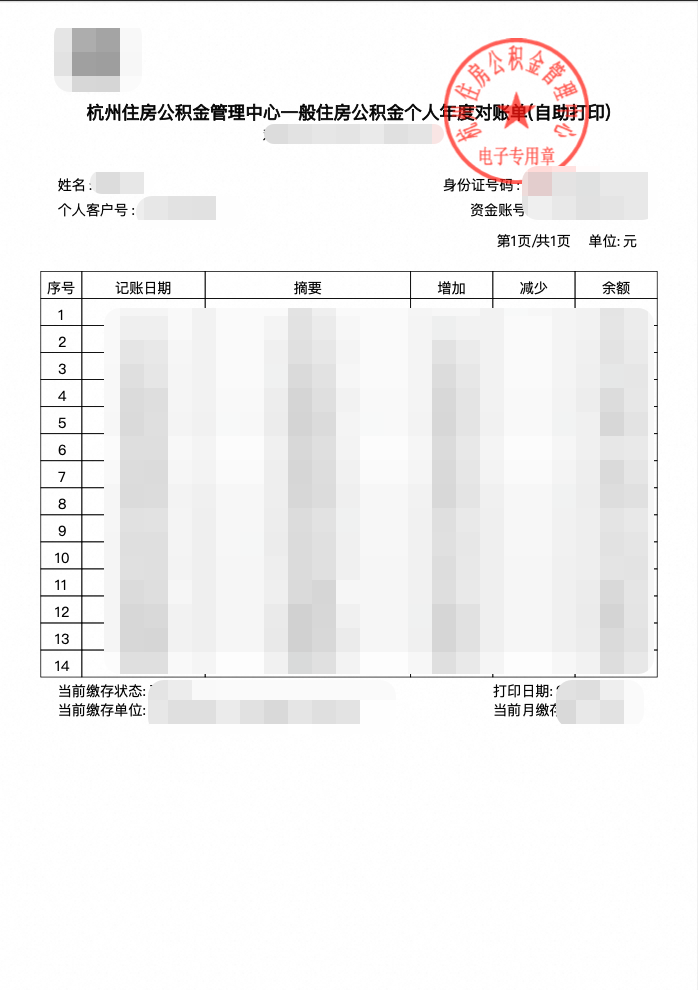
Housing provident fund records |
|