利用传统手段将文档内容转换为视频,比如根据文档内容录制一个视频,不仅需要投入大量的时间和精力,而且往往需要具备专业的视频编辑技能。使用大模型技术可以更加有效且智能化地解决上述问题。本实践方案旨在依托大语言模型(Large Language Models, LLMs)和多模态应用技术,向您展示如何将文档自动转换为视频,并提供配套的完整代码包,帮助您快速入门上手本实践教程。
效果演示 通过本实践教程及完整代码 ,您可以借助大模型将文档转为视频。所生成的视频包含完整的图文、语音、字幕等内容。下面是一个示例,输入文档为阿里云大模型工程师 课程第一章第一课时认识大模型 ,输出的视频效果演示如下:
阿里云大模型工程 方案概览 文档切片: 首先,我们运用大模型来总结文档标题,将文档划分为不同段落。并为每个段落生成一个概括性的段落标题。
生成演示文稿: 紧接着,我们整合各部分内容,包括标题、正文以及图片等,利用这些素材生成演示文稿图片。
生成讲解语音与字幕: 接下来,我们采用多模态大模型技术,将文字材料转换成音频文件,并依据音频的播放时长自动生成配套的文字字幕。
生成视频: 最后我们将所有演示文稿图片剪辑为视频,并将音频与字幕文件嵌入视频。
准备工作 获取 ,用于调用阿里云百炼提供的大模型。
百炼为新用户提供了免费额度,额度消耗完后按 token 计费。您可以查看计费说明 获取计费详情。 配置环境变量,以降低配置 ,根据您的操作系统选择适合的环境变量配置方法。
本实践教程依赖音视频处理工具
MacOS # 您需要在终端运行如下代码
# 请您配置国内镜像源下载
# 安装Windows 安装Miniconda (如已安装请跳过)
使用
在
# 其中,“py12”为虚拟环境名称,可修改;“3.12”为安装
继续在
# 先安装安装
继续在
conda install -c conda-forge ffmpeg本实践教程中的图片生成依赖于浏览器引擎渲染,请您确保您的工作环境中安装了浏览器应用,如
本实践教程基于安装 ,并安装本实践教程所需的
MacOS # 您需要在终端运行如下代码
# 为了提高下载速度,推荐您配置国内镜像源
pip install --upgrade pip
pip install urllib3==1.25.8
pip install pyppeteer
pip install dashscope
pip install --upgrade dashscope
pip install pydub
pip install natsort
pip install moviepy
pip install ffmpeg-python
pip install --upgrade requestsWindows 由于前面已使用
# “your_py_env”需要替换成真实的虚拟环境名称
conda activate your_py_env
接下来执行如下命令:
# 您需要在如果遇到类似“pyppeteer 2.0.0 requires urllib3<2.0.0,>=1.25.8, but you have urllib3 2.4.0”的报错,执行下面这三个命令:
pip uninstall urllib3
# <2.0.0,>=1.25.8快速体验 如果您希望快速尝试,可以直接下载本教程中提供的完整代码 到您的本地工作环境中,并在本地执行如下命令:
MacOS # 解压缩
unzip doc2video.zip
# 进入文件目录
cd doc2video
# 更改权限
chmod +x run.sh
# 运行脚本
./run.shWindows # 解压缩,进入文件目录
cd doc2video
# 运行脚本,您可以在result.log中查看代码运行日志
bash run.sh为了帮助您理解方案流程,并能够根据实际需要进行个性化定制,下面我们将为您介绍如何从 0 开始,逐步构建一个文档生成视频的工程。
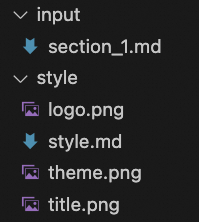
步骤一:准备素材 请您将文档中的文字、Markdownsection_1.md input section_1.md
section_1.md
你有过使用搜索引擎搜索问题却怎么也找不到有效信息的时候吗?
拥有大模型之前
我们使用搜索引擎去搜索问题,然而由于网页内容质量参差不齐,你有可能看了五个网页也找不到自己的答案。

拥有大模型之后
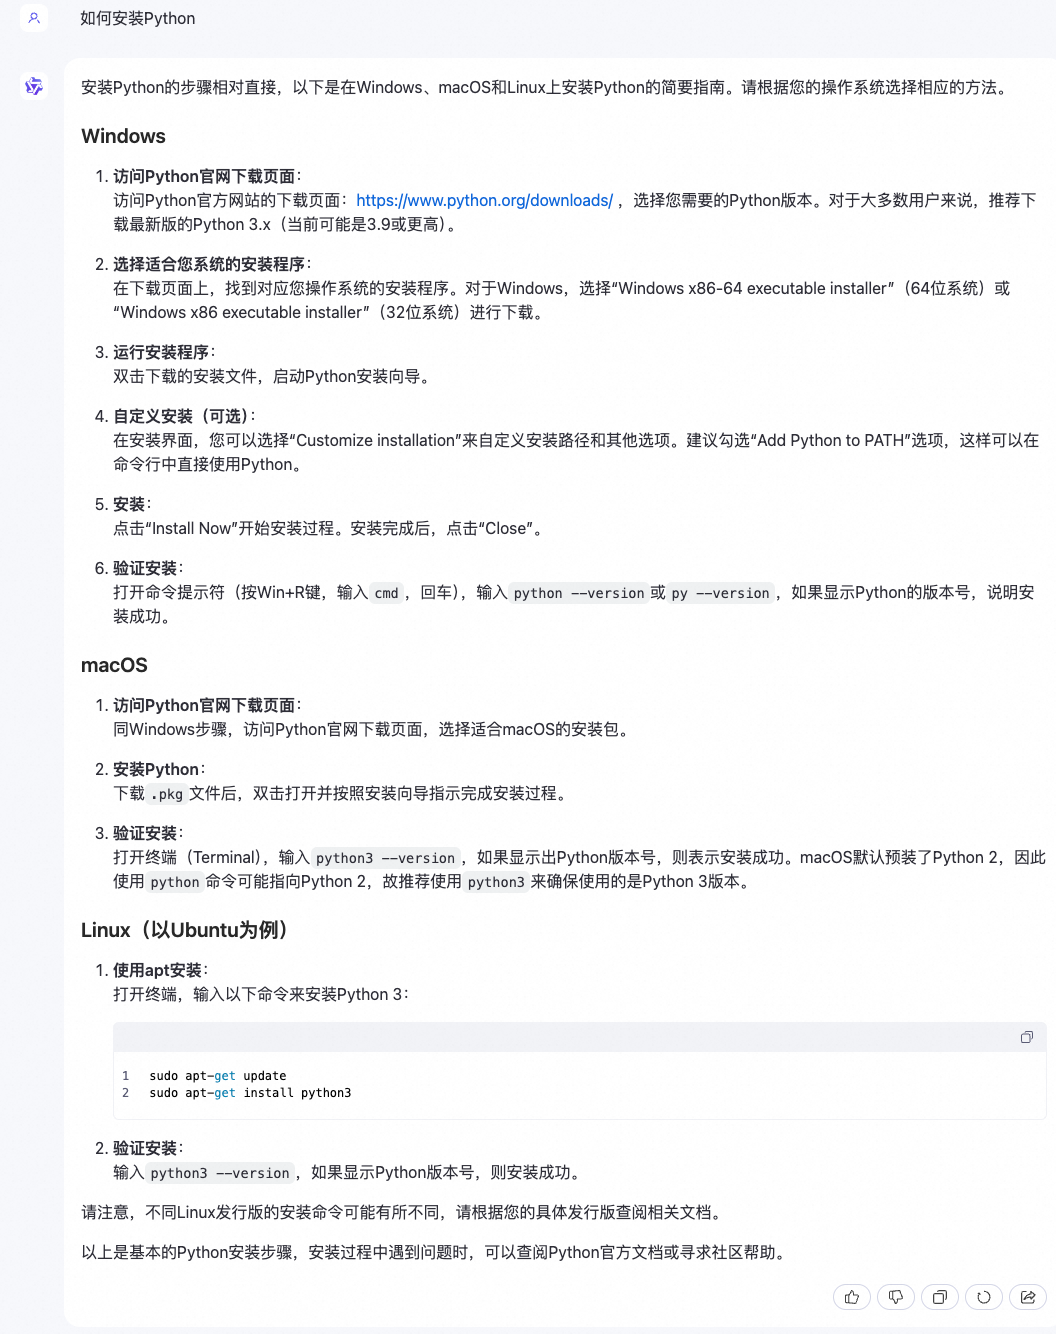
直接将输入搜索引擎的问题输入大模型,比如“如何安装Python”,由于大模型有非常庞大且高质量的知识,因此它会输出正确答案,而且会包含不同系统的Python安装方法,比我们直接使用搜索引擎寻找答案方便多了。
大模型的影响力已经逐渐散播到我们生活的方方面面。从2022年底ChatGPT的一鸣惊人,再到持续进行的“百模大战”,“大模
型”已经逐渐成为了技术和公众领域的热点。
大模型是人工智能领域的一个重要里程碑,它推动了人工智能技术的发展,并为人类的未来带来新的可能性。
有人曾经类比,大模型的发明相当于人类文明的哪个节点?一个浪漫的答案可能是:人类学会使用火的时刻。

学完本课程后,你将能够:
掌握大模型的特点、重要概念以及工作方式;
了解阿里云大模型的基本概况和产品矩阵;
了解大模型,尤其是大语言模型的应用场景和示例。。您可以直接使用完整代码 中我们提供的图片、风格文件等素材,并将其全部保存到style
您需要在您的工作环境目录下创建一个main.py ,以便于设置参数以及函数调用,示例代码如下:
main.py
import argparse
import datetime
import os
import shutil

# 在此处导入各函数


def main(args):
    # 记录开始时间
    start_time = datetime.datetime.now()
    # 创建输出保存路径,将渲染素材复制到指定路径下
    input_base_name = os.path.splitext(os.path.basename(args.input_txt_path))[0]

    if not os.path.exists(args.markdown_path):
        os.makedirs(args.markdown_path)
    for filename in os.listdir(args.input_style_path):
        full_path = os.path.join(args.input_style_path, filename)
        if os.path.isfile(full_path):
            shutil.copy2(full_path, args.markdown_path)


    # 在此处调用各函数

    # 记录结束时间
    end_time = datetime.datetime.now()

    # 计算总时间
    elapsed_time = end_time - start_time
    elapsed_hours, remainder = divmod(elapsed_time.total_seconds(), 3600)
    elapsed_minutes, elapsed_seconds = divmod(remainder, 60)

    start_time_str = start_time.strftime("%Y年%m月%d日 %H时%M分%S秒")
    end_time_str = end_time.strftime("%Y年%m月%d日 %H时%M分%S秒")
    elapsed_time_str = f"{int(elapsed_hours)}时{int(elapsed_minutes)}分{int(elapsed_seconds)}秒"

    print(f"开始时间: {start_time_str}")
    print(f"结束时间: {end_time_str}")
    print(f"总时间: {elapsed_time_str}")


if __name__ == "__main__":

    parser = argparse.ArgumentParser(description="文档生成视频")

    # 添加命令行参数 --input_txt_path,默认值为 './input/section_1.md',表示输入文本的路径
    parser.add_argument('--input_txt_path', type=str, default='./input/section_1.md', help='输入文本的路径')

    # 添加命令行参数 --input_style_path,默认值为 './style',表示输入样式文件夹的路径
    parser.add_argument('--input_style_path', type=str, default='./style', help='输入样式文件夹的路径')

    # 添加命令行参数 --markdown_style_path,默认值为 './style/style.md',表示 Markdown 样式的路径
    parser.add_argument('--markdown_style_path', type=str, default='./style/style.md', help='Markdown 样式的路径')

    # 添加命令行参数 --logo_path,默认值为 './style/logo.png',表示 Logo 图片的路径
    parser.add_argument('--logo_path', type=str, default='./style/logo.png', help='Logo 图片的路径')

    # 添加命令行参数 --theme_path,默认值为 './style/theme.png',表示主题图片的路径
    parser.add_argument('--theme_path', type=str, default='./style/theme.png', help='主题图片的路径')

    # 添加命令行参数 --title_path,默认值为 './style/title.png',表示标题图片的路径
    parser.add_argument('--title_path', type=str, default='./style/title.png', help='标题图片的路径')

    # 添加命令行参数 --json_path,默认值为 './material/json',表示 JSON 文件的路径
    parser.add_argument('--json_path', type=str, default='./material/json', help='JSON 文件的路径')

    # 添加命令行参数 --image_path,默认值为 './material/image',表示图像文件夹的路径
    parser.add_argument('--image_path', type=str, default='./material/image', help='图像文件夹的路径')

    # 添加命令行参数 --audio_path,默认值为 './material/audio',表示音频文件夹的路径
    parser.add_argument('--audio_path', type=str, default='./material/audio', help='音频文件夹的路径')

    # 添加命令行参数 --markdown_path,默认值为 './material/markdown',表示 Markdown 文件夹的路径
    parser.add_argument('--markdown_path', type=str, default='./material/markdown', help='Markdown 文件夹的路径')

    # 添加命令行参数 --srt_and_video_path,默认值为 './material/video',表示字幕和视频文件夹的路径
    parser.add_argument('--srt_and_video_path', type=str, default='./material/video', help='字幕和视频文件夹的路径')

    # 添加命令行参数 --fps,默认值为 30,表示帧率
    parser.add_argument('--fps', type=int, default=30, help='帧率')

    # 添加命令行参数 --title,默认值为 "认识大模型",表示视频标题
    parser.add_argument('--title', type=str, default="认识大模型", help='文档主题')

    args = parser.parse_args()

main(args)您需要将main.py input 、style main.py main.py
python main.py步骤二:文档切片 在这一部分中,我们运用大模型为输入文档生成文档标题并划分段落,然后借助大模型对每个段落的内容进行归纳总结,同时为每个段落自动生成相应的段落标题。
划分文本段落 我们借助通义千问-Plus ,为输入文档生成一个文档标题并划分段落。
通义千问-Plus模型列表与价格 。 通义千问-Plus 新建一个名为theme_generate.py
theme_generate.py
from http import HTTPStatus
import dashscope
import re

def theme_generate_with_qwen_plus(input_filepath, title):
    """
    使用通义千问-Plus生成摘要标题。

    本函数读取指定文件的内容,并基于该内容和给定的主题生成一个精确、概括性的摘要标题。

    参数:
    - input_filepath: 输入文件的路径。该文件的内容将用于生成摘要标题。
    - title: 生成摘要标题需围绕的主题。确保生成的标题与该主题紧密相关。

    返回:
    - response_content: 生成的摘要标题。

    注意:
    - 该函数以流式传输的方式请求生成标题,仅当响应状态码为HTTPStatus.OK时,累加响应内容。
    - 如果发生错误,函数会打印请求的相关错误信息。
    """
    # 读取输入文件内容
    with open(input_filepath, 'r', encoding='utf-8') as file:
        content = file.read()

    # 构建提示信息,指导模型生成与主题紧密相关的标题
    prompt = f"""
                请为以下输入文档创建一个精确的、具备概括性的摘要标题,能够反映文档核心内容,忽略所有链接,仅聚焦文字信息。
                需要紧紧地围绕主题“{title}”。
                直接呈现标题成果,勿附加其他文本,不超过10个汉字,用中文回答。
                以下是输入文档的内容:
              """

    # 构建消息格式
    messages = [{
        'role': 'user',
        'content': f"""
                    "{prompt}"
                    "{content}"
                   """
    }]

    # 初始化响应内容
    response_content = ''

    # 以流式传输的方式获取生成的结果
    responses = dashscope.Generation.call("qwen-plus",
                                          messages=messages,
                                          result_format='message',
                                          stream=True,
                                          incremental_output=True)

    # 遍历响应,累加生成的标题内容
    for response in responses:
        if response.status_code == HTTPStatus.OK:
            response_content += response.output.choices[0]['message']['content']
        else:
            # 打印错误信息
            print('Request id: %s, Status code: %s, error code: %s, error message: %s' % (
                response.request_id, response.status_code,
                response.code, response.message
            ))

    # 移除标题中的双引号(如果存在)
    response_content = re.sub(r'^"|"$', '', response_content)

    # 返回生成的标题内容
return response_content在theme_generate.py theme_generate_with_qwen_plus ,通过通义千问-Plus main.py
导入并调用
# 导入
from theme_generate import theme_generate_with_qwen_plus

# 调用
# 通过API调用通义千问-Plus为输入文档生成文档标题
theme = theme_generate_with_qwen_plus(args.input_txt_path, args.title)
# 打印文档标题
print(theme)我们可以调用该函数来获取示例文档section_1.md
示例文档的标题:大模型:影响与应用。 接下来新建一个名为doc_split.py
doc_split.py
from http import HTTPStatus
import dashscope
import json
import os
def doc_split_with_qwen_plus(input_filepath, output_filepath):

    if not os.path.exists(output_filepath):
        os.makedirs(output_filepath)

    with open(input_filepath, 'r', encoding='utf-8') as file:
        content = file.read()

    prompt = """
                    执行文档处理任务,包括分段与自动生成段落标题,需遵循以下具体细则:

                    1. **分段逻辑**:仔细分析文档内容,根据其内在语义逻辑合理划分段落。

                    2. **标题创作**:为每一独立段落设计一个精炼标题,确保该标题简洁明了(不超过10个字),并能有效准确地概括该段落核心信息。

                    3. **输出规格**:完成处理后,生成的文档结构需符合JSON格式标准,每段落及对应的标题组成一个条目,具体格式示例如下:


                    [
                        {"title": " ", "content": " "},
                        {"title": " ", "content": " "},
                        ...
                    ]

                    输出内容是以"["开头,并以"]"收尾的JSON数据,请不要输出其他内容。

                    4. **原文忠实性**:在输出的JSON数据中,各段落的“content”字段必须精确匹配原始文档的文字内容,不得有增删改动。必须完整地处理原始文档的全部内容,不能有遗漏。请严格保证文字和链接在原文档中的相对位置保持不变。

                    5. **格式化链接**:对于文档中的markdown格式的图片链接,将他们单独保存到JSON条目中。其"title"为"链接{index}","content"为链接地址,其中index为索引顺序。

                    6. **内容限制**:输出内容中不得包含任何多余的空格、换行符、制表符等空白字符,也不得包含任何HTML、XML、Markdown等格式的符号。始终保持中文。

                    请严格依据上述要求执行文档处理任务。

                    文档内容如下:
              """

    messages = [{
        'role': 'user',
        'content': f"""
                    "{prompt}"
                    "{content}"
                   """
    }]

    response_content = ''
    responses = dashscope.Generation.call("qwen-plus",
                                          messages=messages,
                                          result_format='message',
                                          stream=True,
                                          incremental_output=True)

    for response in responses:
        if response.status_code == HTTPStatus.OK:
            response_content += response.output.choices[0]['message']['content']
        else:
            print('Request id: %s, Status code: %s, error code: %s, error message: %s' % (
                response.request_id, response.status_code,
                response.code, response.message
            ))
    if response_content.startswith("```") and response_content.endswith("```"):
        response_content = response_content[8:-3].strip()

    input_base_name = os.path.splitext(os.path.basename(input_filepath))[0]
    output_file_path = os.path.join(output_filepath, f'{input_base_name}.json')
    with open(output_file_path, 'w', encoding='utf-8') as json_file:
        json.dump(json.loads(response_content), json_file, ensure_ascii=False, indent=4)

return response_content在doc_split.py doc_split_with_qwen_plus ,通过通义千问-Plus main.py
导入并调用
# 导入
from doc_split import doc_split_with_qwen_plus

# 调用
# 通过API调用通义千问-Plus为输入文档划分段落,并为每一个段落生成一个段落标题
doc_split_with_qwen_plus(args.input_txt_path, os.path.join(args.json_path))调用该函数来为示例文档section_1.md section_1.json ./material/json
输出 提炼内容 接着我们通过通义千问-Plus ,总结提炼各个段落的内容。
新建一个名为qwen_plus_marp.py
qwen_plus_marp.py
import asyncio

import os
from http import HTTPStatus
import dashscope

def call_with_stream(content):
    prompt2 = """
                    请提取下列文字的主要要点,并将这些要点以Markdown格式输出,请输出中文。
                    如果文字内容为链接,请直接以Markdown格式输出该链接。
                    请严格按照Markdown格式输出代码段,避免输出其他内容,避免出现'''之类的符号。
                    但是Markdown文字内容简洁。
                    Markdown代码段中,每一个小标题下的内容行数禁止超过3行。
                    “- 内容”之后不要再分段落描述。

                    示例输入:你有过使用搜索引擎搜索问题却怎么也找不到有效信息的时候吗?
                    示例输出:- 使用搜索引擎遇到的问题:难以找到有效信息

                    示例输入:https://alidocs.oss-cn-zhangjiakou.aliyuncs.com/res/54Lq3RNeD78gn7Ed/img/6f9f3049-78a2-46b3-a052-88792052890d.png
                    示例输出:https://alidocs.oss-cn-zhangjiakou.aliyuncs.com/res/54Lq3RNeD78gn7Ed/img/6f9f3049-78a2-46b3-a052-88792052890d.png

                    以下是待提炼的文字内容:


              """


    messages = [{
        'role': 'user',
        'content': f"""
                    "{prompt2}"
                    "{content}"
                   """
    }]

    response_content = ''
    responses = dashscope.Generation.call("qwen-plus",
                                          messages=messages,
                                          result_format='message',
                                          stream=True,
                                          incremental_output=True)

    for response in responses:
        if response.status_code == HTTPStatus.OK:
            response_content += response.output.choices[0]['message']['content']
        else:
            print('Request id: %s, Status code: %s, error code: %s, error message: %s' % (
                response.request_id, response.status_code,
                response.code, response.message
            ))

    return response_content
在qwen_plus_marp.py call_with_stream ,通过通义千问-Plus
我们将在整合图文素材时导入并调用call_with_stream
步骤三:生成演示文稿 在这一部分中,我们将图文素材整合到
在介绍详细流程和代码之前,我们首先简单介绍一下这部分用到的工具:Marp。MarpMarp ,打造出独具个人风格特色的演示文稿。
在 由于markdown_gather.py ,用于汇总一些优化和调整
markdown_gather.py
import os
import re
from pathlib import Path
import os
def merge_style_with_md_files(md_file_path, style_file_path):
# 检查样式文件是否存在
if not os.path.isfile(style_file_path):
raise FileNotFoundError(f"样式文件 {style_file_path} 不存在。")
# 读取样式文件内容
with open(style_file_path, 'r', encoding='utf-8') as f:
style_content = f.read()
# 遍历指定目录下的所有文件
for filename in os.listdir(md_file_path):
if filename.startswith('section') and filename.endswith('.md'):
file_path = os.path.join(md_file_path, filename)
# 合并样式内容与 .md 文件内容
if os.path.exists(file_path):
with open(file_path, 'r+', encoding='utf-8') as f:
original_content = f.read()
# 将指针移动到文件开头以覆盖原有内容
f.seek(0)
f.write(style_content + '\n\n' + original_content)
# 清除输出缓冲区以确保所有数据都已写入文件
f.truncate()
def remove_trailing_dashes(directory):
"""
从 Markdown 文件中移除位于文件末尾且后面没有其他内容(除了可能的换行符)的连续破折号(---)。
"""
for filename in os.listdir(directory):
# 检查文件是否以 section 开头且为 .md 文件
if filename.startswith('section') and filename.endswith('.md'):
filepath = os.path.join(directory, filename)
# 读取文件内容
with open(filepath, 'r', encoding='utf-8') as file:
content = file.read()
# 检查文件末尾是否有连续的破折号(---),并且之后没有其他内容(除了可能的换行符)
if content.rstrip().endswith('---') and content.rstrip('---').endswith('\n'):
# 移除末尾的连续破折号(---)及其后面的换行符
content = content.rstrip('---\n')
# 替换文件中的所有 "------" 为空字符串
content = content.replace("------", "")
content = re.sub(r'\n{3,}', '\n\n', content)
# 写入更新后的内容
with open(filepath, 'w', encoding='utf-8') as file:
file.write(content)
def remove_empty_lines(filename):
# 读取文件内容
with open(filename, 'r', encoding='utf-8') as file:
content = file.read()
# 替换文件中的所有 "------" 为空字符串
content = content.replace("------", "")
with open(filename, 'w', encoding='utf-8') as file:
file.write(content)
def append_string_to_file(file_path):
# 读取文件内容
with open(file_path, 'r', encoding='utf-8') as file:
content = file.read()
# 在文件末尾追加字符串 '---'
new_content = content + '---'
# 写入新内容
with open(file_path, 'w', encoding='utf-8') as file:
file.write(new_content)
def insert_logo(file_path, logo_path):
# 读取文件内容
with open(file_path, 'r', encoding='utf-8') as file:
content = file.read()
# 获取 Logo 文件名
logo_filename = Path(logo_path).name
# 定义要插入的字符串
insert_str = f"""<!--\nbackgroundImage: url("./{logo_filename}");\nbackgroundSize: 10% ;\nbackgroundPosition: 98% 3% ;\n-->
"""
# 使用正则表达式替换
# 只替换独立出现的 "---",不包括被其他破折号包围的情况
new_content = re.sub(r'(?<!-)---(?!-)', f'\n{insert_str}\n---', content, flags=re.DOTALL)
# 写入新内容
with open(file_path, 'w', encoding='utf-8') as file:
file.write(new_content)
def insert_bg_if_no_link(filename, theme_url):
# 用于存储最终结果的列表
result = []
# 读取文件内容
with open(filename, 'r', encoding='utf-8') as file:
content = file.read()
# 获取 Logo 文件名
theme_filename = Path(theme_url).name
# 使用正则表达式分割文本
sections = re.split(r'---+', content)
# 遍历每个部分
for i, section in enumerate(sections):
# 查找 "# {字符串内容}" 的模式
header_match = re.search(r'# \{(.+?)\}', section)
if header_match:
# 提取 "# {字符串内容}" 后面的内容
header_content = section[header_match.end():].strip()
# 检查这部分内容是否包含  格式的链接
if not re.search(r'!\[[^\]]*\]\([^\)]*\)', header_content):
# 如果没有链接也没有背景图片,在 "# {字符串内容}" 之后添加指定文本
section = f'{section[:header_match.end()]}\n{section[header_match.end():]}\n---'
# 将处理后的部分添加到结果列表中
result.append(section)
# 如果不是最后一个部分,保留原始的分隔符
if i < len(sections) - 1:
result.append('---')
# 将结果写回文件
with open(filename, 'w', encoding='utf-8') as file:
file.write(''.join(result))
def title_to_md(file_path, content, title_url):
# 读取原文件内容
title_filename = Path(title_url).name
with open(file_path, 'r', encoding='utf-8') as file:
original_content = file.read()
content = f"\n# {content}\n---"
# 在开头添加新内容
new_content = content + '\n' + original_content
# 写入新内容
with open(file_path, 'w', encoding='utf-8') as file:
file.write(new_content)您需要将其和main.py 、各函数文件放在同一路径目录下,并在后续调用该文件中的函数。
整合图文素材 我们将调用前文步骤二中“提炼内容”部分介绍的函数call_with_stream json2md.py
json2md.py
import json
import os
import re
from qwen_plus_marp import call_with_stream
from pathlib import Path
def is_link(text):
"""检查给定的文本是否为链接。"""
return text.startswith("http://") or text.startswith("https://")
def parse_json_list_to_markdown(json_list, theme_url):
"""
将 JSON 对象列表转换为 Markdown 格式,并通过 call_with_stream 处理 'content'。
参数:
- json_list (list): 字典列表,每个字典都包含 'title' 和 'content' 键。
返回:
- str: Markdown 格式的字符串。
"""
theme = "\n\n"
theme_filename = Path(theme_url).name
markdown_content = ""
for item in json_list:
title = item.get('title', '未命名')
processed_content = call_with_stream(item.get('content', ''))
if is_link(processed_content):
markdown_content += f"---\n\n\n\n---"
else:
markdown_content += f"\n\n# {title}\n\n{processed_content}\n\n---"
return markdown_content
def parse_json_list_to_markdown_new(json_list, theme_url):
"""
将 JSON 对象列表转换为 Markdown 格式,并通过 call_with_stream 处理 'content'。
参数:
- json_list (list): 字典列表,每个字典都包含 'title' 和 'content' 键。
返回:
- str: Markdown 格式的字符串。
"""
theme_filename = Path(theme_url).name
theme = f"\n\n"
markdown_content = ""
for i, item in enumerate(json_list):
title = item.get('title', '未命名')
processed_content = call_with_stream(item.get('content', ''))
if processed_content.startswith("```") and processed_content.endswith("```"):
processed_content = processed_content[11:-3].strip()
if not is_link(json_list[i].get('content')):
# 如果是列表中的最后一个元素
if i == len(json_list) - 1:
markdown_content += f"\n\n## {title}\n\n{processed_content}\n\n{theme}\n\n---"
else:
if not is_link(json_list[i + 1].get('content')):
# 当前不是链接且下一个也不是链接
markdown_content += f"\n\n## {title}\n\n{processed_content}\n\n{theme}\n\n---"
else:
# 当前不是链接但下一个是链接
markdown_content += f"\n\n## {title}\n\n{processed_content}\n\n---"
else:
# 当前是链接
markdown_content += f"---\n\n})\n\n---"
return markdown_content
def convert_json_file_to_md(json_file_path, output_dir, theme_url):
"""
读取 JSON 文件,通过 call_with_stream 转换其内容,然后保存为 Markdown 文件。
参数:
- json_file_path (str): JSON 文件的路径。
- output_dir (str): Markdown 文件将被保存的目录。
"""
if not os.path.exists(output_dir):
os.makedirs(output_dir)
with open(json_file_path, 'r', encoding='utf-8') as file:
json_data = json.load(file)
markdown_content = parse_json_list_to_markdown_new(json_data, theme_url)
base_name = os.path.splitext(os.path.basename(json_file_path))[0]
md_file_name = f"{base_name}.md"
output_path = os.path.join(output_dir, md_file_name)
with open(output_path, 'w', encoding='utf-8') as file:
file.write(markdown_content)
def save_markdown_to_file(content, filename):
""" 保存Markdown内容到文件 """
with open(filename, 'w', encoding='utf-8') as file:
file.write(content)
def process_markdown(input_file):
""" 处理Markdown文本,按要求分割并保存 """
with open(input_file, 'r', encoding='utf-8') as file:
input_text = file.read()
# 使用正则表达式确保每个部分都包含 "---"
parts = re.split(r'(?<=---\n)', input_text)
# 移除空字符串部分
parts = [part.strip() for part in parts if part.strip()]
filenames = []
base_path = os.path.dirname(input_file) # 获取基础文件的路径
for i, part in enumerate(parts):
# 生成文件名
filename = f'{os.path.splitext(os.path.basename(input_file))[0]}_{i}.md'
# 构建完整路径
full_filename = os.path.join(base_path, filename)
save_markdown_to_file(f'{part}', full_filename)
filenames.append(full_filename)在json2md.py
您需要在main.py json2md.py
导入并调用
# 导入
from json2md import convert_json_file_to_md
# 调用
# 总结各段落内容,保存为Markdown格式,并设置背景图片,可自行将style文件夹下的theme.png替换为自定义背景
for filename in os.listdir(args.json_path):
    if filename.endswith('.json'):
        json_file_path = os.path.join(args.json_path, filename)
convert_json_file_to_md(json_file_path, args.markdown_path, args.theme_path)为了美化演示文稿,我们进一步添加阿里云markdown_gather.py
导入并调用
# 导入
from markdown_gather import insert_logo, remove_empty_lines, title_to_md

# 调用
# 将文档标题添加到Markdown文件开头作为标题页,并设置标题页背景,可自行将style文件夹下的title.png替换为自定义标题页背景
title_to_md(os.path.join(args.markdown_path,f'{input_base_name}.md'), theme, args.title_path)

# 删除空行,符合Marp格式
remove_empty_lines(os.path.join(args.markdown_path,f'{input_base_name}.md'))

# 添加阿里云logo。可自行替换为其他logo:将logo图片命名为logo.png,放到style文件夹下
insert_logo(os.path.join(args.markdown_path,f'{input_base_name}.md'), os.path.join(args.logo_path))将步骤二中输出的section_1.json section_1.md ./material/markdown
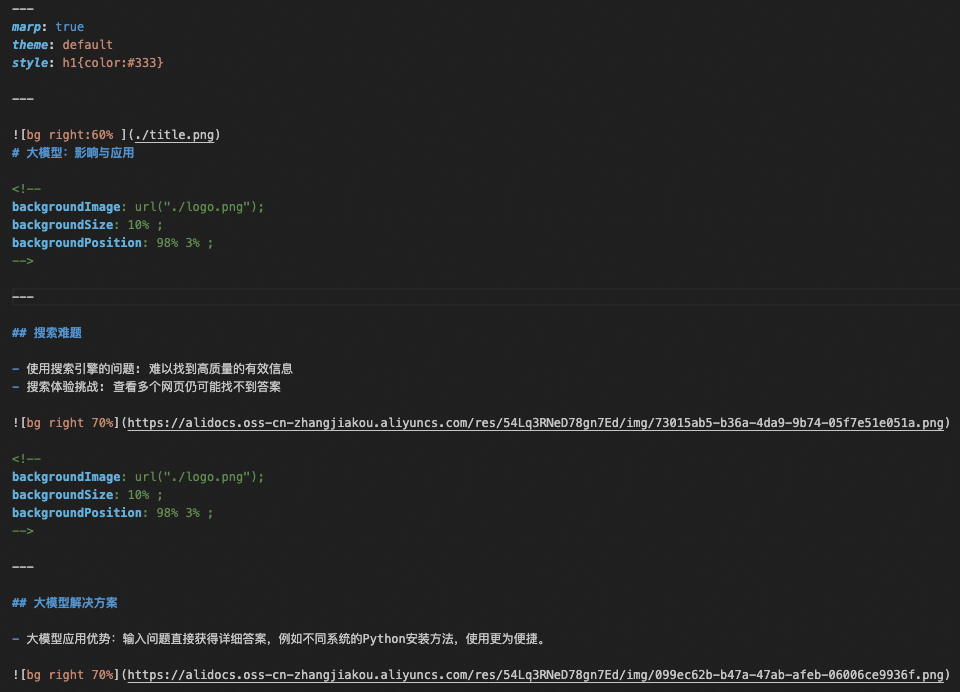
素材整合后的示例输出 生成演示文稿 接下来我们基于
---
marp: true
theme: gaia

---
您可以在本实践教程的完整代码 中style style.md ,并将其置于main.py markdown_gather.py
加载风格文件
# 导入
from markdown_gather import merge_style_with_md_files, remove_trailing_dashes
# 调用
process_markdown(os.path.join(args.markdown_path,f'{input_base_name}.md'))

# 定义并添加Marp样式文件。可查阅Marp官方文档自定义样式:将样式文件命名为style.md,放到style文件夹下
merge_style_with_md_files(args.markdown_path, args.markdown_style_path)

# 删除Markdown文件末尾的“---”,避免生成空白图片
remove_trailing_dashes(args.markdown_path)
得到的输出如下:
加载风格文件 得到上述的输出后,如果您是
在 实时预览效果如下:
Marp 通过预览确认了marp2image.py
marp2image.py
import os
import re
from pathlib import Path
import os
def merge_style_with_md_files(md_file_path, style_file_path):
# 检查样式文件是否存在
if not os.path.isfile(style_file_path):
raise FileNotFoundError(f"样式文件 {style_file_path} 不存在。")
# 读取样式文件内容
with open(style_file_path, 'r', encoding='utf-8') as f:
style_content = f.read()
# 遍历指定目录下的所有文件
for filename in os.listdir(md_file_path):
if filename.startswith('section') and filename.endswith('.md'):
file_path = os.path.join(md_file_path, filename)
# 合并样式内容与 .md 文件内容
if os.path.exists(file_path):
with open(file_path, 'r+', encoding='utf-8') as f:
original_content = f.read()
# 将指针移动到文件开头以覆盖原有内容
f.seek(0)
f.write(style_content + '\n\n' + original_content)
# 清除输出缓冲区以确保所有数据都已写入文件
f.truncate()
def remove_trailing_dashes(directory):
"""
从 Markdown 文件中移除位于文件末尾且后面没有其他内容(除了可能的换行符)的连续破折号(---)。
"""
for filename in os.listdir(directory):
# 检查文件是否以 section 开头且为 .md 文件
if filename.startswith('section') and filename.endswith('.md'):
filepath = os.path.join(directory, filename)
# 读取文件内容
with open(filepath, 'r', encoding='utf-8') as file:
content = file.read()
# 检查文件末尾是否有连续的破折号(---),并且之后没有其他内容(除了可能的换行符)
if content.rstrip().endswith('---') and content.rstrip('---').endswith('\n'):
# 移除末尾的连续破折号(---)及其后面的换行符
content = content.rstrip('---\n')
# 替换文件中的所有 "------" 为空字符串
content = content.replace("------", "")
content = re.sub(r'\n{3,}', '\n\n', content)
# 写入更新后的内容
with open(filepath, 'w', encoding='utf-8') as file:
file.write(content)
def remove_empty_lines(filename):
# 读取文件内容
with open(filename, 'r', encoding='utf-8') as file:
content = file.read()
# 替换文件中的所有 "------" 为空字符串
content = content.replace("------", "")
with open(filename, 'w', encoding='utf-8') as file:
file.write(content)
def append_string_to_file(file_path):
# 读取文件内容
with open(file_path, 'r', encoding='utf-8') as file:
content = file.read()
# 在文件末尾追加字符串 '---'
new_content = content + '---'
# 写入新内容
with open(file_path, 'w', encoding='utf-8') as file:
file.write(new_content)
def insert_logo(file_path, logo_path):
# 读取文件内容
with open(file_path, 'r', encoding='utf-8') as file:
content = file.read()
# 获取 Logo 文件名
logo_filename = Path(logo_path).name
# 定义要插入的字符串
insert_str = f"""<!--\nbackgroundImage: url("./{logo_filename}");\nbackgroundSize: 10% ;\nbackgroundPosition: 98% 3% ;\n-->
"""
# 使用正则表达式替换
# 只替换独立出现的 "---",不包括被其他破折号包围的情况
new_content = re.sub(r'(?<!-)---(?!-)', f'\n{insert_str}\n---', content, flags=re.DOTALL)
# 写入新内容
with open(file_path, 'w', encoding='utf-8') as file:
file.write(new_content)
def insert_bg_if_no_link(filename, theme_url):
# 用于存储最终结果的列表
result = []
# 读取文件内容
with open(filename, 'r', encoding='utf-8') as file:
content = file.read()
# 获取 Logo 文件名
theme_filename = Path(theme_url).name
# 使用正则表达式分割文本
sections = re.split(r'---+', content)
# 遍历每个部分
for i, section in enumerate(sections):
# 查找 "# {字符串内容}" 的模式
header_match = re.search(r'# \{(.+?)\}', section)
if header_match:
# 提取 "# {字符串内容}" 后面的内容
header_content = section[header_match.end():].strip()
# 检查这部分内容是否包含  格式的链接
if not re.search(r'!\[[^\]]*\]\([^\)]*\)', header_content):
# 如果没有链接也没有背景图片,在 "# {字符串内容}" 之后添加指定文本
section = f'{section[:header_match.end()]}\n{section[header_match.end():]}\n---'
# 将处理后的部分添加到结果列表中
result.append(section)
# 如果不是最后一个部分,保留原始的分隔符
if i < len(sections) - 1:
result.append('---')
# 将结果写回文件
with open(filename, 'w', encoding='utf-8') as file:
file.write(''.join(result))
def title_to_md(file_path, content, title_url):
# 读取原文件内容
title_filename = Path(title_url).name
with open(file_path, 'r', encoding='utf-8') as file:
original_content = file.read()
content = f"\n# {content}\n---"
# 在开头添加新内容
new_content = content + '\n' + original_content
# 写入新内容
with open(file_path, 'w', encoding='utf-8') as file:
file.write(new_content)在marp2image.py convert_md_files_to_png ,将main.py convert_md_files_to_png ,代码示例如下:
导入并调用函数
# 导入
from marp2image import convert_md_files_to_png
# 调用
# 使用Marp生成演示文稿图片
convert_md_files_to_png(os.path.join(args.markdown_path,f'{input_base_name}.md'), args.image_path)调用函数得到的所有的输出图片均会被保存到./material/image
示例图片。 步骤四:生成讲解语音与字幕 在这一部分中,我们利用多模态语音大模型将文字内容合成为音频,并且精确计算音频的时长,随后自动生成对应的字幕时间戳。
文字合成音频 我们将文档内容划分为若干个句子,然后通过CosyVoice ,将所有句子全部合成为audio_generate_each_sentence.py
audio_generate_each_sentence.py
import json
import os
import re
import time
import dashscope
from dashscope.audio.tts_v2 import SpeechSynthesizer

import traceback

def read_json_file(file_path):
    with open(file_path, 'r', encoding='utf-8') as file:
        data = json.load(file)
    return data


def split_into_sentences(text):
    # 中文标点符号列表
    punctuation = [',', '。', ';', '?', '!']
    brackets = {'(': ')', '[': ']', '{': '}', '(': ')', '【': '】', '《': '》'}

    # 初始化结果列表和临时句子存储
    sentences = []
    temp_sentence = ''
    bracket_stack = []

    # 遍历文本中的每一个字符
    for char in text:
        # 如果是左括号,压入栈
        if char in brackets:
            bracket_stack.append(char)
        # 如果是右括号且与栈顶匹配,弹出栈
        elif char in brackets.values() and bracket_stack and brackets[bracket_stack[-1]] == char:
            bracket_stack.pop()

        # 如果字符是中文标点之一且括号栈为空,表示句子结束
        if char in punctuation and not bracket_stack:
            # 添加临时句子到结果列表,并清空临时句子
            sentences.append(temp_sentence.strip())
            temp_sentence = ''
        else:
            # 否则,将字符添加到临时句子中
            temp_sentence += char

    # 处理最后一个可能没有标点结尾的句子
    if temp_sentence:
        sentences.append(temp_sentence.strip())

    return sentences


def save_sentences_to_markdown(sentences, base_dir, index1):
    for index2, sentence in enumerate(sentences, start=1):
        # 创建目录
        dir_name = f'audio_for_paragraph_{index1}'
        dir_path = os.path.join(base_dir, dir_name)
        os.makedirs(dir_path, exist_ok=True)

        # 构建文件名
        file_name = f'paragraph_{index1}_sentence_{index2}.md'
        file_path = os.path.join(dir_path, file_name)

        # 写入Markdown文件
        with open(file_path, 'w', encoding='utf-8') as file:
            file.write(sentence + '\n')


def process_json_file(json_file_path, base_dir):

    if not os.path.exists(base_dir):
        os.makedirs(base_dir)

    file_prefix = os.path.splitext(os.path.basename(json_file_path))[0]

    base_dir = os.path.join(base_dir, file_prefix)

    # 读取JSON文件
    json_data = read_json_file(json_file_path)

    # 处理JSON数据中的每个条目
    for index1, item in enumerate(json_data):
        if 'content' in item:
            content = item['content']
            # 检查content是否为链接
            if not is_url(content):
                sentences = split_into_sentences(content)
                save_sentences_to_markdown(sentences, base_dir, index1+1)

def is_url(s):
    url_pattern = re.compile(r'http[s]?://(?:[a-zA-Z]|[0-9]|[$-_@.&+]|[!*\\(\\),]|(?:%[0-9a-fA-F][0-9a-fA-F]))+')
    return bool(url_pattern.match(s))


def synthesize_md_to_speech(base_directory):
    """
    识别指定目录下的所有.md文件,读取其内容并使用DashScope API将其转换为语音,
    保存为同名.mp3文件在同一目录下。

    参数:
    base_directory (str): 包含.md文件的顶层目录路径。
    """
    # 确保环境变量中存在DashScope API密钥
    if 'DASHSCOPE_API_KEY' not in os.environ:
        raise ValueError("DashScope API key must be set in the environment variables.")

    # 遍历指定目录及其子目录
    for root, dirs, files in os.walk(base_directory):
        for file in files:
            if file.endswith('.md'):
                # 构建完整文件路径
                md_file_path = os.path.join(root, file)

                # 读取.md文件内容
                with open(md_file_path, 'r', encoding='utf-8') as f:
                    text = f.read()

                # 初始化语音合成器
                speech_synthesizer = SpeechSynthesizer(model='cosyvoice-v2', voice='longxiaochun_v2')


                # 合成语音
                audio_data = speech_synthesizer.call(text)

                # 构建输出.mp3文件路径
                mp3_file_path = os.path.splitext(md_file_path)[0] + '.mp3'

                # 保存音频到文件
                with open(mp3_file_path, 'wb') as f:
                    f.write(audio_data)

print(f'Synthesized text from file "{md_file_path}" to file: {mp3_file_path}')我们在audio_generate_each_sentence.py
在main.py
导入并引用
# 导入
from audio_generate_each_sentence import process_json_file, synthesize_md_to_speech
# 调用
# 将各段落文档划分为若干句子,并通过API调用CosyVoice合成语音
process_json_file(os.path.join(args.json_path,f'{input_base_name}.json'), args.audio_path)
synthesize_md_to_speech(os.path.join(args.audio_path, input_base_name))调用函数后,所有的音频文件会被保存到./material/audio
文字内容为:你有过使用搜索引擎搜索问题却怎么也找不到有效信息的时候吗? 生成字幕 接下来,我们将通过读取音频的时长以及其对应的文字内容,来生成srt_generate_for_each_sentence.py ,代码示例如下:
srt_generate_for_each_sentence.py
import os
import re
from moviepy import AudioFileClip
from typing import List

def format_time(seconds):
    hours, remainder = divmod(seconds, 3600)
    minutes, seconds = divmod(remainder, 60)
    milliseconds = int((seconds - int(seconds)) * 1000)
    seconds = int(seconds)
    return f"{int(hours):02d}:{int(minutes):02d}:{int(seconds):02d},{milliseconds:03d}"

# 定义一个函数来获取音频文件的时长
def get_audio_duration(file_path):
    audio = AudioFileClip(file_path)
    duration = audio.duration
    audio.close()
    return duration

# 定义一个函数来生成SRT格式的字幕行
def create_srt_line(index, start_time, end_time, text):
    return f"{index}\n{start_time} --> {end_time}\n{text}\n\n"

def generate_srt_from_audio(base_dir: str, output_dir: str, output_srt_file: str) -> None:
    """
    从指定目录下的音频文件夹生成SRT字幕文件。

    :param base_dir: 包含音频文件夹的根目录。
    :param output_dir: 输出SRT文件的目录。
    :param output_srt_file: 输出SRT文件的完整路径。
    """

    # 创建输出目录,如果它不存在
    if not os.path.exists(output_dir):
        os.makedirs(output_dir)

    # 确保输出文件名有.srt后缀
    if not output_srt_file.endswith('.srt'):
        output_srt_file += '.srt'


    # 初始化当前时间
    current_time = 2.000  # 初始时间

    # 打开SRT文件进行写入
    with open(output_srt_file, 'w', encoding='utf-8') as srt_file:
        srt_index = 1

        # 获取所有符合条件的子目录,并按索引排序
        sub_dirs = [d for d in os.listdir(base_dir) if d.startswith('audio_for_paragraph_')]
        sub_dirs.sort(key=lambda x: int(re.search(r'\d+', x).group()))

        # 遍历所有子目录
        for sub_dir in sub_dirs:
            sub_dir_path = os.path.join(base_dir, sub_dir)

            # 查找所有的.md和.mp3文件
            files = [f for f in os.listdir(sub_dir_path) if f.endswith('.md') or f.endswith('.mp3')]
            md_files = [f for f in files if f.endswith('.md')]

            # 按照index1和index2排序.md文件
            md_files.sort(key=lambda x: (int(x.split('_')[1]), int(x.split('_')[3].split('.')[0])))

            # 处理每个.md文件
            for md_file in md_files:
                md_file_path = os.path.join(sub_dir_path, md_file)
                mp3_file_path = os.path.splitext(md_file_path)[0] + '.mp3'

                # 确保对应的.mp3文件存在
                if os.path.exists(mp3_file_path):
                    # 读取.md文件内容
                    with open(md_file_path, 'r', encoding='utf-8') as f:
                        text = f.read().strip()

                    # 获取.mp3文件时长
                    duration = get_audio_duration(mp3_file_path)

                    # 生成SRT格式的字幕行
                    start_time_str = format_time(current_time)
                    end_time_str = format_time(current_time + duration)
                    srt_line = create_srt_line(srt_index, start_time_str, end_time_str, text)

                    # 写入SRT文件
                    srt_file.write(srt_line)

                    # 更新当前时间
                    current_time += duration + 0.3  # 加上0.5秒以避免时间重叠

                    srt_index += 1
                else:
                    print(f"No corresponding MP3 file found for {md_file}")

    print("SRT file generated successfully.")
在srt_generate_for_each_sentence.py generate_srt_from_audio ,该函数通过读取输入音频的时长以及其对应的文字内容,来生成
在main.py generate_srt_from_audio ,代码示例如下:
导入并调用函数
# 导入
from srt_generate_for_each_sentence import generate_srt_from_audio
# 调用
# 生成srt字幕文件
generate_srt_from_audio(os.path.join(args.audio_path, input_base_name), args.srt_and_video_path, os.path.join(args.srt_and_video_path, input_base_name))调用函数会自动生成./material/video
步骤五:生成视频 在这一部分中,我们将生成的演示文稿剪辑为视频,并将音频文件和字幕文件嵌入到视频中。
剪辑视频 首先我们计算每一张演示文稿在视频中的持续时间。新建一个calculate_durations_for_each_image.py ,代码示例如下:
calculate_durations_for_each_image.py
import os
from pydub import AudioSegment

def calculate_audio_durations(directory):
    """
    计算指定目录下所有以 audio_for_paragraph_{index} 命名的文件夹中 mp3 文件的总持续时间(以秒为单位)。

    参数:
        directory (str): 需要扫描的根目录路径。

    返回:
        list: 每个 audio_for_paragraph_{index} 文件夹中 mp3 文件总持续时间(秒)的列表。
    """
    # 初始化结果列表
    durations = []

    # 遍历目录下的所有子目录
    for entry in os.scandir(directory):
        if entry.is_dir() and entry.name.startswith("audio_for_paragraph_"):
            # 提取 index
            index = int(entry.name.split("_")[-1])

            # 初始化当前文件夹的总持续时间为0
            total_duration_ms = 0

            # 遍历子目录中的所有文件
            for file_entry in os.scandir(entry.path):
                if file_entry.name.endswith(".mp3"):
                    # 加载 mp3 文件并计算持续时间
                    audio = AudioSegment.from_mp3(file_entry.path)
                    delay = 300
                    total_duration_ms += len(audio) + delay

            # 将当前文件夹的总持续时间转换为秒,并添加到结果列表中
            total_duration_seconds = total_duration_ms / 1000.0
            durations.append((index, total_duration_seconds))

    # 按照 index 排序结果列表
    durations.sort(key=lambda x: x[0])


    # 只保留持续时间(秒)
    durations = [duration for _, duration in durations]

    durations.insert(0, 2)

    return durations
在calculate_durations_for_each_image.py calculate_audio_durations ,其功能为计算每一张演示文稿在视频中的持续时间。
在main.py calculate_audio_durations ,代码示例如下:
导入并调用函数
# 导入
from calculate_durations_for_each_image import calculate_audio_durations
# 调用
# 计算各段落的所有音频时长
durations = calculate_audio_durations(os.path.join(args.audio_path, input_base_name))接着我们将所有演示文稿剪辑为视频。新建一个函数文件,命名为movie_editor.py ,代码示例如下:
movie_editor.py
from moviepy import *
import os
import re
from PIL import Image
import natsort
import math
import numpy as np

def images_to_video_with_durations(input_image_path, output_video_path, durations, fps, base_name):
    # 获取所有符合条件的图片,并按文件名中的数字排序
    pattern = r'^' + re.escape(base_name) + r'_(\d+)\.png$'
    image_files = [
        f"{input_image_path}/{file}"
        for file in os.listdir(input_image_path)
        if re.match(pattern, file)
    ]
    image_files = natsort.natsorted(image_files, key=lambda x: int(re.match(pattern, os.path.basename(x)).group(1)))

    # 确定视频的背景尺寸
    target_width, target_height = 1280, 720
    background_size = (target_width, target_height)

    # 为每张图片创建一个单独的剪辑
    clips = []
    for i, file in enumerate(image_files):
        img = Image.open(file)
        width, height = img.size
        ratio = width / height
        if width > target_width or height > target_height:
            if ratio > target_width / target_height:
                new_width = target_width
                new_height = math.floor(new_width / ratio)
            else:
                new_height = target_height
                new_width = math.floor(new_height * ratio)
        else:
            new_width, new_height = width, height

        img = img.resize((new_width, new_height), resample=Image.Resampling.LANCZOS)
        img_clip = ImageClip(np.array(img)).with_duration(durations[i]).with_position(("center", "center"))

        bg_clip = ColorClip(size=background_size, color=(255,255,255), duration=durations[i])
        composite_clip = CompositeVideoClip([bg_clip, img_clip])
        # 添加转场效果(除了最后一个剪辑)
        # if i < len(image_files) - 1:  # 确保不是最后一个剪辑
        #     composite_clip = composite_clip.fx(vfx.fadein, duration=0.3).fx(vfx.fadeout, duration=0.3)


        clips.append(composite_clip)

    # 使用concatenate_videoclips函数将所有剪辑串联起来
    final_clip = concatenate_videoclips(clips, method="compose")


    # 写入视频文件
    output_filename = f"{base_name}.mp4"

    final_clip.write_videofile(os.path.join(output_video_path, output_filename), fps=fps)
在movie_editor.py images_to_video_with_durations ,其功能是将所有输入演示文稿按顺序剪辑为视频。在main.py images_to_video_with_durations ,代码示例如下:
导入并调用函数
# 导入
from movie_editor import images_to_video_with_durations
# 调用
images_to_video_with_durations(os.path.join(args.image_path,f'{input_base_name}'), args.srt_and_video_path, durations, args.fps, input_base_name)调用代码后,生成的视频section_1.mp4 ./material/video
以上视频不包含音频与字幕。 嵌入音频与字幕 接下来我们将音频文件嵌入到视频中。新建一个函数文件,命名为audio2video.py ,代码示例如下:
audio2video.py
import os
from moviepy import *
from glob import glob
import re
def merge_audio_and_add_to_video(video_path, audio_base_dir, output_path):
    """
    合并多个音频文件并添加到视频中。

    :param video_path: 视频文件的路径。
    :param audio_base_dir: 包含音频文件夹的基目录。
    :param output_path: 输出视频的路径。
    """
    # 加载视频文件
    video_clip = VideoFileClip(video_path)

    # 初始化音频列表
    audio_clips = []

    silent_audio_start = AudioClip(lambda t: [0,0], duration=2)
    audio_clips.append(silent_audio_start)

    # 遍历所有子目录,按数字大小排序
    audio_dirs = glob(os.path.join(audio_base_dir, "audio_for_paragraph_*"))
    audio_dirs.sort(key=lambda x: int(re.search(r'\d+', os.path.basename(x)).group()))

    # 遍历所有子目录
    for audio_dir in audio_dirs:
        # 获取当前目录的index
        index = int(os.path.basename(audio_dir).split("_")[-1])

        # 遍历目录中的所有mp3文件
        mp3_files = glob(os.path.join(audio_dir, f"paragraph_{index}_sentence_*.mp3"))
        mp3_files.sort(key=lambda x: int(re.search(r'_sentence_(\d+)', os.path.basename(x)).group(1)))

        # 遍历排序后的mp3文件列表
        for mp3_file in mp3_files:
            # 加载音频文件
            audio_clip = AudioFileClip(mp3_file)

            # 添加到音频列表
            if audio_clips:
                # 如果不是第一个音频,则在前一个音频之后添加0.5秒的静音
                # 替换原有的 AudioNullClip 代码
                silent_audio = AudioClip(lambda t: [0,0], duration=0.3)
                audio_clips.append(silent_audio)
            audio_clips.append(audio_clip)

    # 合并所有音频片段
    final_audio = concatenate_audioclips(audio_clips)

    # 将音频添加到视频中
    video_with_audio = video_clip.with_audio(final_audio)

    # 输出带有新音频的视频文件
    video_with_audio.write_videofile(output_path, codec='libx264', audio_codec='aac')

    # 关闭剪辑对象,释放资源
video_clip.close()我们在函数文件audio2video.py merge_audio_and_add_to_video ,其功能为将音频文件嵌入到视频中。
在main.py merge_audio_and_add_to_video ,代码如下:
导入并调用函数
# 导入
from audio2video import merge_audio_and_add_to_video
# 调用
merge_audio_and_add_to_video(os.path.join(args.srt_and_video_path,f'{input_base_name}.mp4'), os.path.join(args.audio_path,f'{input_base_name}'), os.path.join(args.srt_and_video_path,f'{input_base_name}_with_audio.mp4'))调用代码后,生成的视频会保存在./material/video
最后我们将字幕文件嵌入到视频中。新建一个函数文件,命名为srt2video.py ,代码示例如下:
srt2video.py
import subprocess
import os
def merge_video_and_subtitle(video_and_srt_path, base_name):
    video_ext = ".mp4"
    srt_ext = ".srt"

    video_path = os.path.join(video_and_srt_path, f"{base_name}_with_audio" + video_ext).replace("\\", "/")
    srt_path = os.path.join(video_and_srt_path, base_name + srt_ext).replace("\\", "/")
    output_path = os.path.join(video_and_srt_path, f"{base_name}_with_audio_with_subs" + video_ext).replace("\\", "/")

    command = [
        'ffmpeg',
        '-i', video_path,
        '-vf', f'subtitles={srt_path}',
        '-c:a', 'copy',
        output_path
    ]

    try:
        subprocess.run(command, check=True)
    except subprocess.CalledProcessError as e:
print(f"An error occurred while merging video and subtitles: {e}")我们在函数文件srt2video.py merge_video_and_subtitle ,其功能为将main.py merge_video_and_subtitle ,代码示例如下:
导入并调用函数
# 导入
from srt2video import merge_video_and_subtitle
# 调用
merge_video_and_subtitle(args.srt_and_video_path, input_base_name)调用代码后,生成的视频section_1_with_audio_with_subs.mp4 ./material/video
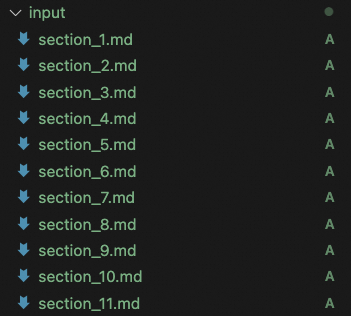
以上视频为最终效果输出,包含音频与字幕。 步骤六(可选):生成长文档视频 通过以上步骤,相信您已经成功地构建了完整的文档生成视频项目工程,并且能够成功地将我们提供的示例文档section_1.md 阿里云大模型工程师 课程第一章第一课时认识大模型 。我们建议您将长篇幅文档划分为若干短文档,并生成所有短文档对应的视频,最终将所有视频整合为一个完整的视频。
划分文档 您需要将长篇幅文档按顺序划分为若干短文档,并按特定的命名格式保存到input section_index.md ,index
生成长文档视频 新建一个merge_all_videos.py ,代码示例如下:
merge_all_videos.py
import os
import re
from moviepy import VideoFileClip, concatenate_videoclips

def merge_videos(input_directory):
    # 定义视频文件的模式
    video_pattern = r"section_(\d+)_with_audio_with_subs\.mp4"

    # 查找并排序符合模式的文件
    files = sorted(
        (fn for fn in os.listdir(input_directory) if re.match(video_pattern, fn)),
        key=lambda x: int(re.match(video_pattern, x).group(1))
    )

    # 读取所有视频片段
    clips = [VideoFileClip(os.path.join(input_directory, file)) for file in files]

    # 合并所有视频片段
    final_clip = concatenate_videoclips(clips)

    # 输出合并后的视频
    output_path = os.path.join(input_directory, 'output_merge_all_video.mp4')
    final_clip.write_videofile(output_path, audio_codec='aac')

merge_videos("./material/video")在merge_all_videos.py merge_videos
为了更便捷地实现所有短文档视频生成及合并所有视频的全过程,我们新建一个名为run.sh
run.sh
#!/bin/bash

# 日志文件路径
log_file="./result.log"

# 清空日志文件
> "$log_file"

# 记录脚本开始时间
start_time=$(date +%s)

# 定义Python脚本路径
python_main_script_path="main.py"
python_merge_script_path="merge_all_videos.py"

# 定义视频输出路径
video_path=“./material/video/”
# 获取所有符合条件的文件名,并按数字排序
files=$(find ./input -maxdepth 1 -type f -name "section_*.md" | sort -V)

# 遍历文件列表
index=0
for file in $files; do
    index_part=$(basename "$file" .md | cut -d '_' -f 2)
    echo "正在处理第${index_part}部分" >> "$log_file"
    python "$python_main_script_path" --input_txt_path "$file" >> "$log_file" 2>&1
    if [ $? -ne 0 ]; then
        echo "Error processing $file" >> "$log_file"
        exit 1
    fi
    ((index++))
done

# 合并视频
python "$python_merge_script_path" --input_directory video_path >> "$log_file" 2>&1

# 记录脚本结束时间
end_time=$(date +%s)

# 计算脚本运行时间
runtime=$((end_time - start_time))

# 格式化运行时间为 xx时xx分xx秒
hours=$((runtime / 3600))
minutes=$(((runtime % 3600) / 60))
seconds=$((runtime % 60))

# 输出提示信息
echo "视频已生成完毕" >> "$log_file"
echo "总计时间: $hours 时 $minutes 分 $seconds 秒" >> "$log_file"

# 输出日志信息
cat "$log_file"在run.sh run.sh
MacOS # 更改权限
chmod +x run.sh
# 运行脚本
./run.shWindows # 运行脚本,您可以在result.log中查看代码运行日志
bash run.sh运行脚本后,您可以在./result.log output_merge_all_video.mp4 ./material/video 效果演示 。
总结 通过本实践教程,您将能够:
了解如何综合运用大语言模型、多模态应用、Marp
通过我们提供的完整代码上手完整地体验文档生成视频的端到端全过程;
自行调整输入文档、Marp