本文以RHEL 7服务器为例,为您介绍如何将脱机IDC中的物理主机或经典虚拟化平台中的虚拟机迁移到阿里云。
背景信息
您可以将物理服务器或虚拟机迁移到阿里云。
将物理服务器迁移到阿里云ECS(P2V和V2V)
您可以使用服务器迁移中心SMC(Server Migration Center)将物理服务器的操作系统镜像迁移到阿里云ECS,在将镜像导入ECS后,再通过已导入的镜像创建RHEL实例。
将虚拟机迁移到阿里云ECS(V2V)
在本地物理服务器上创建阿里云支持的虚拟机镜像。您可以参考本文操作完成迁移,也可以使用阿里云的服务器迁移中心SMC进行迁移。
关于SMC迁移的更多信息,请参见迁移流程。
将虚拟机迁移到阿里云ECS
按照以下步骤将虚拟机迁移到阿里云ECS:
如果RHEL 7服务器上已运行满足步骤1:准备一台物理RHEL 7服务器中提到的要求的虚拟机,则可以直接从步骤3:配置Guest操作系统开始。
步骤1:准备一台物理RHEL 7服务器
登录到物理RHEL 7服务器。
确认下表中列出的所有包都已安装在您的RHEL服务器上。
您可以运行
yum info 包名查看已安装的包。包
存储库
描述
libvirt
rhel-7-server-rpms
用于管理平台虚拟化的开源API、守护进程和管理工具。
virt-manager
rhel-7-server-rpms
桌面虚拟机管理器。
libguestfs
rhel-7-server-rpms
一组用于访问和修改虚拟机(VM)磁盘镜像的工具。
libguestfs-tools
rhel-7-server-rpms
用于虚拟机的系统管理工具,包括Guestfish。
qemu-img
rhel-7-server-rpms
用于将虚拟机磁盘镜像文件从一种格式转换为另一种格式的工具。
步骤2:创建虚拟机
从Red Hat下载页面下载最新的Red Hat Enterprise Linux 7.5 更新 KVM Guest镜像或Red Hat Enterprise Linux 7.4 更新 KVM Guest镜像。
说明建议您下载RHEL 7.5版本,RHEL 7.5相比较于RHEL 7.4功能更全面。
将镜像保存到在步骤1准备的RHEL服务器中。
将镜像移动到/var/lib/libvirt/images目录中。
在Virtual Machine Manager窗口上,单击
 图标创建新的虚拟机。
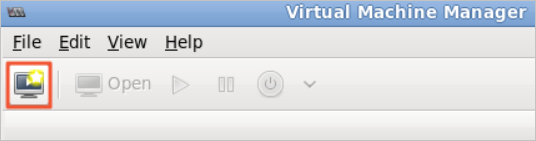
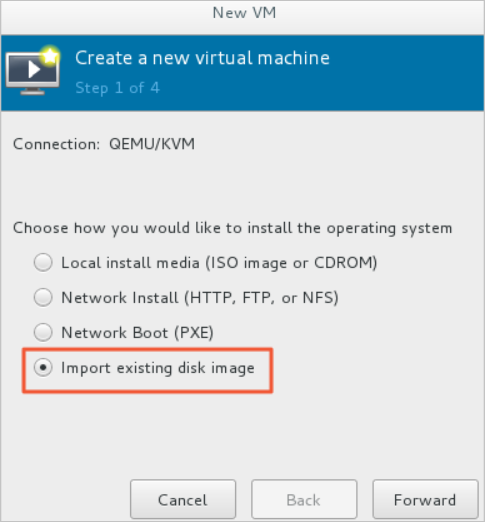
按照Create a new virtual machine向导完成配置。
选择Import existing disk image安装Guest操作系统,然后单击Forward。
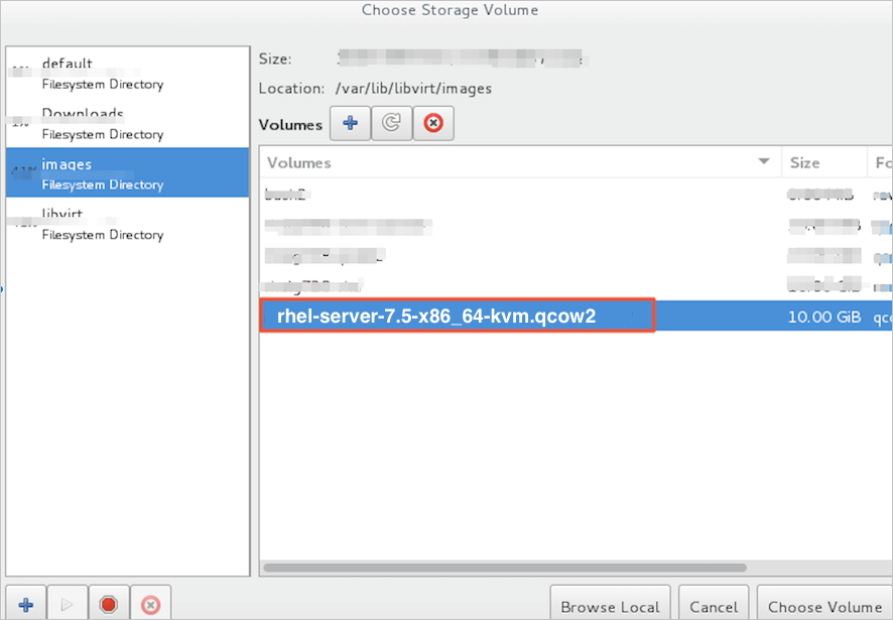
浏览/var/lib/libvirt/images目录并选择qcow2 KVM Guest镜像。
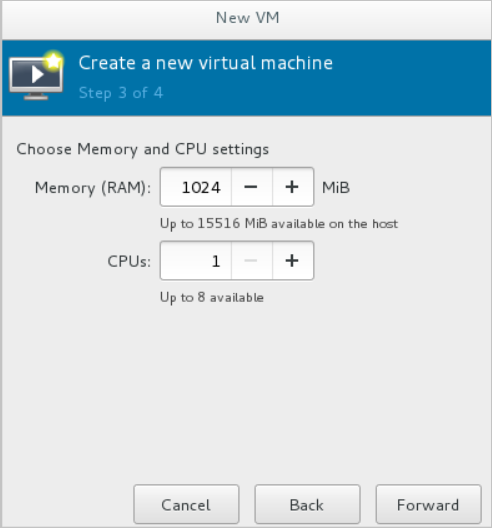
为新虚拟机设置内存和CPU内核。
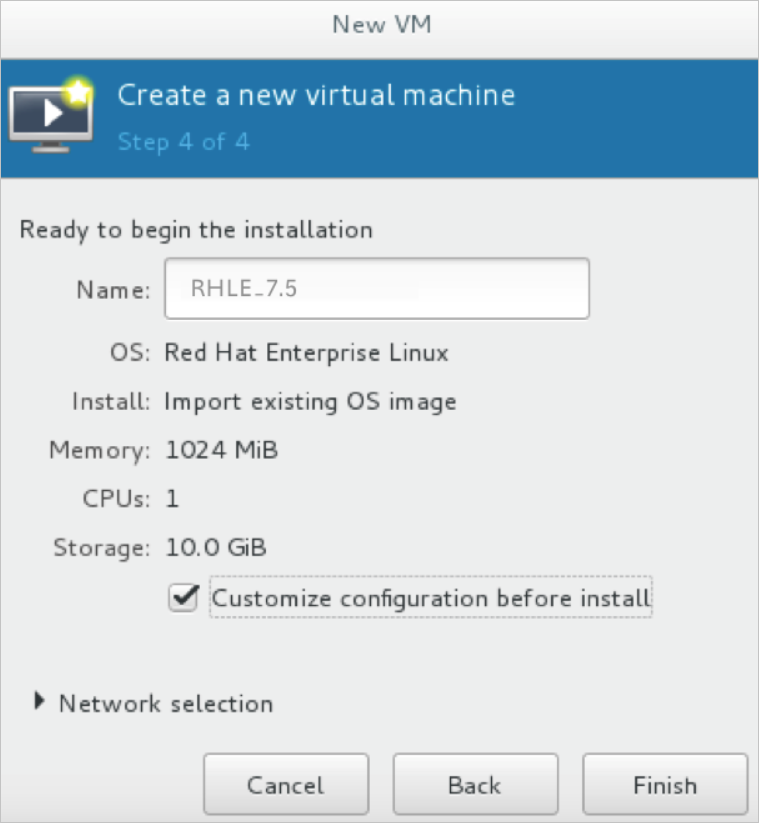
查看新虚拟机的配置,指定名称,然后选中Customize configuration before install。
在自定义配置对话框的左侧窗格中,单击NIC,然后设置Device model为virtio。
单击Begin Installation。
将开始创建新虚拟机。在此过程中,虚拟机控制台将显示并引导到登录提示。
当登录提示出现时,关闭虚拟机。
运行以下命令,为虚拟机的根用户设置密码。
virt-customize -a /var/lib/libvirt/images/rhel-server-7.5-x86_64-kvm.qcow2 --root-password password:<密码>本示例中为虚拟机根用户设置的密码为
redhat!,命令示例如下:# virt-customize -a /var/lib/libvirt/images/rhel-server-7.5-x86_64-kvm.qcow2 --root-password password:redhat! [ 0.0] Examining the guest ... [ 103.0] Setting a random seed [ 103.0] Setting passwords [ 112.0] Finishing off启动RHEL虚拟机并以根用户身份登录。
步骤3:配置Guest操作系统
在您登录到虚拟机后,前往配置Guest操作系统。
确保RHEL虚拟机的Guest操作系统满足要求。
具体要求,请参见Red Hat云接入概述中的ECS限制及自定义RHEL镜像条件部分。
需要验证的Guest操作系统配置如下表所示。
项目
要求
/etc/shadow
通过运行chattr命令使/etc/shadow处于未锁定状态。
qemu-ga
已卸载qemu-ga。
网络
已禁用或已卸载网络管理器,并且已启用网络服务。
ssh
已启用SSH服务,并且未设置PermitRootLogin。
防火墙
已禁用防火墙。
文件系统
使用xfs、ext3或ext4。不要使用具有64位功能的ext4。
passwd
已安装passwd。
分区
使用MBR分区或者GPT分区。
逻辑卷管理器(LVM)
未使用逻辑卷管理器(LVM)。
/lib
只能对/lib和/lib64使用相对路径。
cloud-init
Guest操作系统必须安装了cloud-init。
说明cloud-init缺省配置会禁止密码方式登录,如需启用密码登录,请参见文档安装cloud-init,根据其中安装cloud-init段落中的第5步,修改/etc/cloud/cloud.cfg配置文件中cloud_init_modules段落。
配置ntp.conf文件。
按照以下步骤配置ntp.conf文件,文件位于/etc/ntp.conf目录中。
运行以下命令,将ntp.conf文件备份为ntp.conf.bk。
cp /etc/ntp.conf /etc/ntp.conf.bk编辑/etc/ntp.conf文件并将其内容替换为以下内容。
driftfile /var/lib/ntp/drift pidfile /var/run/ntpd.pid logfile /var/log/ntp.log # Access Control Support restrict default kod nomodify notrap nopeer noquery restrict -6 default kod nomodify notrap nopeer noquery restrict 127.0.0.1 restrict 192.168.0.0 mask 255.255.0.0 nomodify notrap nopeer noquery restrict 172.16.0.0 mask 255.240.0.0 nomodify notrap nopeer noquery restrict 100.64.XX.XX mask 255.192.0.0 nomodify notrap nopeer noquery restrict 10.0.0.0 mask 255.0.0.0 nomodify notrap nopeer noquery # local clock server 127.127.1.0 fudge 127.127.1.0 stratum 10 restrict ntp1.aliyun.com nomodify notrap nopeer noquery restrict ntp1.cloud.aliyuncs.com nomodify notrap nopeer noquery restrict ntp10.cloud.aliyuncs.com nomodify notrap nopeer noquery restrict ntp11.cloud.aliyuncs.com nomodify notrap nopeer noquery restrict ntp12.cloud.aliyuncs.com nomodify notrap nopeer noquery restrict ntp2.aliyun.com nomodify notrap nopeer noquery restrict ntp2.cloud.aliyuncs.com nomodify notrap nopeer noquery restrict ntp3.aliyun.com nomodify notrap nopeer noquery restrict ntp3.cloud.aliyuncs.com nomodify notrap nopeer noquery restrict ntp4.aliyun.com nomodify notrap nopeer noquery restrict ntp4.cloud.aliyuncs.com nomodify notrap nopeer noquery restrict ntp5.aliyun.com nomodify notrap nopeer noquery restrict ntp5.cloud.aliyuncs.com nomodify notrap nopeer noquery restrict ntp6.aliyun.com nomodify notrap nopeer noquery restrict ntp6.cloud.aliyuncs.com nomodify notrap nopeer noquery restrict ntp7.cloud.aliyuncs.com nomodify notrap nopeer noquery restrict ntp8.cloud.aliyuncs.com nomodify notrap nopeer noquery restrict ntp9.cloud.aliyuncs.com nomodify notrap nopeer noquery server ntp1.aliyun.com iburst minpoll 4 maxpoll 10 server ntp1.cloud.aliyuncs.com iburst minpoll 4 maxpoll 10 server ntp10.cloud.aliyuncs.com iburst minpoll 4 maxpoll 10 server ntp11.cloud.aliyuncs.com iburst minpoll 4 maxpoll 10 server ntp12.cloud.aliyuncs.com iburst minpoll 4 maxpoll 10 server ntp2.aliyun.com iburst minpoll 4 maxpoll 10 server ntp2.cloud.aliyuncs.com iburst minpoll 4 maxpoll 10 server ntp3.aliyun.com iburst minpoll 4 maxpoll 10 server ntp3.cloud.aliyuncs.com iburst minpoll 4 maxpoll 10 server ntp4.aliyun.com iburst minpoll 4 maxpoll 10 server ntp4.cloud.aliyuncs.com iburst minpoll 4 maxpoll 10 server ntp5.aliyun.com iburst minpoll 4 maxpoll 10 server ntp5.cloud.aliyuncs.com iburst minpoll 4 maxpoll 10 server ntp6.aliyun.com iburst minpoll 4 maxpoll 10 server ntp6.cloud.aliyuncs.com iburst minpoll 4 maxpoll 10 server ntp7.cloud.aliyuncs.com iburst minpoll 4 maxpoll 10 server ntp8.cloud.aliyuncs.com iburst minpoll 4 maxpoll 10 server ntp9.cloud.aliyuncs.com iburst minpoll 4 maxpoll 10修改完成后按Esc键,并输入
:wq后按下回车键,保存并退出。在确认Guest操作系统的配置后,便可以创建虚拟机镜像了。您也可以使用阿里云提供的服务器迁移中心SMC创建和导入虚拟镜像,更多信息,请参见什么是服务器迁移中心。
步骤4:创建虚拟镜像
在RHEL虚拟机菜单上,选择View > Snapshots。
单击+图标并创建快照。
在创建快照后,将创建虚拟机镜像。虚拟机镜像采用QCOW2格式。