To create a complex Cloud Contact Center, configure settings within the instance after it is created. This topic describes the configuration methods.
Prerequisites
You have created a Cloud Contact Center instance.
Only users with the administrator role can configure and manage the Cloud Contact Center.
Configuration overview
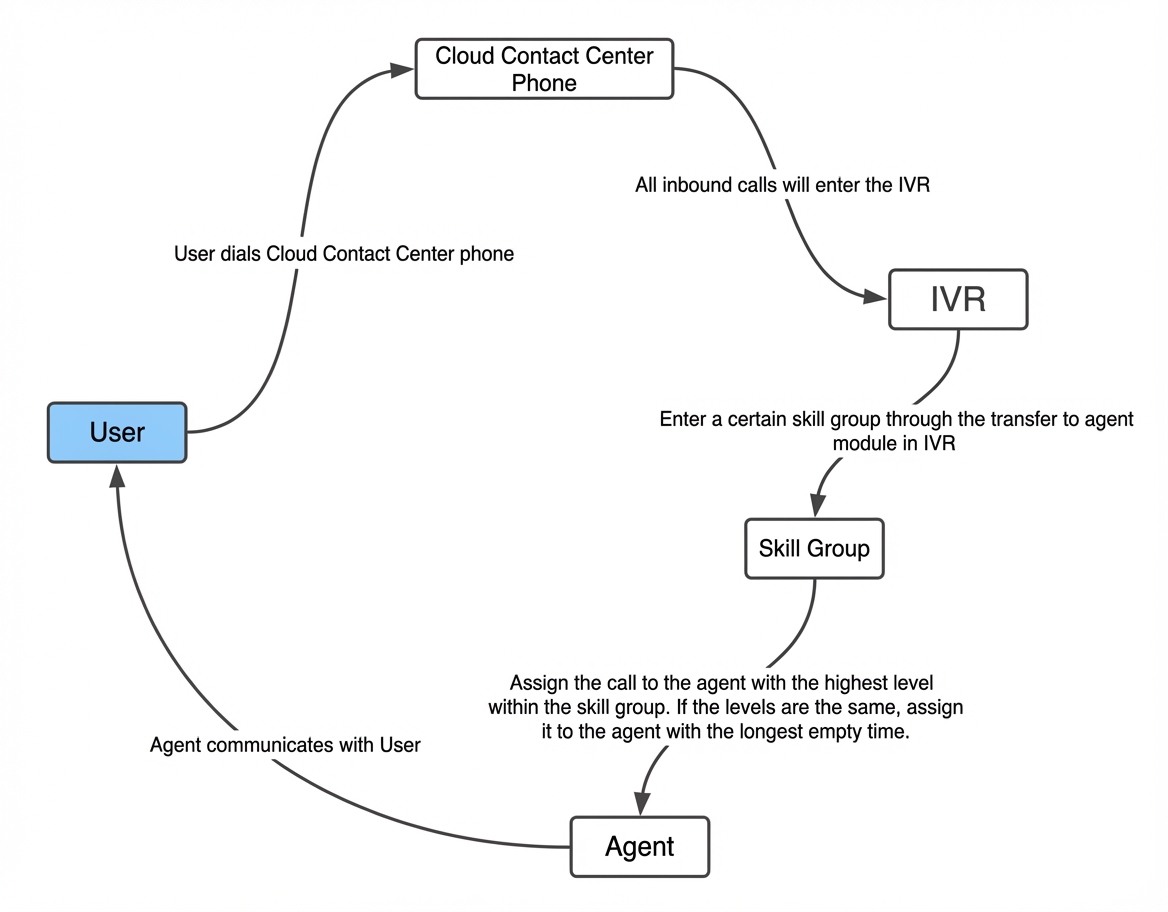
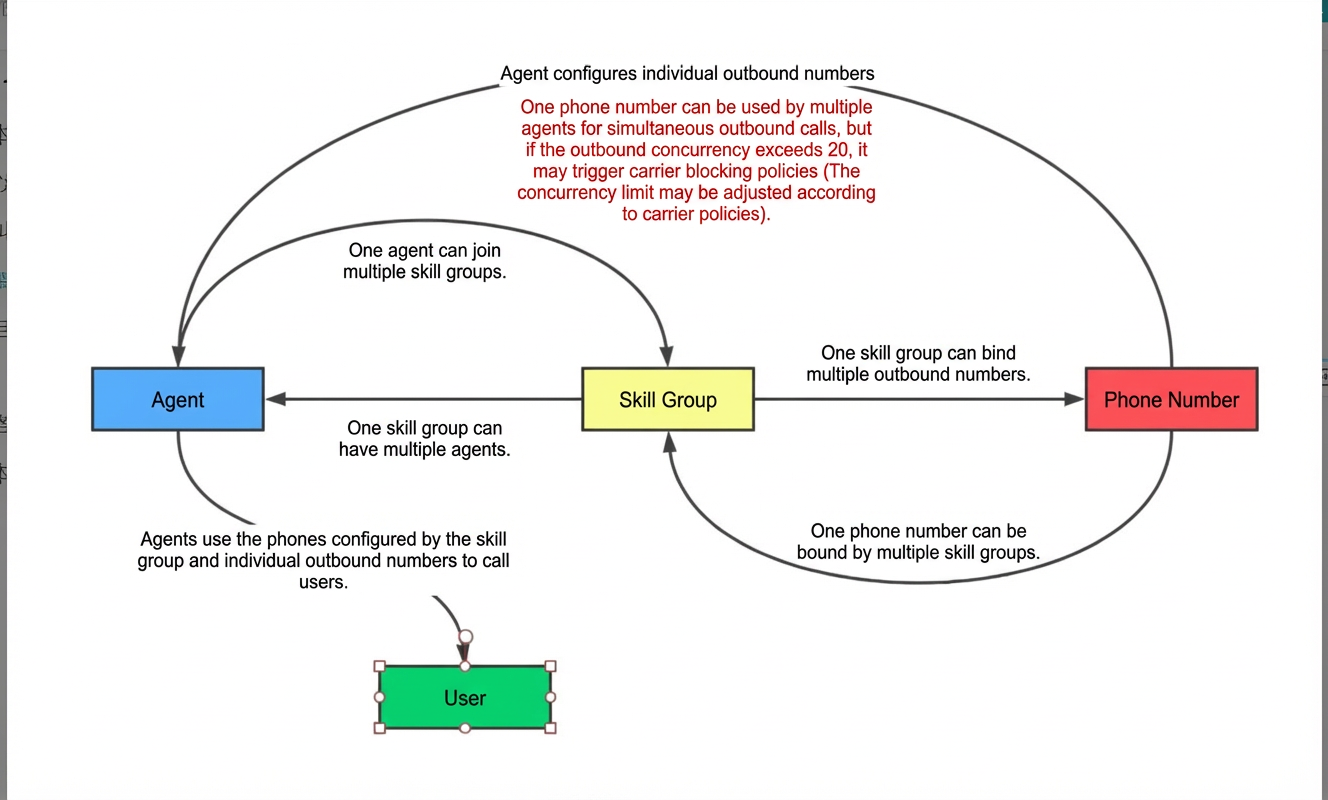
Cloud Contact Center configuration follows two main paths: inbound and outbound.
Inbound call flow diagram
Outbound call flow diagram
Procedure
Open the Cloud Contact Center instance console
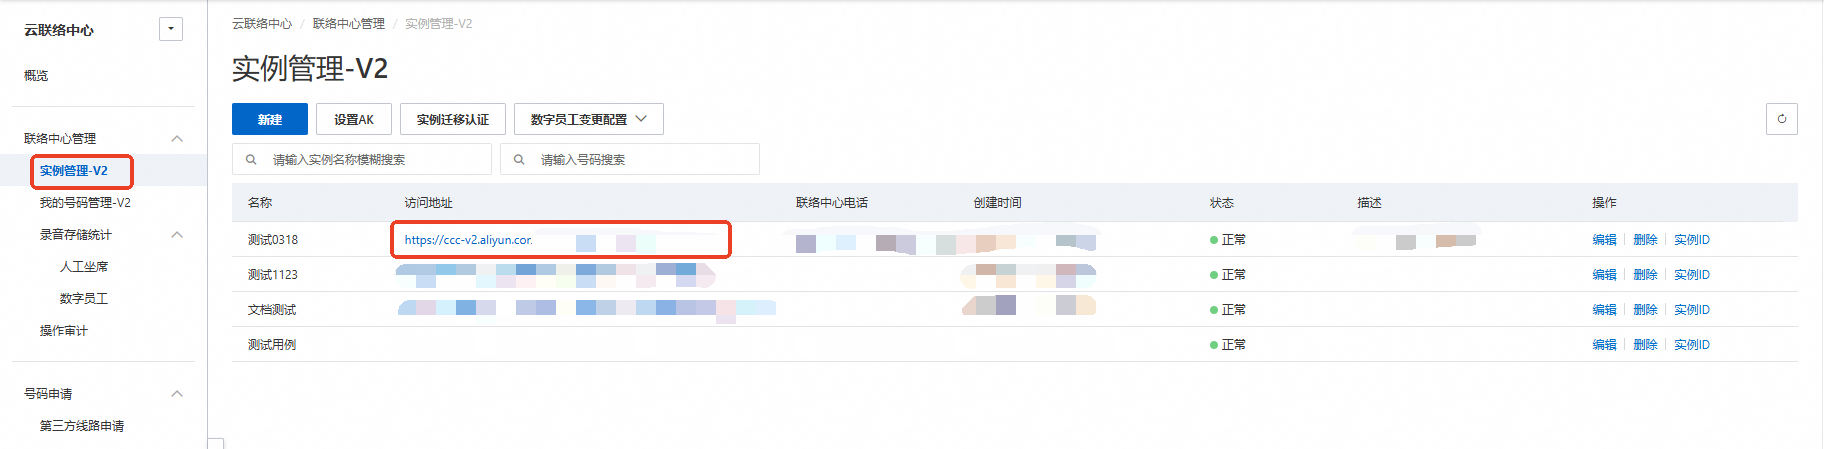
Log on to the Cloud Contact Center Management Console. Go to the instance management interface and click the instance endpoint to open the instance console and begin configuring the Cloud Contact Center.
Agent management
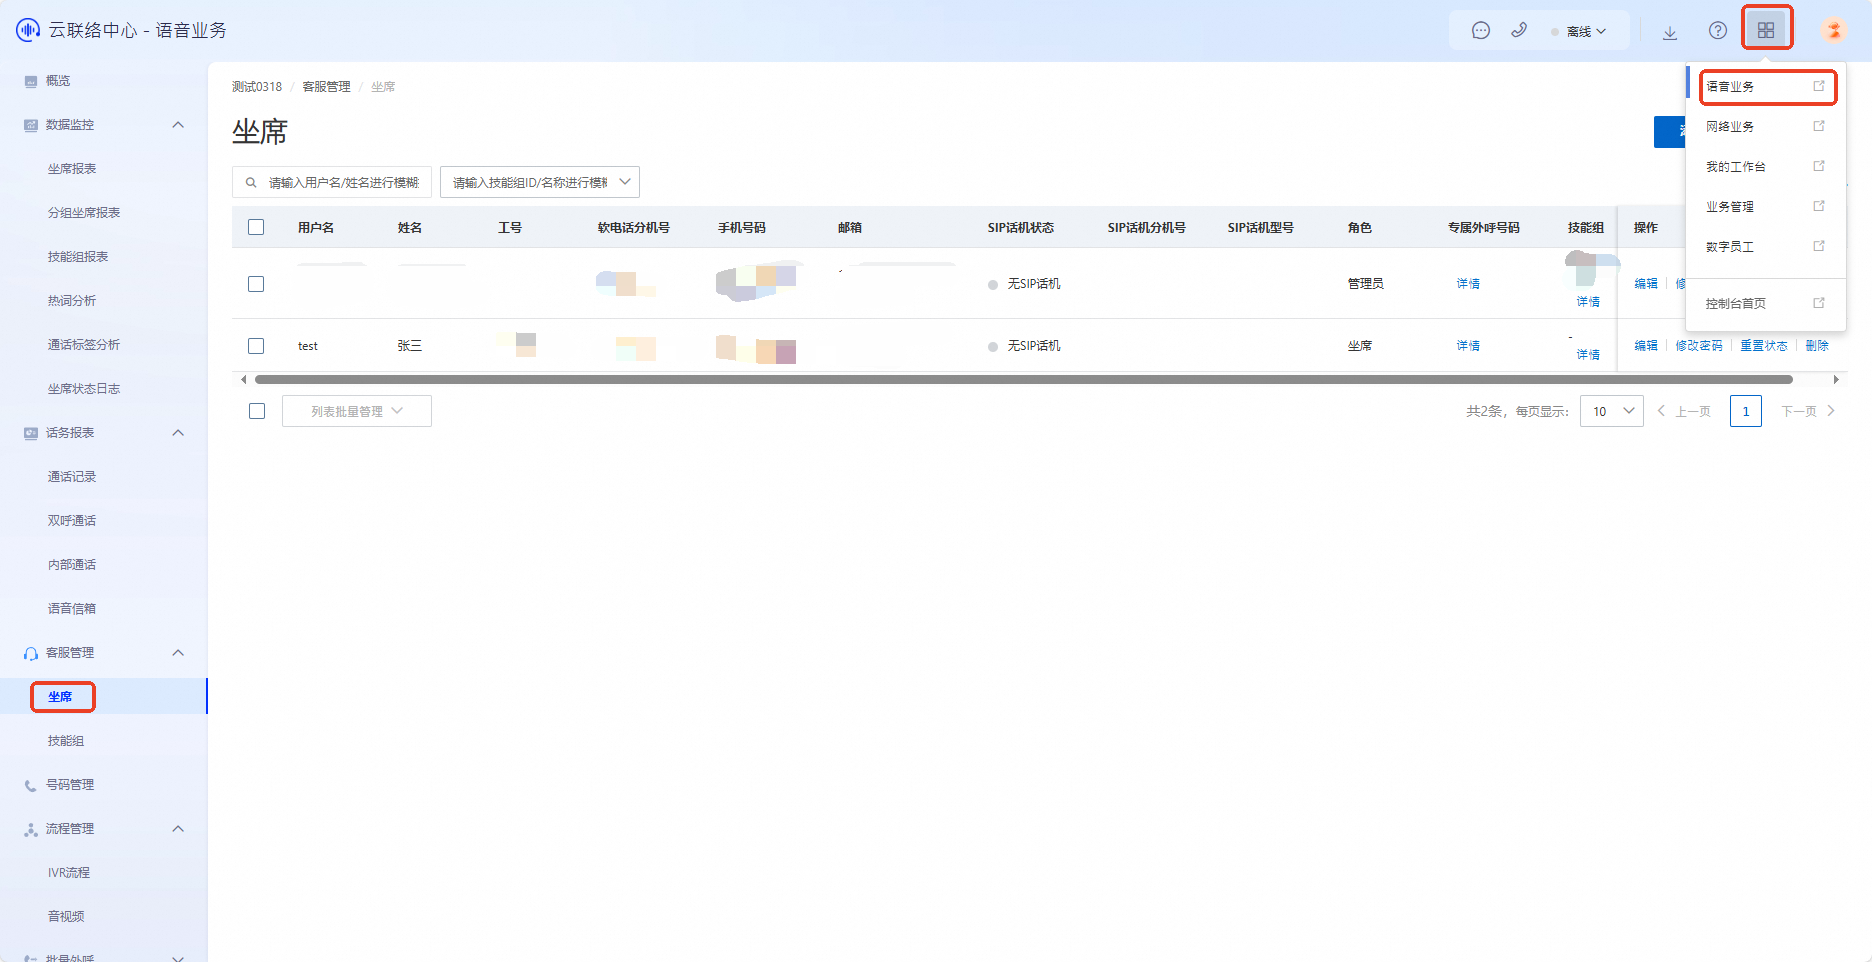
Go to the Voice Service console. In the navigation pane on the left, choose Agent Management > Agents to open the agent management interface. Administrators can create, edit, import, delete, assign skill groups, and set dedicated agents here. Each agent has an independent Cloud Contact Center configuration to serve customers by answering inbound calls or making outbound calls. For more information, see Agents.
Skill group management
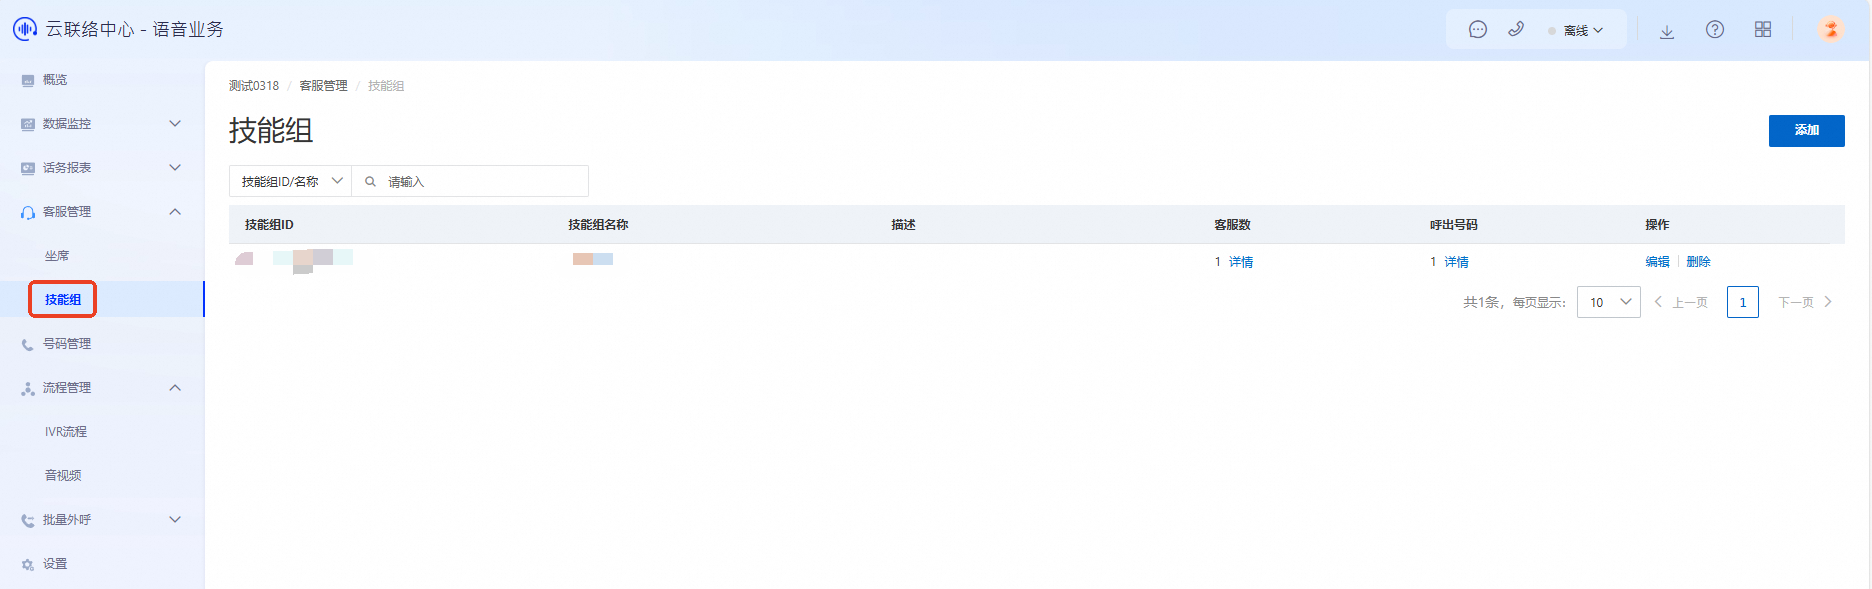
Skill groups organize agents into teams. After creating a skill group, assign agents to it. On the skill group management page, administrators can create, edit, delete, attach agents, and bind outbound numbers. Each skill group corresponds to a queue in the voice flow (IVR) that routes calls to agents, serving different customer types. For more information, see Skill Groups.
Audio management
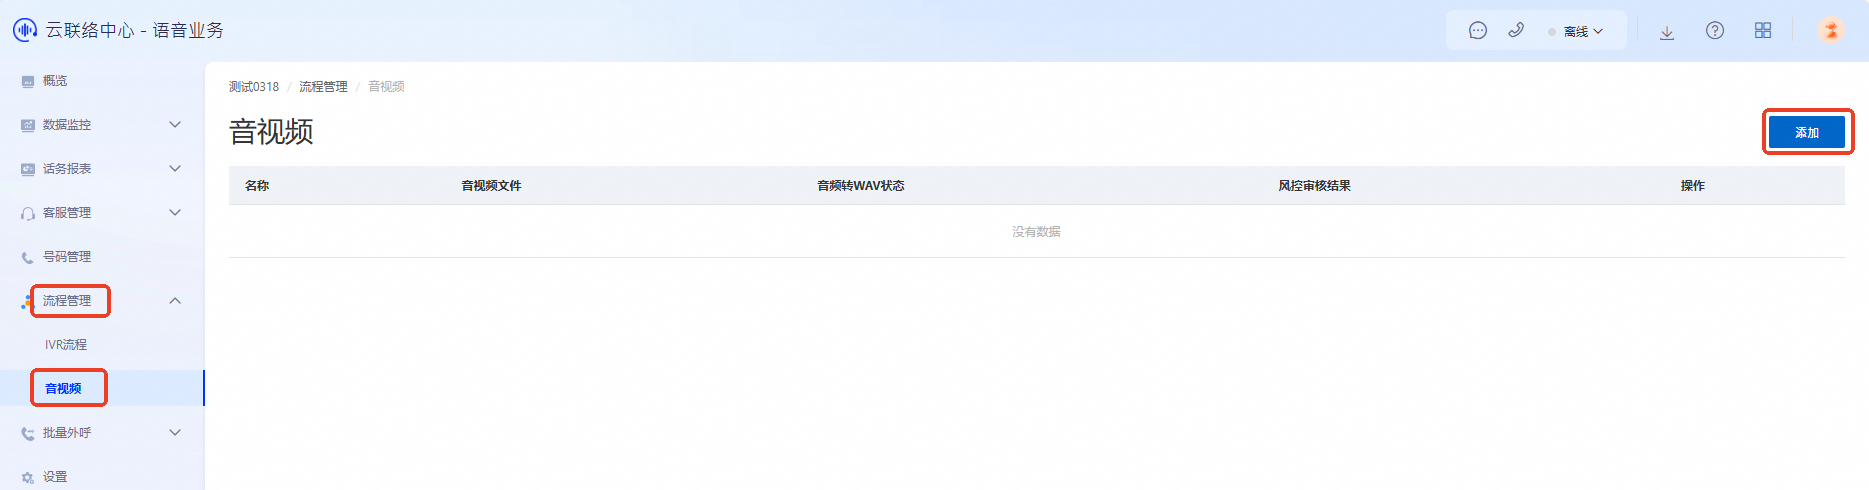
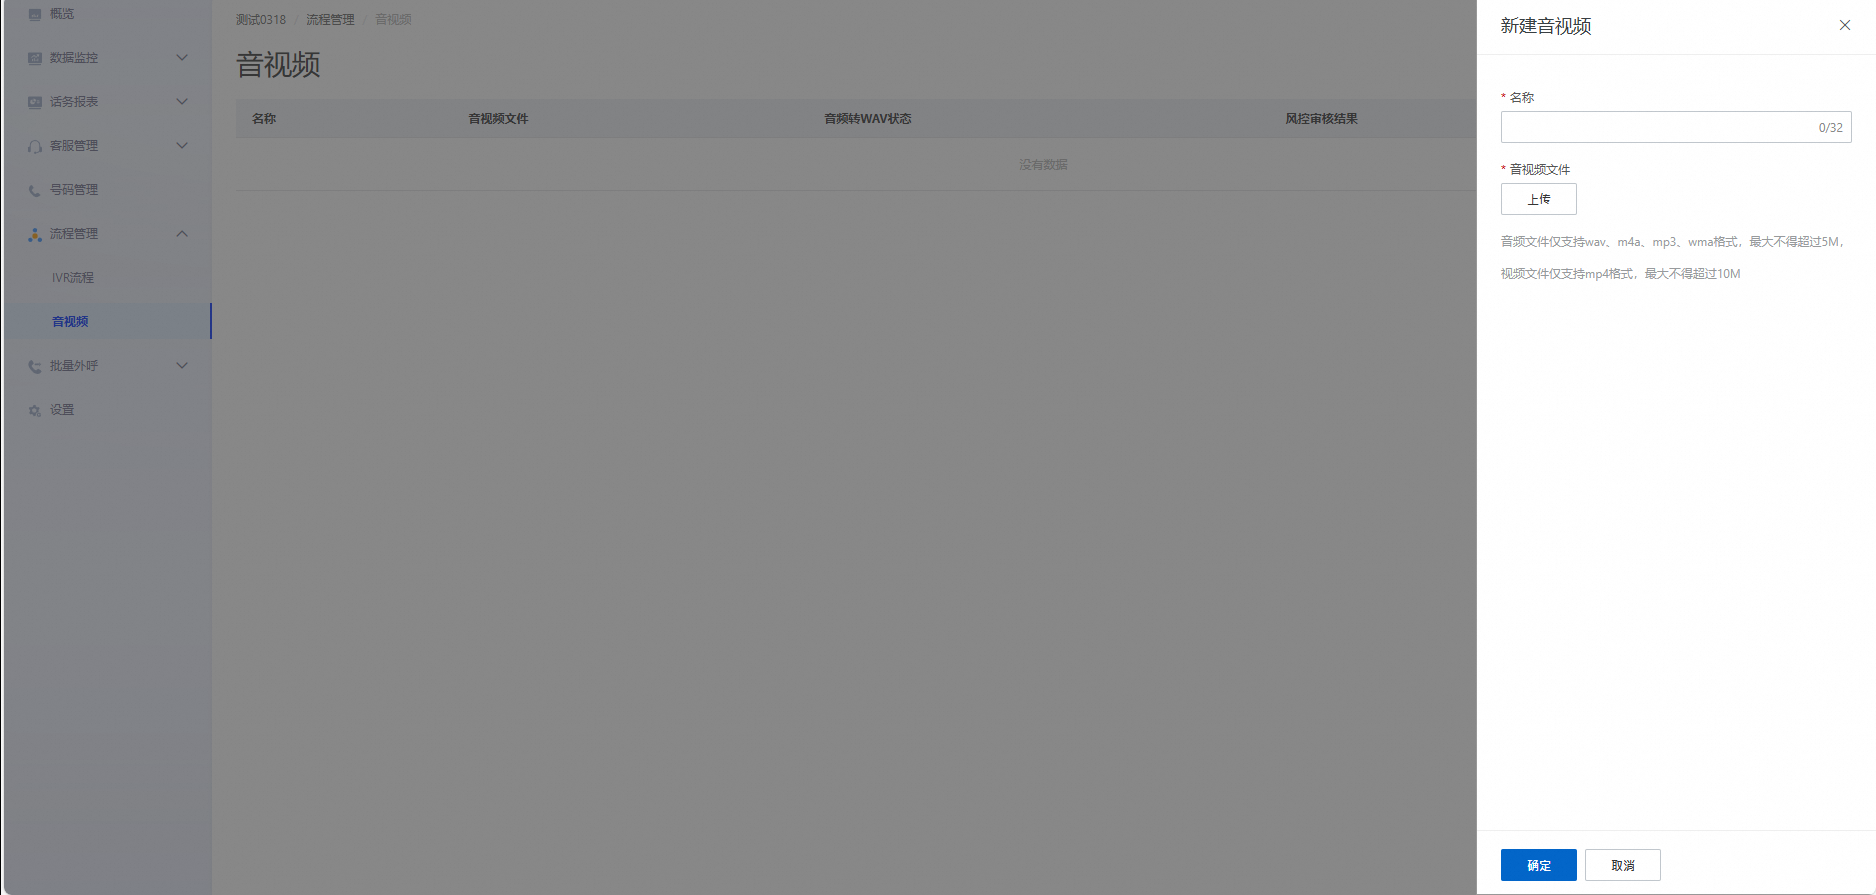
In the navigation pane on the left, choose Flow Management > Audio and Video to open the audio list page. Click Add to create a new audio file. Upload a pre-recorded audio file in WAV format, up to 5 MB. Administrators can add, play, download, edit, and delete audio files on this page. For more information, see Audio and Video.
Create an IVR flow
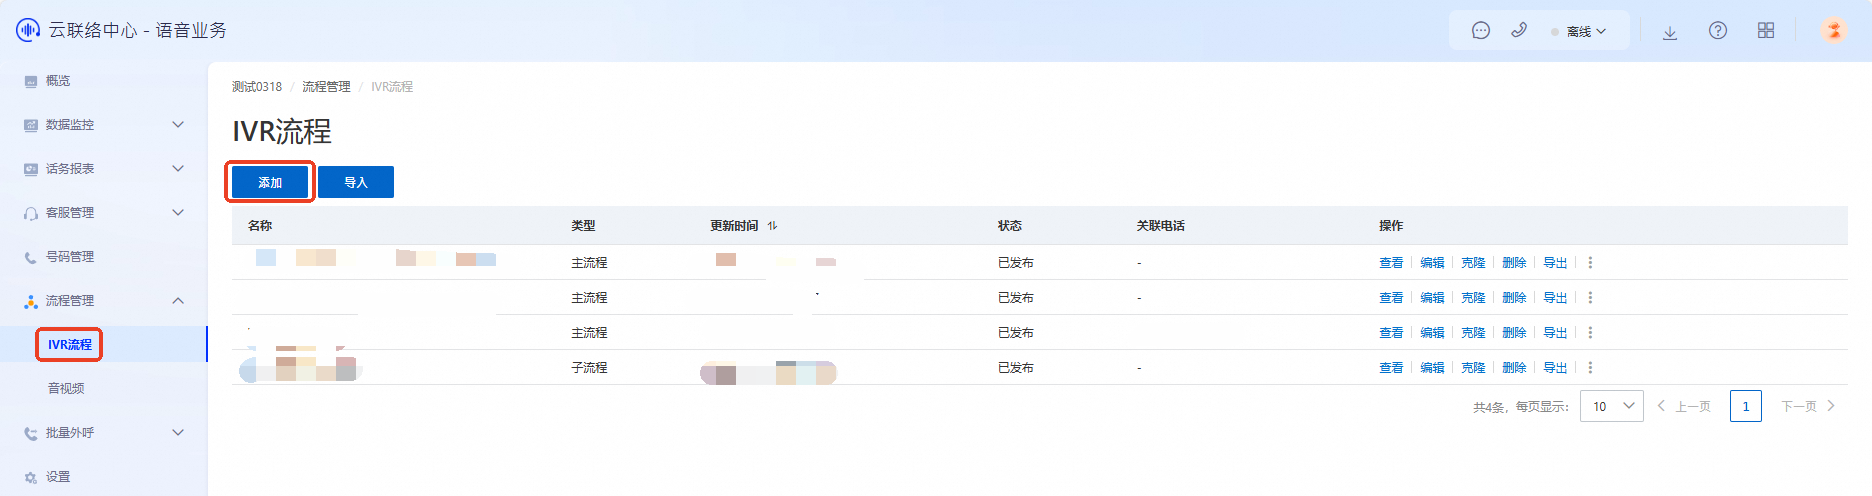
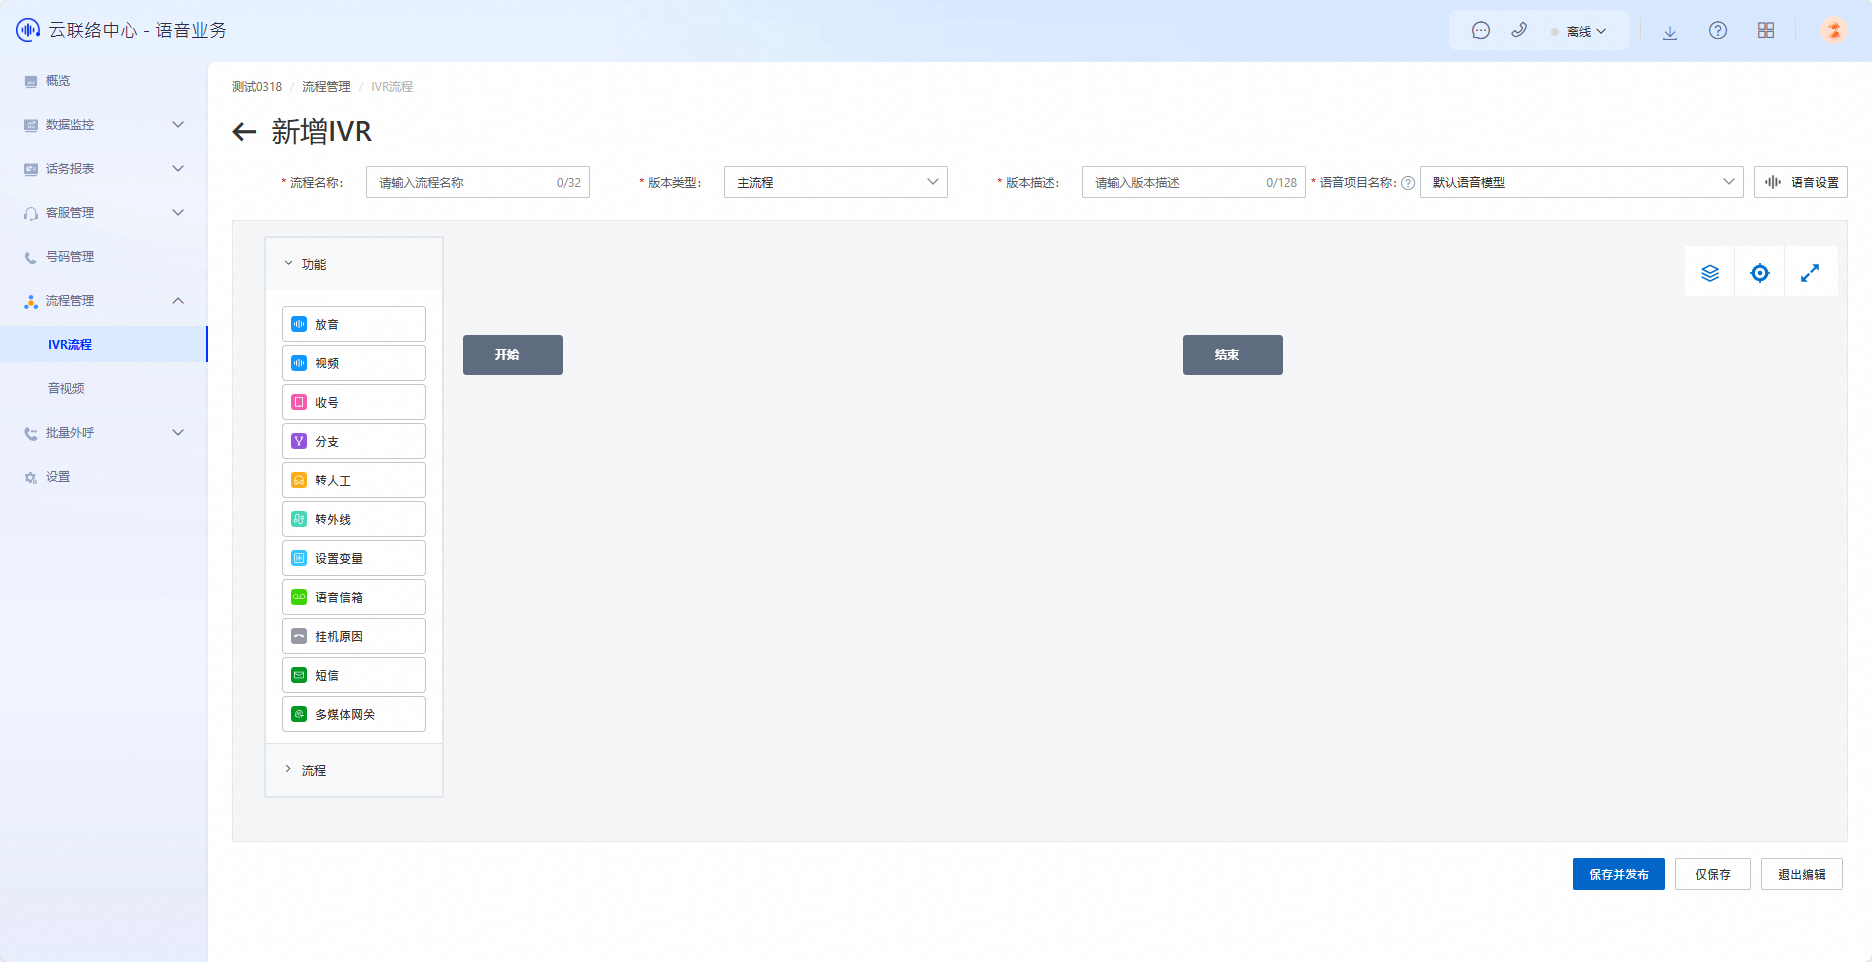
In the navigation pane on the left, choose Flow Management > IVR Flows to open the IVR flow list page. Click Add to open the IVR flow editor. Configure the flow based on your business needs. For details about using each module, see IVR Modules. After editing, click Save and Publish. Only published IVR flows can be attached to phone numbers and used.
Number management
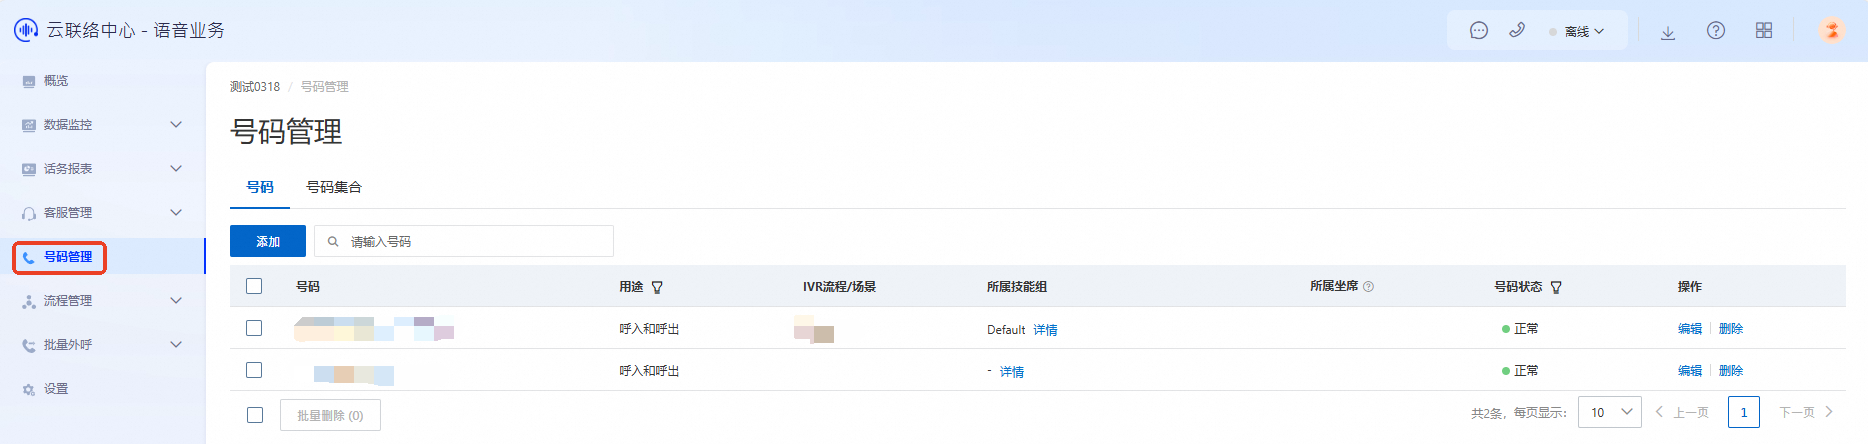
In the navigation pane on the left, choose Number Management to open the Cloud Contact Center phone number list page. Administrators can add new numbers or modify existing number configurations here. Attach an IVR flow to a number to support inbound calls. Bind an outbound skill group to a number so agents in that group can make outbound calls using the configured number. For more configuration details, see Number Management.
The complete Cloud Contact Center setup is now finished. Agents can log on to the agent workspace to provide service. For workspace operations, see the Agent Workspace section. Administrators can review Data Metrics on the Data Dashboard (Overview) page to evaluate overall Cloud Contact Center performance or assess agent performance.